
01Who this is for
- Founders who send newsletters, they keep their domain reputation safe by confirming ownership of each From address.
- Marketing managers in agencies, they avoid delivery blocks by verifying every client sender email before a blast.
02Enhanced email verification for campaigns, explained
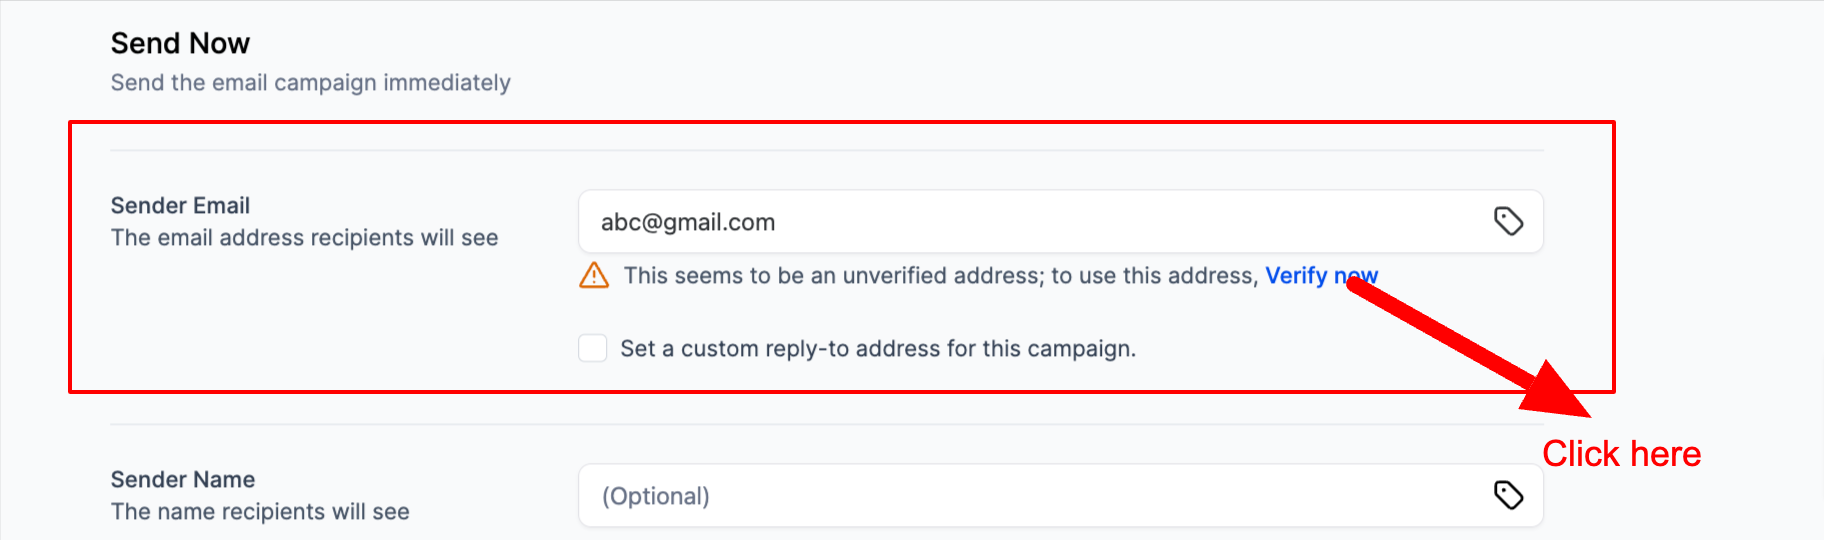
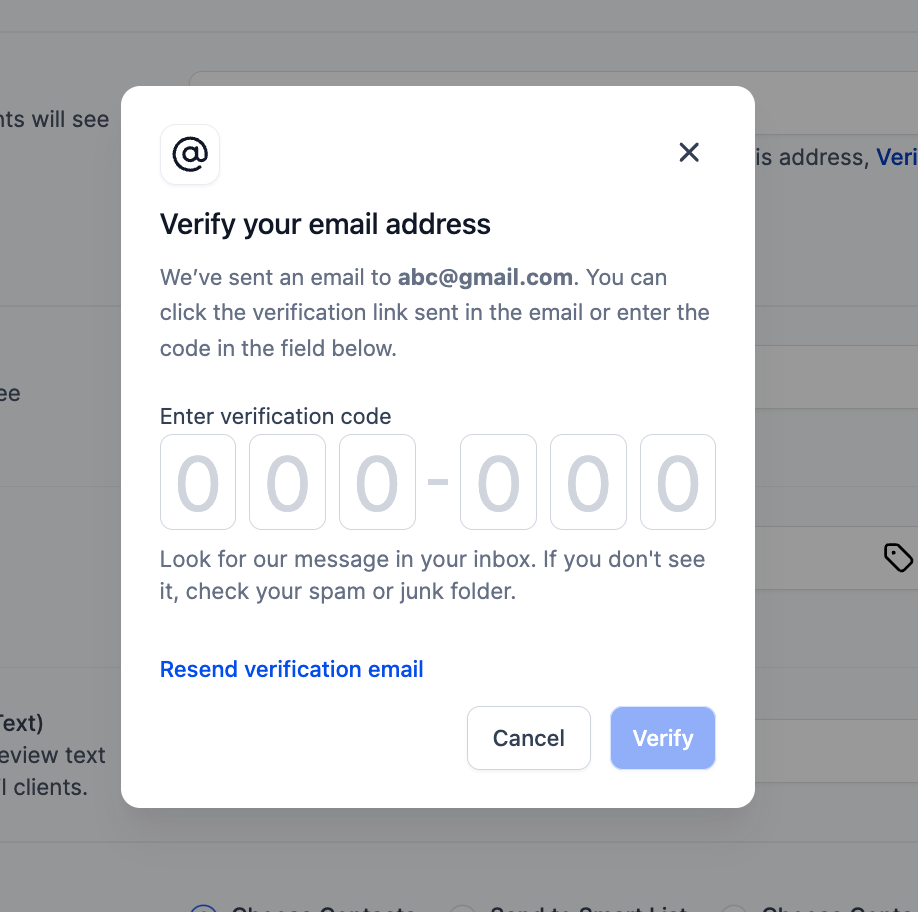
The platform now requires every From address on an email campaign to be verified via a six digit OTP. When you type an unverified address, a Verify Now button appears; clicking it sends a code to that mailbox. After entering the correct OTP, the address becomes trusted and can be used in any future campaign without repeating the process.
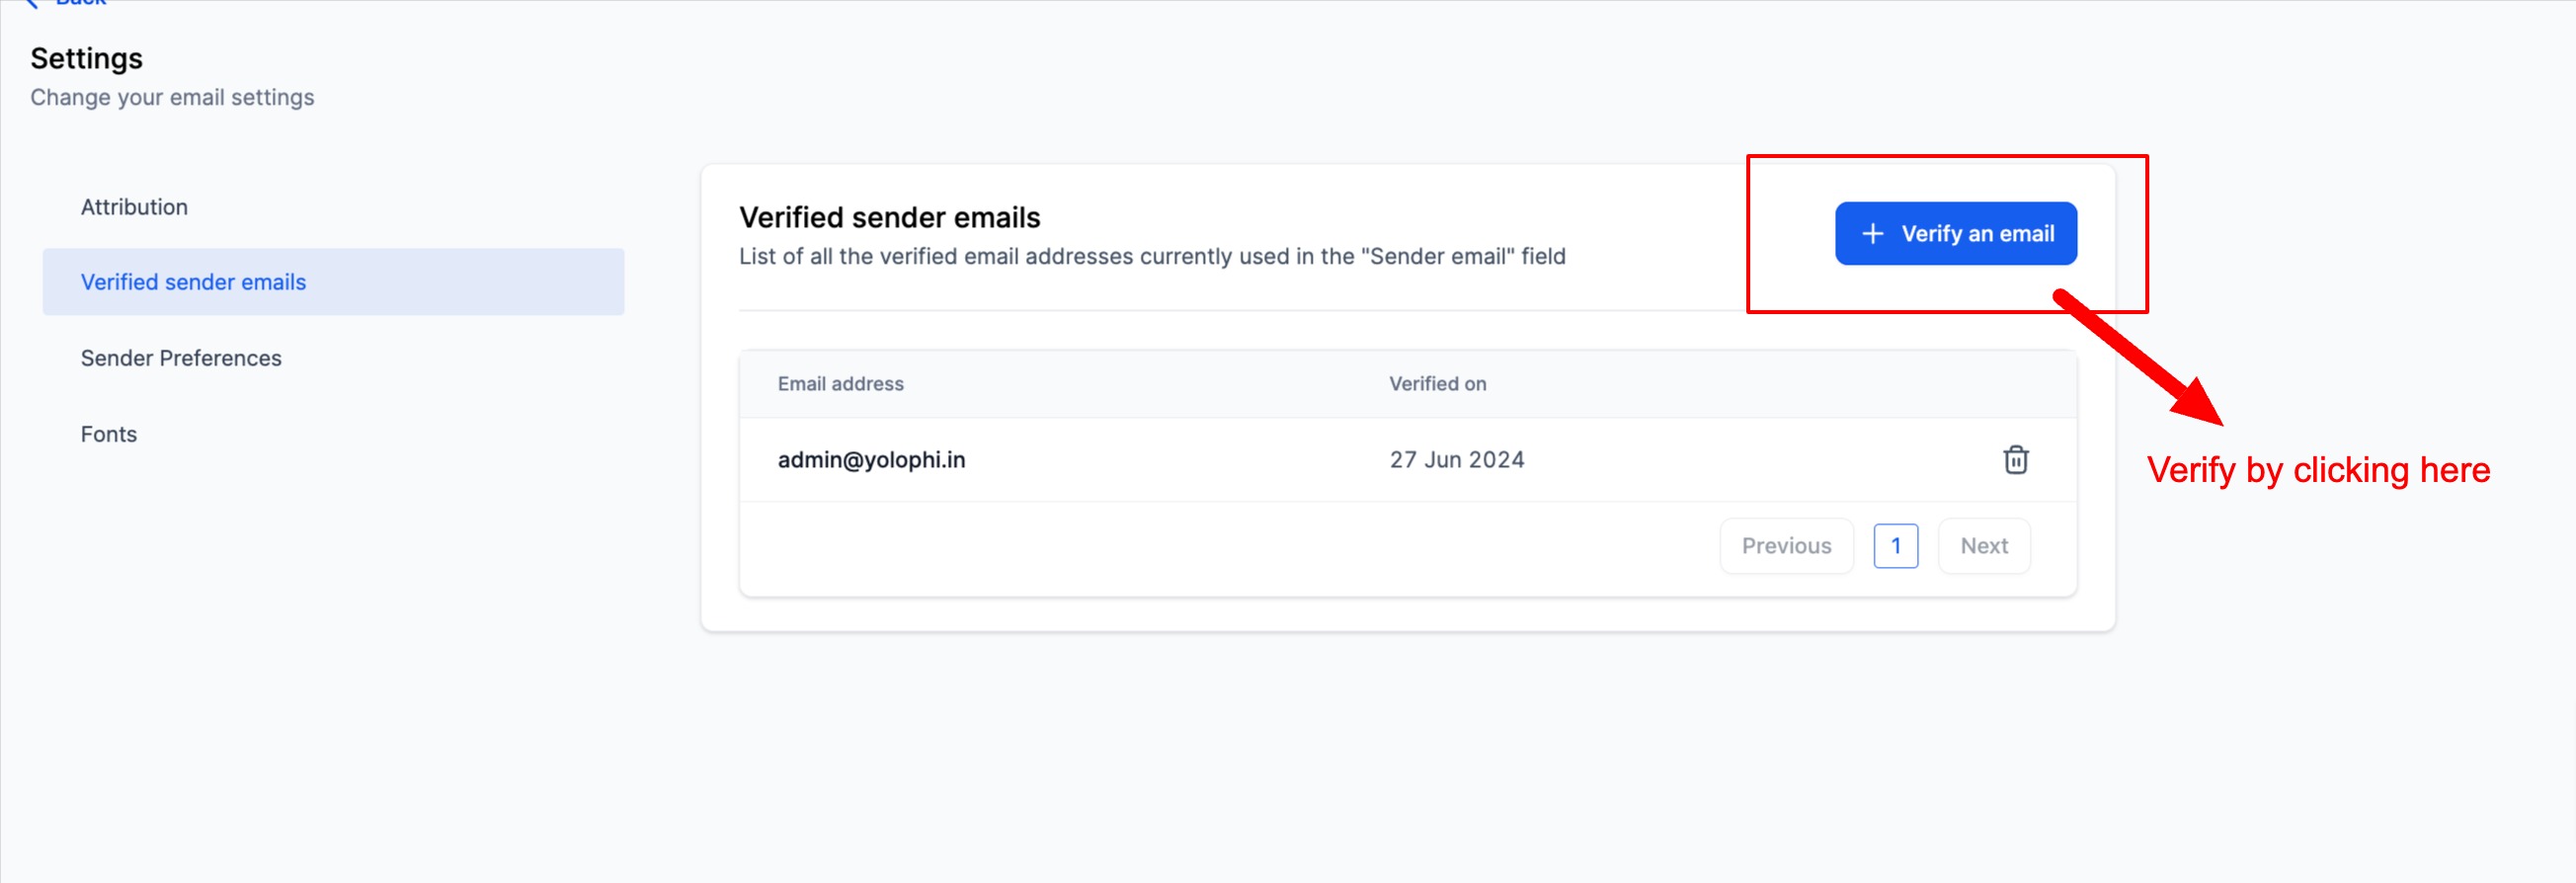
Verification can also be initiated from the Settings page. The same OTP flow runs, so the address is ready before any campaign is built. Once verified, the address stays marked as verified for the account.
This feature lives inside the Email Marketing area for campaign level verification and under Settings for account wide verification.
03How businesses use enhanced email verification for campaigns
- Real estate brokerage. Agents enter their personal email as the From address in a new property listing campaign, click Verify Now, and type the OTP they receive. Once approved, the campaign can be sent to leads without interruption.
- Dental practice. The office manager opens Settings, selects Verify an email, and follows the OTP steps to confirm the clinic’s official email address. Future appointment reminders and newsletters use the verified address automatically.
- Online coaching business. The Founder creates a webinar invitation campaign, enters the coaching brand email, runs the OTP verification, and then schedules the email series with confidence that the sender identity is protected.
04The numbers and rules that matter
- OTP is a 6 digit code.
05How to set up and use enhanced email verification for campaigns in HighLevel
Verify email from a campaign
- Open Email Marketing and start a new campaign.
- Type the desired From email address in the sender field.
- Click the Verify Now button that appears beside the unverified address.
- Open the inbox for that address, copy the six digit OTP, and paste it into the dialog.
- Confirm the OTP; the address is now verified and ready for sending.
Verify email from the Settings page
- Navigate to Settings in the platform navigation.
- Locate and click the Verify an email option.
- The system sends a six digit OTP to the entered address.
- Retrieve the OTP from the inbox and enter it into the verification prompt.
- Accept the code; the address is marked as verified for all campaigns.
06What it looks like in HighLevel
07Settings that matter
- Verify Now. Starts the OTP process for the From address entered in a campaign, sending a one time code to that mailbox.
- Verify an email. Launches the same OTP flow from the Settings page, allowing verification before any campaign is created.
08Things to know before you rely on it
- If the From address matches a custom domain issued under LC Email, the system treats it as already verified.
- When the From address equals the Location admin email saved in Settings, verification is skipped.
- OTPs expire quickly; a new code must be requested if the original times out.
- Each address needs verification only once; after it is marked verified, it remains usable for all future campaigns.
09If something goes wrong
- OTP email does not arrive. Check the spam folder, confirm the address was entered correctly, and ensure no filters block messages from no reply senders.
- OTP expires before entry. Click Verify Now again to receive a fresh OTP.
- Campaign fails to send because the address isn’t verified. Open the campaign, click Verify Now next to the From address, complete the OTP flow, and resend the campaign.
10How it connects to the rest of HighLevel
- Full guide on enabling and billing for email verification Email verification setup
- Configuring sender email priority and display name Sender priority settings
- Reference list of outgoing system generated emails System email reference
Michael's take

Spam folders and spoofed emails waste time and hurt deliverability. Getting your From address verified once helps avoid those issues and supports your sending reputation. The first thing I would get right is the OTP flow for the primary address you send from. Make sure you can receive that code quickly, then lock that address in as your default sender.