
01Who this is for
- Agencies that send proposals and need to follow up right away when a client signs.
- Service providers managing NDAs or contracts and requiring internal alerts for each document action.
- Businesses that track high value agreements and want to route large deals into separate pipelines.
02Documents & contracts workflow trigger, explained
The Documents & Contracts trigger links the lifecycle of a document to any workflow in HighLevel. When a document reaches a defined status, such as Sent, Viewed, Signed/Accepted, or Completed, the trigger activates the workflow. You can then add actions like email sends, tag updates, or Slack notifications.
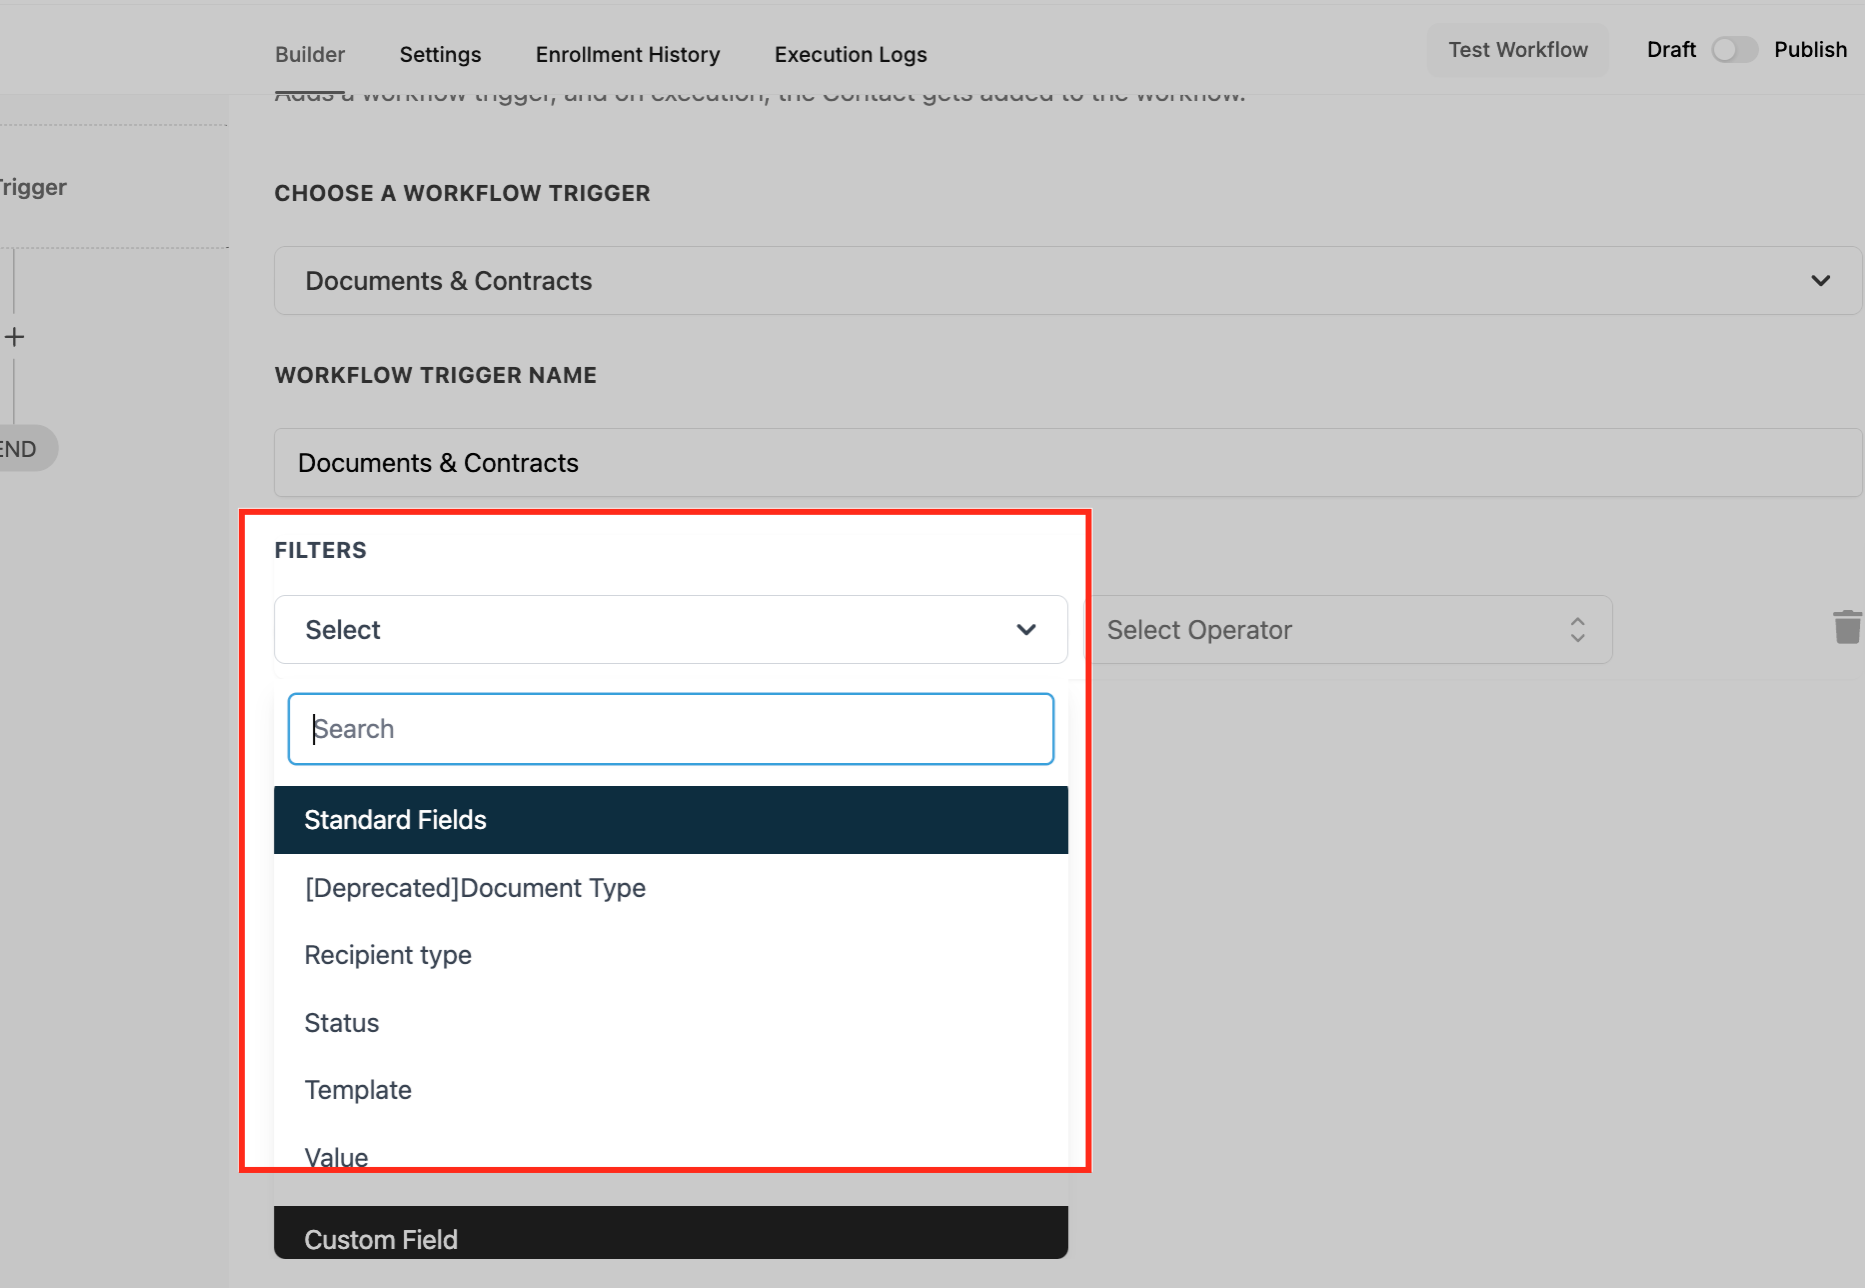
The trigger lives inside the Automation area. After creating a workflow, you add a new trigger and select Documents & Contracts from the Payments section. Filters let you narrow the activation to particular templates, recipient types, or monetary values, ensuring only the right documents start the automation.
All settings are configured directly in the trigger builder. Naming the trigger, choosing filters, and saving finalize the setup. Once saved, any matching document event automatically runs the associated workflow steps.
03How businesses use documents & contracts workflow trigger
- Digital marketing agency. The agency creates a workflow that starts when a client signs a proposal template. Using the Recipient Type filter set to Contact, the workflow sends a welcome email and adds the client to a project pipeline.
- Legal consultancy. The consultancy configures a trigger for NDA templates. With the Status filter set to Viewed, it notifies a staff member via Slack so the attorney can follow up with the prospective client.
- Enterprise SaaS vendor. The vendor applies the Value filter to contracts above a high ticket threshold. When such a contract is signed, the workflow updates a custom field and creates a task for the sales manager.
04How to set up and use documents & contracts workflow trigger in HighLevel
Set up Documents & Contracts trigger
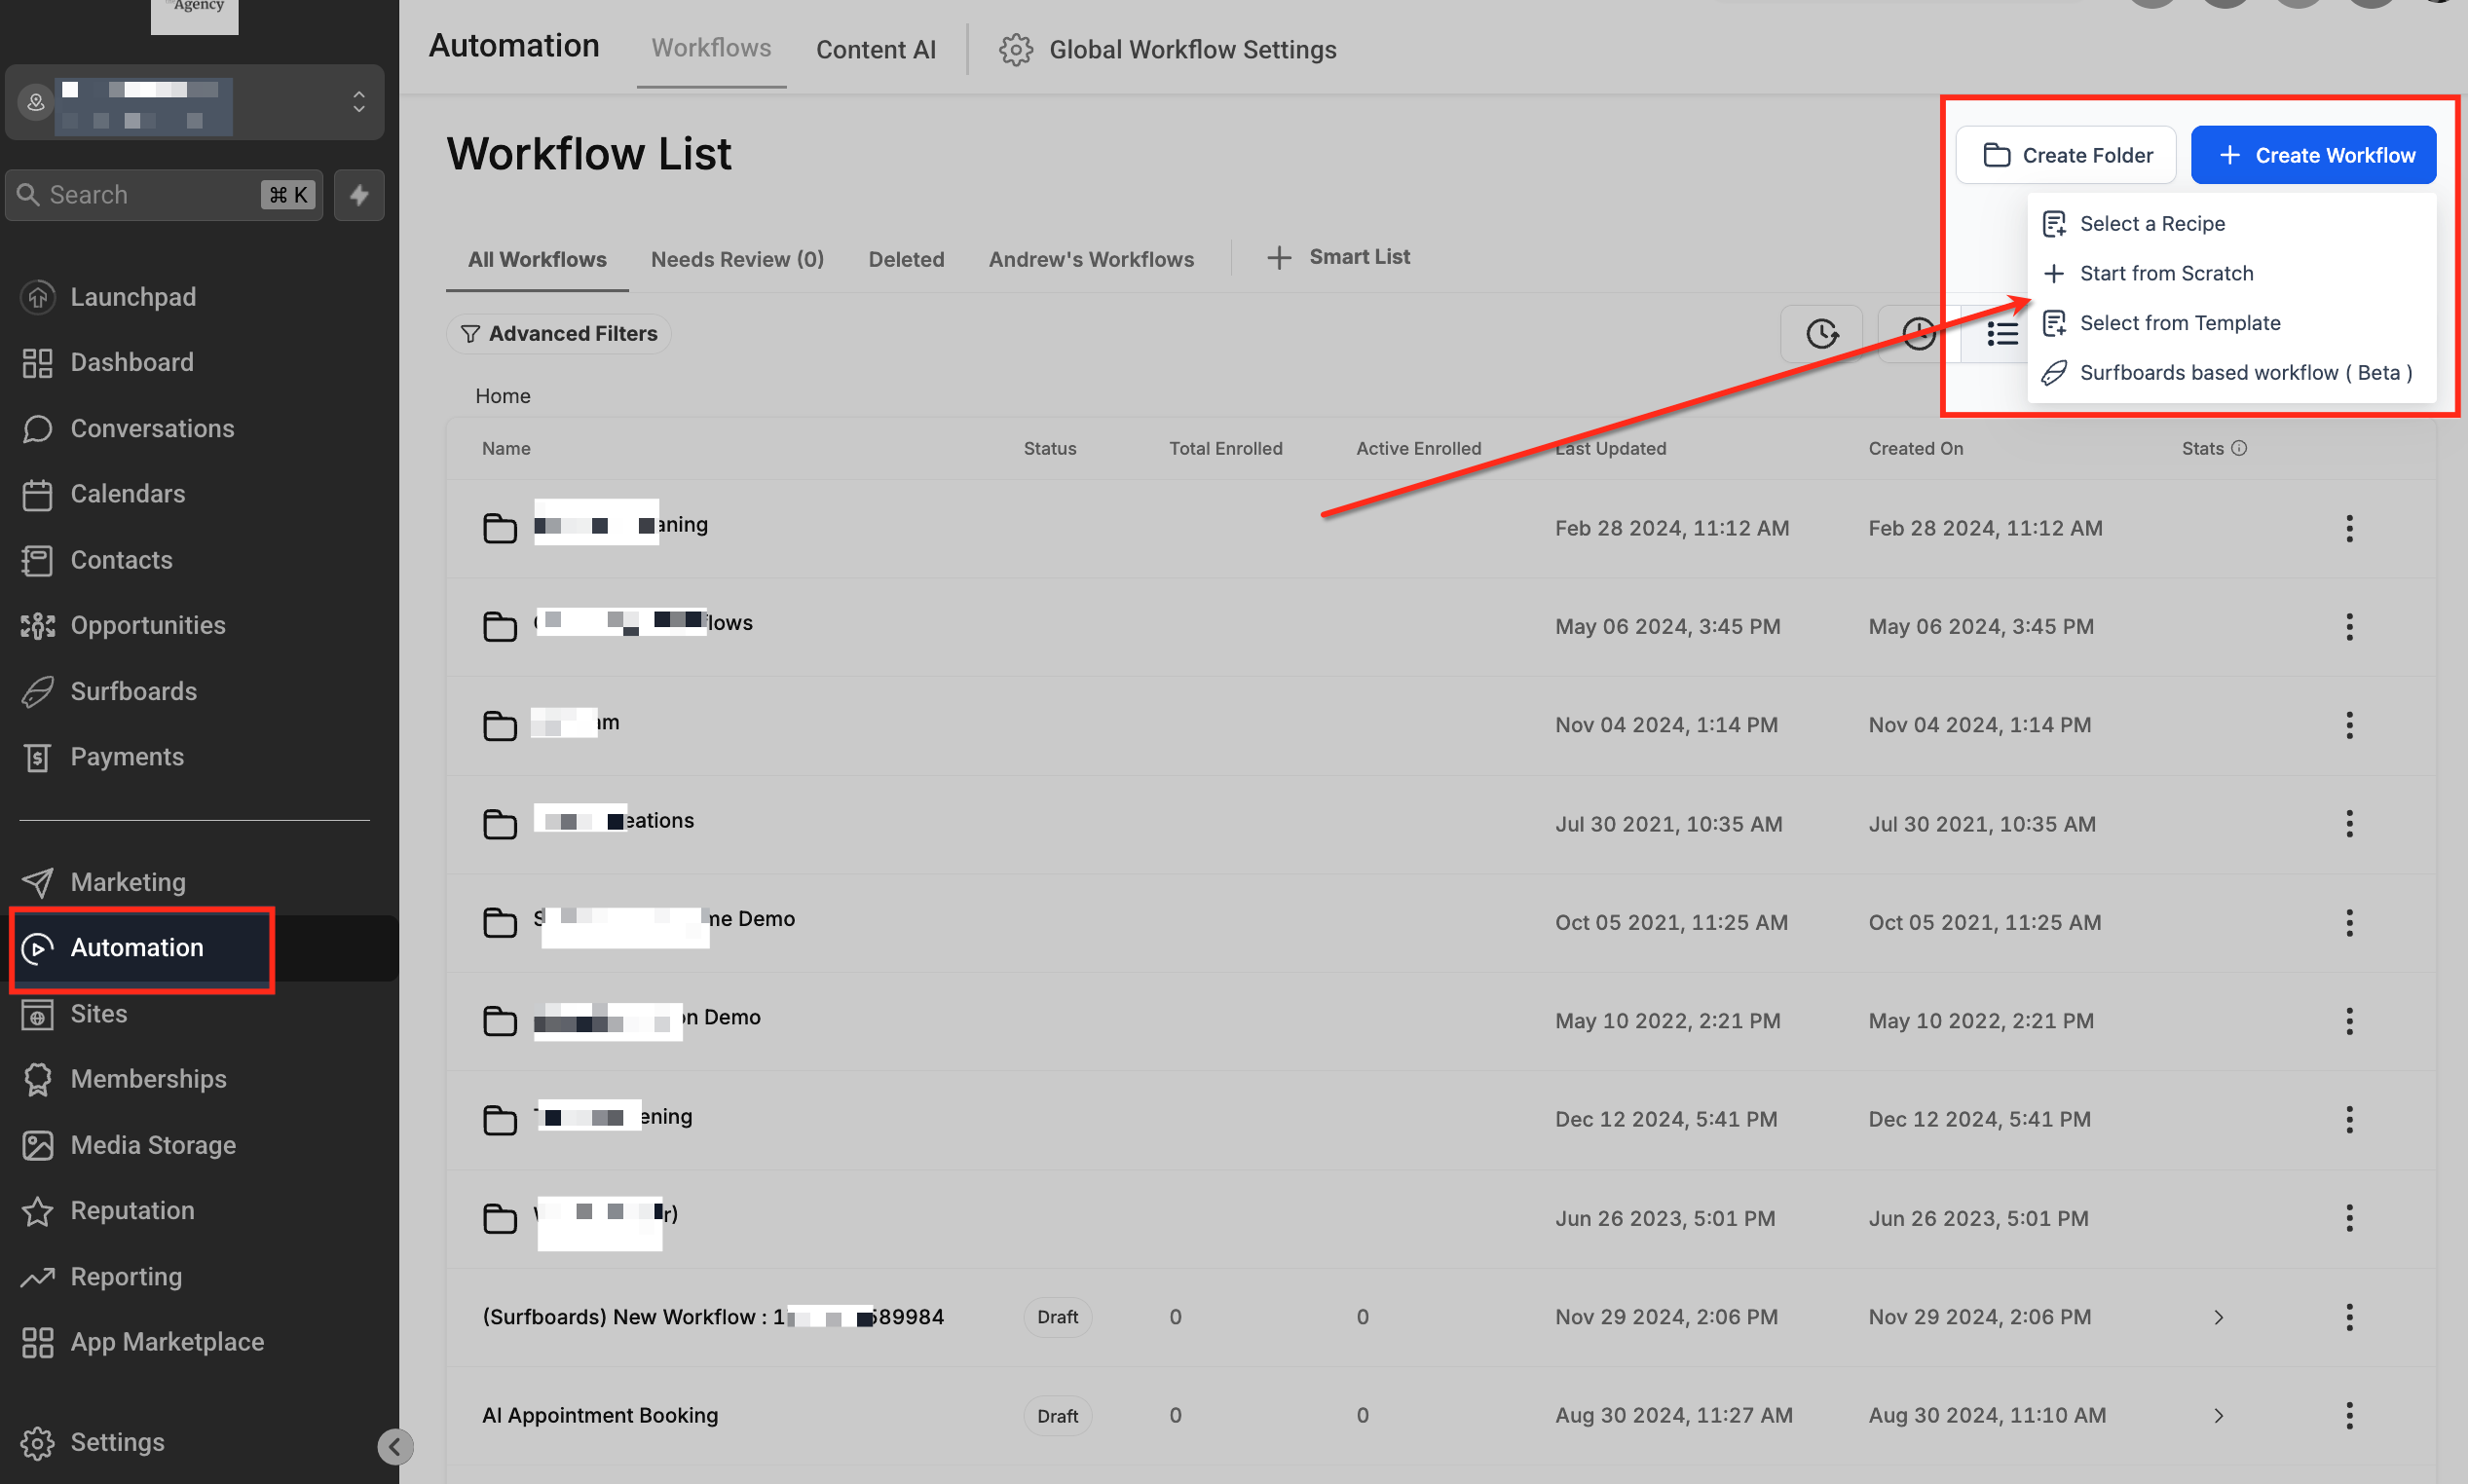
- Open the Automation menu and click the blue + Create Workflow button, then choose Start from Scratch.
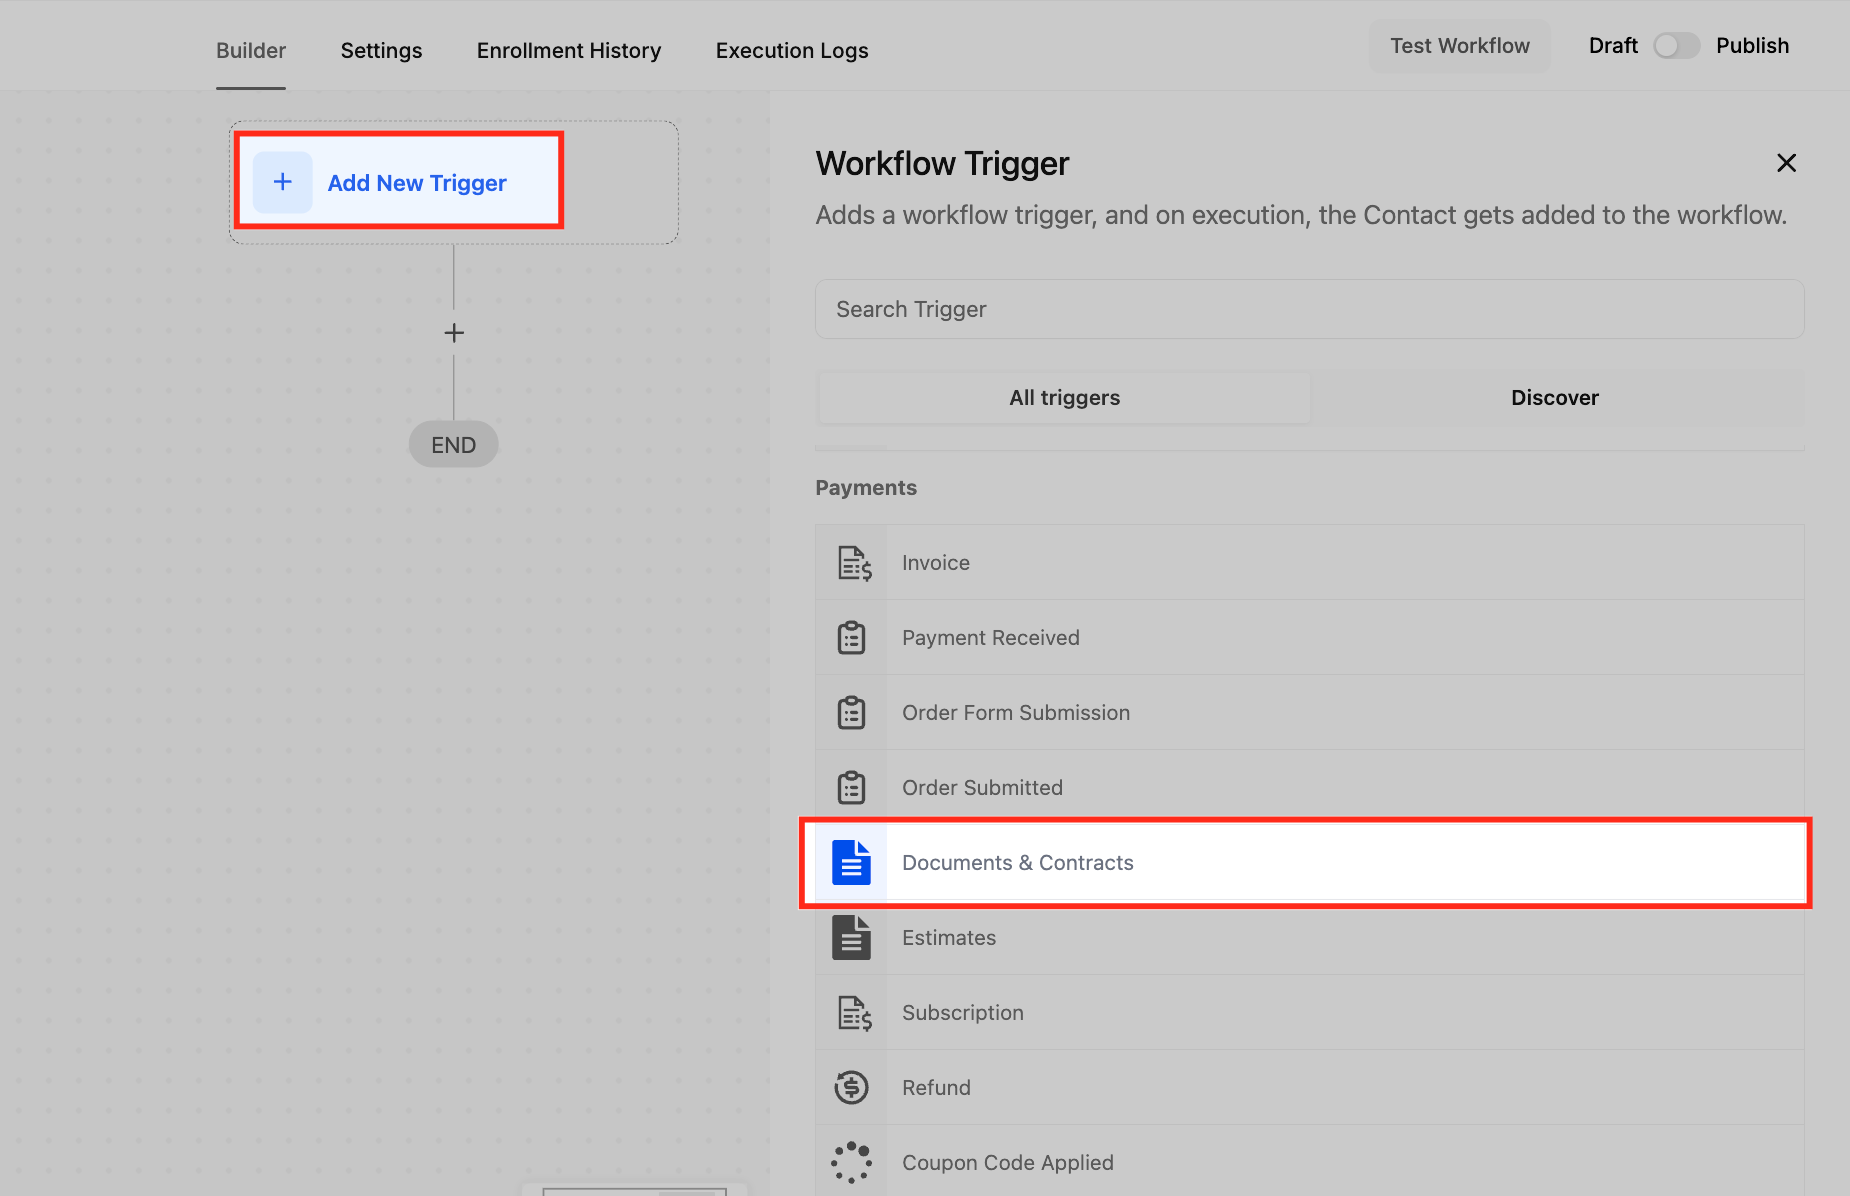
- In the workflow builder, click + Add New Trigger to define the entry condition.
- Scroll to the Payments section and select Documents & Contracts as the trigger type.
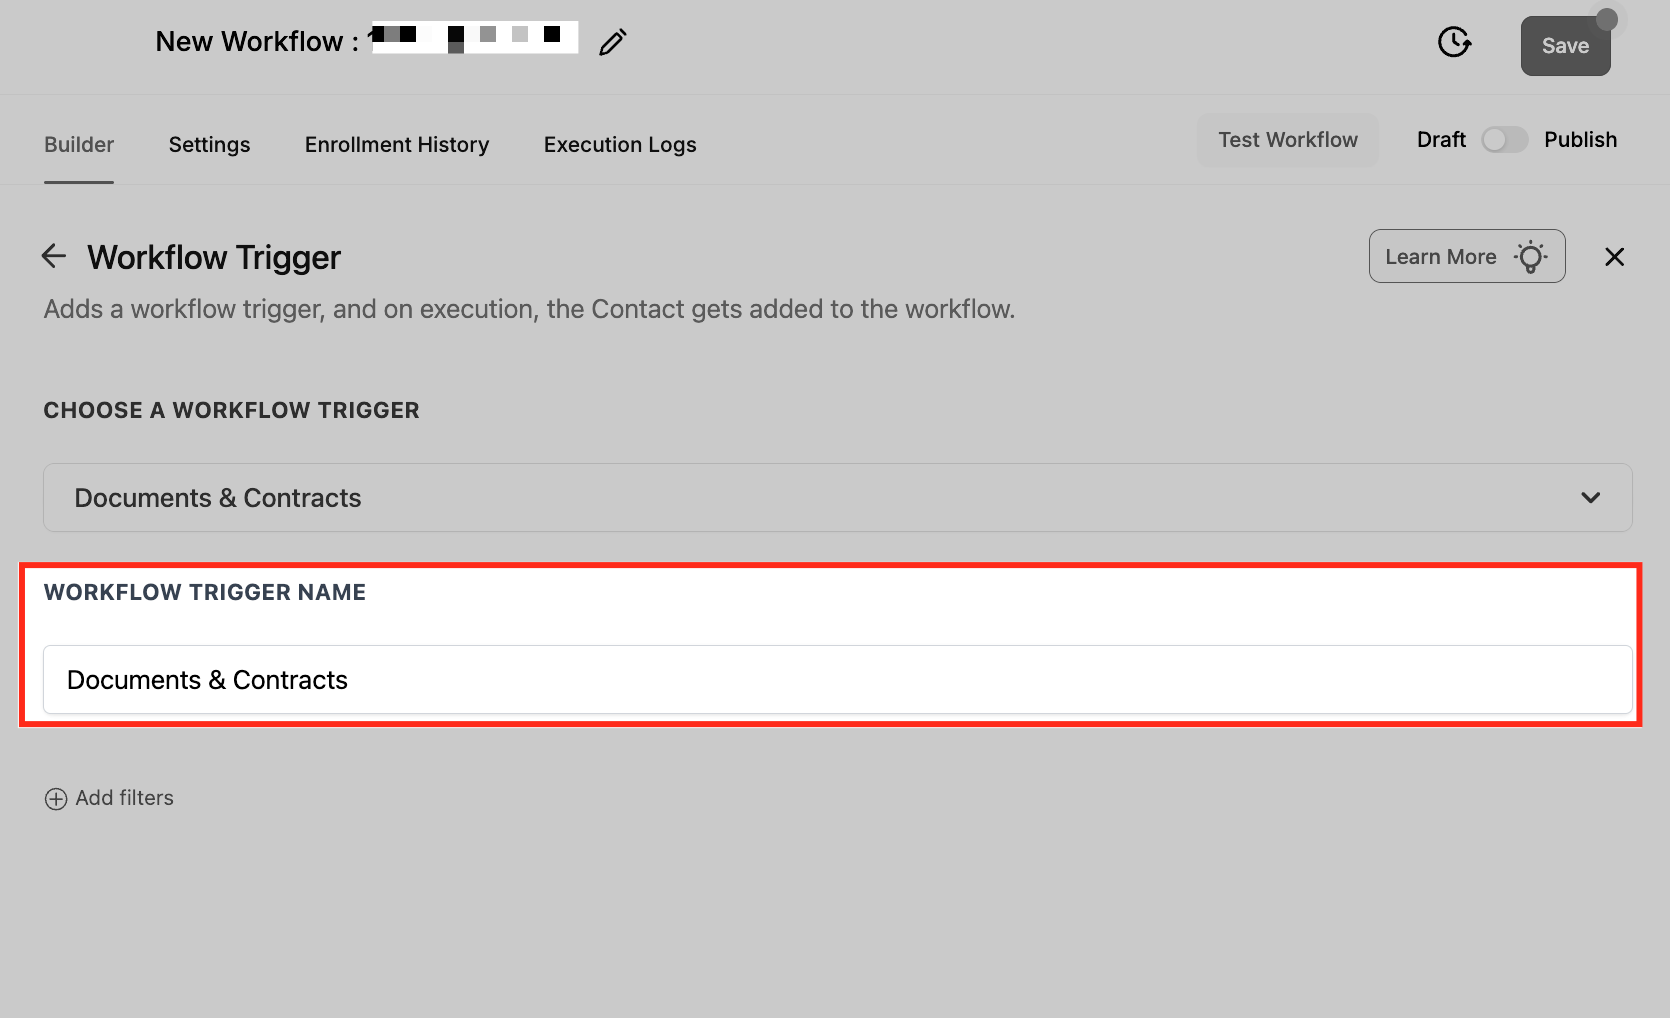
- Enter a descriptive name for the trigger in the Workflow Trigger Name field.
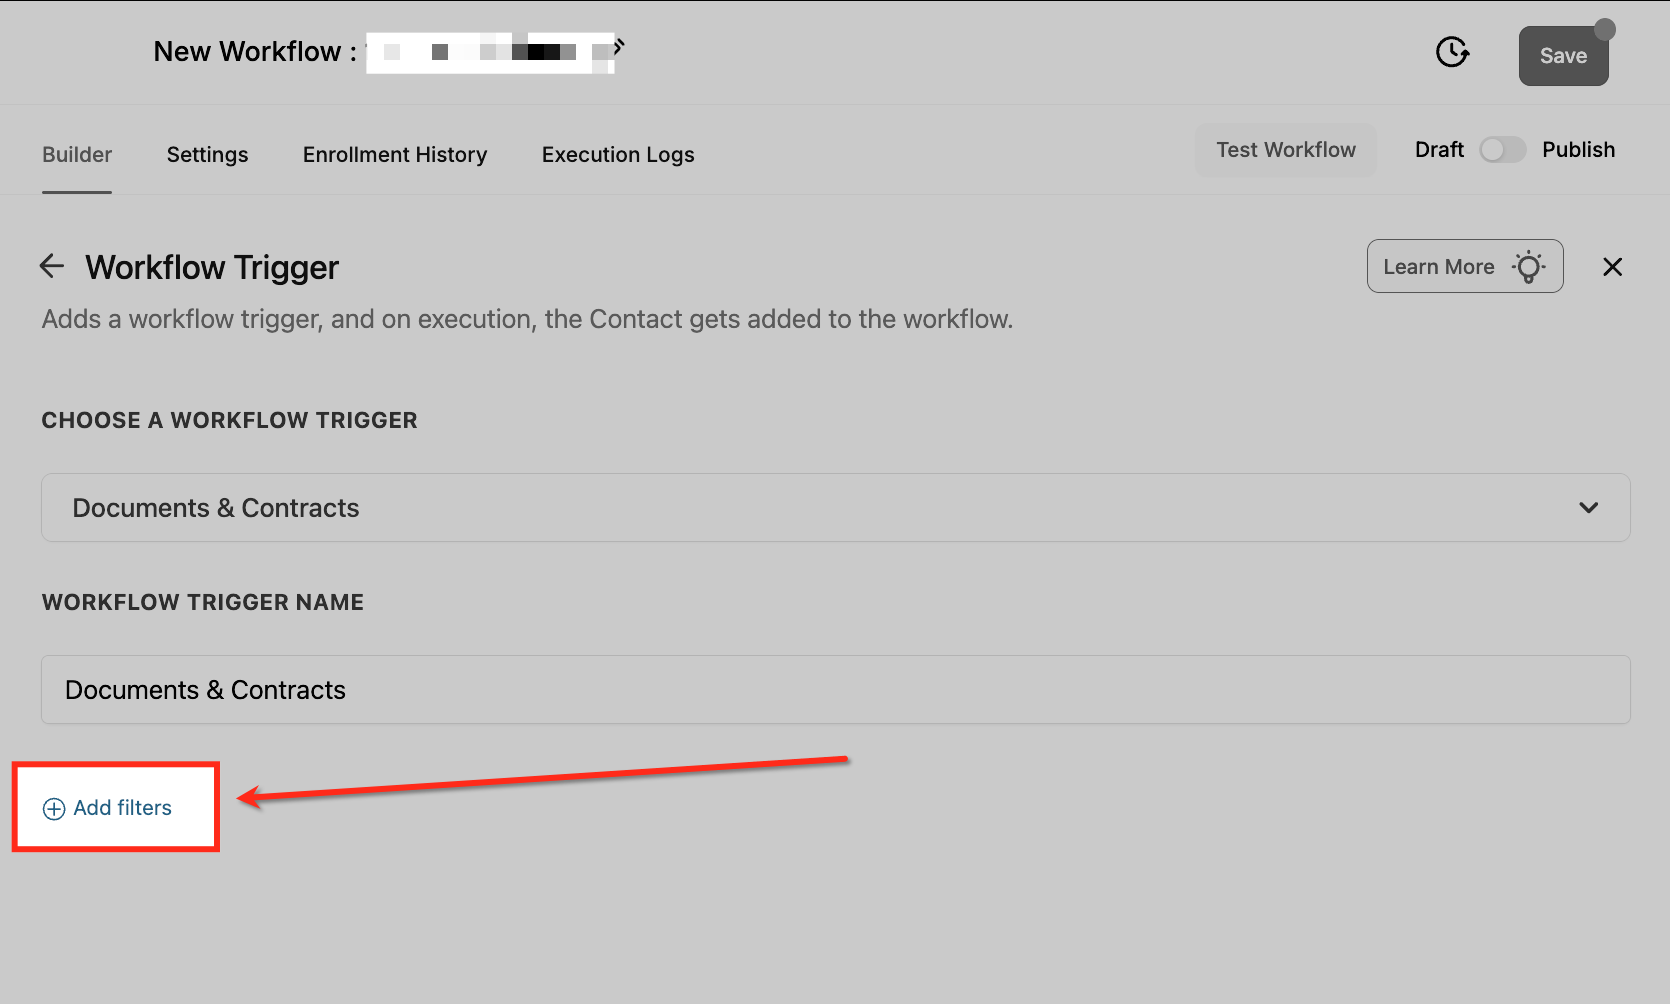
- Click Add Filters to open the filter configuration panel.
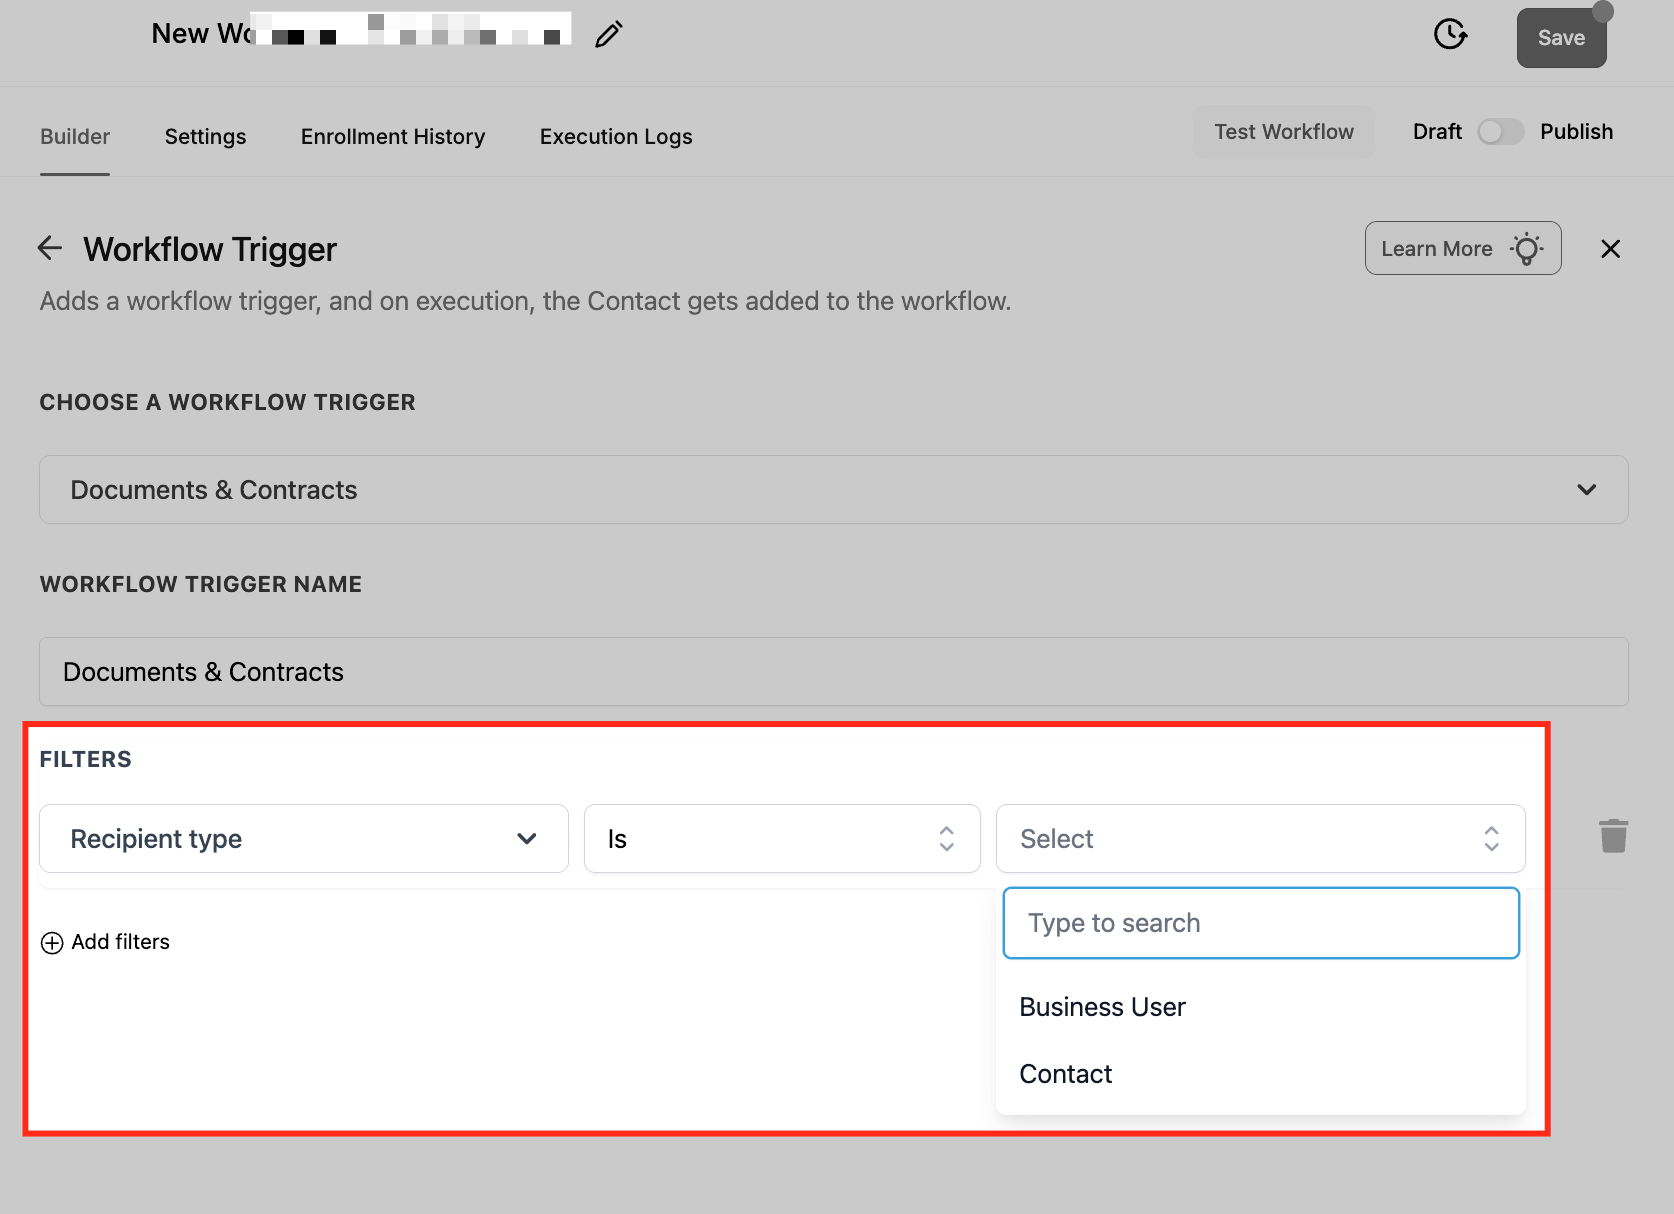
- Set the Recipient Type filter to Contact or Business User depending on who receives the document.
- Add additional filters such as Status, Template, or Value to narrow when the workflow should fire.
- Click Save Trigger to finalize the configuration.
05What it looks like in HighLevel
06Settings that matter
- Workflow Trigger Name. Provides a label for the trigger so you can identify it among other workflow entries.
- Recipient Type. Limits the trigger to actions taken by either a Contact (external) or a Business User (internal).
- Status. Specifies which document stage, Sent, Viewed, Signed/Accepted, or Completed, activates the workflow.
- Template. Selects a particular document template that must be involved for the trigger to fire.
- Value. Applies a numeric condition, such as greater than or equals to, based on the contract’s monetary amount.
07How it connects to the rest of HighLevel
- Create, clone and send documents in HighLevel Documents & contracts basics
- Automatically send document templates in a workflow Auto send templates
- Set up email templates and team alerts for documents Email templates & alerts
Michael's take

Be aware that automating document based actions can quickly create a cascade of messages if you’re not careful with duplicate status changes. The trigger treats each change. Like moving from Viewed to Signed. As its own event, so you may end up with overlapping emails or alerts.