
01Opportunity Custom Values, explained
Opportunity Custom Values store information about a specific deal in Custom Fields. When you add a merge field to a reusable document template, HighLevel substitutes the field’s value from the Opportunity that triggers the workflow.
The feature works only with reusable templates, not individual documents. The merge field token appears in the template during editing and is replaced with the actual value when the document is generated.
02How businesses use Opportunity Custom Values
- Speed up document creation. One reusable template can automatically adapt to each deal, reducing manual editing before sending proposals or contracts.
- Maintain consistent deal information. Pulling values directly from the Opportunity record keeps formatting and details standardized across multiple deals.
03Before you start
- Create the Opportunity custom field.
- Enter a value for that field on the Opportunity record.
- Associate the Opportunity with the correct contact.
- Save the template before selecting it in a workflow.
- Use an Opportunity related trigger in the workflow.
- Contact must have a valid email address.
04How to set up and use Opportunity Custom Values in HighLevel
Set up opportunity Custom Values in a template
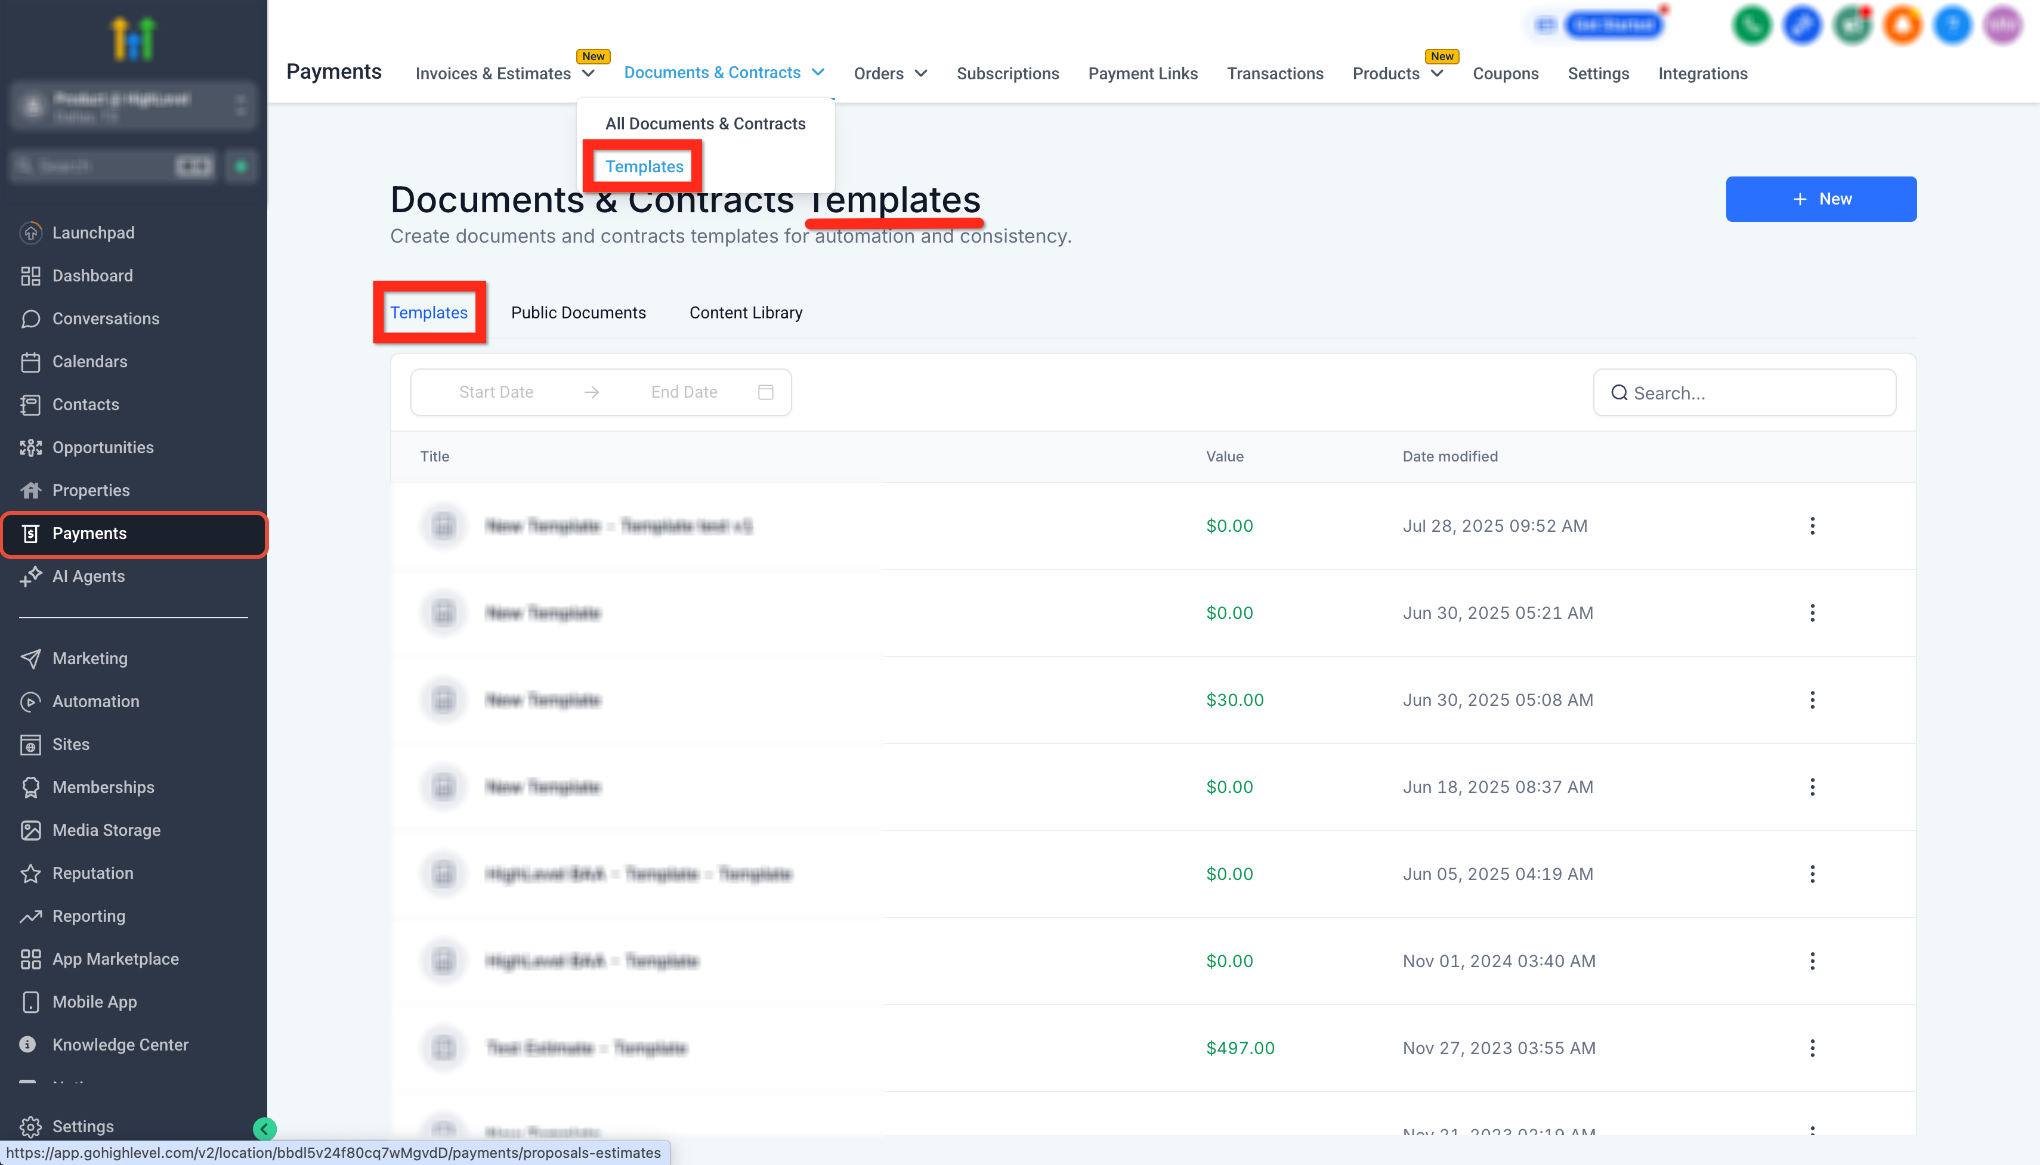
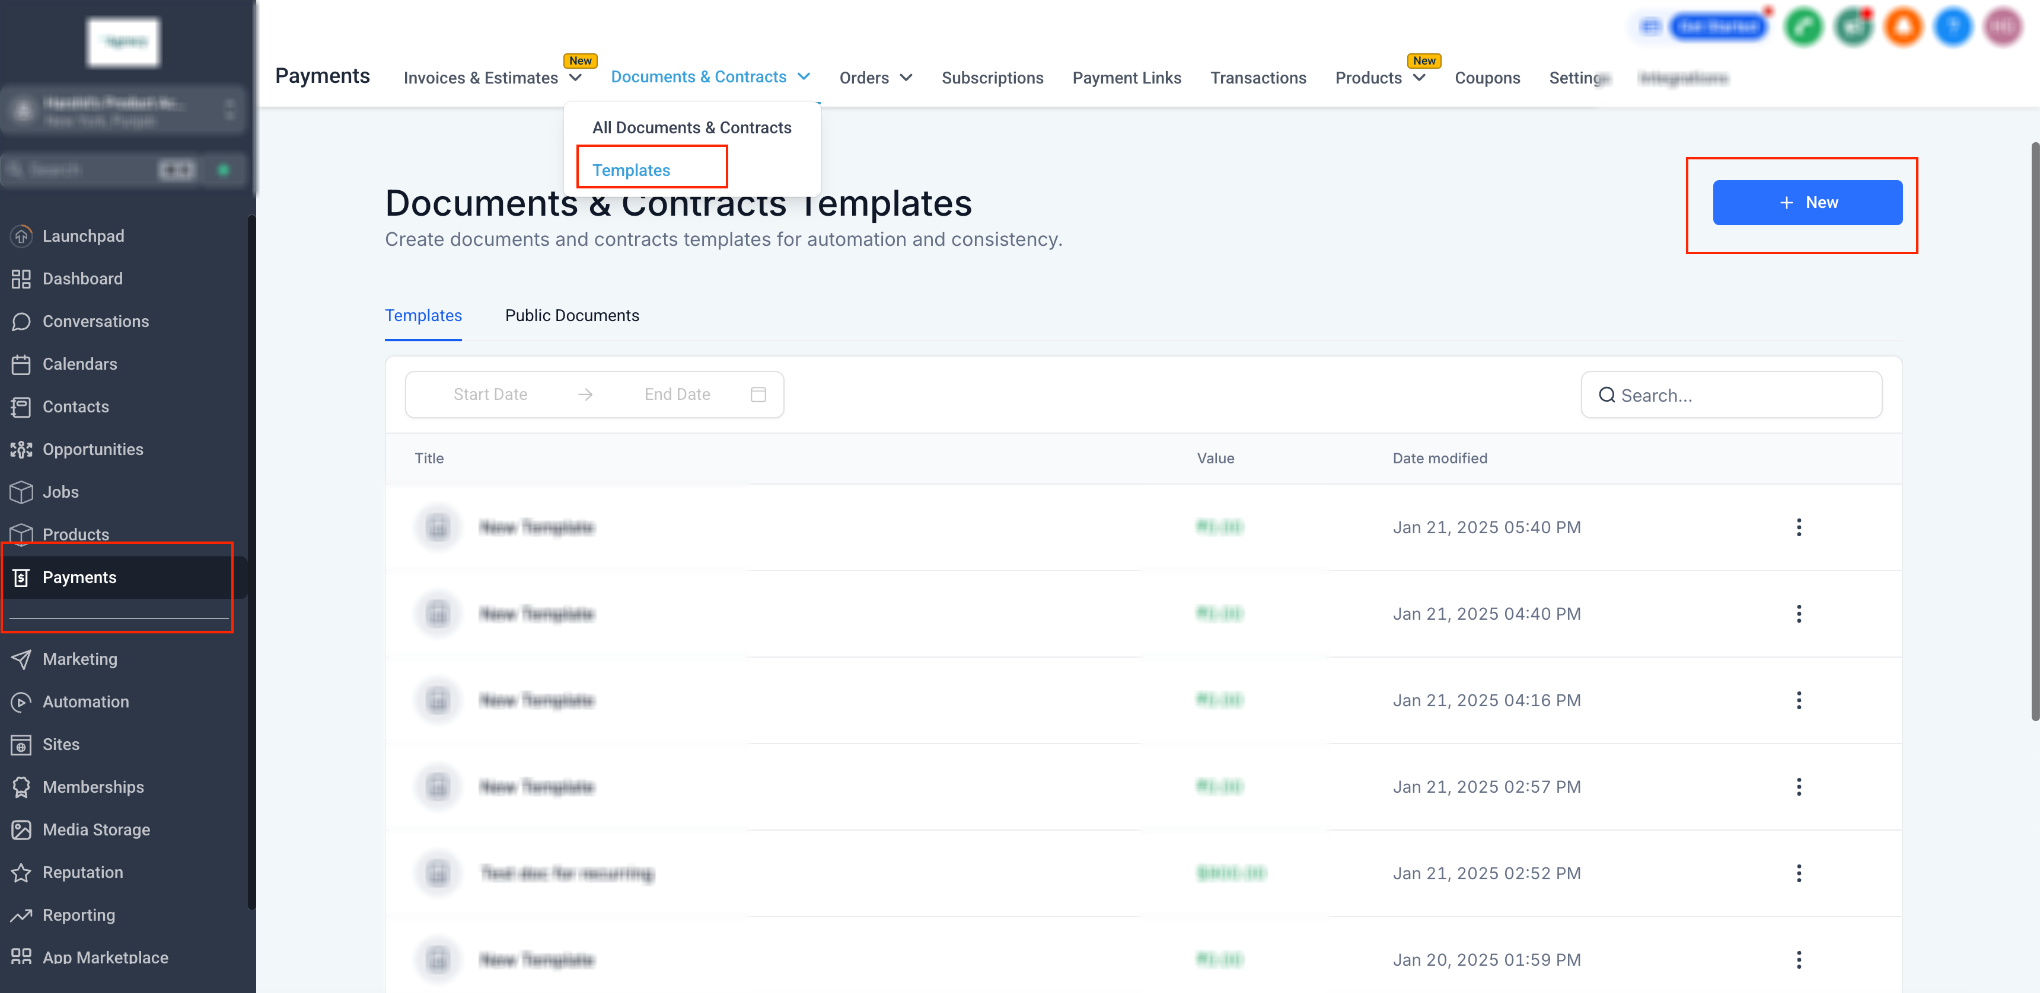
- Go to Payments > Documents & Contracts > Templates.
- Click + New or open an existing template.
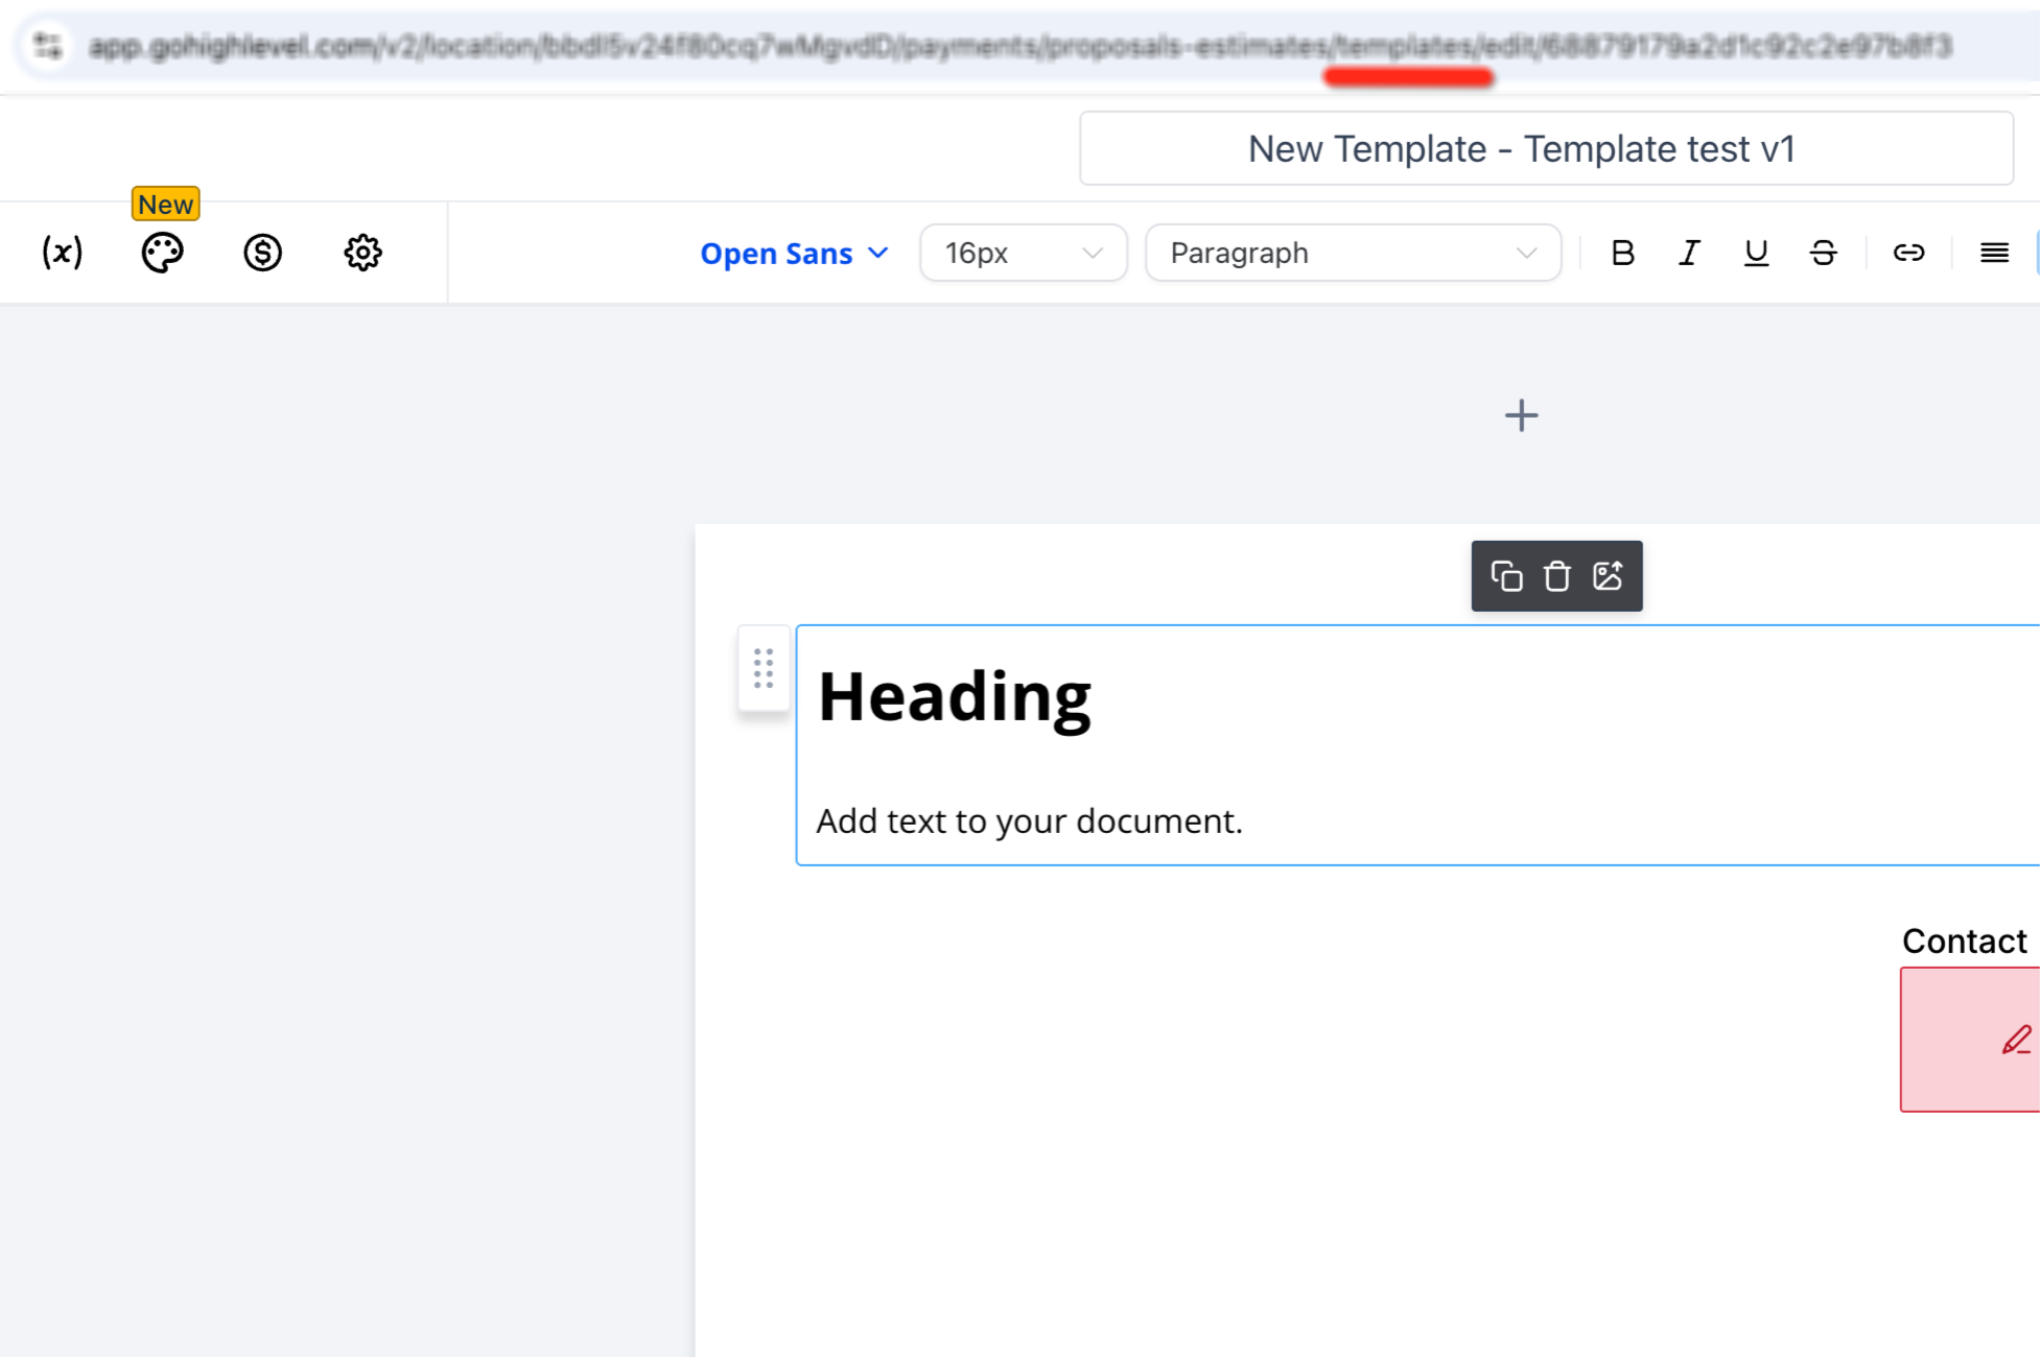
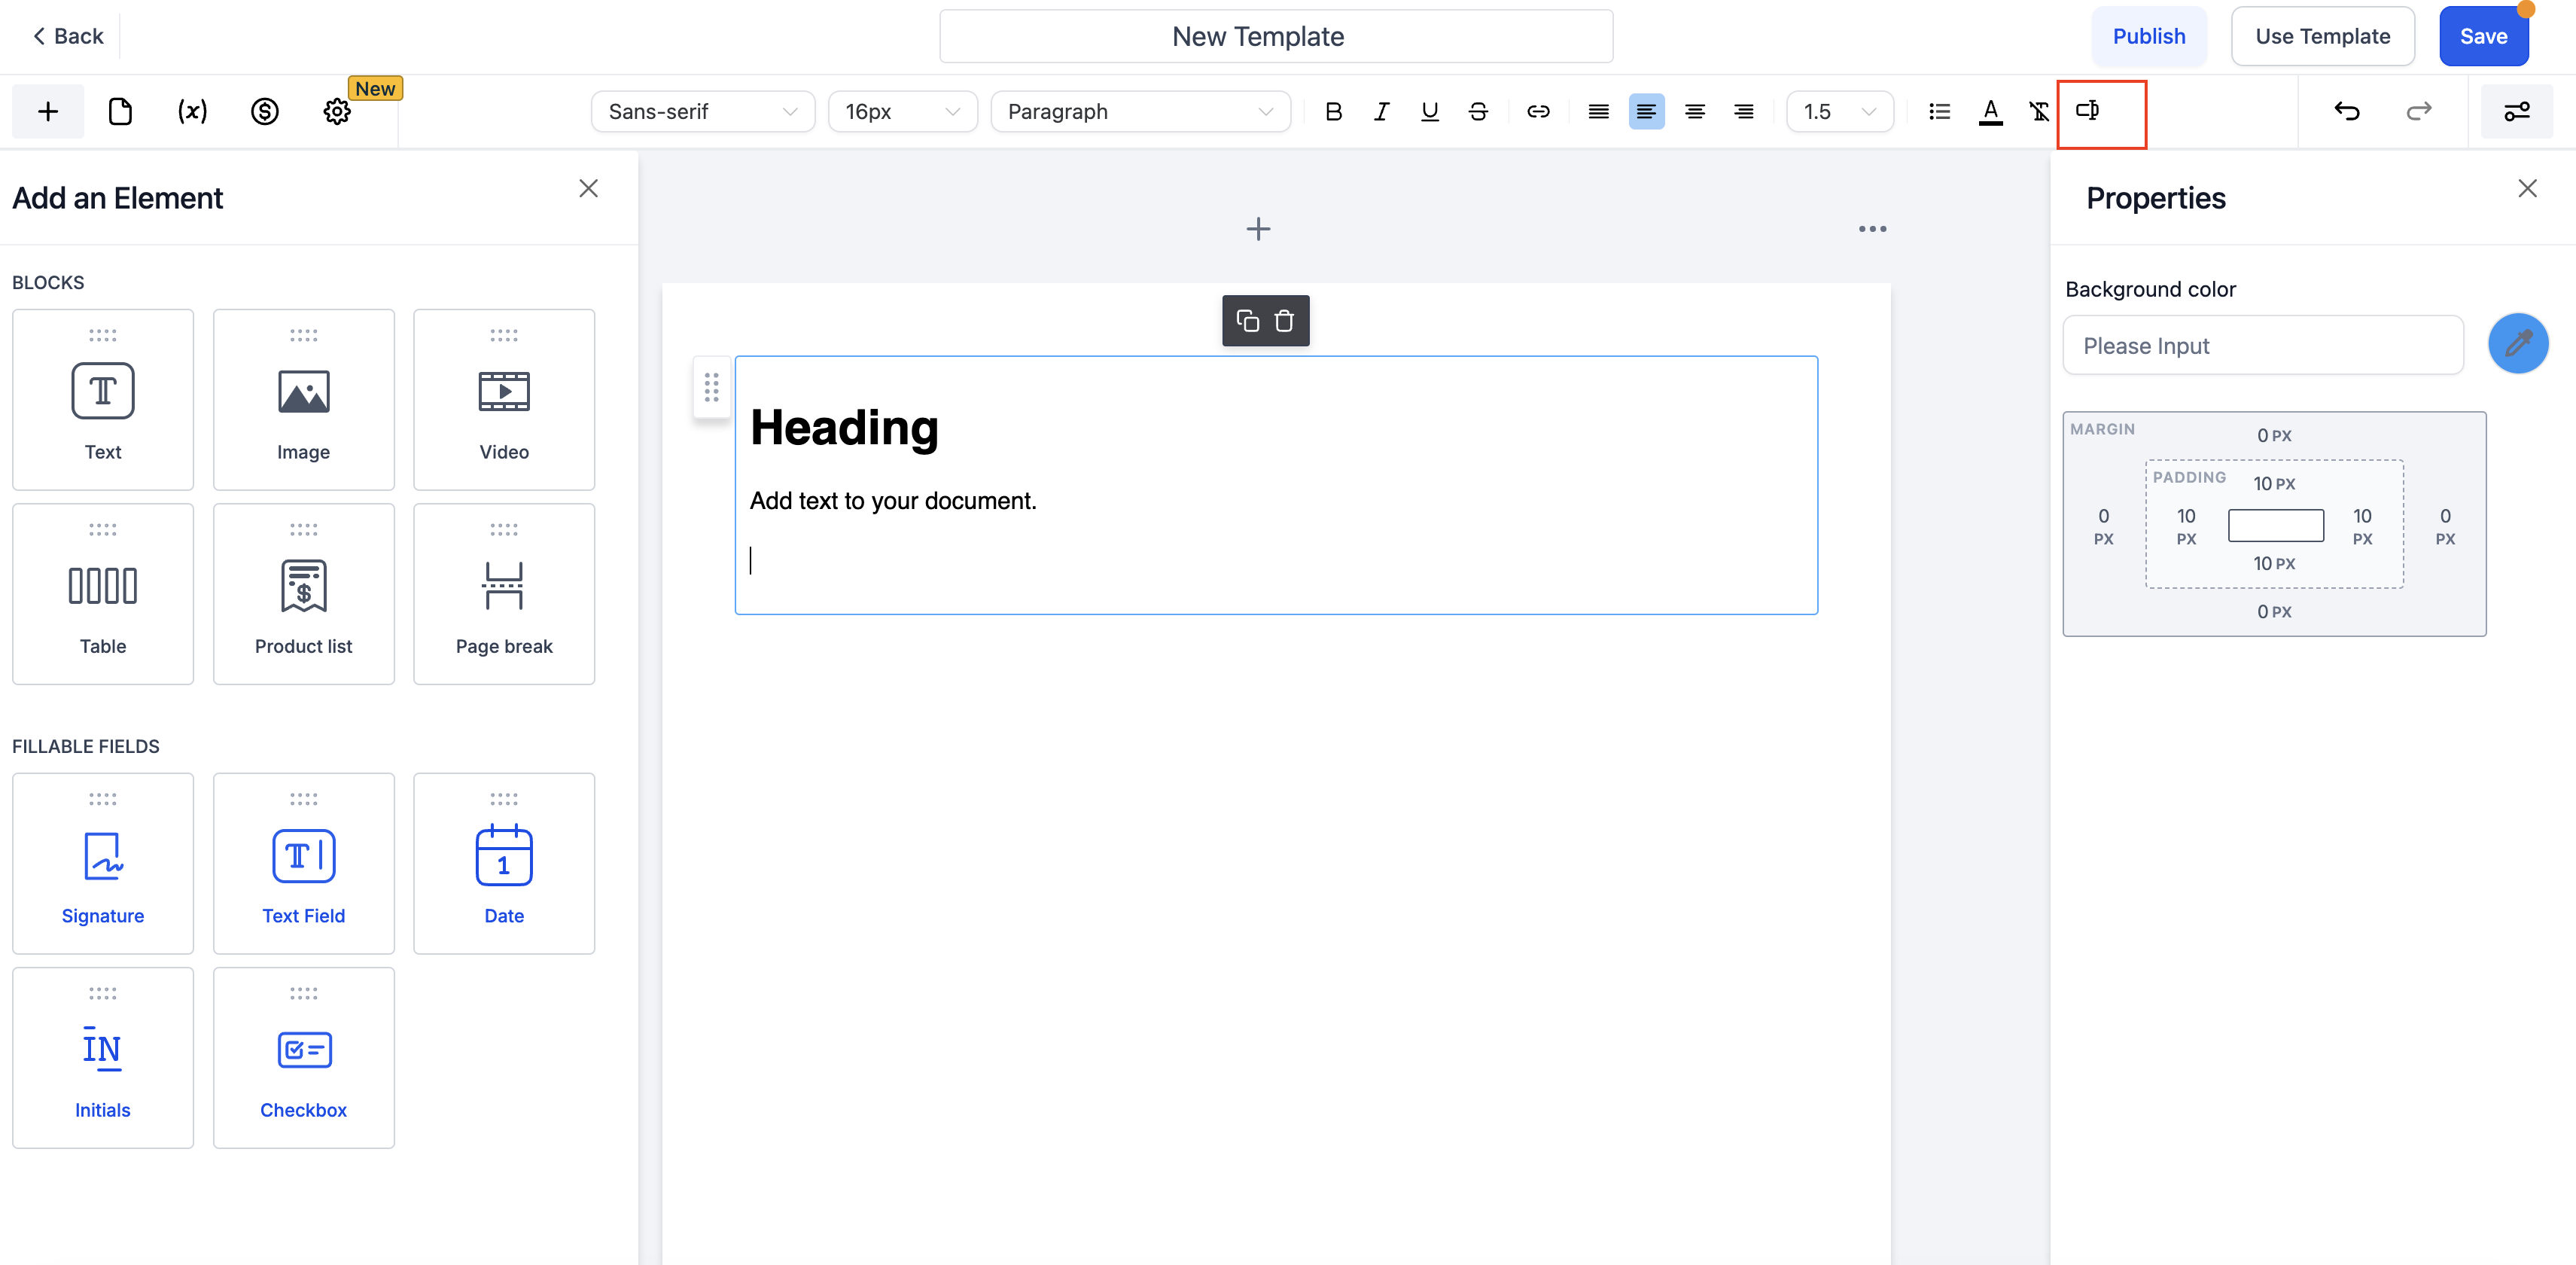
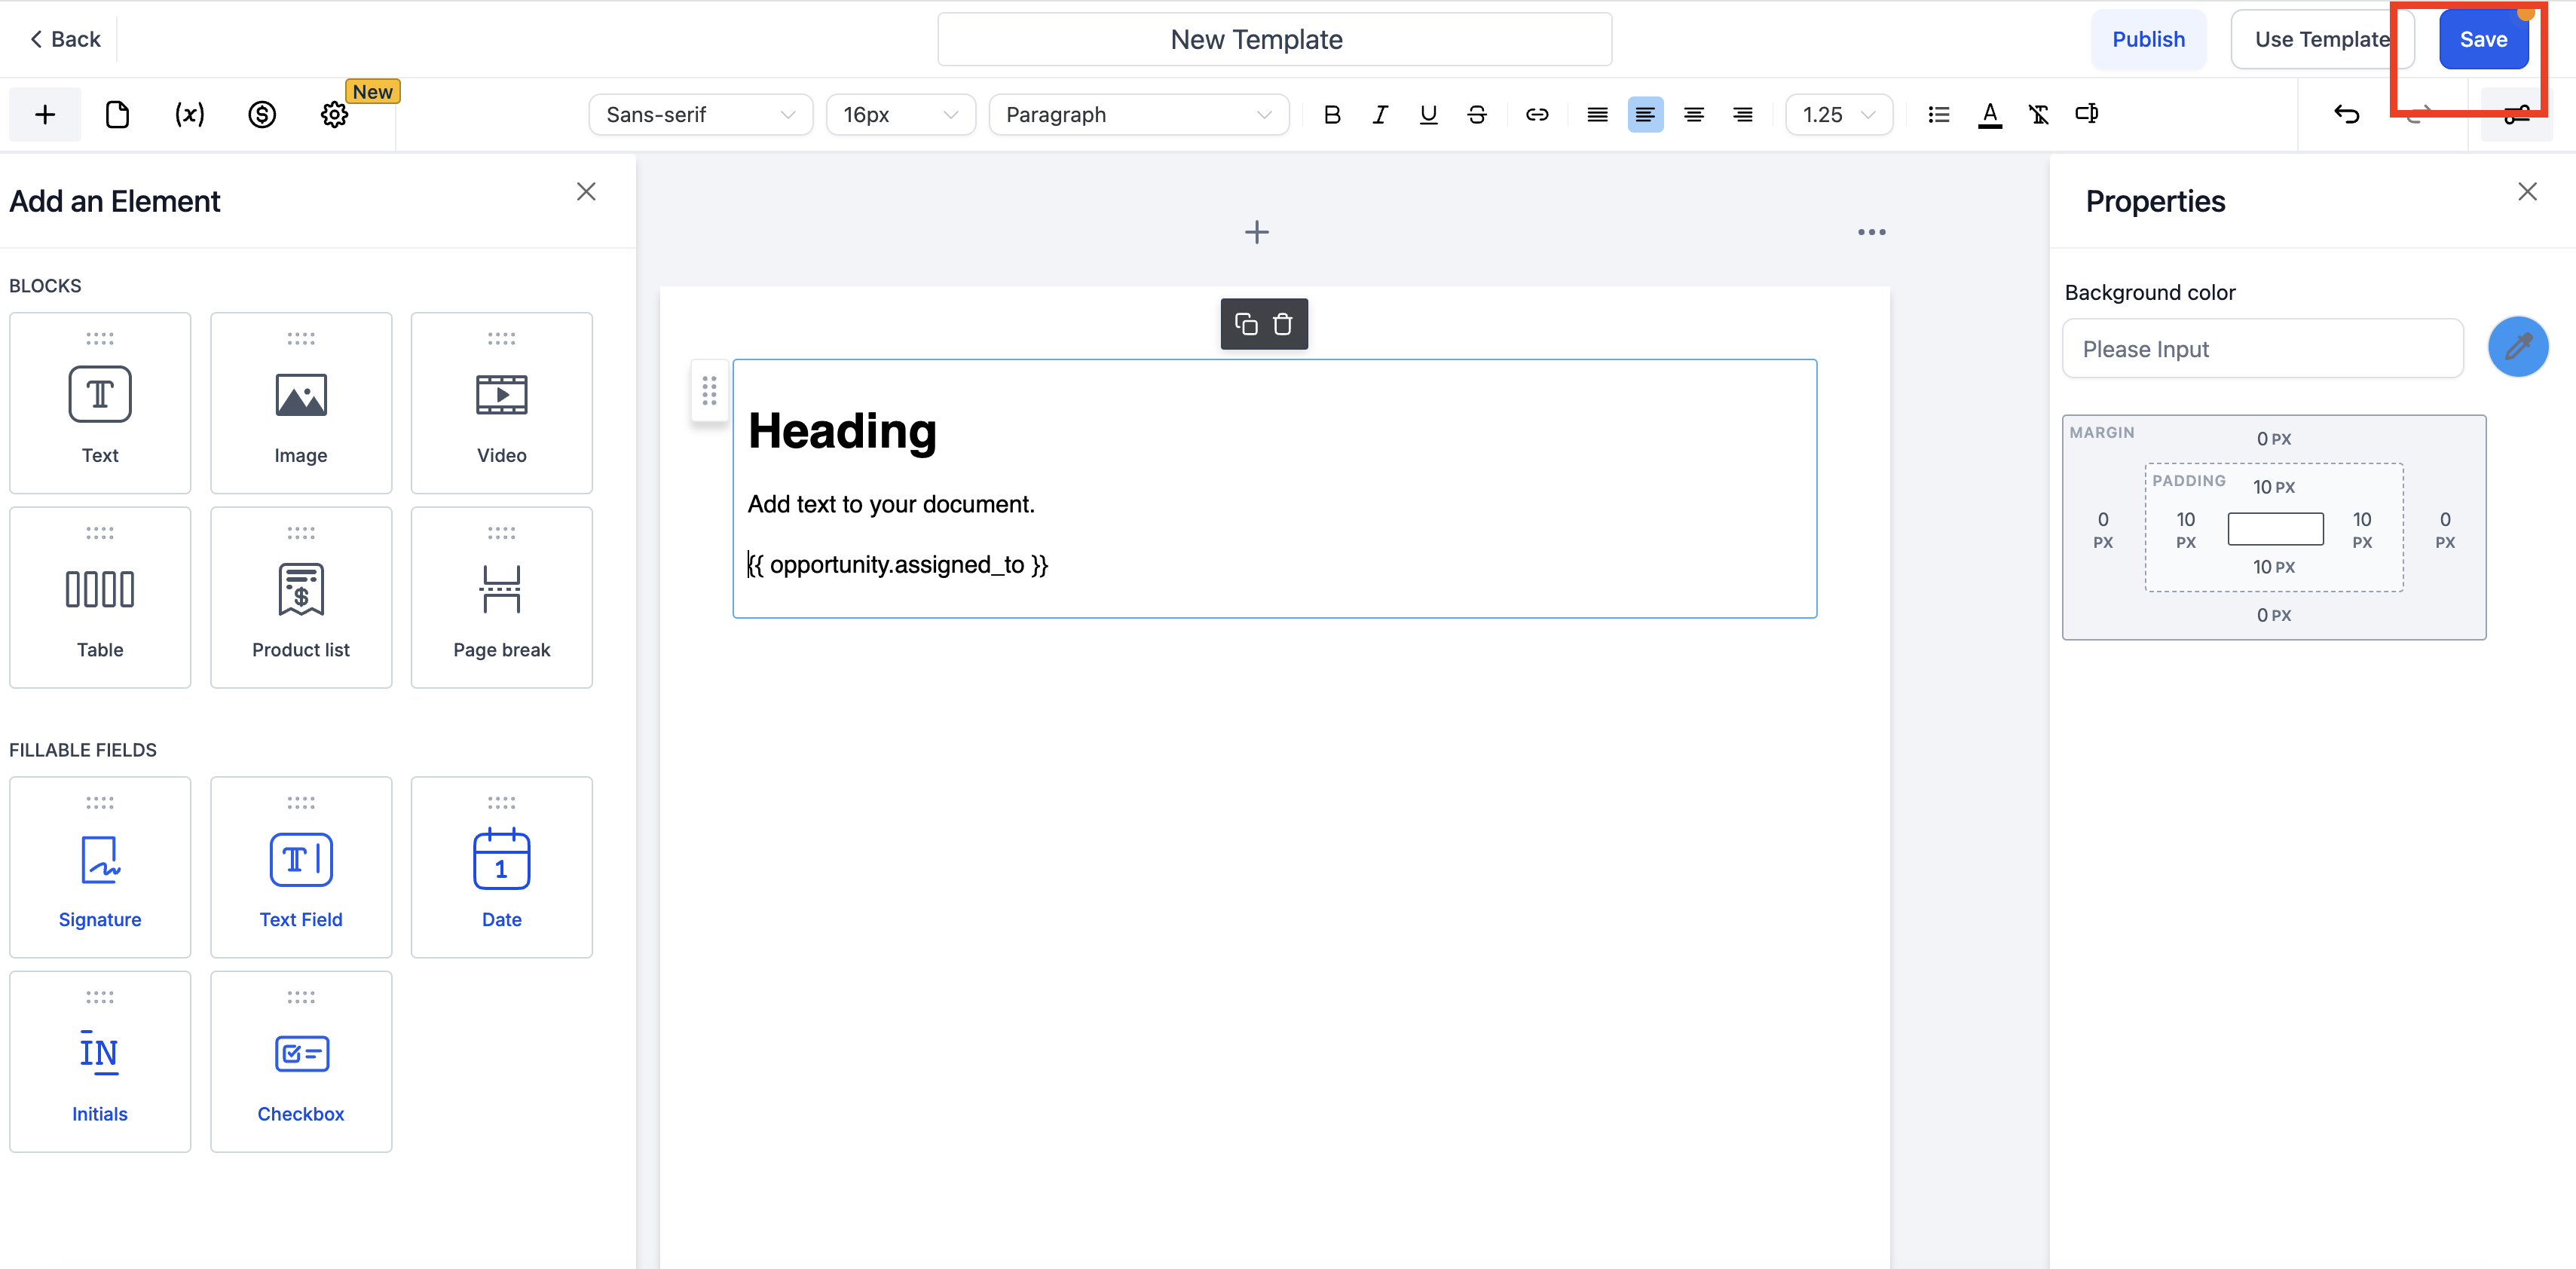
- Add a Text block or Table where the Opportunity information should appear.
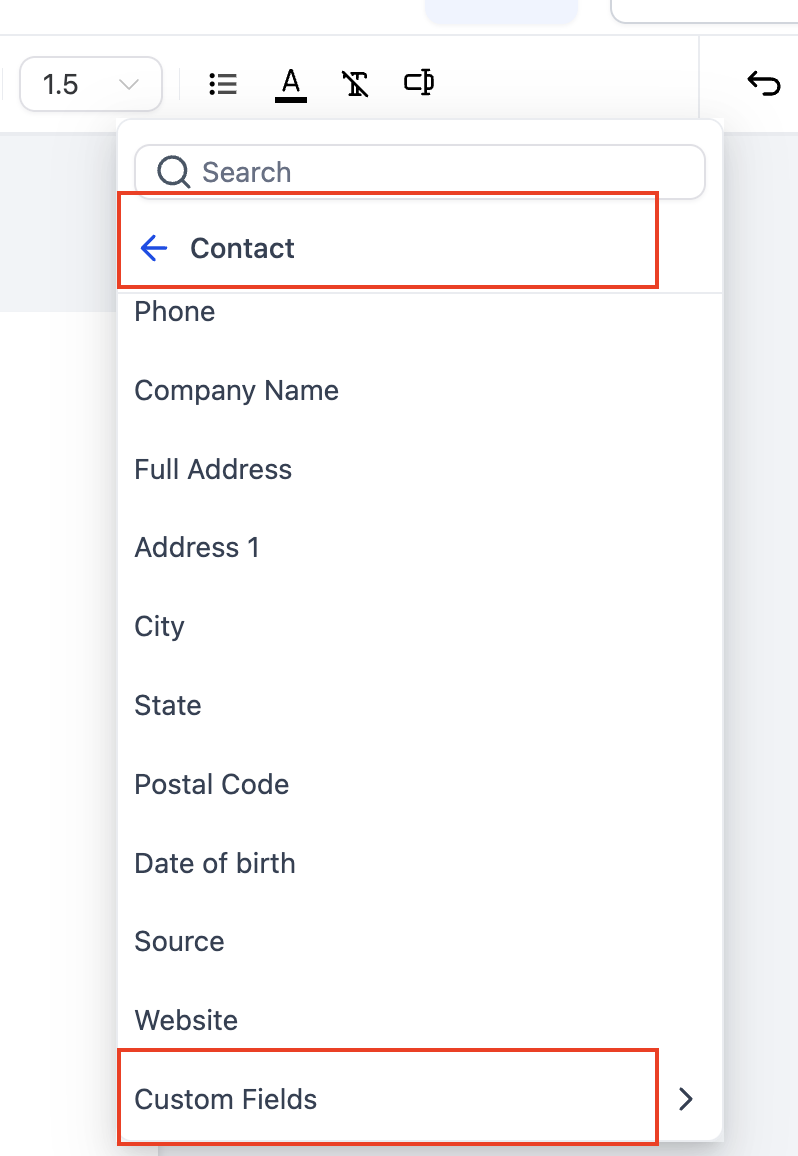
- Place the cursor in the required location and click the Merge Fields icon.
- Select Contact > Custom Fields > Opportunity Details > Field Name.
- Confirm the merge field token appears in the correct location.
- Click Save.
Use the template in a workflow
- Go to Automation > Workflows.
- Create or open a workflow.
- Add a trigger: Pipeline Stage Changed or Opportunity Status Changed.
- Configure trigger filters such as pipeline, stage, or status.
- Click + Add Action and choose Send Documents & Contracts.
- Select the From User and the saved template.
- Choose Create as Draft or Send Directly.
- Select the delivery channel and complete recipient or signer information.
- Click Save Action then publish the workflow.
05What it looks like in HighLevel
06Settings that matter
- Merge field token insertion. Using the Merge Fields menu inserts the exact token for the selected Opportunity field, preventing formatting or syntax errors.
07Things to know before you rely on it
- Opportunity values only populate when the required field, value, template, and workflow context are available.
- The token remains visible while editing the template but should disappear in the generated document.
- Create as Draft can be used for testing; when ready, change the action to Send Directly to send the document automatically.
08If something goes wrong
- Opportunity value blank in generated document. Confirm the field contains a value on the Opportunity that triggered the workflow and that the field was selected under Opportunity Details and saved before the workflow ran.
- Merge field token still visible in generated document. Reinsert the field using the Merge Fields menu and test again.
- Template not appearing in workflow action. Ensure you created a reusable template, not an individual document, and that you clicked Save.
- Document remained in Drafts instead of sending. Check whether the action uses Create as Draft and confirm the contact has a valid email address.
Michael's take

Michael ReimerFounder of CRM Pros, HighLevel Commander and Certified Admin
Configuring Opportunity Custom Values lets a single template adapt to each deal without having to copy paste details each time. For teams that regularly send proposals, the reduced manual steps make the process feel smoother.
Get More InformationOpens on HighLevelPublished November 2, 2026 · Updated November 3, 2026