
01Who this is for
- Real estate agencies benefit because they can send buyer, seller and witness agreements without re entering each party.
- Contractors gain accuracy by assigning a crew lead, client and inspector roles that auto fill from contact records.
02Multirole signing, explained
The feature lives in the Documents & Contracts area where you build templates. Within a template you add fillable fields such as signature boxes, dates or text inputs and assign each to a role. Up to six roles can be defined, each with a name, email and phone setting.
When a workflow includes the Send Document action and selects a multi role template, the platform reads the role definitions, inserts any contact placeholders, and allows you to replace values at the workflow level. The document is then delivered to each signer sequentially, each receiving a unique link to complete their assigned fields.
03How businesses use multirole signing
- Real estate brokerage. Create a template that includes buyer, seller and witness roles. Use placeholders for buyer and seller contact details. In a workflow, select the template and let the system fill in the parties for each transaction, sending the agreement to all three signers automatically.
- Construction contractor. Build a contract template with roles for client, project manager and safety inspector. Assign signature and date fields to each role. When a new project starts, a workflow triggers the send, populating the client’s information from the contact record and routing the document to each party.
- Financial advisory firm. Design a service agreement template with advisor and client roles. Use a custom field for the advisor’s email. In a workflow, override the client email for specific engagements while keeping the advisor placeholder, then dispatch the document for signatures.
04The numbers and rules that matter
- Define up to 6 signer roles per template.
05Before you start
- A Documents & Contracts template must exist before configuring roles.
- At least one fillable element must be assigned to the Contact role.
06How to set up and use multirole signing in HighLevel
Set up multi role signing
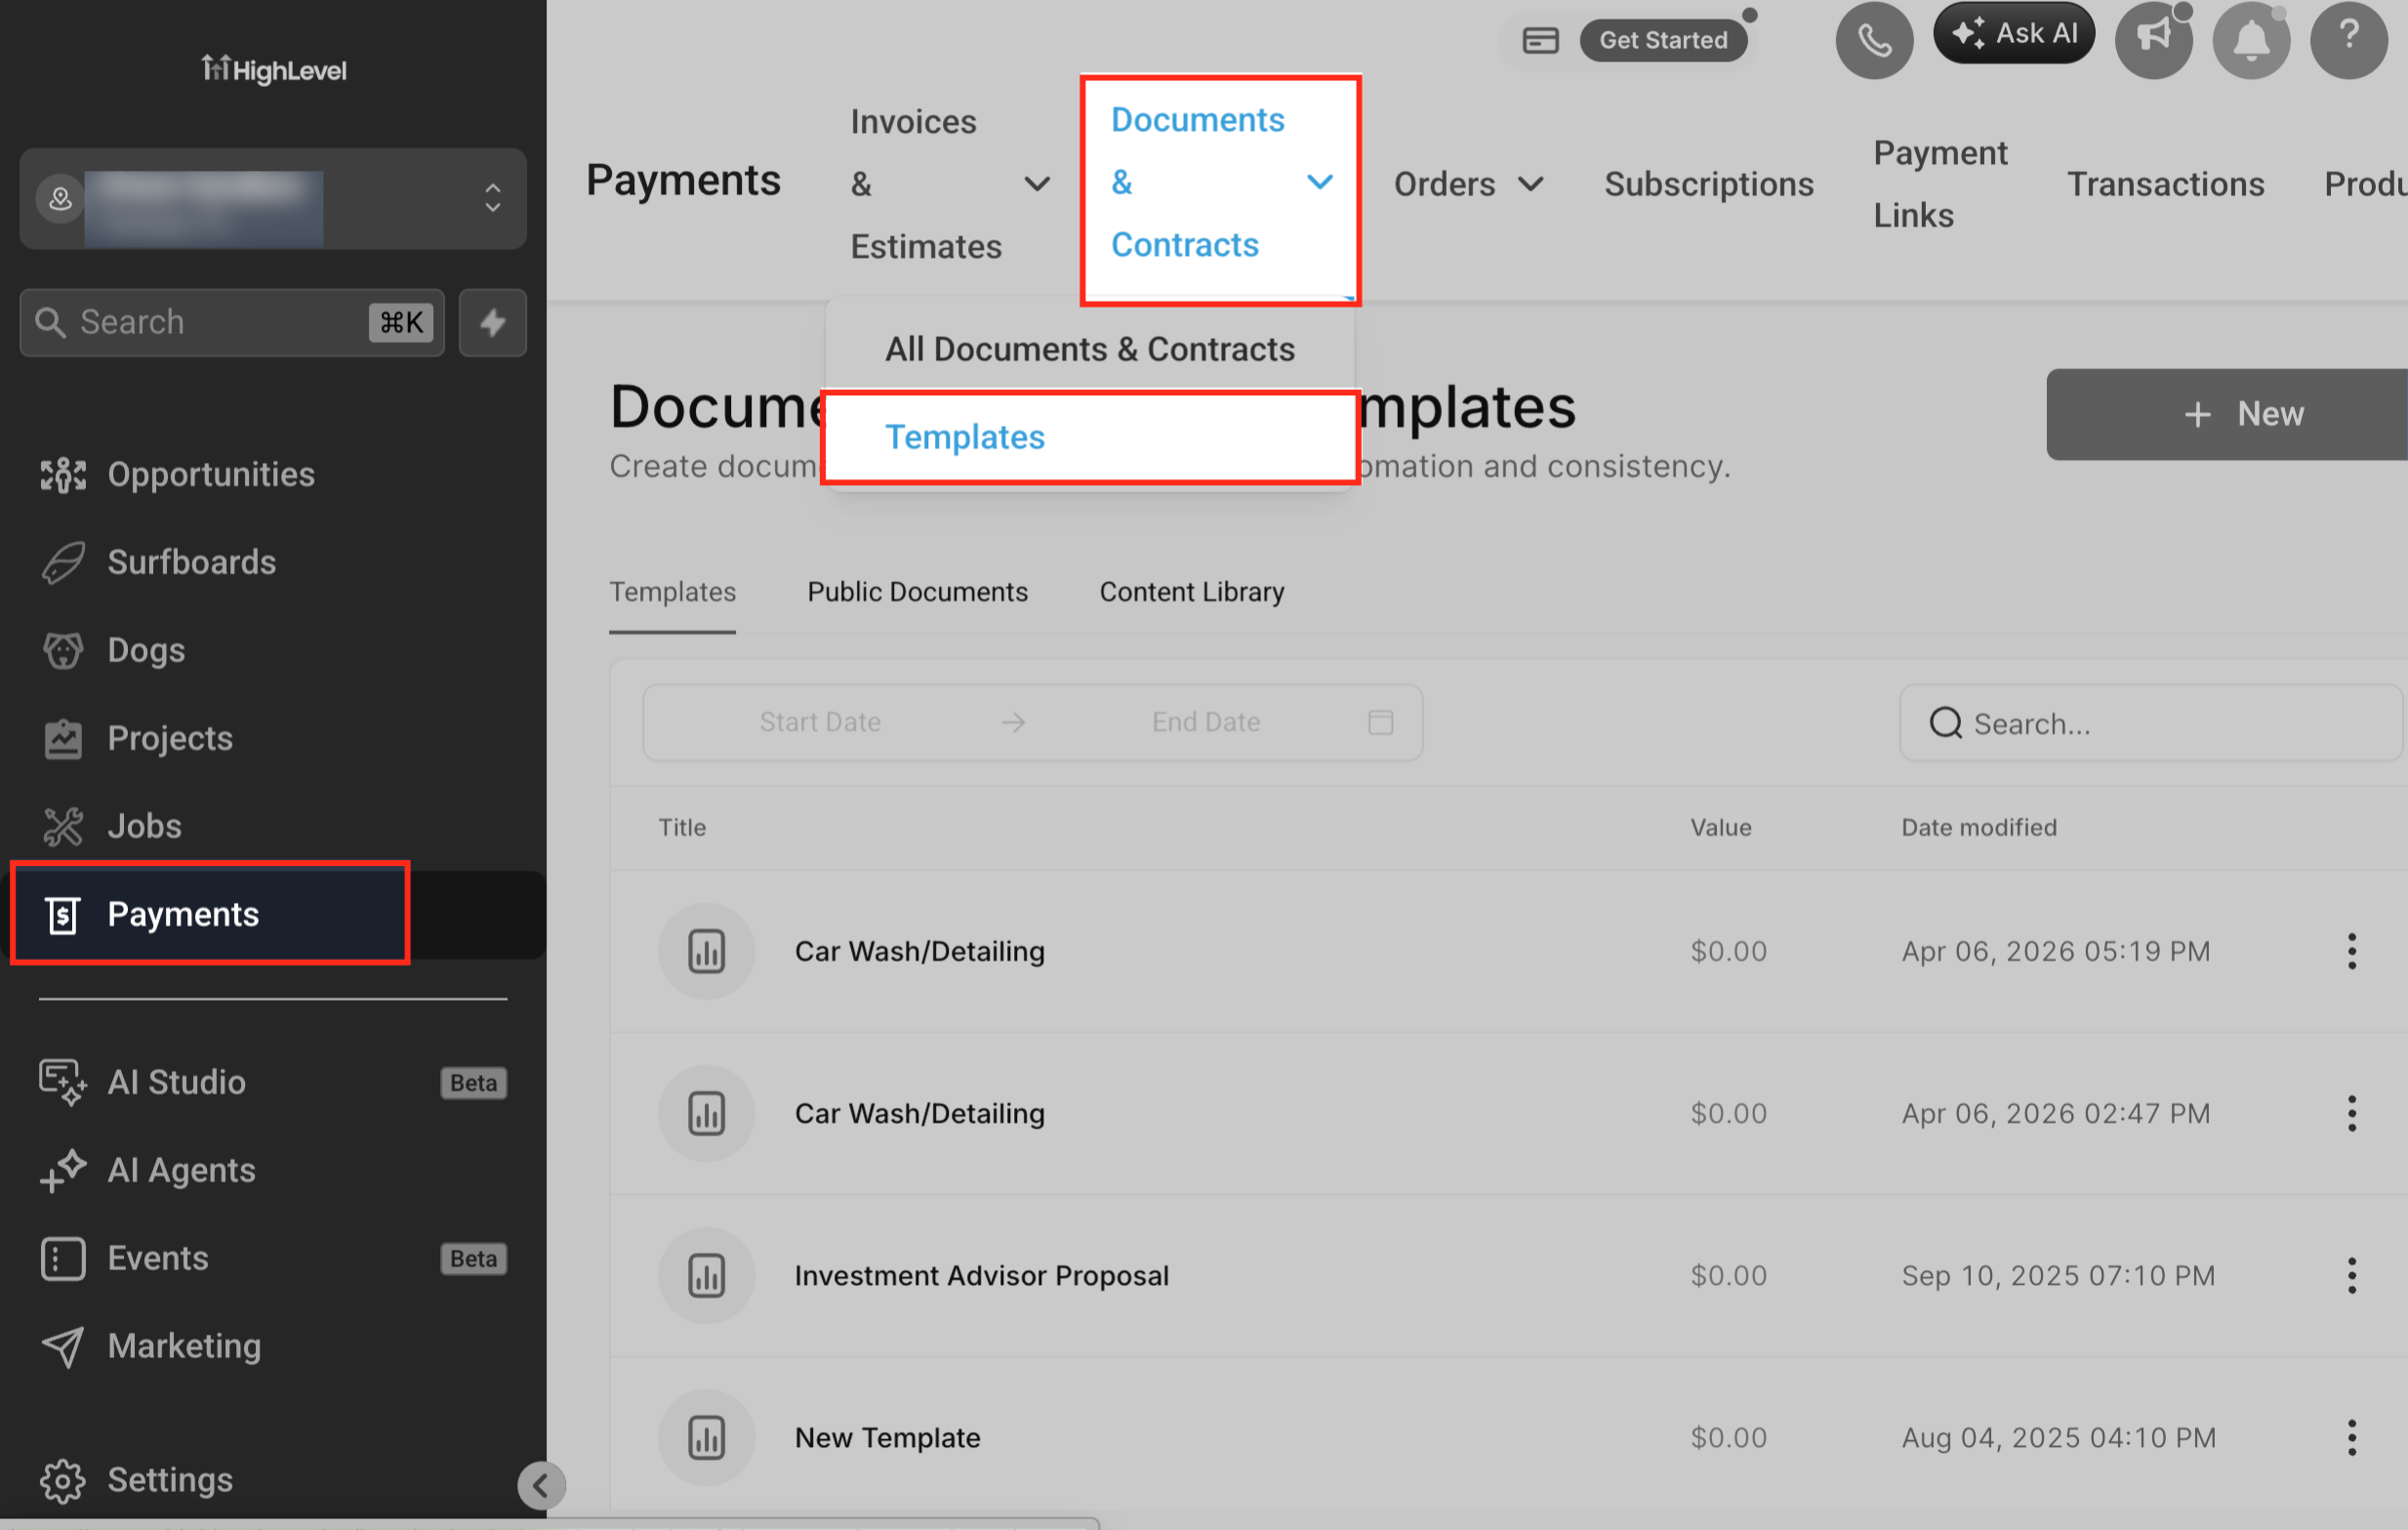
- Open the Templates list under Payments > Documents & Contracts and pick an existing template or start a new one.
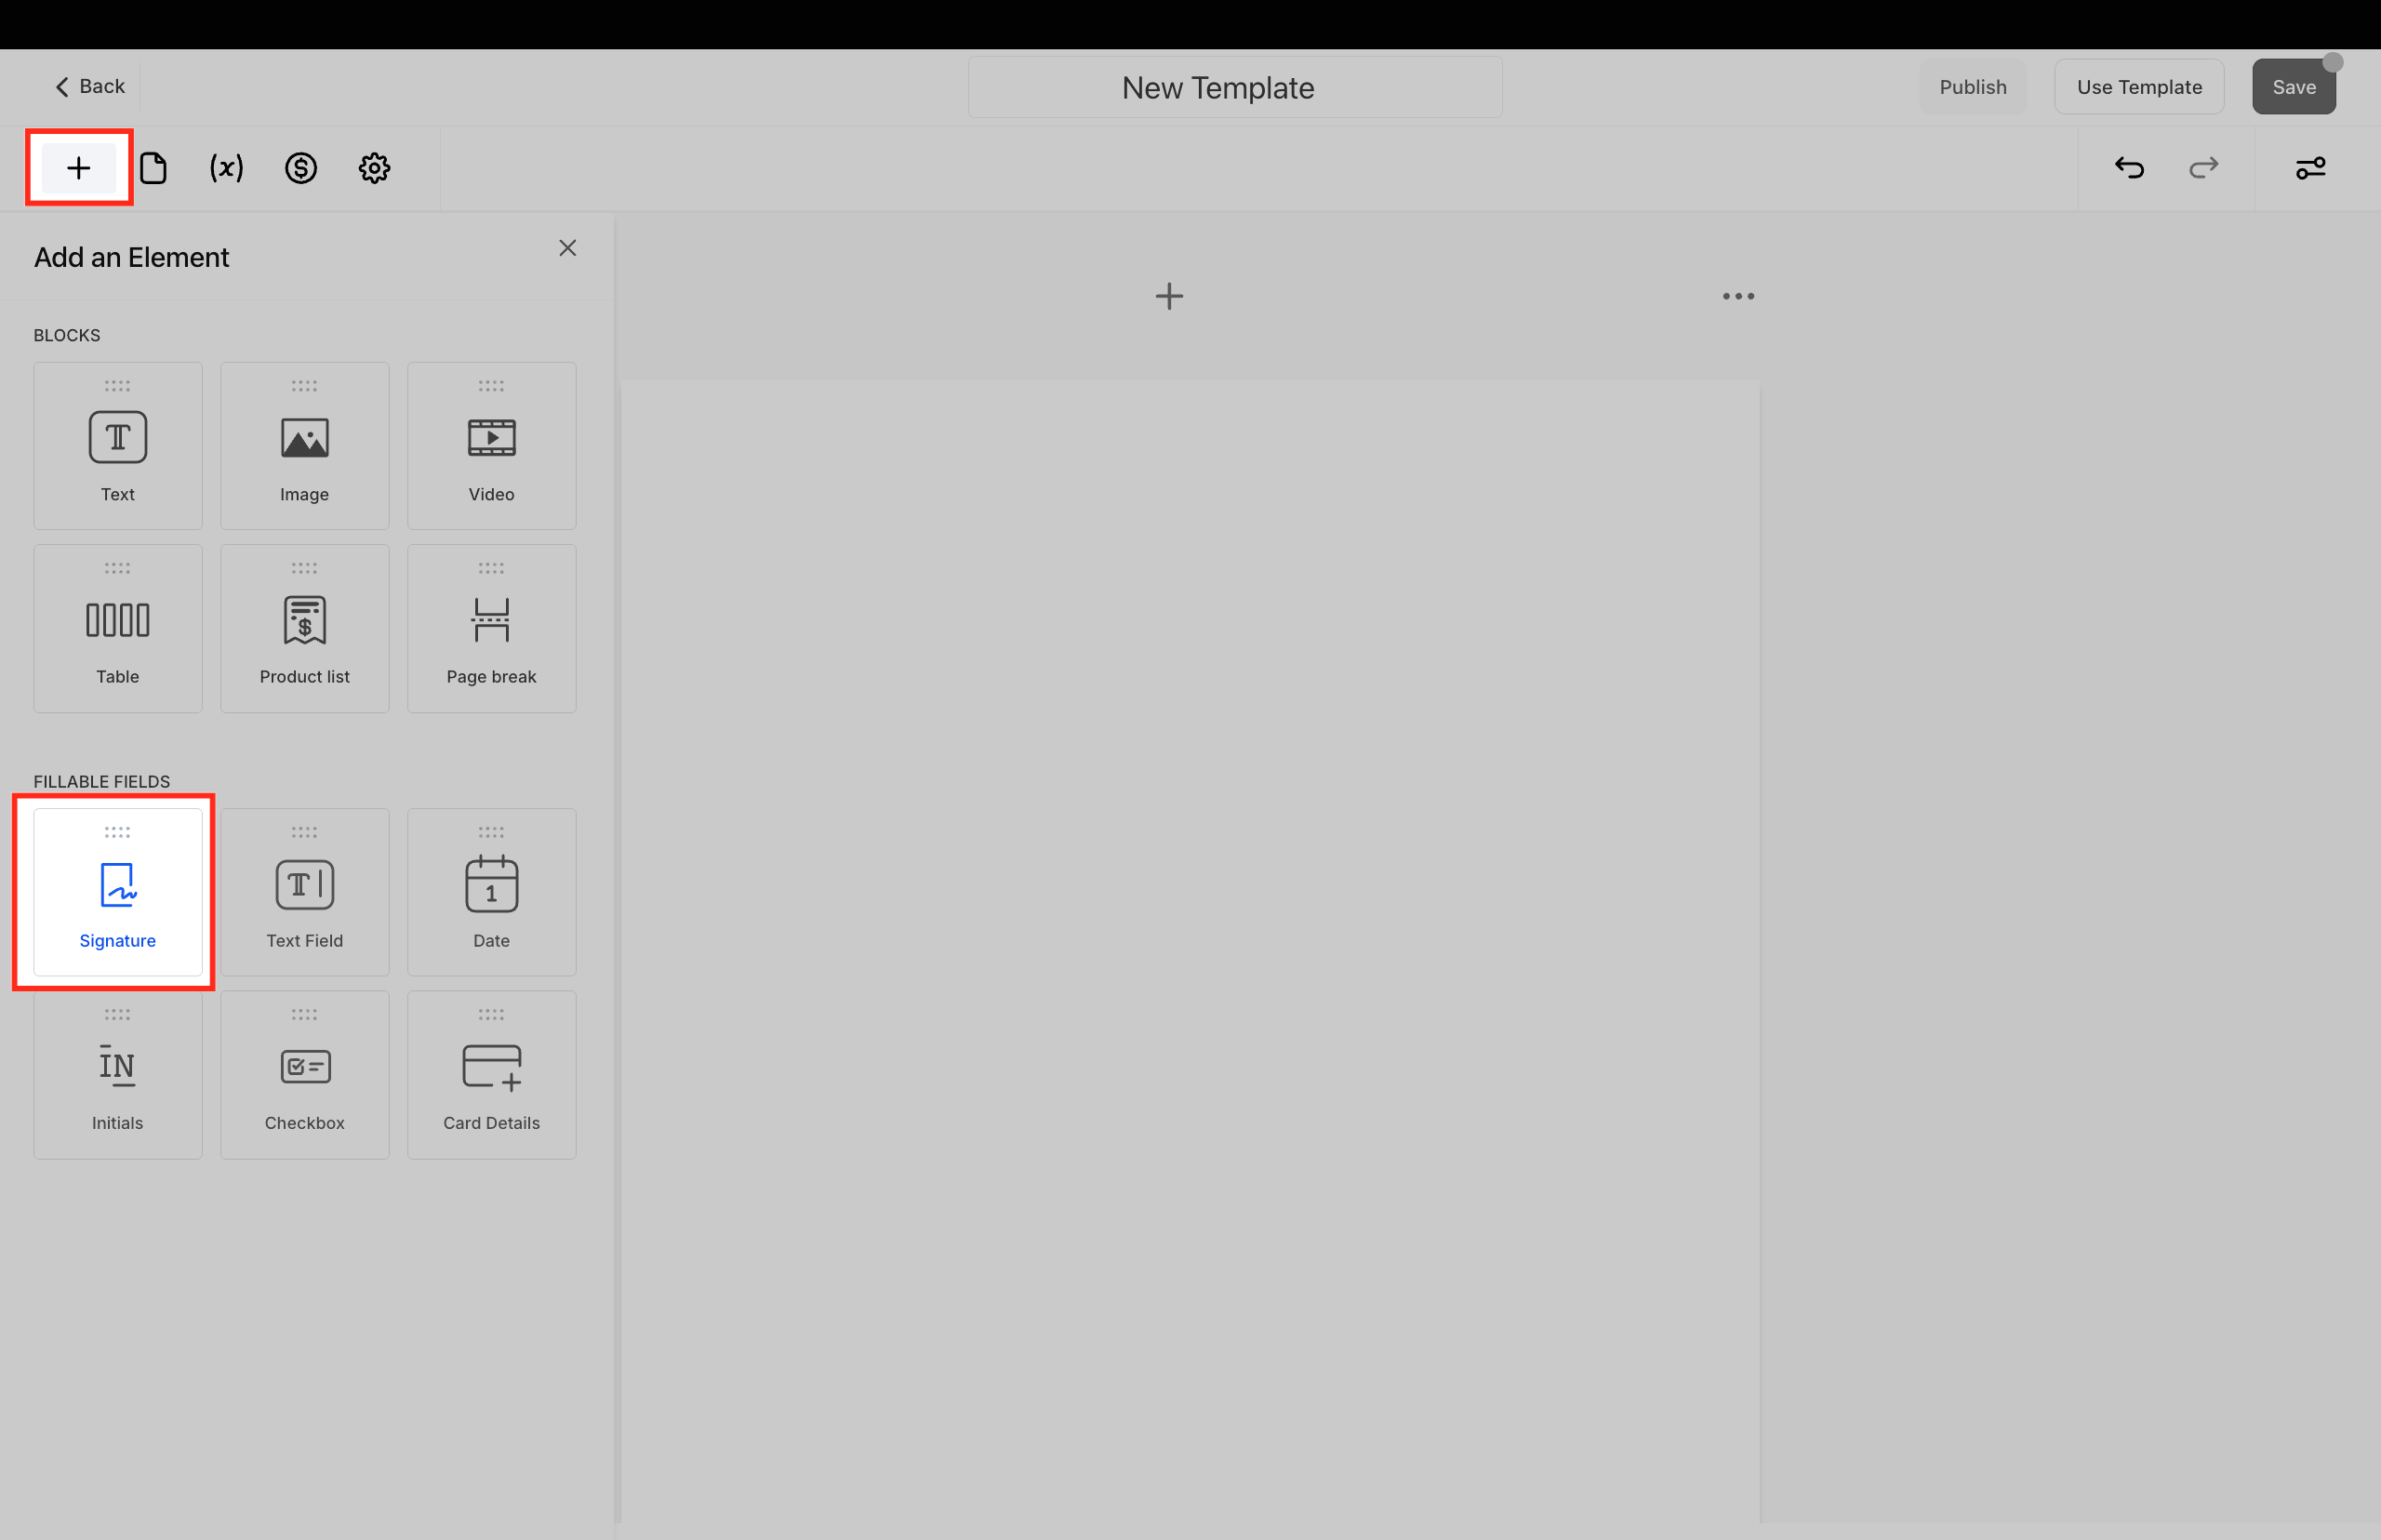
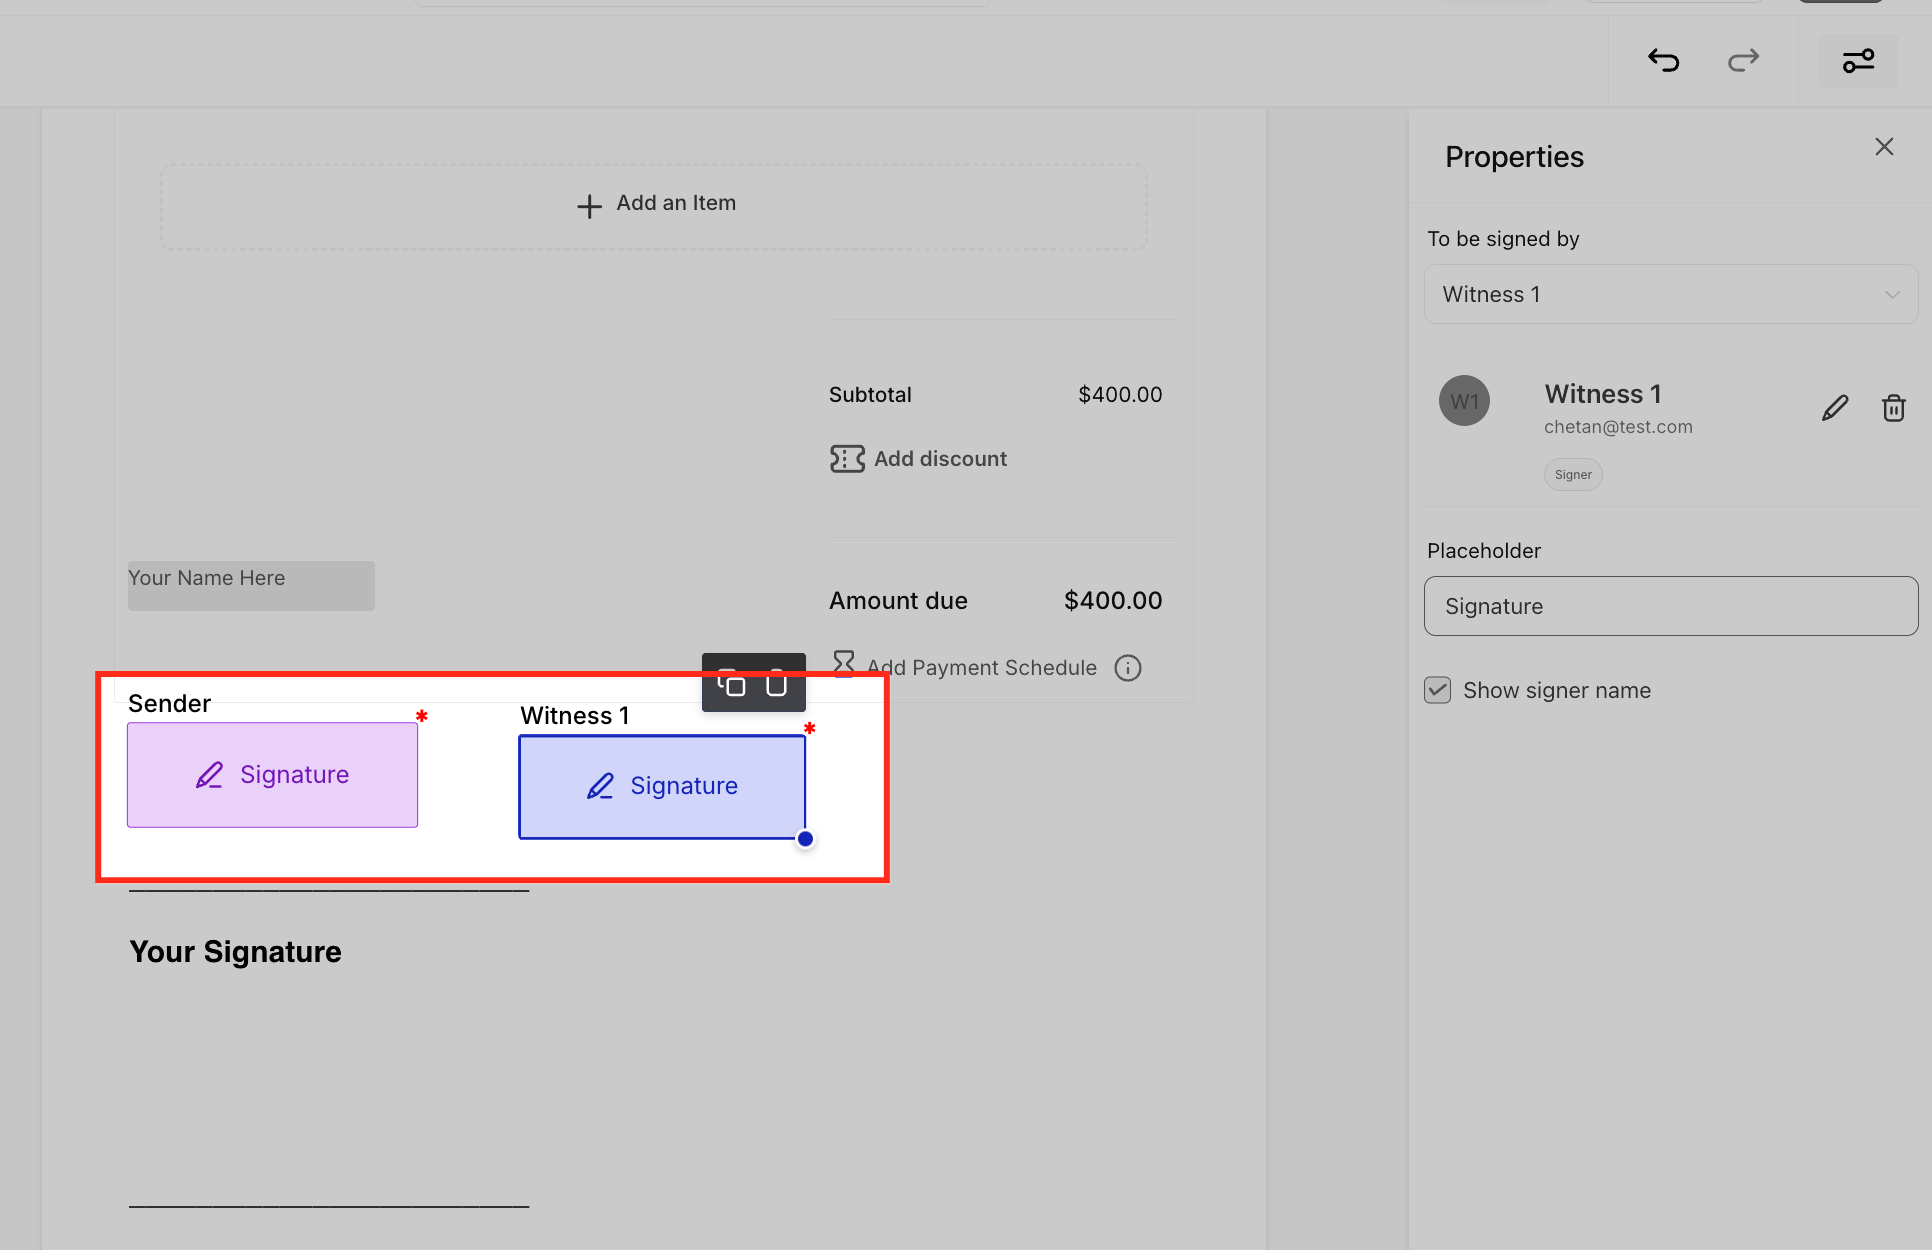
- In the editor, insert a fillable field such as a signature box or date input and select it.
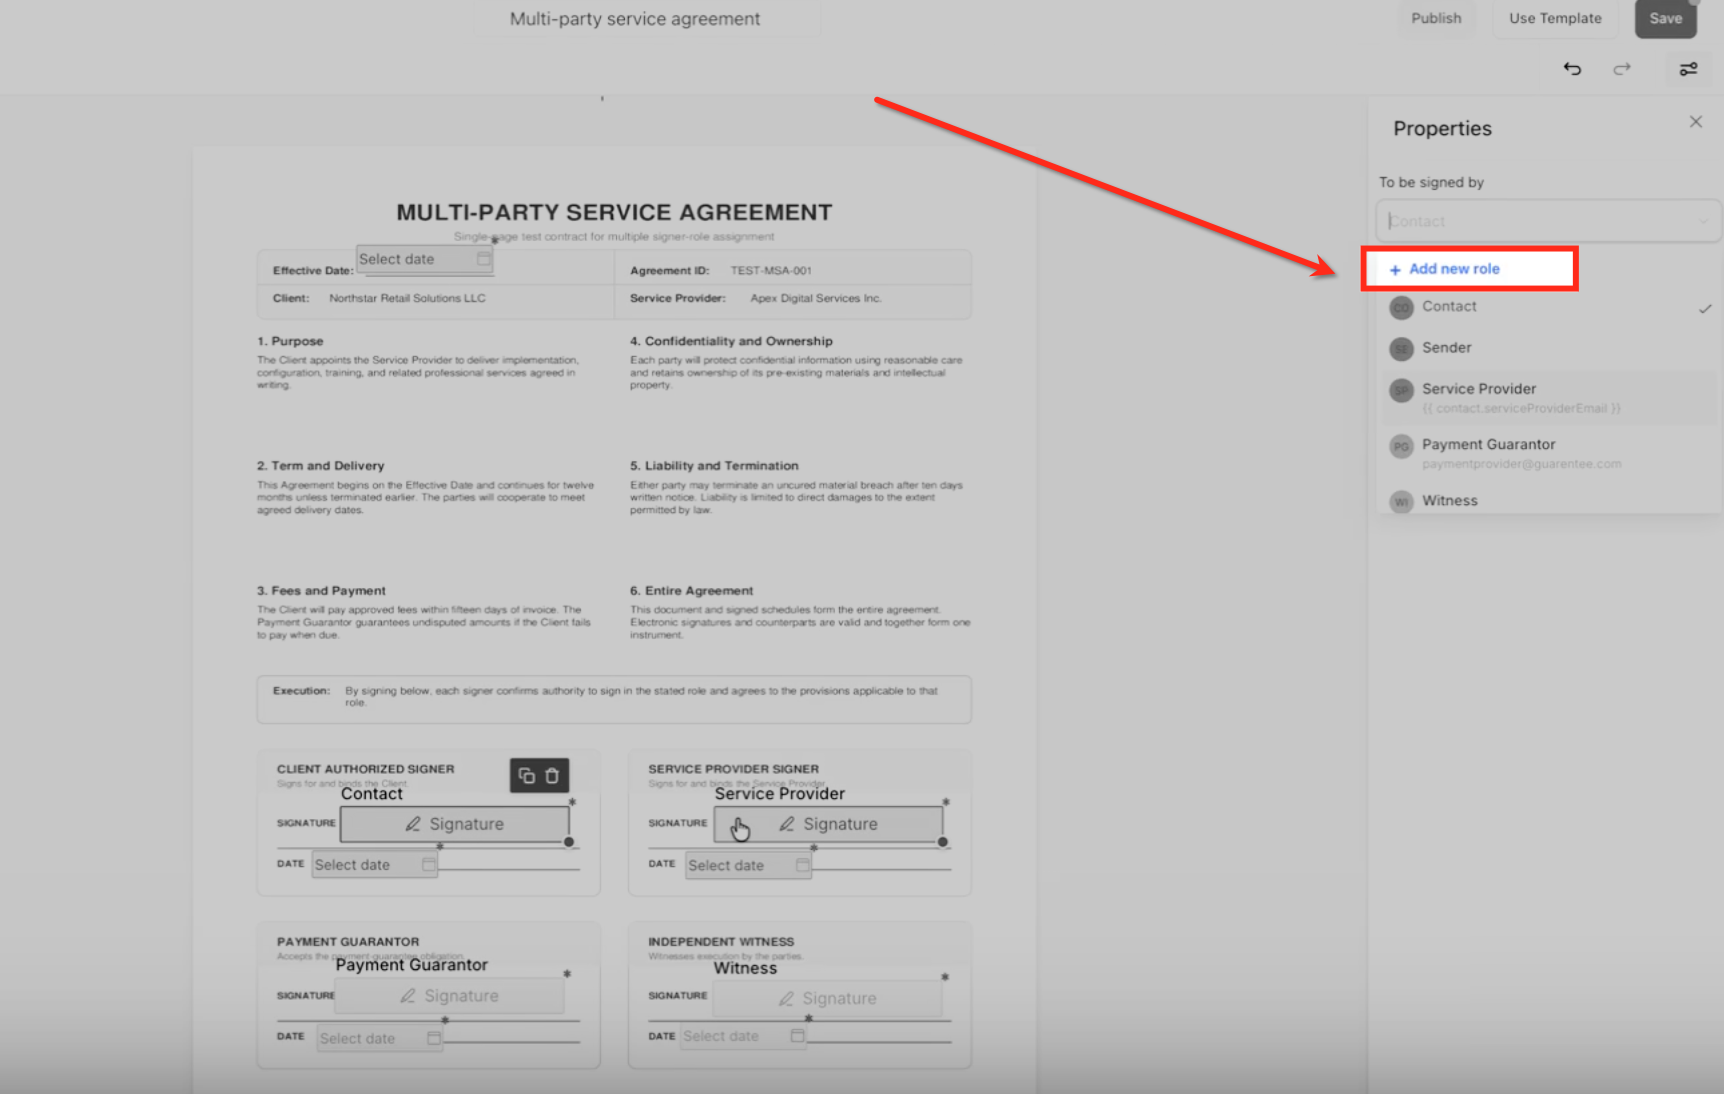
- With the field selected, click Add Role to open the role creation window.
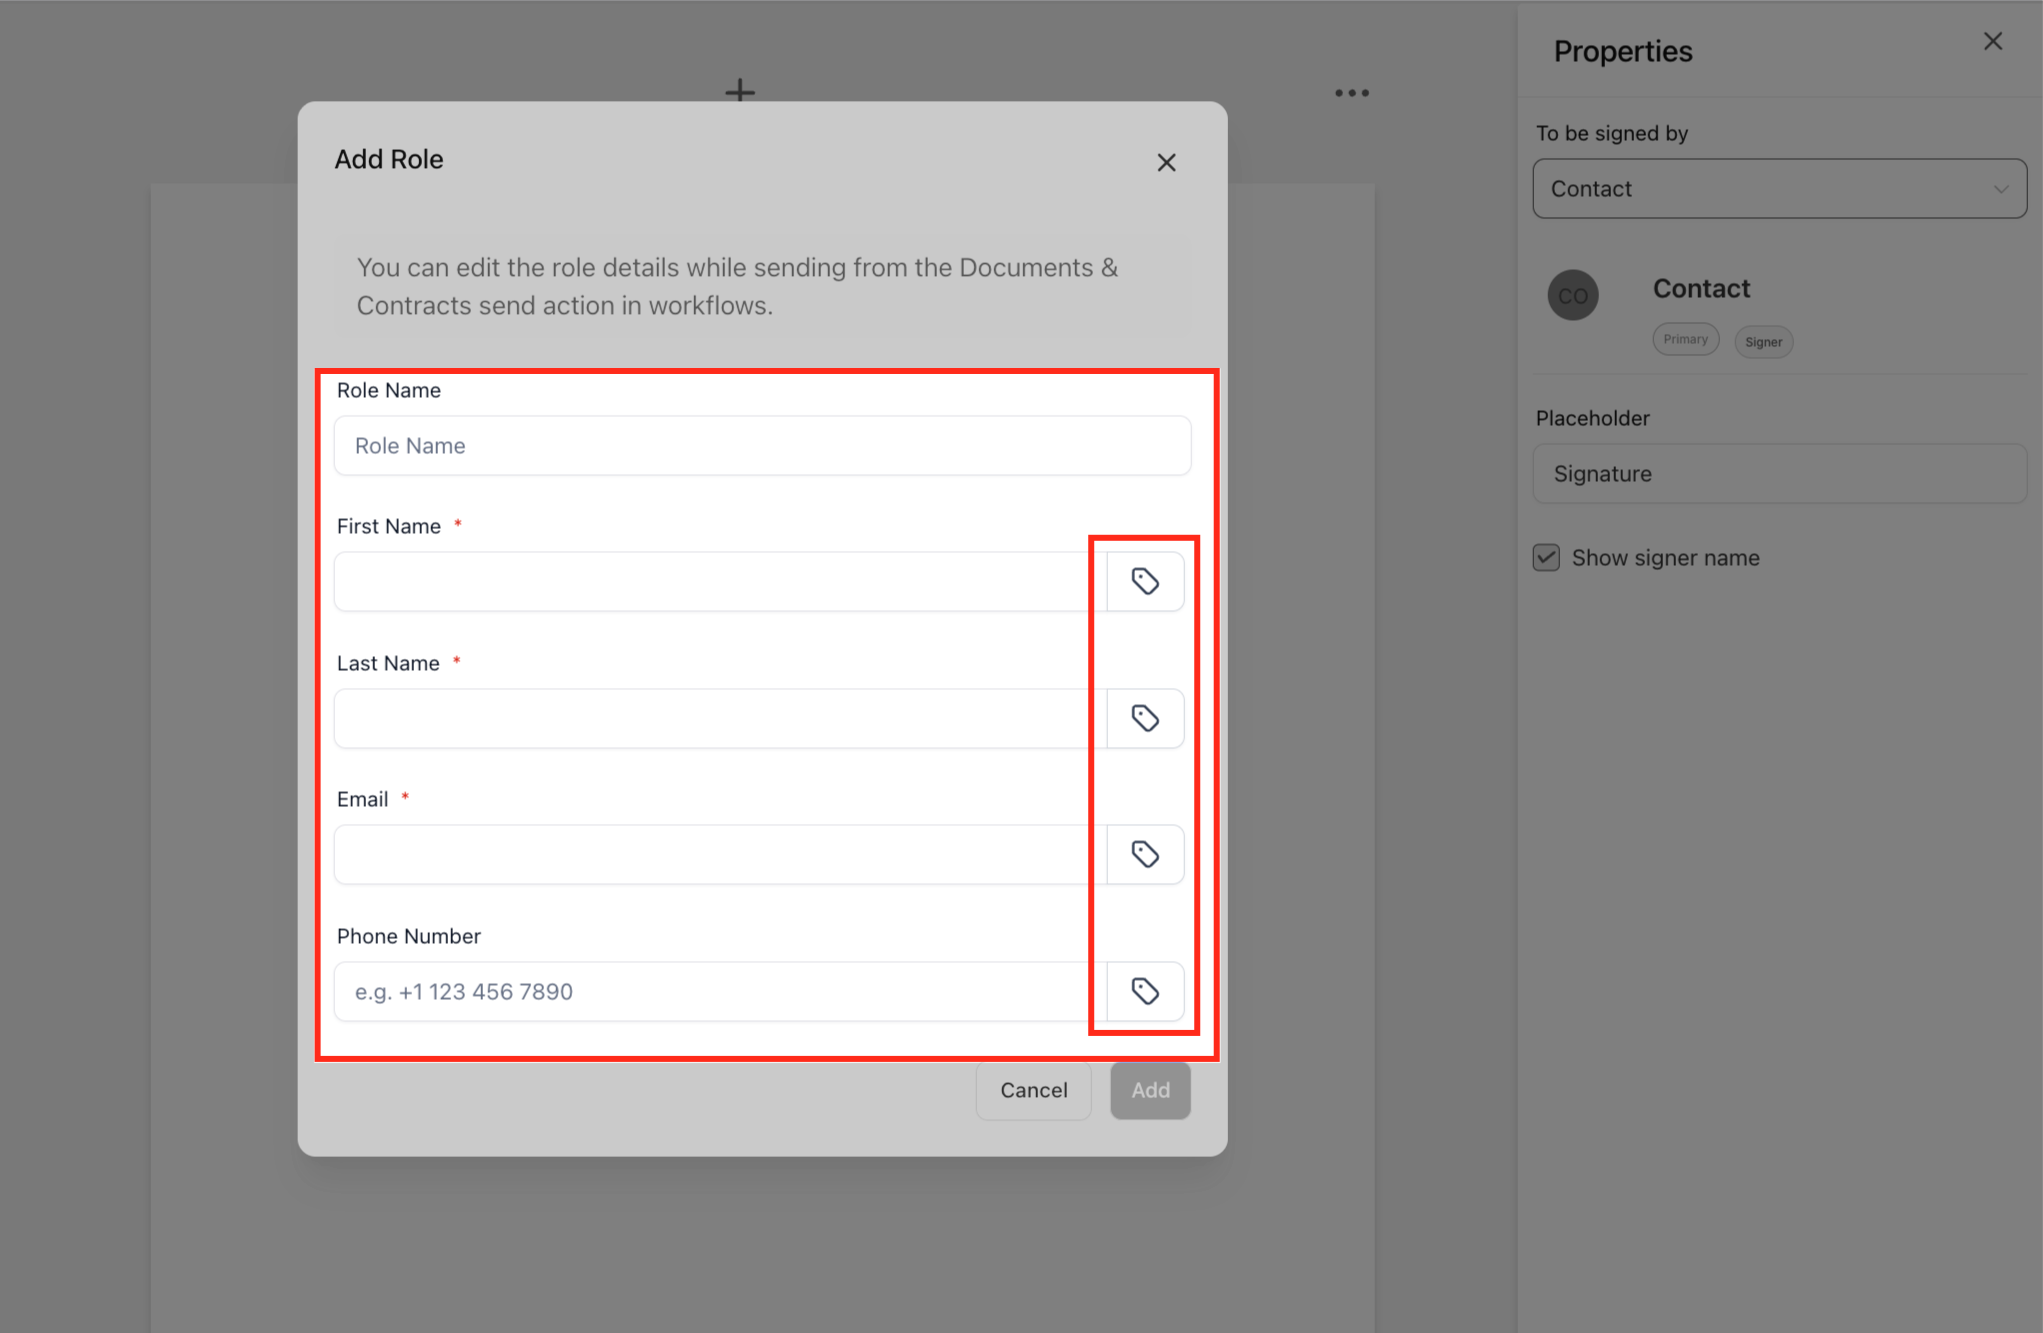
- Enter a role label and provide either a fixed name, email and phone or choose a custom field placeholder for each.
- The chosen signature field automatically links to the new role; add more fillable fields and assign them to the same or other roles as needed.
- Click Save to lock the role definitions and field assignments into the template.
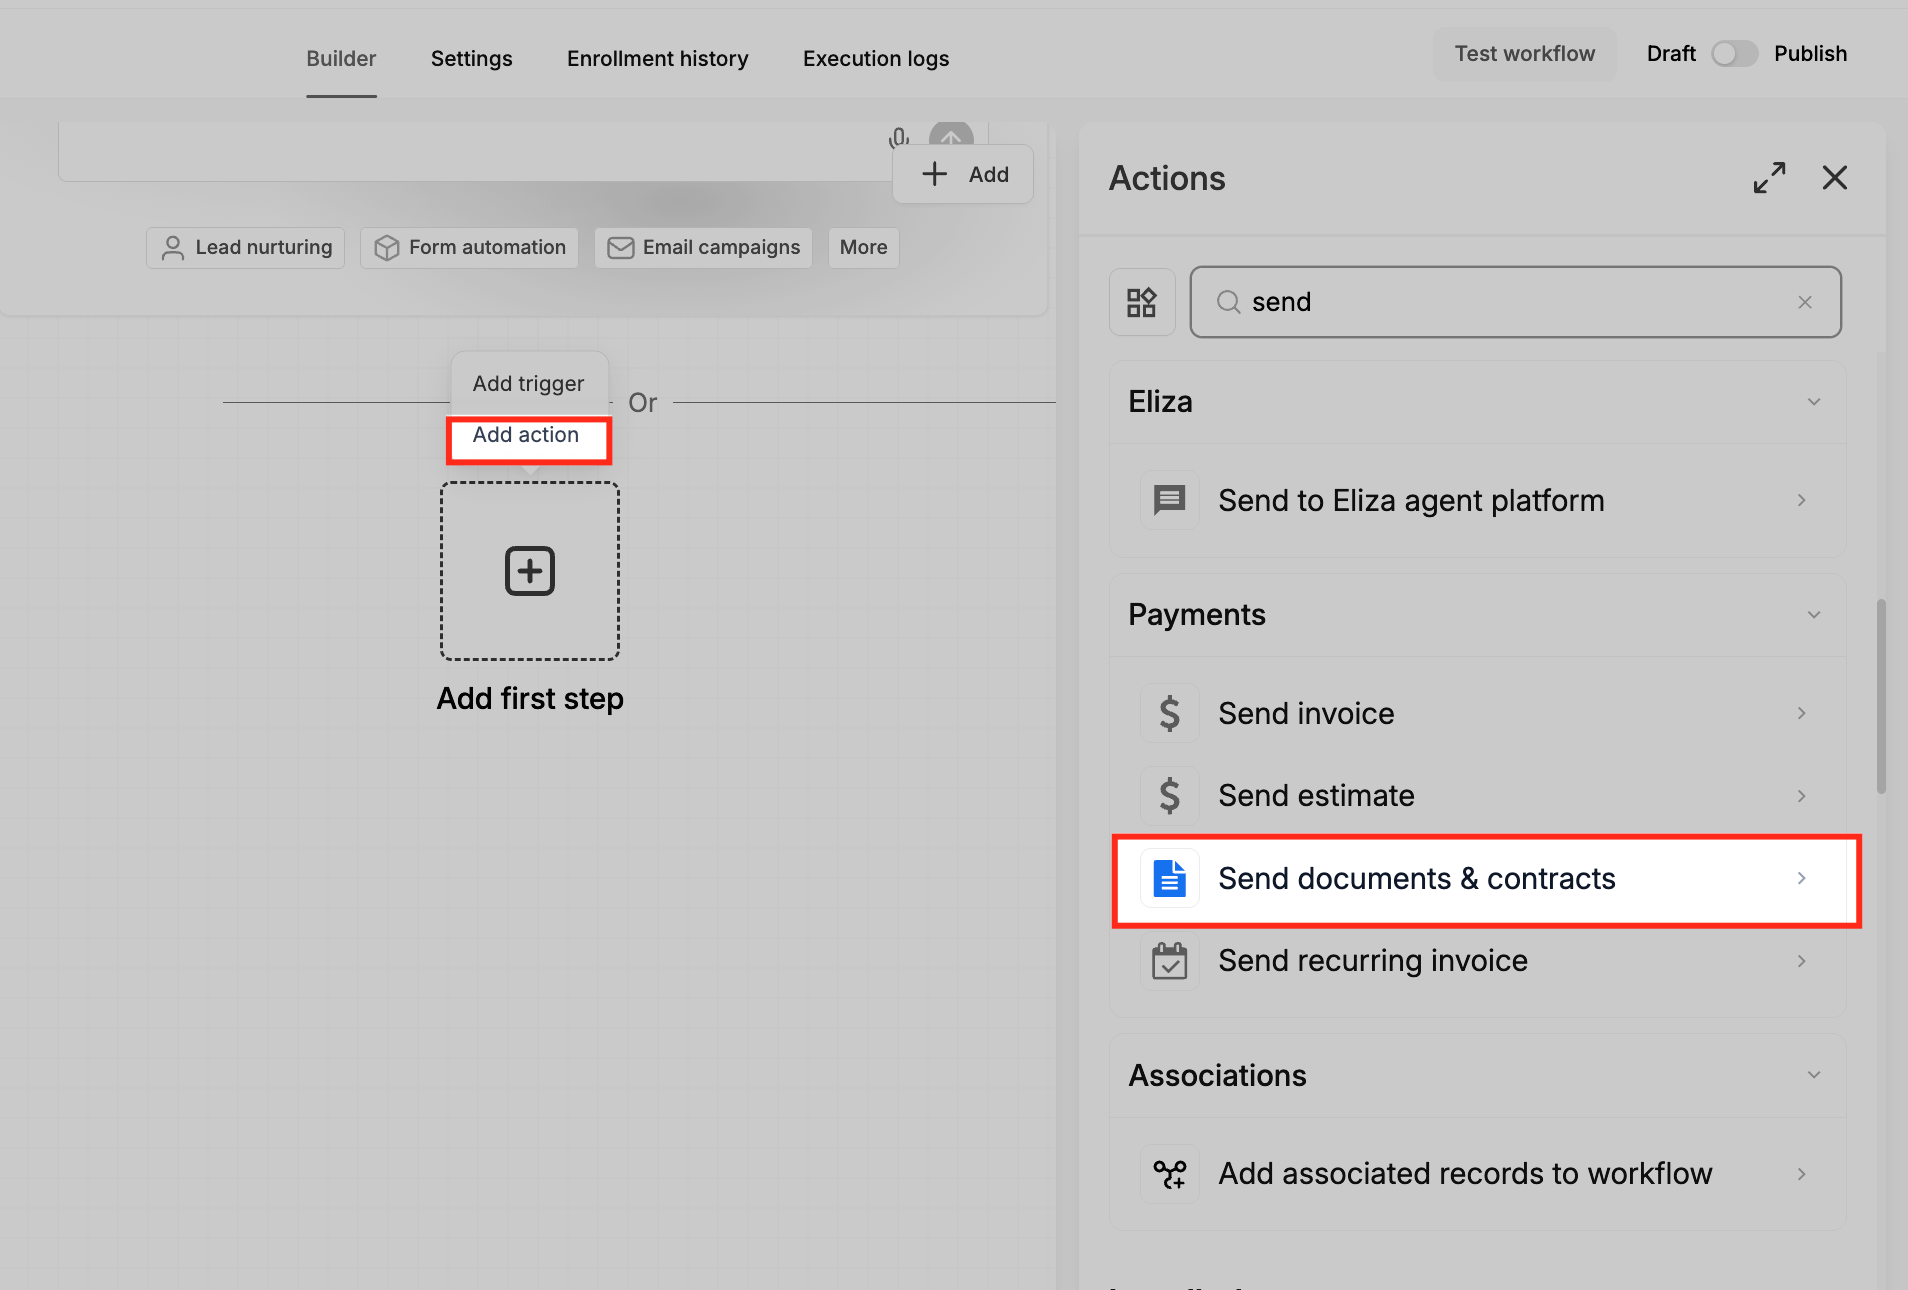
- Go to Automation > Workflows and either create a new workflow or edit an existing one, then add the Send Document action.
- Select the multi role template you just configured; the system will list all roles that have fillable elements.
- If any role needs different details for this send, click Edit next to that role and enter new values; these will override the template defaults.
- Save the Send Document action and publish the workflow to activate the multi role signing process.
07What it looks like in HighLevel
08Settings that matter
- Role Name. Determines the label shown above the signer’s fields when they receive the document.
- Email. Provides the email address that receives the signing link; can be a static address or a placeholder that resolves from the contact record.
- Phone Number. Optional phone number used for SMS notifications or identification, also accepting static values or contact placeholders.
09Things to know before you rely on it
- A maximum of six signer roles can be defined on a single template.
- Every role must contain at least one fillable element to be recognized.
- The Contact role requires a fillable element; without it the Send Document action will not operate.
- Values entered in a workflow override any defaults set on the template.
10How it connects to the rest of HighLevel
- Learn how to create and send document templates in a workflow. Workflow document automation
- Explore the full set of Documents & Contracts features. Documents & Contracts overview
- Start a free trial to test multi role signing. 30 day trial
Michael's take

The first thing I would get right is the Contact role because without it the workflow can’t trigger the document send. Making sure that role has a fillable element prevents the workflow from breaking.
Once the template is solid, I’d set up placeholder fields for the roles that rarely change and rely on workflow overrides for the parts that do. That way you keep one master template and still adapt each deal without copy pasting.