
01Who this is for
- Dashboard editors can configure custom values.
- Viewers can only see the resolved values.
02Custom Values, explained
Custom values are tokens that pull information from a location or the logged in user. They appear in any input field that shows a {} button, such as widget conditions, embed URLs, titles and text boxes. When the dashboard is viewed, the token is replaced with the real value for that subaccount.
The feature lives within the dashboard editor. Tokens are chosen from a picker that lists Location fields, User fields and any custom values you have defined under Settings > Custom values. The resolved value shows in view mode, while editors see the token placeholder while editing.
03How businesses use Custom Values
- Marketing agency. An agency can embed a client specific reporting URL using {{ location.id }} inside an Embed element, so each client sees only their own data when they access the shared dashboard.
- Franchise restaurant chain. Each restaurant can set its name as a custom value, then insert {{ location.name }} into dashboard titles, providing a personalized performance view for every outlet.
- Real estate brokerage. Agents add a token for {{ user.email }} in a text box to display their contact information on the dashboard without manually typing it for each agent.
04The numbers and rules that matter
- Location fields include ID, Name, Email, Phone, Website, Address, City, State, Country, Postal Code, Timezone.
- User fields include ID, Email, Phone, Role, Type, First Name, Last Name, Name, Full Name.
05Before you start
- Editors must have edit access to the dashboard or custom report.
- Location profile fields (e.g., name, address) must be filled in Settings for each subaccount.
- Custom values must be created and populated under Settings > Custom values for each location.
06How to set up and use Custom Values in HighLevel
Insert a token in a widget condition
- Open the desired dashboard and switch to Edit mode.
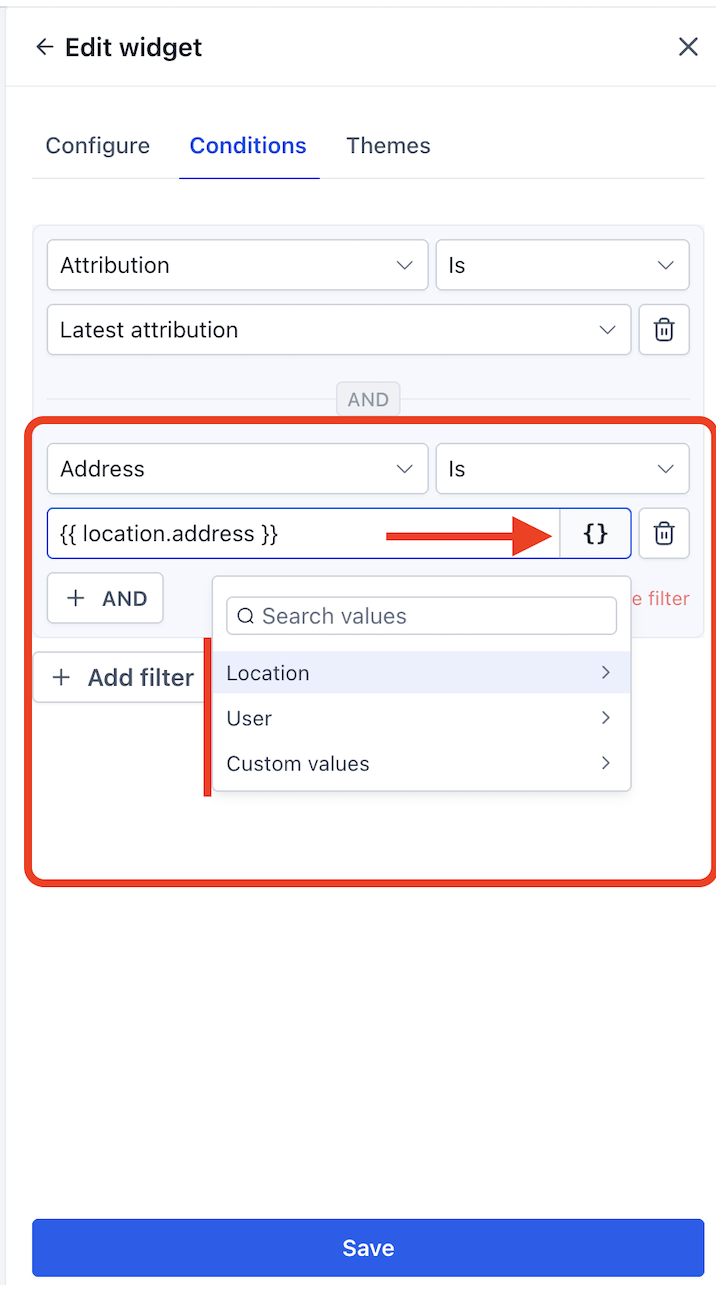
- Select a widget to edit and open its Conditions tab.
- Choose the field you want to evaluate and set the appropriate operator.
- Click the {} button located in the value input area.
- Search or browse the picker for a Location, User, or Custom value.
- Pick the required field; the token appears inside double curly braces.
- Save the widget to apply the condition.
Insert a token in a dashboard element
- Open the dashboard and activate Edit mode.
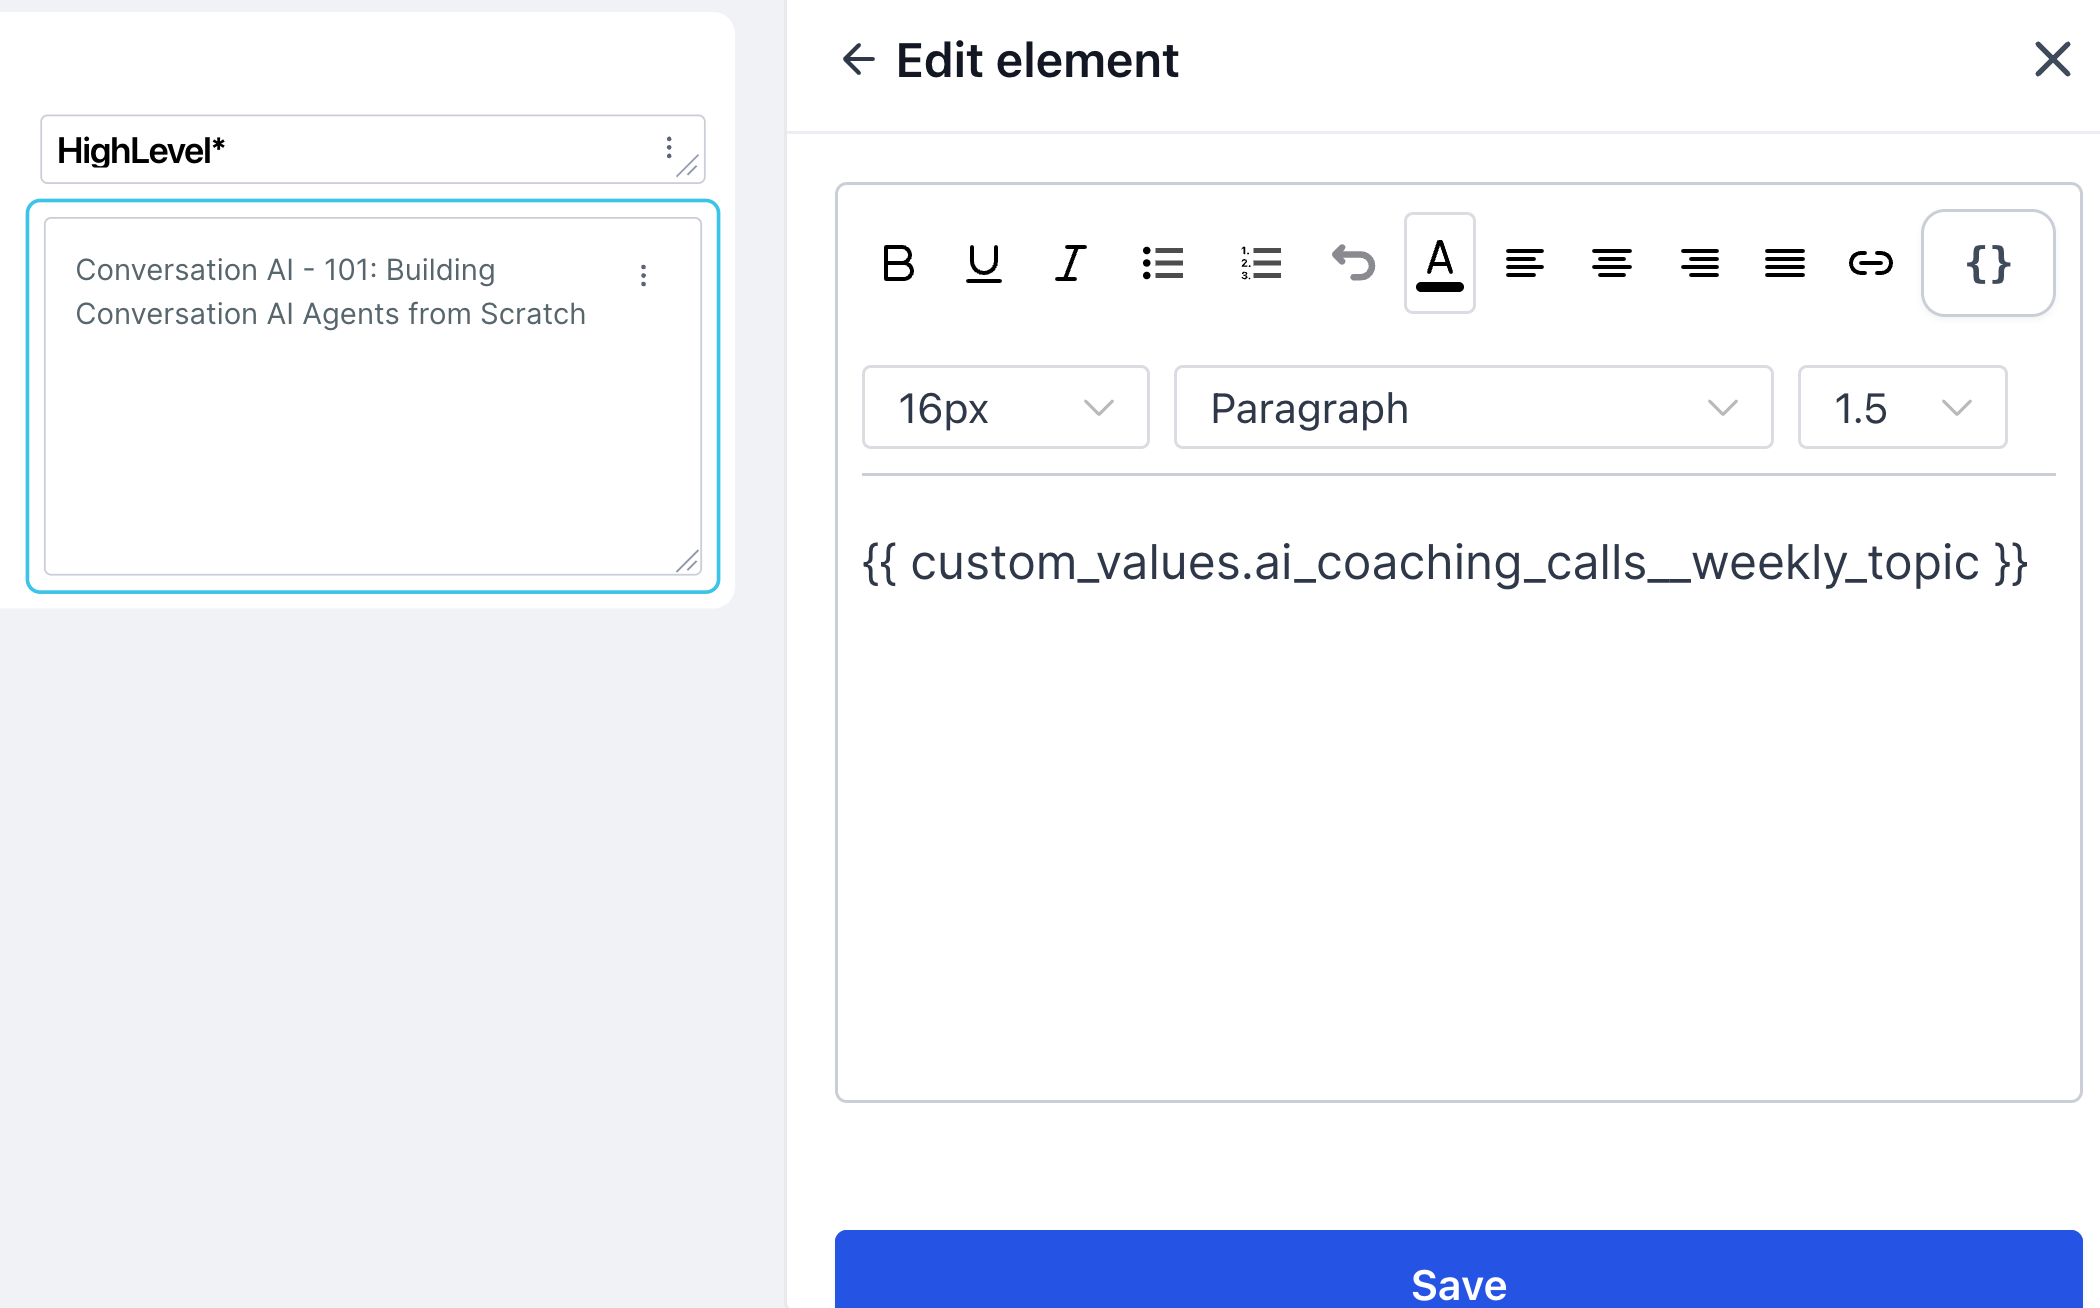
- Click Add element and pick Embed, Title, or Text box.
- Press the {} button next to the relevant input field.
- Search or browse for a Location, User, or Custom value.
- Select the field; the token is inserted into the input.
- Save the element.
- Switch to View mode to see the token resolved for that location.
Create a custom value
- Navigate to Settings > Custom values.
- Click the + Add custom value button.
- Enter a name and its corresponding value; optionally assign a folder.
- Press Create to store the new custom value.
07What it looks like in HighLevel
08Settings that matter
- Custom values. Defines user created tokens that appear in the {} picker and can be inserted into dashboard fields.
09Things to know before you rely on it
- If a token cannot be resolved, it appears as blank in view mode.
- Custom values are only supported in inputs that show a {} button; the Image element does not accept tokens.
- Only editors can insert custom values; viewers see only the resolved output.
10If something goes wrong
- Token shows as blank when the underlying field has no data.. Ensure the corresponding Location or User field is filled in Settings, or create and populate the custom value for each location.
11How it connects to the rest of HighLevel
- Learn how to use custom fields as metrics in dashboards and reports. Custom fields as metrics
- Understand how trend badges determine increases or decreases. Trend badge settings
- Discover how to add and customize dashboard widgets. Dashboard widgets
Michael's take

Many people try to copy paste static text into every dashboard instead of using tokens.
If I were setting up a client network, I would build one dashboard and insert {{ location.name }} into titles and embed URLs so each subaccount sees its own data.