
01Custom Fields in dashboard table widgets, explained
Custom Fields can now be added as selectable columns in Contacts and Opportunities table widgets. This gives you the ability to display any custom data you have collected directly in the widget, without needing to export or switch tools. The feature works in both Dashboards and Custom Reports.
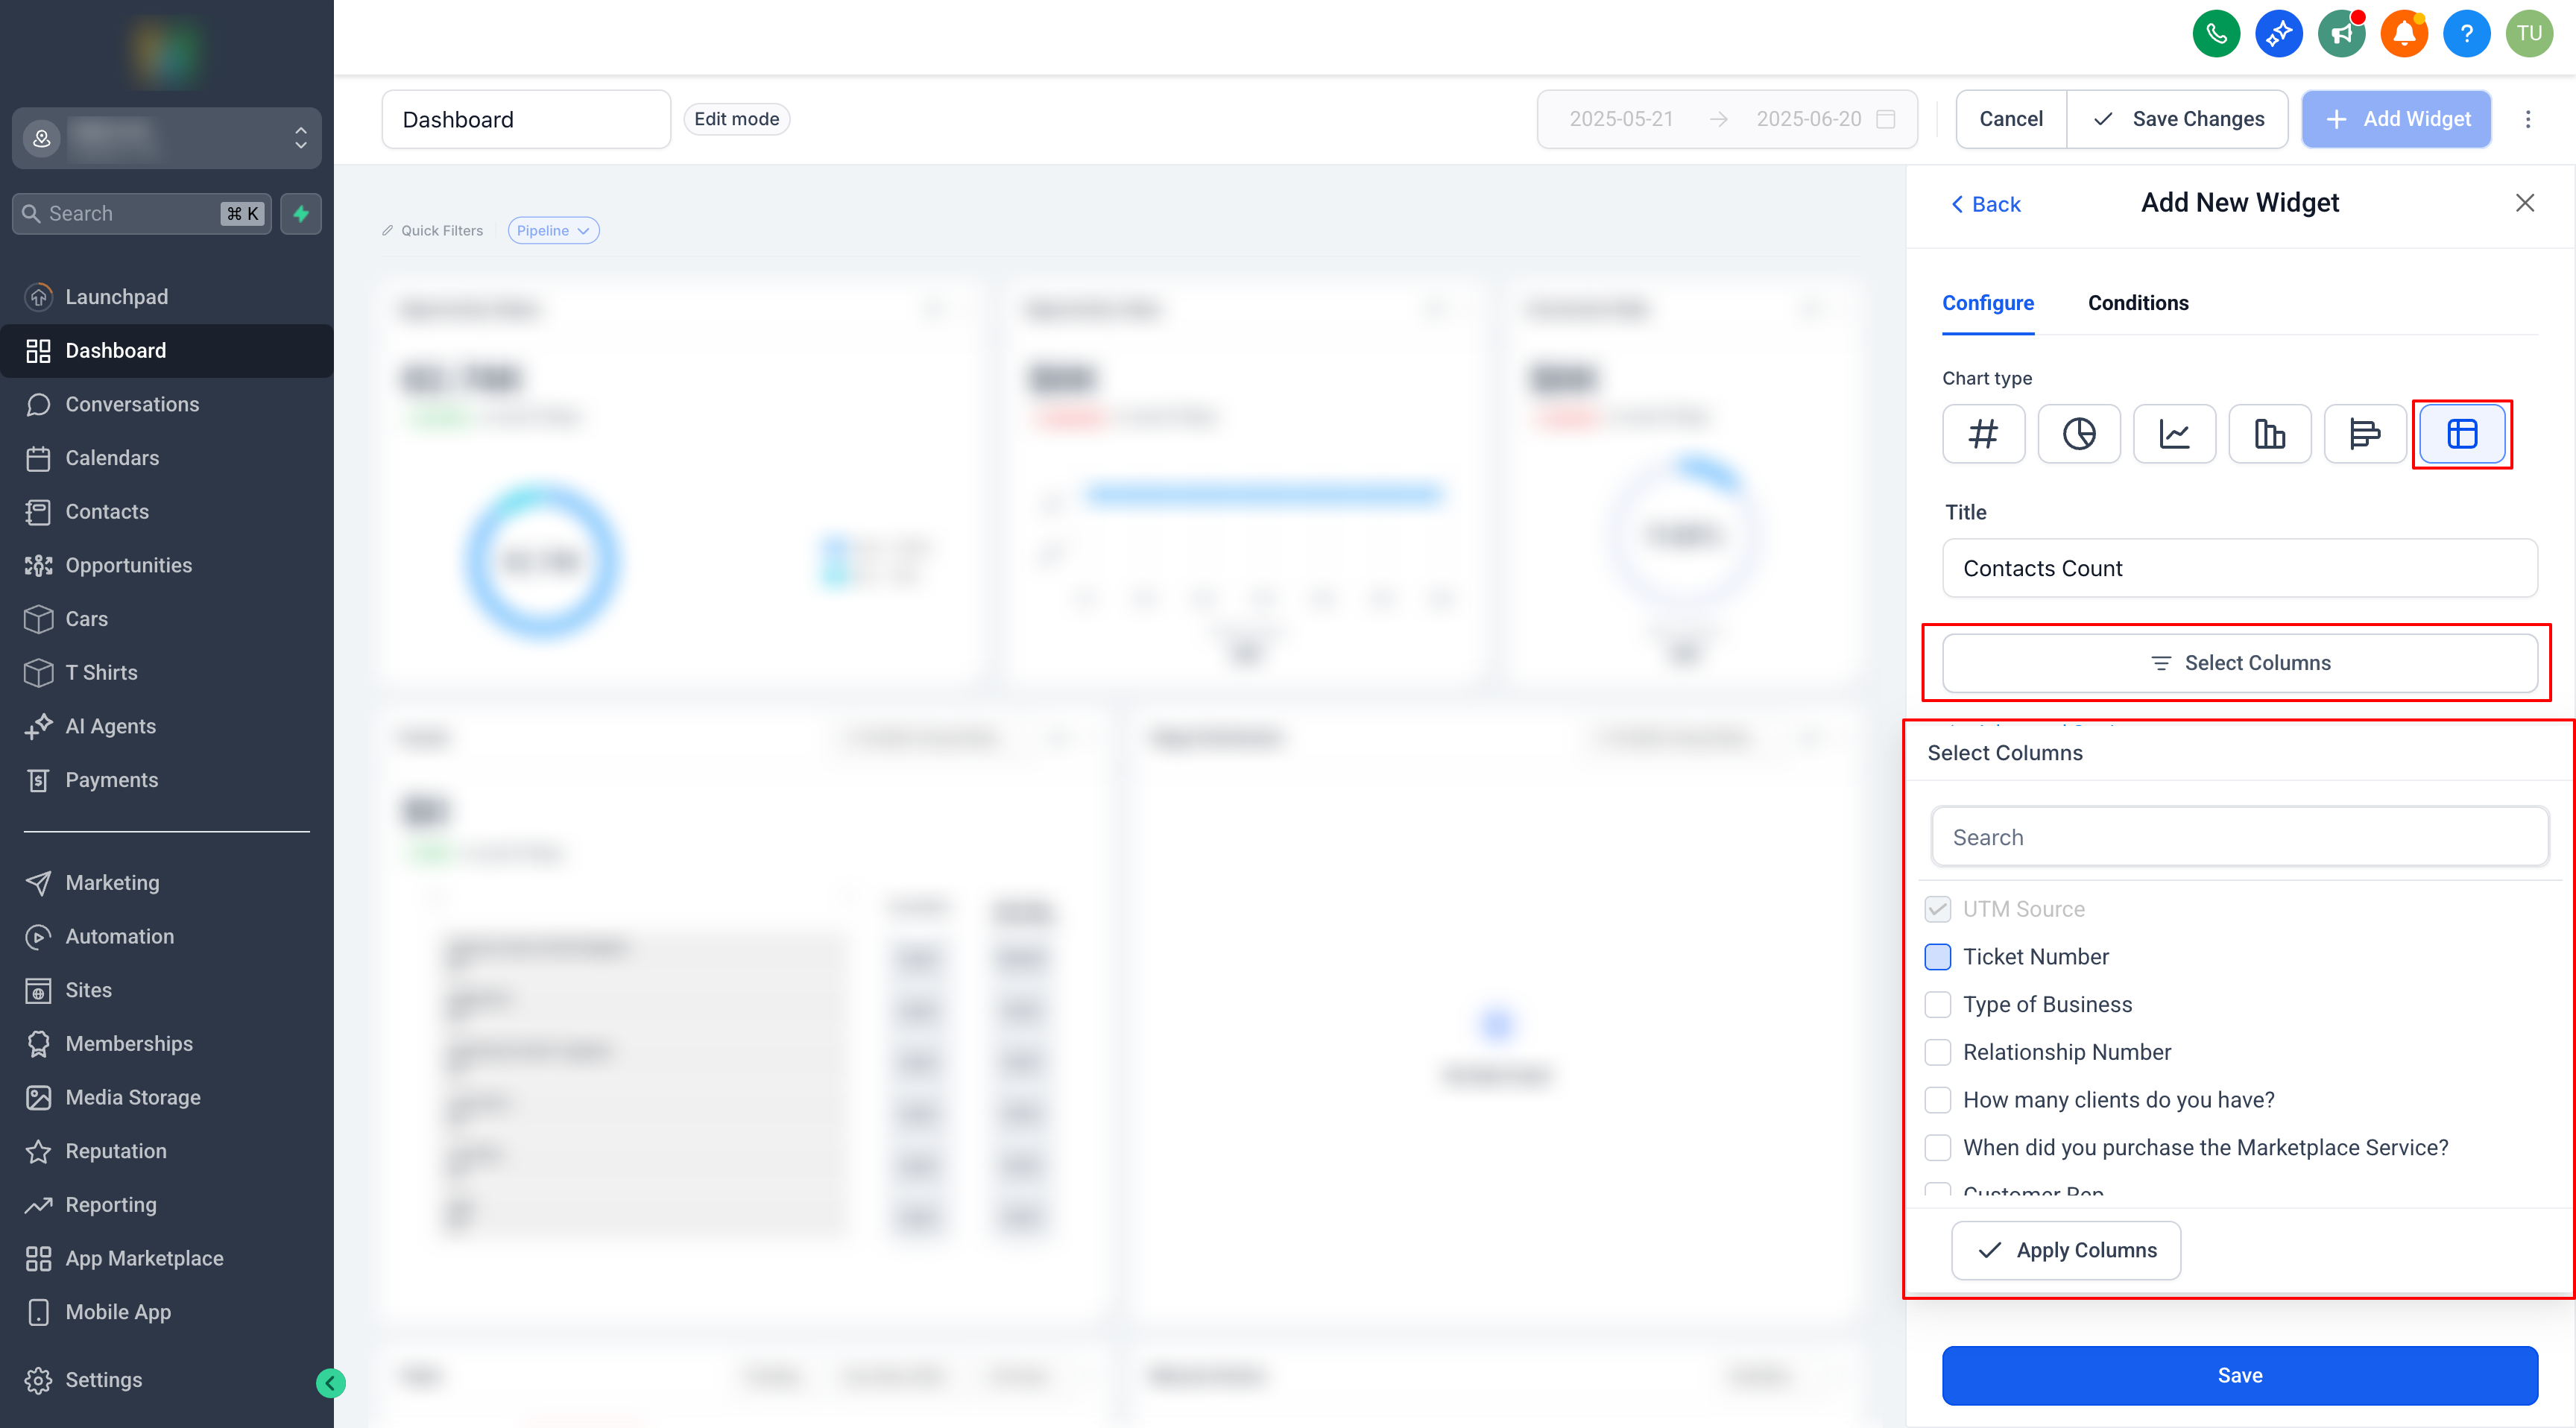
To use the feature, you enter edit mode on a dashboard or report, add a table widget, open the column selector and check the Custom Fields you want to show. After saving, the chosen fields appear as new columns in the table.
02How businesses use Custom Fields in dashboard table widgets
- Personalize dashboards. Add Custom Fields in the column selector so the dashboard and reports reflect the specific metrics your business tracks.
- Track unique data points. Select Custom Fields such as Birthdate and view them alongside standard information, allowing you to track unique data points directly from a single view.
03Before you start
- You need permission to edit the dashboard or report.
04How to set up and use Custom Fields in dashboard table widgets in HighLevel
Add Custom Fields to widget
- Enter Edit Mode.
- Go to your dashboard or custom report.
- Click Edit to begin making changes.
- Add a Table Widget.
- Click Add Widget.
- Choose either a Contacts or Opportunities table widget.
- Select Columns.
- Open the column selector for the table widget.
- You’ll now see all Custom Fields available.
- Check the fields you want to display.
- Save and View.
- Click Save to apply your changes.
- Your selected Custom Fields will now appear as columns in the table.
05What it looks like in HighLevel
Michael's take

Michael ReimerFounder of CRM Pros, HighLevel Commander and Certified Admin
Adding Custom Fields to your dashboard tables lets you see the exact data you need in one view.
Don’t forget to verify you have edit rights on the dashboard before you start.
Get More InformationOpens on HighLevelPublished November 2, 2026 · Updated November 3, 2026