
01Who this is for
- Sales managers who need team members to view filtered lead data without changing the dashboard layout.
- Marketing agencies that want clients to explore custom campaign metrics while preserving the original widget settings.
- Support supervisors who require agents to narrow ticket lists by status without granting editing permissions.
02Quick filters, explained
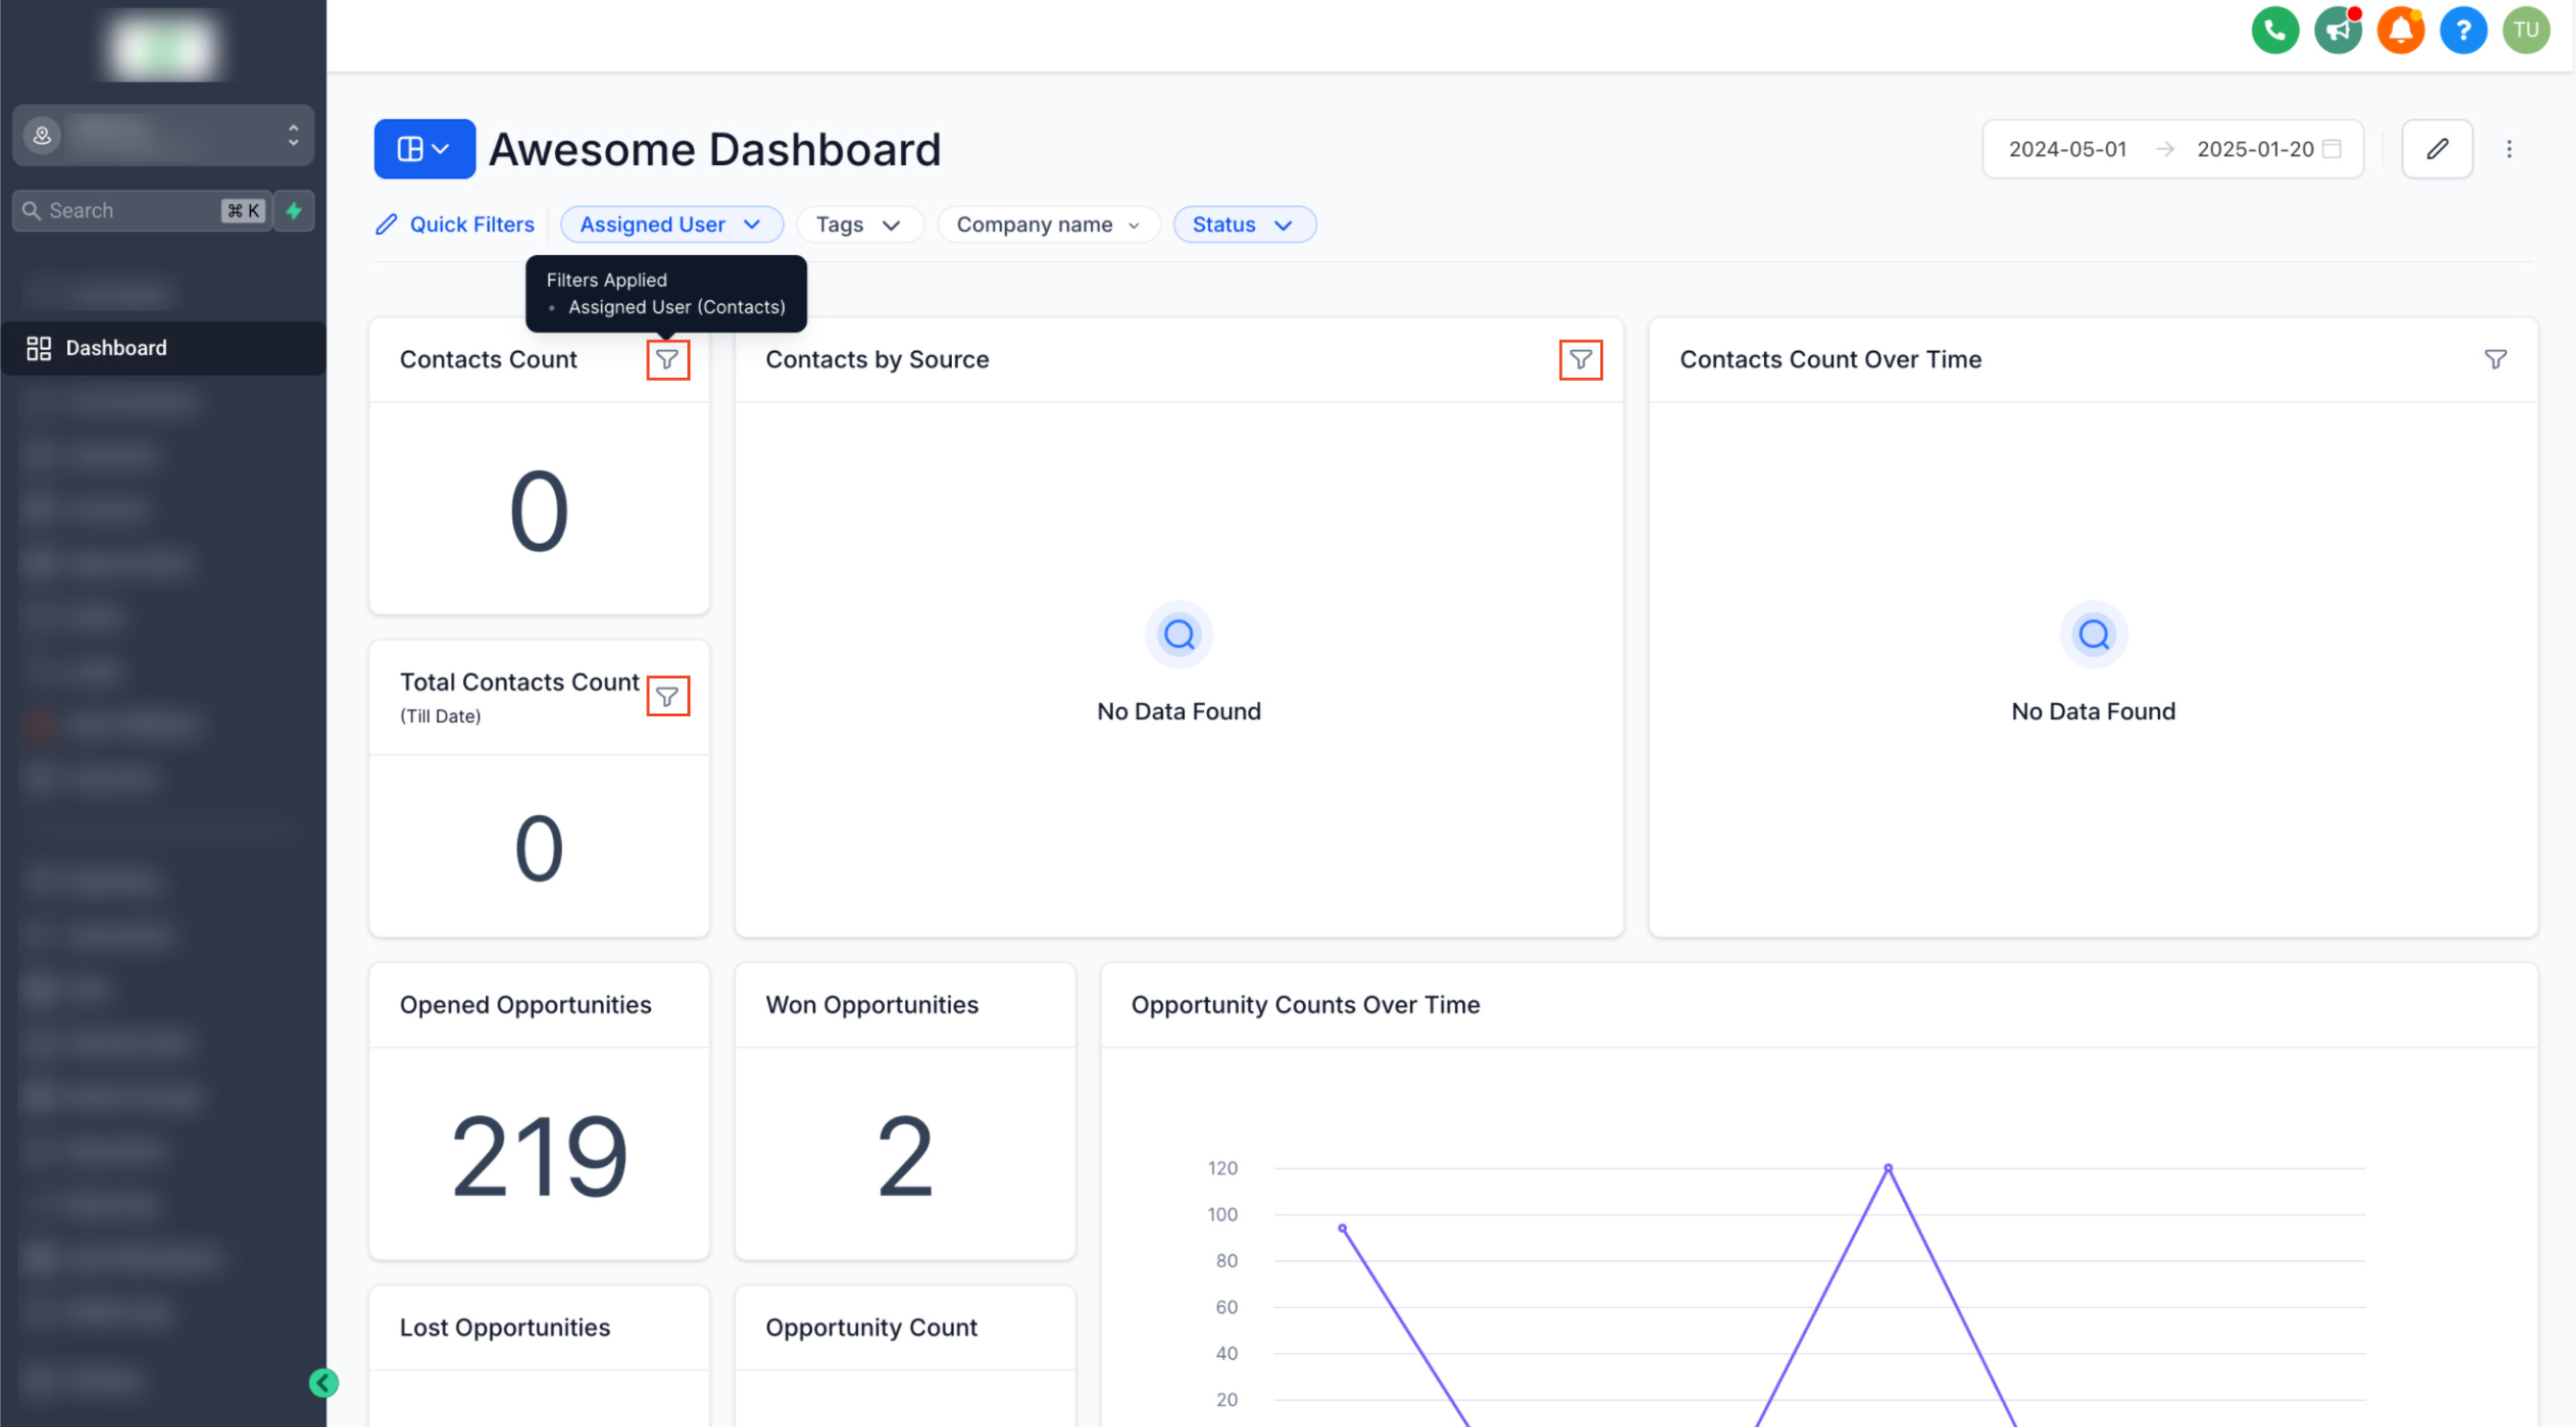
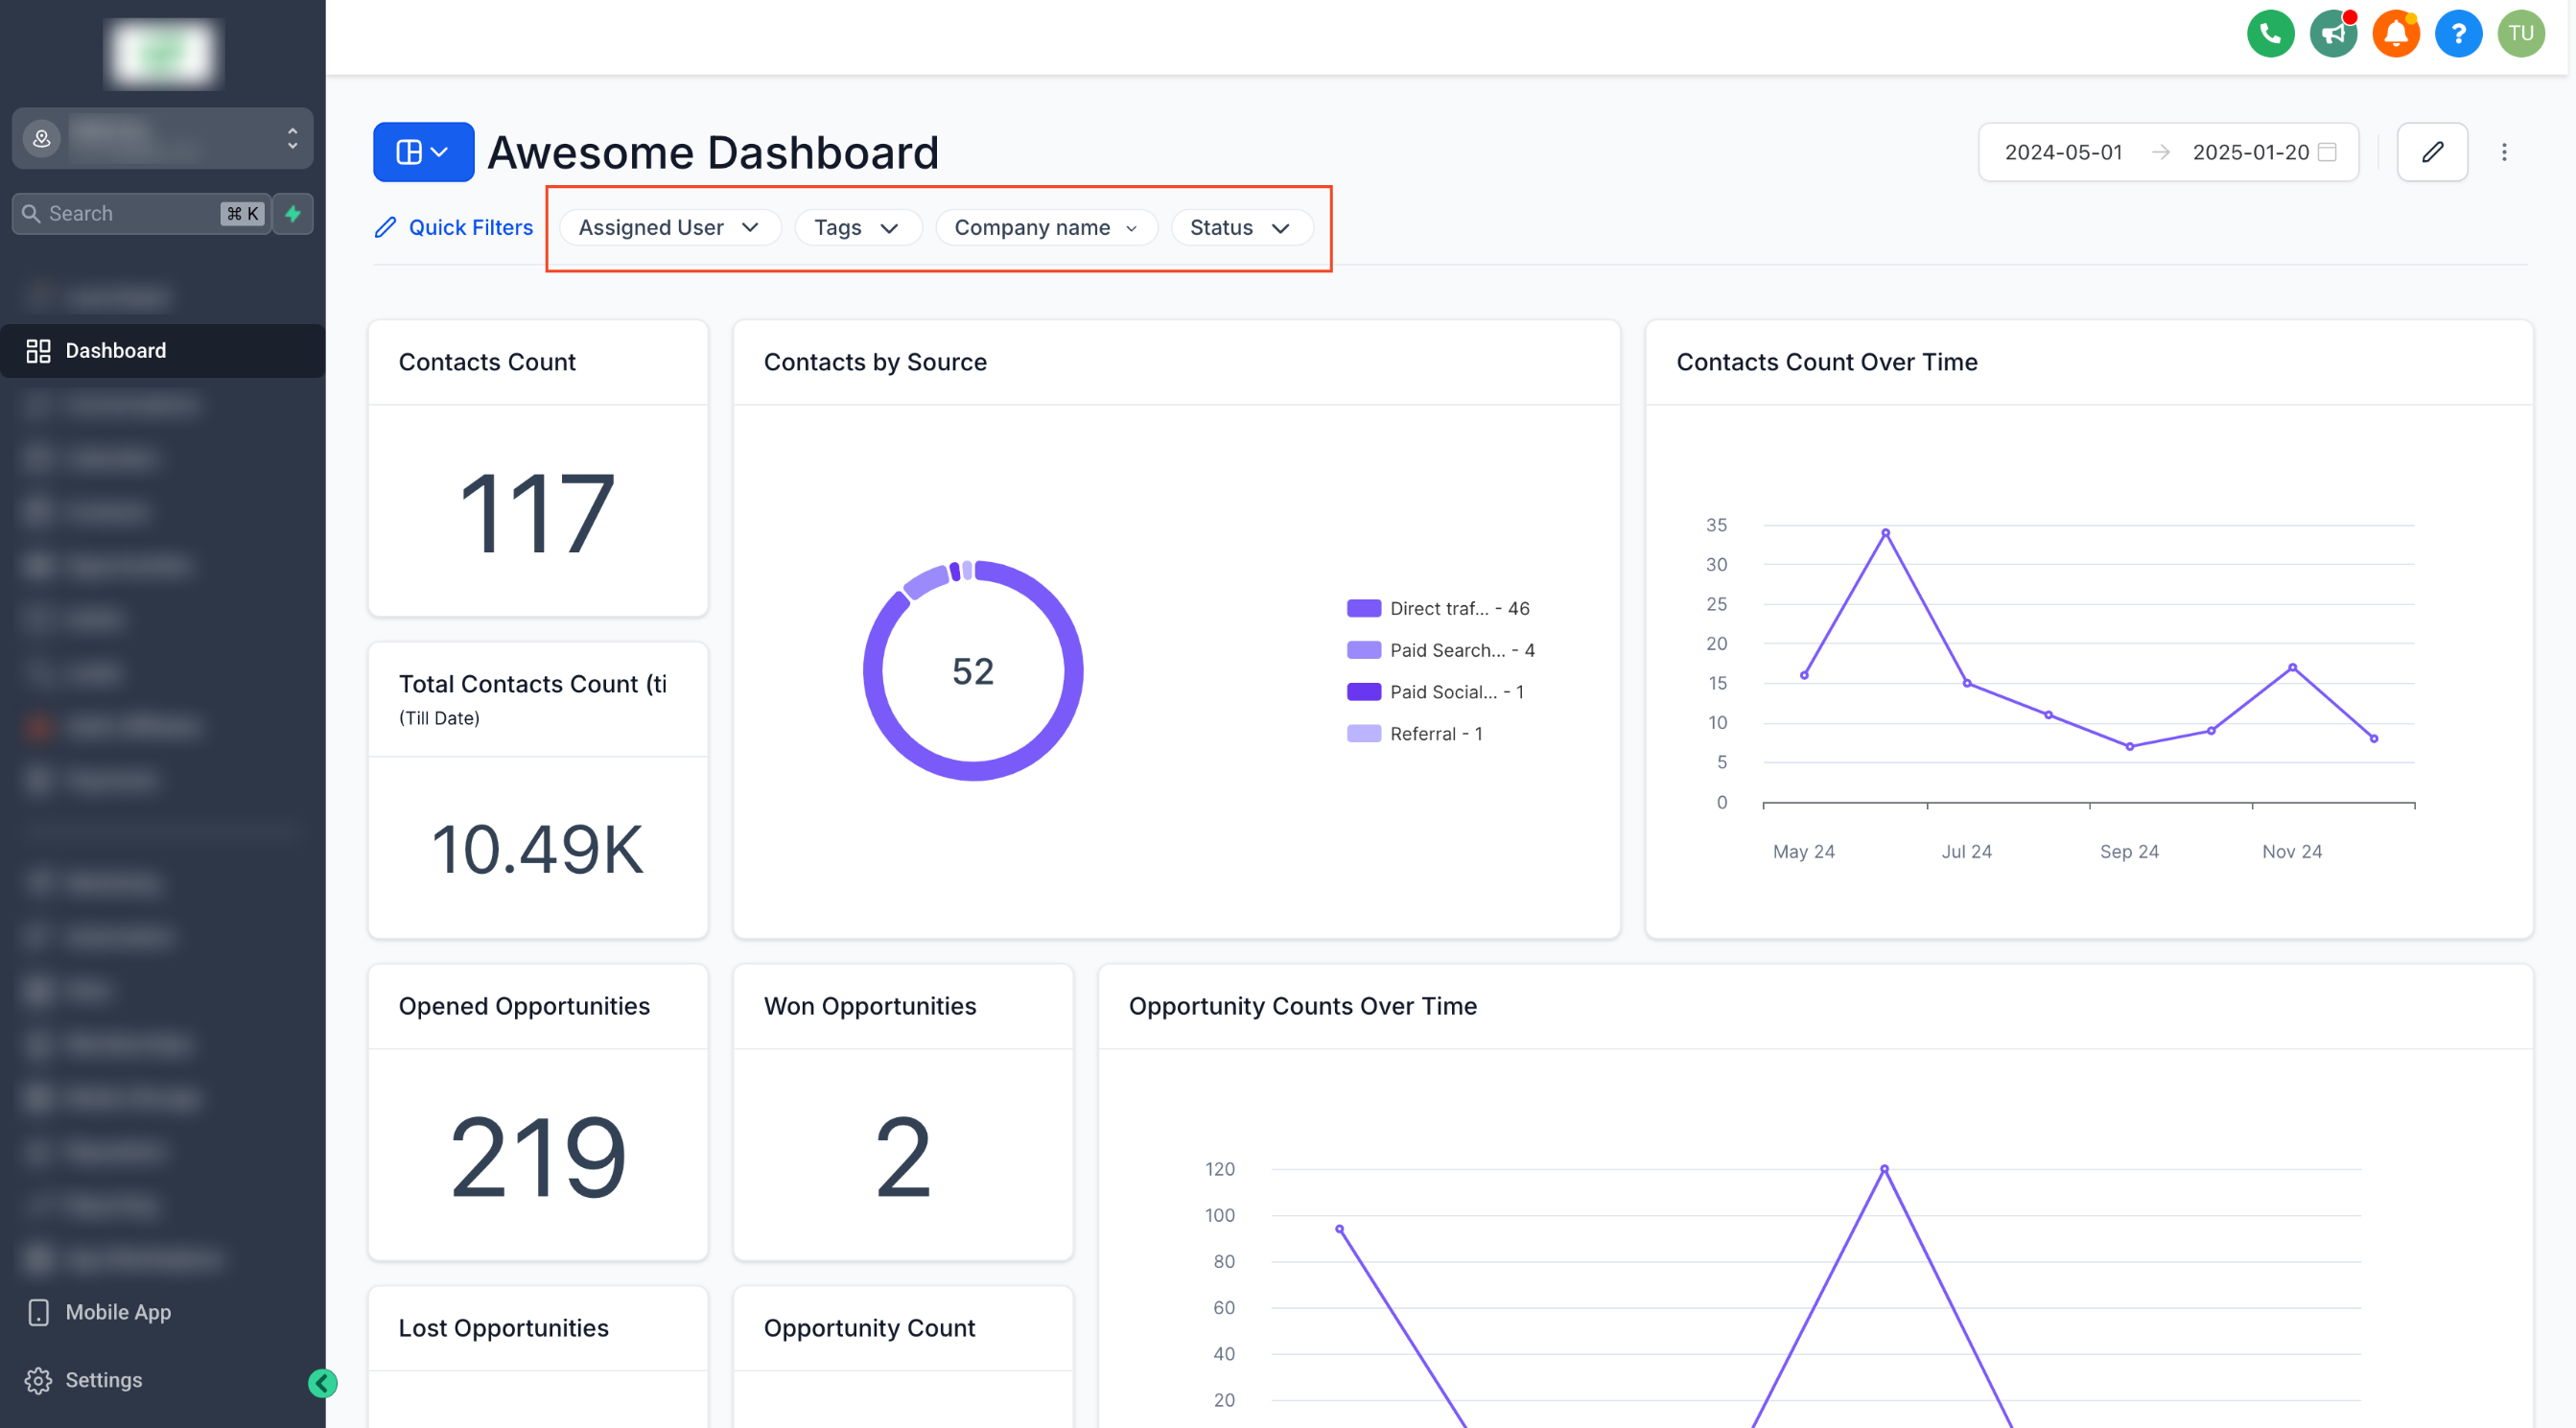
Quick Filters are a dashboard feature that adds filter controls at the top of a dashboard. They let users select criteria that affect all compatible custom widgets, updating the displayed data in real time. Filters are stored for the individual user and do not modify the dashboard for others.
The filters only affect widgets that pull from the same data source as the filter property. They work together with any widget level filters using AND logic, so both conditions must be met. Quick Filters can be added only by users who have full or edit access to the dashboard, while users with view access can apply existing filters.
Quick Filters are available on every dashboard individually. Each dashboard must be configured separately, and the feature currently supports only custom widgets that you have created, not the platform’s default General Widgets.
03How businesses use quick filters
- Real estate agency. The agency adds Quick Filters for property type and city to a custom dashboard showing lead sources. Agents with view access select the city filter to see only listings in their area, while the dashboard layout stays unchanged.
- Health clinic. A clinic creates a dashboard with custom widgets for appointment statistics. They add a Quick Filter for appointment status. Staff members apply the filter to view only cancelled appointments without needing edit permissions on the dashboard.
- SaaS startup. The startup builds custom widgets tracking user sign ups by plan. Quick Filters for plan tier are added, allowing product managers to select a tier and right away see the related sign up numbers while preserving the original widget filters.
04Before you start
- User must have full or edit access to the dashboard to add Quick Filters.
- Dashboard must contain custom widgets; Quick Filters do not apply to default General Widgets.
05How to set up and use quick filters in HighLevel
Add quick filters to a dashboard
- Open the dashboard where you want to add Quick Filters.
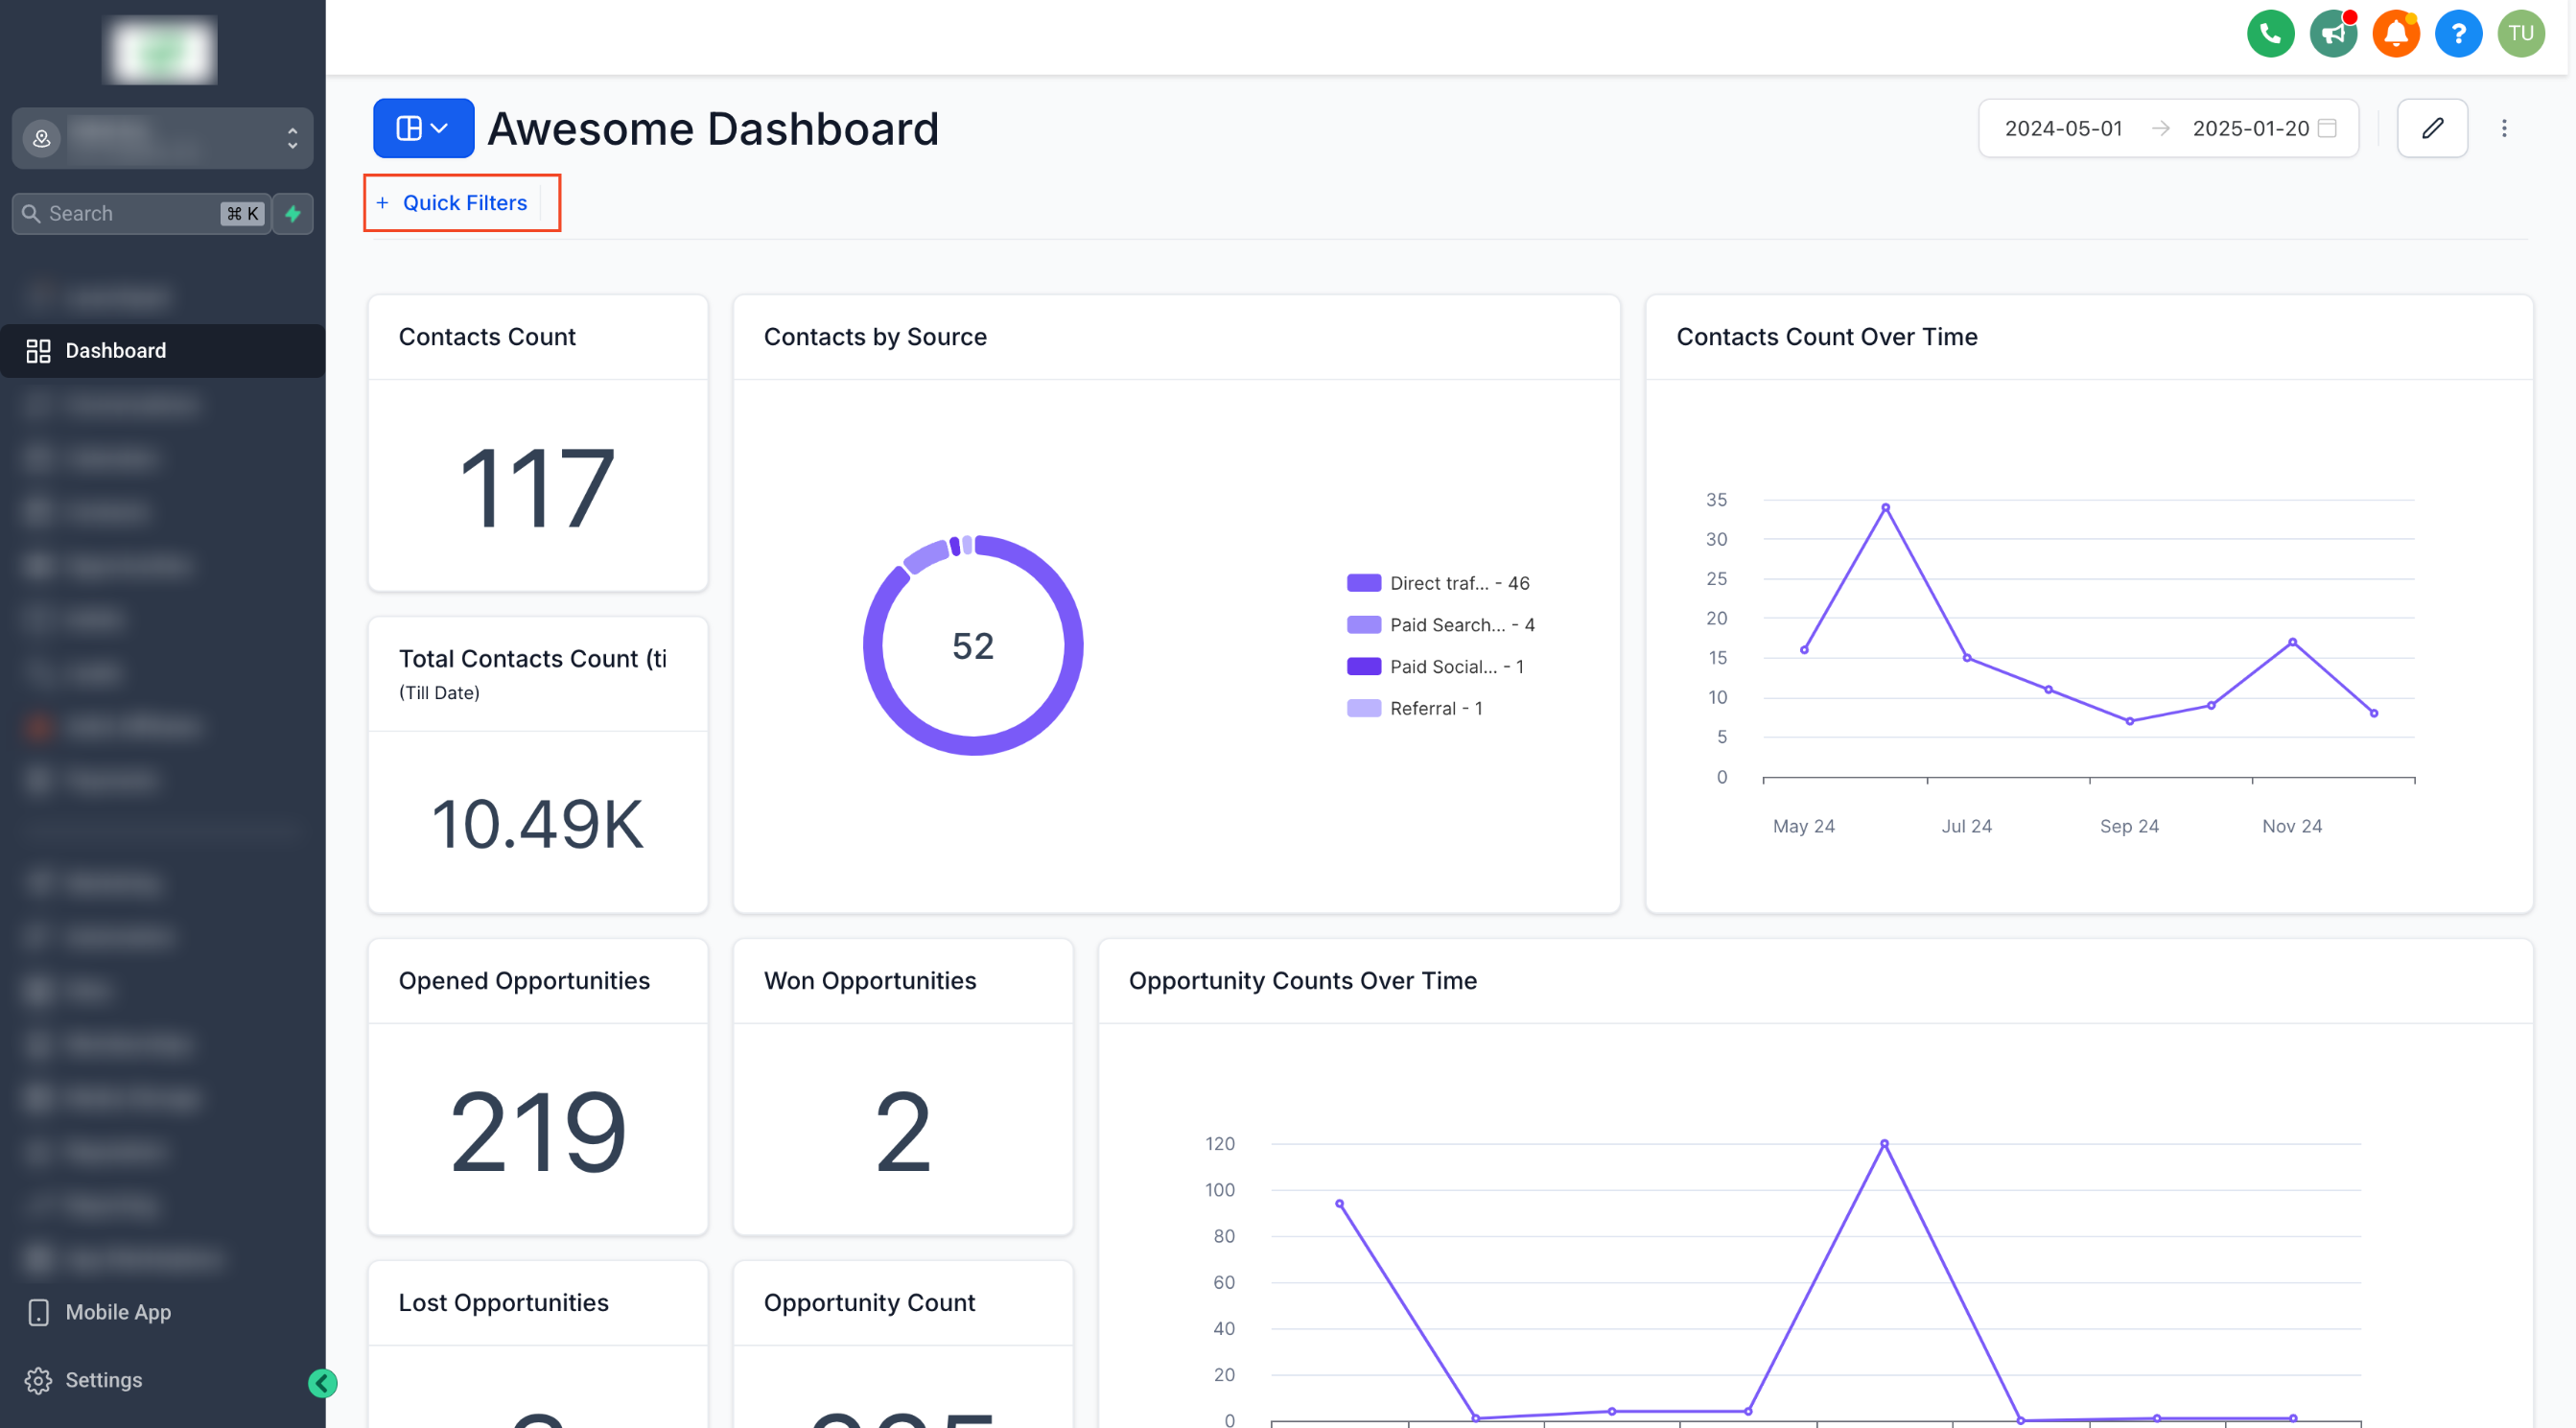
- Click the Quick Filters button at the top of the dashboard.
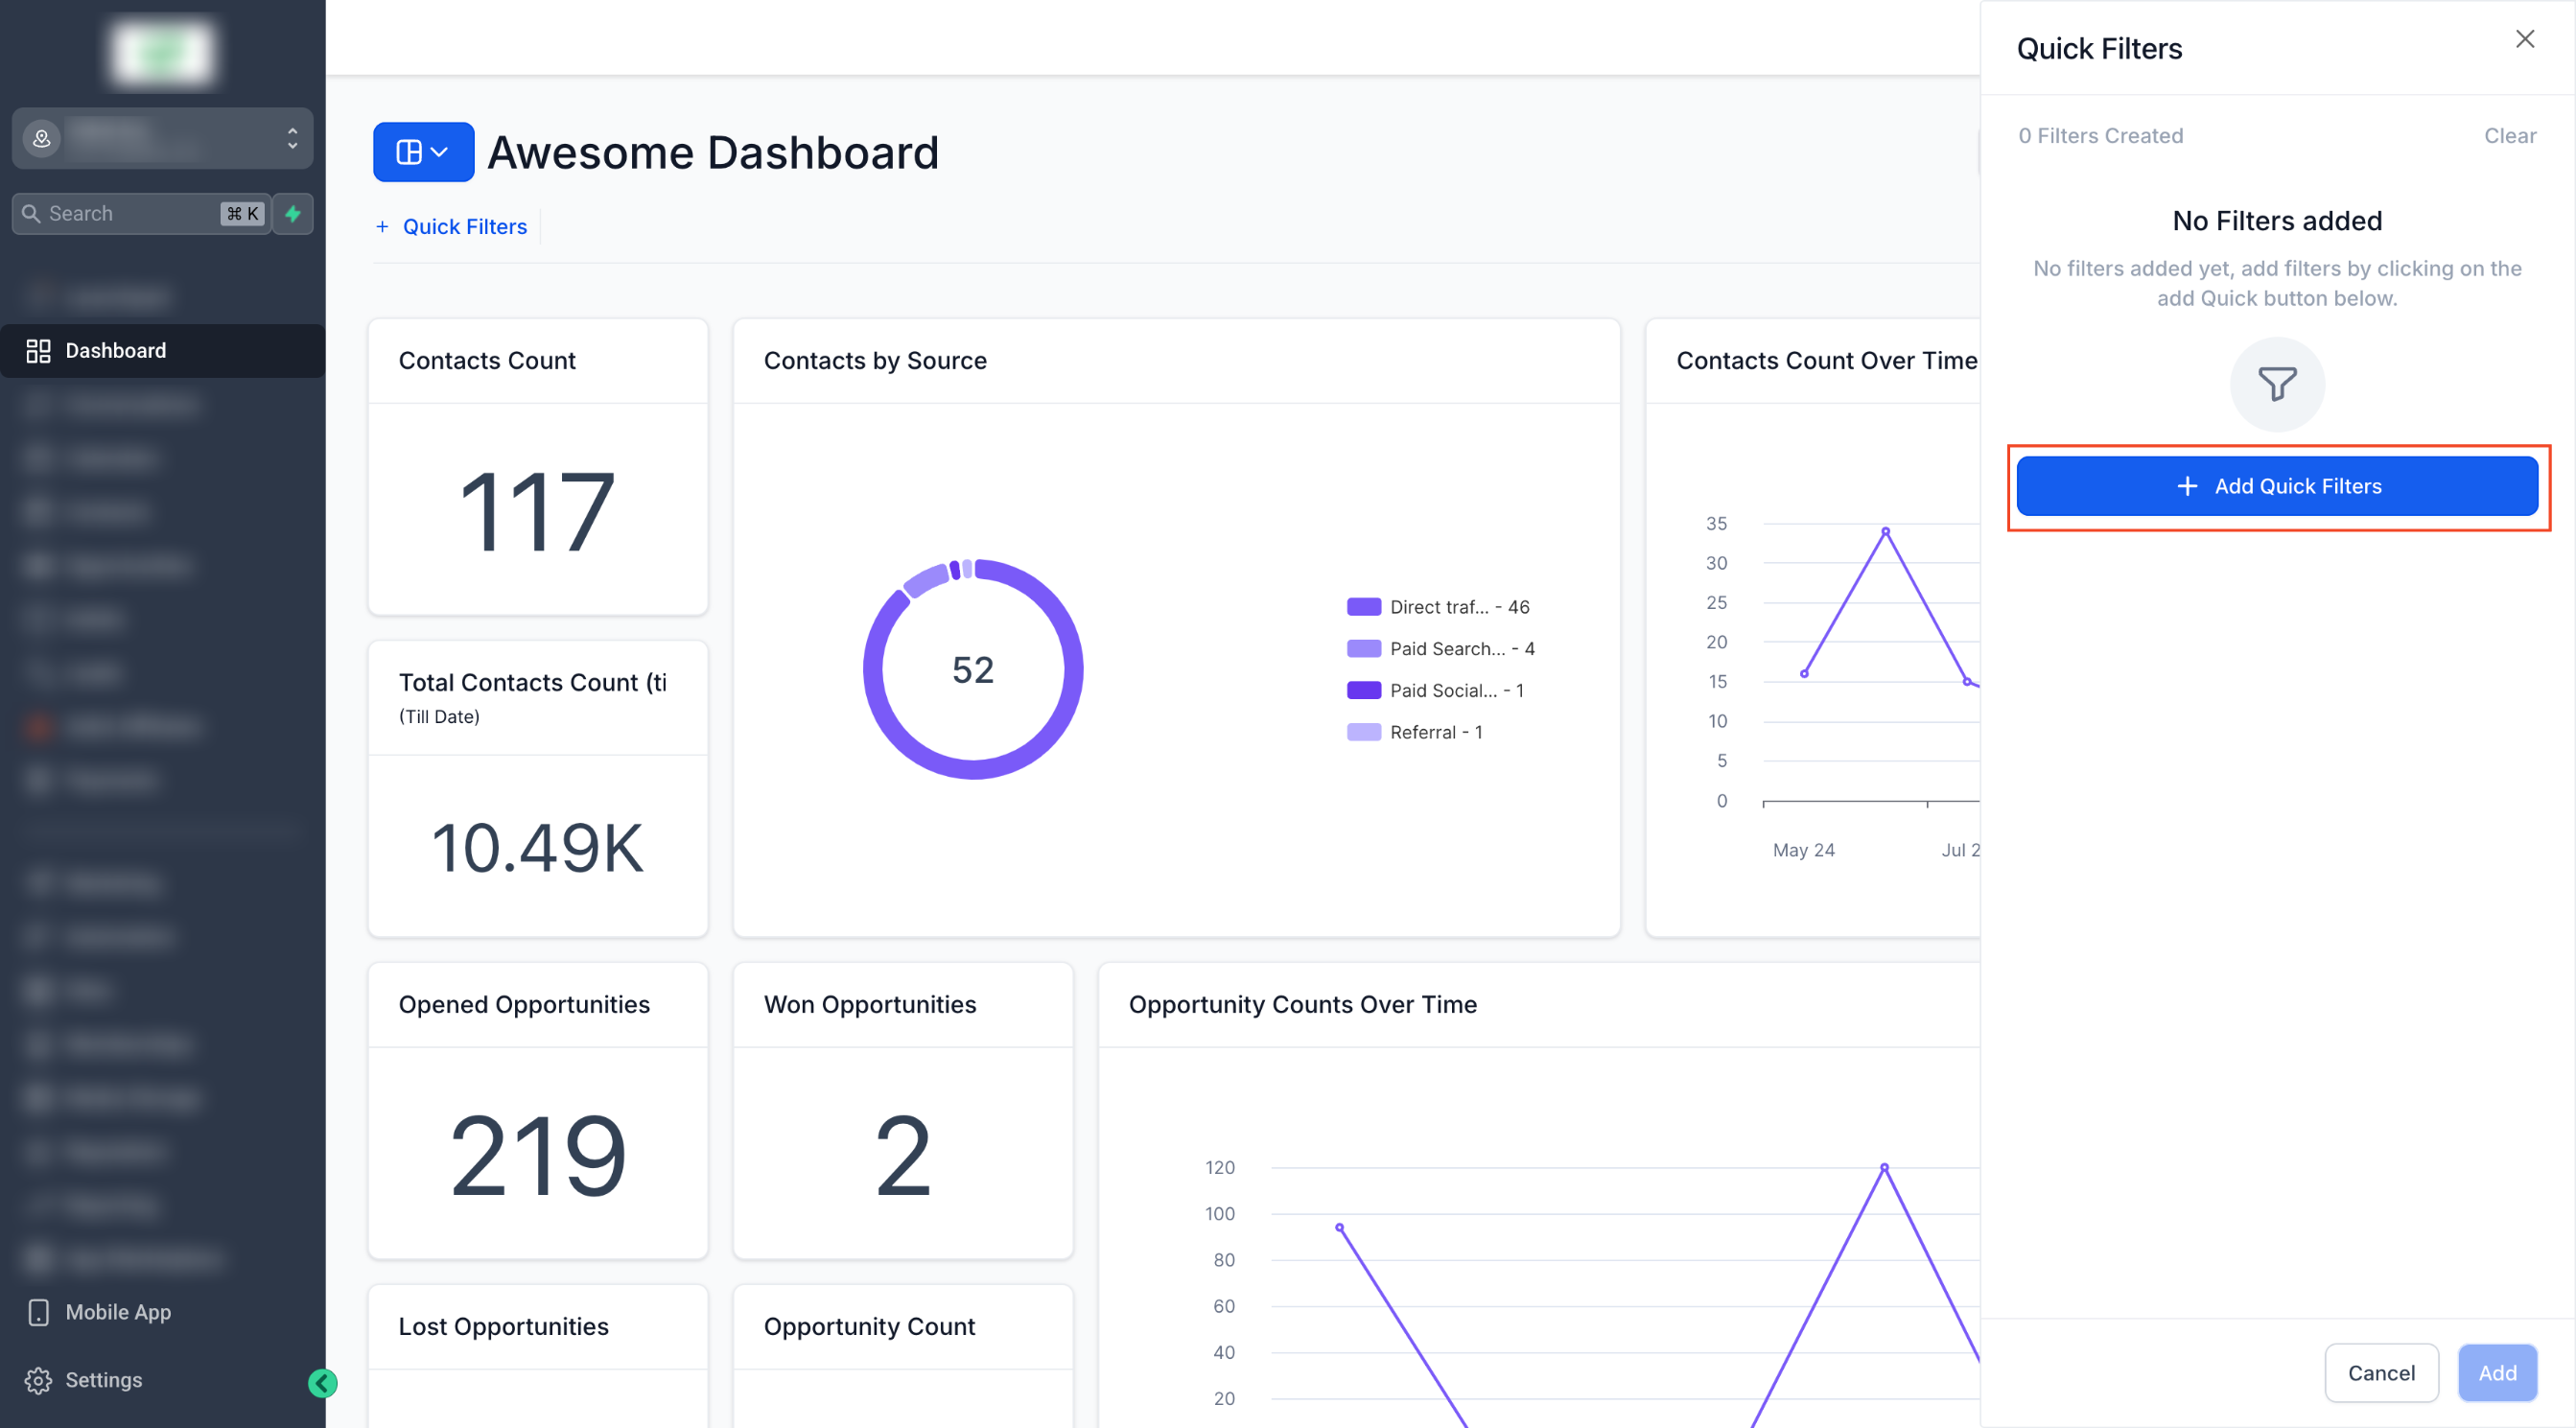
- Press the + Add Quick Filters button.
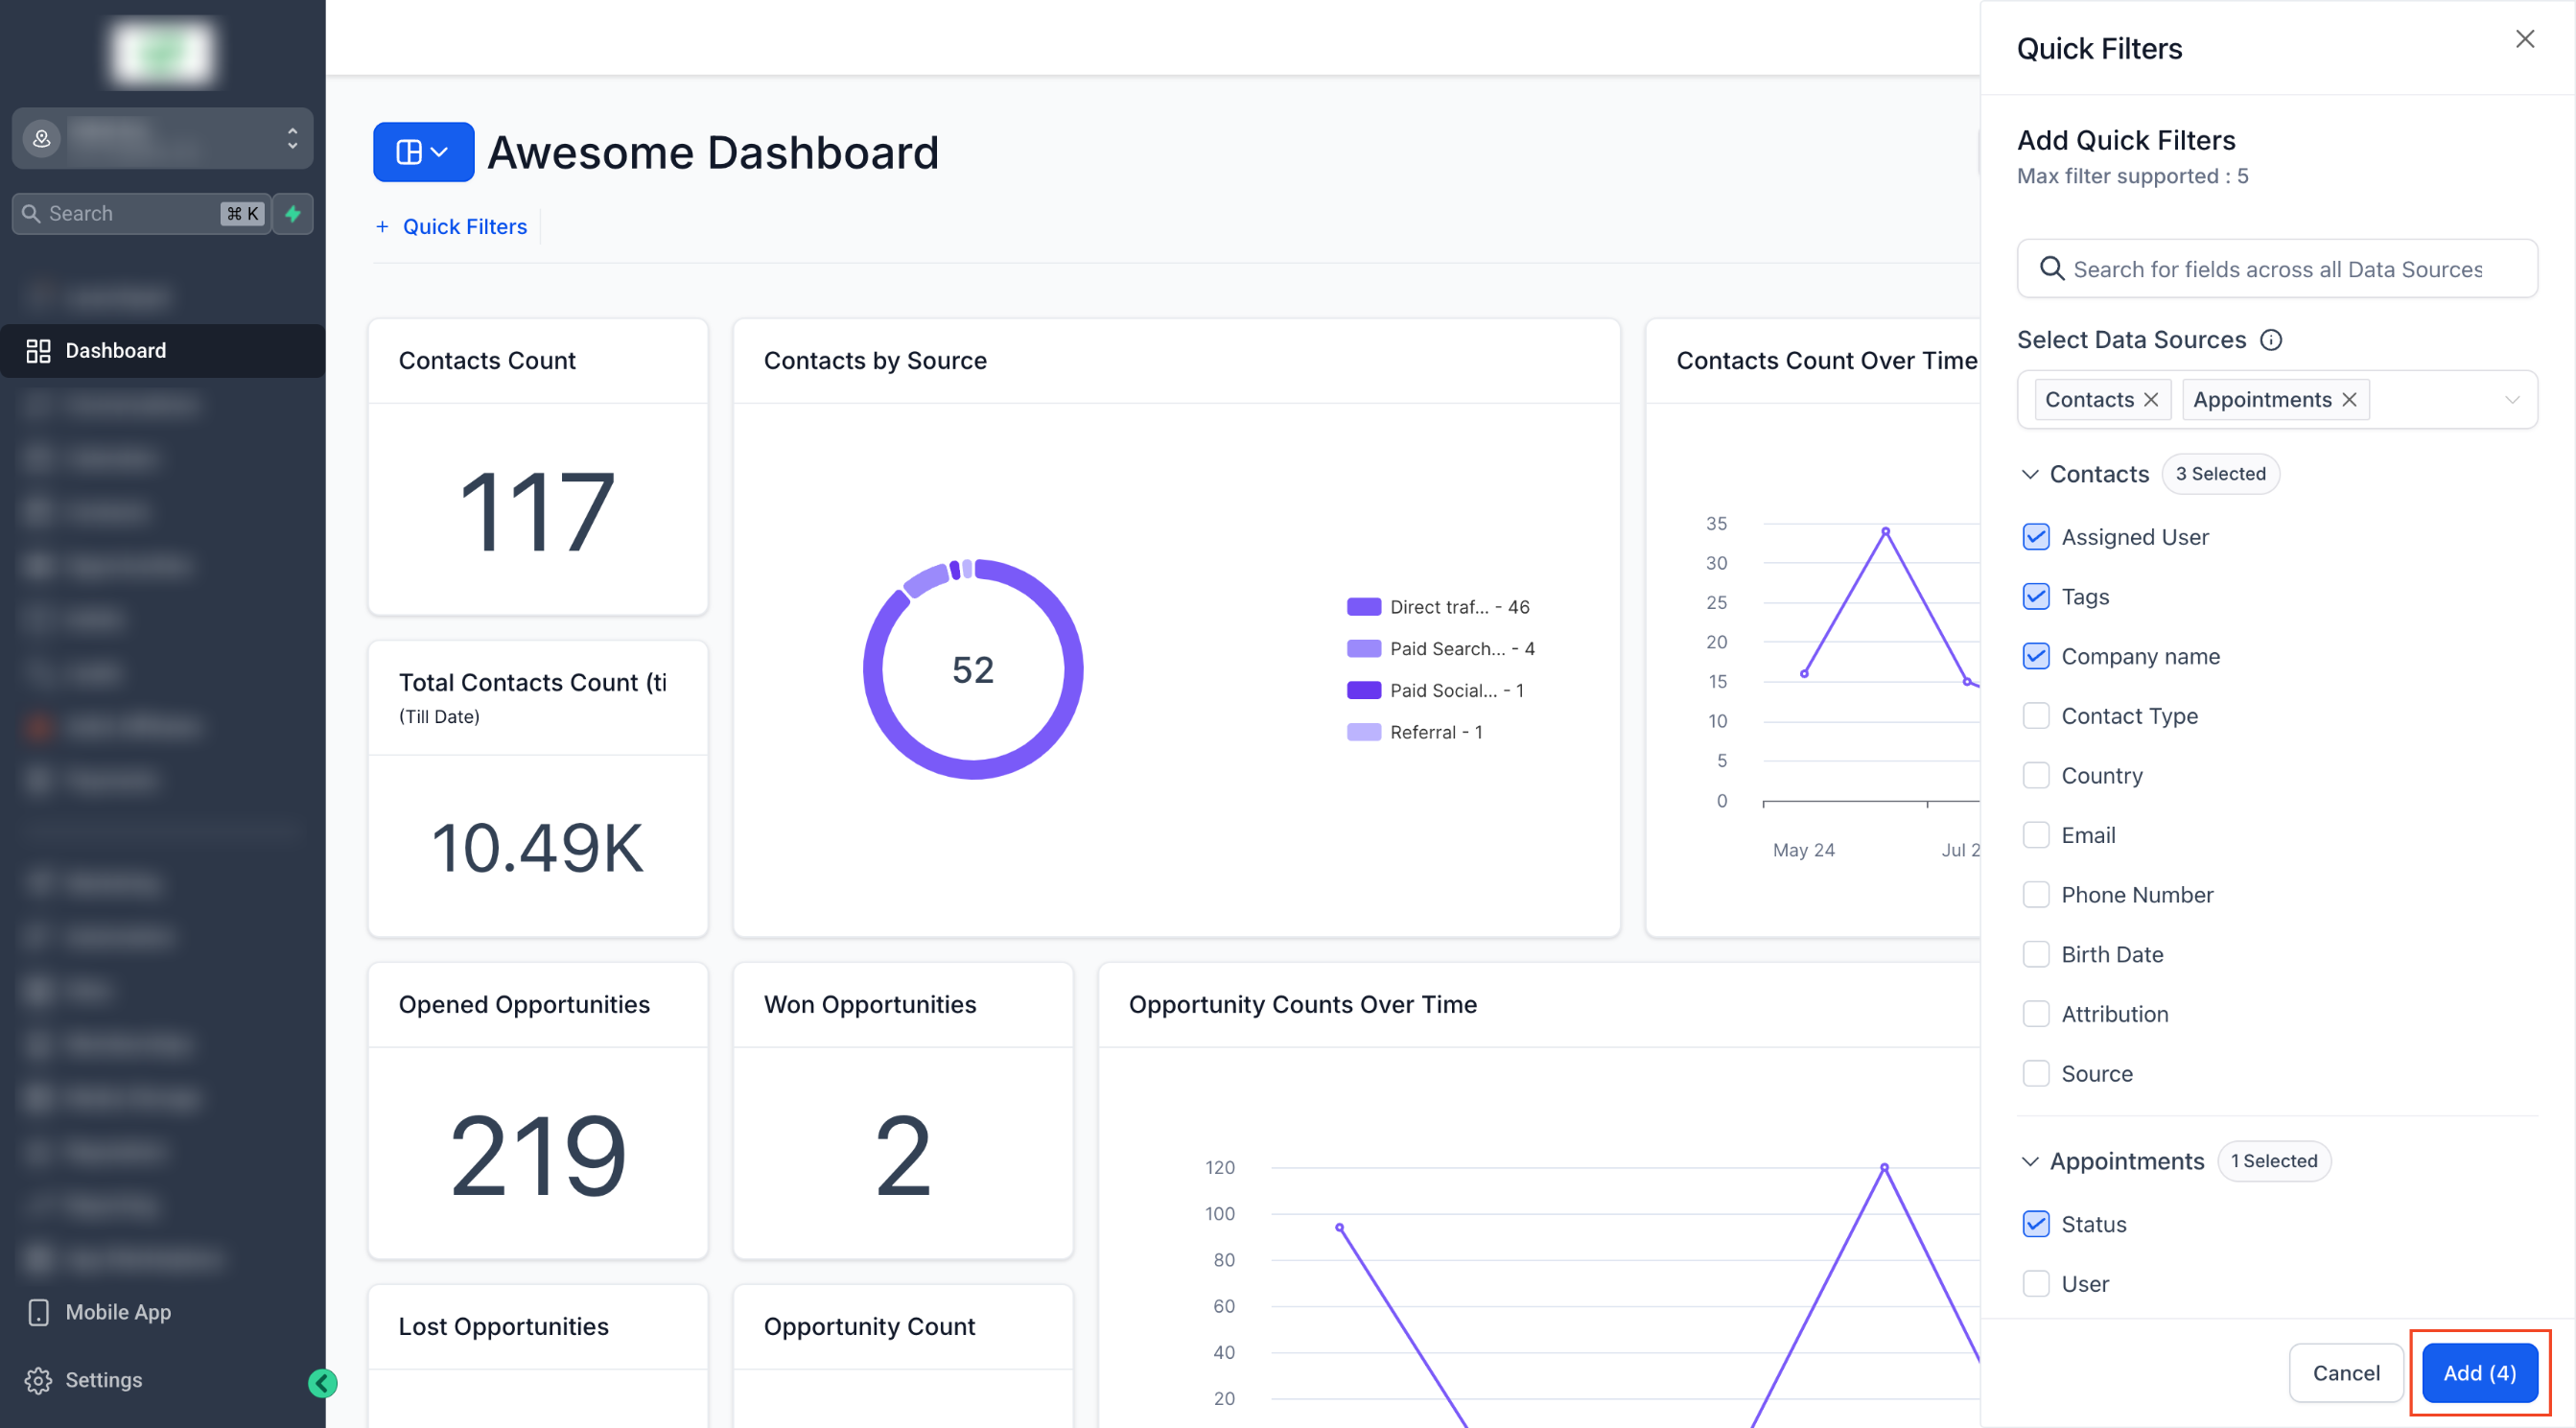
- Use the search bar or browse categories to locate desired filters.
- Check the boxes for the chosen filters and click Add.
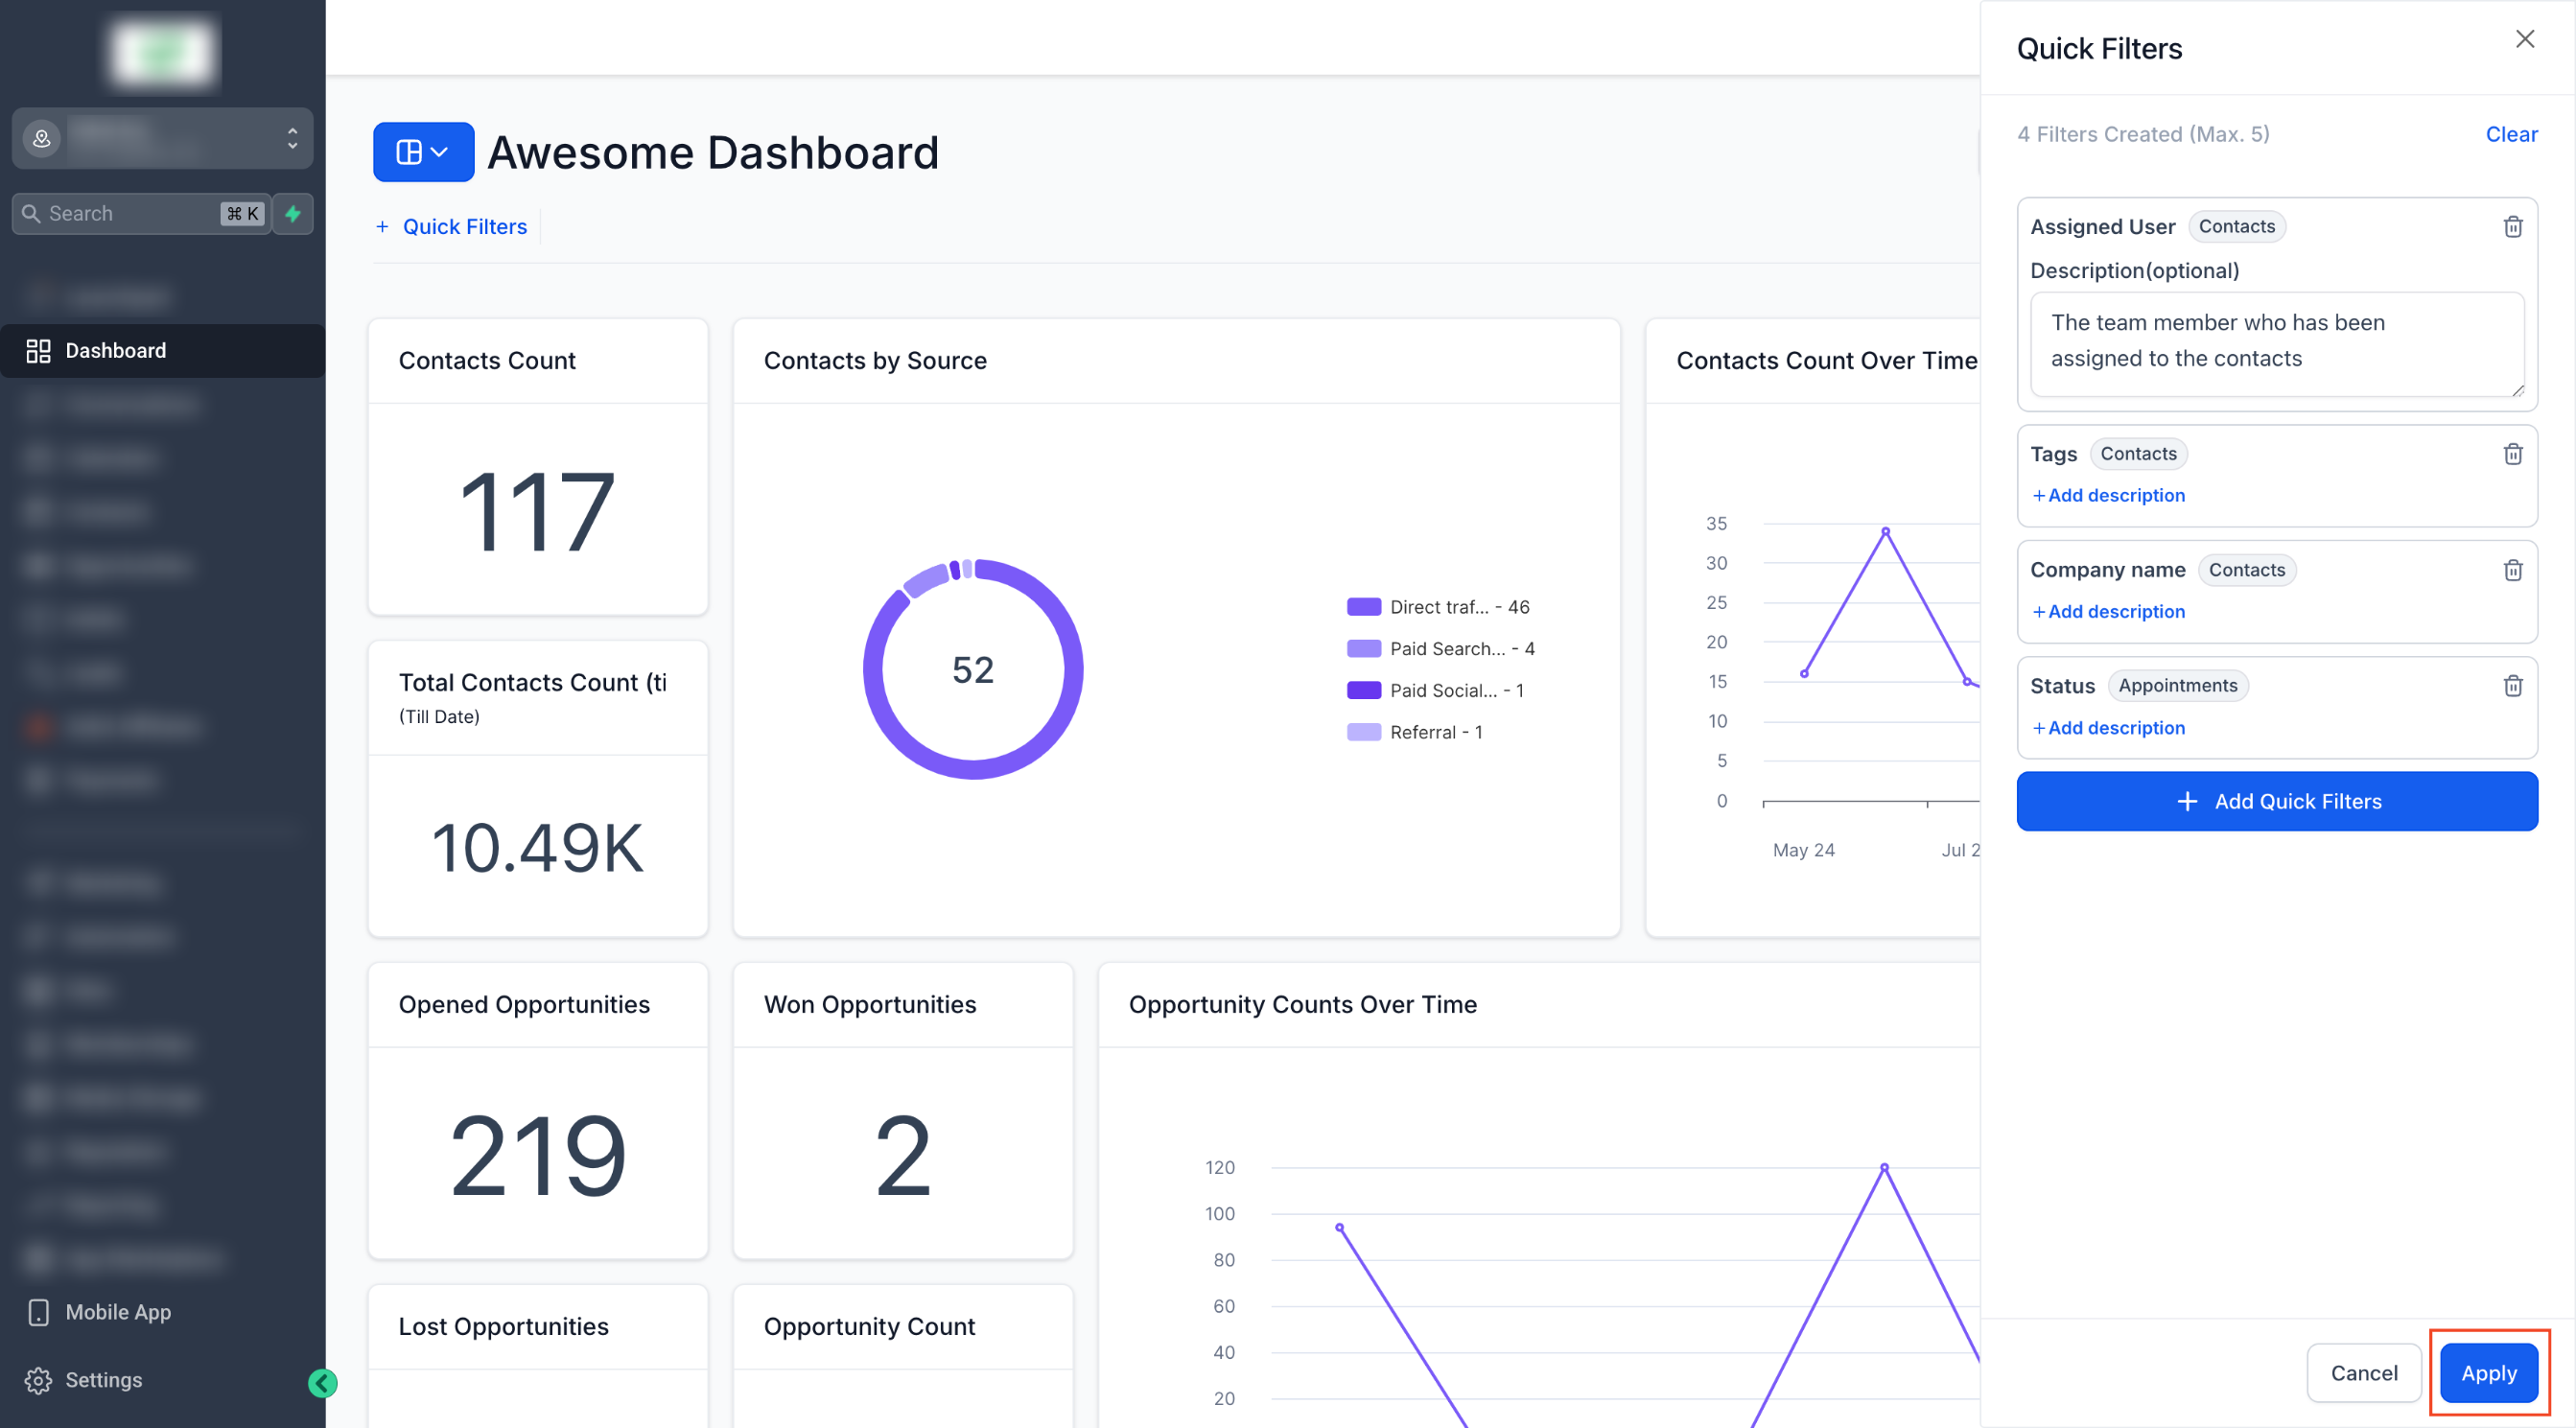
- Review the selected filters, add optional descriptions, and click Apply.
- Note: Only users with full or edit access can add Quick Filters.
- Note: Filters apply only to widgets that use the same data source and are saved only for the current browser session.
Use quick filters
- Open the dashboard that has Quick Filters configured.
- Click the Quick Filter bar at the top of the dashboard.
- Select a filter and adjust its properties as needed.
- Watch the widgets update to reflect the applied filter.
- Remember that filters affect only the user who sets them and do not change the view for other users.
06What it looks like in HighLevel
07Things to know before you rely on it
- Quick Filters work only with custom widgets; they do not affect default General Widgets.
- Filters apply solely to widgets that use the same data source as the selected filter property.
- Only users with full or edit access can add Quick Filters; users with view access can only apply them.
- Filters affect only the user who sets them and are saved within the current browser session.
- Quick Filters and widget level filters combine using AND logic, which may result in no data if conditions conflict.
08How it connects to the rest of HighLevel
- Learn how to create a custom dashboard before adding Quick Filters. Create custom dashboard
- Check dashboard permissions to ensure you have edit access for adding filters. Dashboard permissions
- Add custom widgets to your dashboard, which are required for Quick Filters to work. Add custom widgets
Michael's take

Quick filters can feel risky if you let anyone change dashboard data, but they keep the core layout safe while still letting each person slice the data they need. The biggest mistake is assuming the filter will change for the whole team. It only changes for the user who set it.
When you need a shared dashboard that still lets each rep look at their own segment, quick filters are a clean solution. They give flexibility without opening the dashboard up to accidental edits, and they work nicely alongside widget level filters for more granular control.