
01Who this is for
- Founders who need a uniform contact intake process, ensuring every team member captures the same information.
- Sales managers who want to hide irrelevant fields and highlight critical data to reduce entry errors.
02Add contact modal upgrade, explained
The upgraded Add Contact experience appears as a side panel instead of a separate window. It works on both desktop and mobile browsers, keeping the user on the current page while adding a new contact.
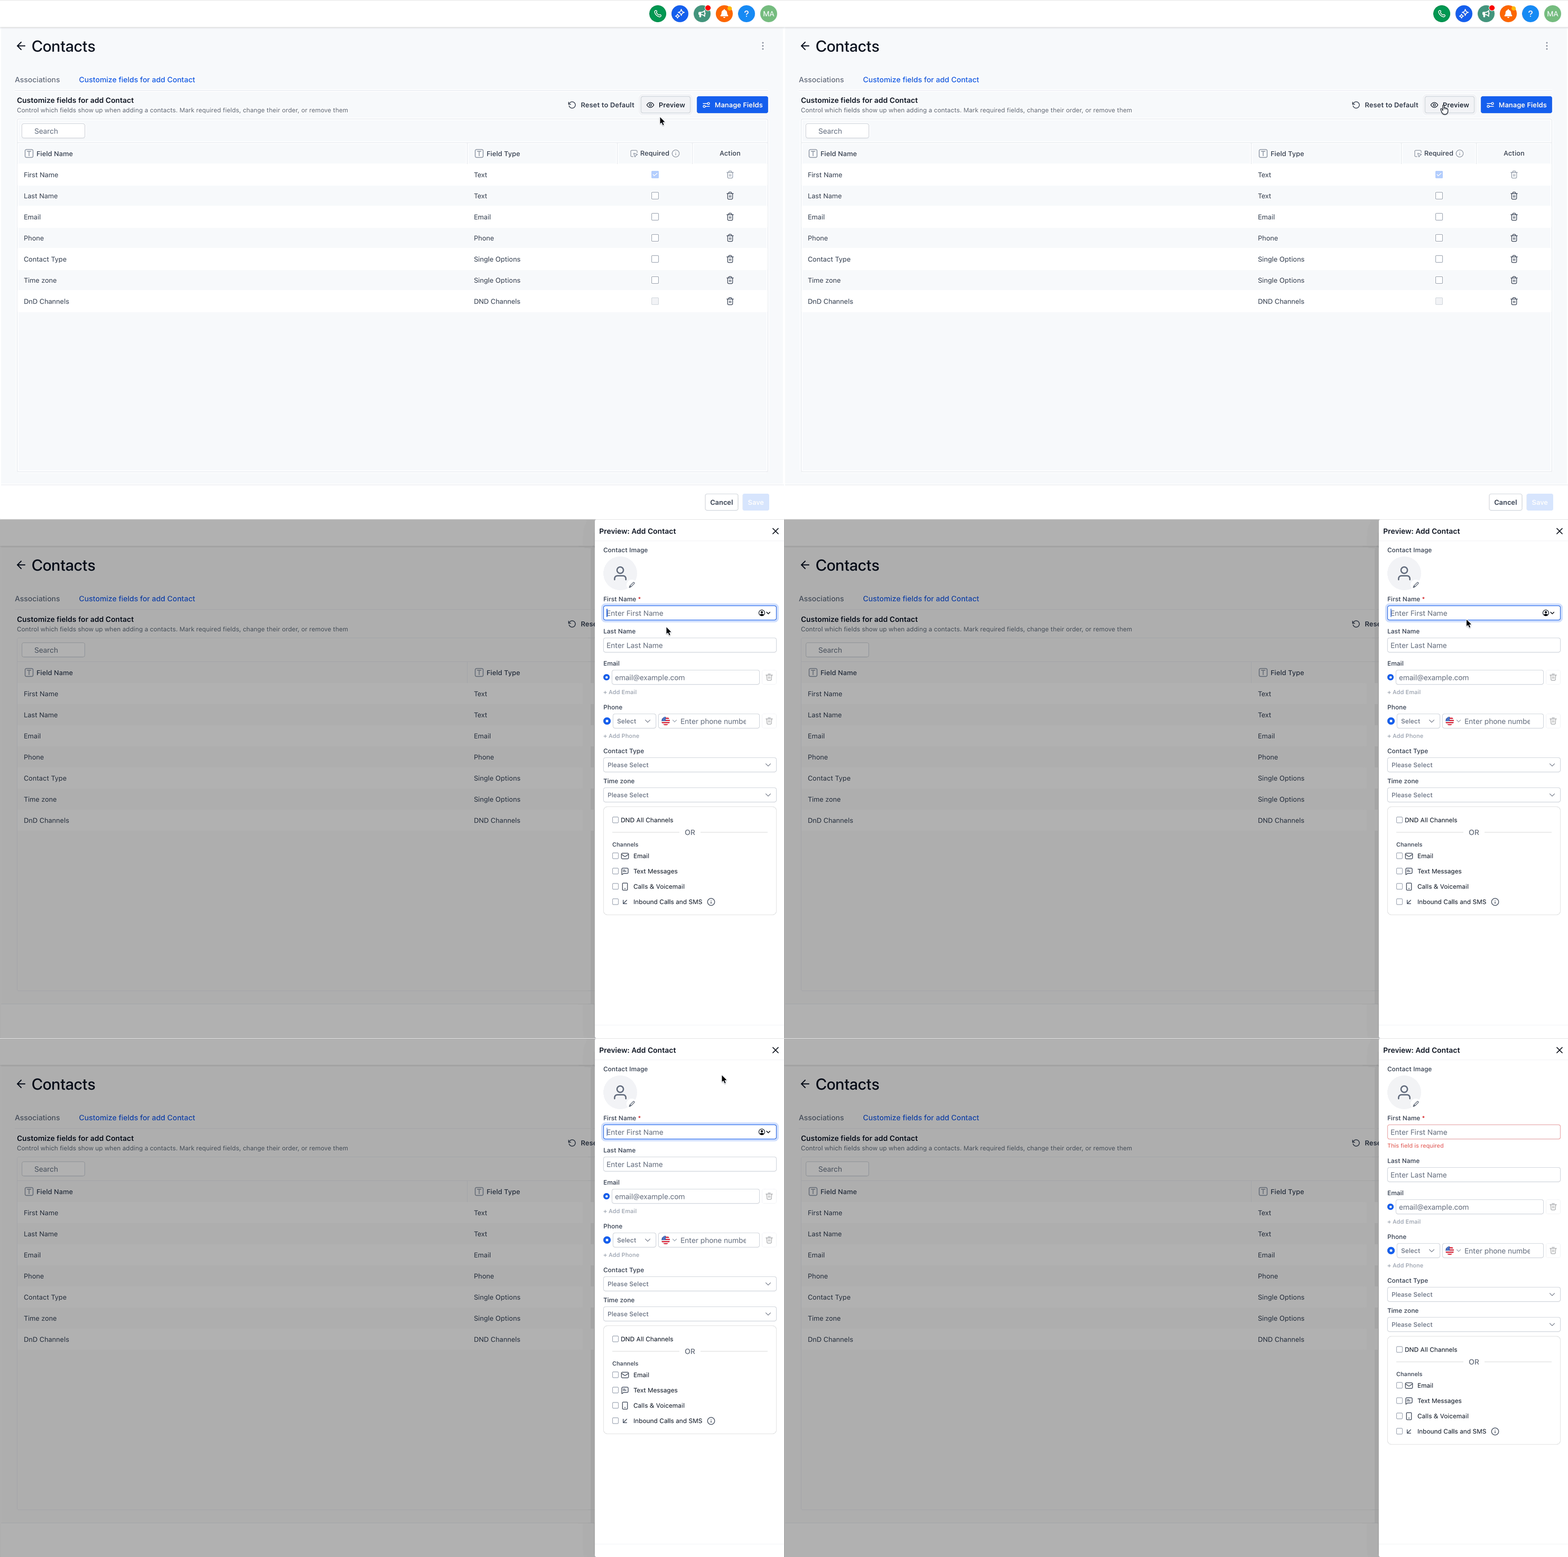
Admins access a control panel where they can add or remove both standard and custom contact fields, drag fields into the desired order, and toggle a Required setting for any field. After arranging the form, they can preview the layout and save it for the whole subaccount.
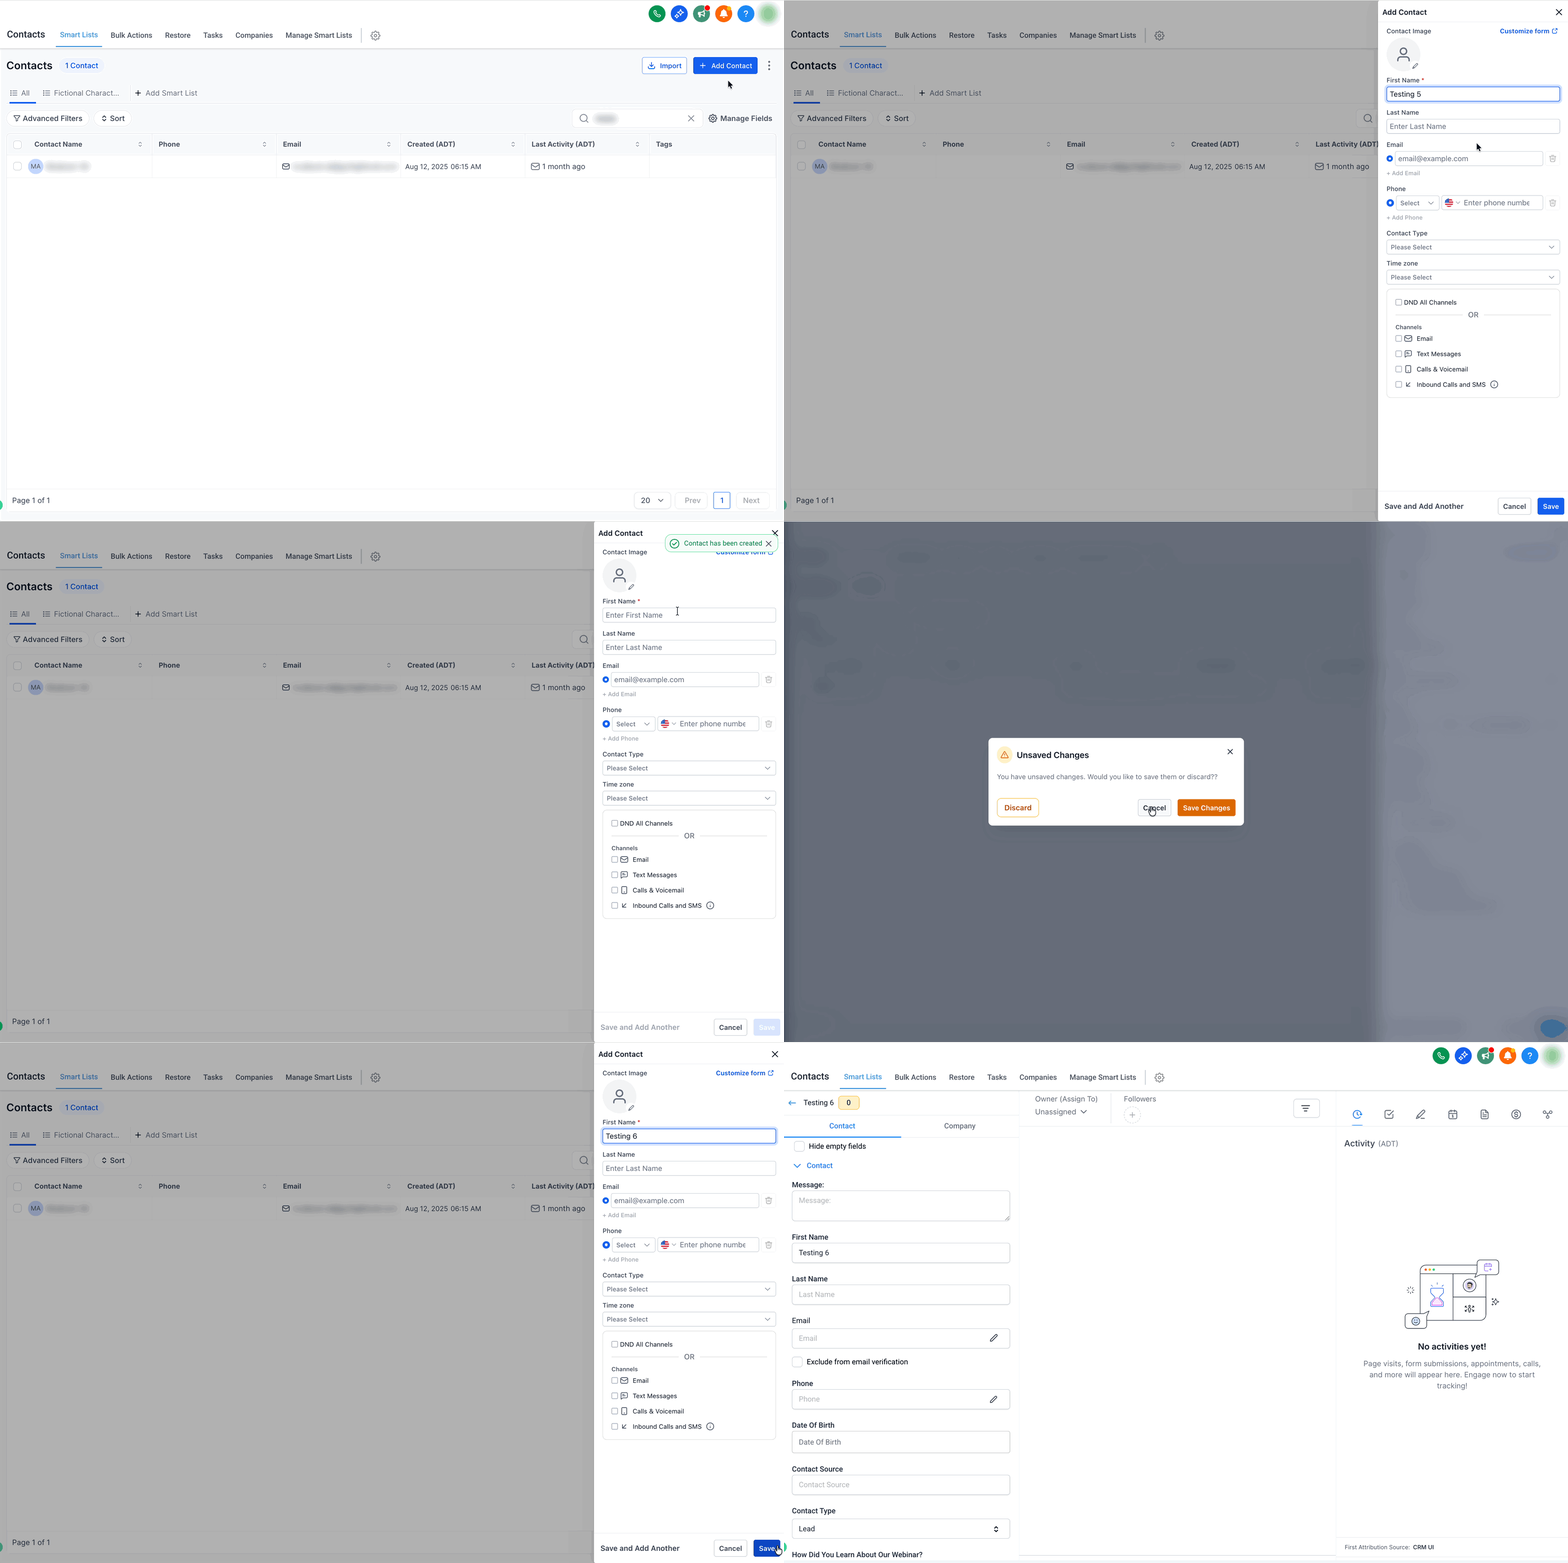
All users who have access to the Contacts area open the same slide out by clicking the + Add Contact button in Smart Lists. The form respects the admin’s configuration, offering Save, Save & Add Another, or Cancel actions, and warns if unsaved changes are about to be lost.
03How businesses use add contact modal upgrade
- Real estate agency. The agency adds custom fields for property preferences and reorders the form so agents see those fields first. Required toggles ensure every new lead includes a phone number before the record is saved.
- Dental practice. The practice includes a custom field for patient insurance ID, sets it as required, and removes unused fields. Staff creates new patient contacts directly from the appointment page without leaving the view.
- Digital marketing firm. The firm adds a custom field for campaign source, makes it required, and uses the Save & Add Another option to quickly enter multiple leads generated at a trade show.
04The numbers and rules that matter
- Deleted contacts can be restored for up to 60 days.
05Before you start
- The Labs feature must be turned on by an admin at Agency settings > Labs before the modal appears.
06How to set up and use add contact modal upgrade in HighLevel
Configure the Add Contact modal
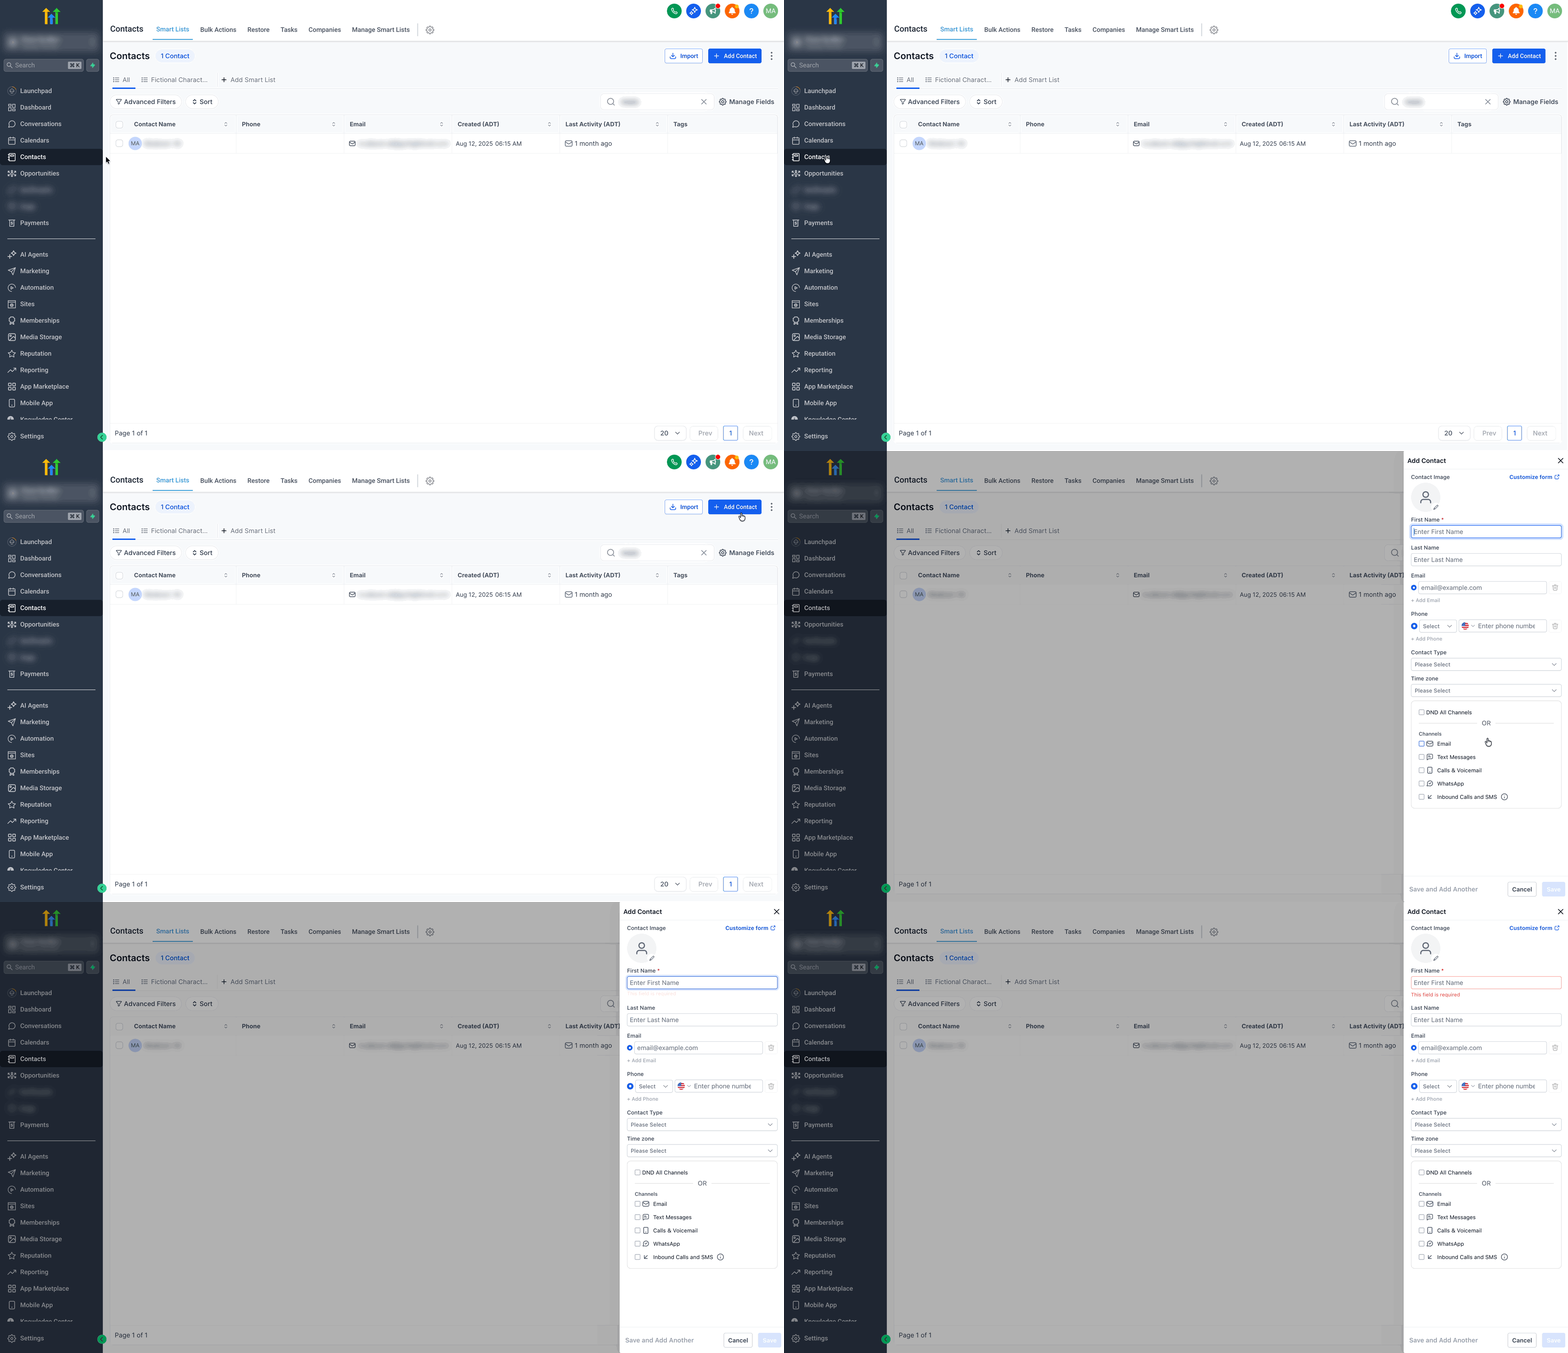
- Open the side panel from Contacts > Smart Lists > + Add Contact.
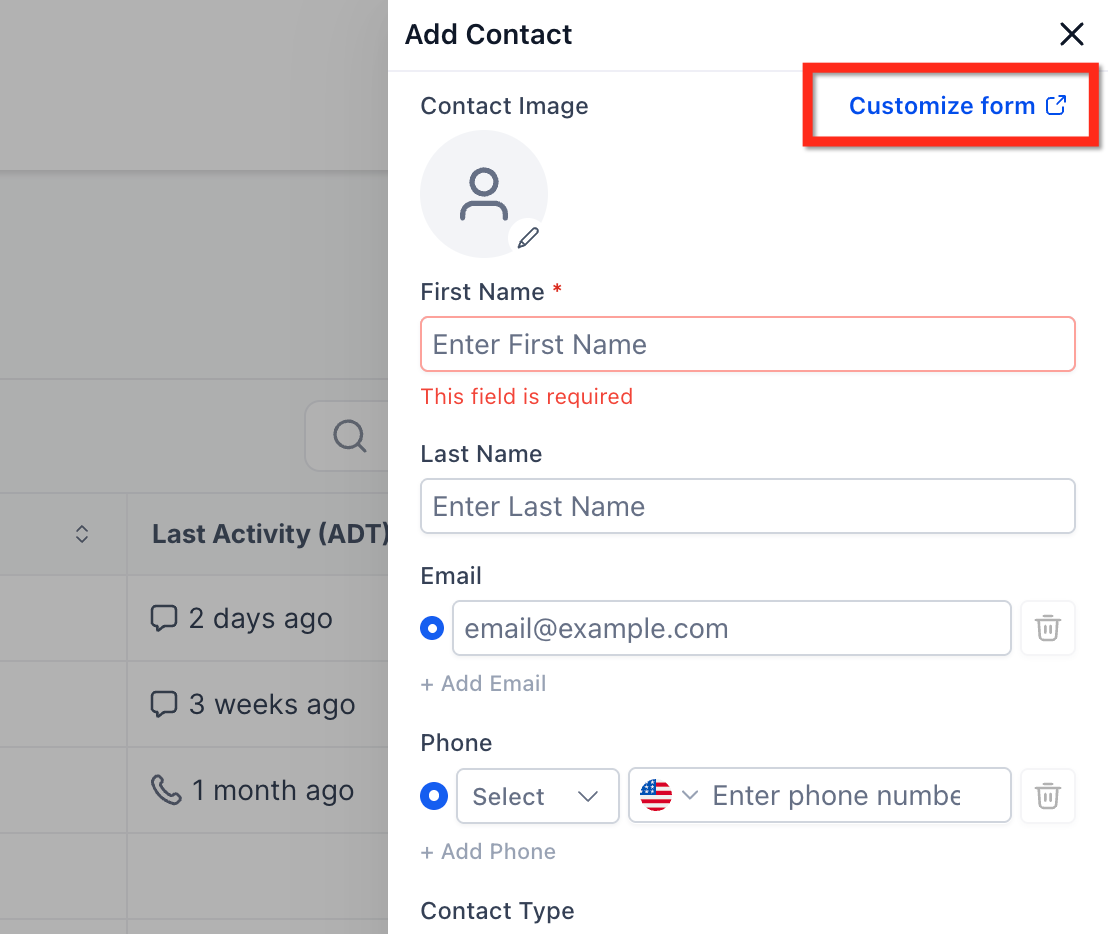
- Select the Customize Form button.
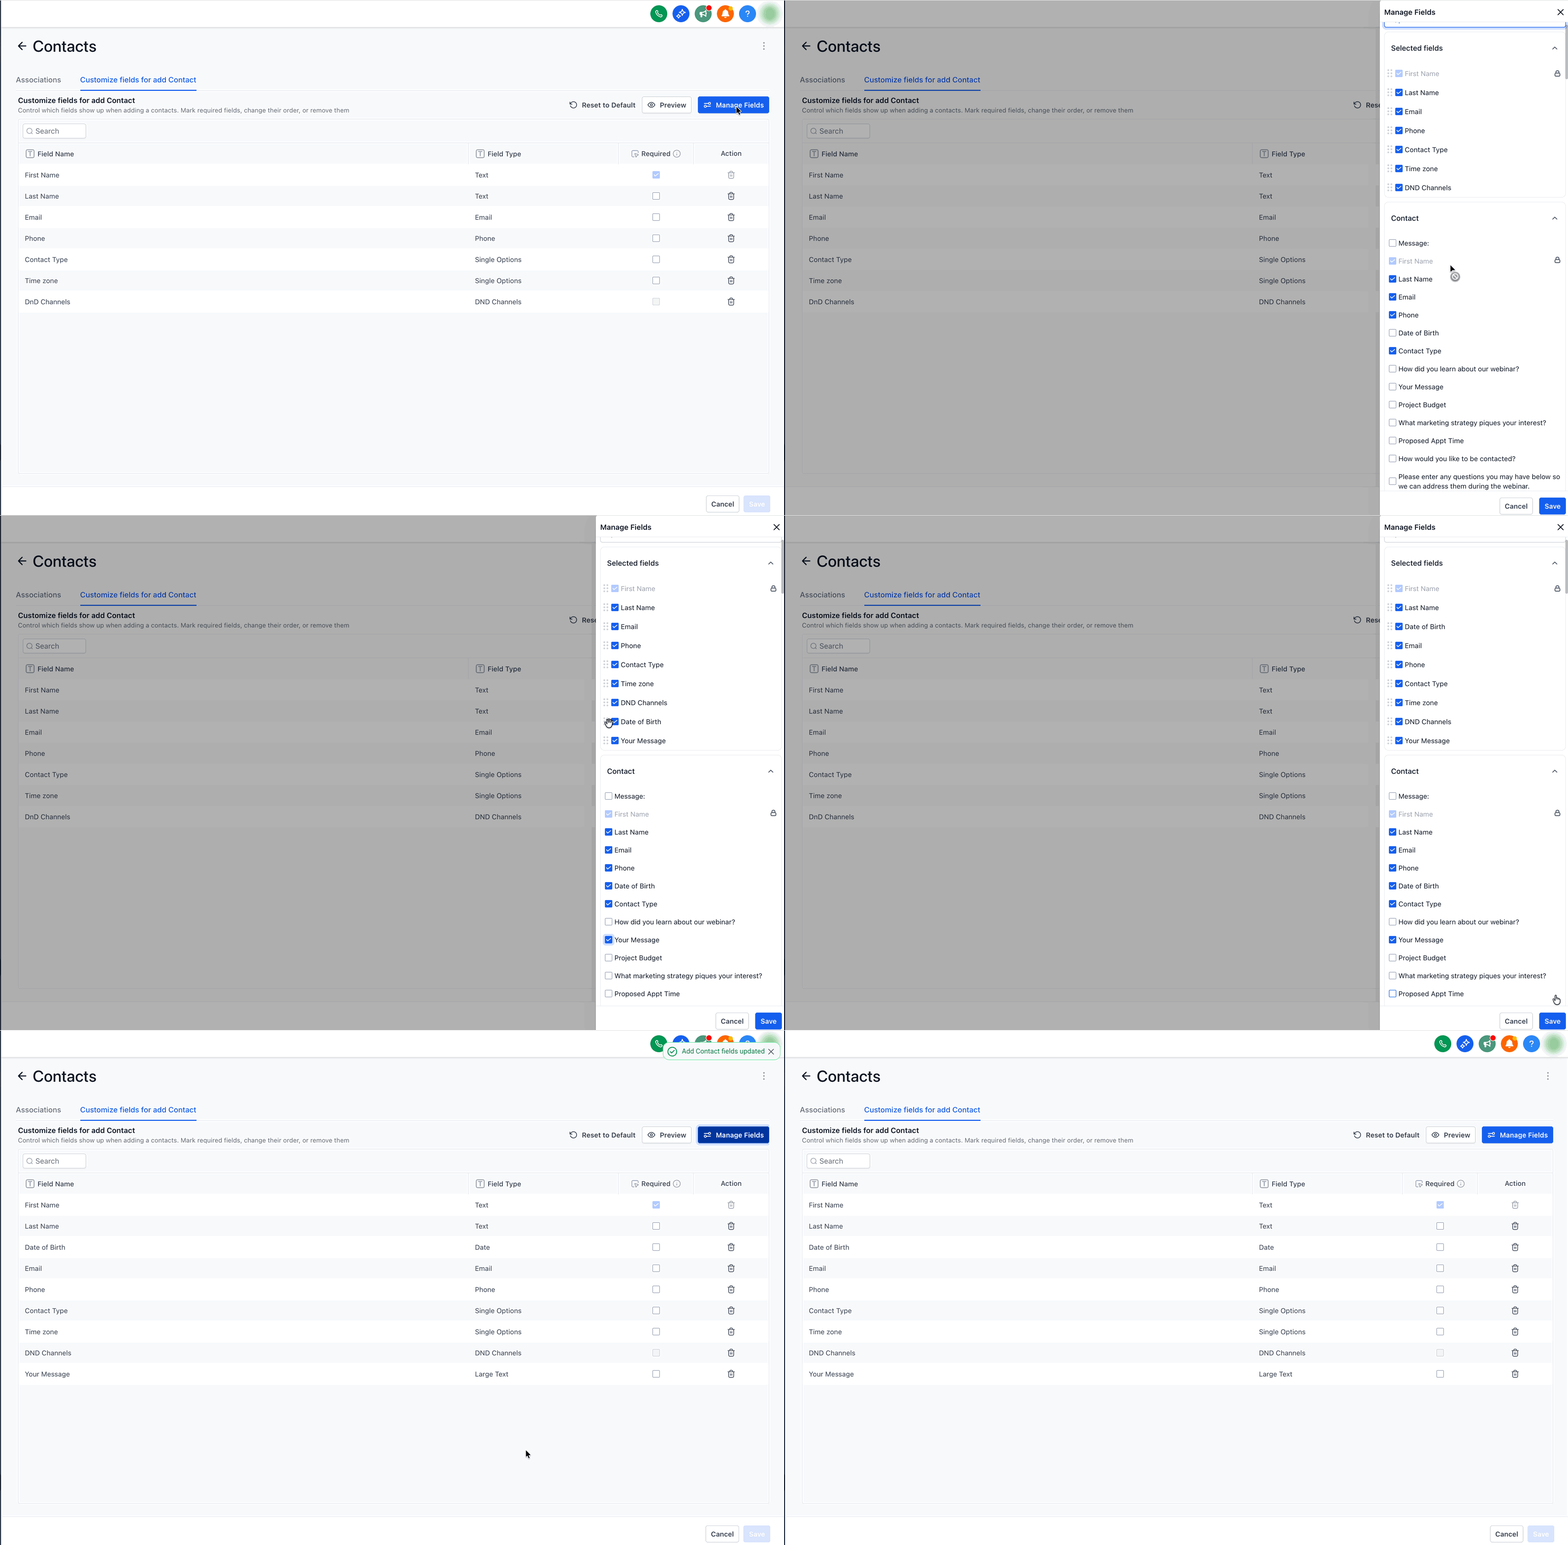
- Add or remove any standard fields needed for your process.
- Add or remove contact level custom fields you want to capture at creation.
- Drag fields to place them in the preferred sequence.
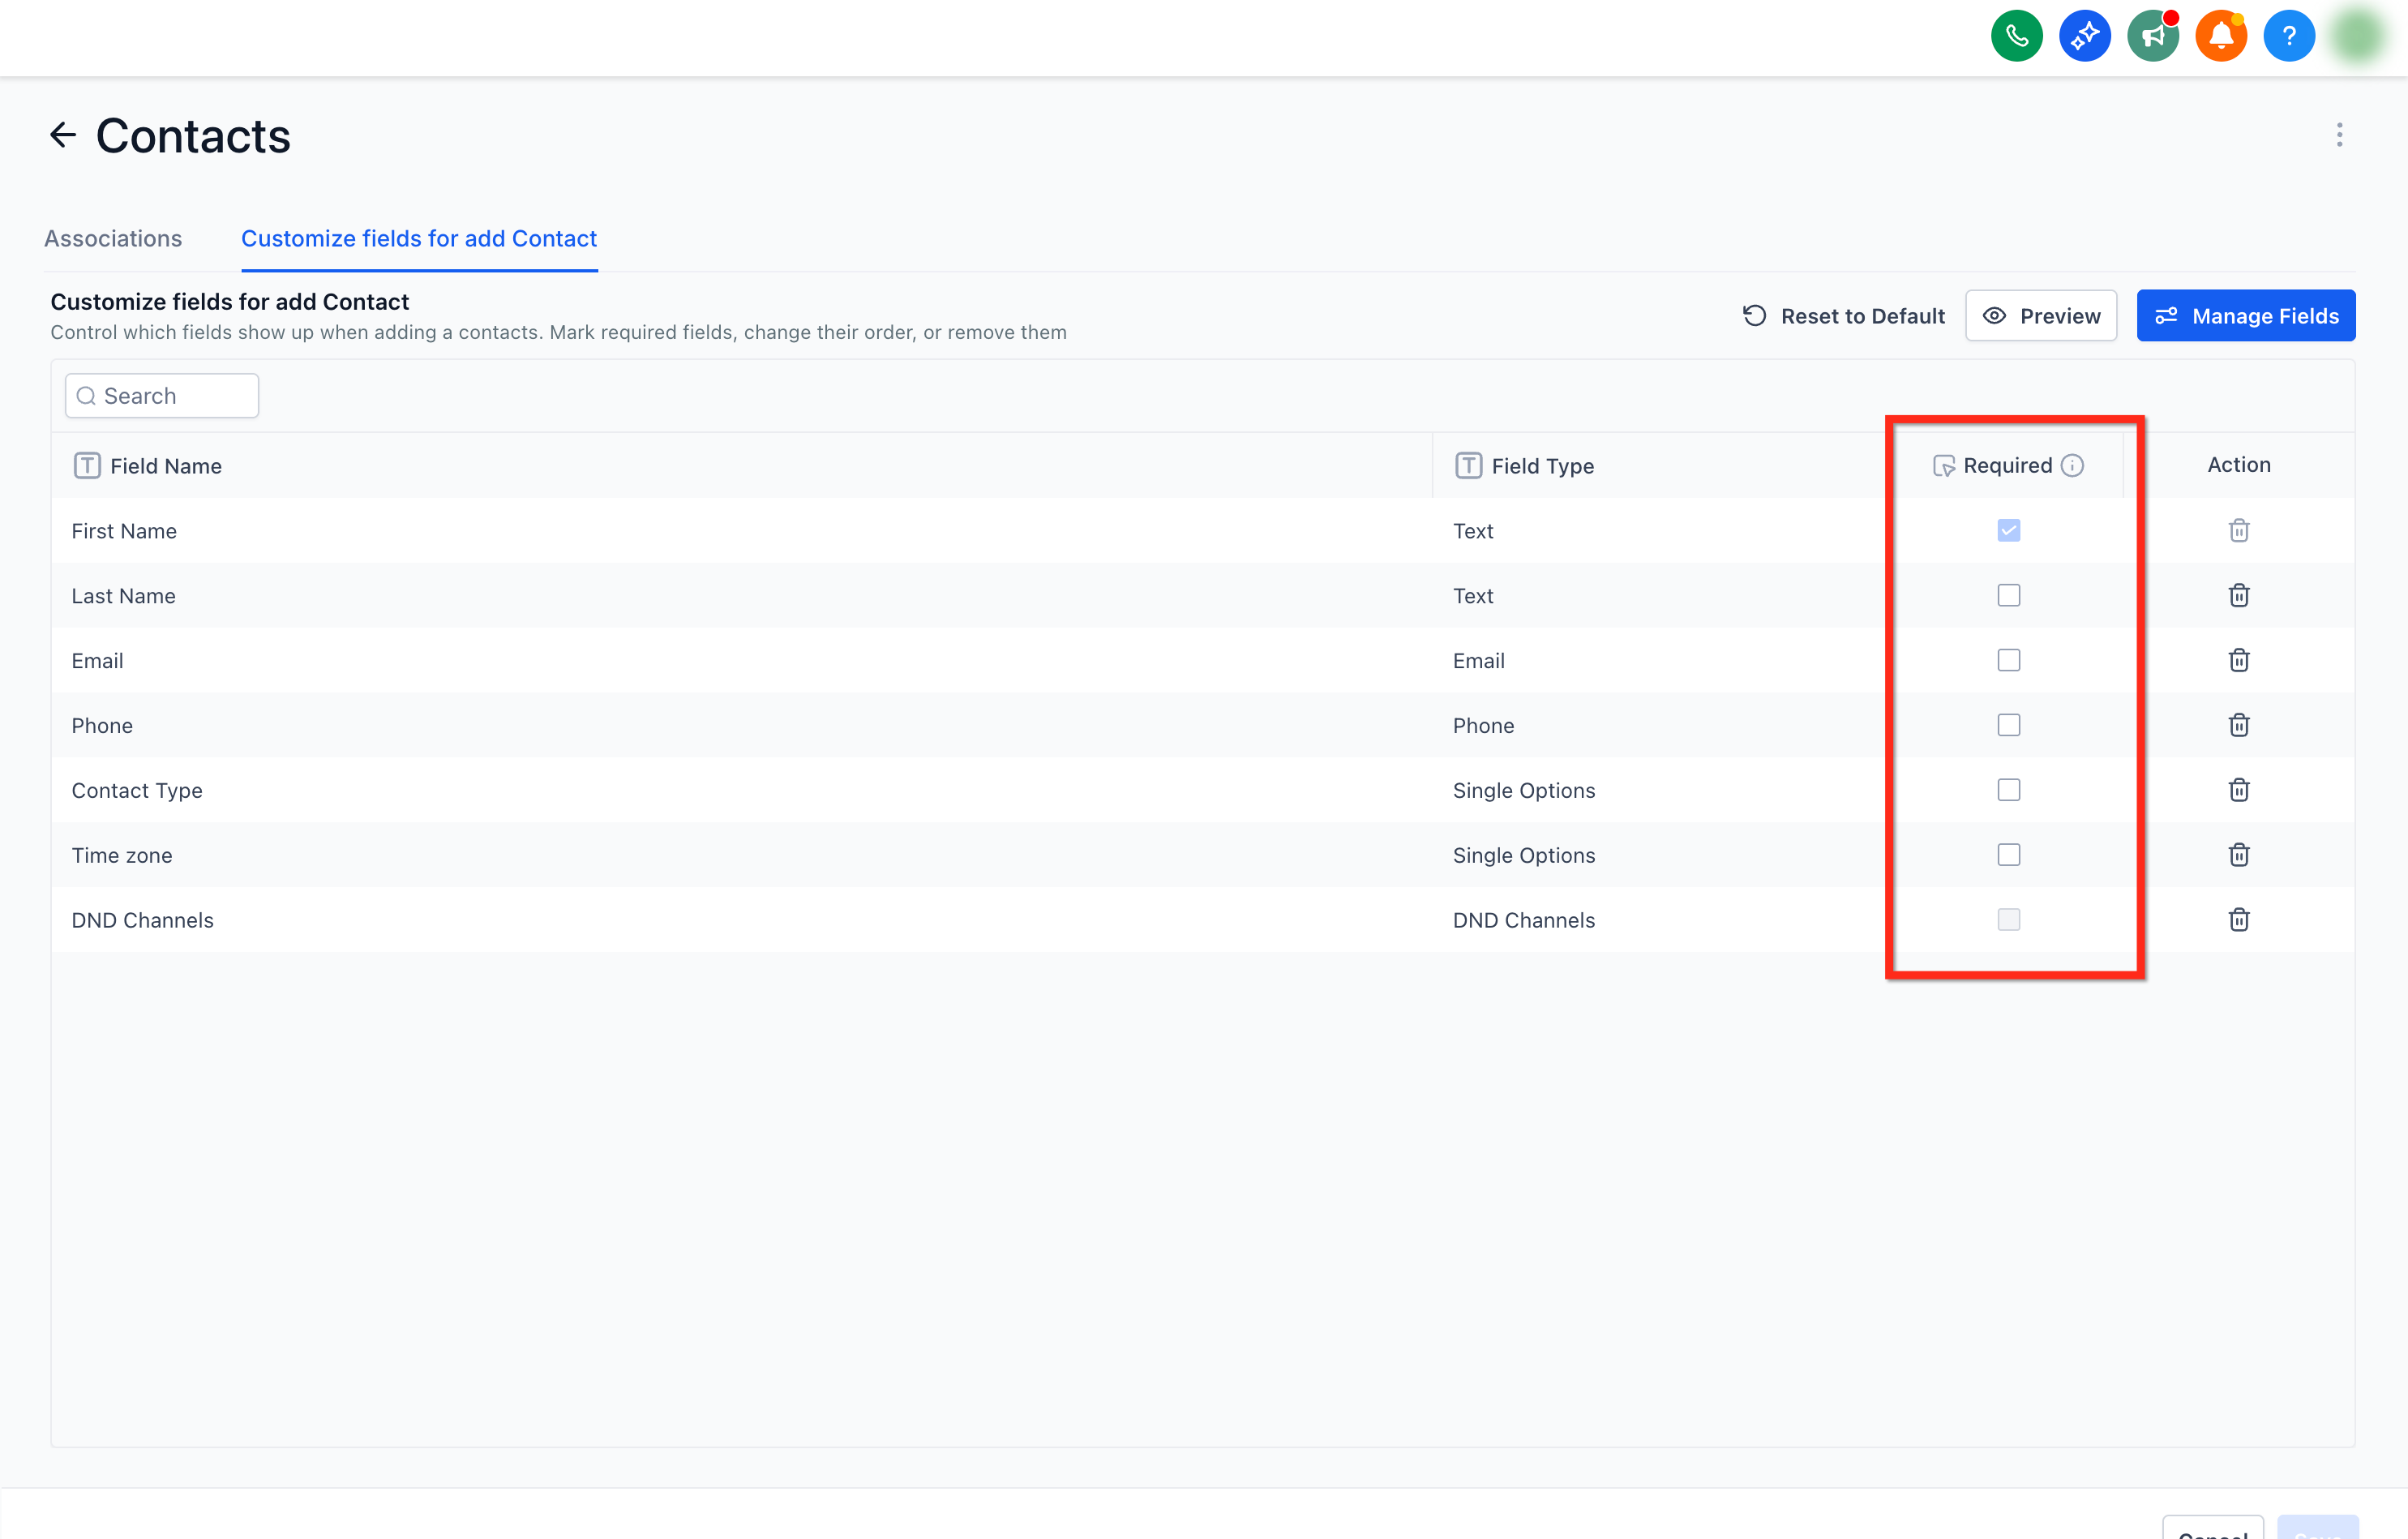
- Activate the Required toggle for fields that must be completed before saving.
- Click Preview to review the layout and then Save the configuration.
Manage Smart Lists and restore contacts
- Go to Contacts > Smart Lists.
- Click the three dot (⋮) actions menu next to the Add Contact button.
- Choose Manage Smart Lists from the menu.
- Select Restore to recover a recently deleted contact.
Create a new contact using the modal
- Navigate to Contacts > Smart Lists > + Add Contact to open the slide out.
- Enter data in all fields marked as required.
- Press Save to store the contact or Save & Add Another to open a blank form for the next entry.
- If you change your mind, click Cancel to close the panel.
- When closing with unsaved changes, confirm the prompt to discard or keep the data.
07What it looks like in HighLevel
08Settings that matter
- Contact Deduplication Preferences. Defines which fields (for example Email or Phone) are used to identify duplicate contacts during manual entry and imports.
09Things to know before you rely on it
- The modal upgrade is only available in Labs and must be enabled by an admin.
- Required field rules apply only to manual entry; they do not affect CSV imports or API calls.
- CSV imports automatically merge contacts that match on email or phone and cannot create duplicates.
- When merging duplicates manually, you can select up to ten contacts and designate a master record.
- Deleted contacts remain recoverable for up to 60 days after removal.
10How it connects to the rest of HighLevel
- Smart Lists creation and column management Smart Lists guide
- Adding files to contacts via a custom field Custom field files
- HighLevel pricing and plan options Pricing page
Michael's take

The upgraded Add Contact modal lets you show only the fields your team uses and mark the ones you can’t live without as required, helping avoid missing data and keeping you focused on closing deals.
If I were setting this up, I’d start by pulling the fields that matter for my sales pipeline, marking the stage and source as required, and then using the Save & Add Another button for quick data entry. I’d also fire a simple Contact Created workflow to tag new leads right away, ensuring the rest of the system stays in sync.