
01Who this is for
- Founders of equipment rental businesses who need transparent checkout totals for customers.
- Finance managers at property leasing firms who must keep tax reporting accurate across bookings.
- Operations heads of event venue rentals who want to avoid manual tax calculations for each reservation.
02Rental taxes, explained
Taxes for Rentals are manual rates linked to the product that each rental listing creates automatically. After you assign one or more tax rates to that product in Payments, the rates are applied each time the listing is booked. The tax appears on the public booking page, in the booking edit view, on invoices and in exported reports.
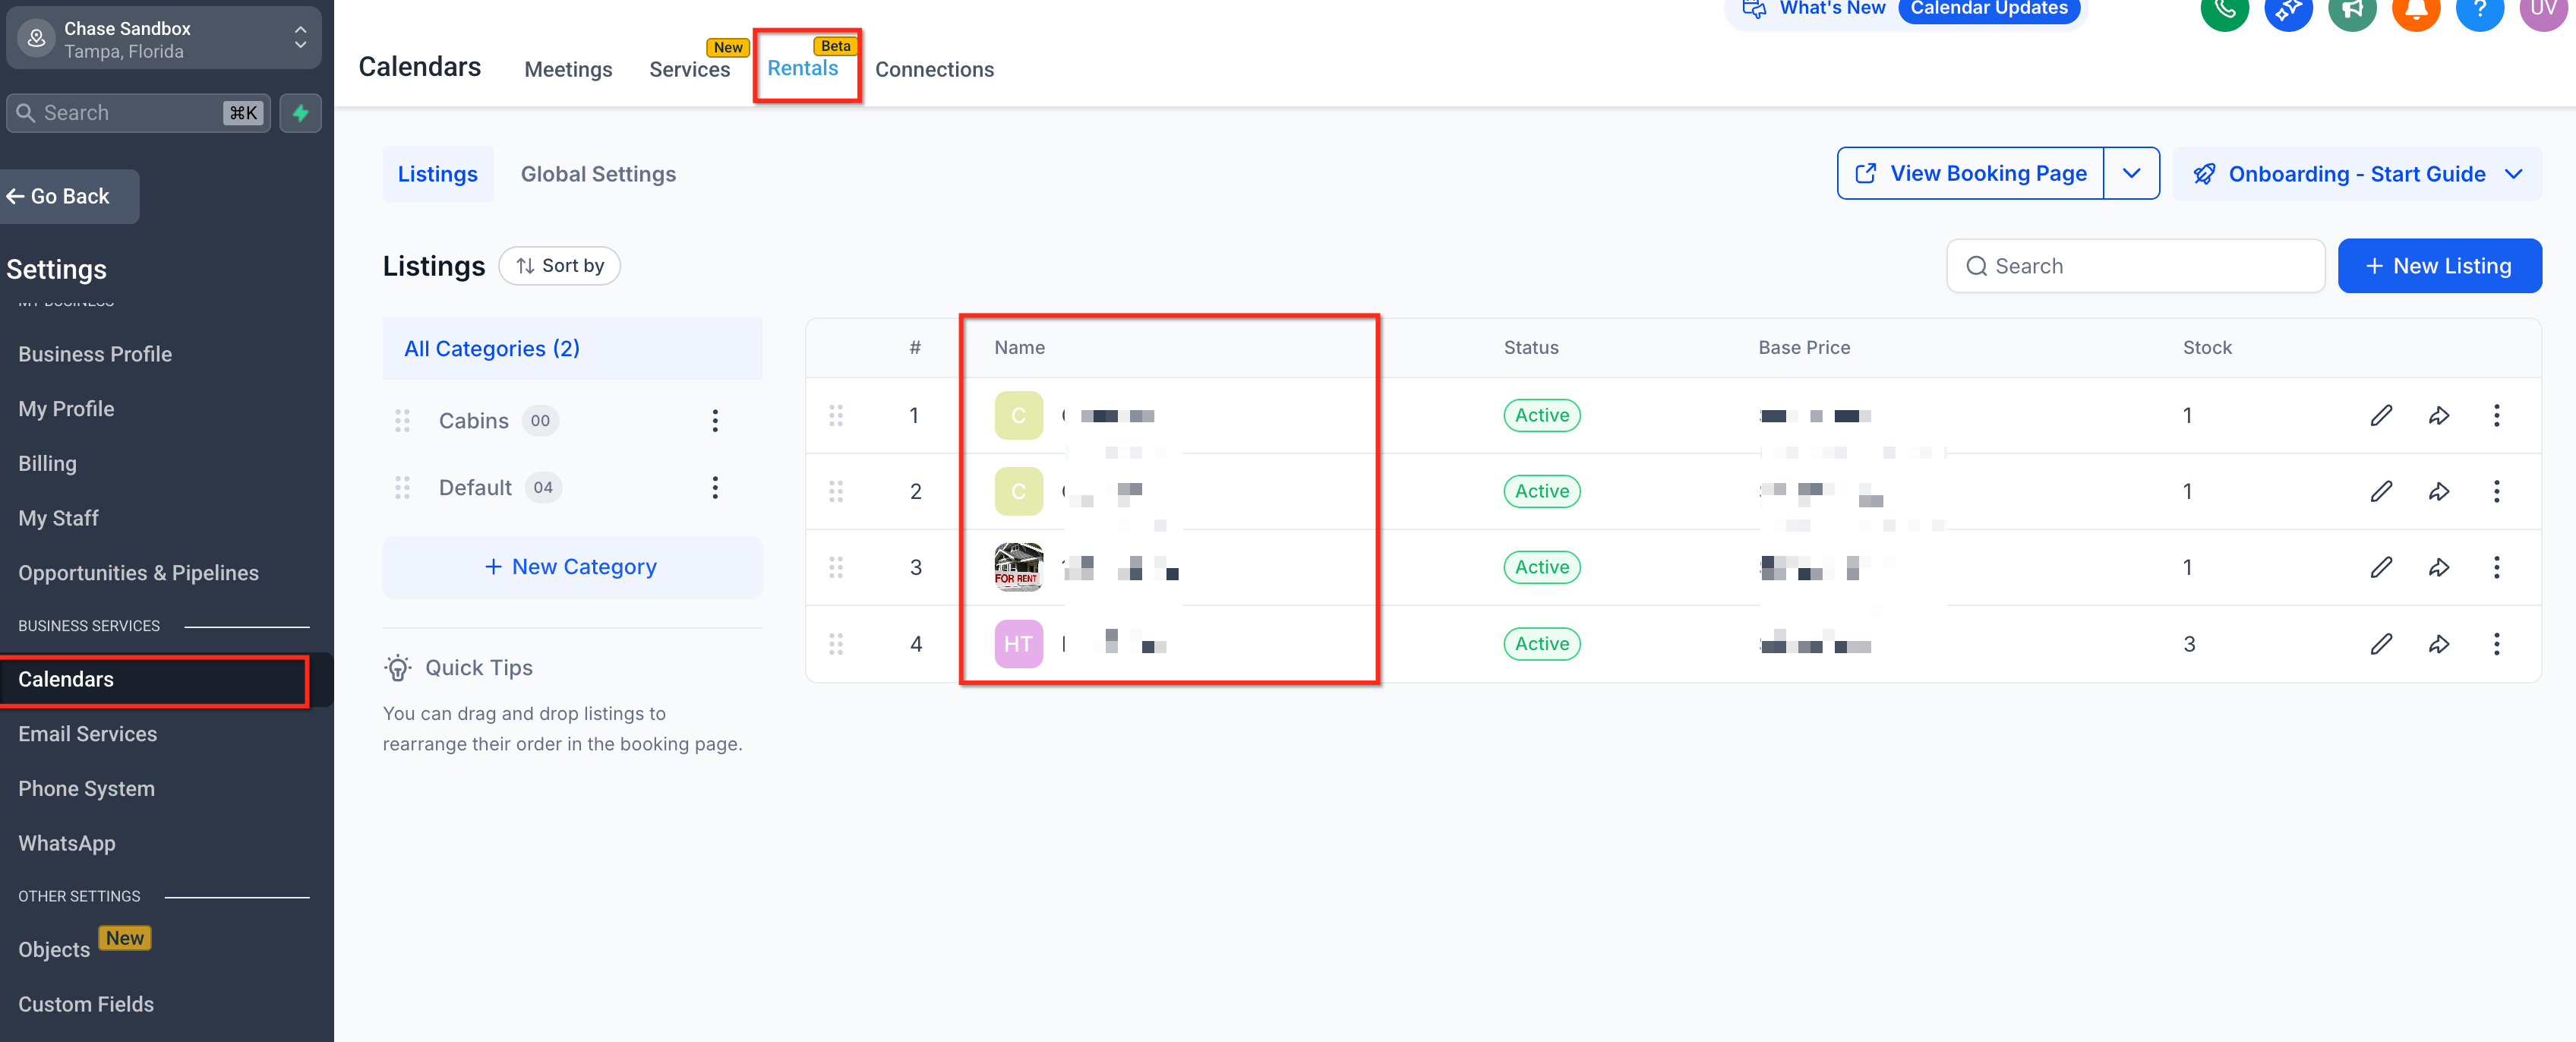
The tax setting lives in two places. First, the listing editor under Calendars > Calendar Settings > Rentals > Listings provides a button that opens the linked product. Second, the product’s tax rates are managed in Payments > Settings > Taxes. Whether the tax is inclusive or exclusive depends on the tax configuration in Payments.
During a booking that includes multiple listings, the system calculates tax for each listing separately and then adds the amounts to produce the final total. Tax is only applied to the rental price, not to any security deposit.
03How businesses use rental taxes
- Construction equipment rental company. The business opens each equipment listing, clicks Configure Taxes for This Listing, and assigns the applicable state tax rate to the linked product. Future bookings automatically show the tax line item on the checkout page and on invoices.
- Vacation property management firm. For each property listing the firm edits the inventory settings, navigates to the tax configuration, and adds the local occupancy tax as a manual rate. When a guest books, the tax appears above the total and is reflected in the payment record.
- Audio visual event rental service. The service creates separate listings for lighting and sound kits, assigns different tax percentages to each linked product, and verifies the tax lines by creating test bookings. The tax amounts are displayed on the booking detail view and in the generated invoice.
04The numbers and rules that matter
- In multilisting bookings taxes are calculated per listing and then combined.
05Before you start
- A tax rate must be defined in Payments > Settings > Taxes.
- The rental listing you want to tax must already exist.
06How to set up and use rental taxes in HighLevel
Apply taxes to rental listings
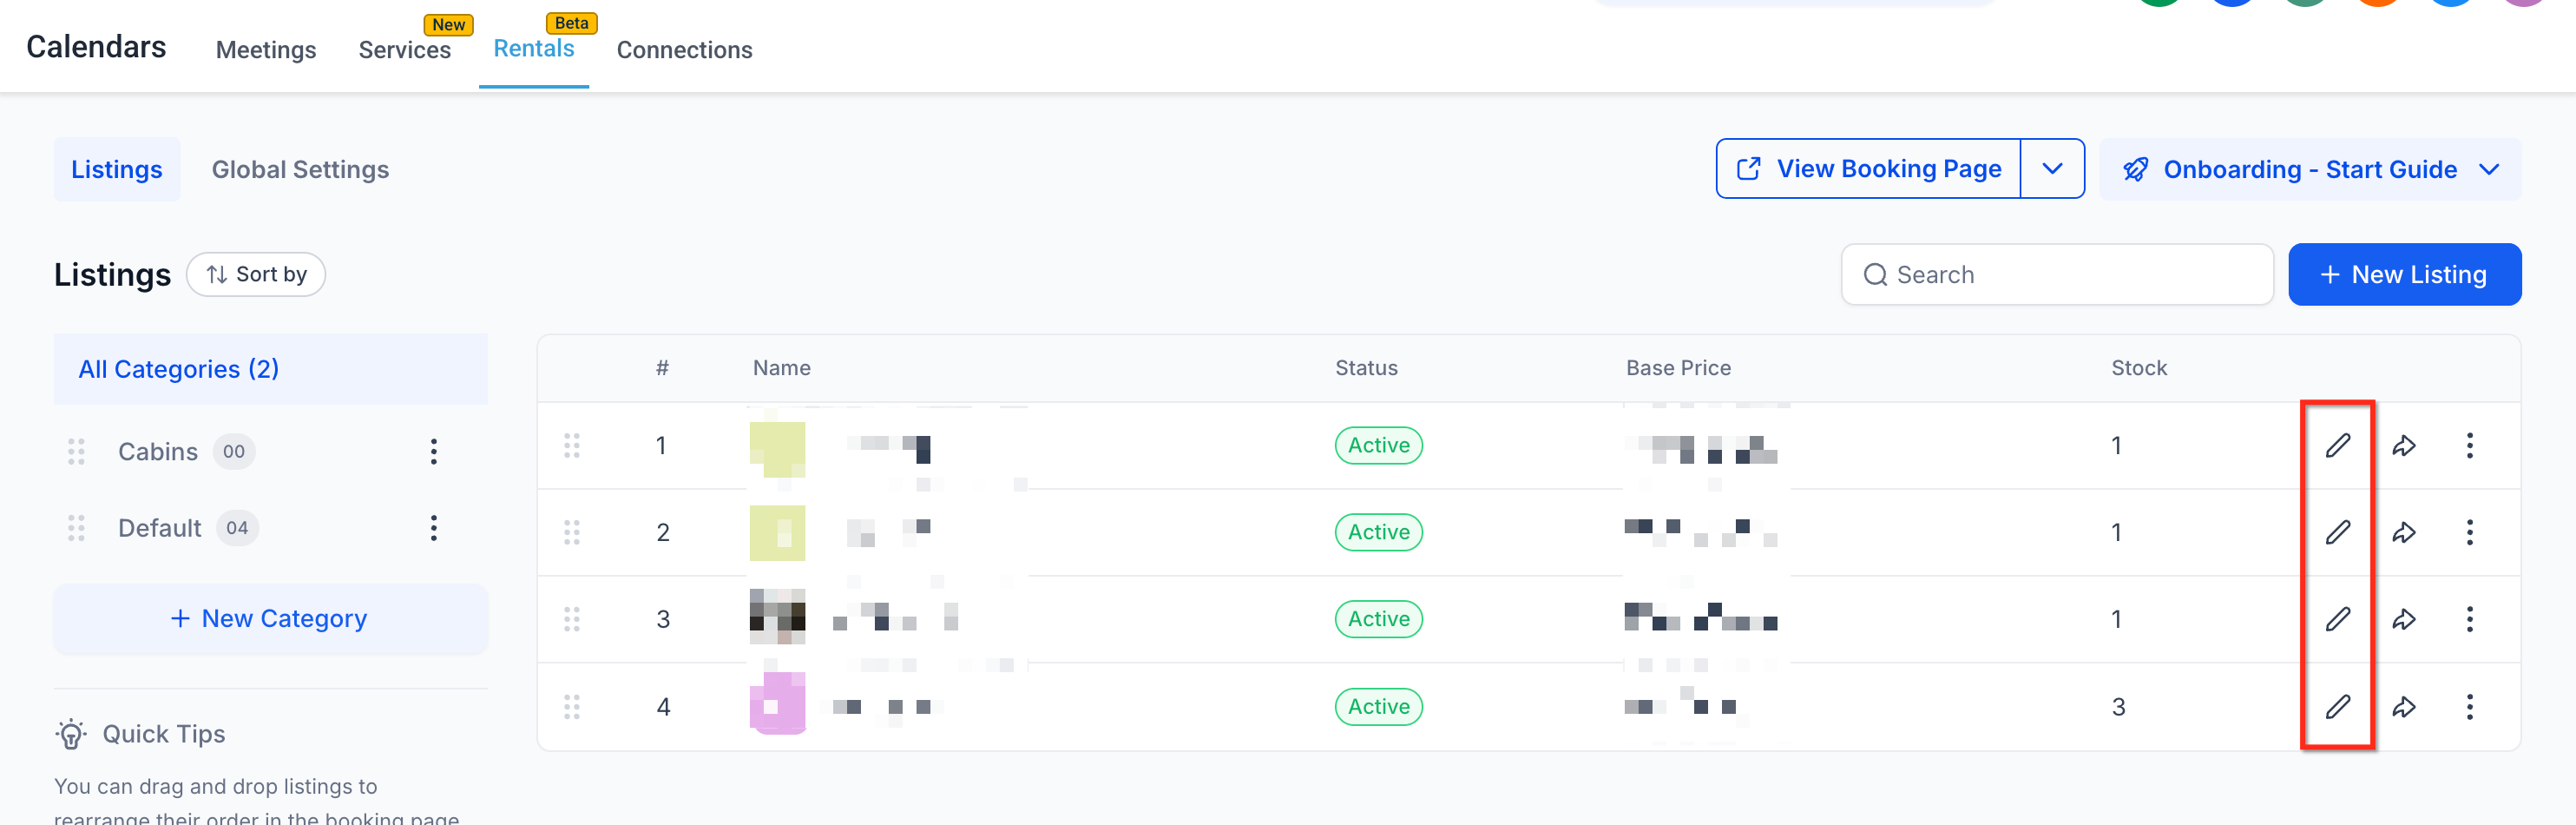
- Open the desired listing via Calendars > Calendar Settings > Rentals > Listings.
- Select Edit Listing for that item.
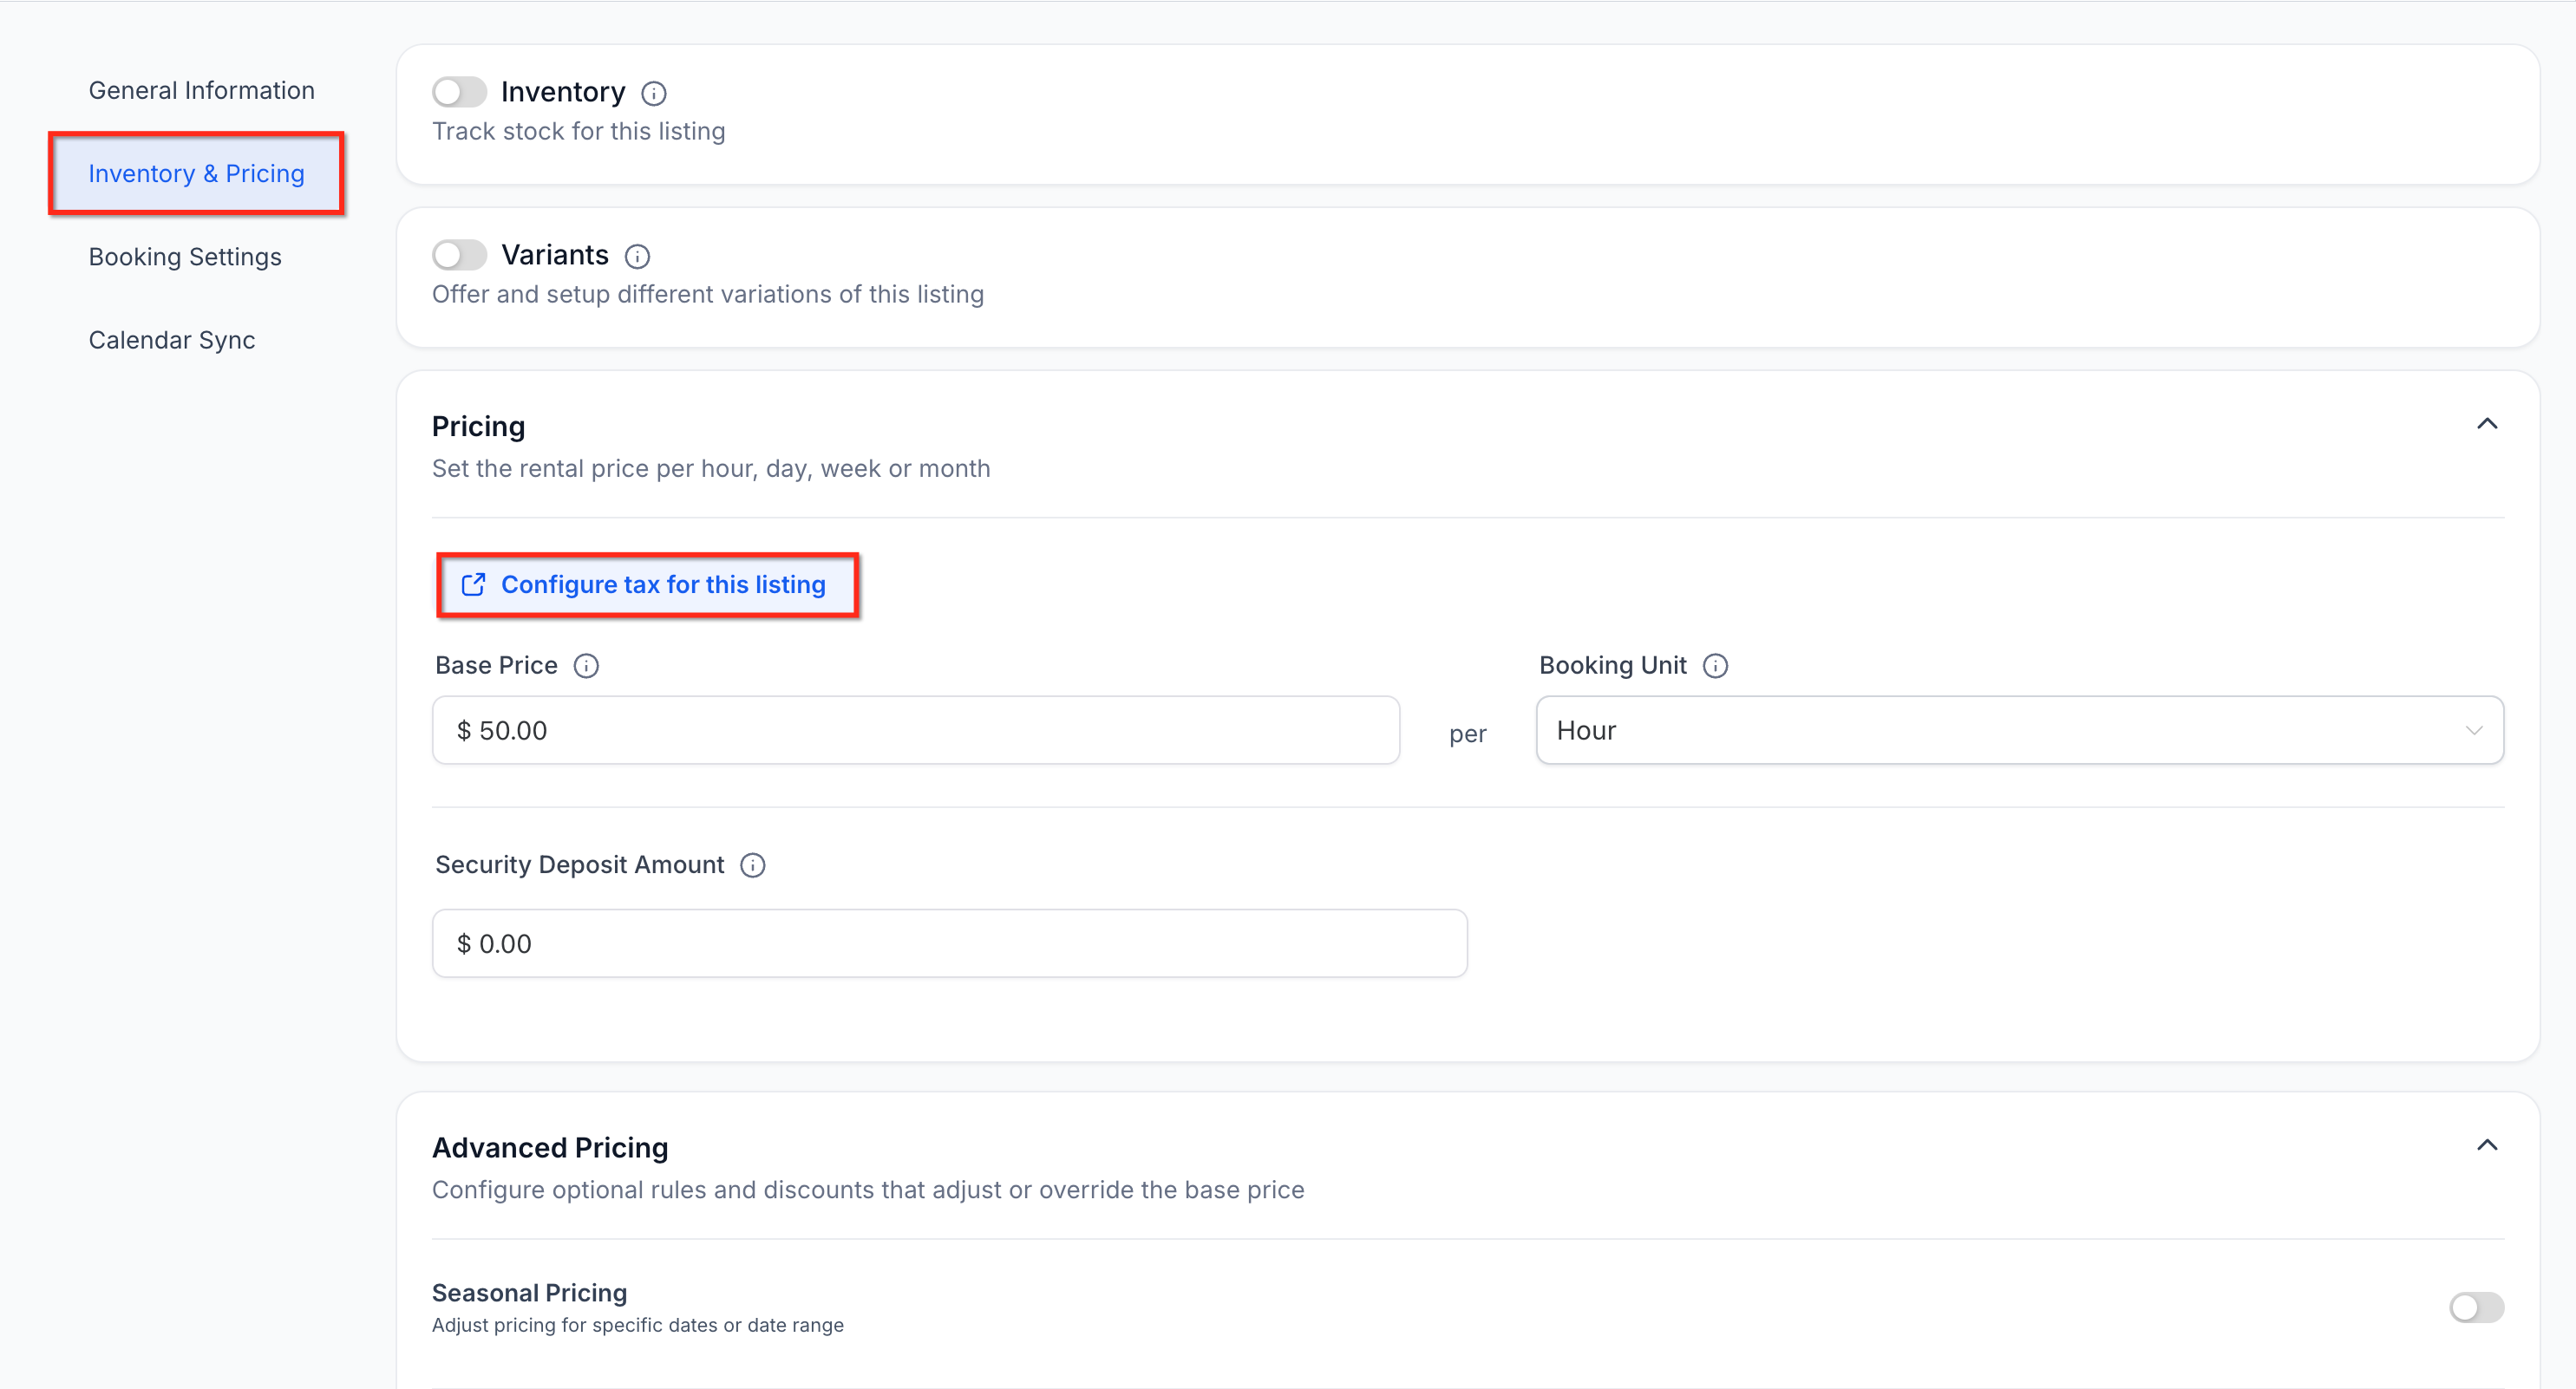
- Switch to the Inventory & Pricing tab and click Configure Taxes for This Listing.
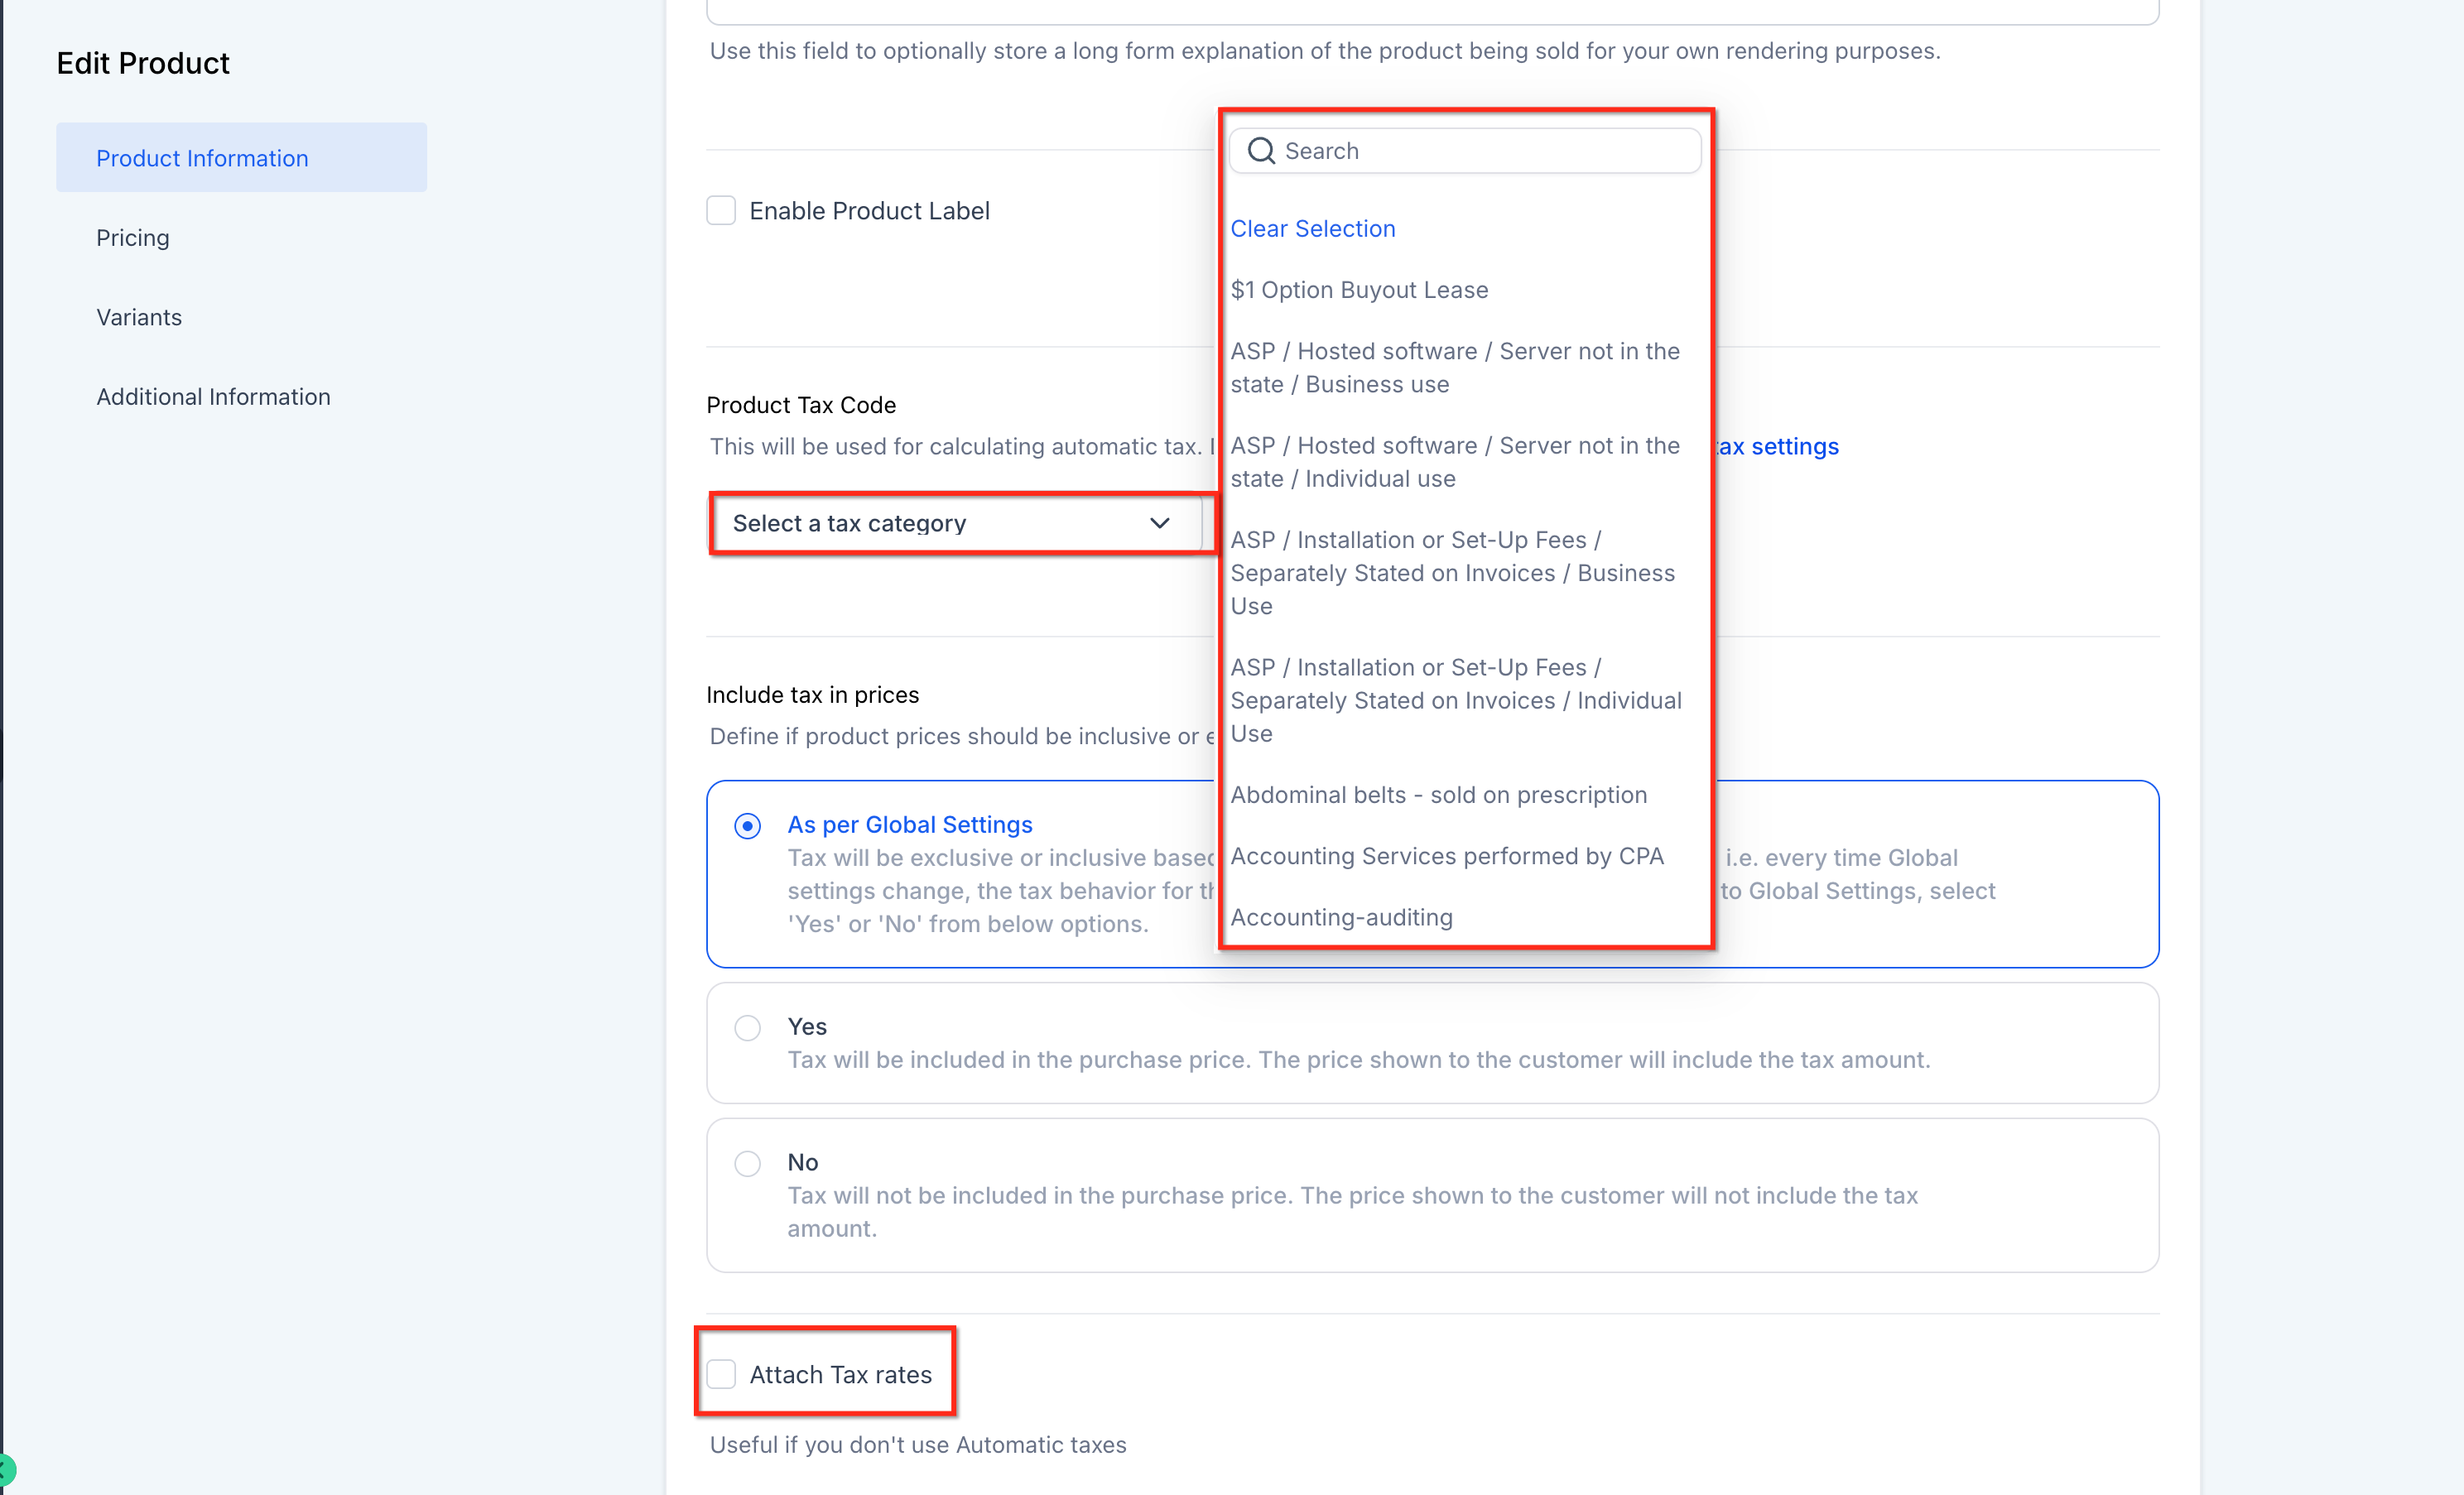
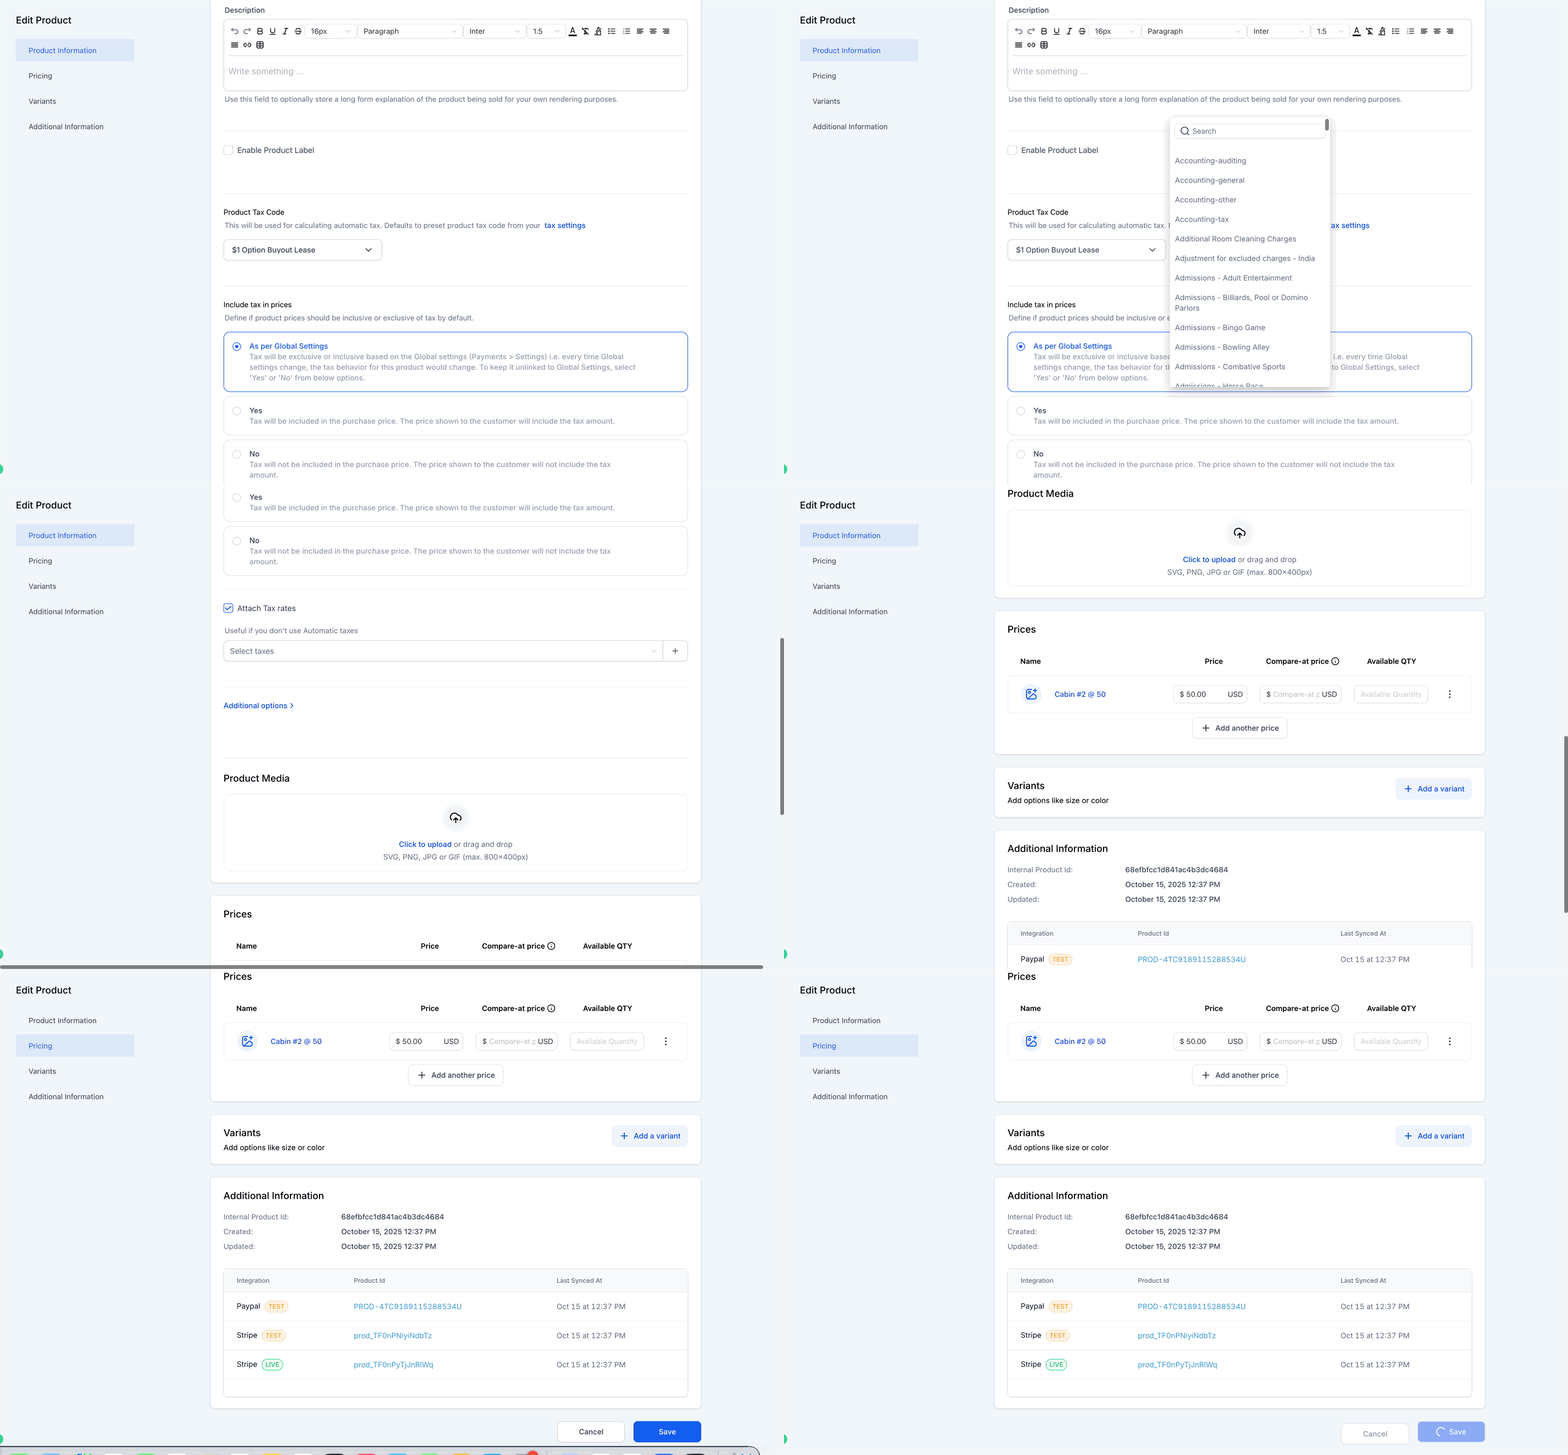
- When redirected, locate the linked product under Payments > Products, add or modify the manual tax rate, and click Save.
- Create a new booking or view a future booking to check that the tax appears as expected.
- Confirm that the tax is applied only to new bookings after the configuration is saved.
07What it looks like in HighLevel
08Settings that matter
- Taxes. Controls which manual tax rates are attached to a product that backs a rental listing.
- Configure Taxes for This Listing. Opens the linked product in Payments so you can add or edit tax rates for that specific listing.
09Things to know before you rely on it
- Only manual taxes are supported; automatic tax calculation is not available.
- Taxes are applied solely to the rental price, not to any associated security deposit.
- Changes to tax rates affect only future bookings; existing bookings remain unchanged.
- Each rental listing creates its own linked product, so tax rates are set per listing.
10How it connects to the rest of HighLevel
- Create and edit rental listings Edit rentals
- Configure pricing and discounts for rentals Pricing options
- View and manage rental appointment bookings Booking overview
Michael's take

In my experience, showing taxes item by item can make the checkout feel clearer for renters.
If your rentals are simple and you don’t need a tax breakdown, you might skip setting up manual taxes.