
01Who this is for
- Marketing managers can present groups with a clean, modern view that reflects brand visuals.
- Appointment coordinators benefit from staff selection and easy navigation for clients.
- Small business owners gain a polished calendar presentation without extra design work.
02Neo group view template, explained
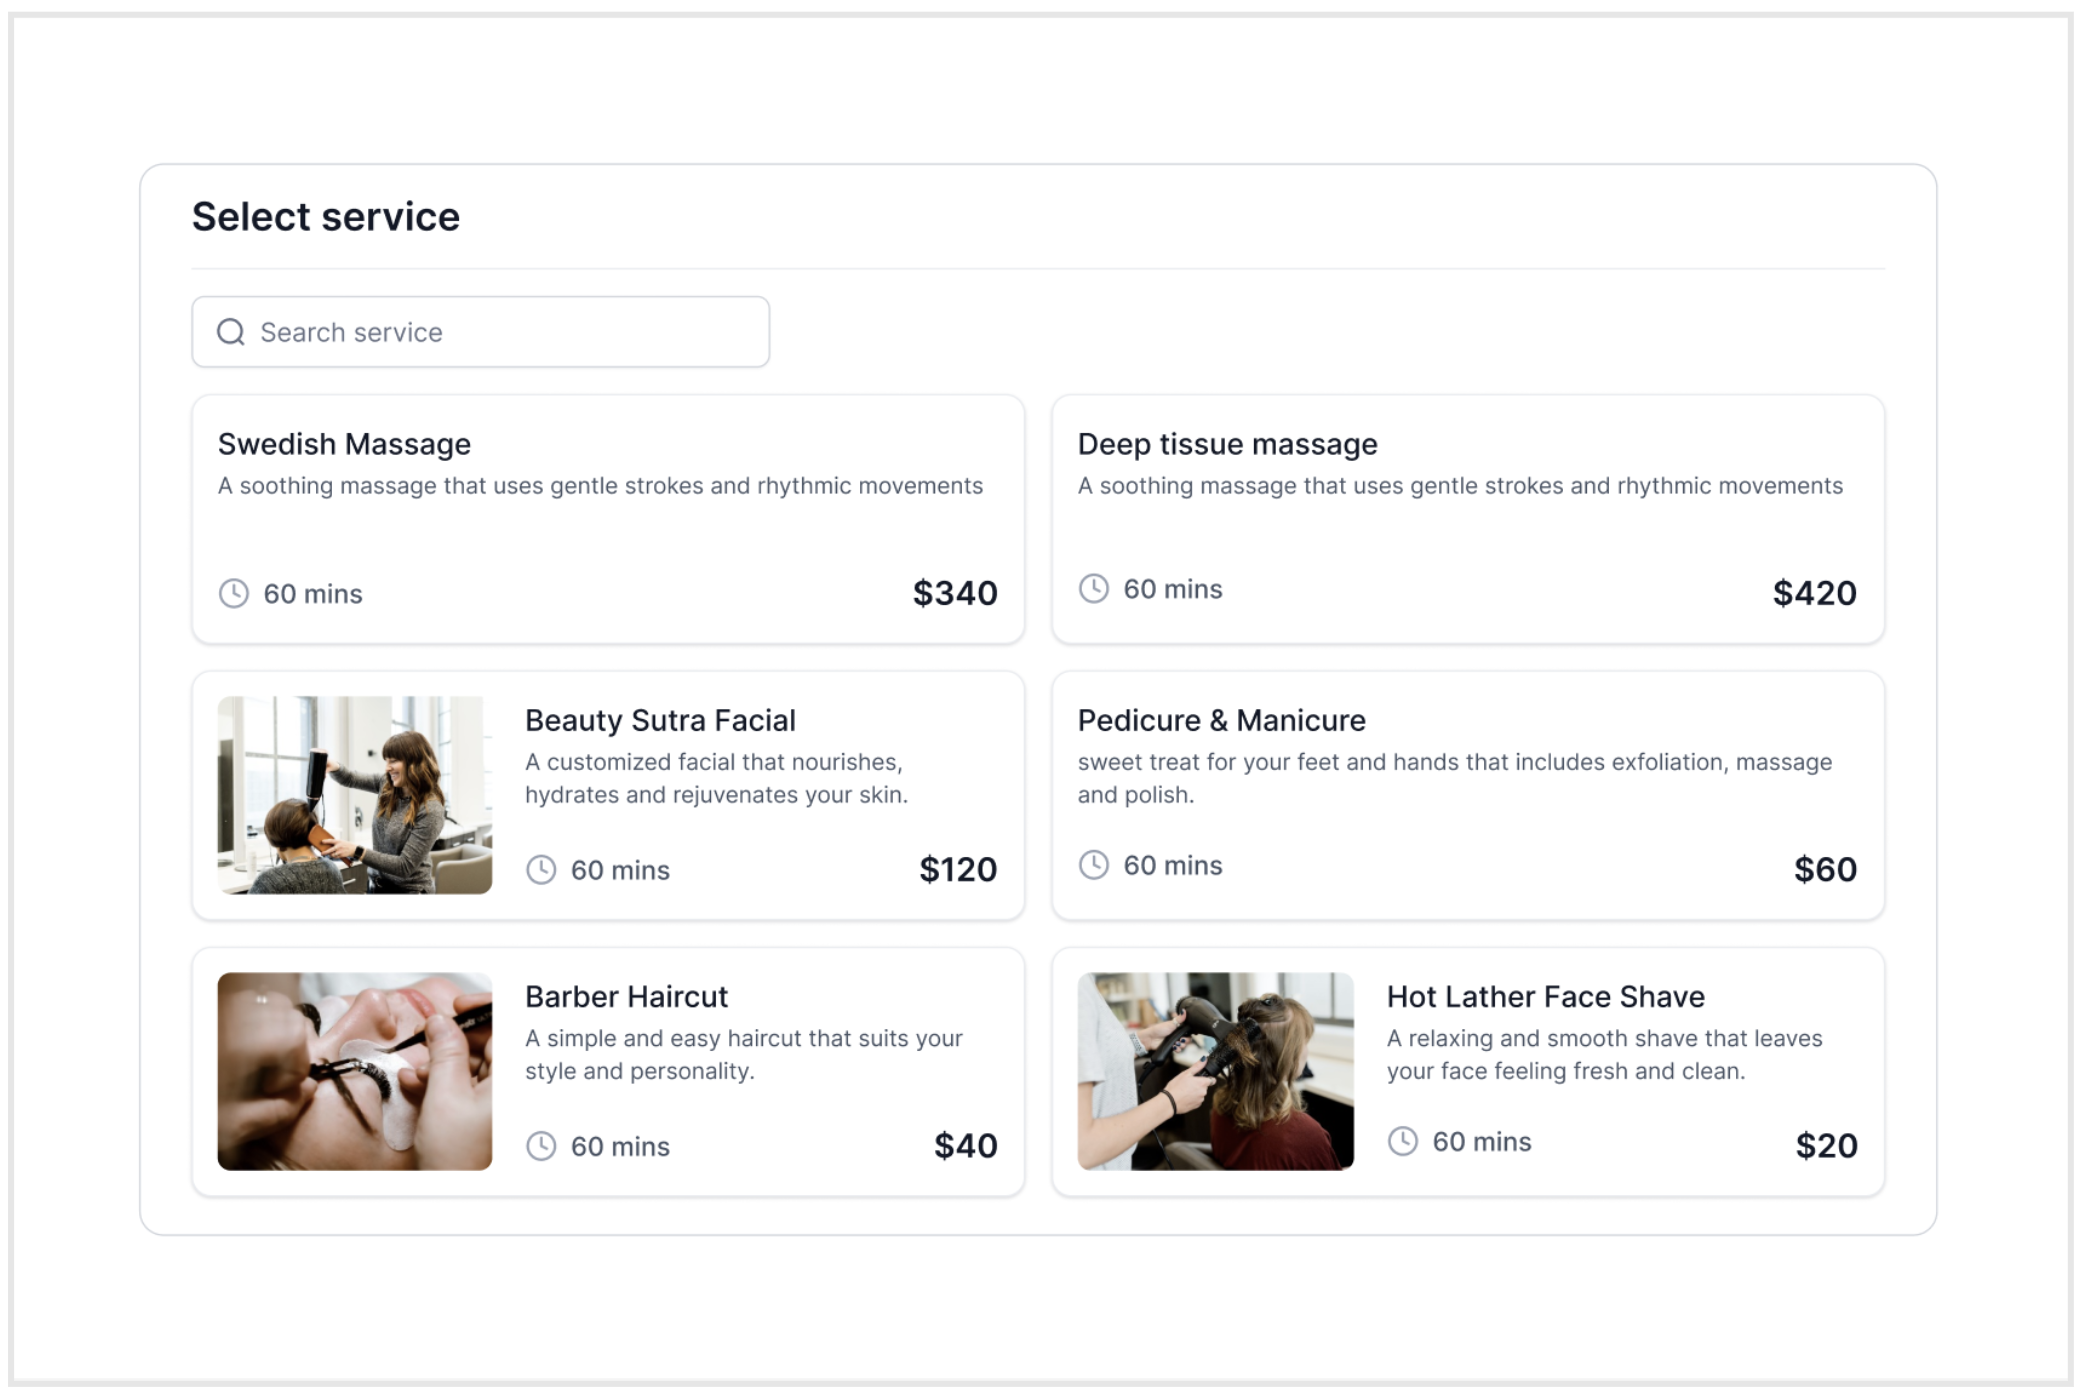
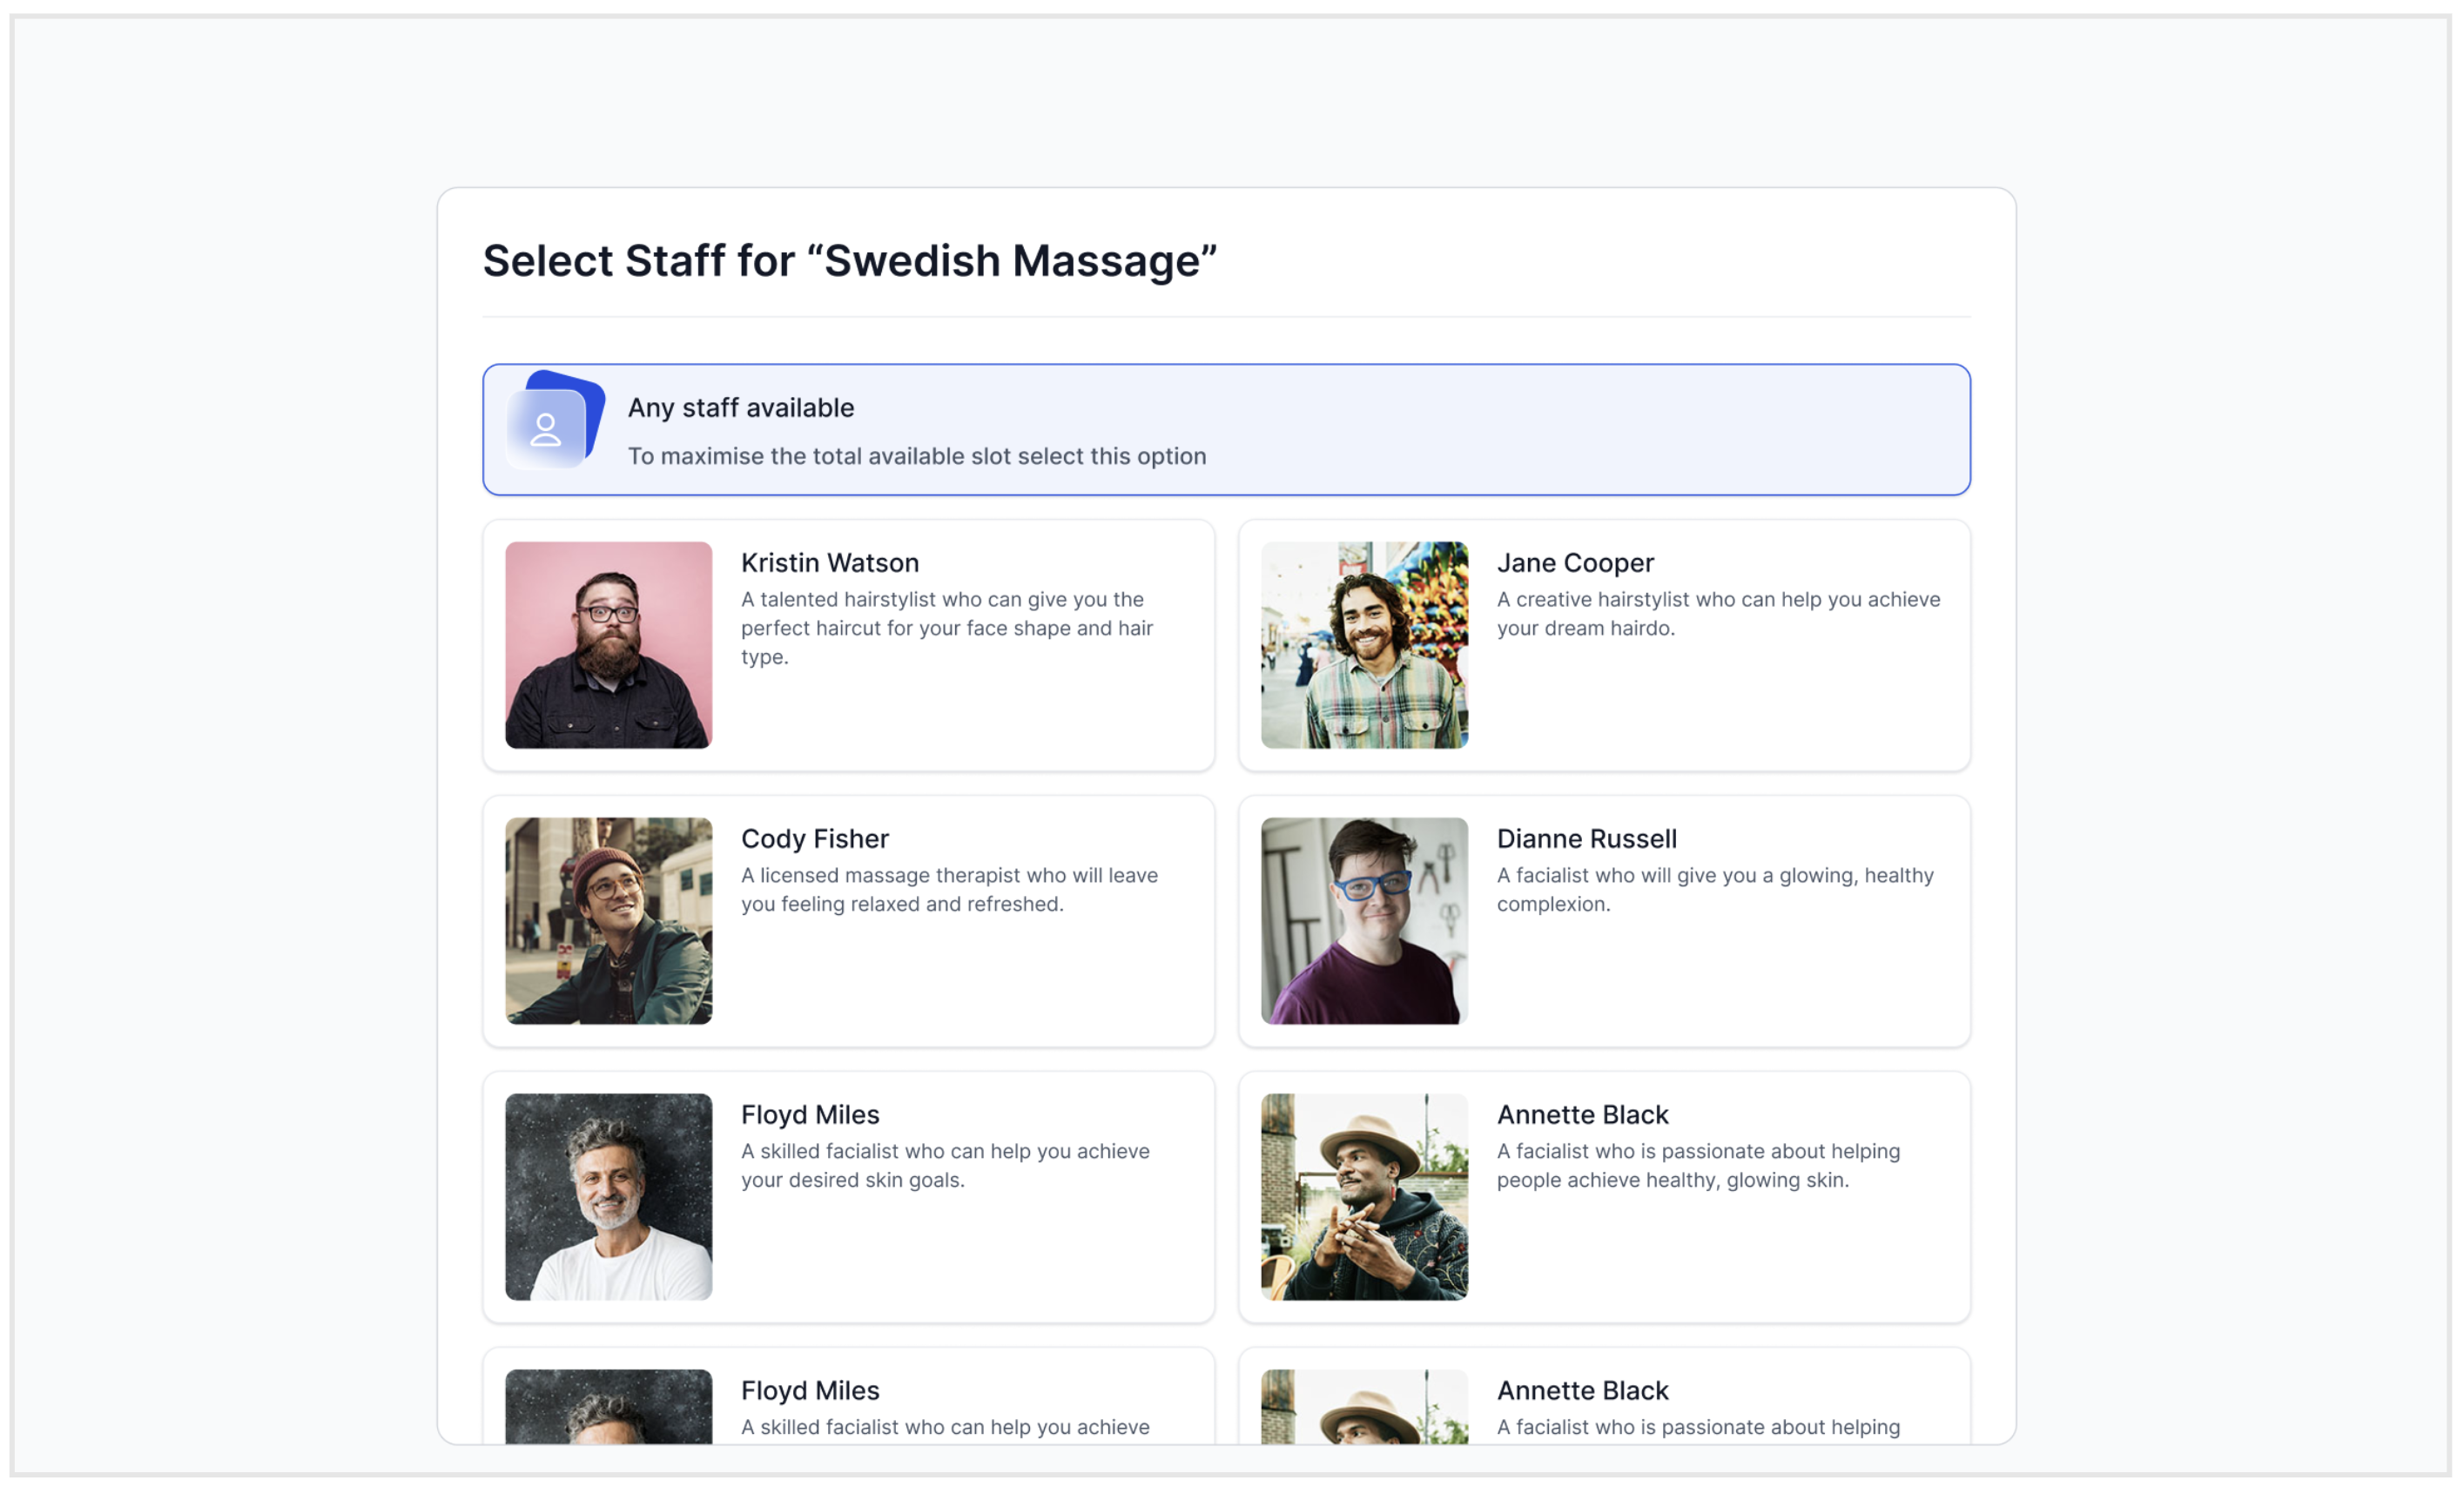
The Neo Group View Template adds a contemporary design option for group pages in HighLevel. It lets you switch between the classic layout and a sleek Neo layout, shows calendar specific cover images, and includes staff selection when enabled on a calendar. The template is chosen during group creation or later in the group’s settings.
All group and calendar settings are found under Calendar Settings in the top navigation. Within Calendar Settings, the Groups tab holds the group creation interface, and the Customization tab of a calendar holds the option to upload a cover image. Selecting Neo provides a refined visual flow and supports the additional features listed.
03How businesses use neo group view template
- Fitness studio. Create a group for each class type using the Neo template, then upload a relevant cover image for each class calendar. The modern view helps members navigate schedules quickly, and staff selection lets clients pick specific trainers.
- Dental practice. Set up a group for different dental services with the Neo layout, add a cover image to each service calendar, and enable staff selection so patients can choose a preferred dentist when booking.
- Consulting agency. Configure a group for consulting packages, choose the Neo template for a polished look, and attach cover images that reflect each consulting area. Staff selection allows clients to select a consultant during appointment booking.
04How to set up and use neo group view template in HighLevel
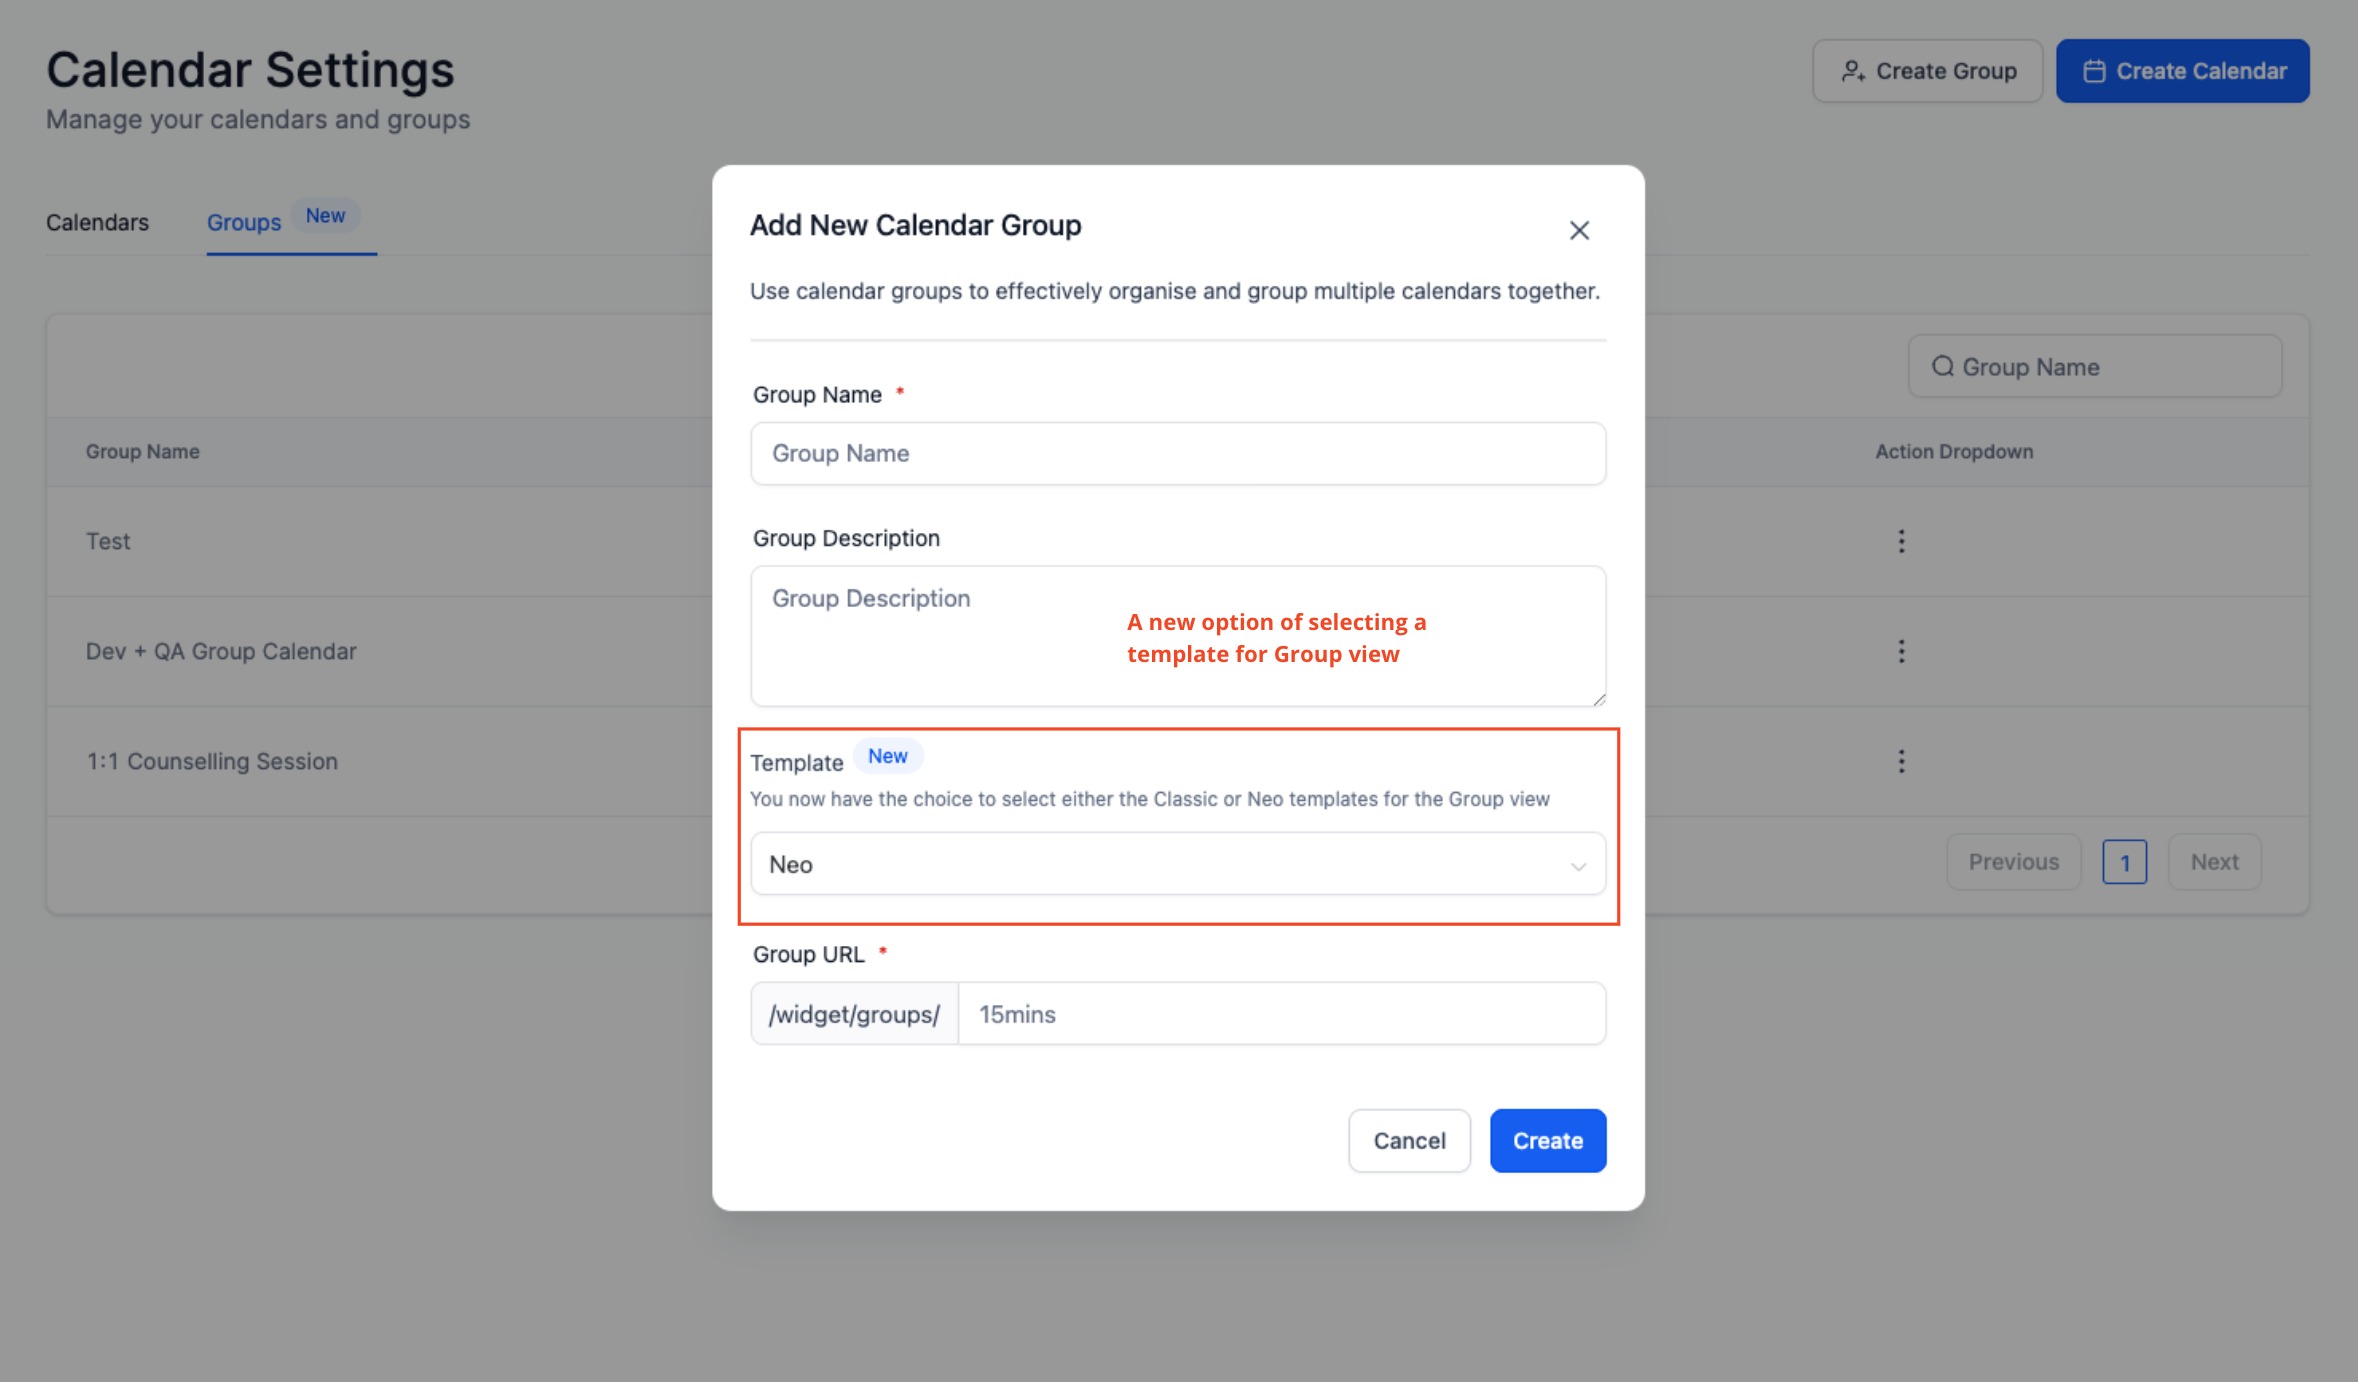
Create a group using the Neo template
- Open Calendar Settings from the top navigation menu.
- Select the Groups tab within Calendar Settings.
- Click the Create Group button to start a new group.
- In the Template field, keep the default Neo selection or change to Classic if desired.
- Enter the Group Name, Group Description, and optionally a Group URL.
- Press the Create button to save the new group.
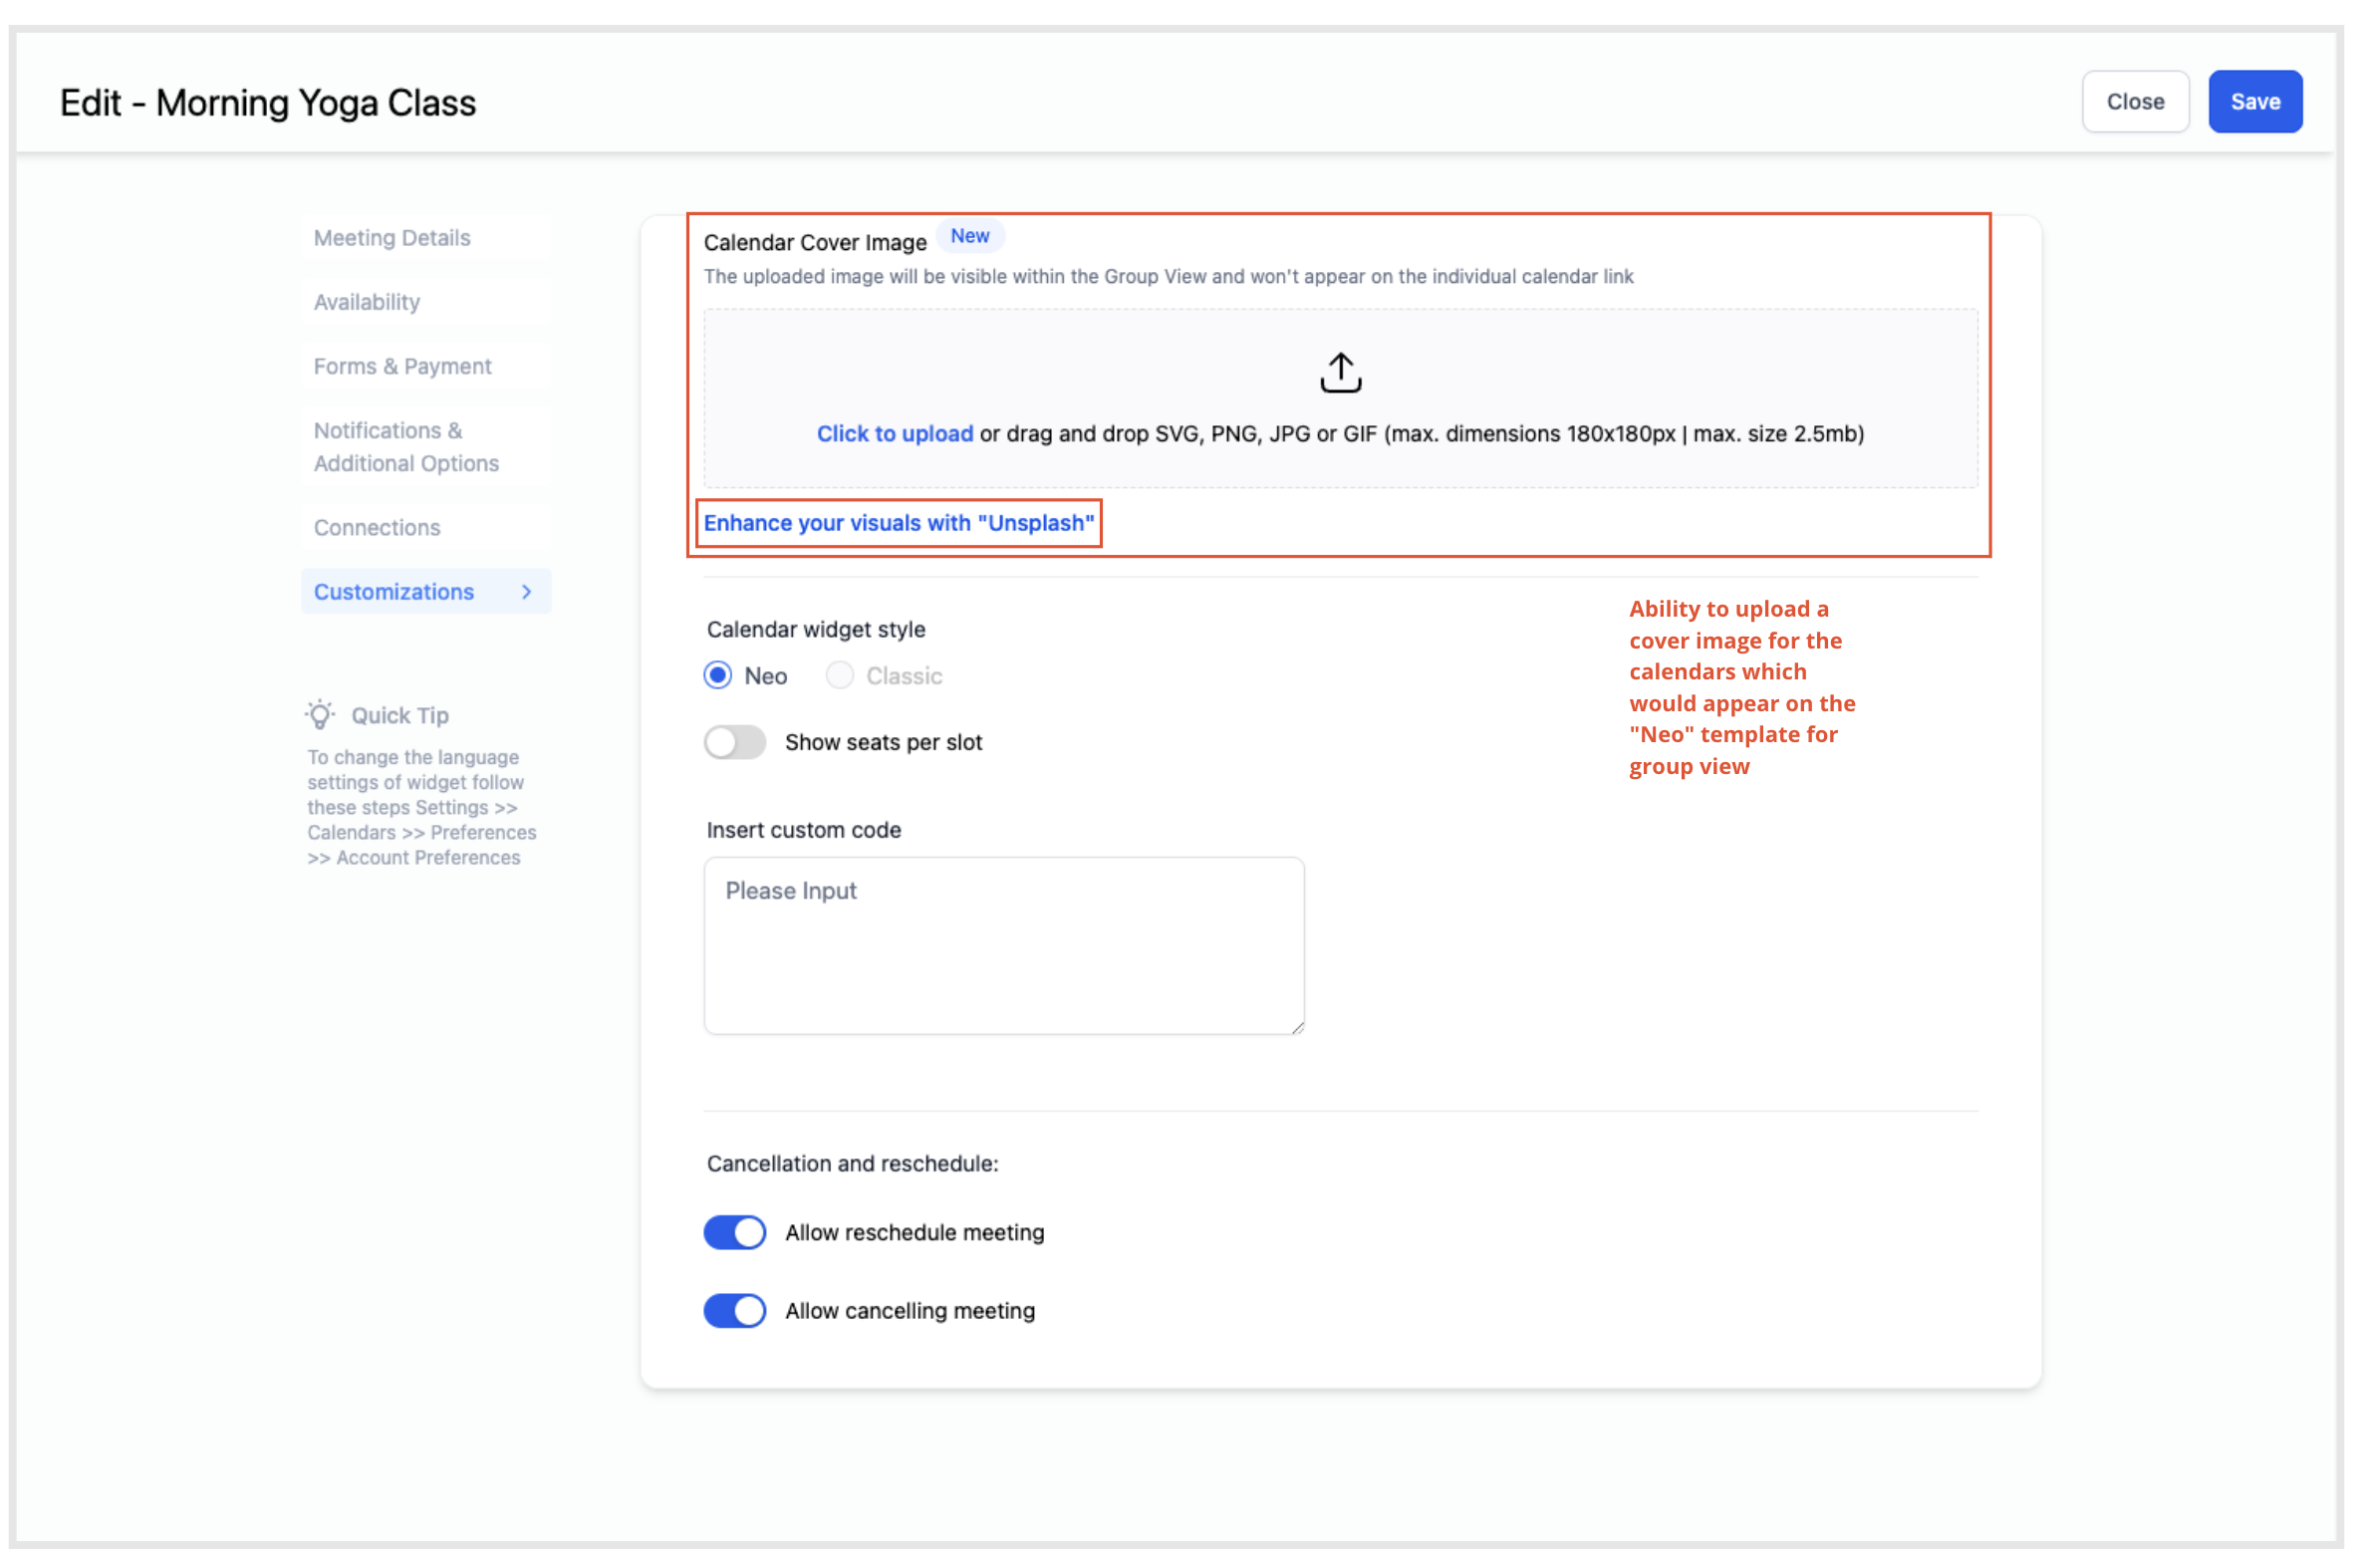
Upload a cover image to a calendar
- Navigate to Calendar Settings in the menu.
- Choose Edit Calendar for an existing calendar or go to Advanced Settings while creating a new one.
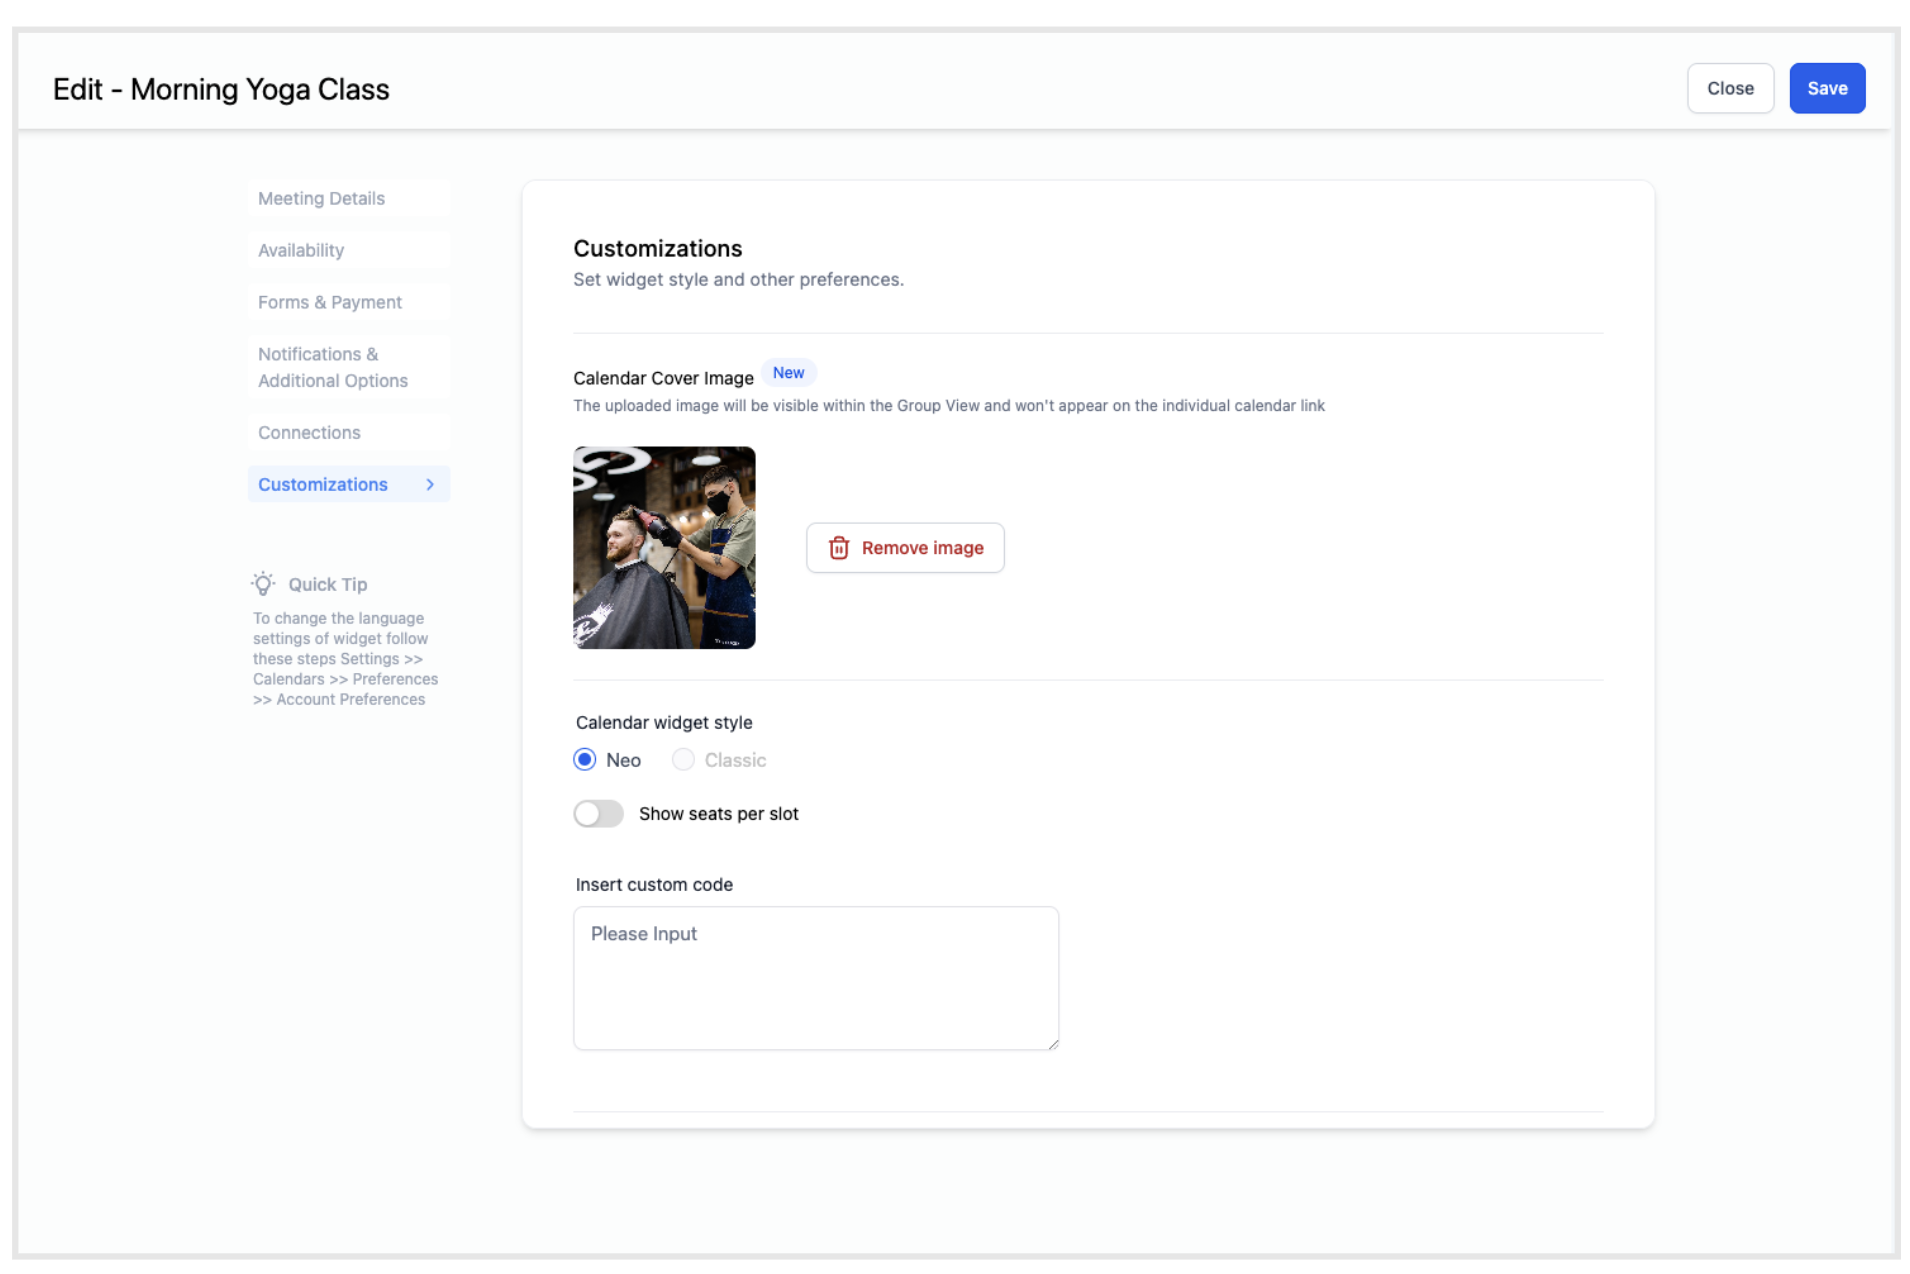
- Open the Customization tab to reach image options.
- Click the upload option for a calendar cover image.
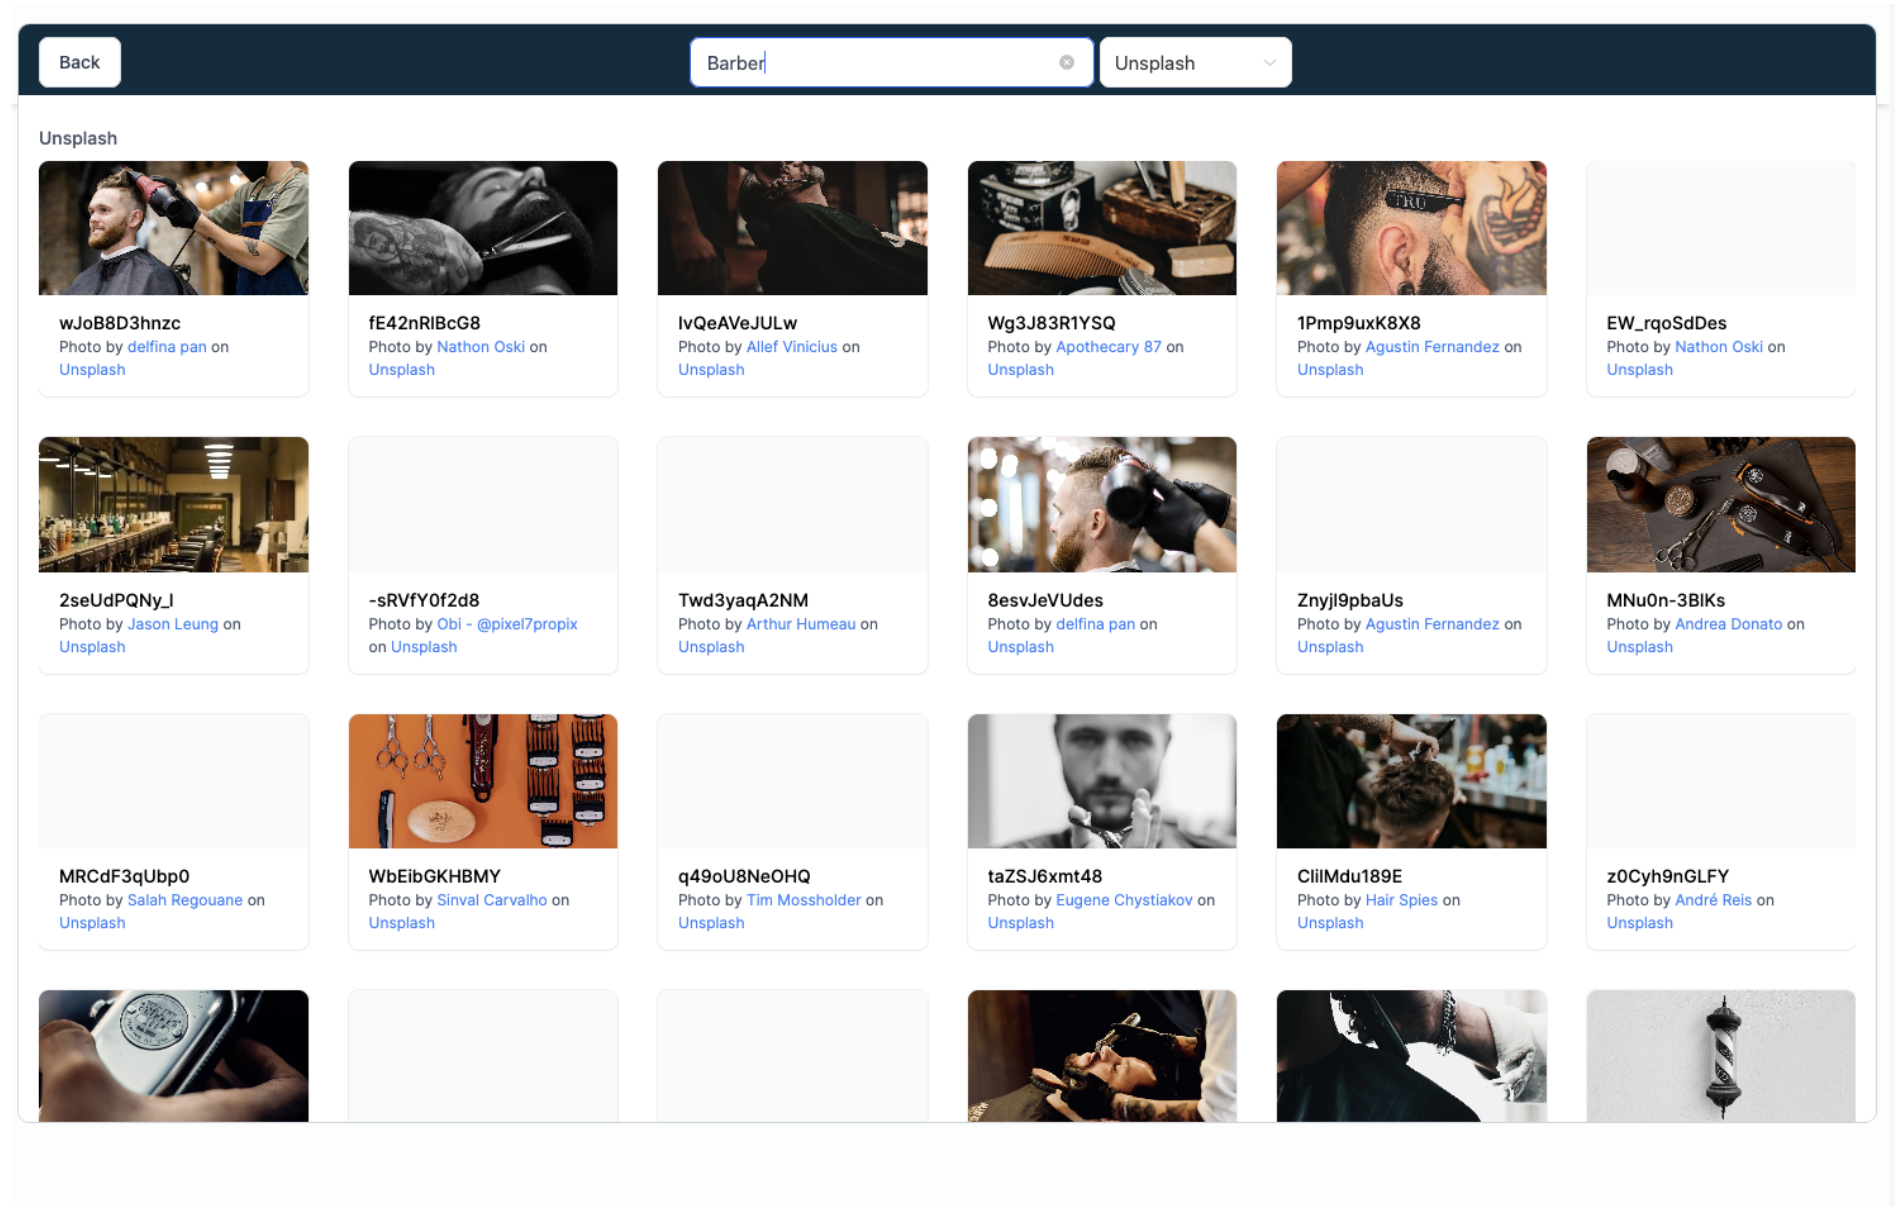
- Select either Upload from Your Local Device or search Unsplash for an image.
- After choosing the image, click Upload or Select to apply it as the calendar cover.
05What it looks like in HighLevel
06Settings that matter
- Template. Determines whether a group uses the modern Neo layout or the older Classic layout.
- Customization. Provides the option to upload a cover image for a calendar, enhancing its visual presentation.
07Things to know before you rely on it
- The article does not specify any usage limits or restrictions for the Neo template or cover images.
08How it connects to the rest of HighLevel
- Learn how to set up a group calendar in HighLevel for additional context. Group calendar setup guide
- Find out how to assign unassigned calendars to groups, which works with the Neo template. Assign calendars to groups
- Get details on embedding a HighLevel calendar on a webpage after using the Neo layout. Embed calendar guide
Michael's take

Most people think the Neo template only works for brand new groups and skip adding a cover image because it seems optional. In reality the cover image is what makes the Neo style truly stand out, so I would always upload a relevant picture or pull one from Unsplash before publishing the group.
If I were setting up a group, I would first enable staff selection in the calendar if my service requires it, then create the group with Neo as the default layout. The final check would be to verify the cover image looks good on both desktop and mobile views.