
01Who this is for
- Medical clinic staff can label patient flow stages such as Checked in or Waiting for doctor, keeping the schedule accurate.
- Retail pickup locations can use Ready for pickup to signal when orders are prepared, aligning staff tasks.
- Service center managers can track vehicle status with custom labels while the underlying scheduling logic stays consistent.
02Custom appointment statuses, explained
Custom appointment statuses replace the default labels with words that reflect how a business runs its appointments. Each label is attached to one of six predefined states, Pending, Active, Completed, No show, Cancelled, or Invalid, and the state controls slot holding, calendar syncing and notifications.
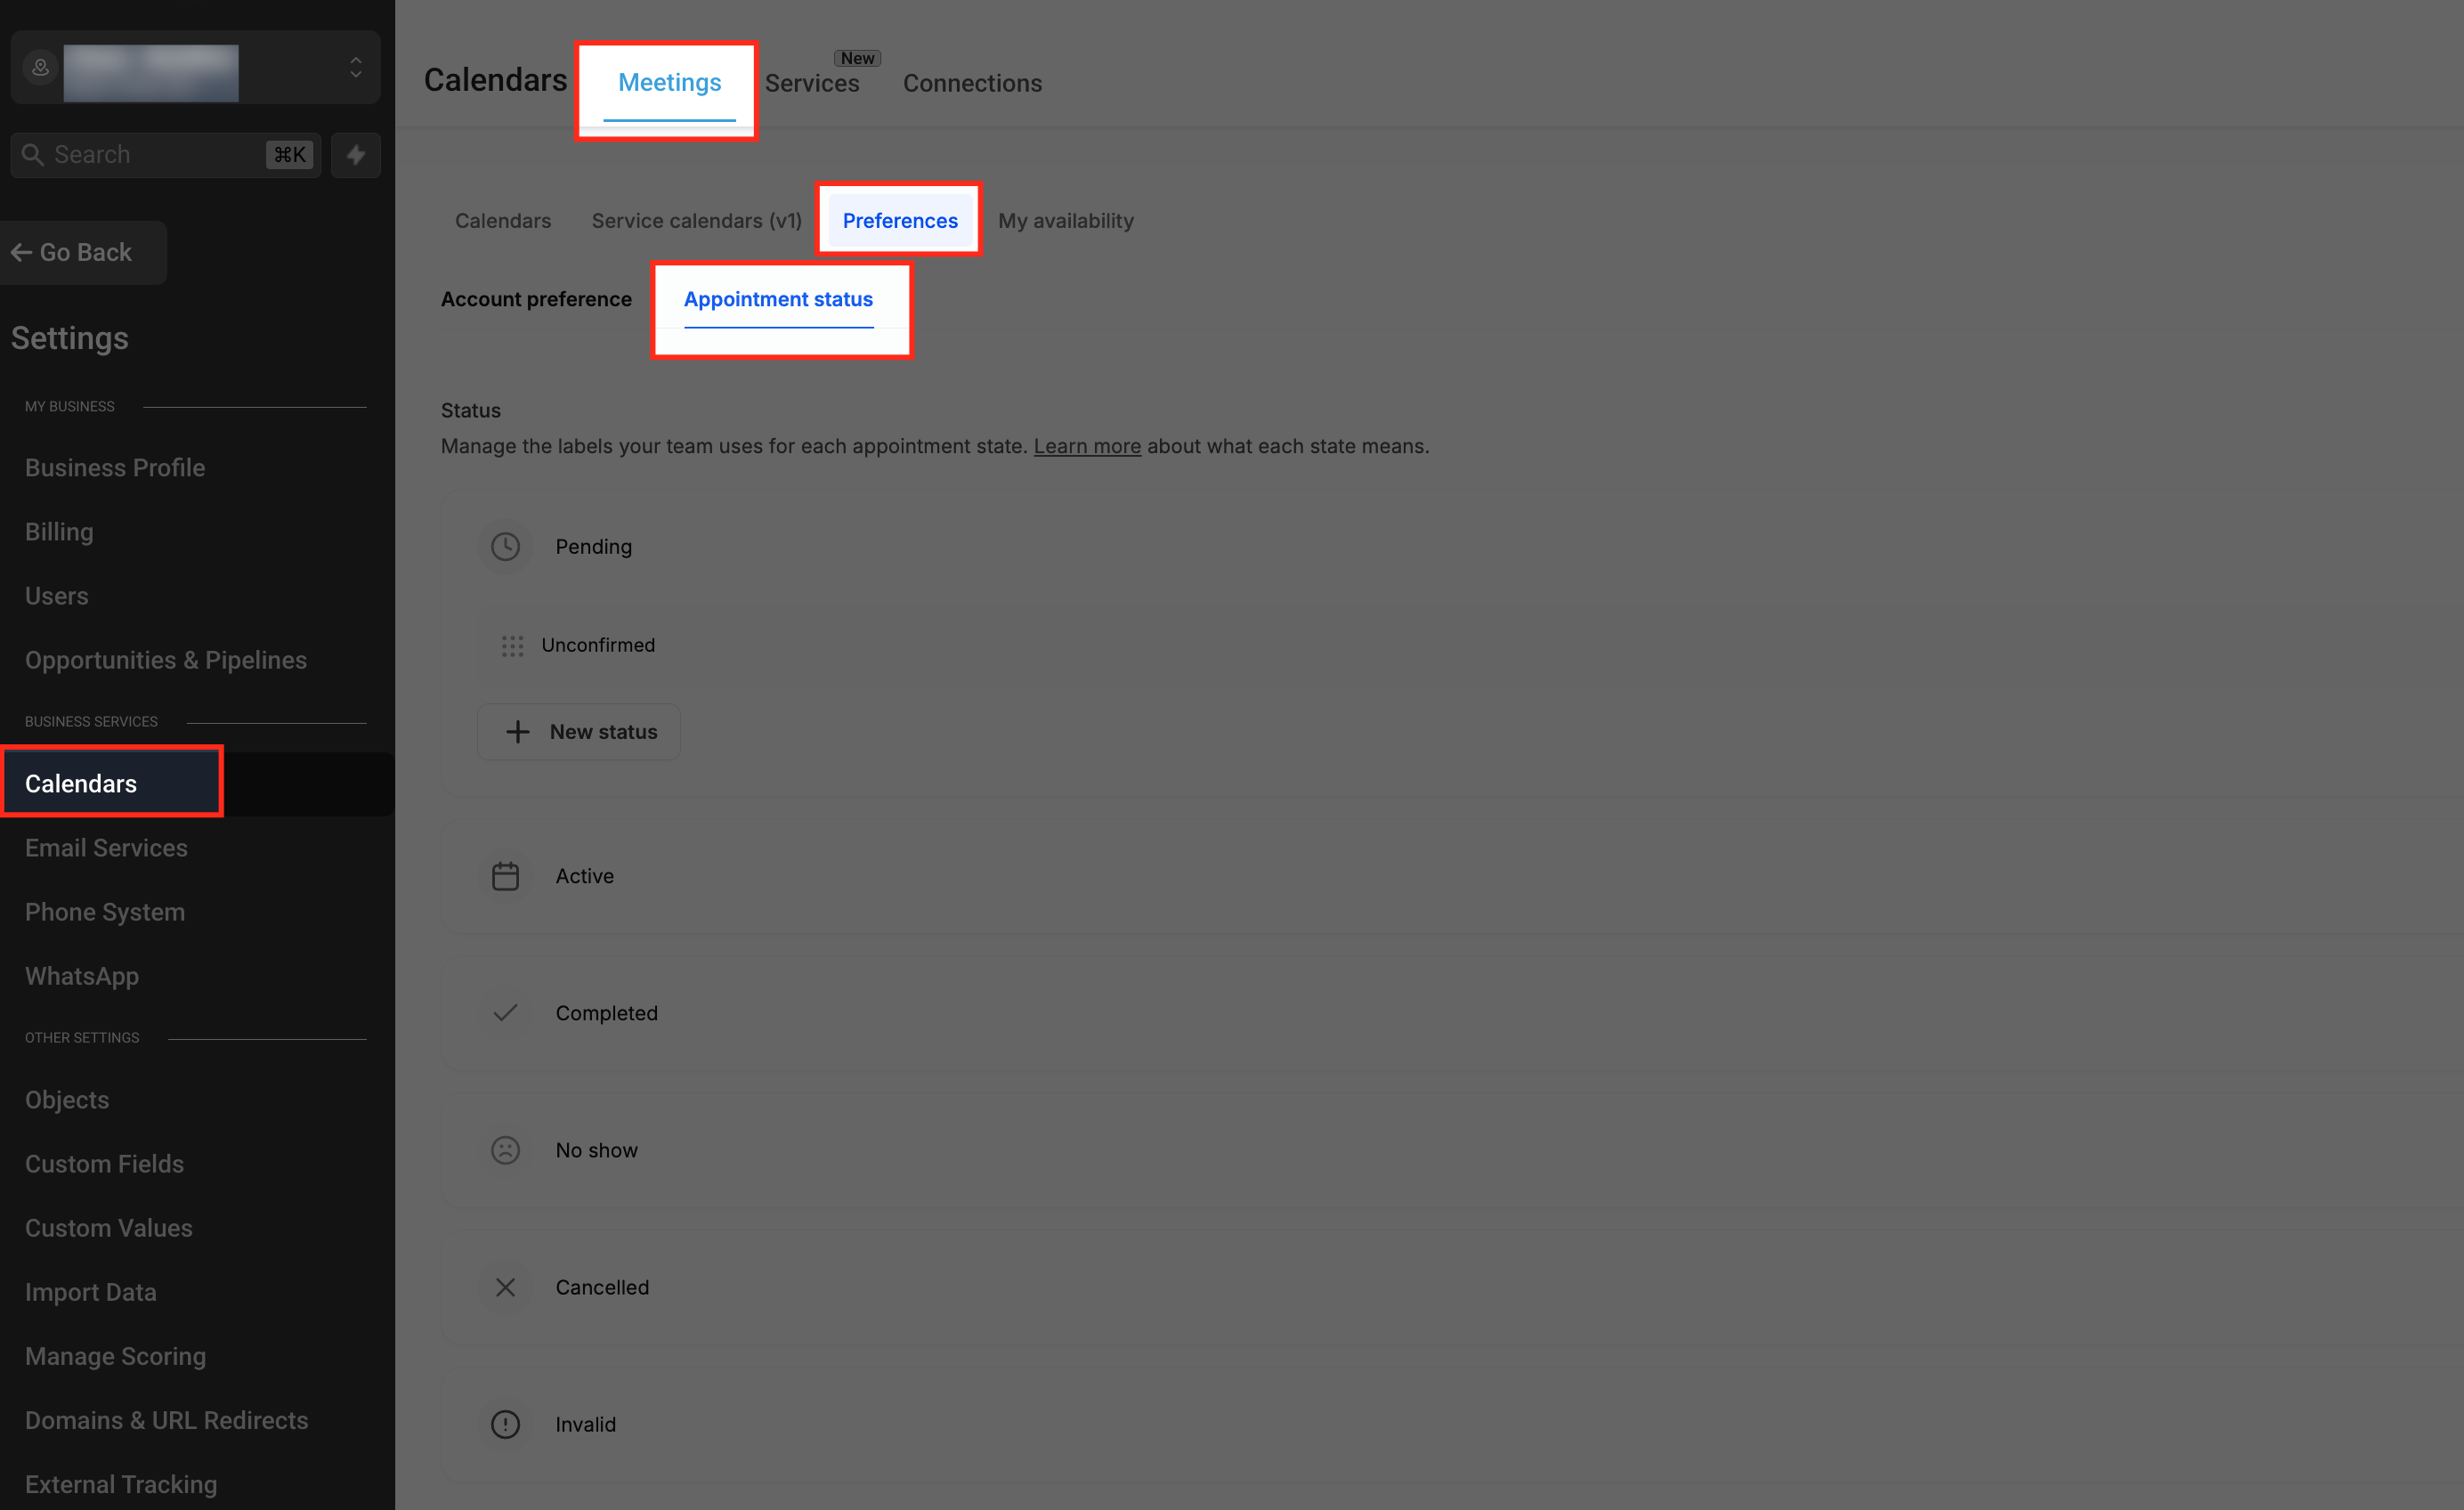
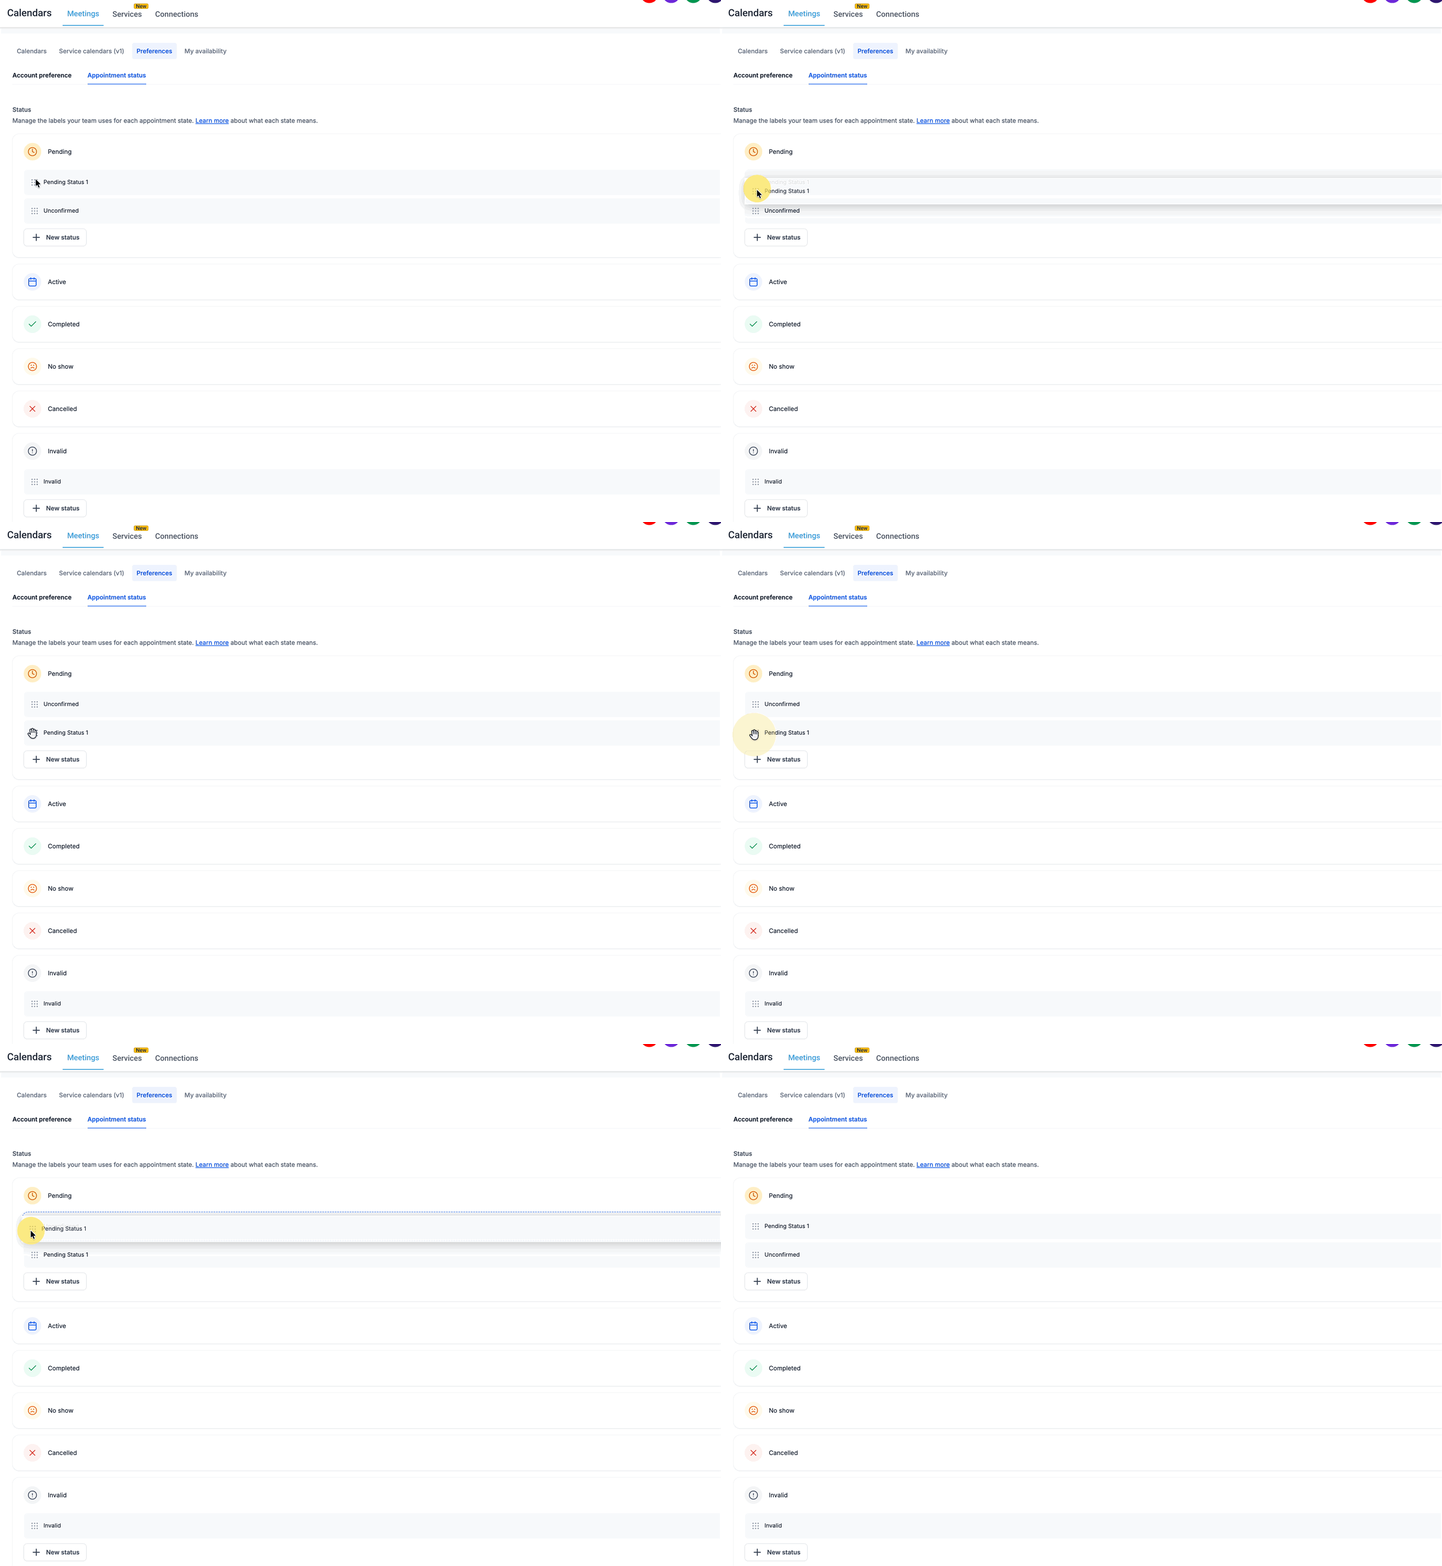
The feature lives under Settings > Calendars > Preferences > Appointment Status. From there you can view statuses grouped by state, add new ones, rename, reorder, archive or restore them. All changes are reflected in booking windows, list views and workflow triggers that reference appointment statuses.
03How businesses use custom appointment statuses
- Medical clinic. Create a status called Checked in inside the Active state. When a patient arrives, staff select that status in the appointment details, which updates the label without altering the slot or calendar link. Workflows can trigger a reminder when the status changes.
- Retail store with order pickup. Add a status named Ready for pickup under the Completed state. After staff finish packaging, they set the appointment to this status, freeing the time slot while keeping the record. An automation can send a text to the customer when the status is applied.
- Auto repair shop. Rename the default status Waiting for service to In Service under the Active state. All existing appointments and any automation that referenced the old name automatically show the new label, ensuring consistency without extra updates.
04The numbers and rules that matter
- Names can be up to 40 characters.
- A state can hold up to 25 statuses.
05Before you start
- Enable Custom Appointment Statuses from Labs for the specific location before creating or editing statuses.
06How to set up and use custom appointment statuses in HighLevel
Add a new custom appointment status
- Open the state you want to modify, such as Active, in the Appointment Status settings.
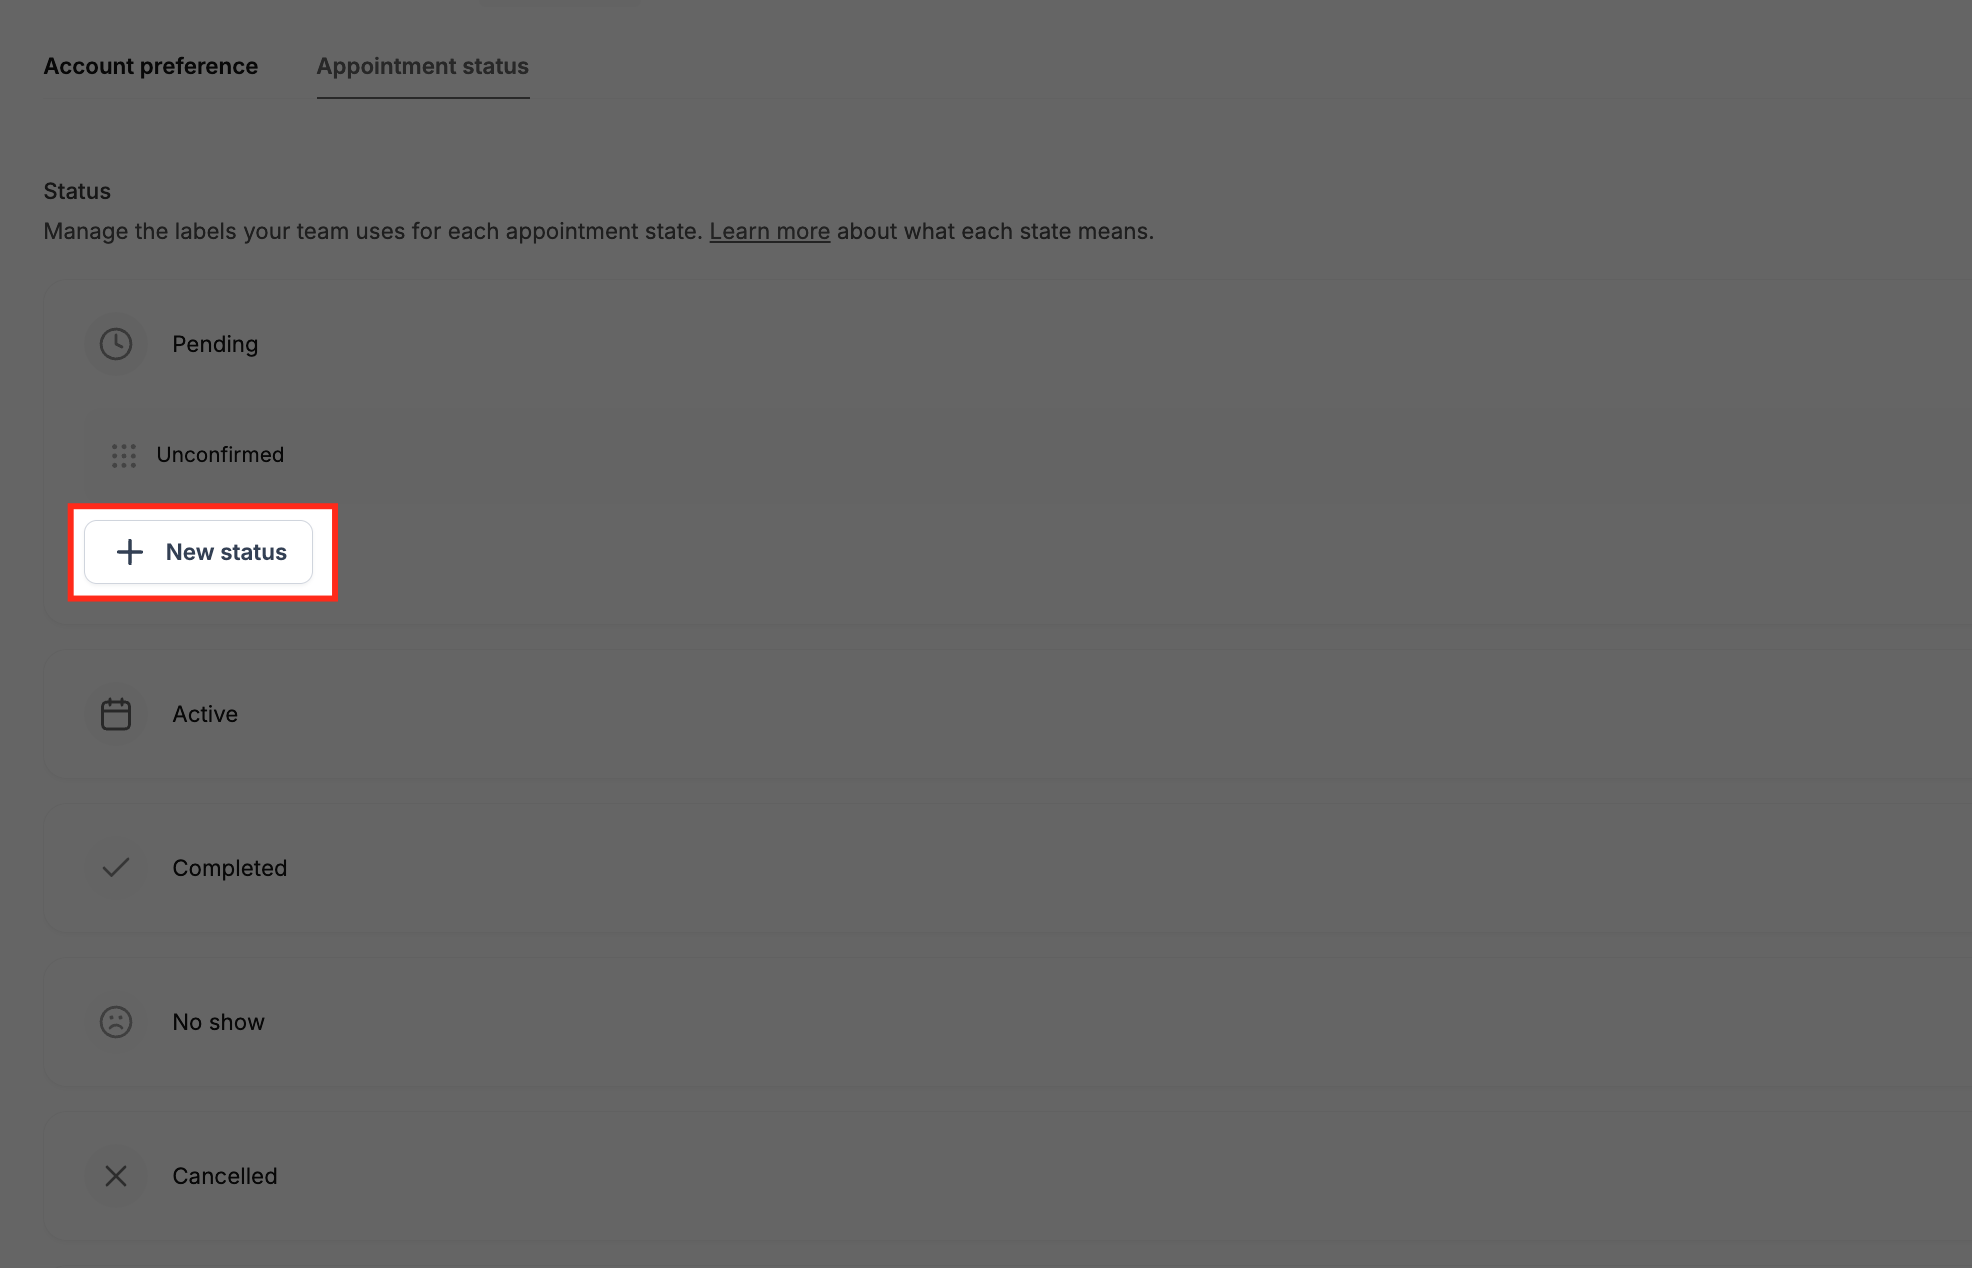
- Select New status, type the desired label, and press Enter to confirm.
- The new label appears at the bottom of that state’s list and is ready for use.
Rename an existing appointment status
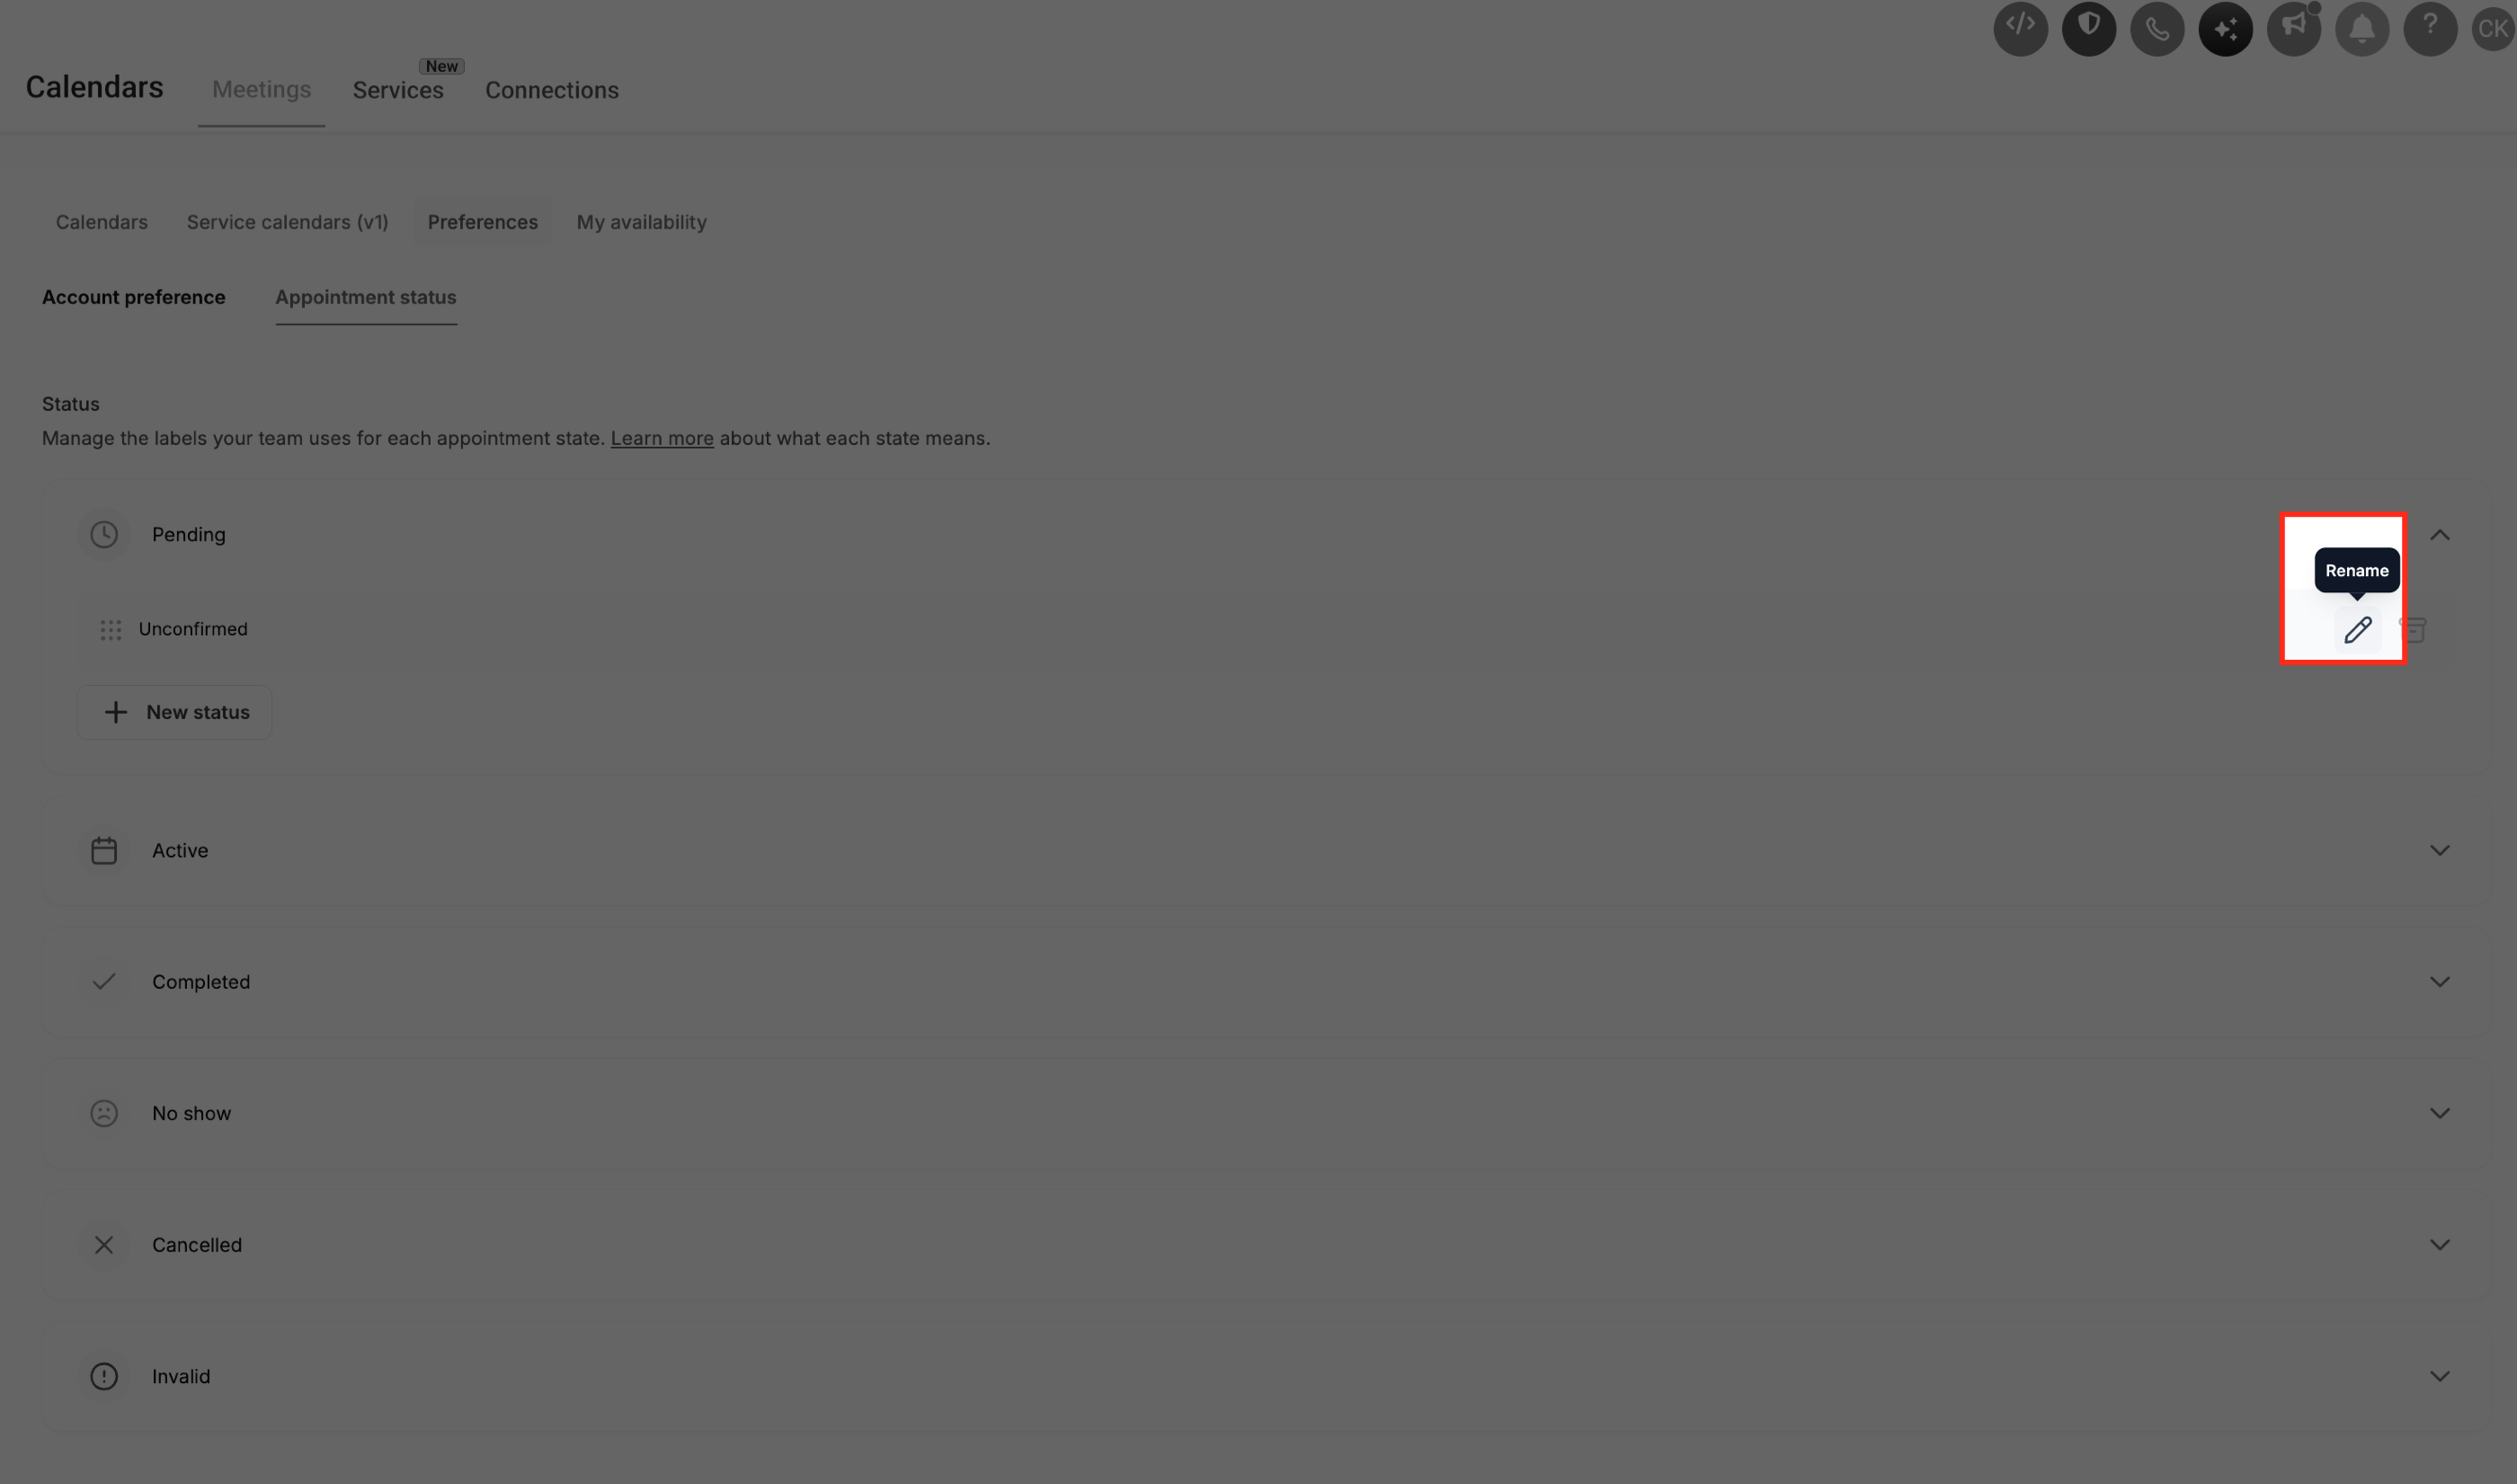
- Hover over the status you wish to change and click the pencil icon.
- Edit the text to the new name and confirm the edit.
- All appointments and automations now show the updated label.
07What it looks like in HighLevel
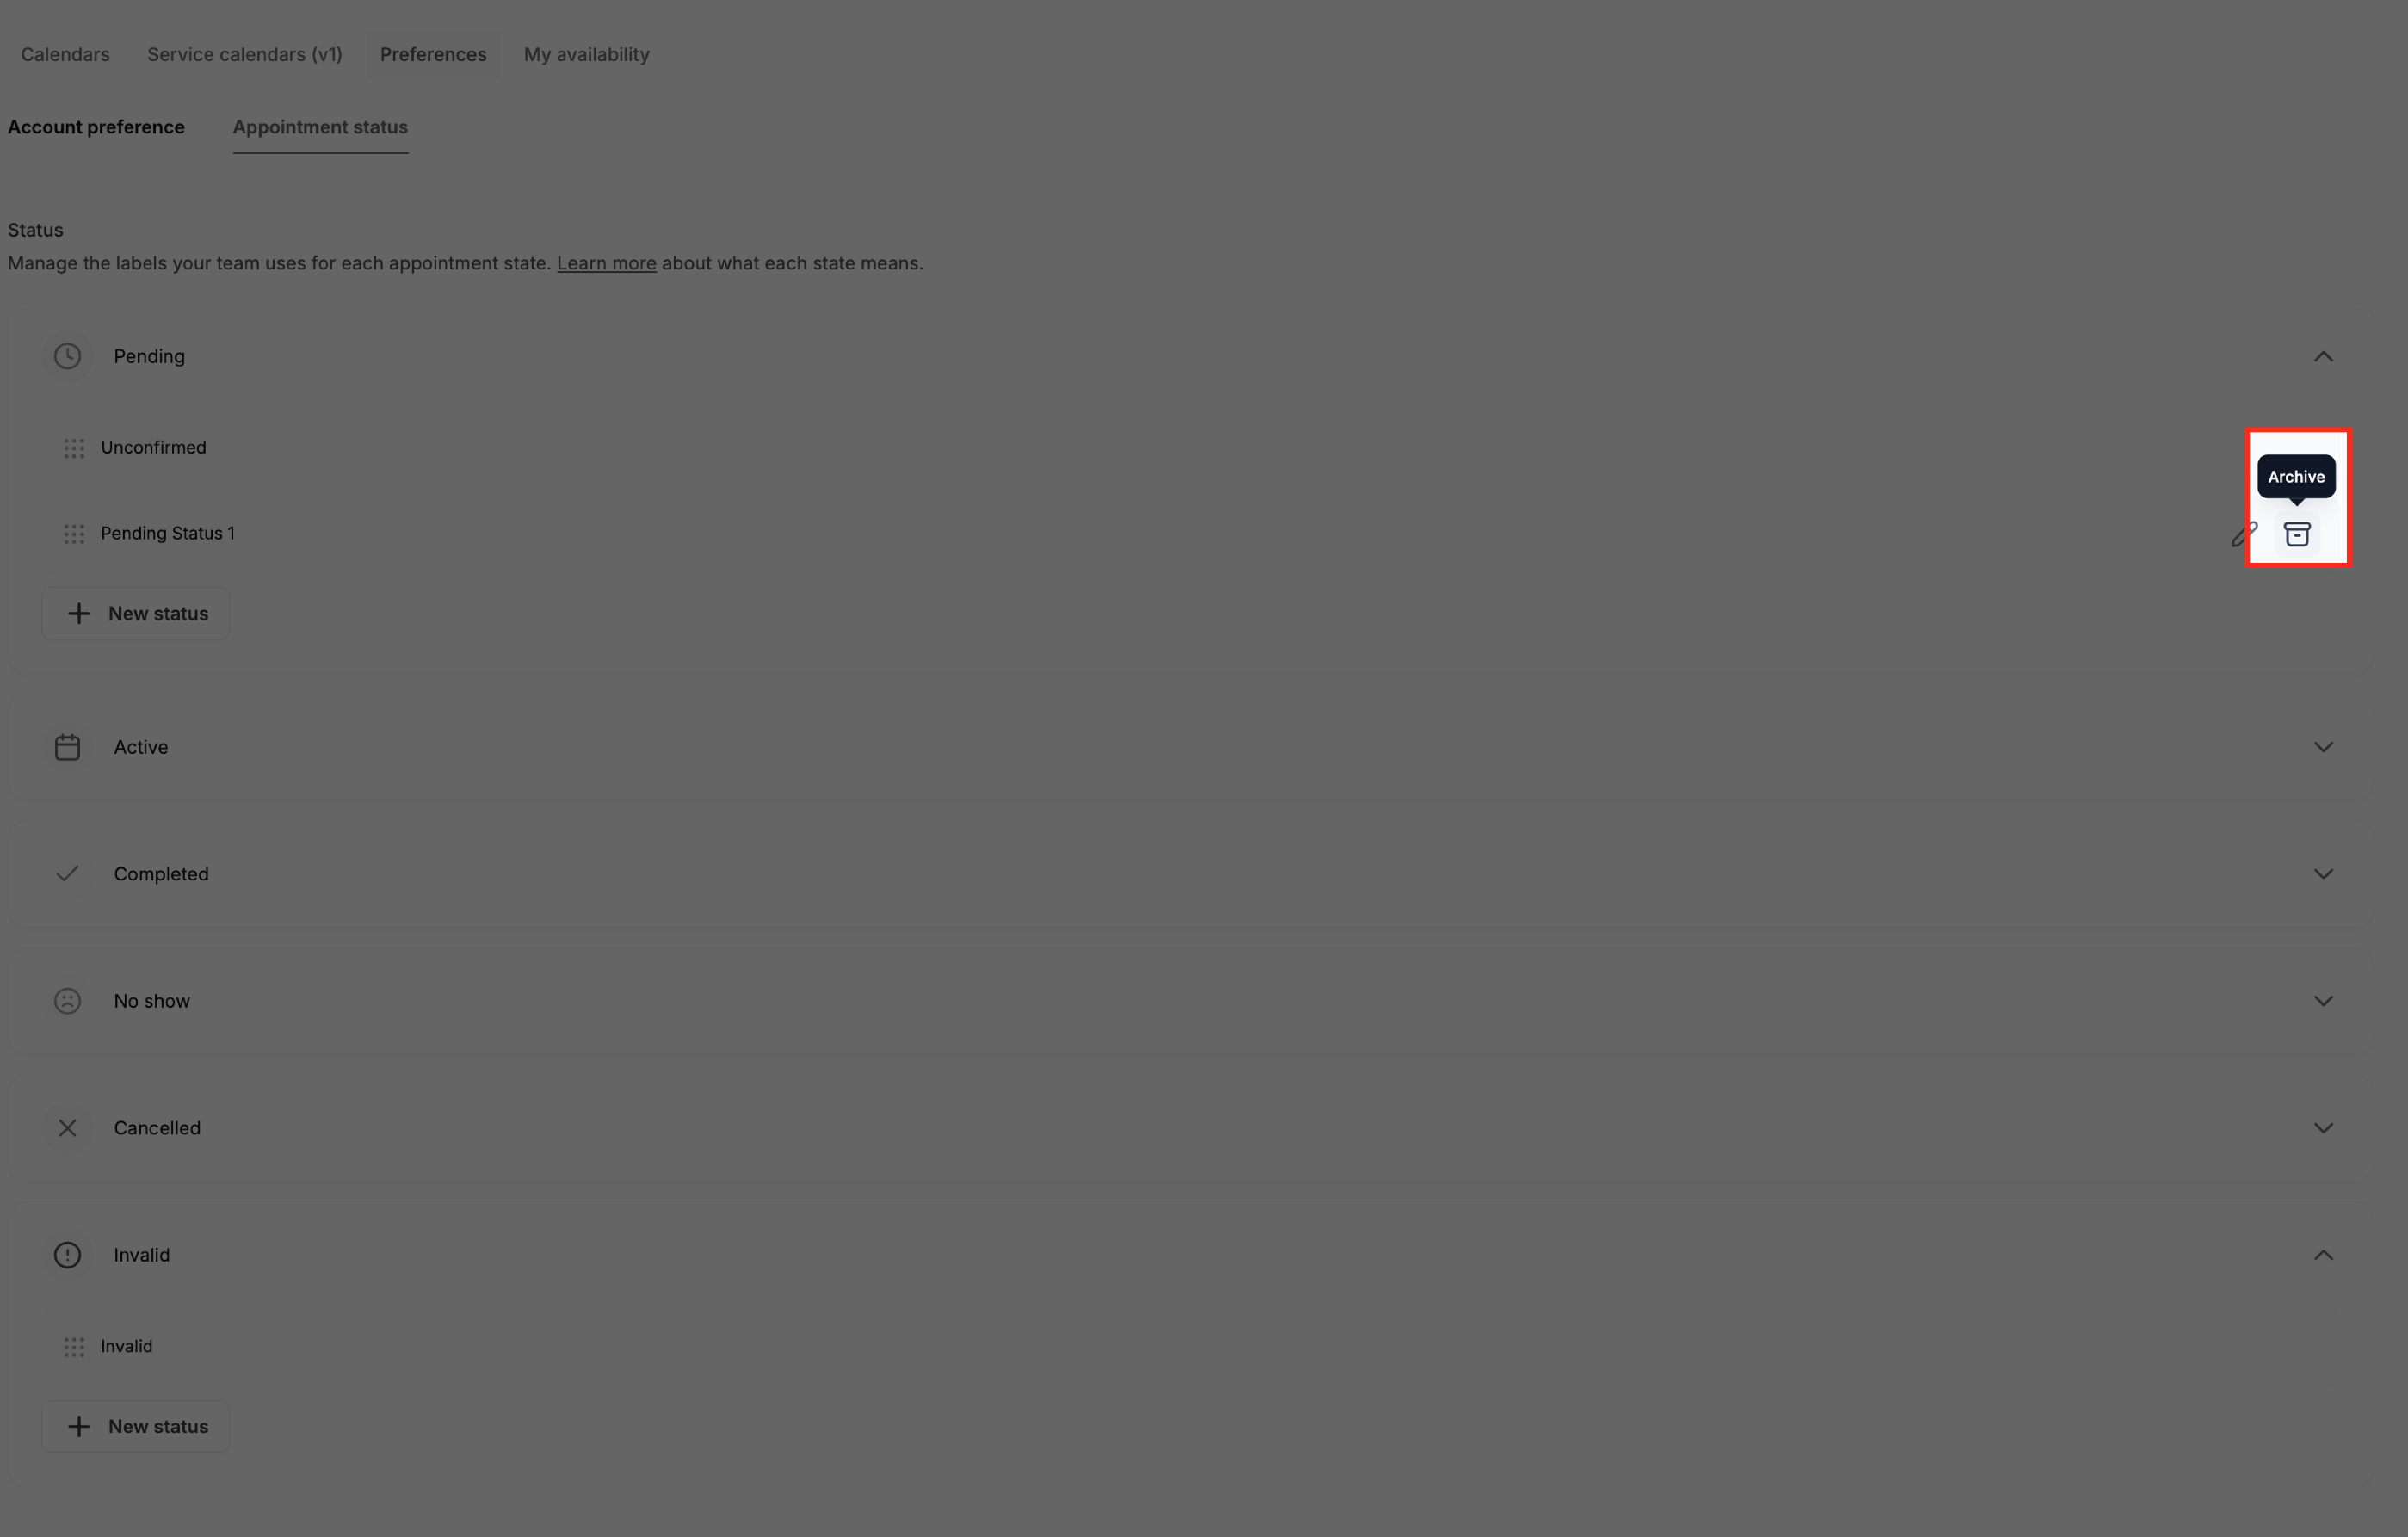
08Settings that matter
- Custom Appointment Statuses. Turns on the ability to define your own status labels for appointments.
- Auto confirm. Determines whether new bookings begin in the Active state (on) or Pending state (off).
09Things to know before you rely on it
- Status names may be up to 40 characters long and must be unique, ignoring case and extra spaces.
- A single state can contain a maximum of 25 statuses.
- The six predefined states cannot be added, renamed, or removed.
- Each state must always retain at least one active status; the last active status cannot be archived.
- Statuses cannot be moved from one state to another.
10How it connects to the rest of HighLevel
- Set up a group calendar to share custom statuses across team members Group calendar setup
- Start a free trial to explore custom appointment statuses 30 day trial
Michael's take

Businesses that need to see exactly where a client is in the check in flow often end up with confusing notes or missed steps. Custom appointment statuses solve that by letting you label each stage with the words your team already uses, while the underlying state still handles slot holding and notifications.
The first setting I would get right is turning the feature on in Labs for the location. Without that toggle the rest of the labeling and automation options never appear, so it’s the foundation for any further customization.