
01Who this is for
- Appointment based service providers, because they can qualify leads before confirming a slot.
- Sales teams that need to capture consent or specific details before a discovery call.
- Marketing agencies managing multiple calendars, to keep data collection consistent across services.
02Custom forms, explained
The feature lets you select a previously built form and associate it with a calendar. When a prospect chooses a time, the form appears; after submitting, the data is saved to the contact record. If the form logic disqualifies the lead, no appointment or payment is created. The confirmation page can show a default message, redirect, or follow the custom form’s own redirect or message rules.
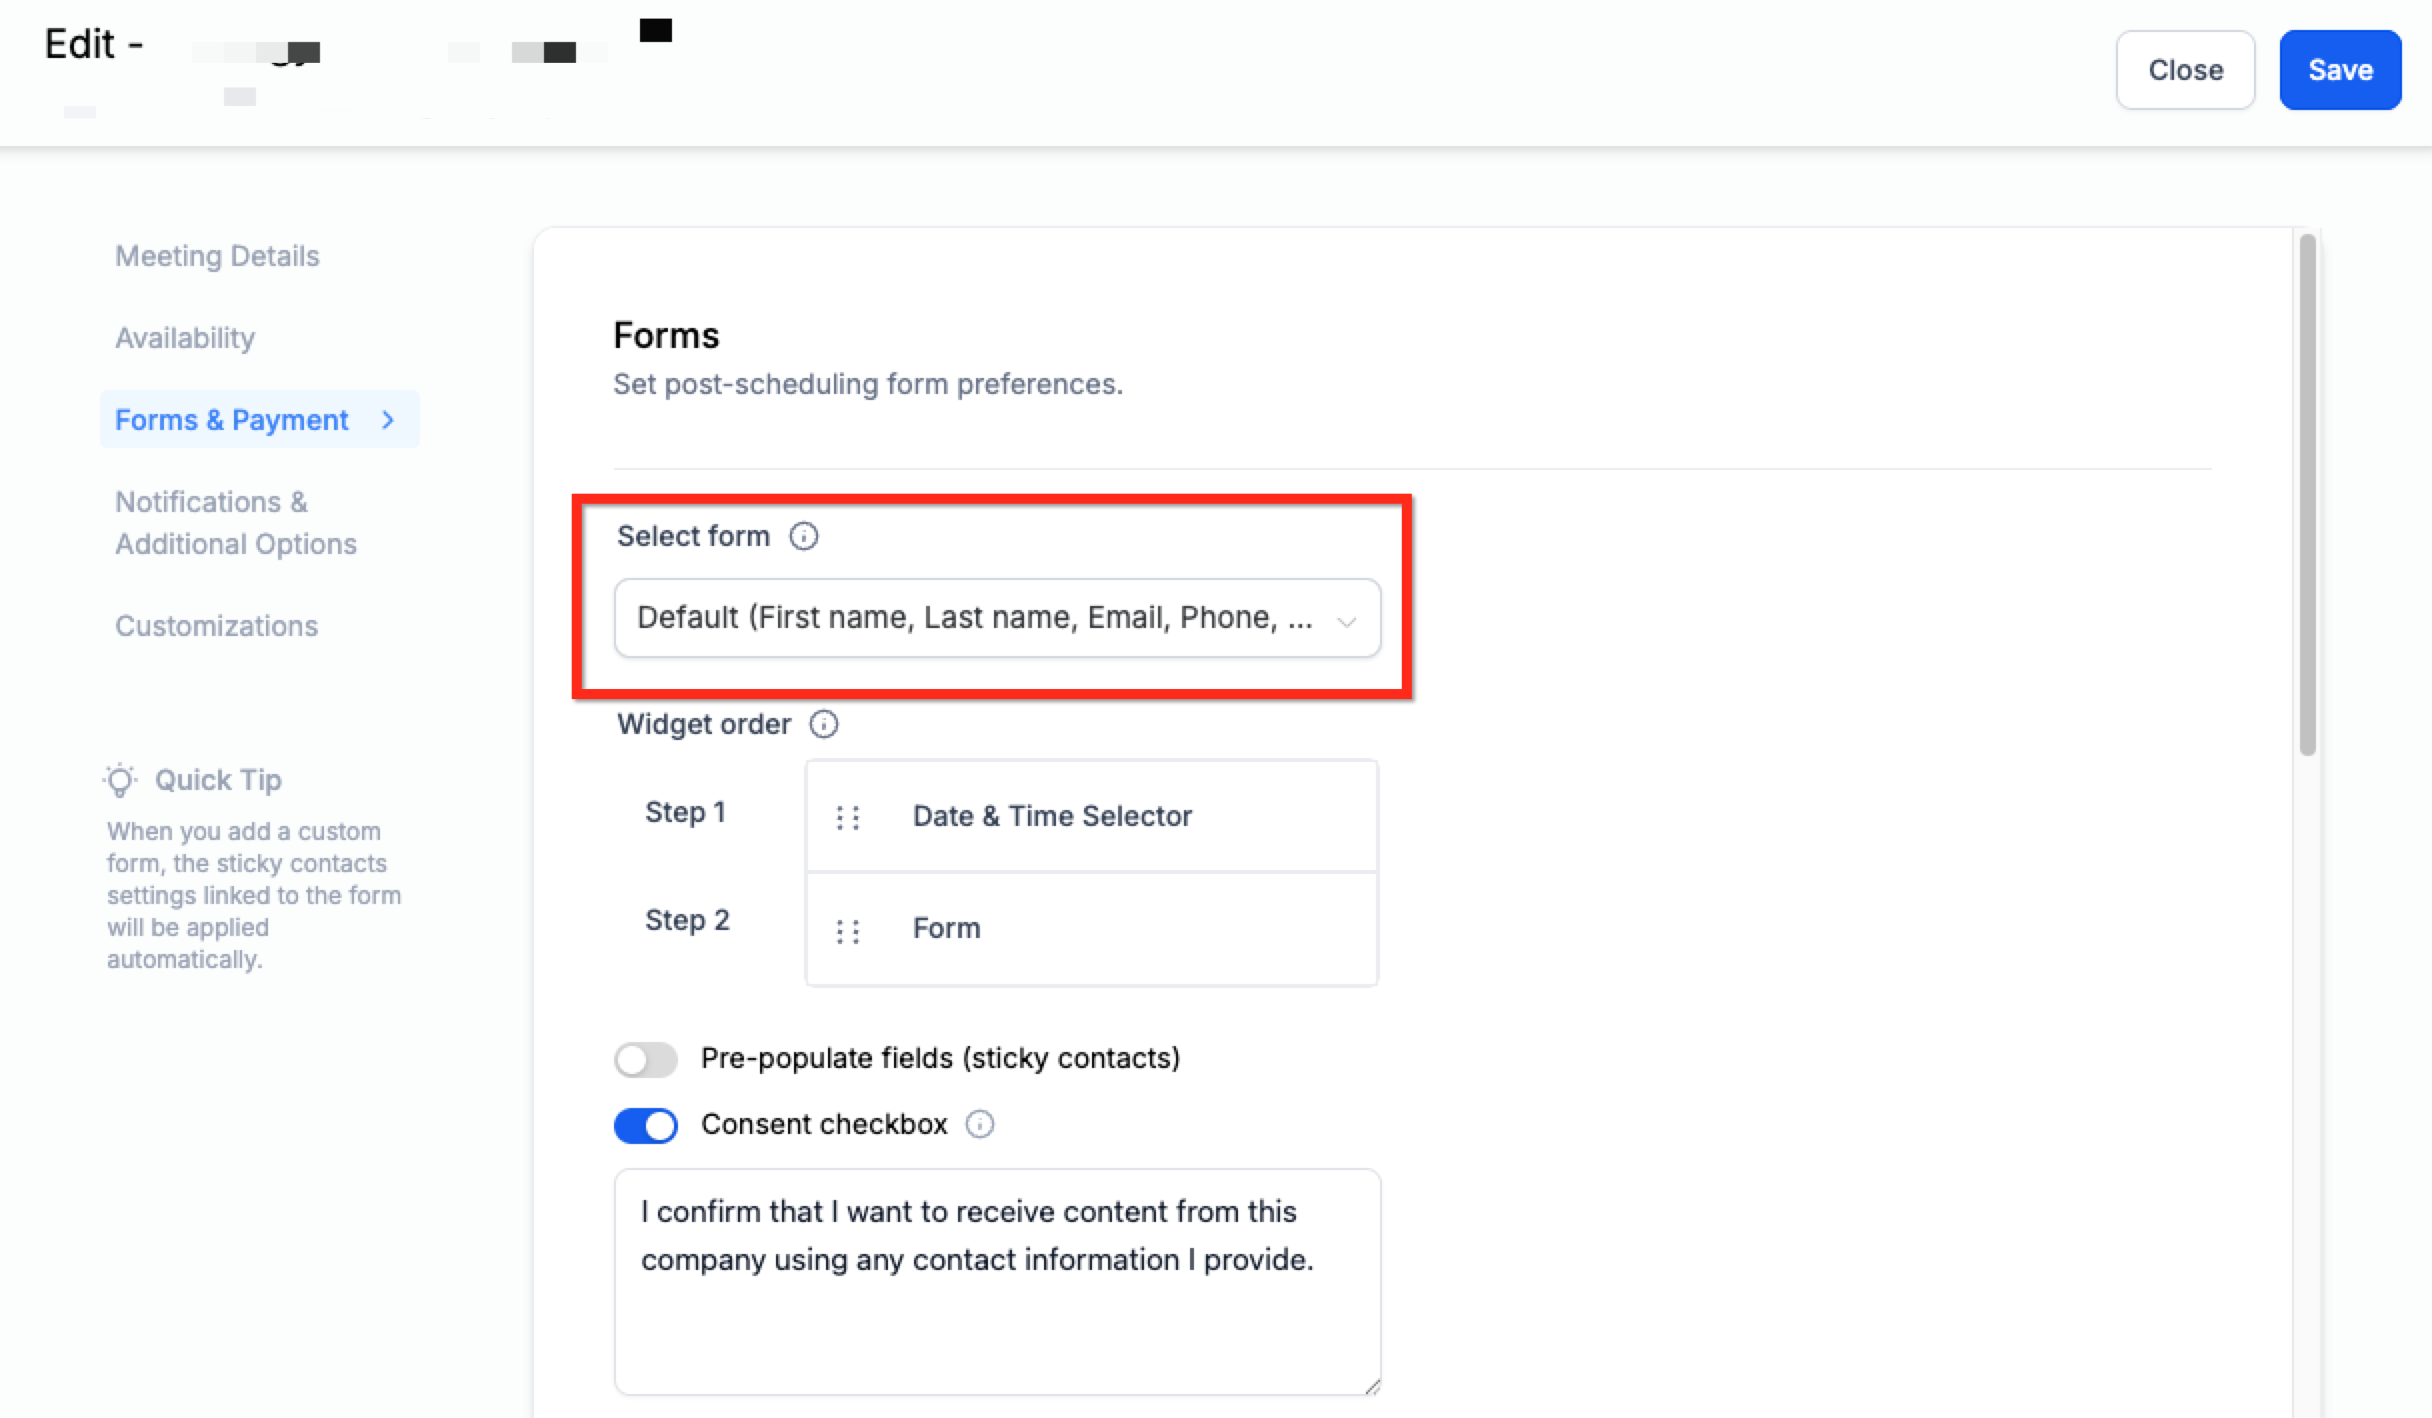
You find the option inside each calendar’s settings under the Forms & Payment tab. The Select Form dropdown lists all forms saved under Sites > Forms. After picking a form, you save the calendar to enable the new booking flow.
All forms must be added individually to each calendar. The same form can be reused on many calendars, but the attachment process must be repeated for each one.
03How businesses use custom forms
- Dental practice. The practice creates a new patient intake form in Sites > Forms. It then opens each provider’s calendar, selects the form from the Select Form dropdown, and saves. Patients complete the intake after selecting an appointment slot, and the information appears on their contact record.
- Consulting firm. The firm builds a qualification form with custom fields. It attaches the same form to calendars for different service lines by editing each calendar’s settings and choosing the form. Consultants receive the pre booking answers automatically.
- Fitness studio. The studio designs a membership questionnaire form. It reuses this form on the calendars for group classes and personal training sessions by repeating the edit select save steps for each calendar. Members fill the questionnaire before confirming a class.
04Before you start
- Create the desired form in Sites > Forms and save it.
- Make sure the form contains at least one field.
05How to set up and use custom forms in HighLevel
Attach a custom form to a calendar
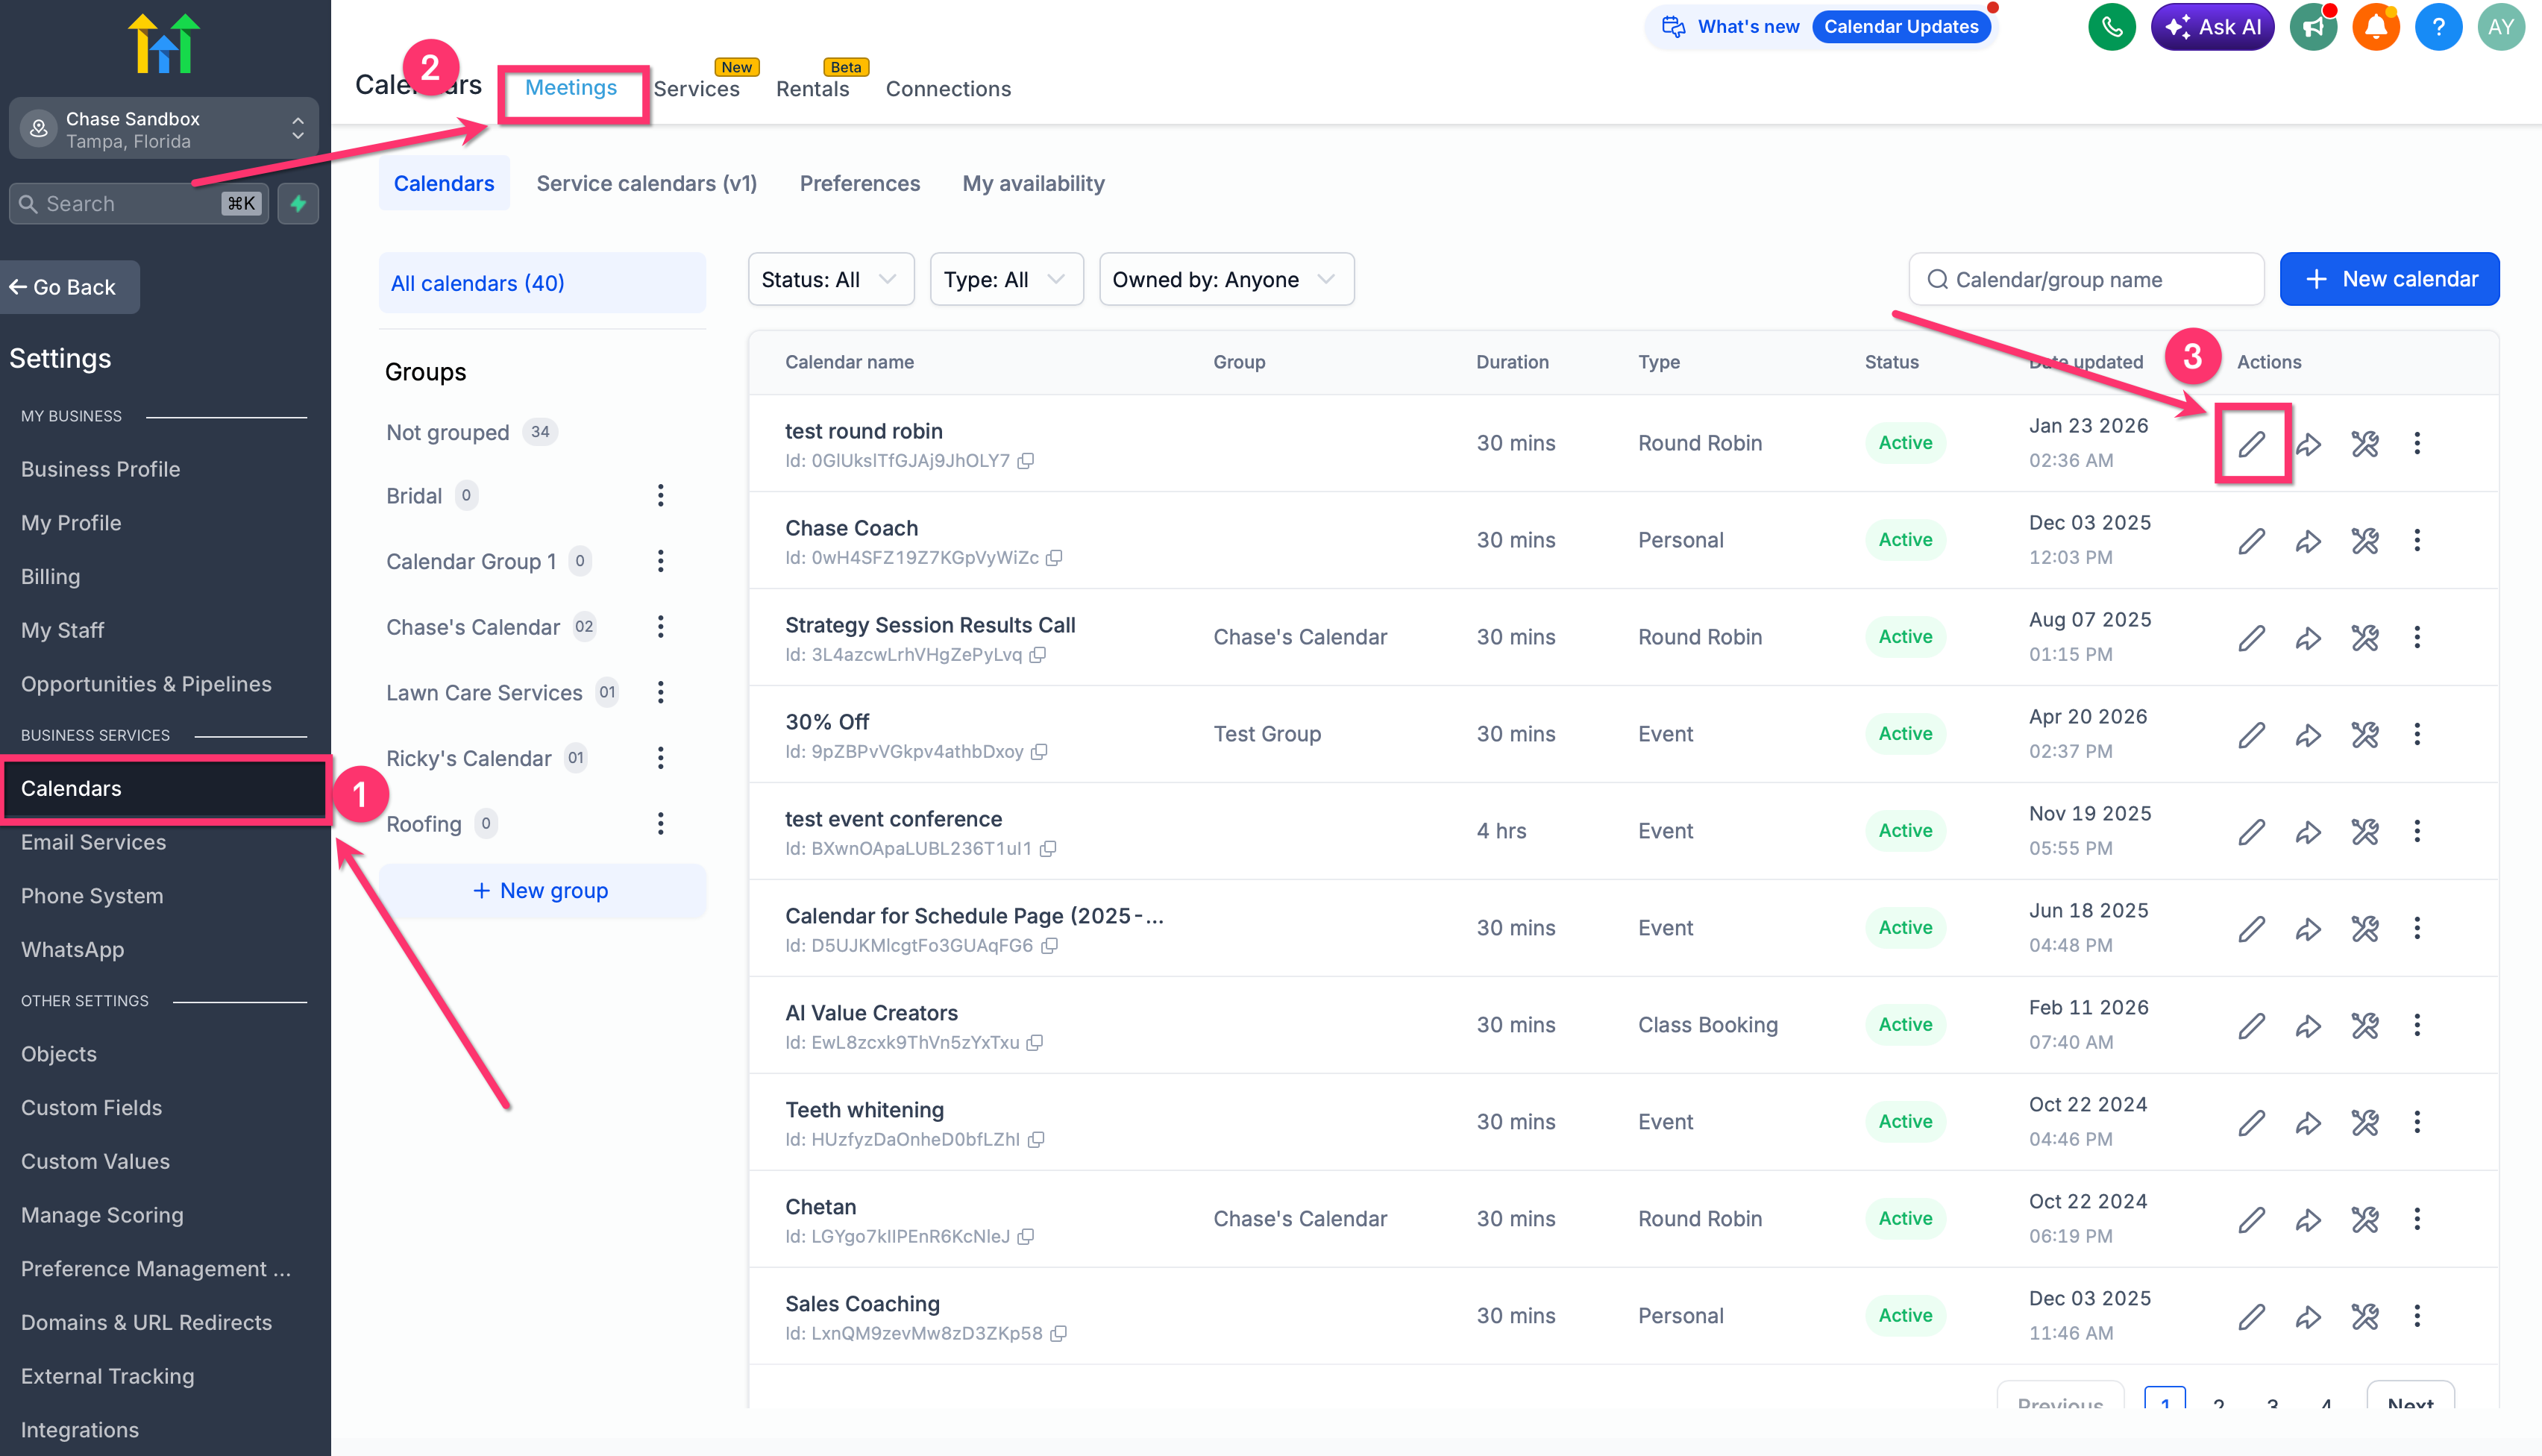
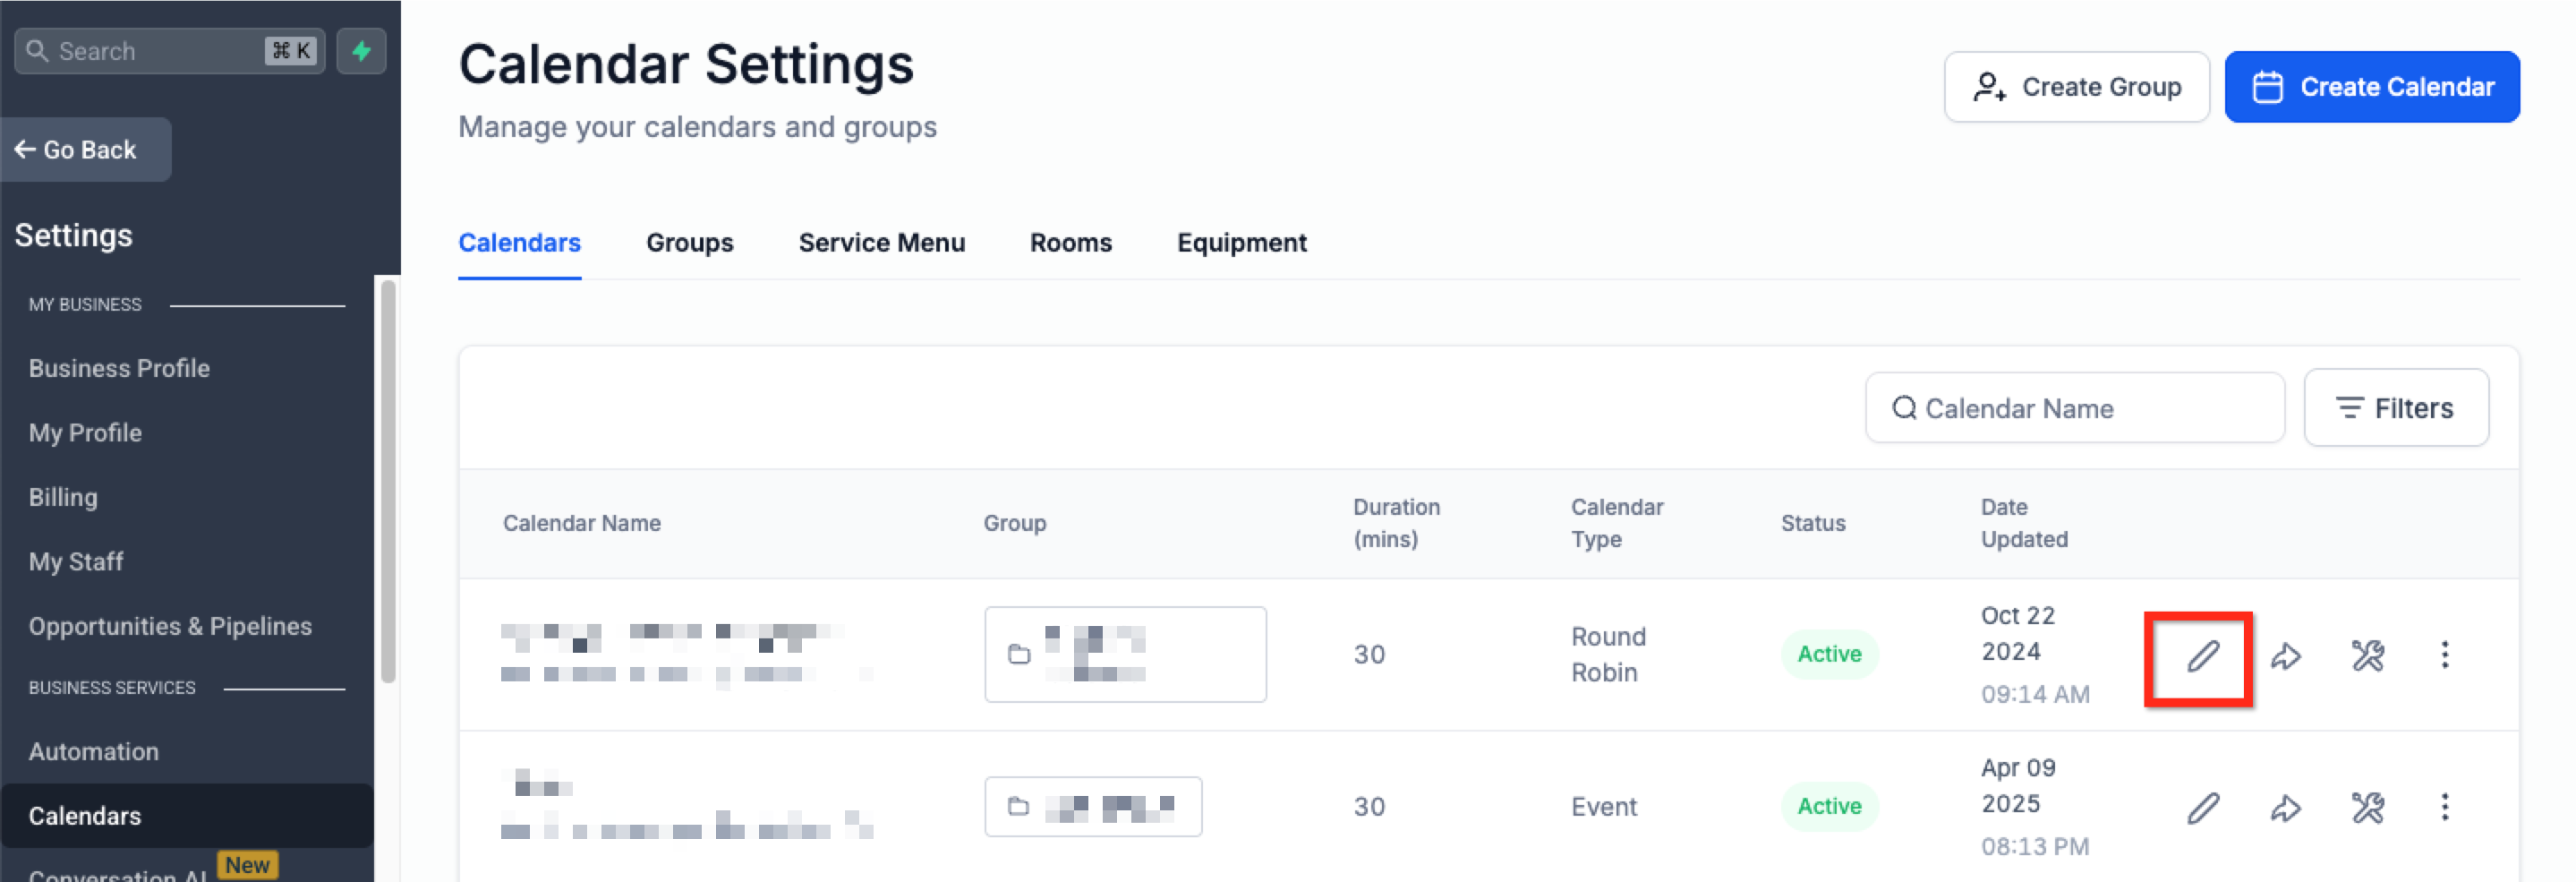
- Open Calendars from the main menu and click Calendar Settings.
- Locate the calendar you want to modify and click its Edit button.
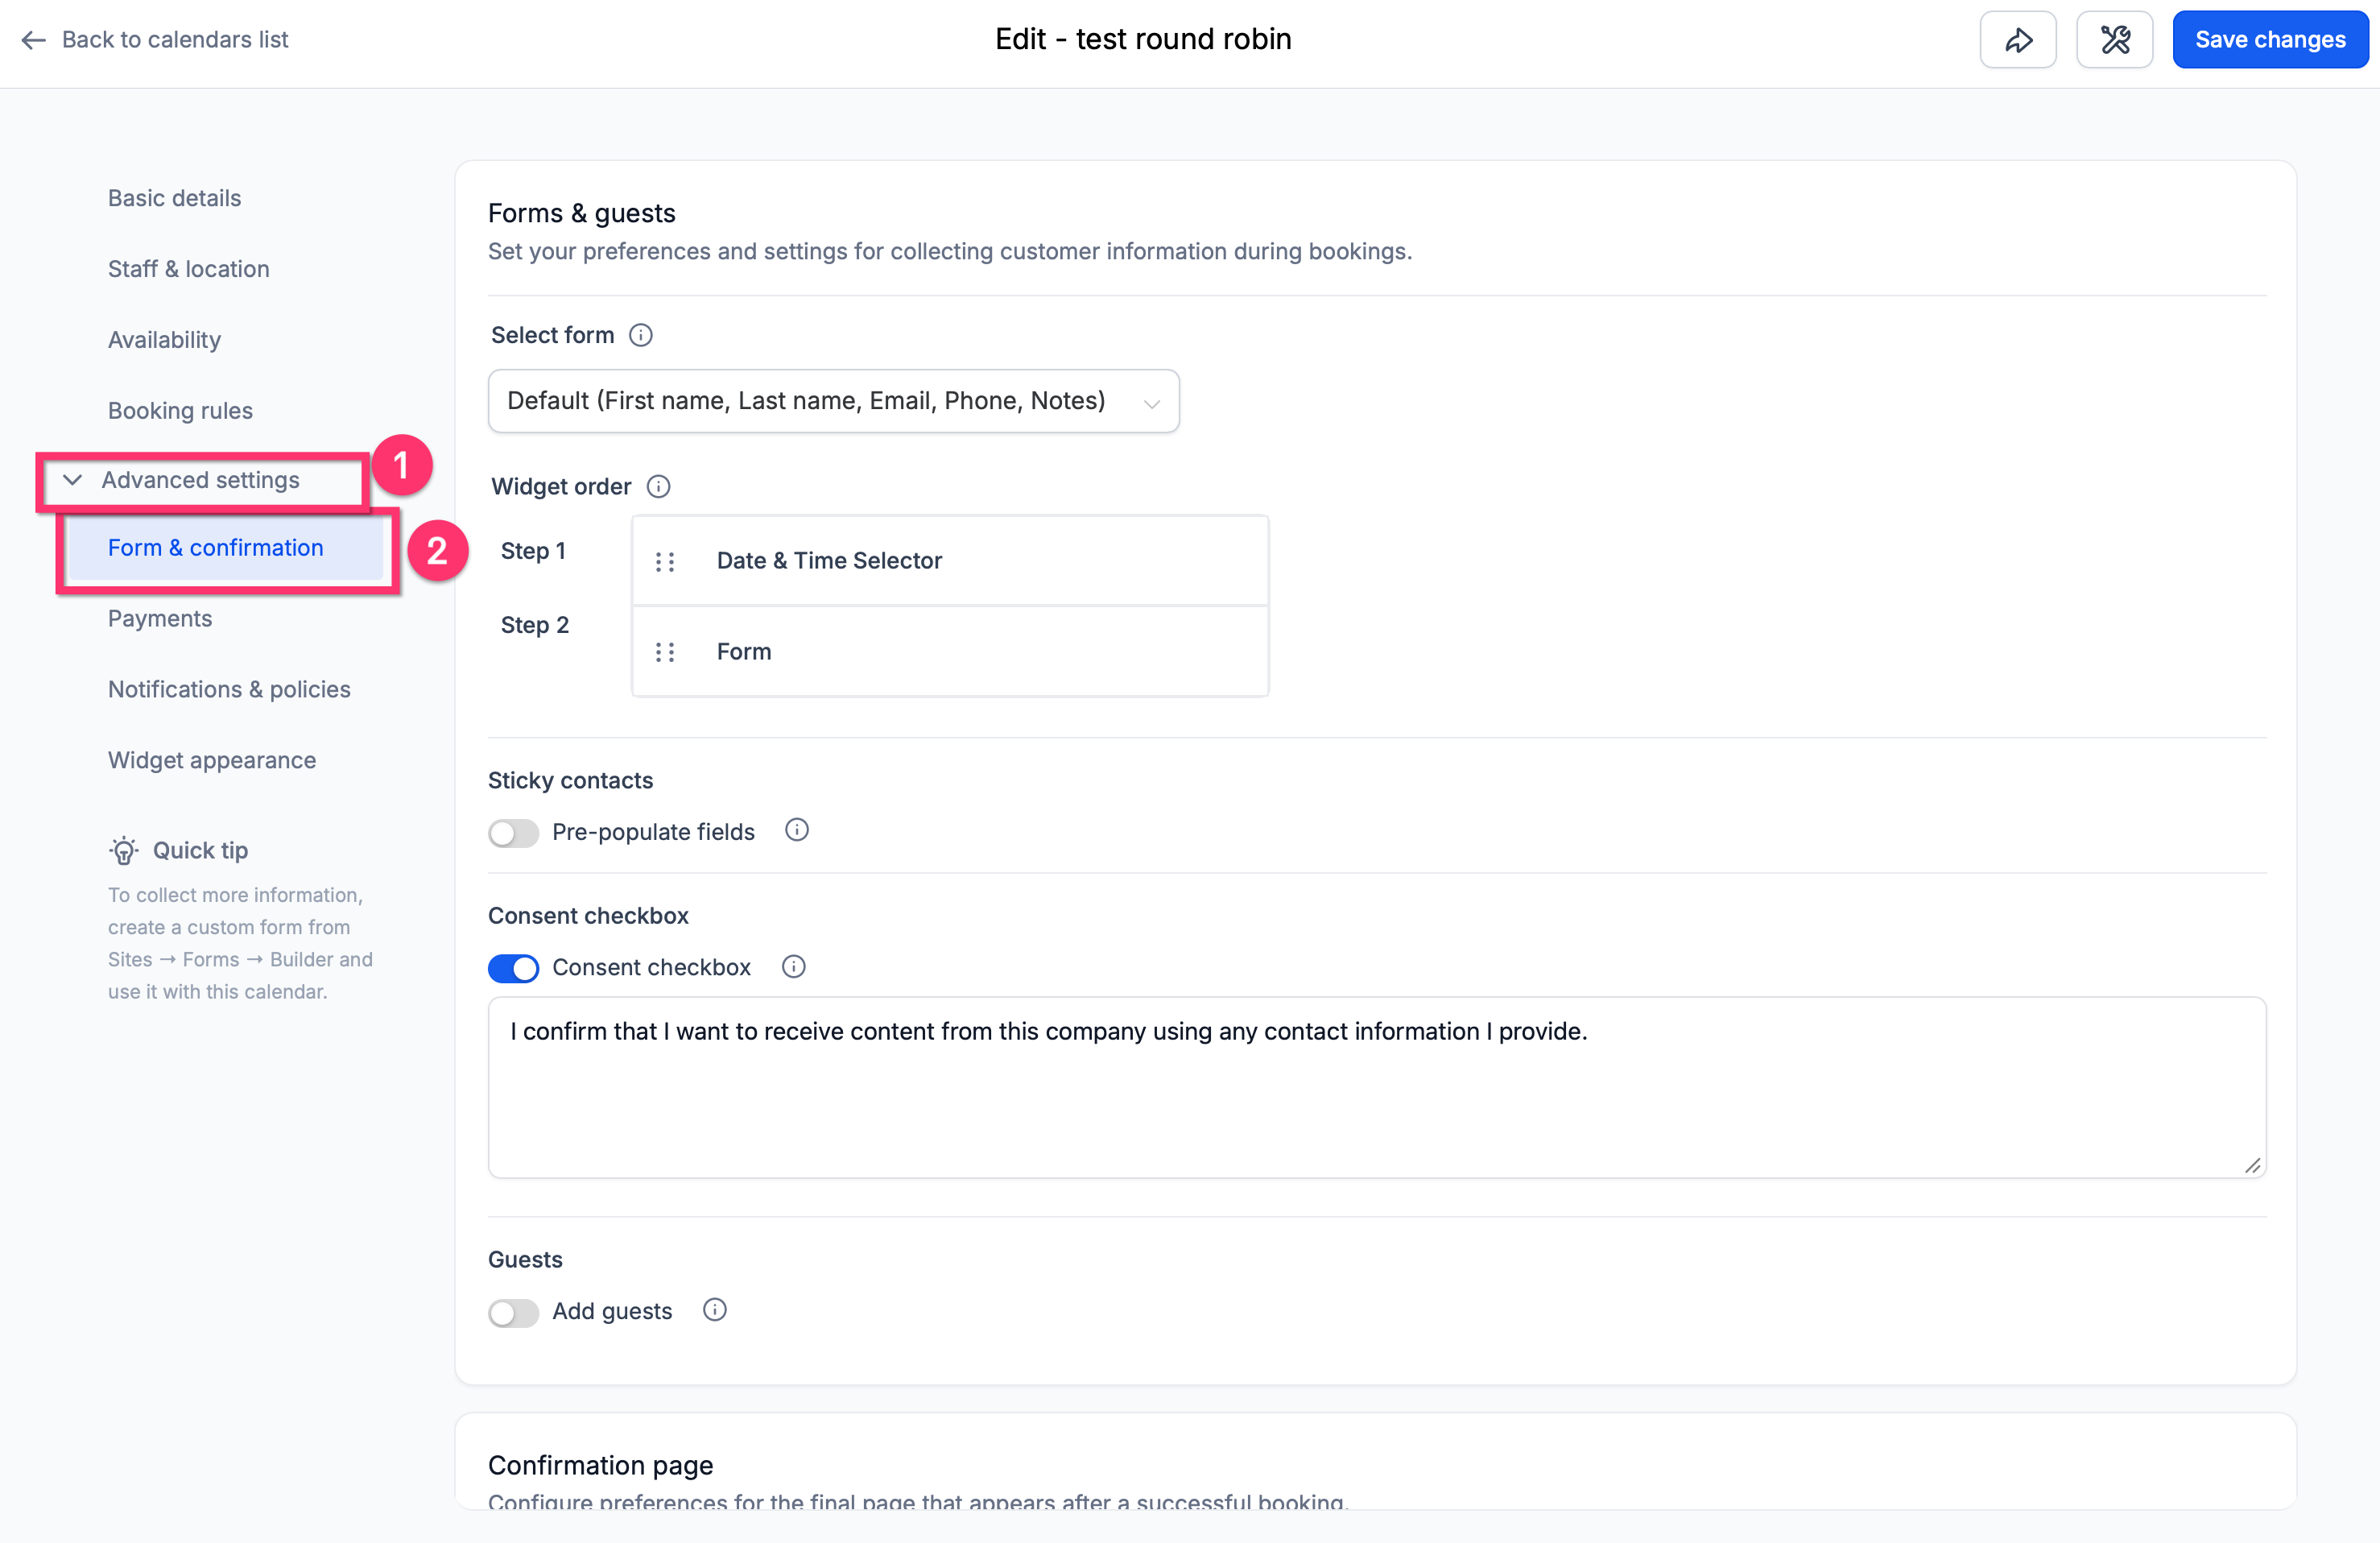
- Select the Forms & Payment tab in the left navigation.
- Choose the required form from the Select Form dropdown.
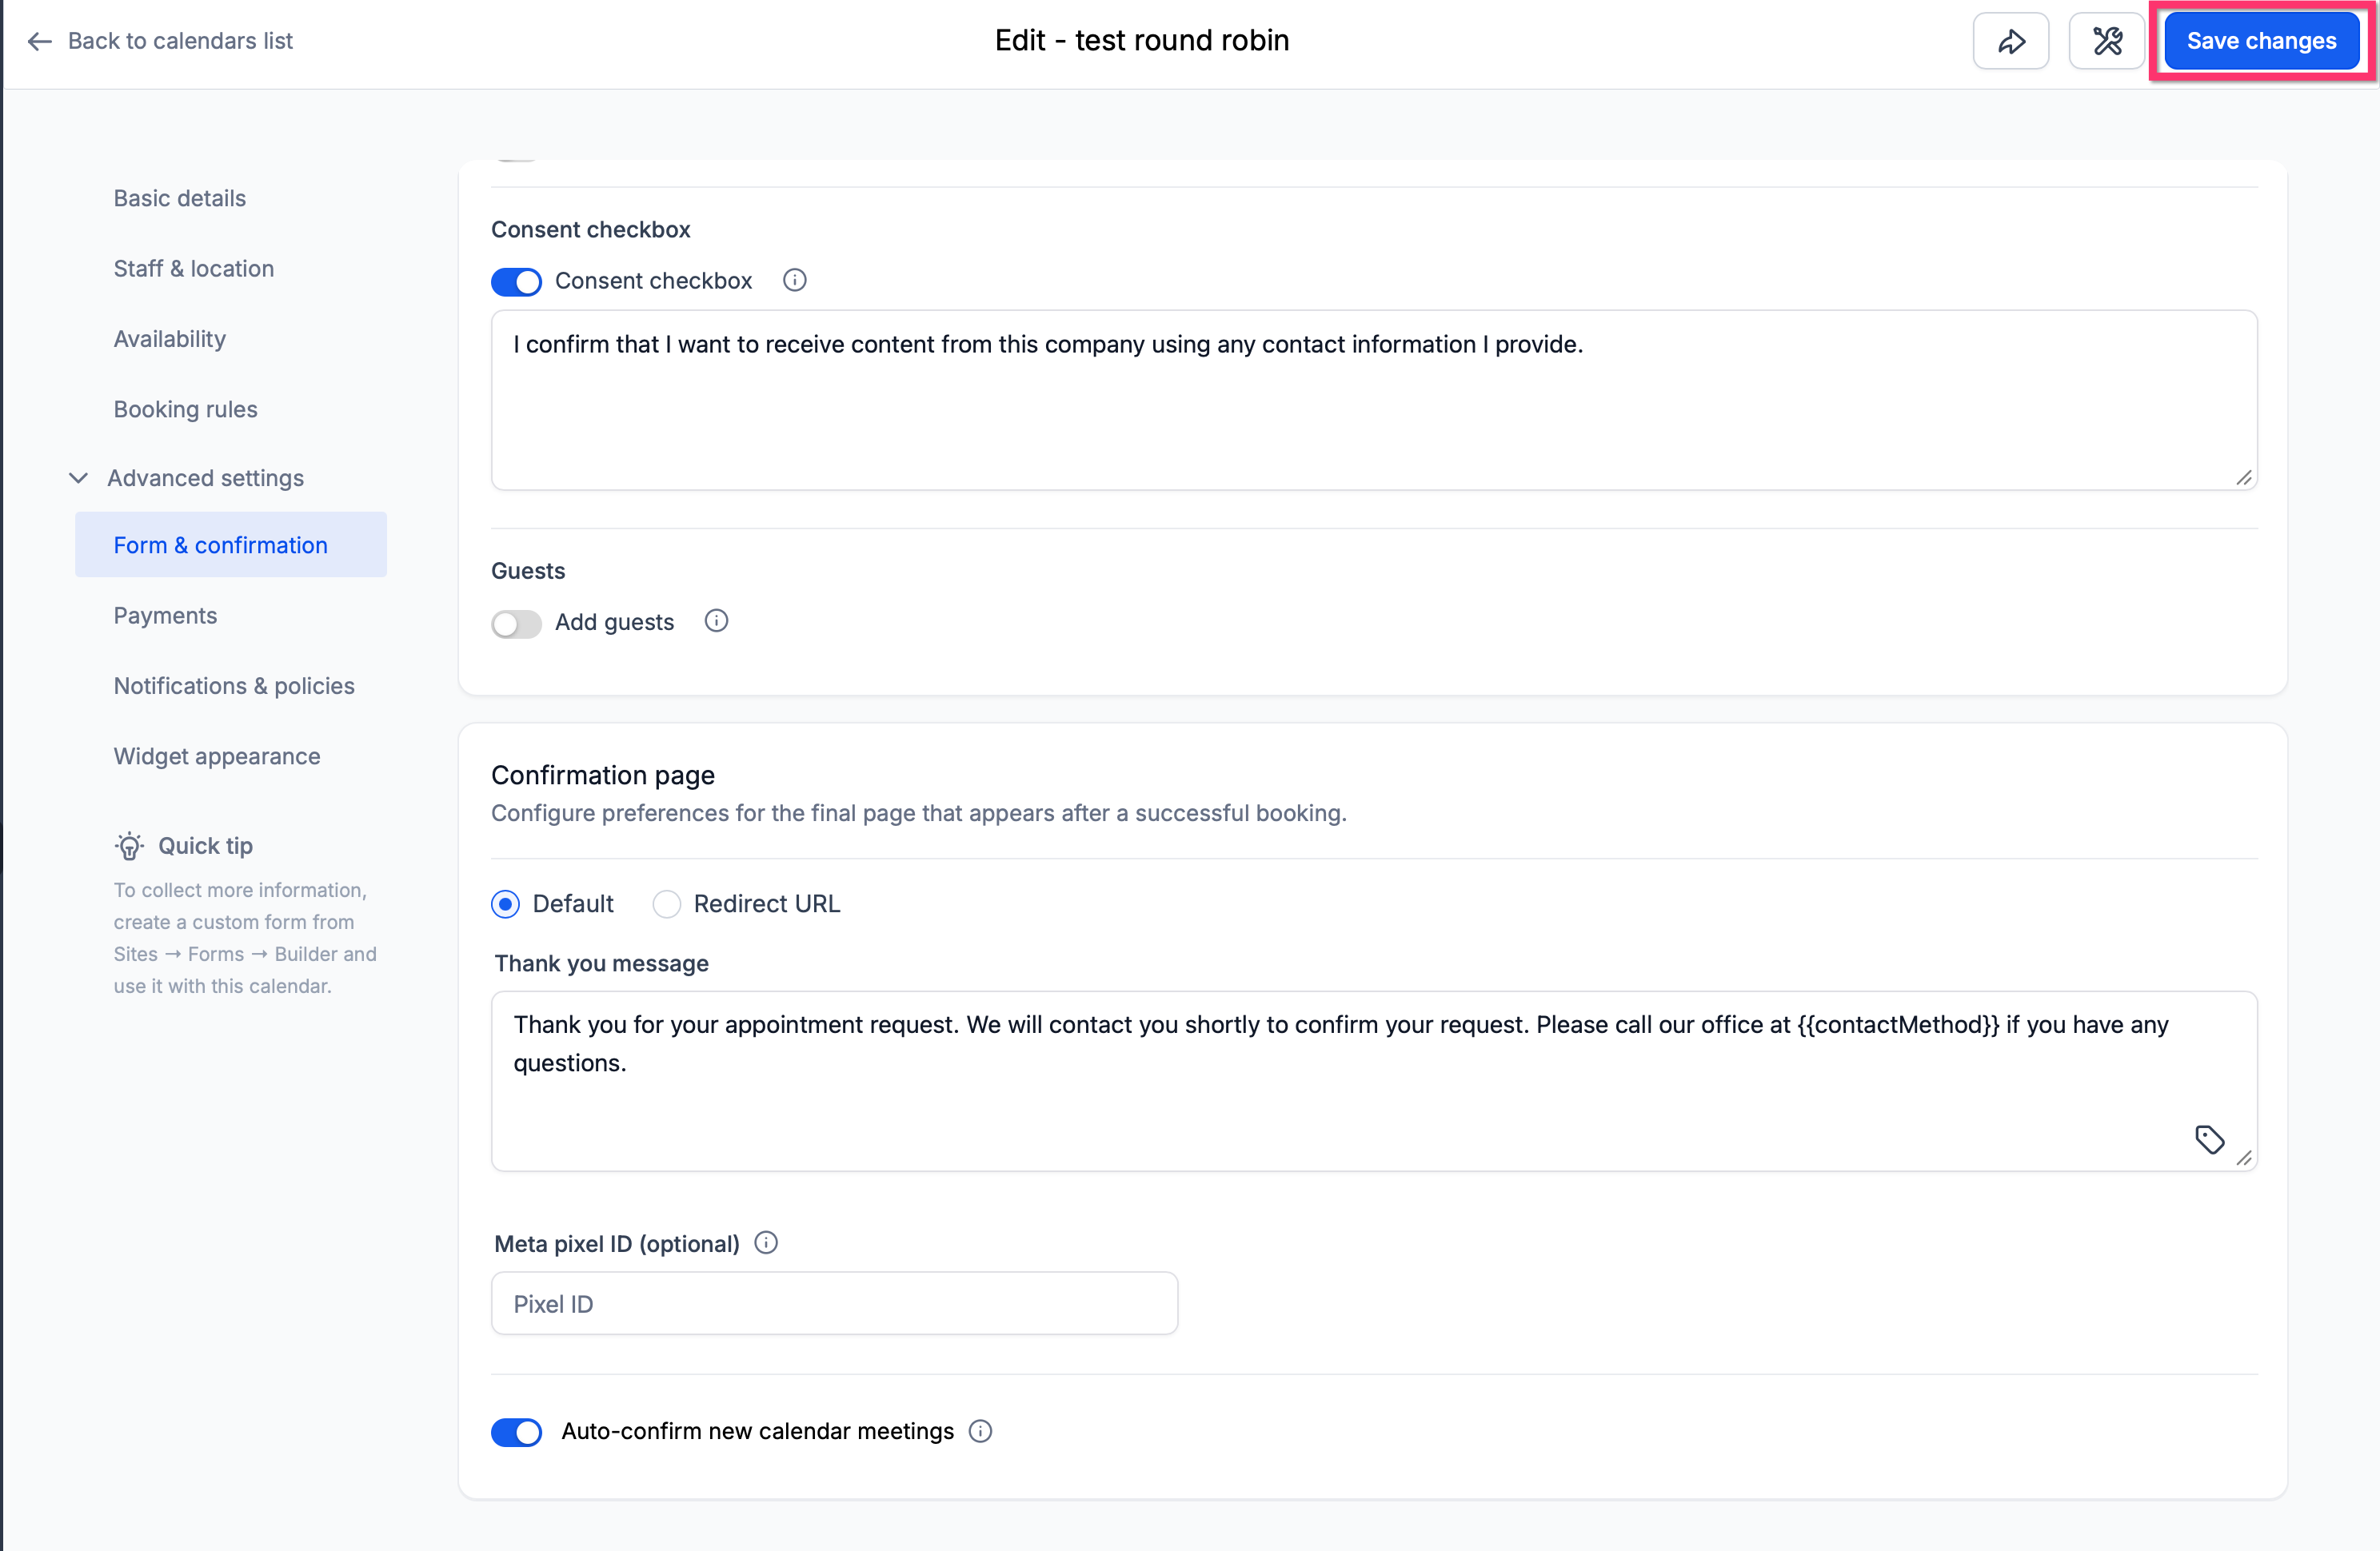
- Press the blue Save button at the top right.
Reuse a form across multiple calendars
- Open Calendar Settings for the target calendar.
- Click the Edit button beside that calendar.
- Select the same form from the Select Form dropdown and save.
06What it looks like in HighLevel
07Settings that matter
- Confirmation page. Controls what the user sees after submitting the form; options include Default, Redirect URL, or using the custom form’s own redirect or message rules.
08Things to know before you rely on it
- Only one custom form can be attached to a calendar at a time.
- Forms must be added manually to each calendar and are not automatically applied.
- If the form’s disqualify logic triggers, the appointment and any payment are cancelled.
- Form data is saved to the contact record only after the final Book Appointment button is clicked.
09If something goes wrong
- Form does not appear in the calendar’s Select Form dropdown. Verify the form is saved under Sites > Forms and includes at least one field, then refresh the calendar settings page.
10How it connects to the rest of HighLevel
- Customize the look of your calendar to match branding. Calendar colors
- Sync your HighLevel calendar with Google Calendar for smooth scheduling. Google Calendar sync
- Embed a HighLevel calendar on your website using HTML code. Embed calendar
Michael's take

Adding a form before a booking adds an extra step, so consider how it may affect lead flow.
The disqualification logic and consent options add complexity, so make sure the form fields align with your automations.