
01Who this is for
- Marketing managers, they can route leads from different triggers straight to the relevant nurture step, avoiding duplicate branches.
- Coaching program owners, they can start new members at the appropriate onboarding sequence based on the enrollment trigger.
- Real estate teams, they can direct contacts from a new lead capture trigger directly to the property follow up action.
02Go to connections for triggers, explained
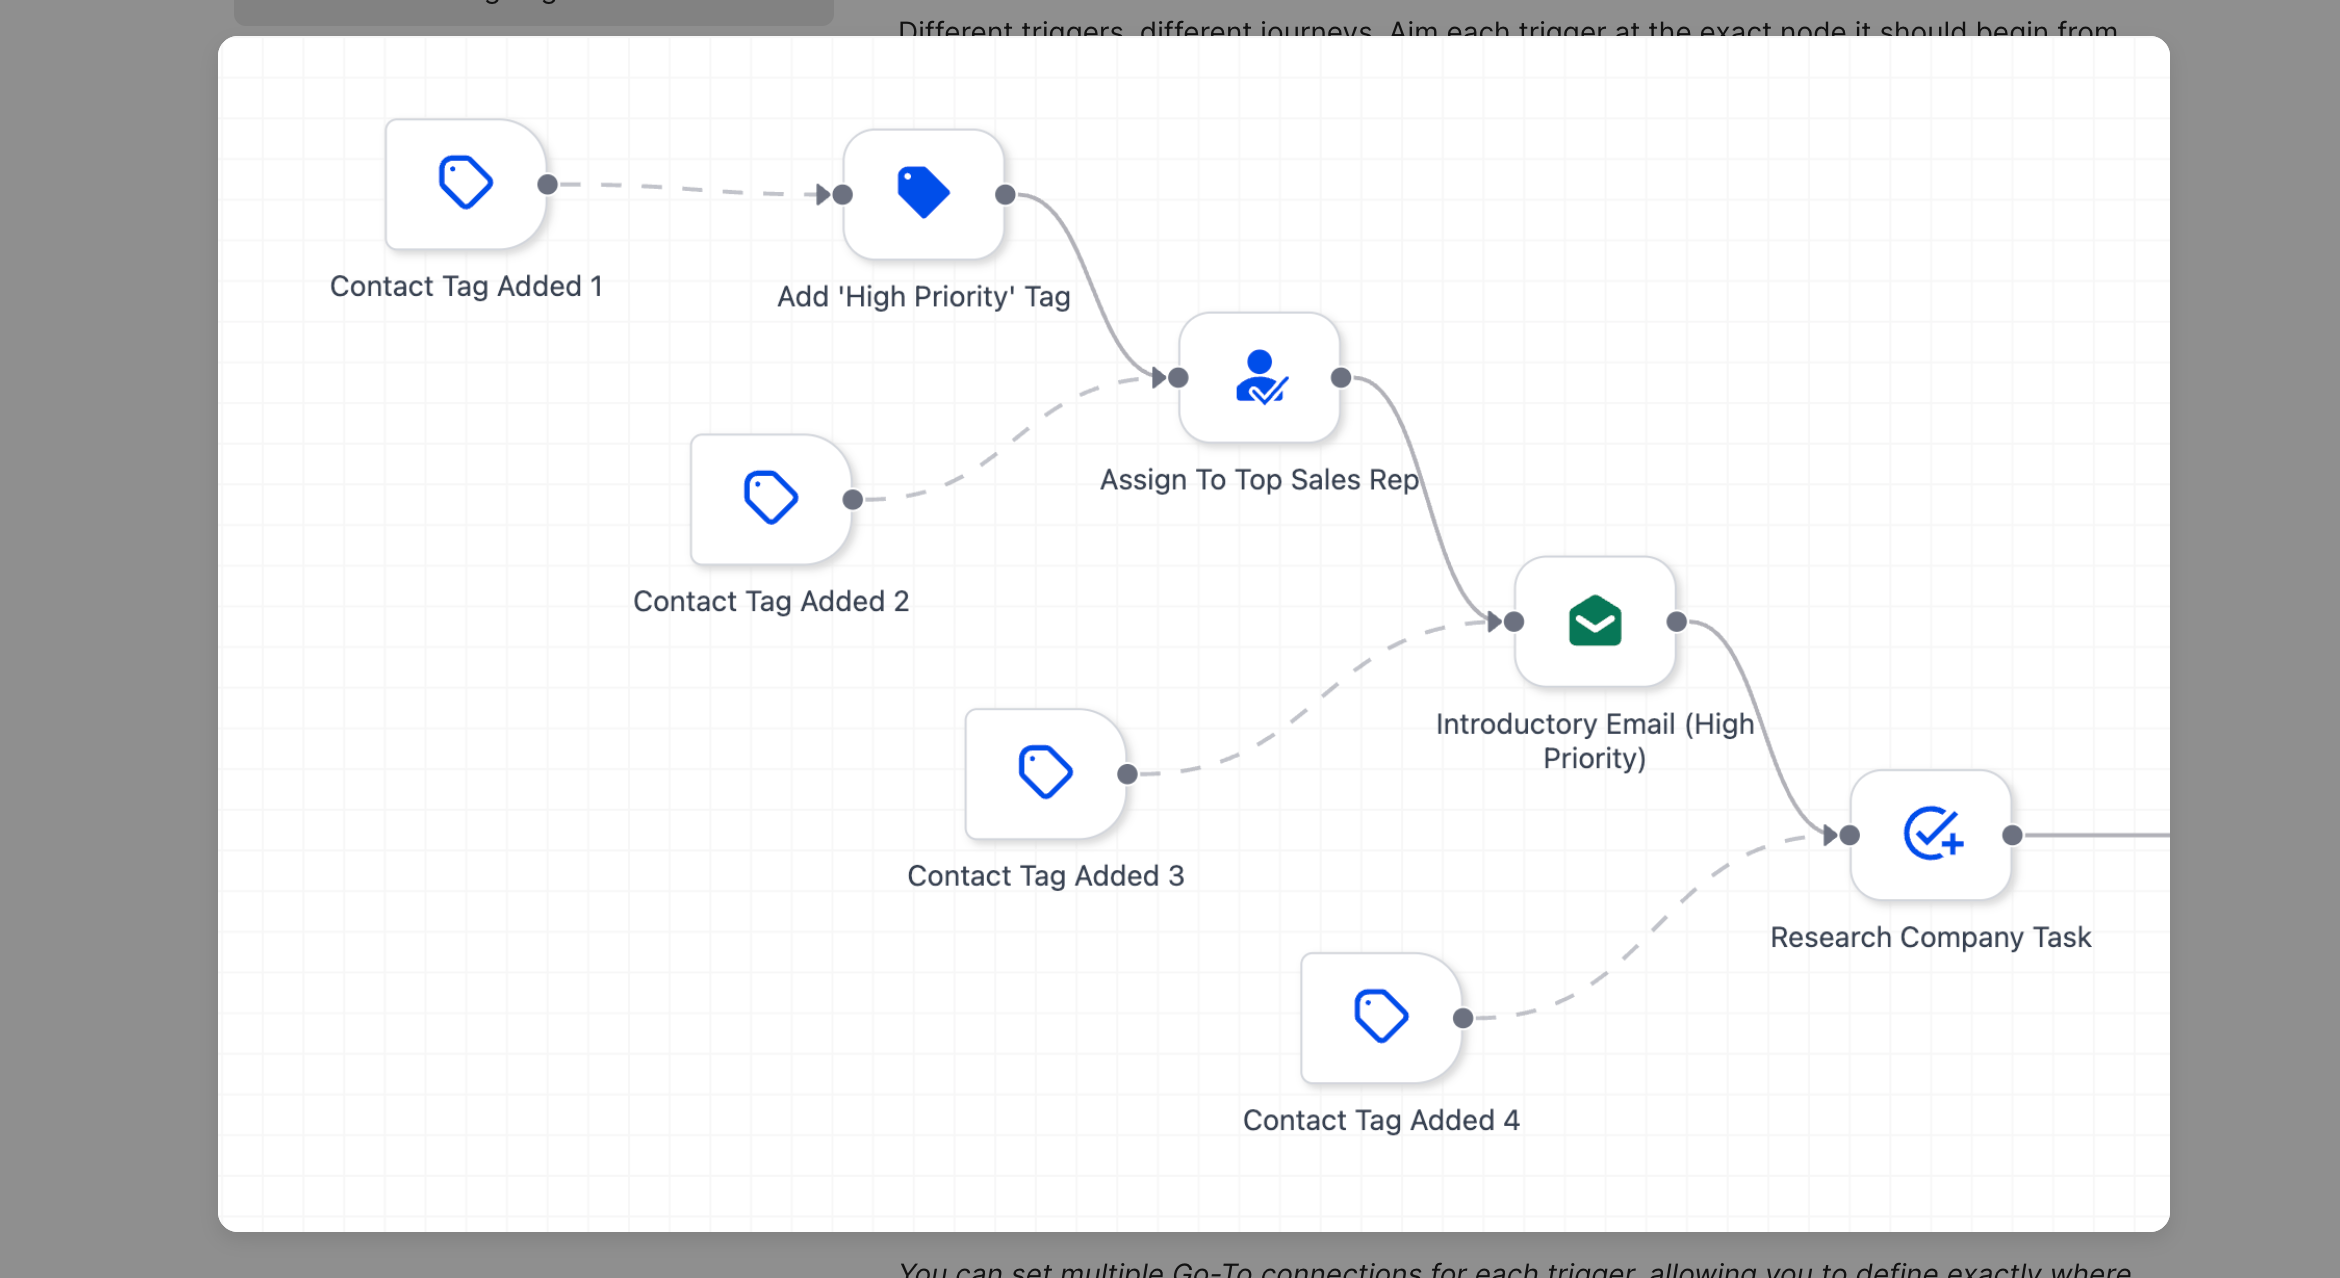
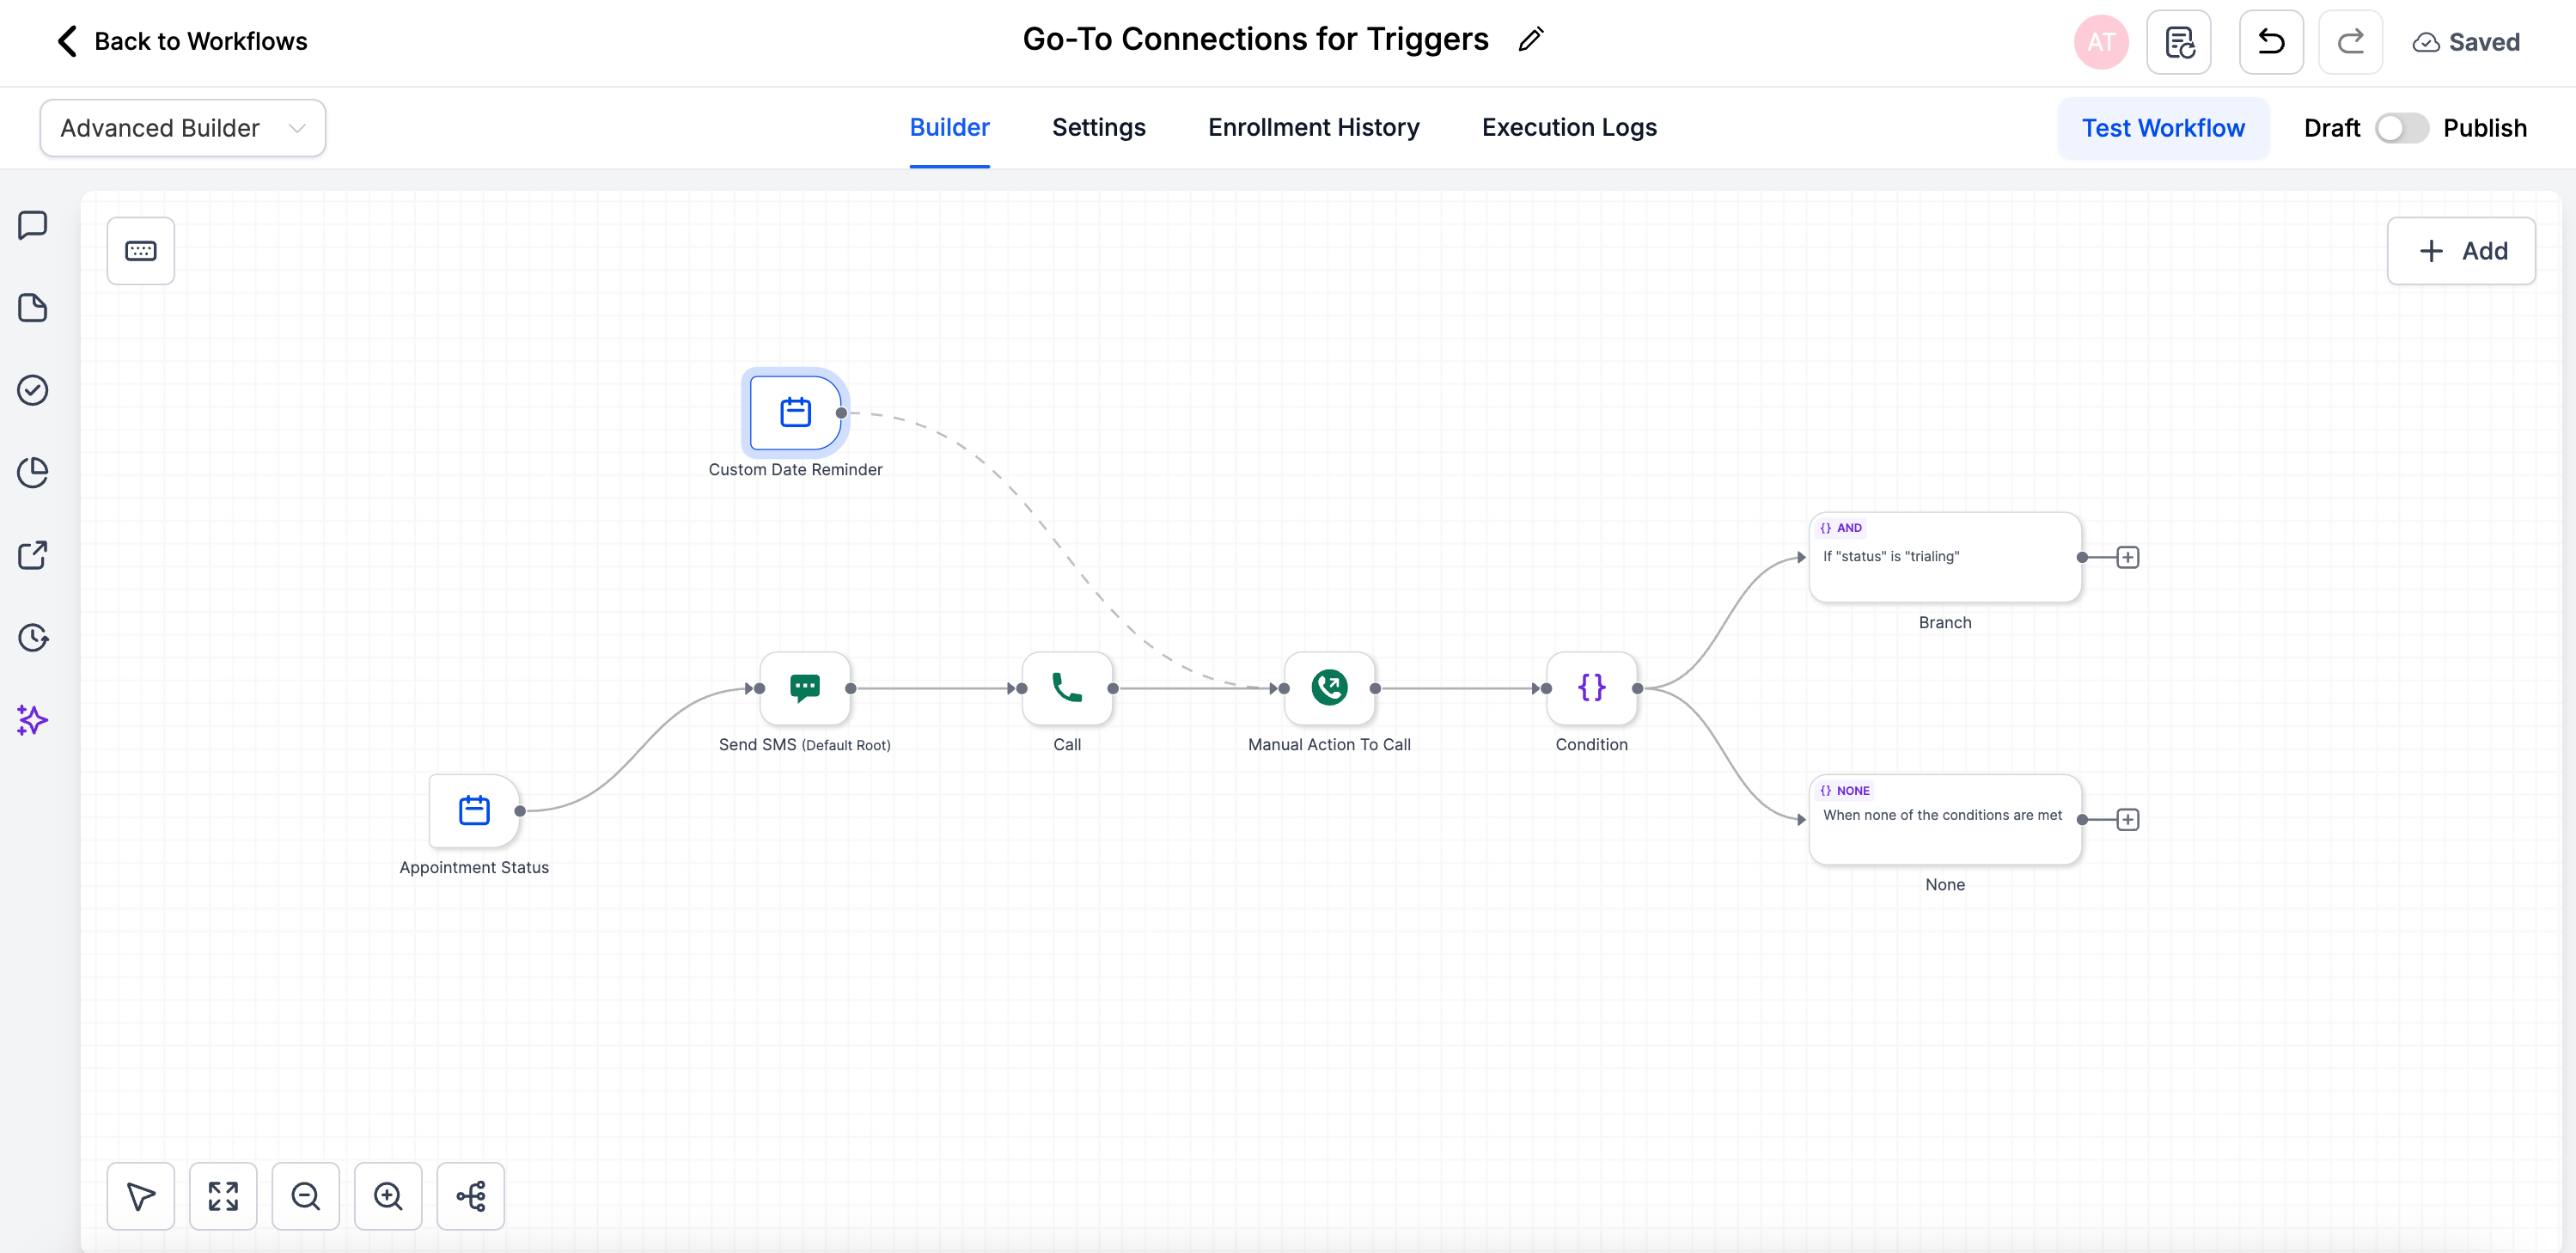
Go to connections are special dashed lines that let a trigger point to a specific first action on the workflow canvas. Each trigger can have only one such connection, and the linked action receives only one incoming connection from a trigger or a previous action.
When a trigger matches, the contact right away moves to the connected action and continues through the workflow normally. If a trigger has no go to link, it defaults to the root action at the top of the canvas.
The feature exists only in the Advanced Builder view of HighLevel. To use it, open a workflow in Advanced Builder, place your triggers and actions, and draw the go to connections as needed.
03How businesses use Go To connections for triggers
- Coaching program. Create a trigger for a new student enrollment. Drag a go to connection from that trigger to the first lesson delivery action. When a student signs up, they start exactly at the lesson action without passing through unrelated steps.
- Real estate agency. Set a trigger for a property inquiry form submission. Connect the trigger to the follow up call scheduling action. New inquiries go straight to the call scheduler, keeping the workflow focused on that lead path.
- Ecommerce store. Add a trigger that fires when an order is placed. Link it to the order confirmation email action. Customers who purchase are sent the confirmation immediately, while other triggers handle post purchase upsells separately.
04The numbers and rules that matter
- Single enrollment per contact.
- 1:1 connections only.
05Before you start
- The workflow must be opened in Advanced Builder.
- At least one trigger and one action must be placed on the canvas.
06How to set up and use Go To connections for triggers in HighLevel
Set up go to connections
- Open the workflow in Advanced Builder.
- Add or reposition the triggers and actions you need.
- Click the small connector dot on a trigger, drag to the connector dot on the target action, and release.
- If you need to change the start point, drag the same dashed connector to a different node.
- Save the workflow and publish when you are ready.
07What it looks like in HighLevel
08Things to know before you rely on it
- Available only in Advanced Builder; not supported in Standard Builder.
- Each trigger can connect to only one action.
- Each action can receive only one incoming connection from a trigger or a previous action.
- If a trigger has no go to link, it automatically connects to the root action.
- A contact can run only one branch per workflow run; re entry is controlled by the workflow’s re entry settings.
09How it connects to the rest of HighLevel
- Learn the basics of triggers in HighLevel. Triggers overview
- Get step by step instructions for building workflows with triggers, filters, and actions. Workflow creation guide
- Set up a scheduler trigger to start actions at a specific time. Scheduler trigger guide
Michael's take

Businesses that juggle several lead sources often end up with tangled workflows or duplicated automations. Go To connections let each trigger jump straight to its own starting action, keeping the canvas clean and the execution fast.
The first thing I would set right is the Go To link for the most common trigger so that new contacts land exactly where they need to be without extra steps.
After that, I’d give the workflow a quick run through to verify that each trigger points where I expect. It’s a simple visual check, but it saves a lot of headaches later when contacts start flowing through the proper paths.