
01Who this is for
- Marketing managers can apply a single button style across all client funnels, ensuring brand uniformity.
- Web designers benefit from dragging saved elements instead of rebuilding each page, saving time.
- Operations teams keep navigation menus consistent on websites and ecommerce stores without repeating edits.
02Universal Elements, explained
Universal Elements are individual components, such as buttons, icons, or menus, saved in the Saved Assets library. They stay linked to every page where they are placed, so a single edit can affect many locations.
When an element is edited, the change is saved in the builder but only becomes visible to visitors after the affected pages are published. The library shows thumbnails and supports keyword search, making it easy to locate and rename items. Deleting an element removes the saved item from the library for future use, so pages that rely on it should be reviewed first.
03How businesses use Universal Elements
- Fitness studio. Save the studio’s primary call to action button as a Universal Element. Drag the saved button onto each class sign up page. When the workout schedule changes, edit the button once and publish; every sign up page updates automatically.
- Online retailer. Create a Universal Element for the site’s “Add to Cart” icon and place it on product, collection and checkout pages. Updating the icon’s color in the element and publishing the pages updates the look across the entire store without manual edits.
- Coaching business. Save the coach’s branded logo as a Universal Element and drop it onto funnel landing pages, blog posts and webinar registrations. Changing the logo in the saved element and publishing ensures the new branding appears everywhere right away.
04Before you start
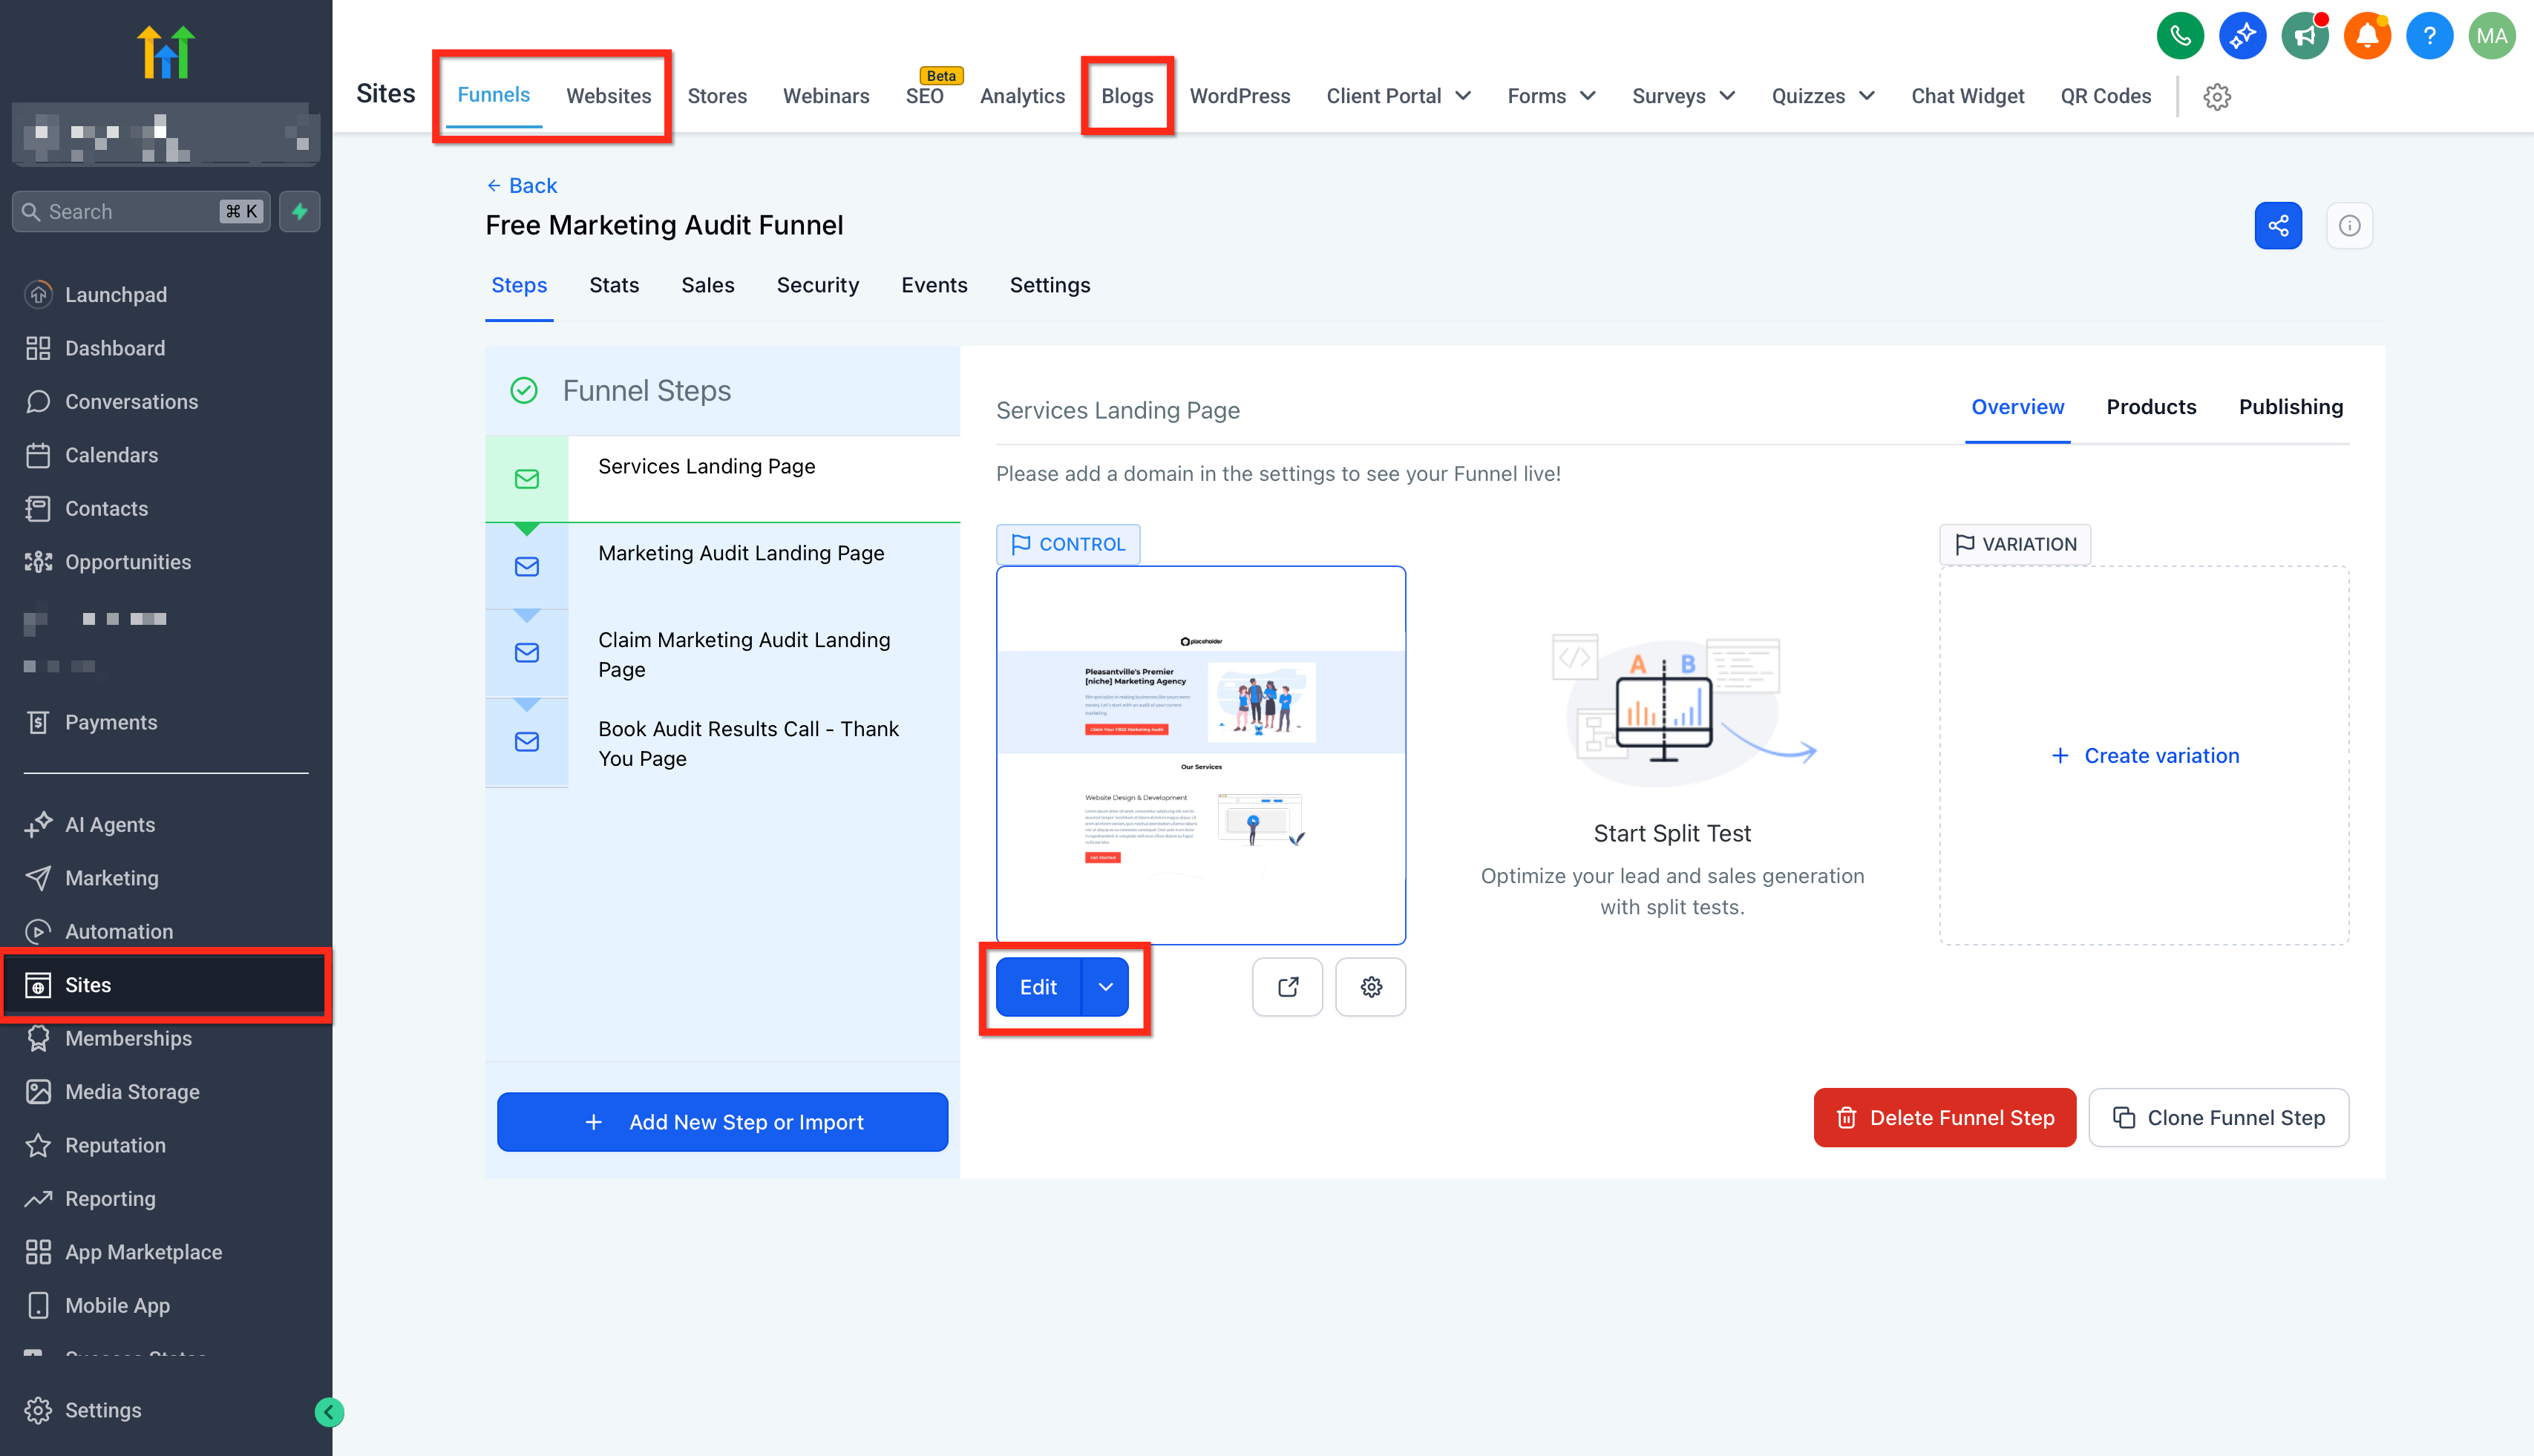
- A page must be open in the Page Builder (Funnel, Website, Blog, Webinar, or Store).
05How to set up and use Universal Elements in HighLevel
Set up a universal element
- Open the desired page in the Page Builder.
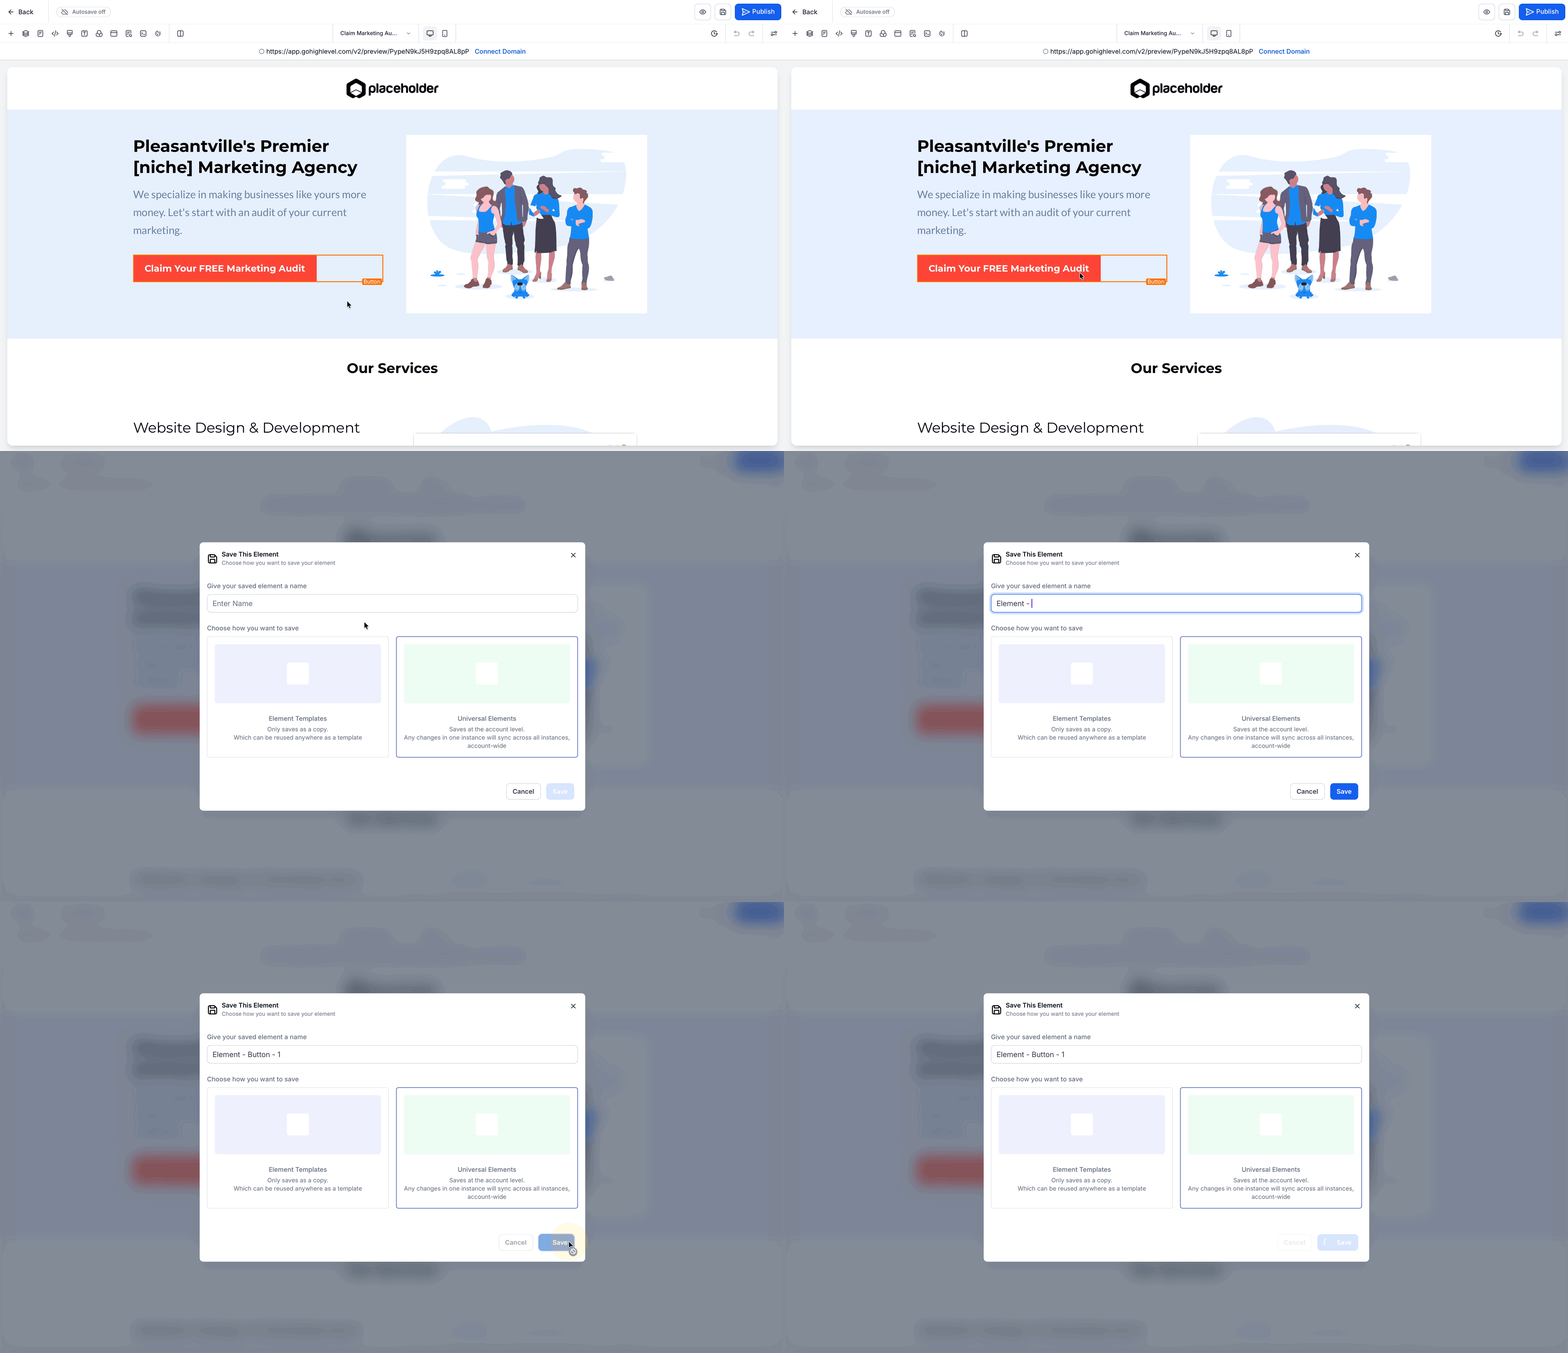
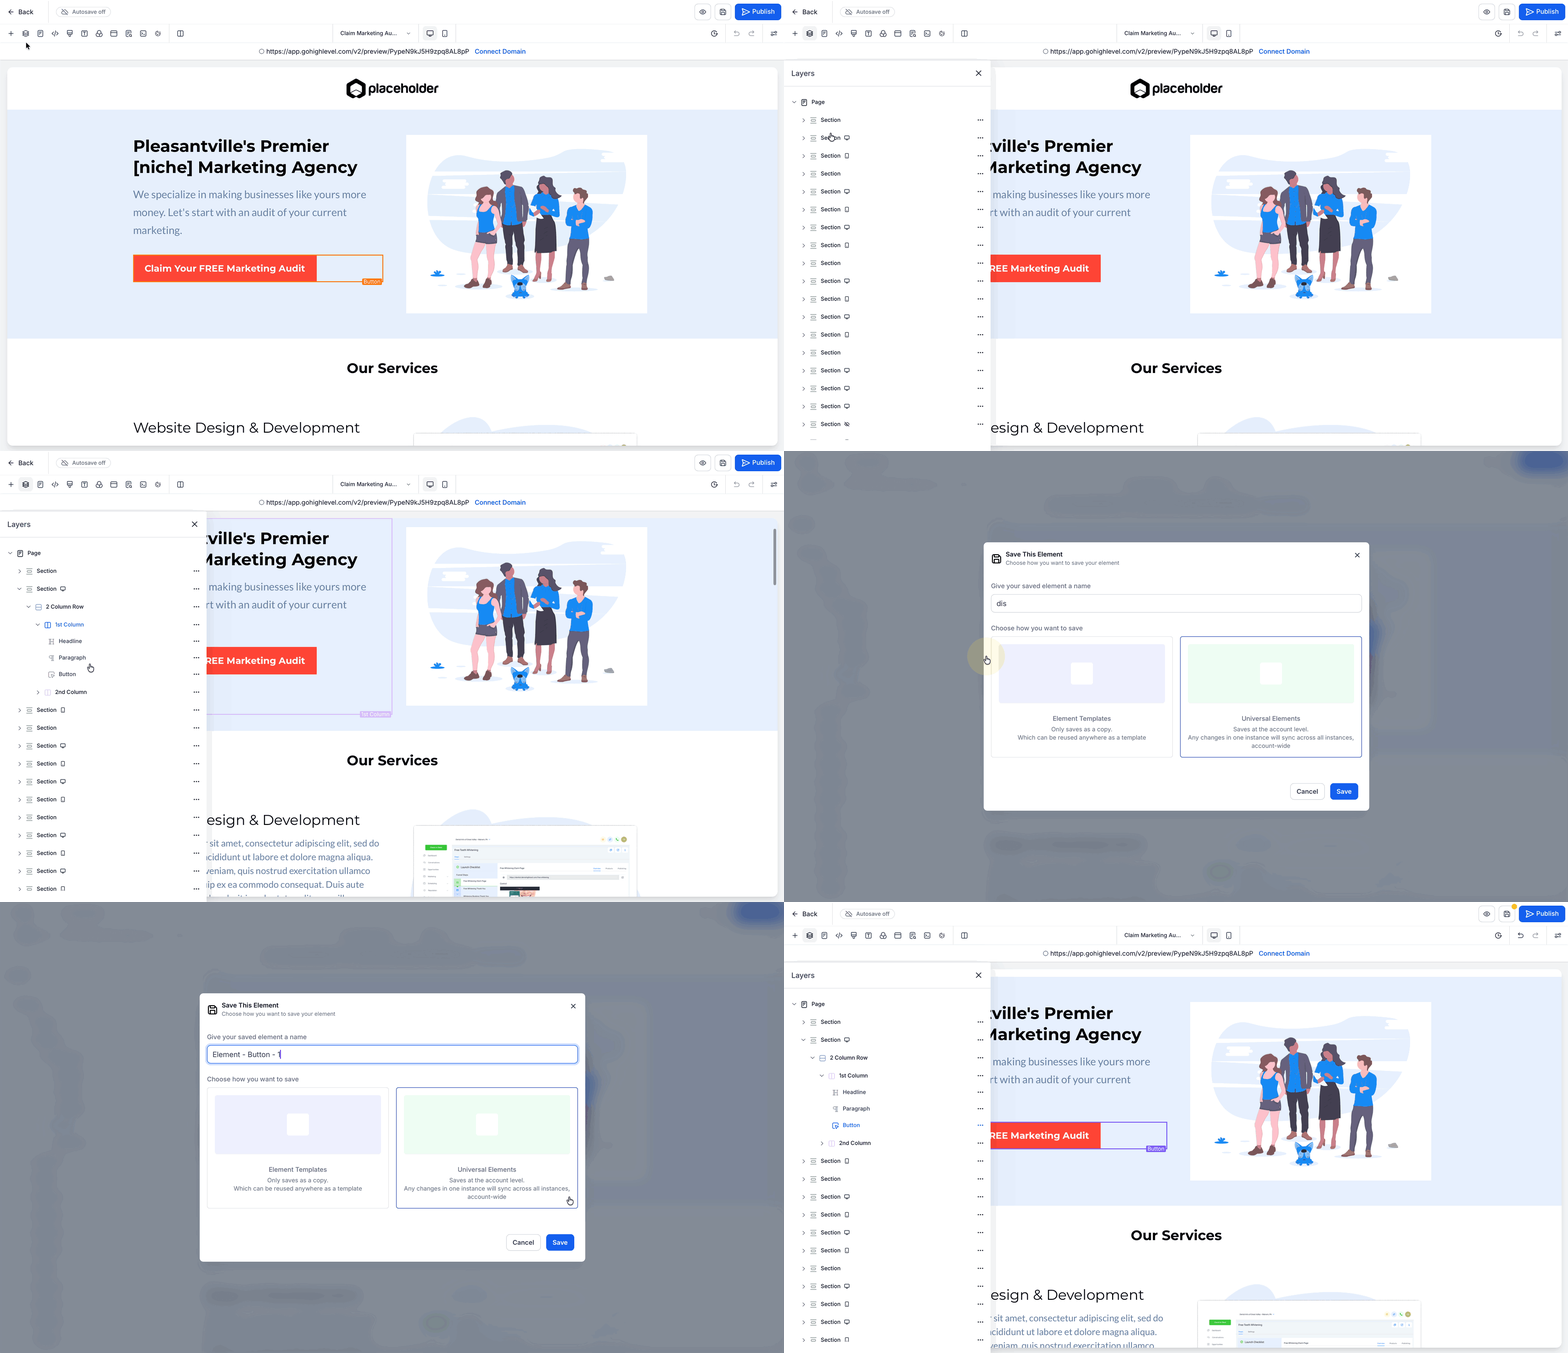
- Select the element you want to reuse, such as a button or icon.
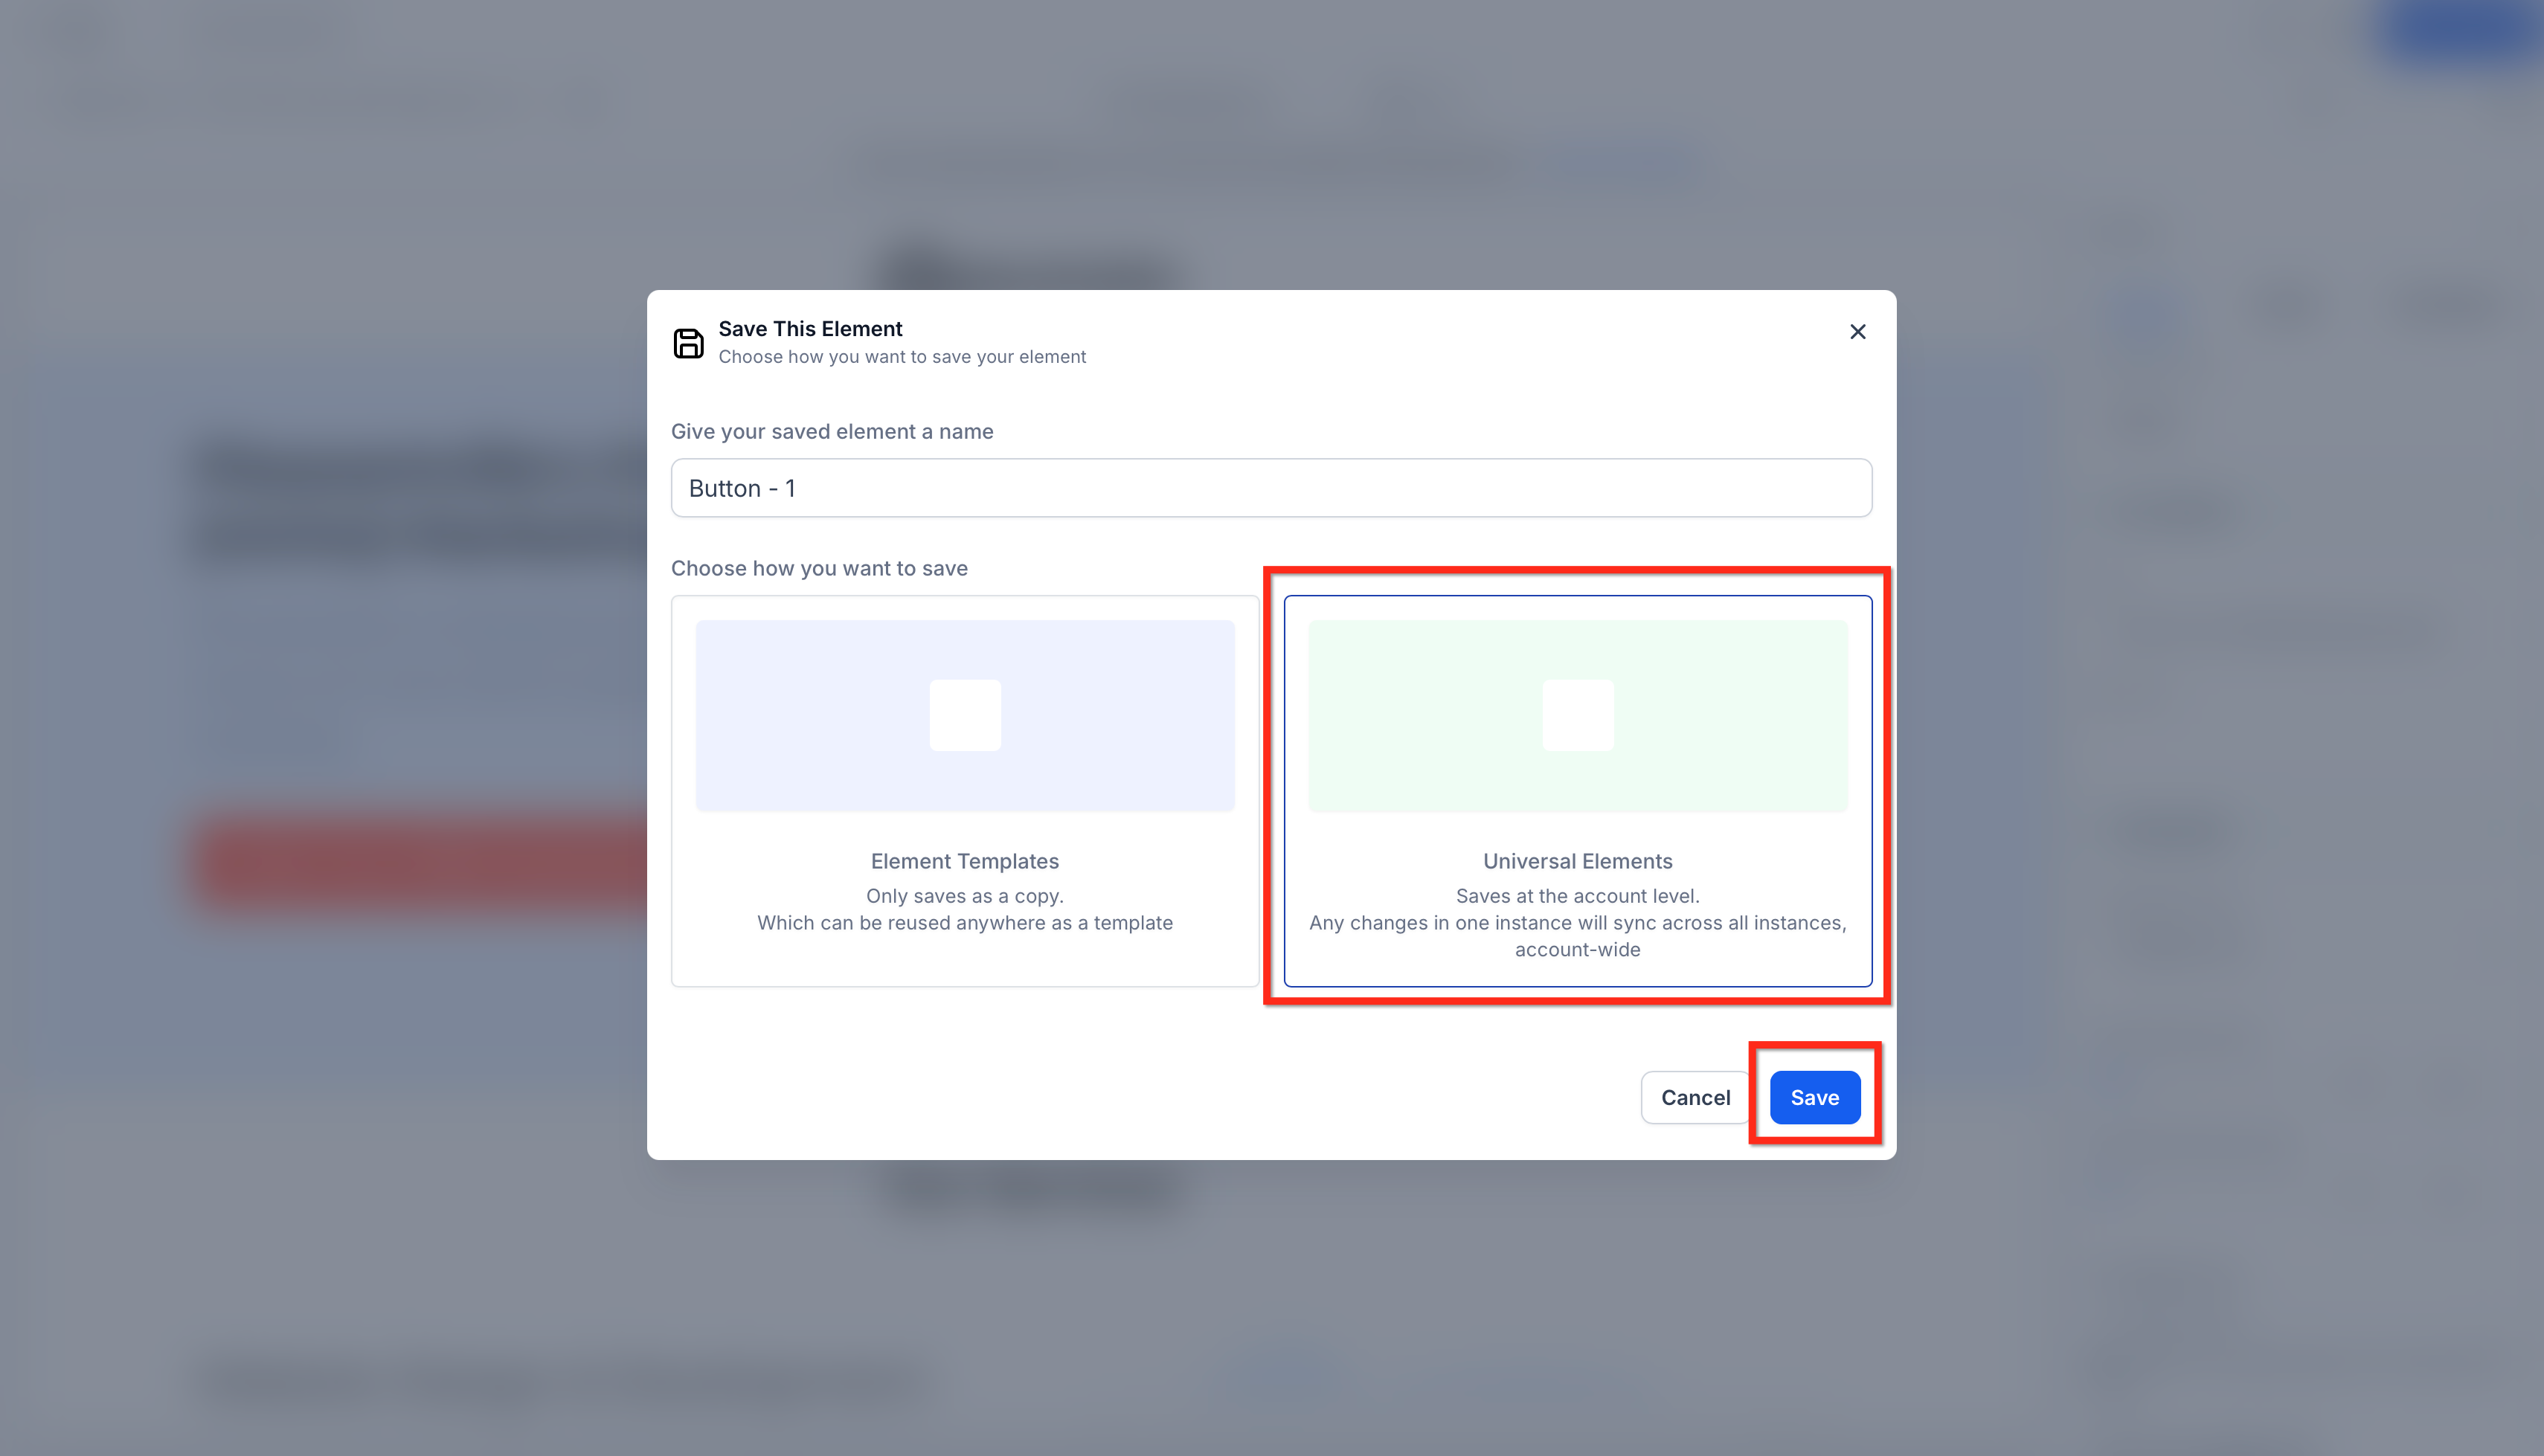
- Click the Save icon on the orange toolbar or use the Layers panel menu to choose Save as Universal Element.
- Enter a clear, searchable name for the element.
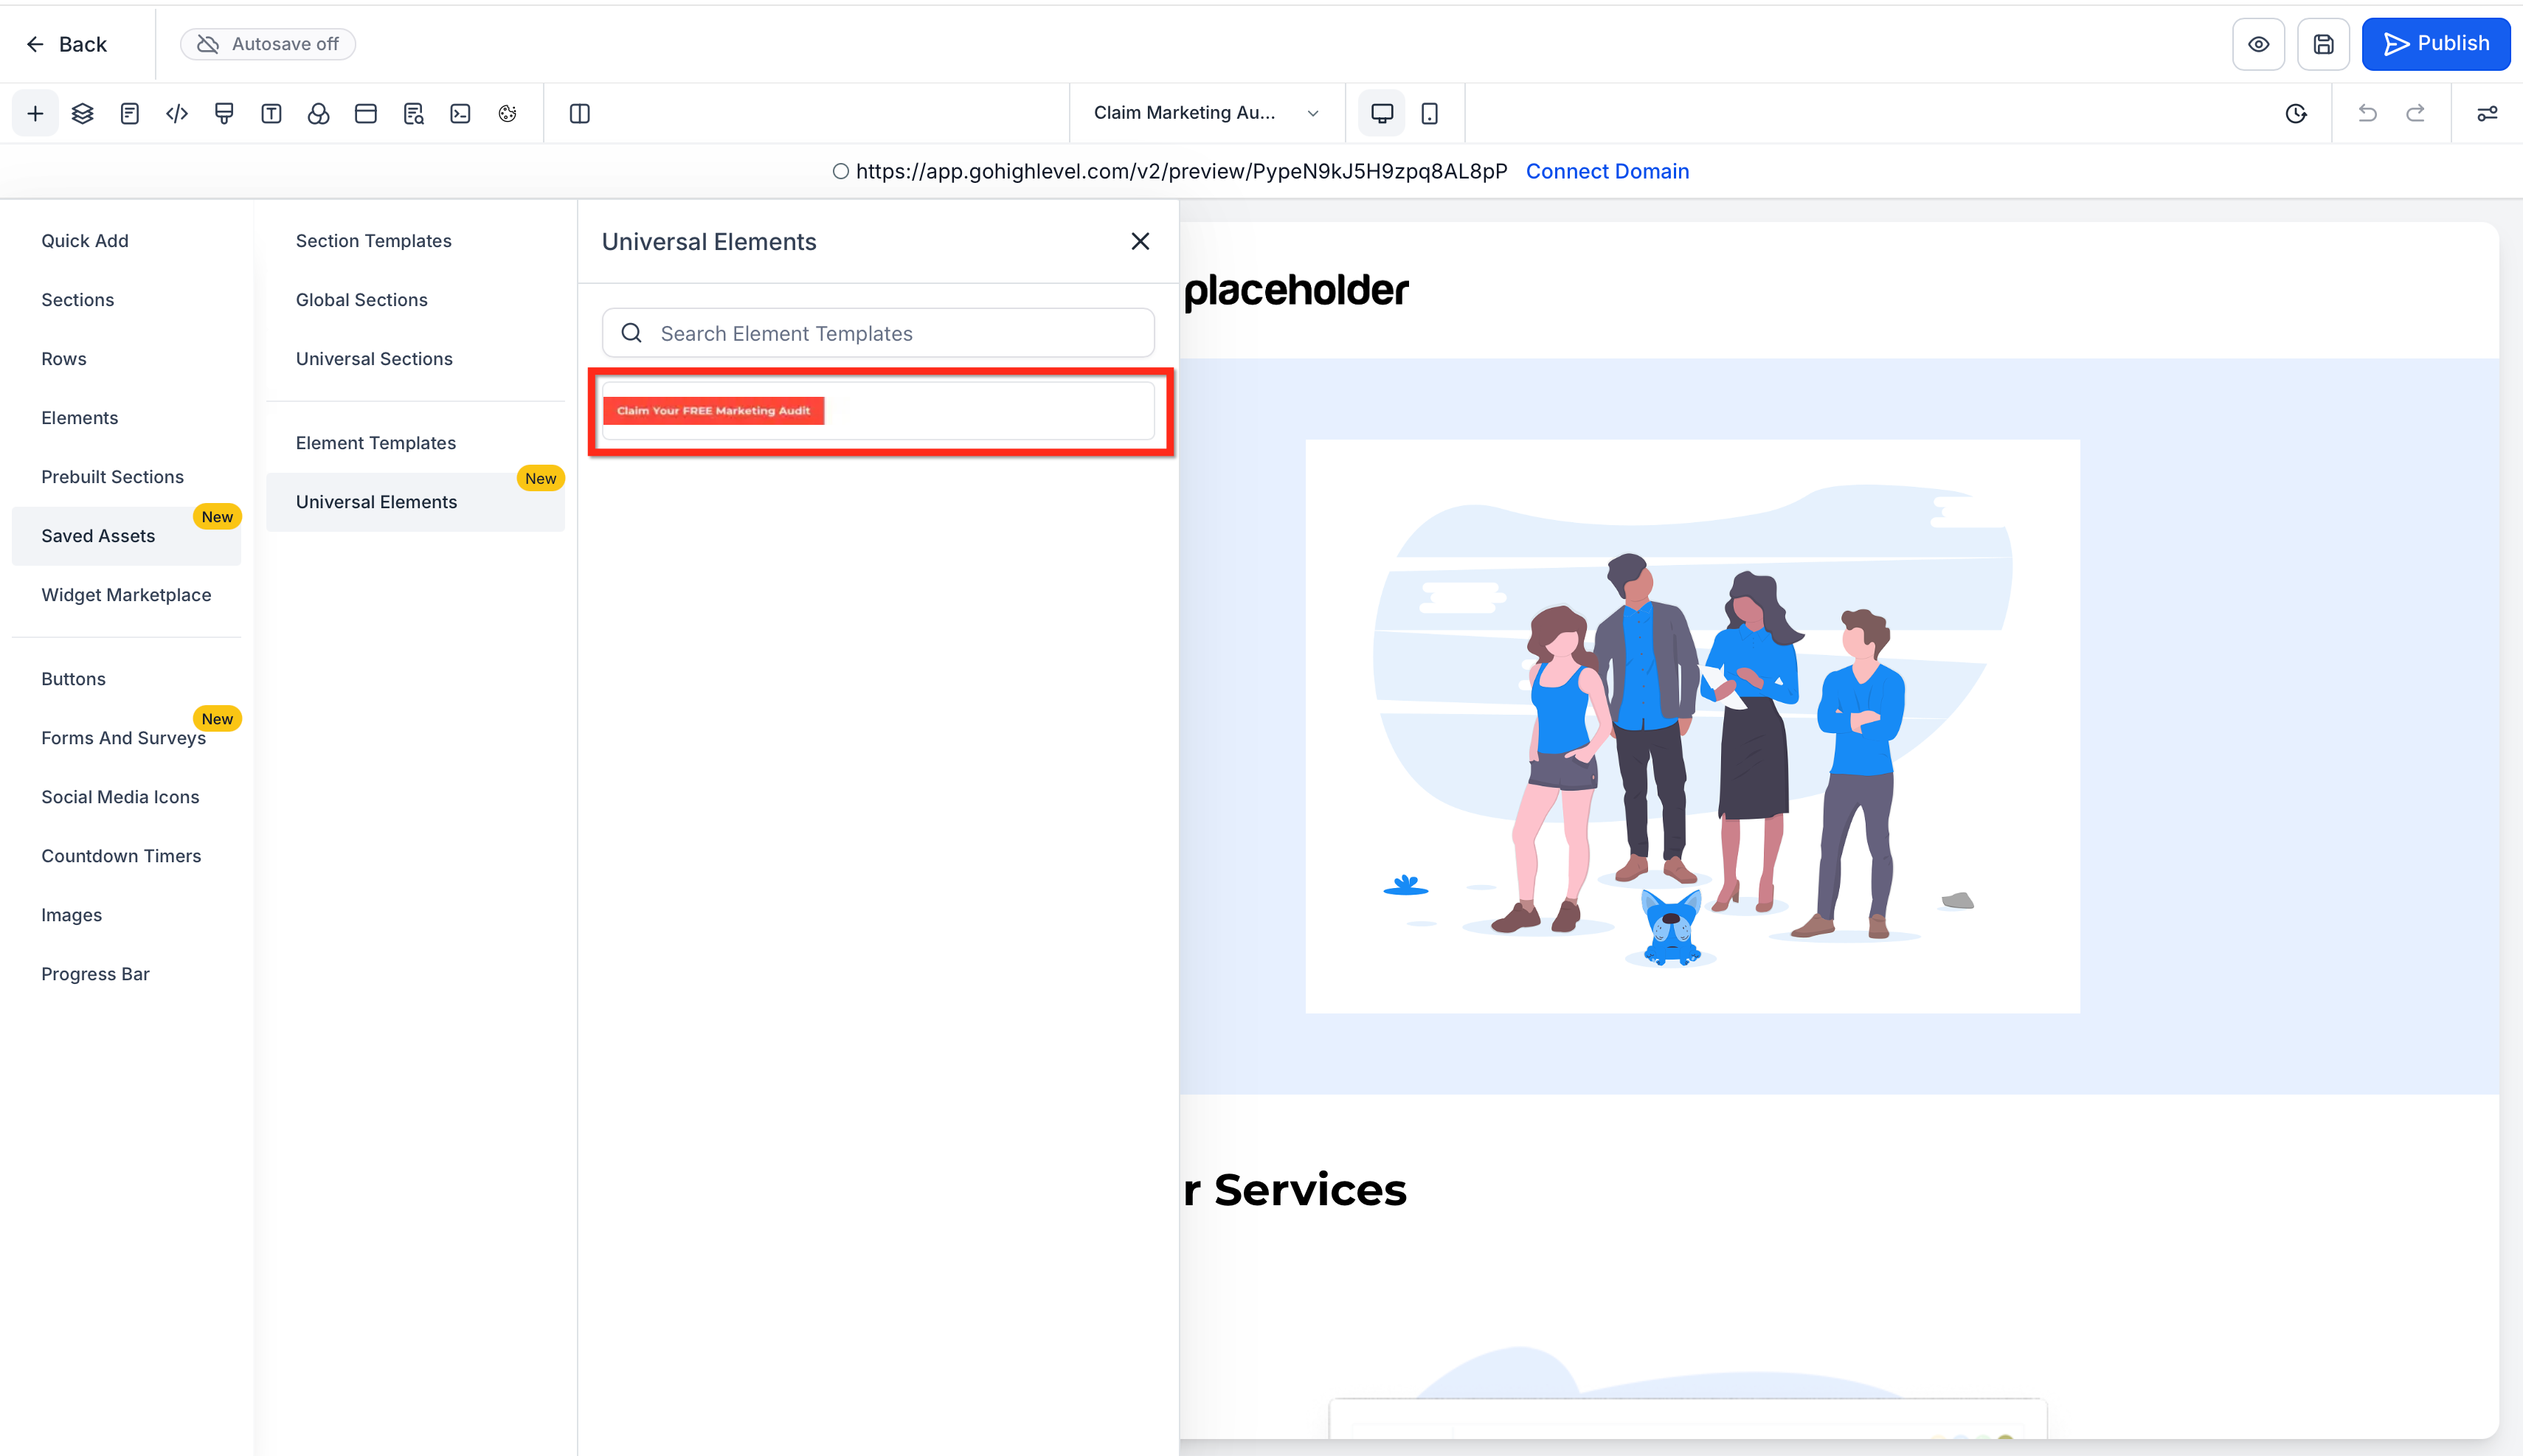
- Confirm the save so the element appears in Saved Assets > Universal Elements.
Place a universal element
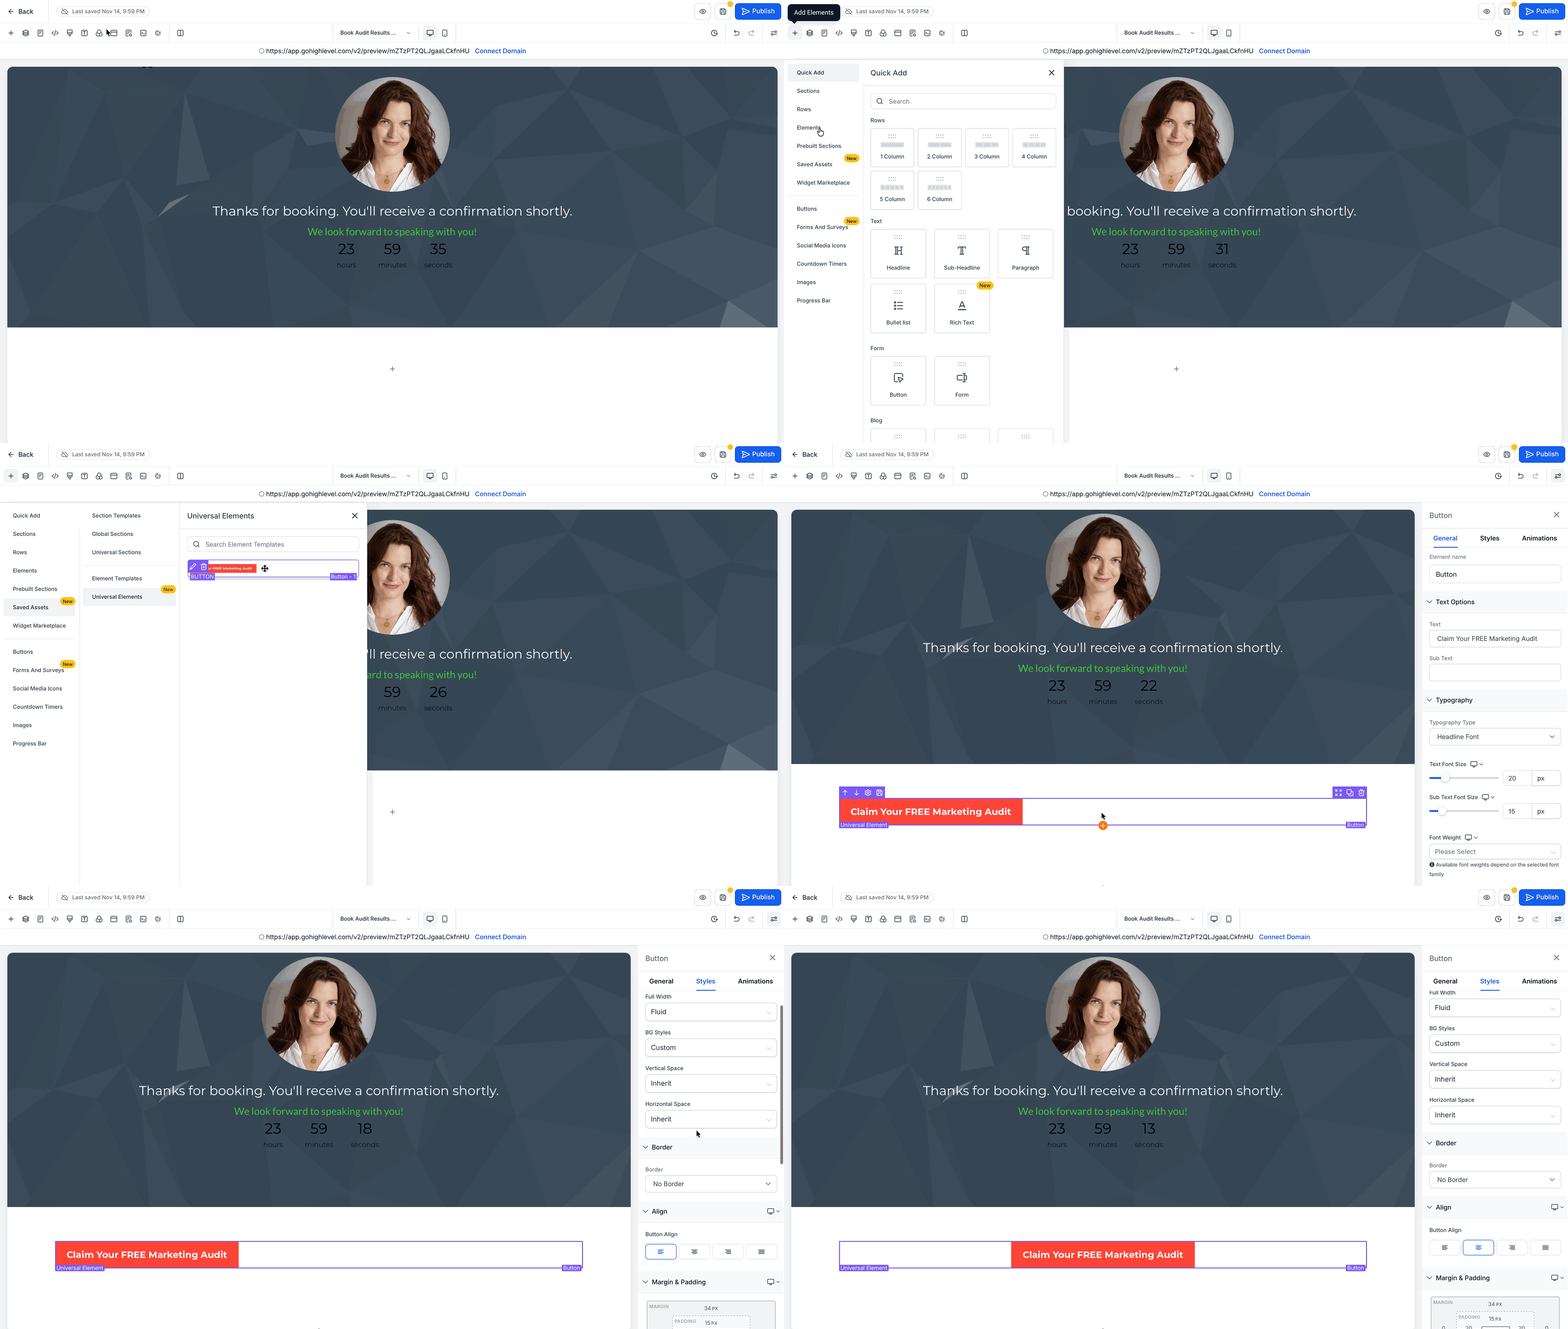
- Open Add Elements, then navigate to Saved Assets > Universal Elements.
- Find the needed element by searching or browsing the thumbnails.
- Drag the element onto the page canvas.
Edit and publish a universal element
- Select the placed Universal Element and make the desired design changes.
- Save the page changes in the builder.
- Publish the page so the updated element becomes visible to visitors.
Manage saved universal elements
- Browse and search for elements via Add Elements > Saved Assets > Universal Elements.
- Rename items using consistent prefixes for clarity.
- Delete unused elements only after confirming no pages currently rely on them.
06What it looks like in HighLevel
07Things to know before you rely on it
- Changes to a Universal Element are not visible to visitors until the affected pages are published.
- Deleting a Universal Element removes it from the library; review pages that use the element before removal.
08How it connects to the rest of HighLevel
- Learn how to add tracking scripts to funnels and websites, which can work alongside Universal Elements. Add tracking code
- Set up scroll to element links to navigate between sections that may contain Universal Elements. Scroll to element links
- Review plan options to ensure you have access to the Page Builder features needed for Universal Elements. Pricing and plans
Michael's take

Universal Elements are a solid choice for teams that want consistent design without repetitive edits; skip it if you only ever need one off designs and don’t share components across pages.