
01Who this is for
- Marketing agencies can create QR codes that direct leads to specific landing pages, simplifying campaign tracking.
- Event planners can embed QR codes linking to registration forms, allowing attendees to sign up right away with a scan.
- Retail businesses can place QR codes on product pages that open checkout links, enabling quick purchases from mobile devices.
02QR code elements, explained
The QR Code element adds a scannable image to any page built with HighLevel. It points to a destination URL that can be a funnel, website page, calendar, form, survey, payment link or any external address.
When the element is on the canvas you can resize it and move it for both desktop and mobile views. Selecting the element reveals a blue Edit QR Code button that opens an inline builder, so you can change the destination or create a new QR without leaving the page.
The element is part of the Page Builder library. QR codes themselves are stored in a QR library tied to the current location, and they can be managed from the QR builder screens or from the element’s inline editor.
03How businesses use the QR code element
- Marketing agency. Create a QR code that links to a client’s campaign landing page. Drag the QR element onto the funnel page, select the QR from the library, and publish. The QR can be scanned by prospects to reach the landing page directly.
- Event planning company. Generate a QR that points to an event registration form. Place the QR element on the event website, edit the destination to the form URL, and publish. Attendees scan the code to open the registration form on their phones.
- Retail ecommerce store. Add a QR that directs shoppers to a payment link for a product. Insert the QR element on the product page, select or create the payment QR, and publish the page. Customers can scan the code to start checkout right away.
04The numbers and rules that matter
- Supported destination URLs: Funnel/website page, calendar, form, survey, payment link, external URL.
05How to set up and use the QR code element in HighLevel
Add QR code element
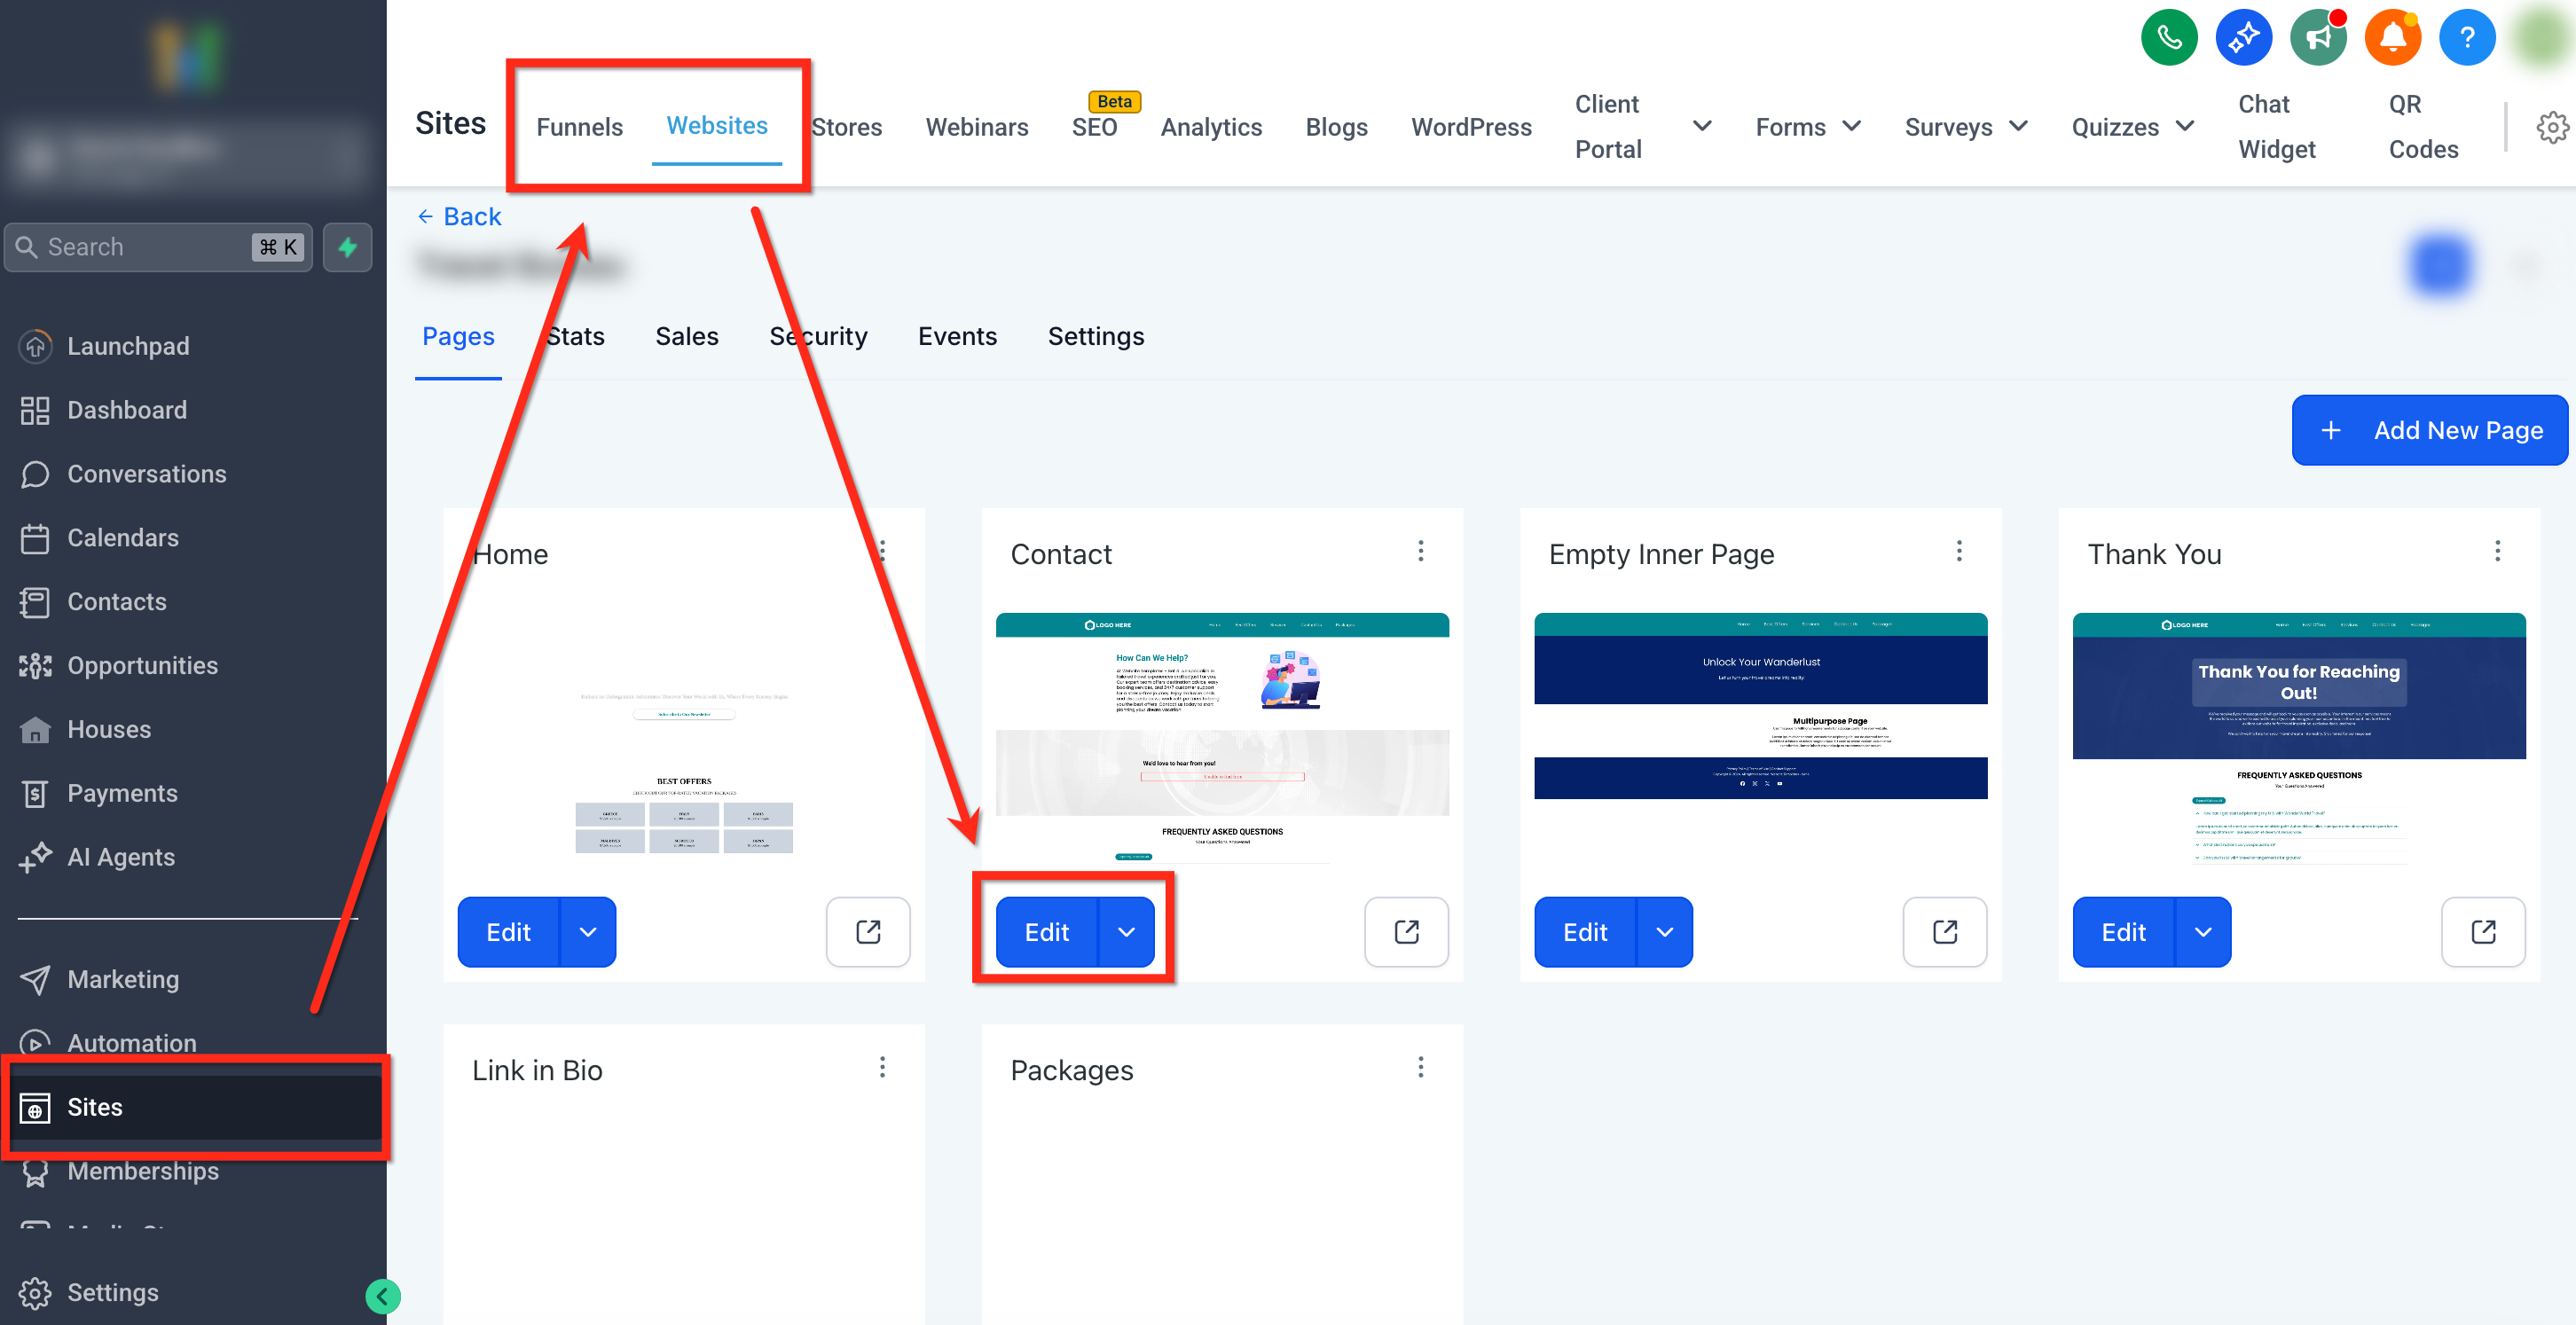
- Open Sites > Websites (or Funnels) and select the page you want to edit.
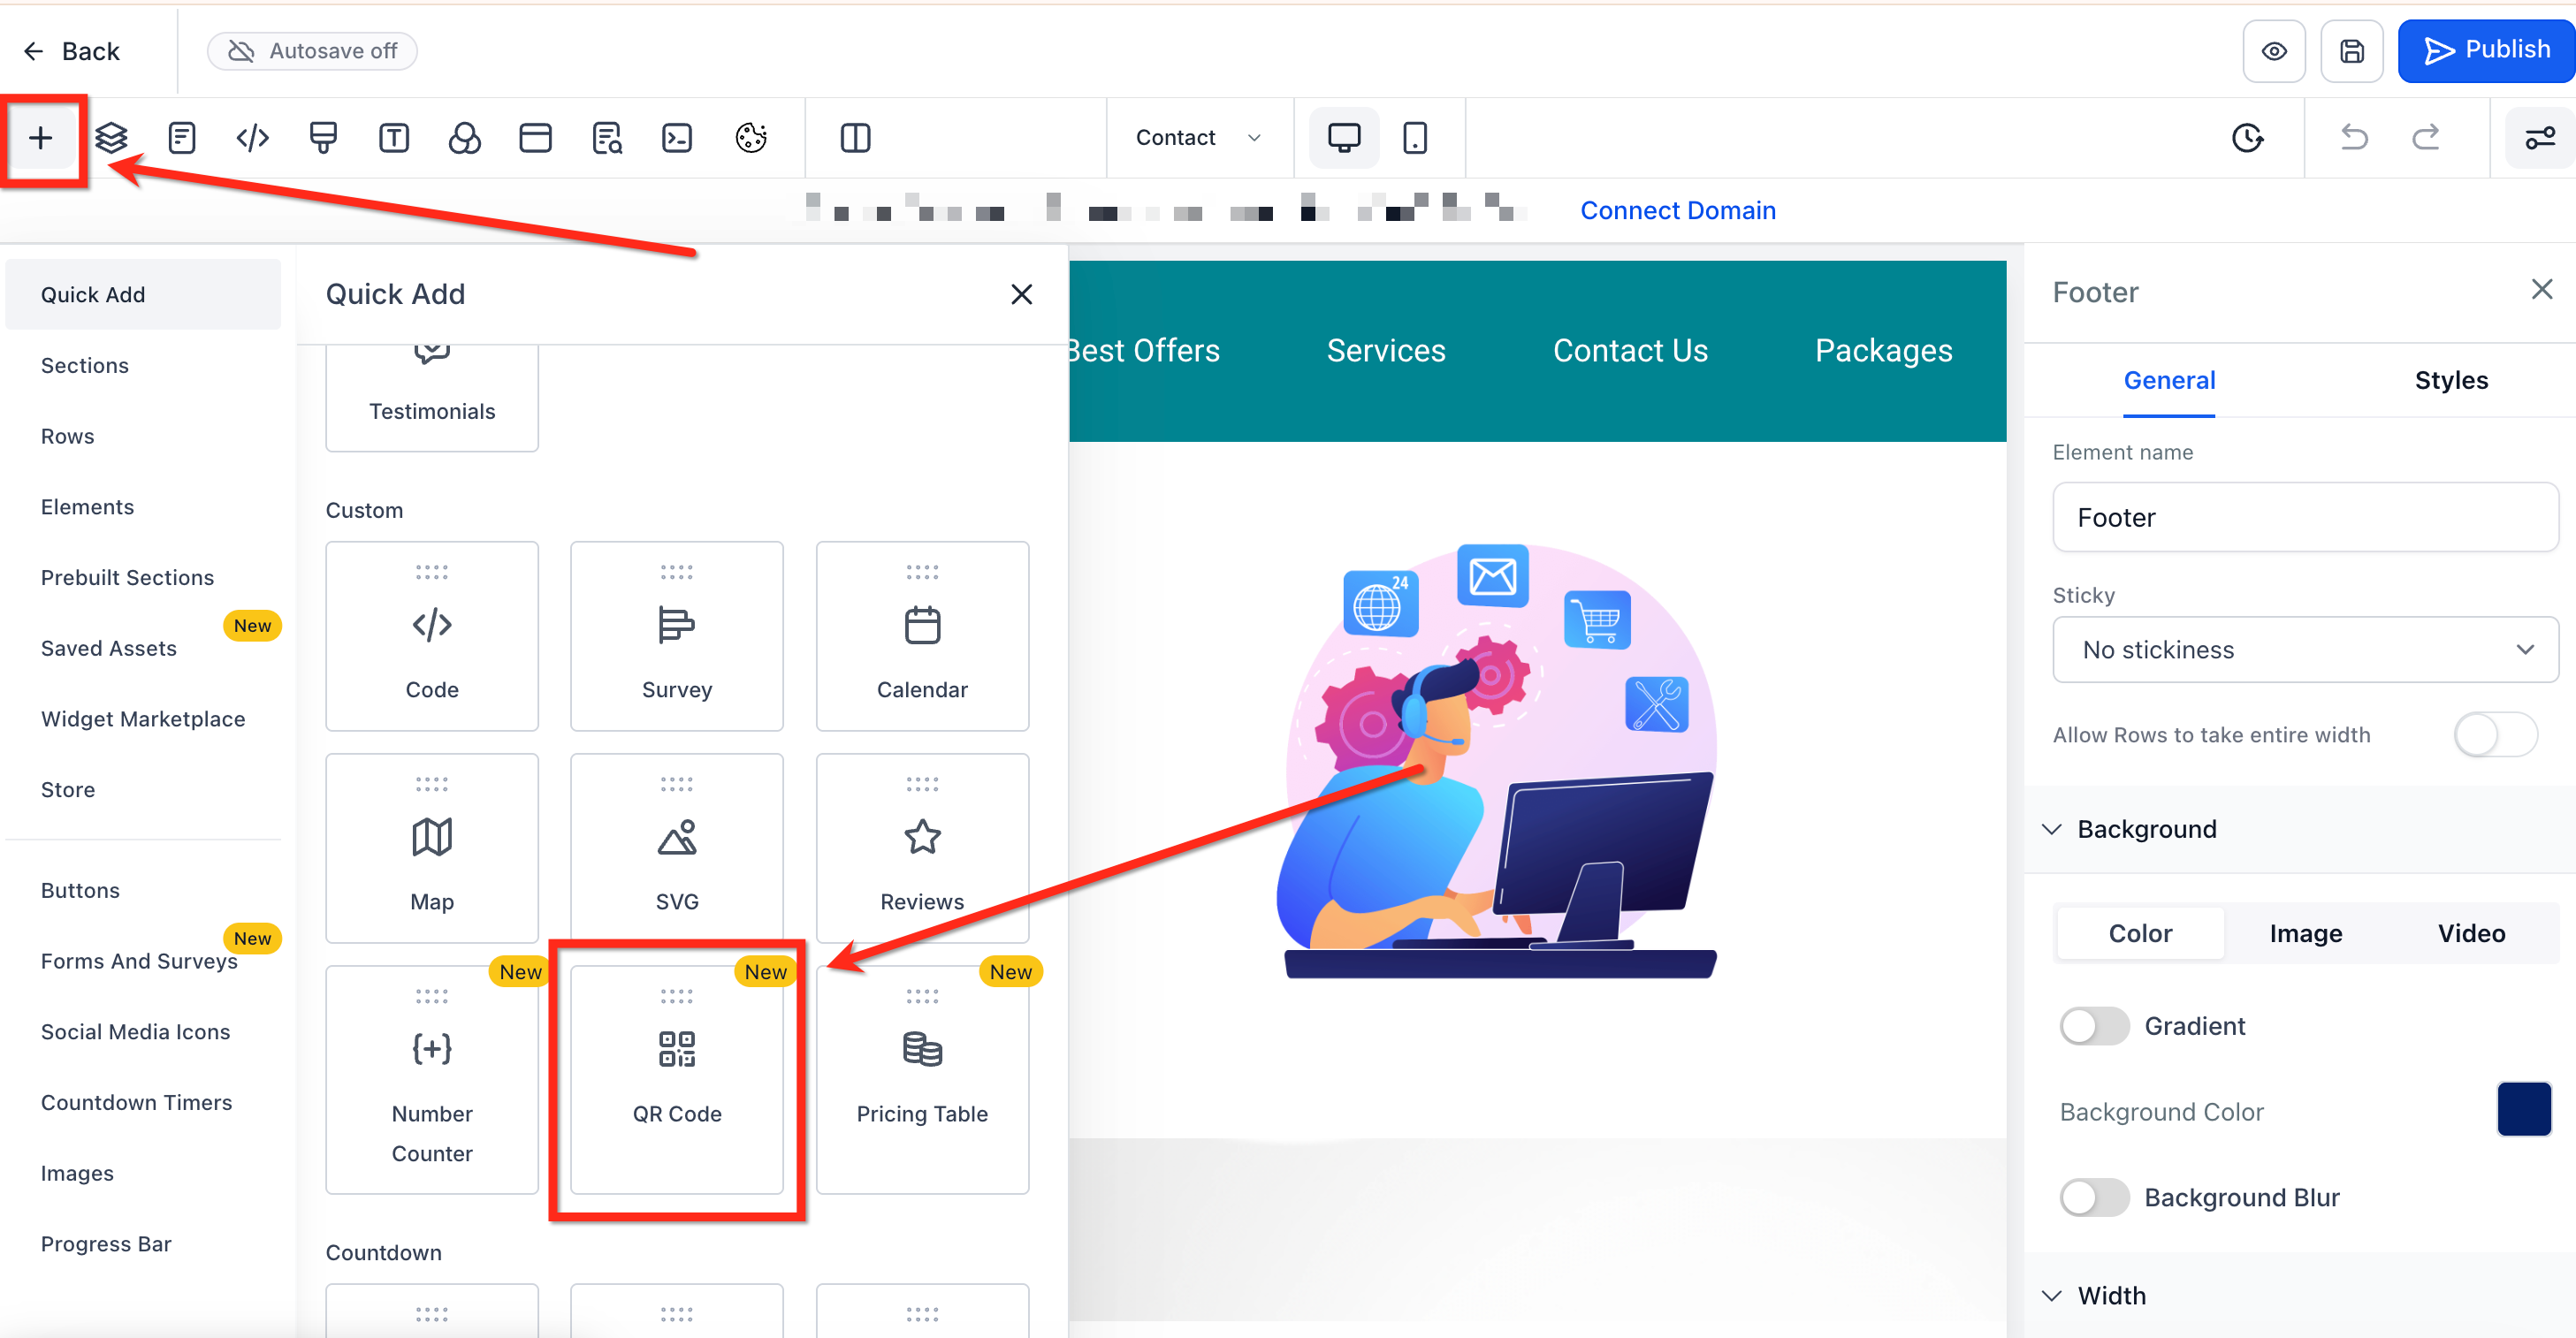
- Click the + (add elements) icon to open the elements panel.
- Scroll down until you see QR Code and drag it onto the canvas.
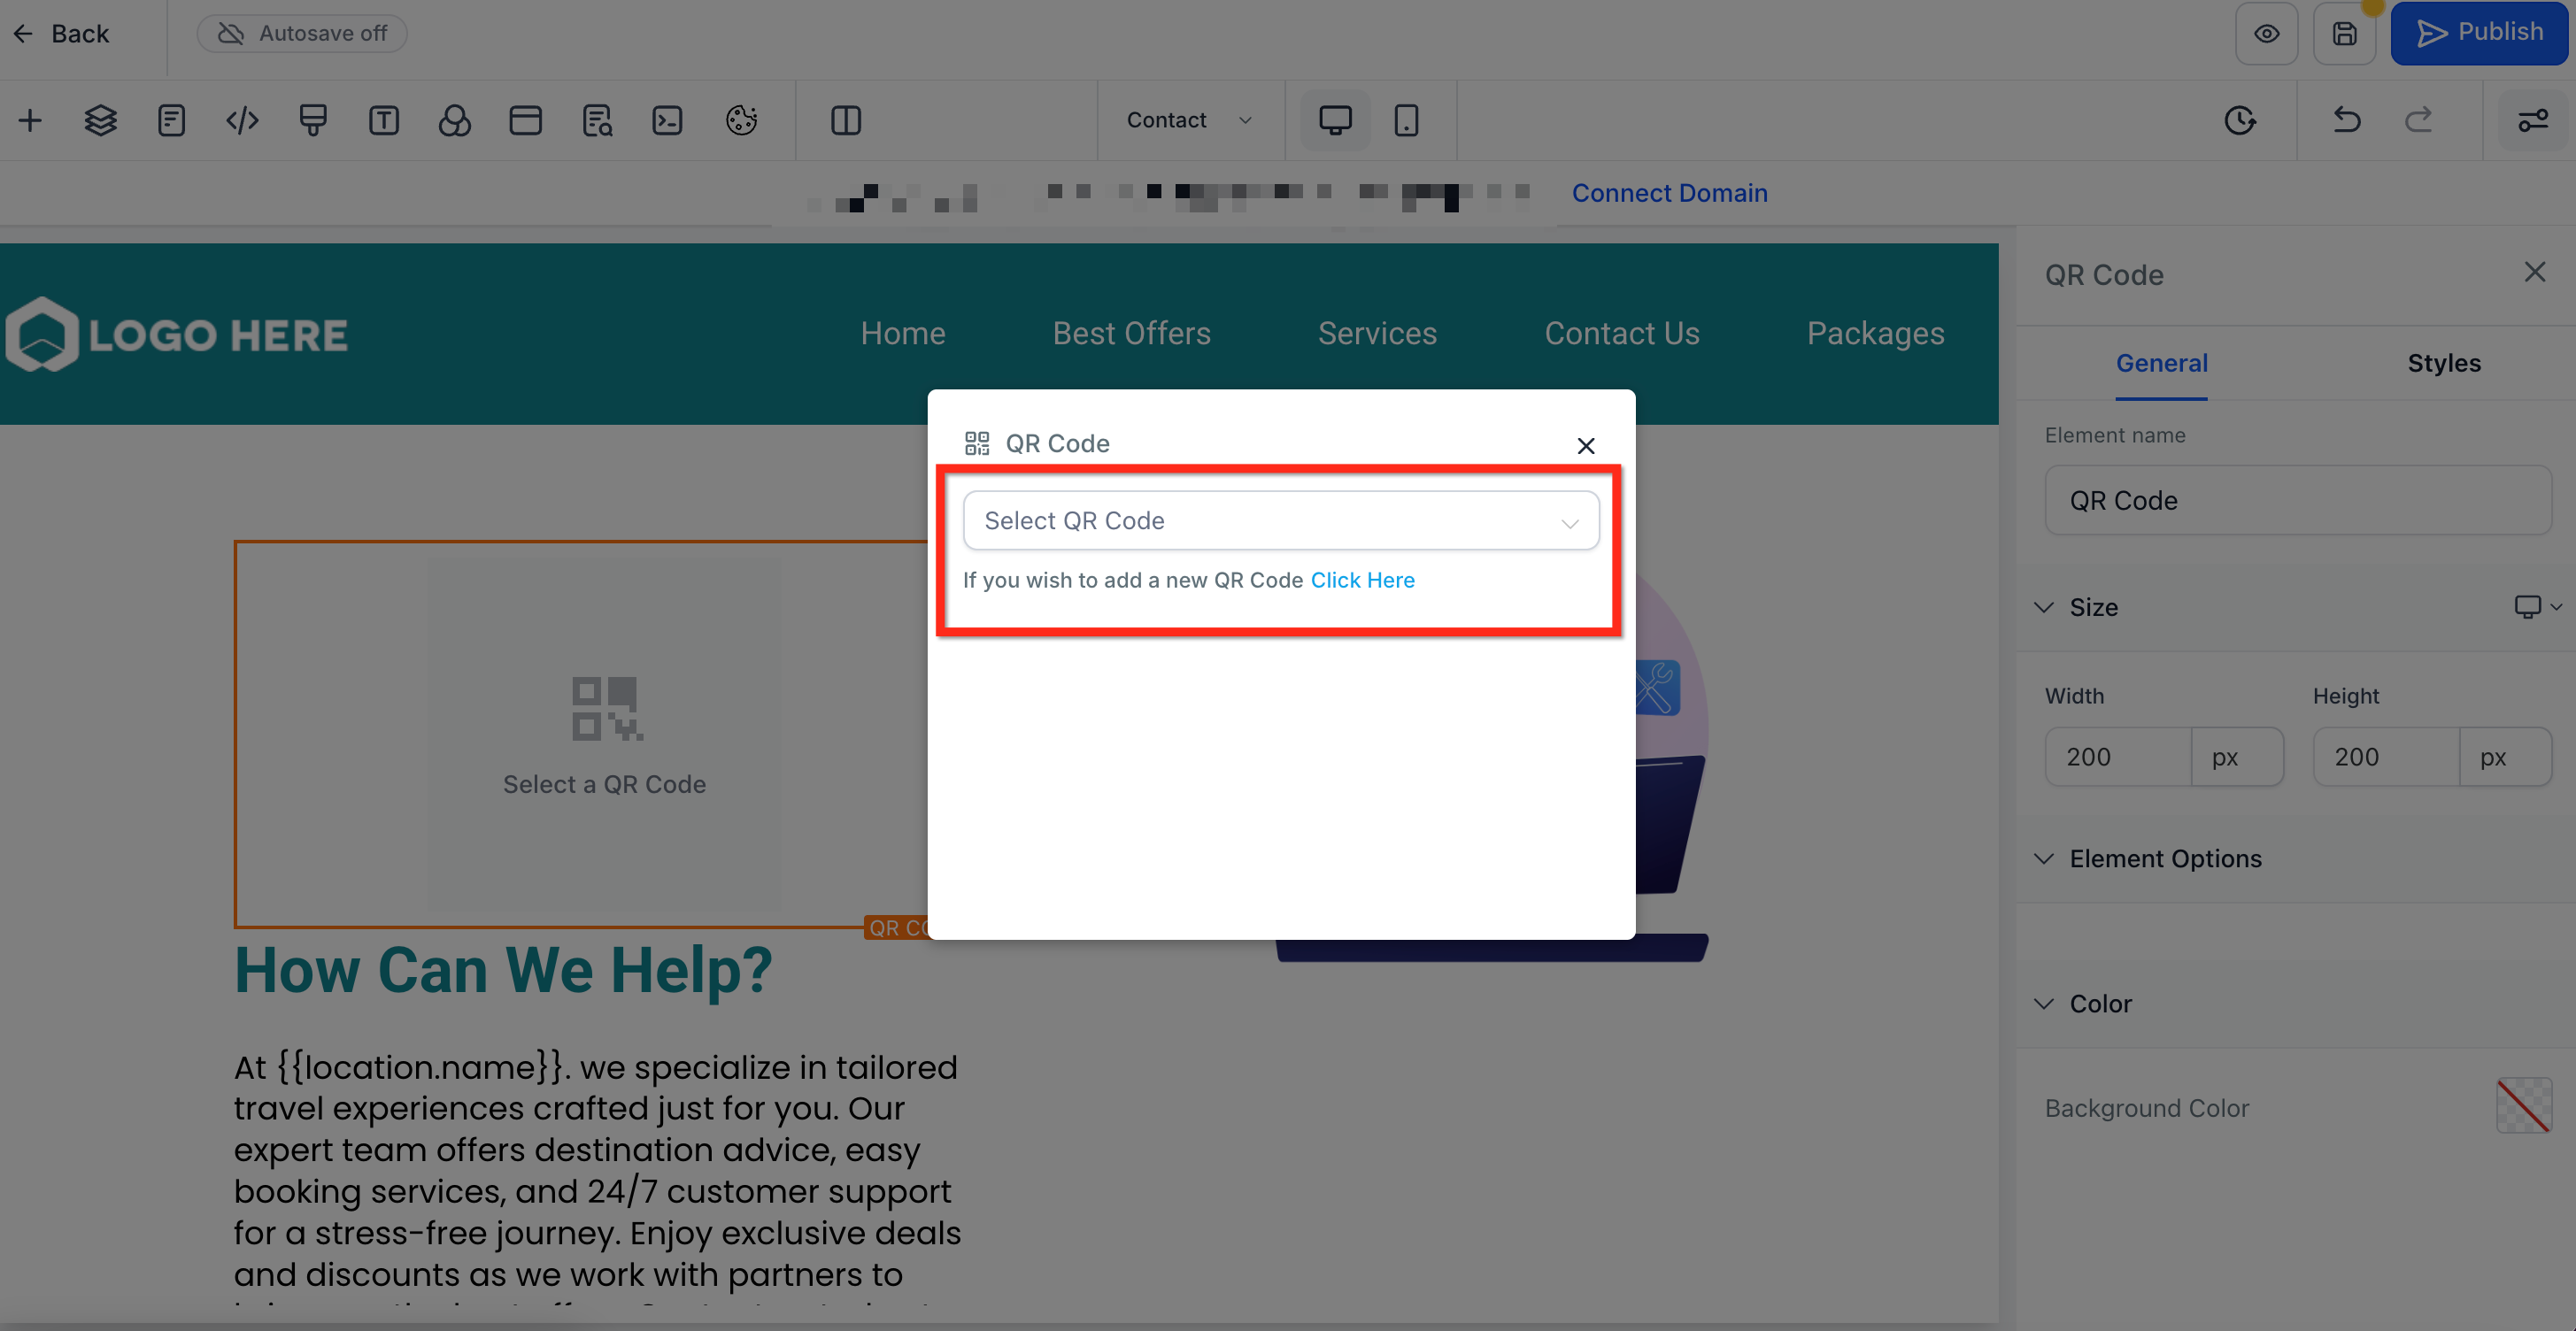
- Click the drop down menu on the element and choose the QR code you want to use.
- Click the text below the drop down to open the QR Code builder and create a new QR code.
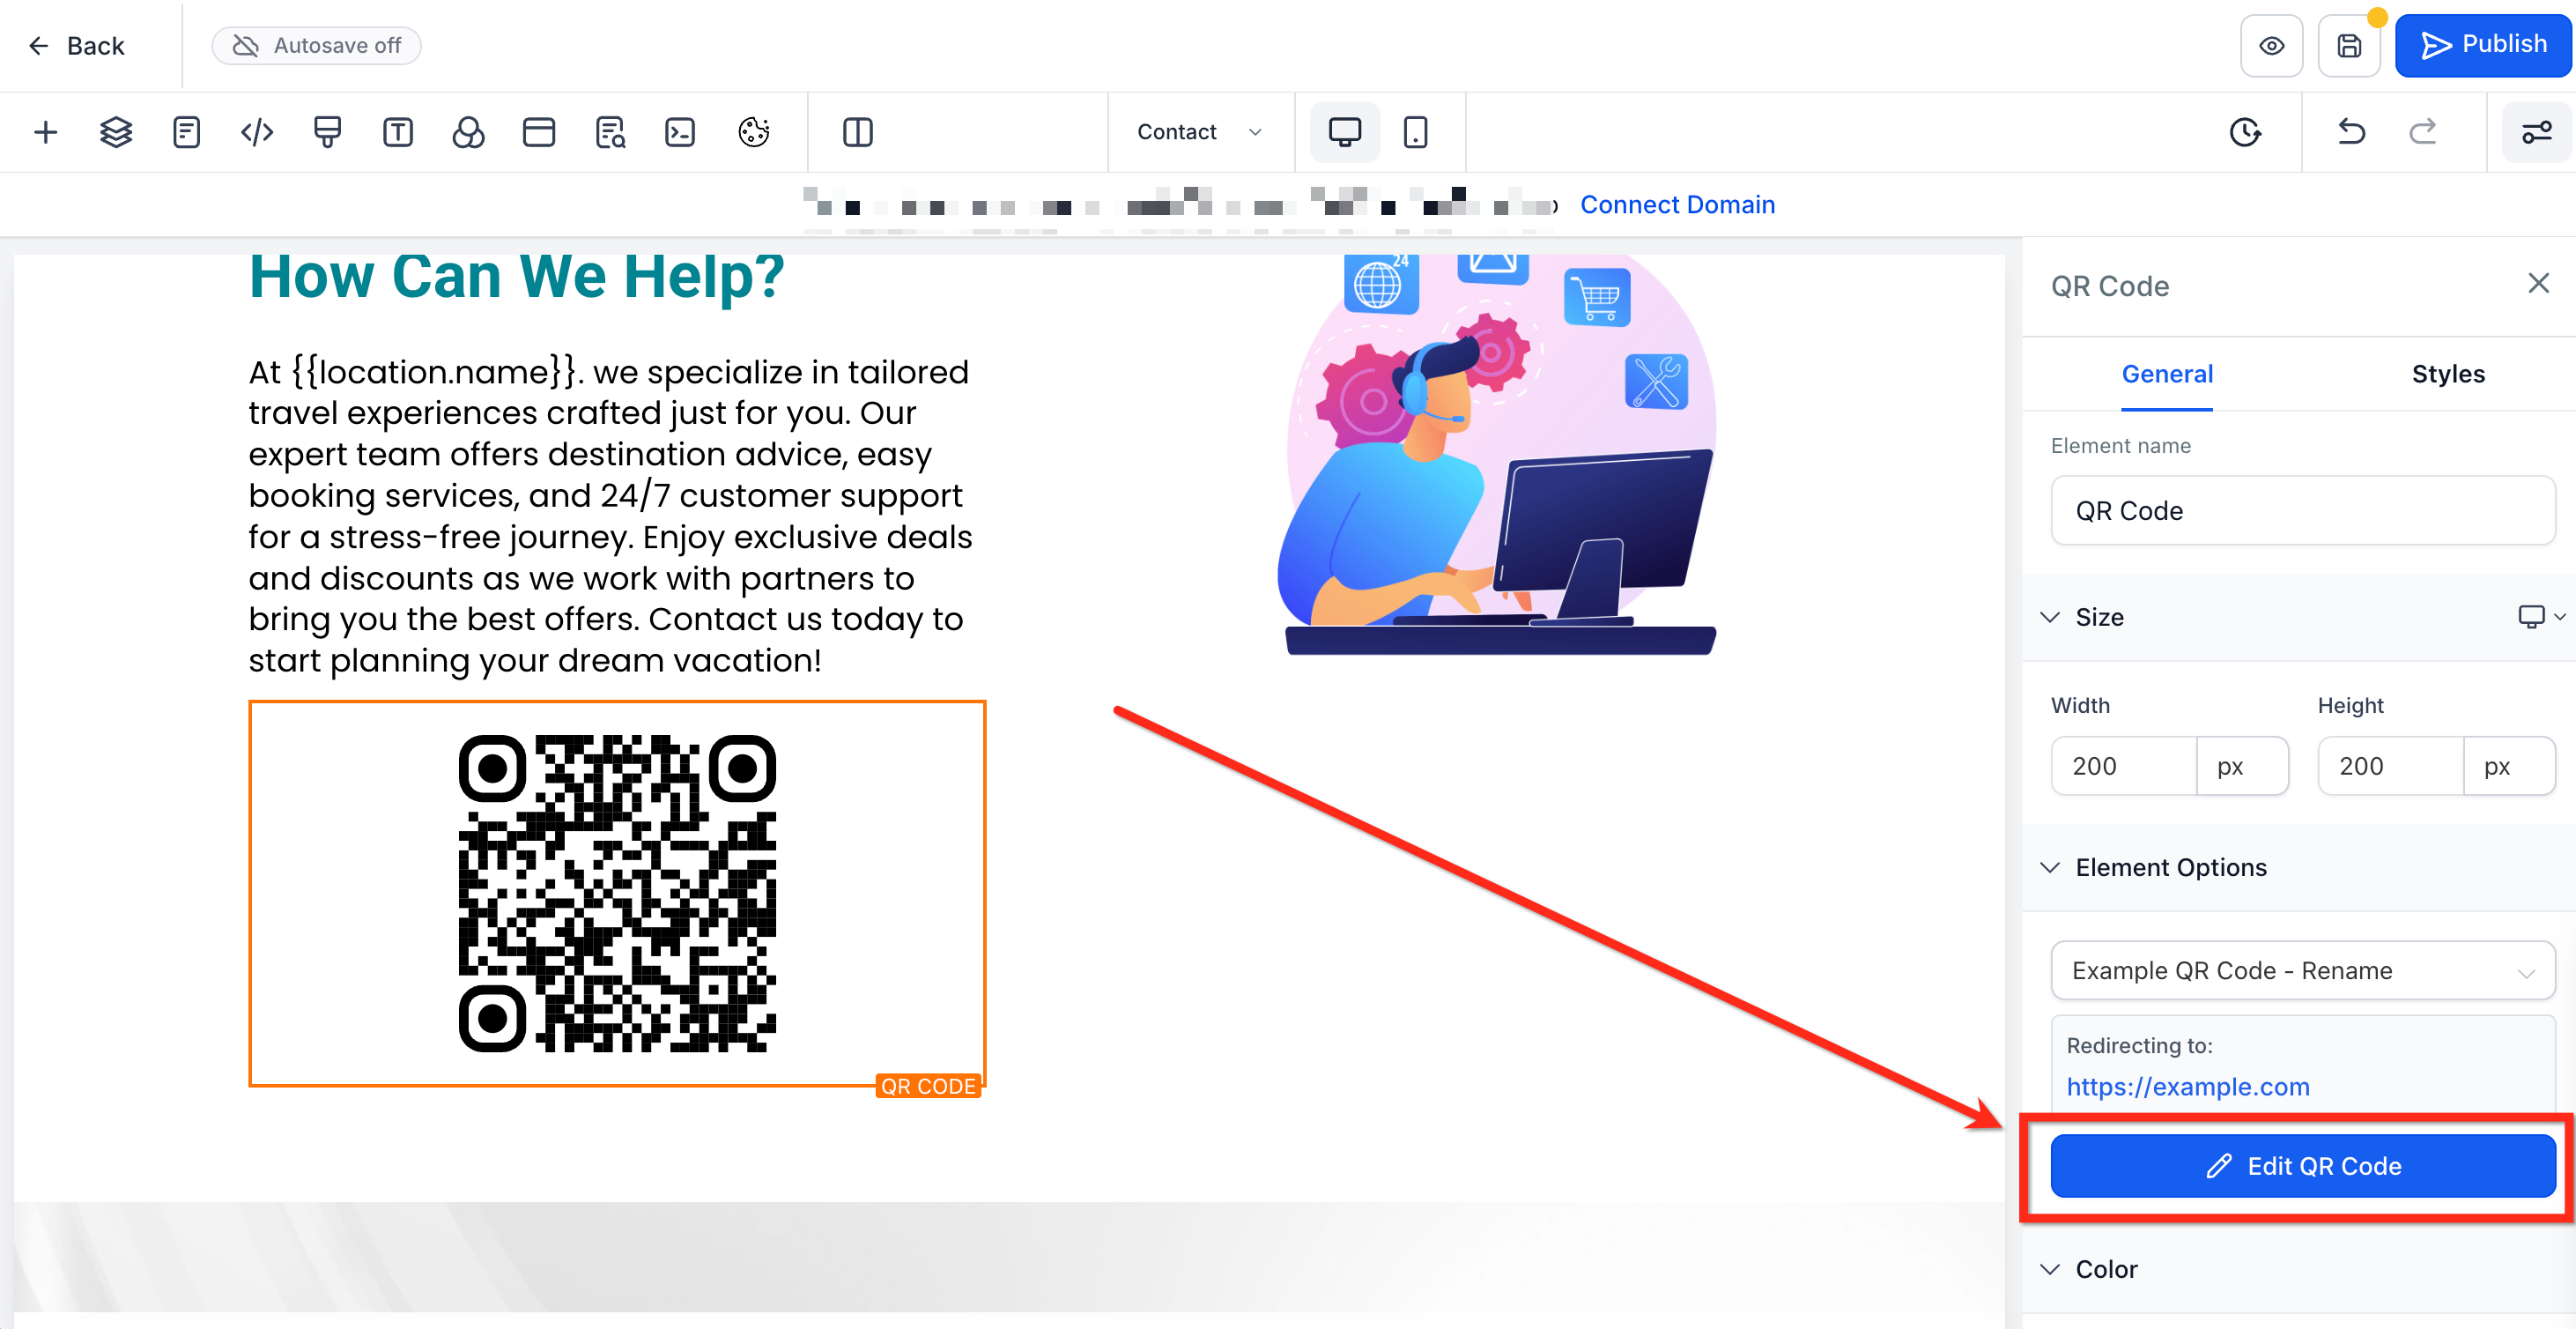
- Select the QR code element on the canvas.
- Click the blue Edit QR Code button to modify the QR’s settings.
06What it looks like in HighLevel
07Settings that matter
- QR Code. Controls the scannable image displayed on the page and the URL it opens when scanned.
- Edit QR Code. Opens the inline QR builder so you can change the selected QR’s destination or other properties.
08Things to know before you rely on it
- If a QR code previously chosen is deleted from the library, the element will prompt you to select or create another one.
- QR codes that belong to a different location are flagged with a label to avoid confusion.
- The element can be resized and positioned separately for desktop and mobile views.
09If something goes wrong
- QR code destination changes are not reflected for visitors.. Republish or update the page after editing the QR or swapping the selected QR.
- The selected QR code no longer appears in the element.. When prompted, choose a different QR or create a new one, then republish the page.
10How it connects to the rest of HighLevel
- Learn how to save and reuse element templates in the Page Builder. Element templates guide
- Explore border control options for page elements. Border control
- Understand how to use global sections across pages. Global sections
Michael's take

The QR code element can turn a simple page into a quick scan portal for bookings, payments or any link.
Avoid forgetting to republish the page after swapping or editing a QR, or your visitors will still see the old destination.