
01Who this is for
- Agency owners who design multiple funnels can reuse approved buttons and forms, ensuring every client site follows the same brand guidelines.
- Coaches who run webinars can quickly add the same sign up form to each event page, saving time and maintaining visual uniformity.
- Ecommerce merchants can replicate product call to action buttons across product pages without recreating styles each time.
02Element templates, explained
Element Templates capture a single element from the page builder, including its fonts, colors and spacing, and store it in a shared library for the location. The library is accessible to any user with edit rights in the same subaccount.
When you need the element again, open the Add Elements (+) menu, choose Saved Assets, then select Element Templates. The saved element is inserted onto the page with its original styling intact.
Templates are static; editing an instance on a page does not alter other pages that use the same template, and they do not sync like Global or Universal Sections.
03How businesses use element templates
- Dental practice. Open the page builder and select the appointment button used on the homepage. Save the button as an Element Template with a clear name. Insert the saved button on each new service page to keep the call to action identical.
- Real estate agency. Create a styled property image element for featured listings. Save it as an Element Template. Drag the template onto each new property page, ensuring the image block looks the same everywhere.
- Online course creator. Design a sign up form for a webinar and customize its colors. Save the form as an Element Template. Add the saved form to every upcoming webinar landing page without rebuilding it each time.
04The numbers and rules that matter
- There is currently no hard limit on the number of Element Templates you can create.
05Before you start
- User must have edit rights within the same subaccount (location).
- Access to Sites and the page builder must be available.
06How to set up and use element templates in HighLevel
Save an element template
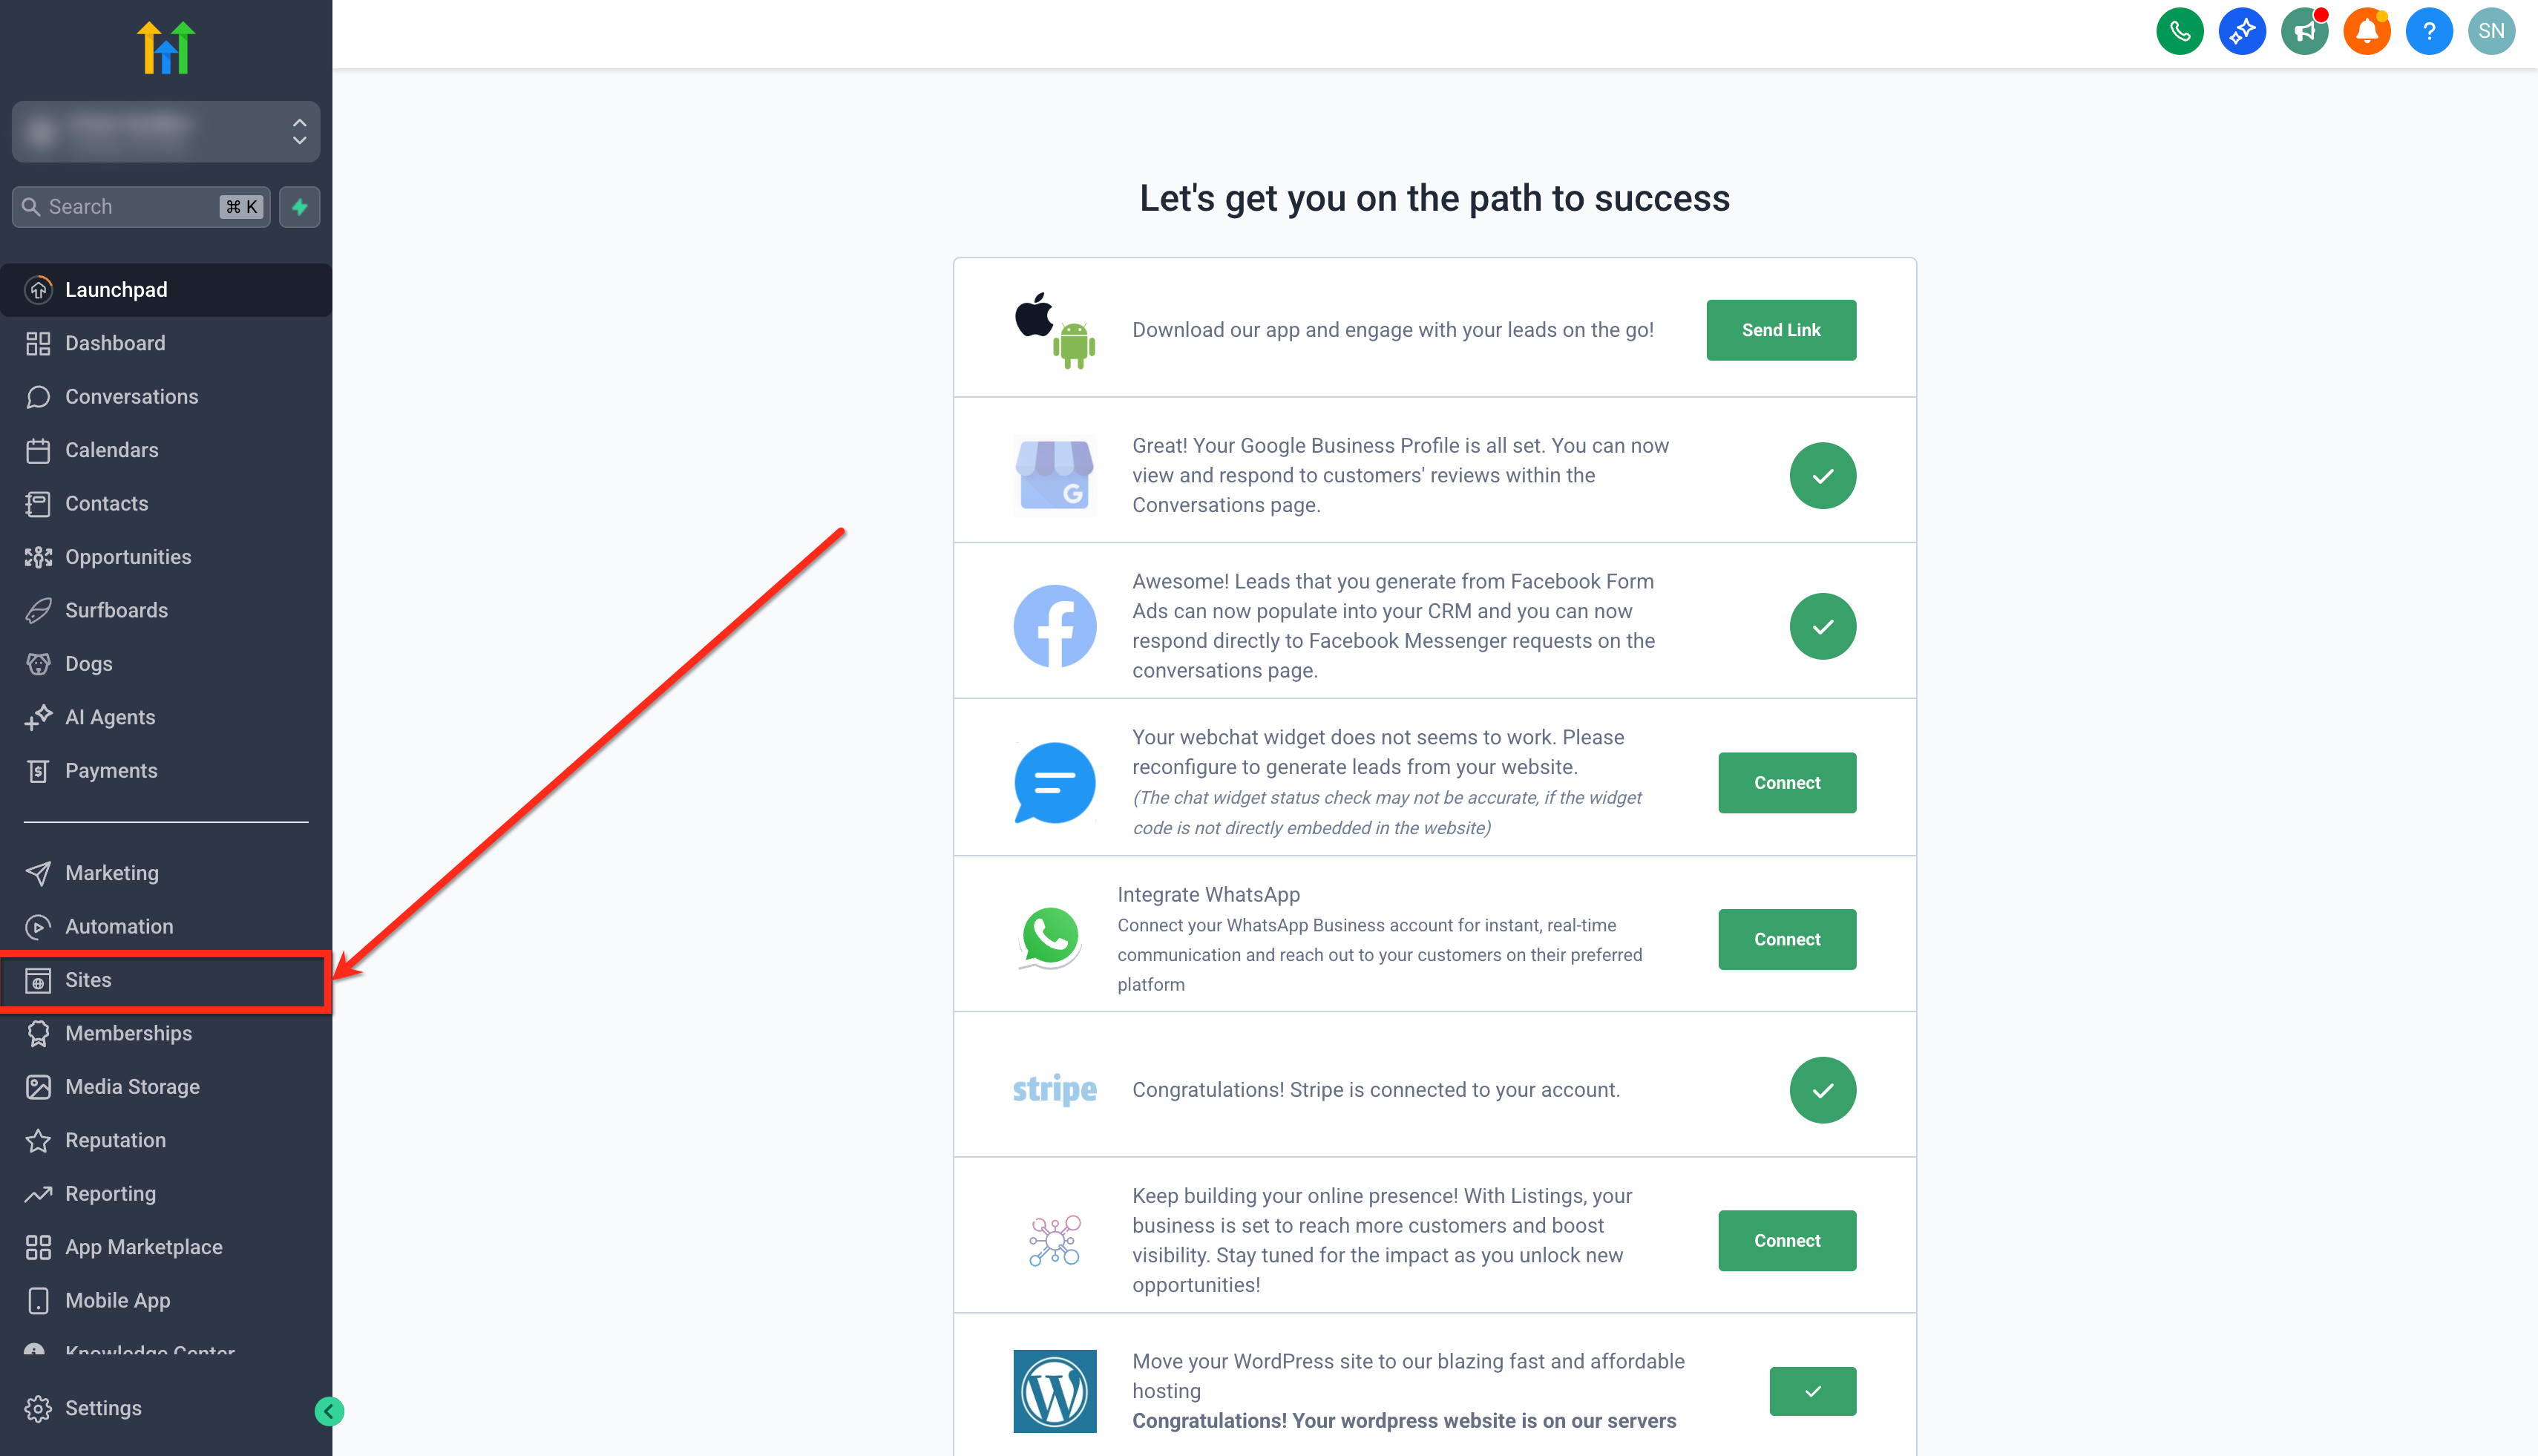
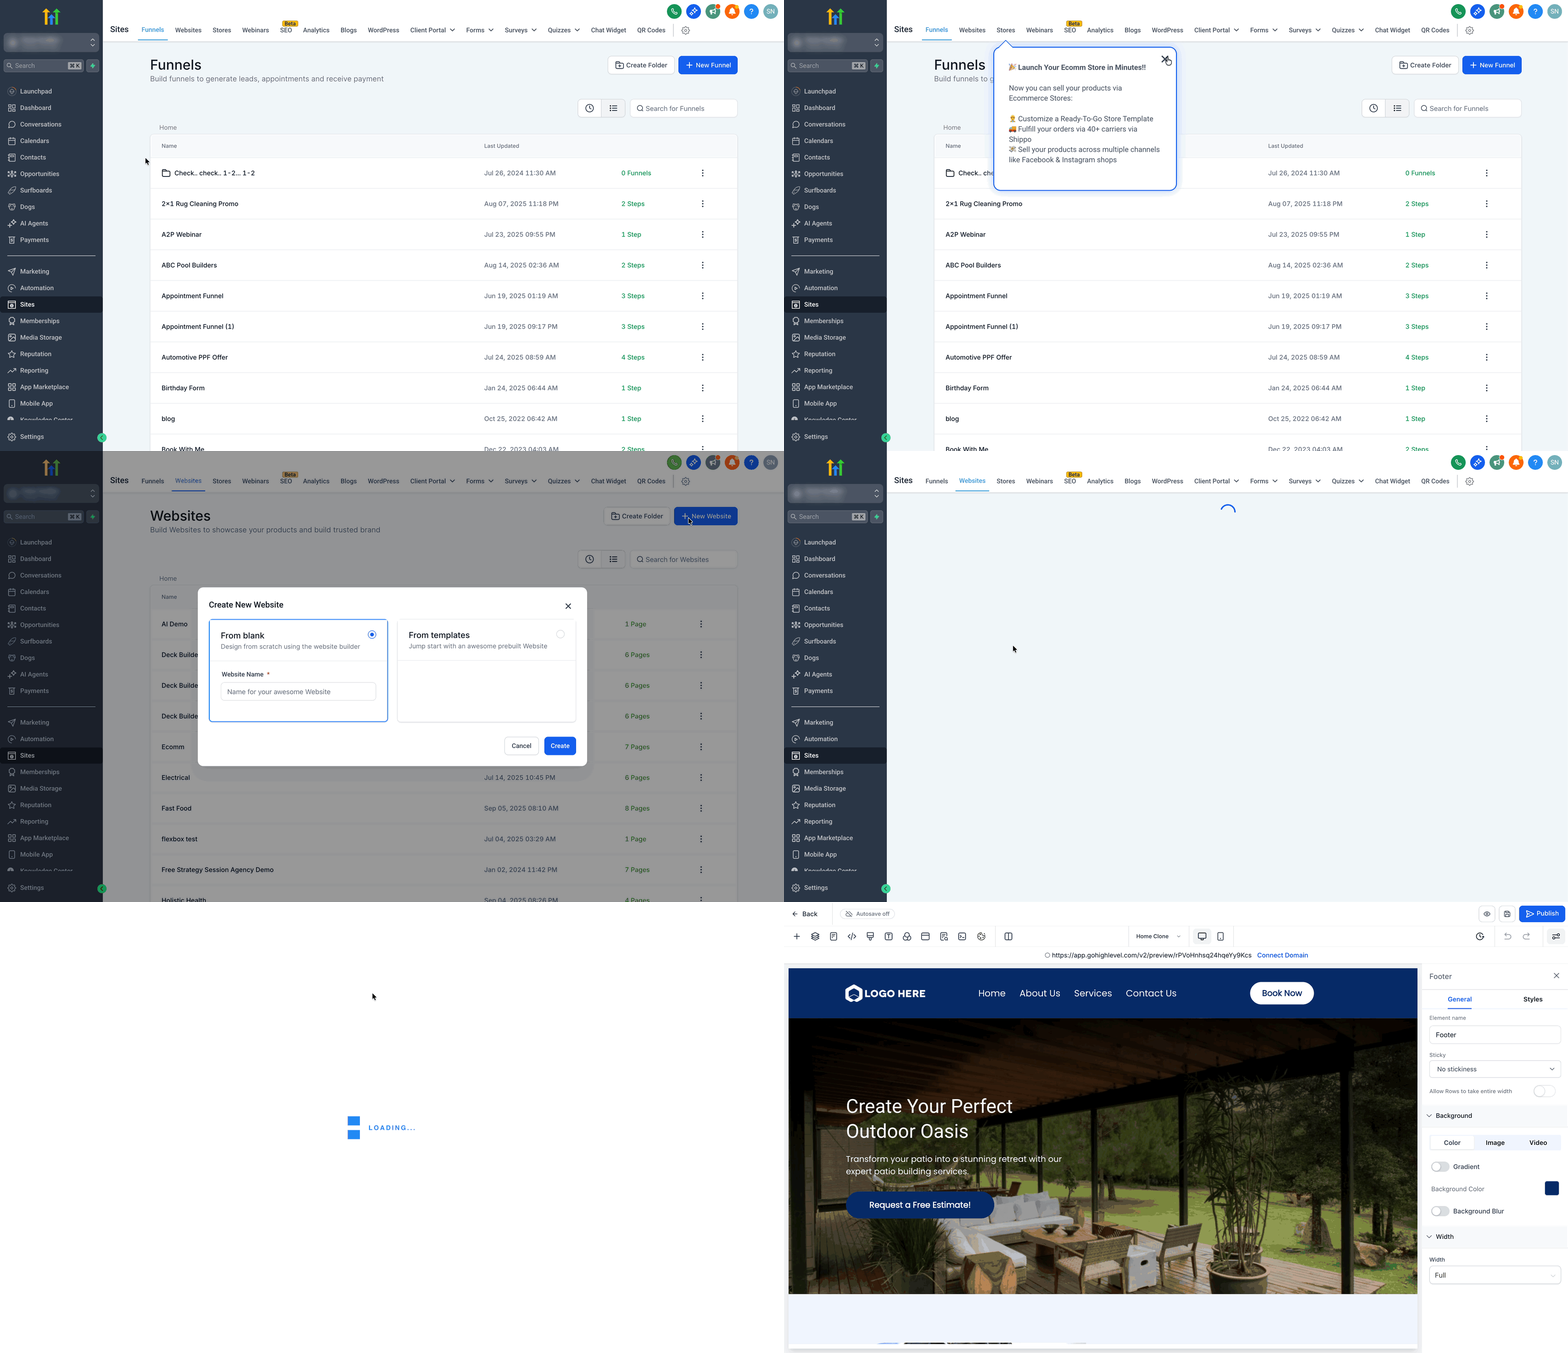
- Click the Sites option from the left navigation of your subaccount.
- Create a new funnel or website, or edit an existing one.
- Add or edit the element you want to reuse, such as a button, headline or image.
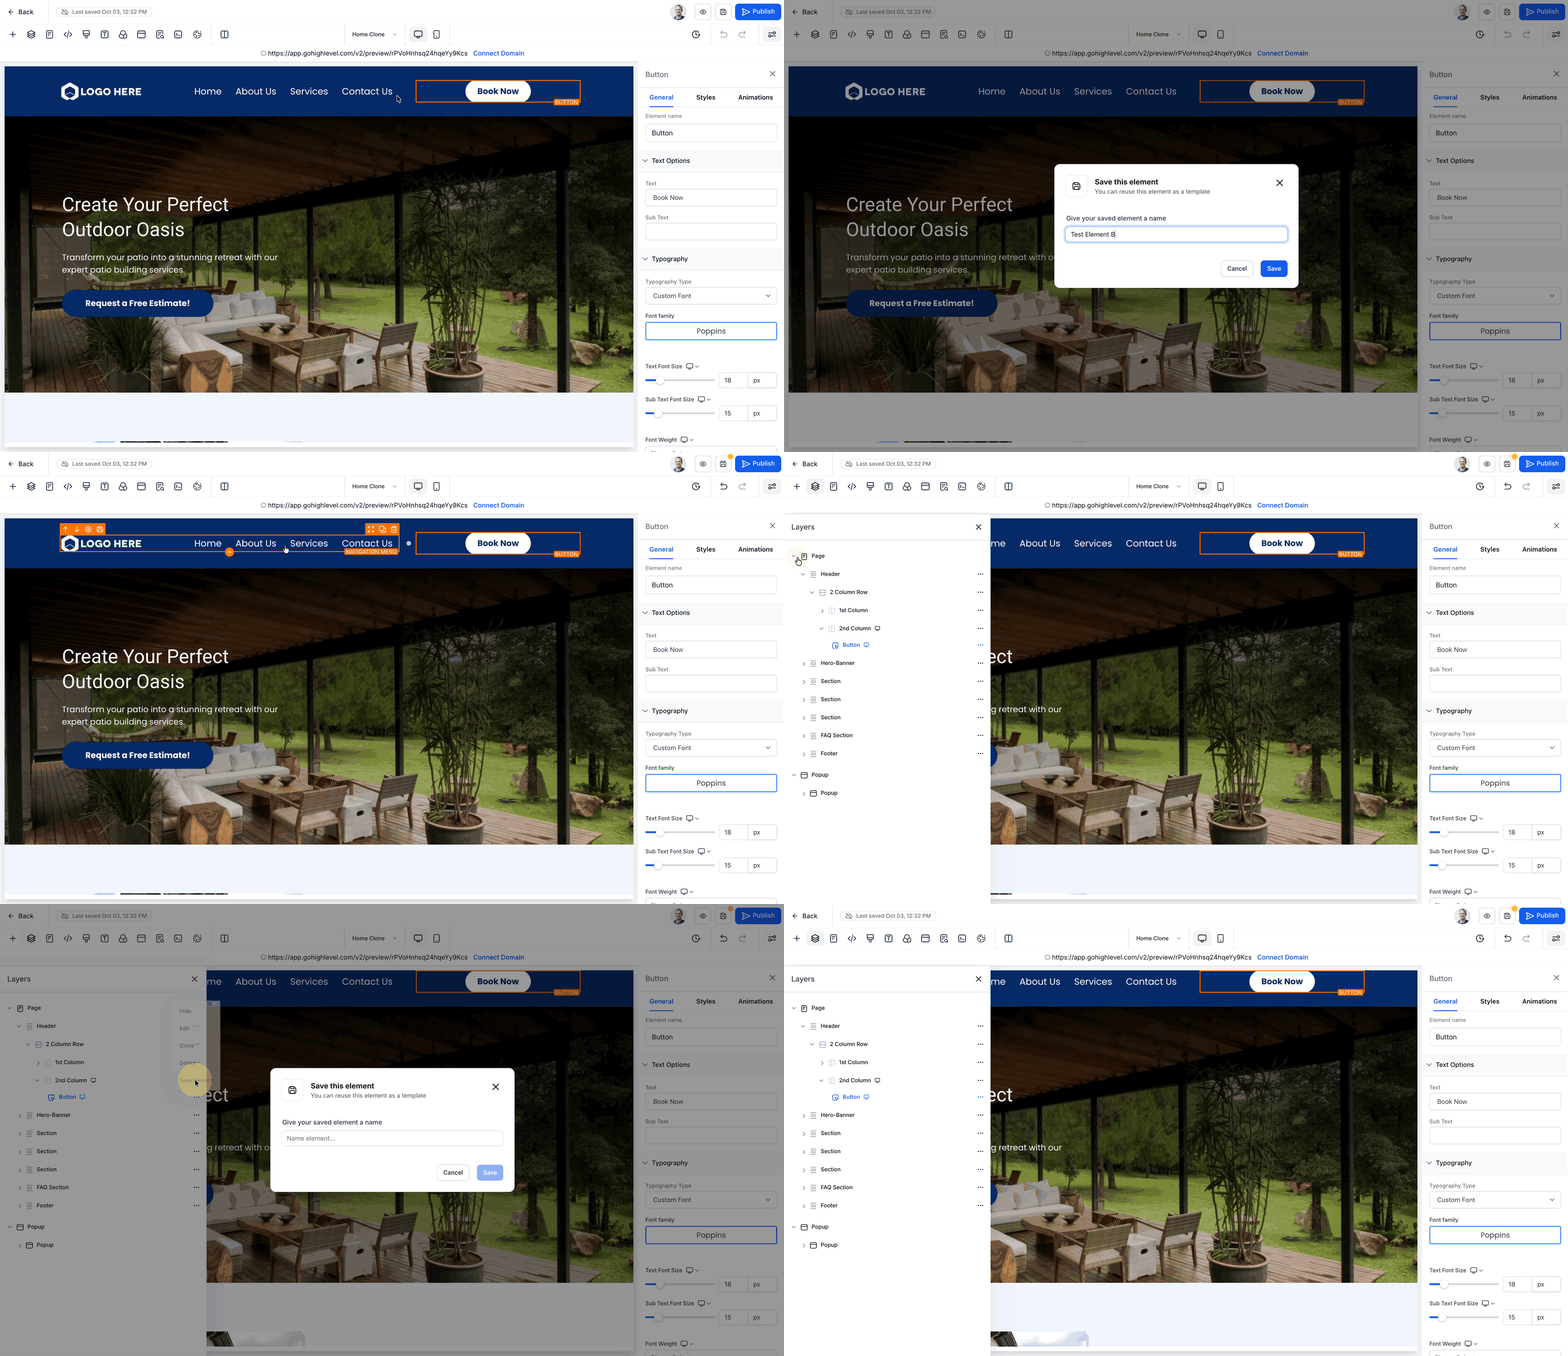
- Click the Save icon on the element’s outline toolbar, or open Layers, click the three dot menu, and select Save Element.
- In the pop up modal, type a clear, descriptive name for the template and confirm the save.
- The element now appears in the Element Templates section of the Saved Assets library for the location.
Reuse an element template
- Open the page where you want to insert the element.
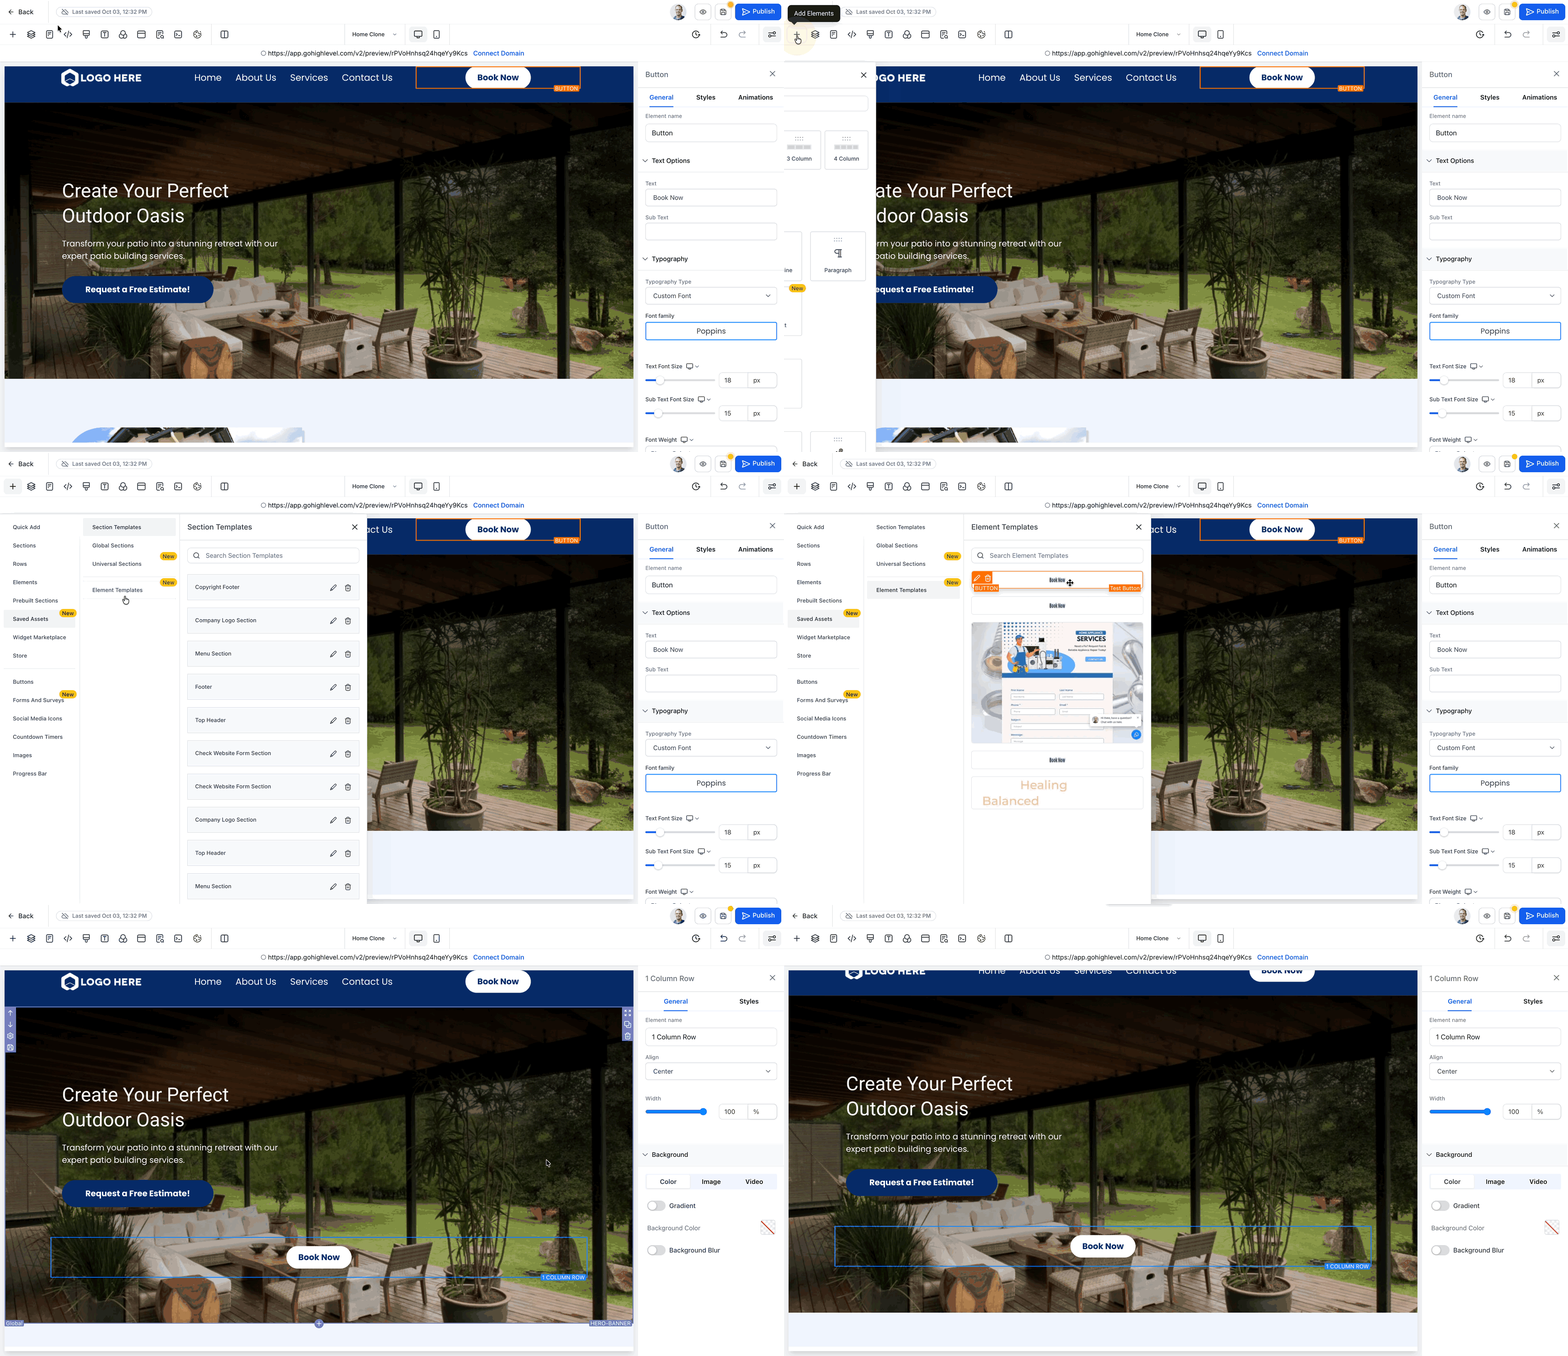
- Click the Add Elements (+) button.
- Select Saved Assets, then choose Element Templates.
- Pick the desired template and it will be placed on the page with its original styling.
07What it looks like in HighLevel
08Things to know before you rely on it
- There is no hard limit on how many Element Templates you can create; keep names organized for easy search.
- Templates cannot be placed into folders; use naming conventions to group them.
- Element Templates are static; editing one instance does not affect other pages that use the same template.
- They do not sync across locations like Global or Universal Sections.
09How it connects to the rest of HighLevel
- Learn how Global Sections work in the Page Builder Global Sections
- Control borders on page elements in HighLevel Border control
- Add QR code elements to your pages QR code element
Michael's take

Treat Element Templates as static building blocks. You edit each instance separately after you drop it.
If I were setting up a new funnel, I’d create a primary CTA button template first, name it clearly, and then sprinkle it across all pages. That way the brand stays consistent and I avoid rebuilding the same button over and over.