
01Who this is for
- Founders who need a simple checkout inside a lead capture form to streamline sales.
- Marketing managers who want to offer multiple product options without building a separate store.
02Products in forms, explained
Products in Forms adds a Sell Products element to the Form Builder. The element appears under the Payments section and provides a configuration panel where you select products, define how they are displayed, and choose whether the form collects a fixed price or a custom amount.
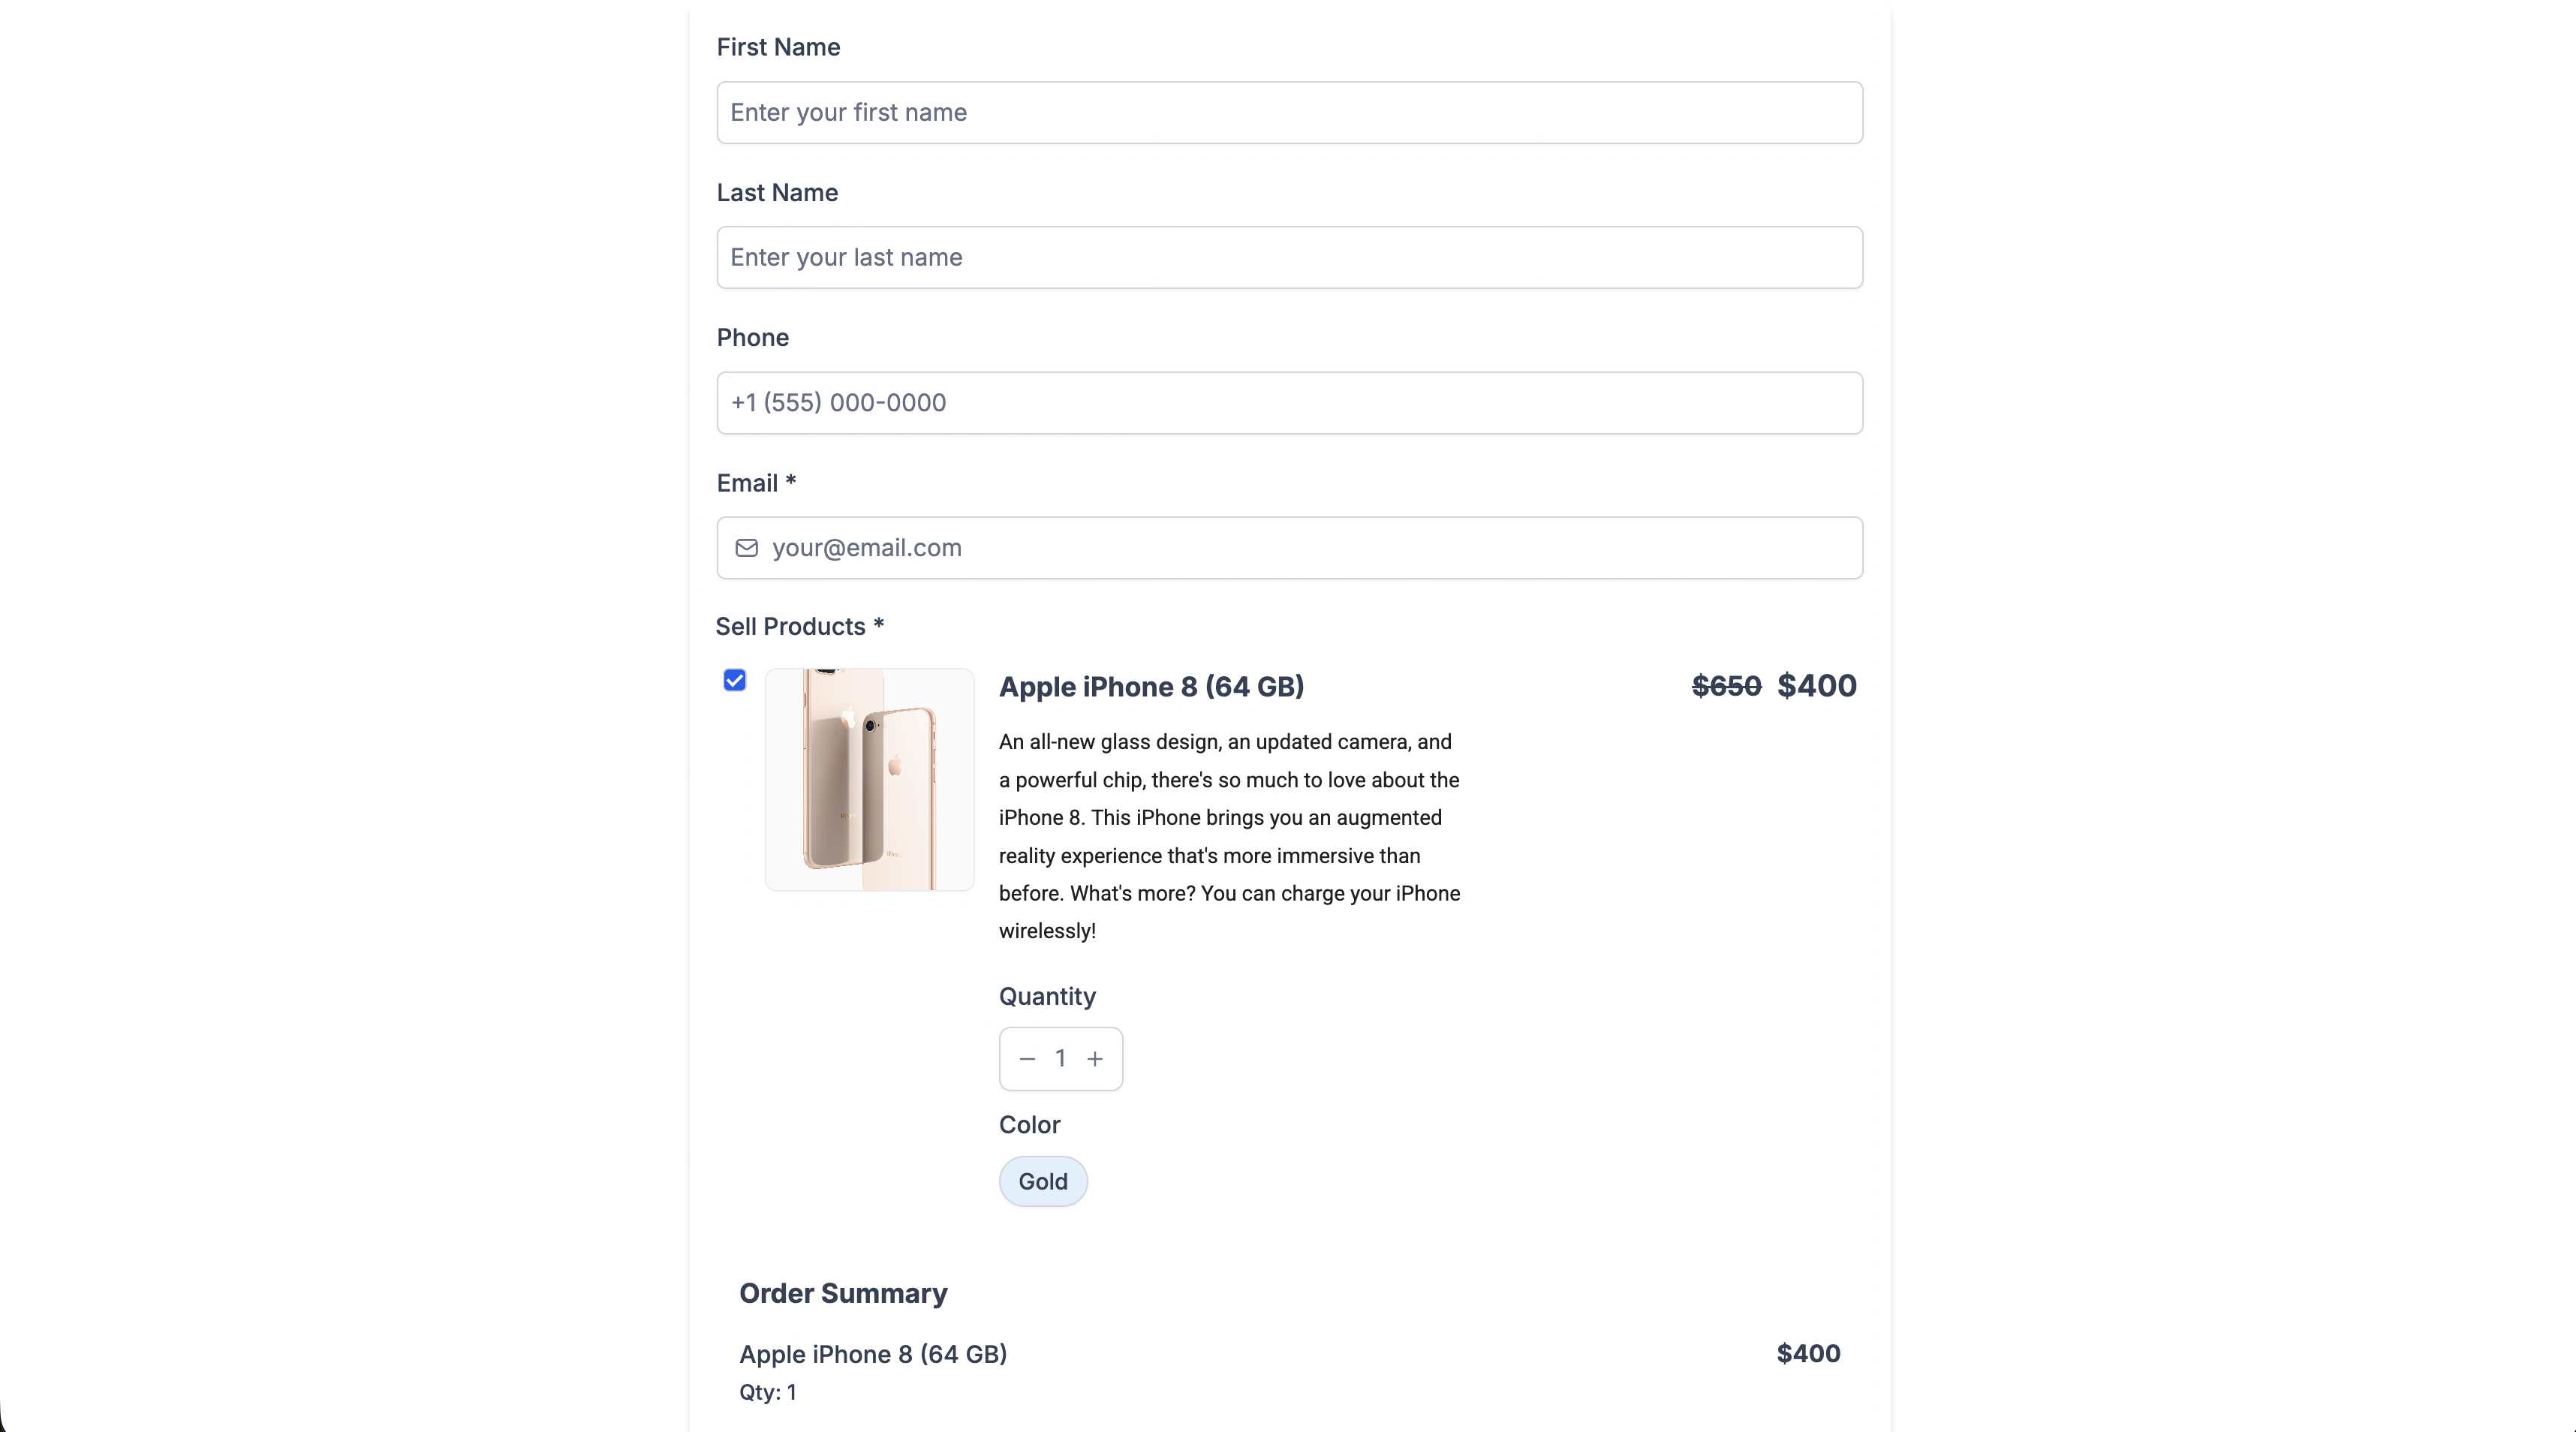
When a visitor submits the form, the selected product details, price level, variant and quantity travel through the checkout flow, appear on the payment summary, and are recorded in the submission data. The element respects inventory counts and applies tax where applicable.
03How businesses use products in forms
- Dental practice. Add the Sell Products element to the appointment request form, list dental kits with single column layout, and let patients choose a size variant. The payment is processed directly through the connected provider.
- Online boutique. Create a one step order form that showcases apparel in a two column layout, includes product images, and offers price levels for different sizes. Customers pick a variant and quantity before submitting.
- Consulting agency. Insert a Sell Products element into a lead capture form to sell consulting packages. Use the multi selection mode to let prospects choose a package tier and see the calculated total before payment.
04The numbers and rules that matter
- You can add up to 20 products.
05How to set up and use products in forms in HighLevel
Add the Sell Products element to a form
- Open the desired form in the Form Builder.
- In the Payments section, drag the Sell Products element onto the canvas.
- Click the element to open its configuration panel on the right side.
Connect and configure payment providers
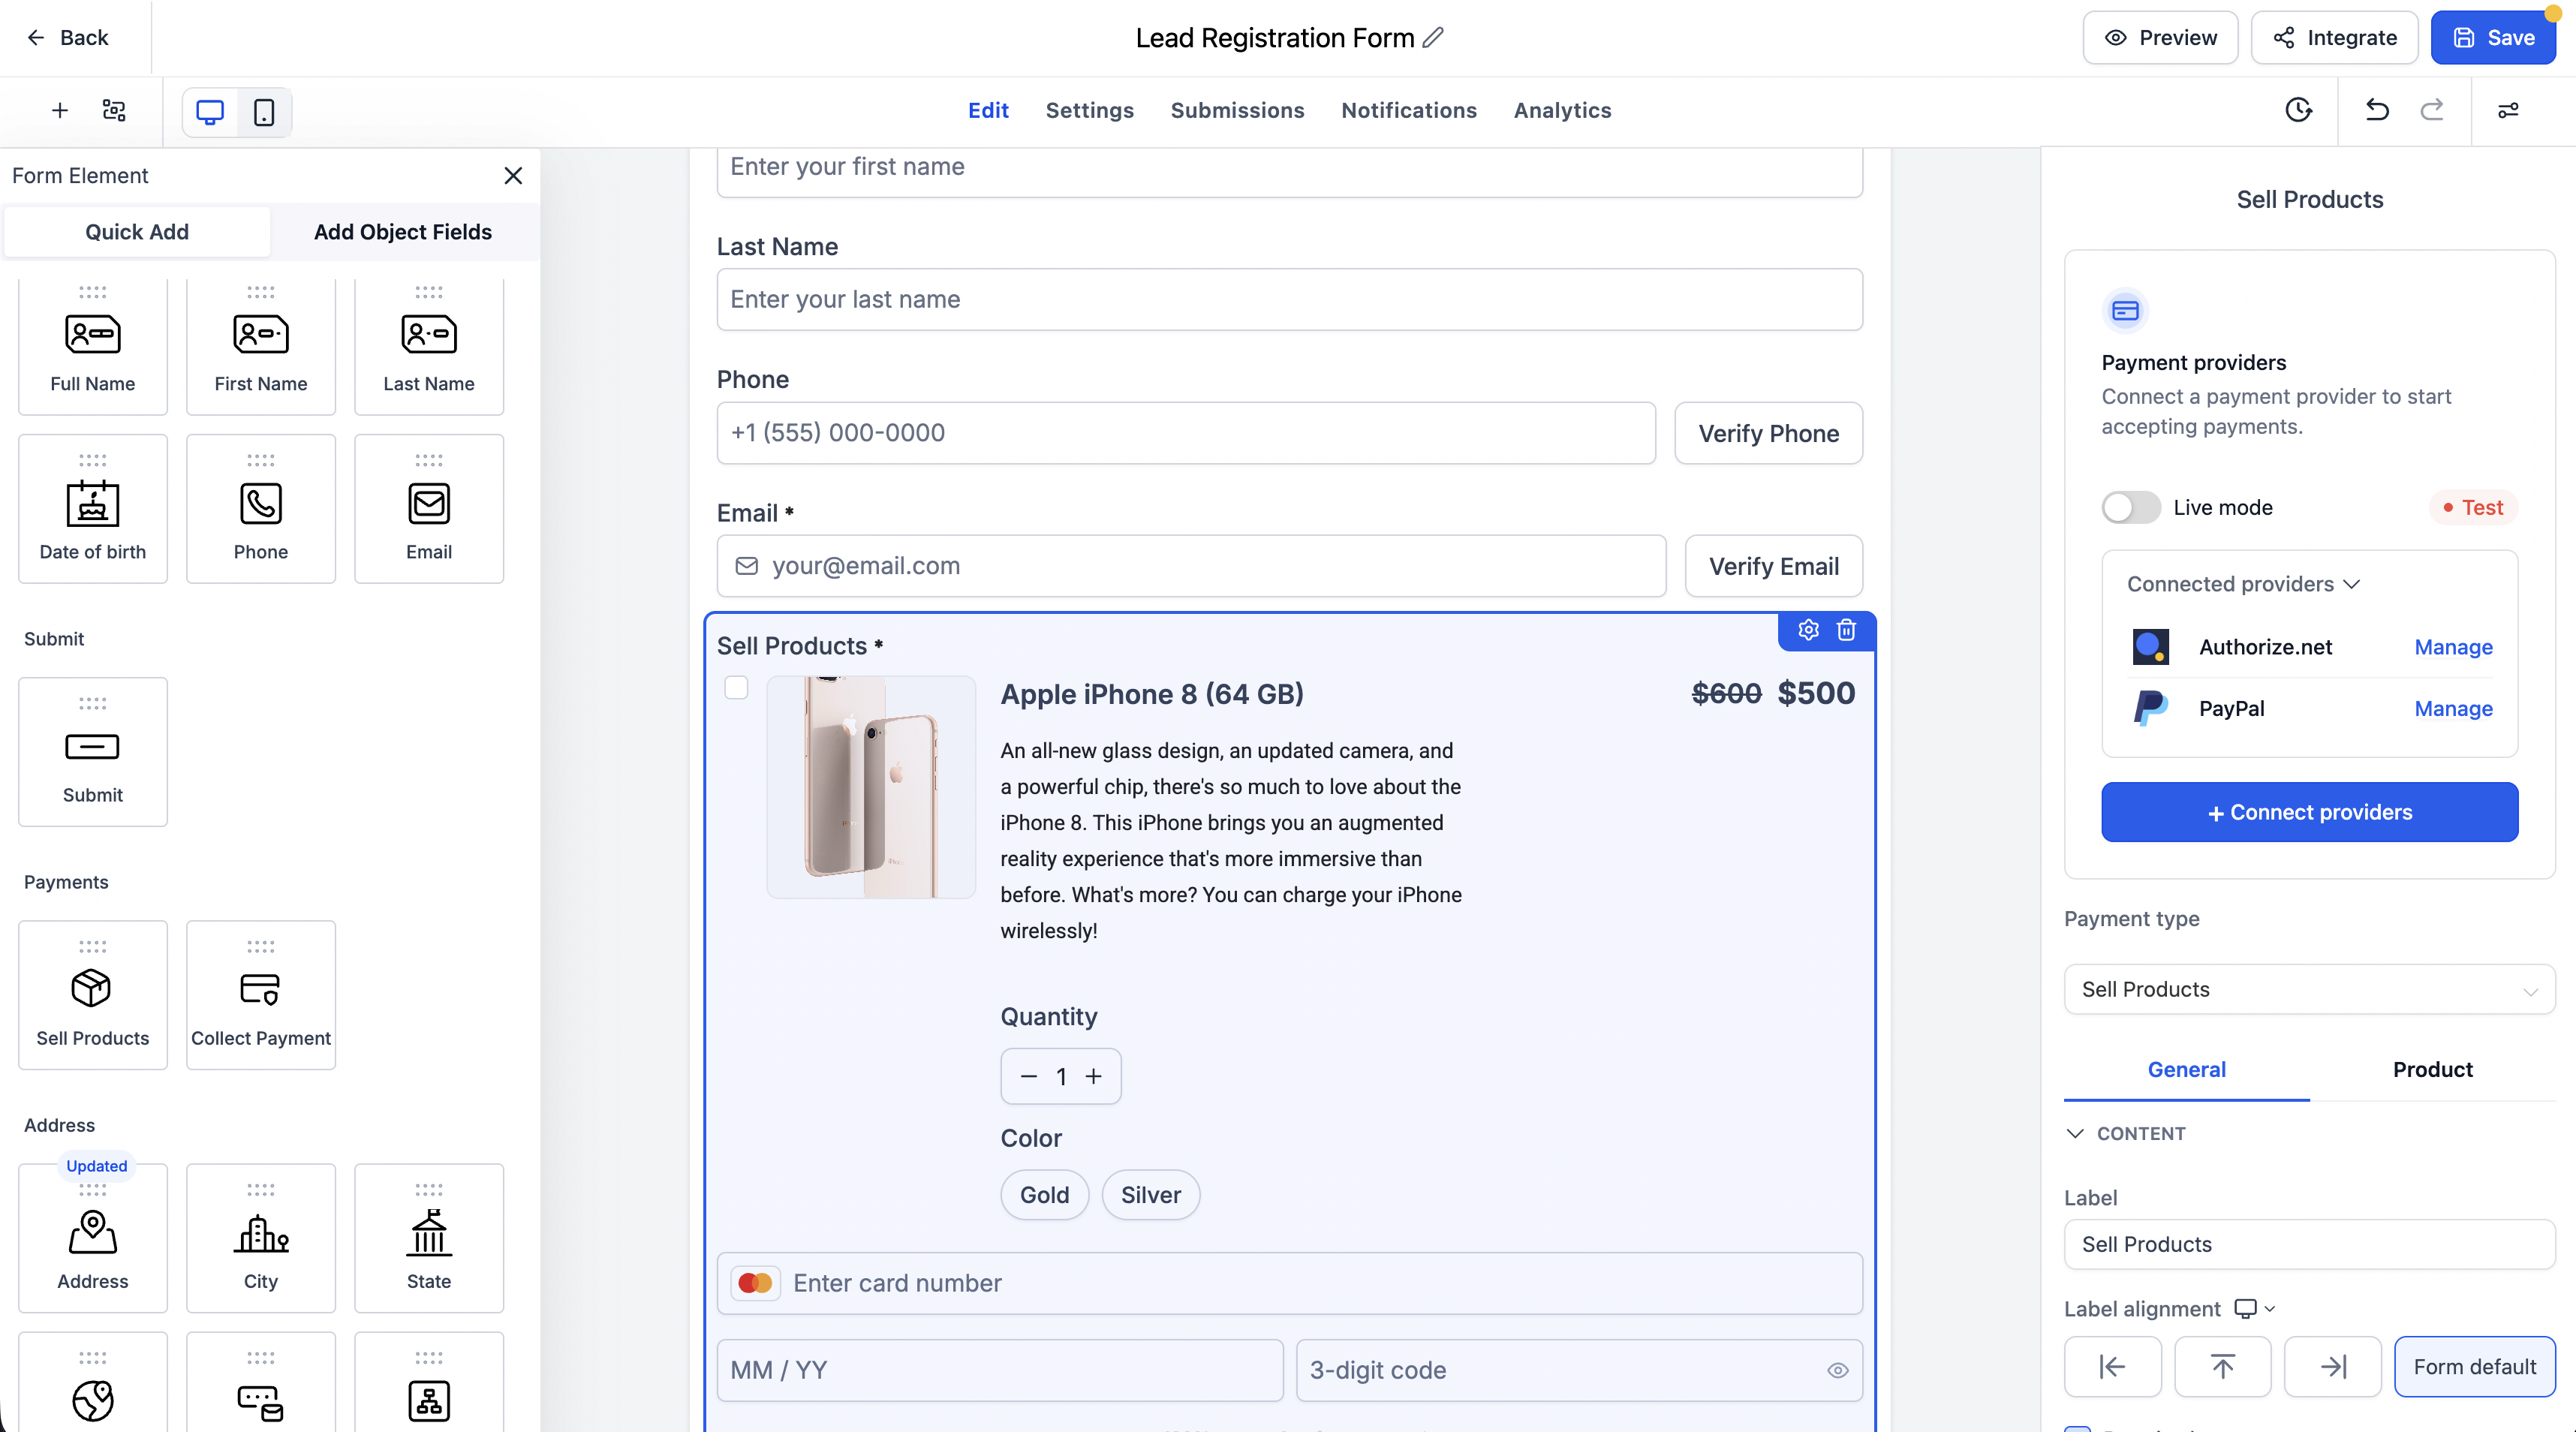
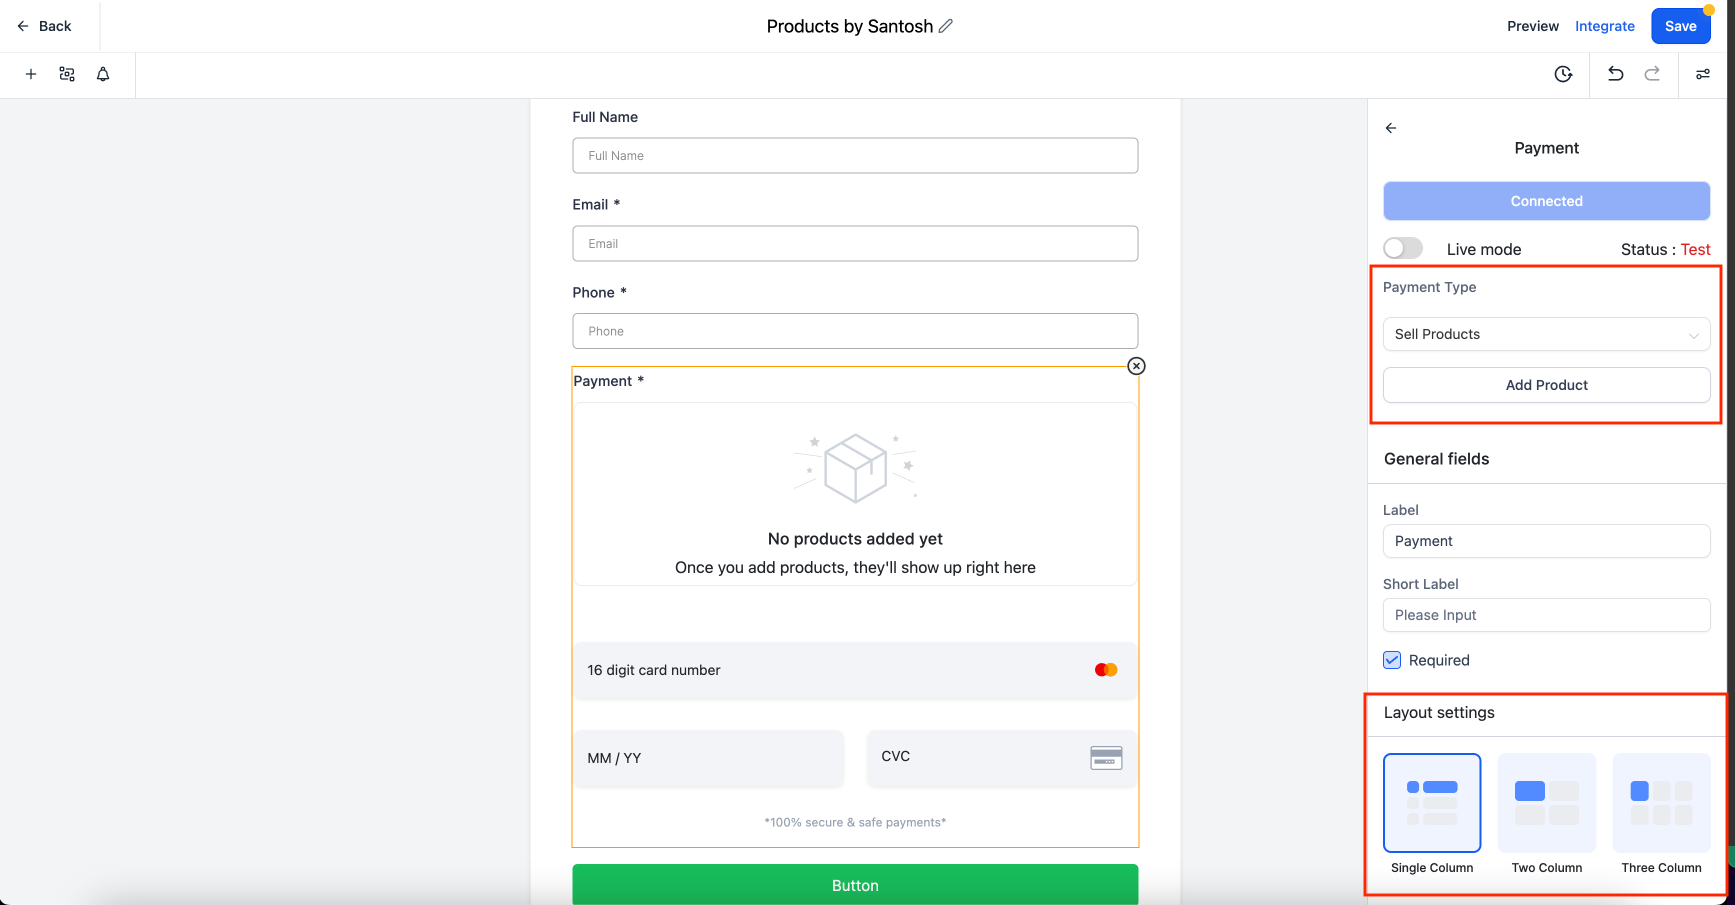
- Click Connect providers to start linking a payment gateway from the builder.
- Review the list of providers shown under Connected providers.
- Select Manage to adjust the settings for a connected provider.
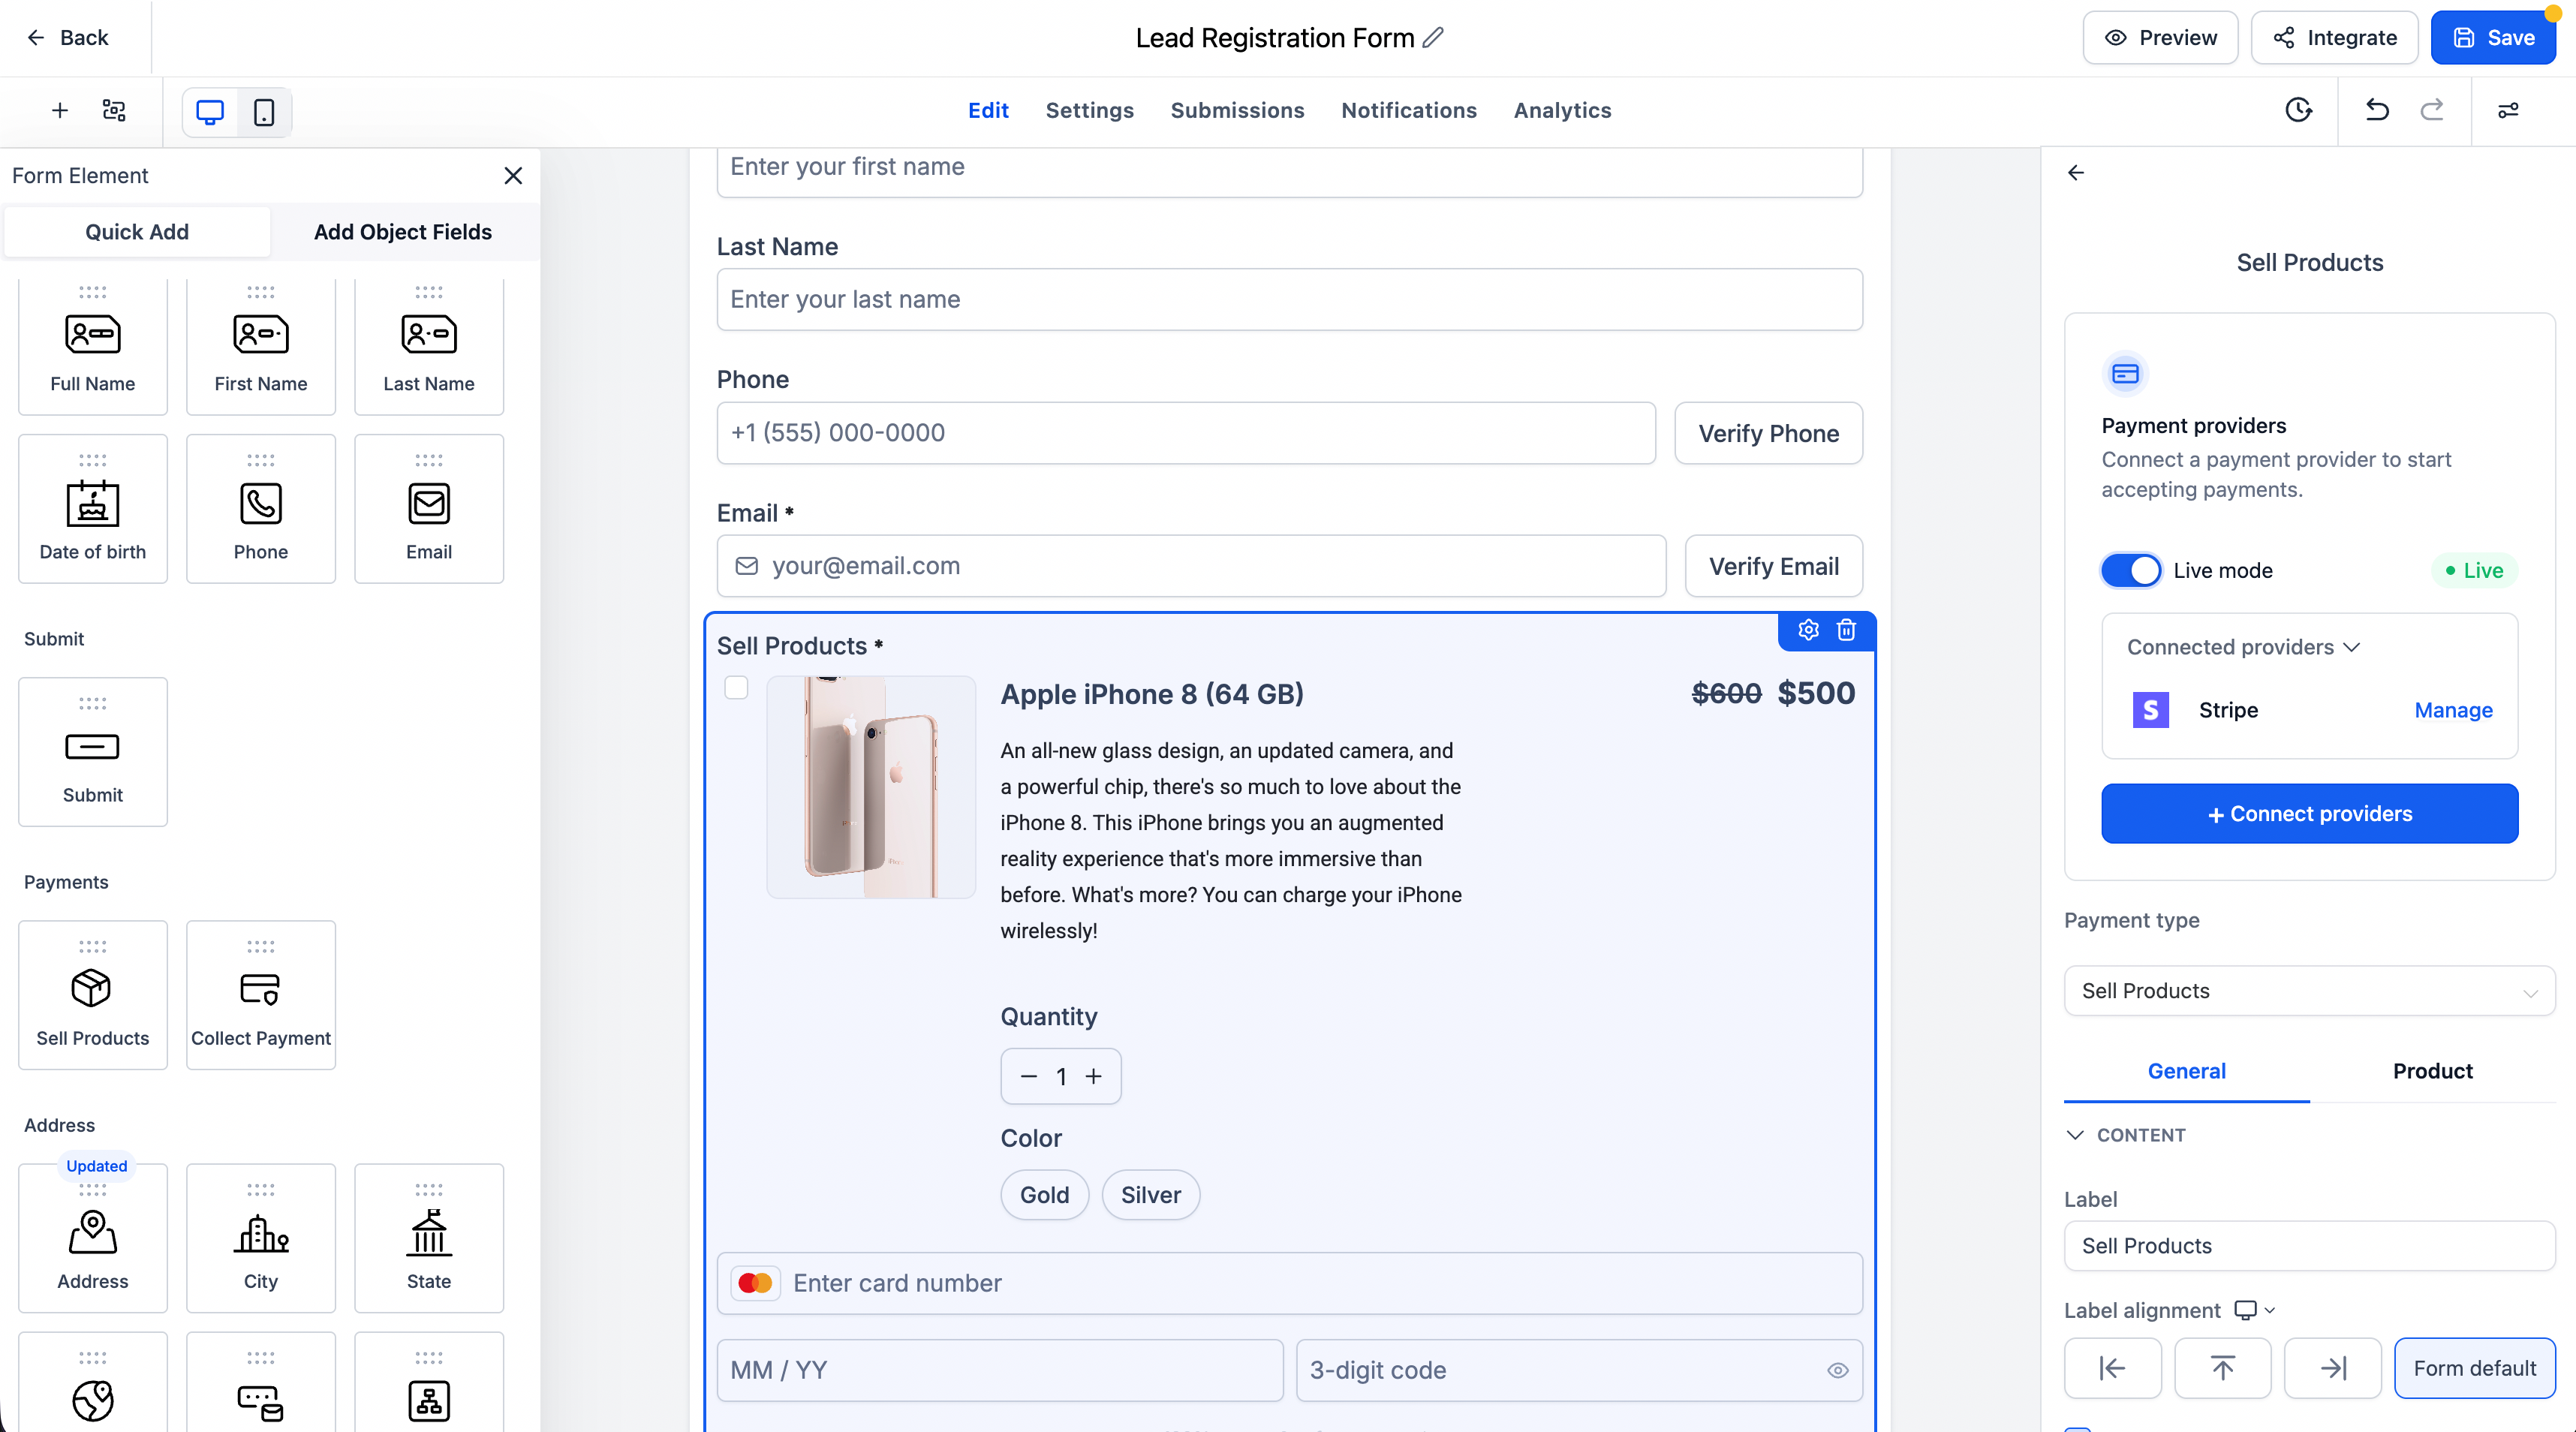
- Toggle Live mode to switch between test and live configurations.
Add and configure products for the form
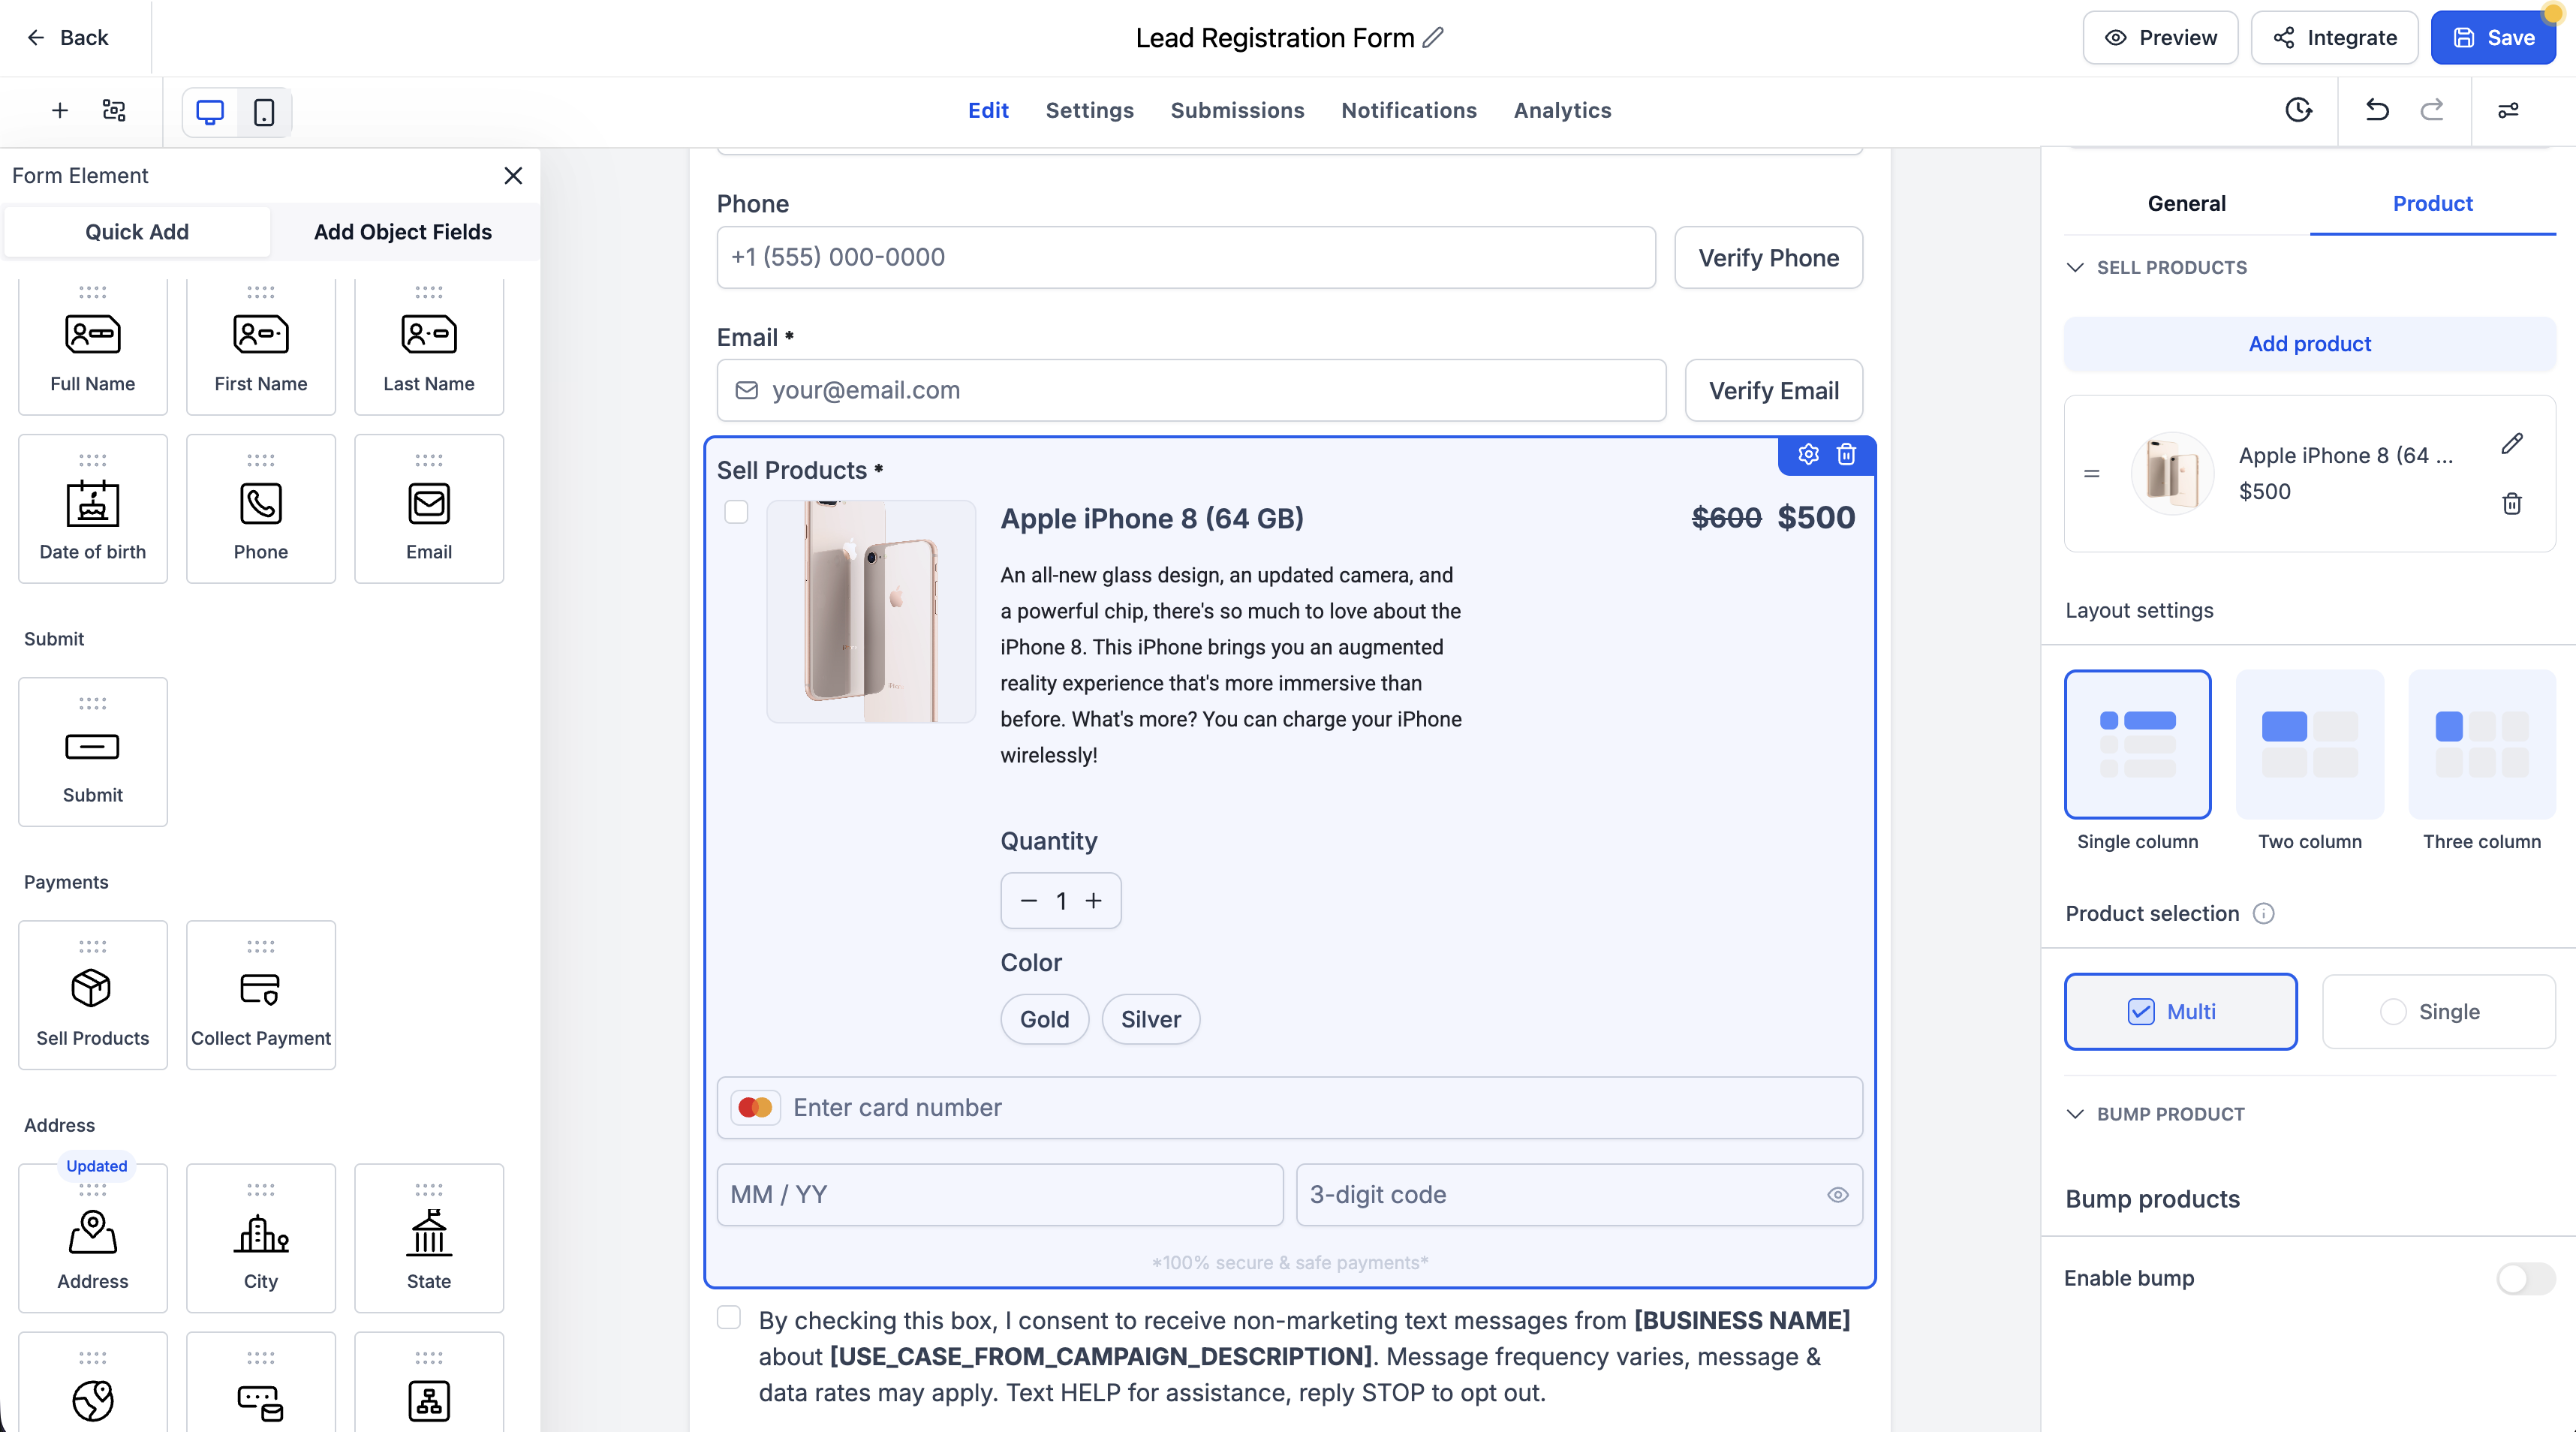
- Open the Product tab inside the element’s configuration panel.
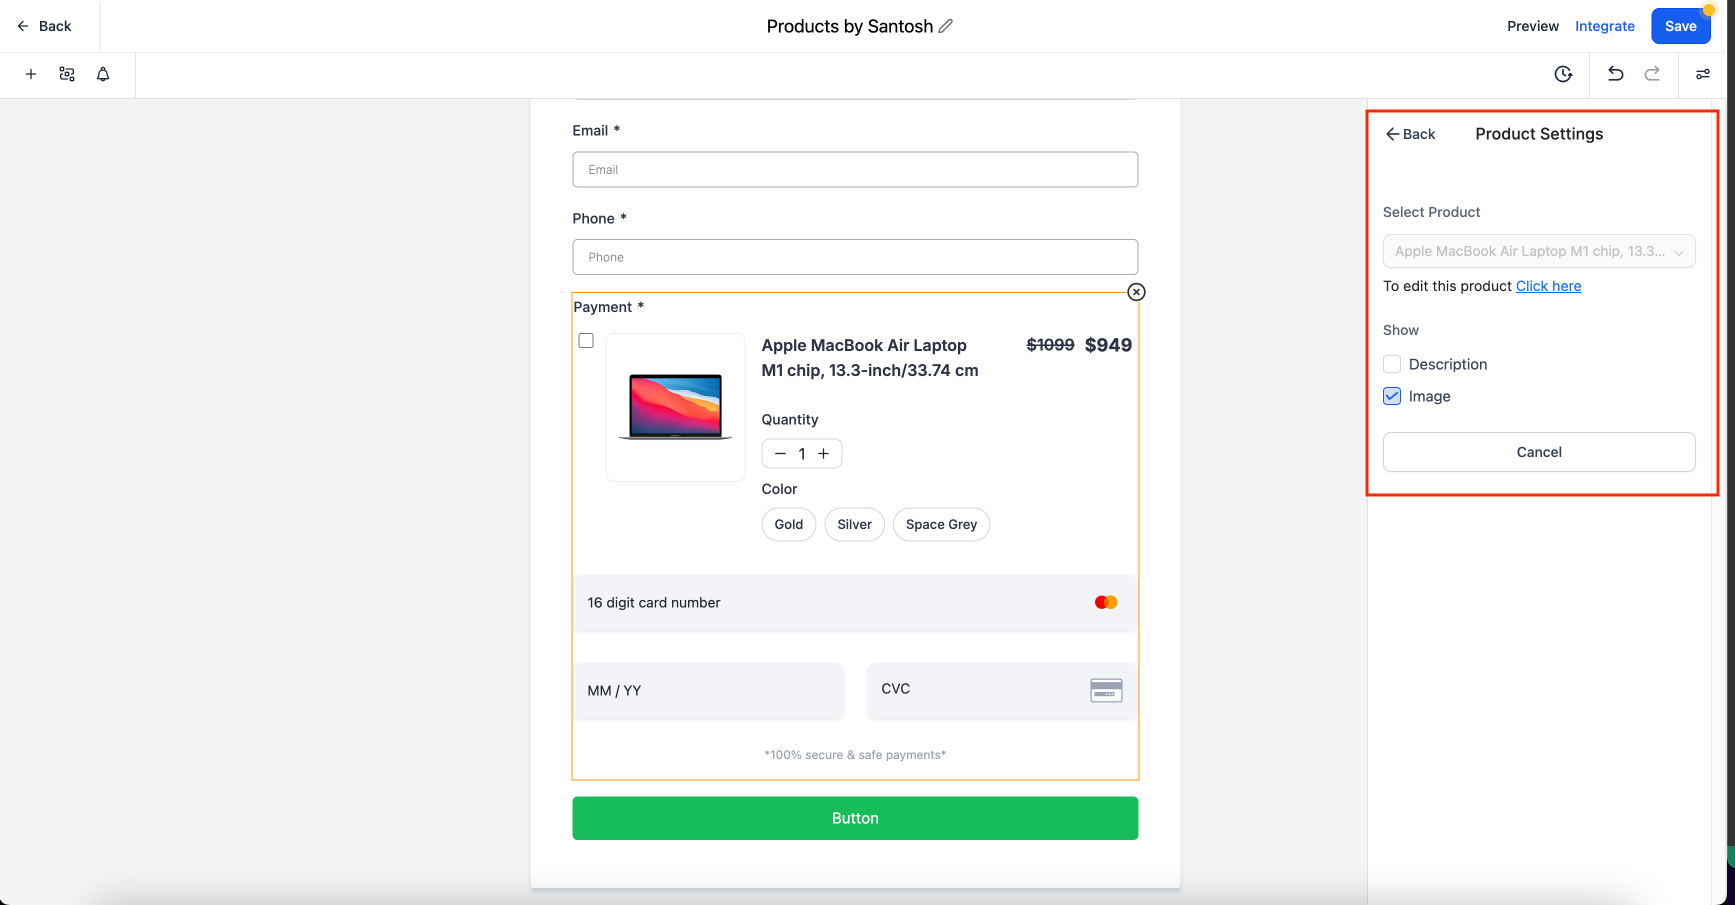
- Click Add product and choose a product from the library.
- Pick a layout option, Single column, Two column, or Three column.
- Select the product selection mode, Single or Multi.
Set price levels and product variants
- Enable Price Levels to let customers choose from predefined prices.
- Enable Variants to present options such as color or size.
- Validate that required selections appear in the payment summary before submission.
06What it looks like in HighLevel
07Settings that matter
- Payment Type. Determines whether the form sells a fixed product or collects a custom amount from the user.
- Layout settings. Controls whether products appear in a single, two column, or three column arrangement.
- Product selection. Sets the element to allow a single product choice or multiple product selections.
- Live mode. Switches payment provider connections between test and live environments.
08Things to know before you rely on it
- You can add a maximum of 20 products to a single Sell Products element.
- Three layout options are available: single, two column, and three column.
- Recurring products cannot be sold with this element.
- NMI and Authorize.net require the First Name field to be filled when the payment element is present.
- Refund amounts are not captured by the element.
- The older API based Stripe connect method is not supported.
- Payment element will not display in Calendars that use custom forms.
- Multi payment handling with multi native forms is not yet available in funnels.
- Undo/Redo actions do not work when the payment element is used.
09How it connects to the rest of HighLevel
- Find out how to embed HighLevel forms on external website builders for broader reach. Embedding forms
Michael's take

Adding products directly to a HighLevel form feels like a modest convenience shift. It lets you turn a simple lead capture page into a one step checkout without juggling separate store software.
A boutique apparel shop that sells a few seasonal items fits this well. They can show images, let shoppers pick size or color, and collect payment in the same form that captures the customer's contact details.