
01Who this is for
- Content marketers gain a place for readers to ask questions and share feedback, helping to keep audiences engaged.
- Service based businesses can answer client inquiries directly on blog posts, showing expertise and building trust.
- Community managers obtain a single view of all comments, making moderation and trend analysis straightforward.
02Blog comments, explained
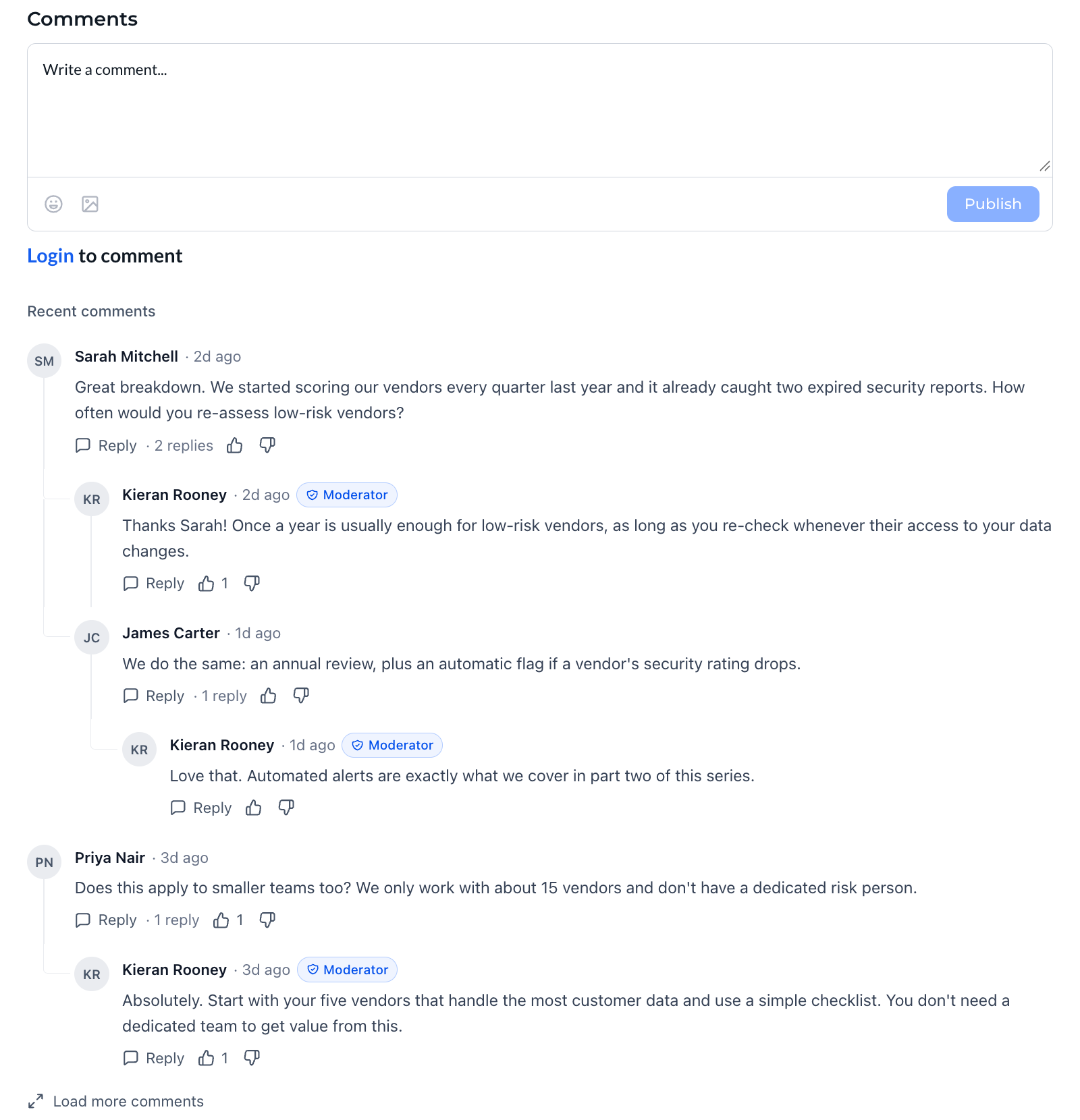
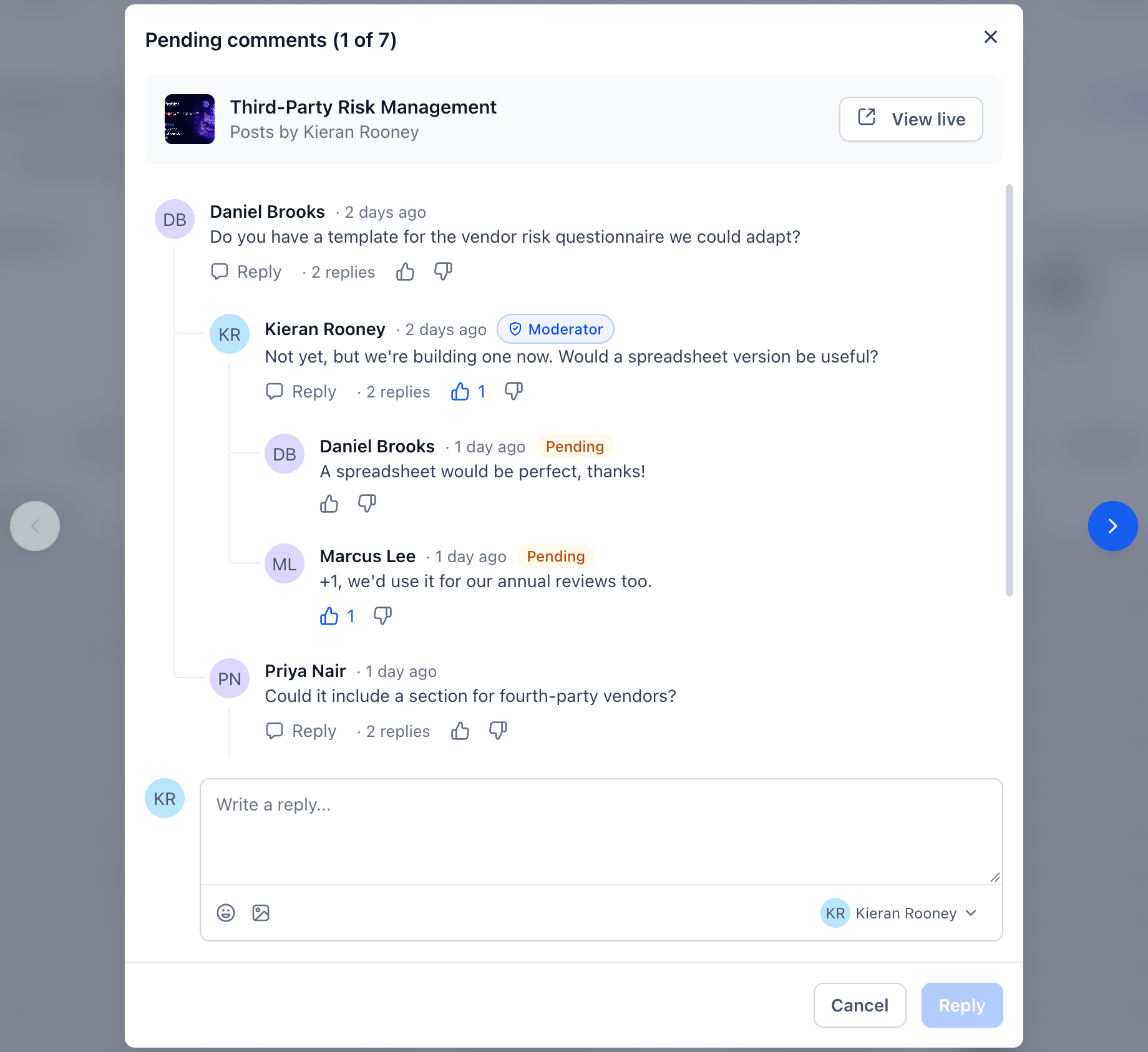
The Comments element creates a comment area that appears on every post of a selected blog site. It lets visitors write comments, reply up to three levels deep, add one image per comment, and react with emojis or likes. Team replies show a Moderator badge so readers can tell official answers from peer comments.
All comments are stored within the blog site and appear in search results, because published comments become part of the page HTML. Approvals can be required, and email notifications can be sent for each new comment or as a daily digest.
The feature lives in the blog builder. You add the Comments element to the blog post page, then manage every comment from the Comments tab of the blog site. Settings for approval and notifications are accessed from a gear icon on that tab.
03How businesses use blog comments
- Business website. Add the Comments element to blog posts so readers can discuss content, ask questions, and share feedback directly on the site.
- Online course platform. Place a comment section under each lesson post, allowing students to ask follow up questions and instructors to reply with the Moderator badge.
- News or media site. Enable readers to comment on articles, react with emojis, and let editors moderate and reply to keep conversations constructive.
04The numbers and rules that matter
- One image per comment.
- Replies can be nested up to three levels.
05Before you start
- A blog site must already be created in HighLevel.
- Access to edit the blog post page in the builder is required.
06How to set up and use blog comments in HighLevel
Add comments to your blog posts
- Open Sites.
- Click Blogs and open the desired blog site.
- Select Edit blog site and open the blog post page in the builder.
- Open the elements panel and locate the Comments element marked New.
- Drag the Comments element onto the page, typically below the post content.
- Choose whether readers may add emoji and image attachments.
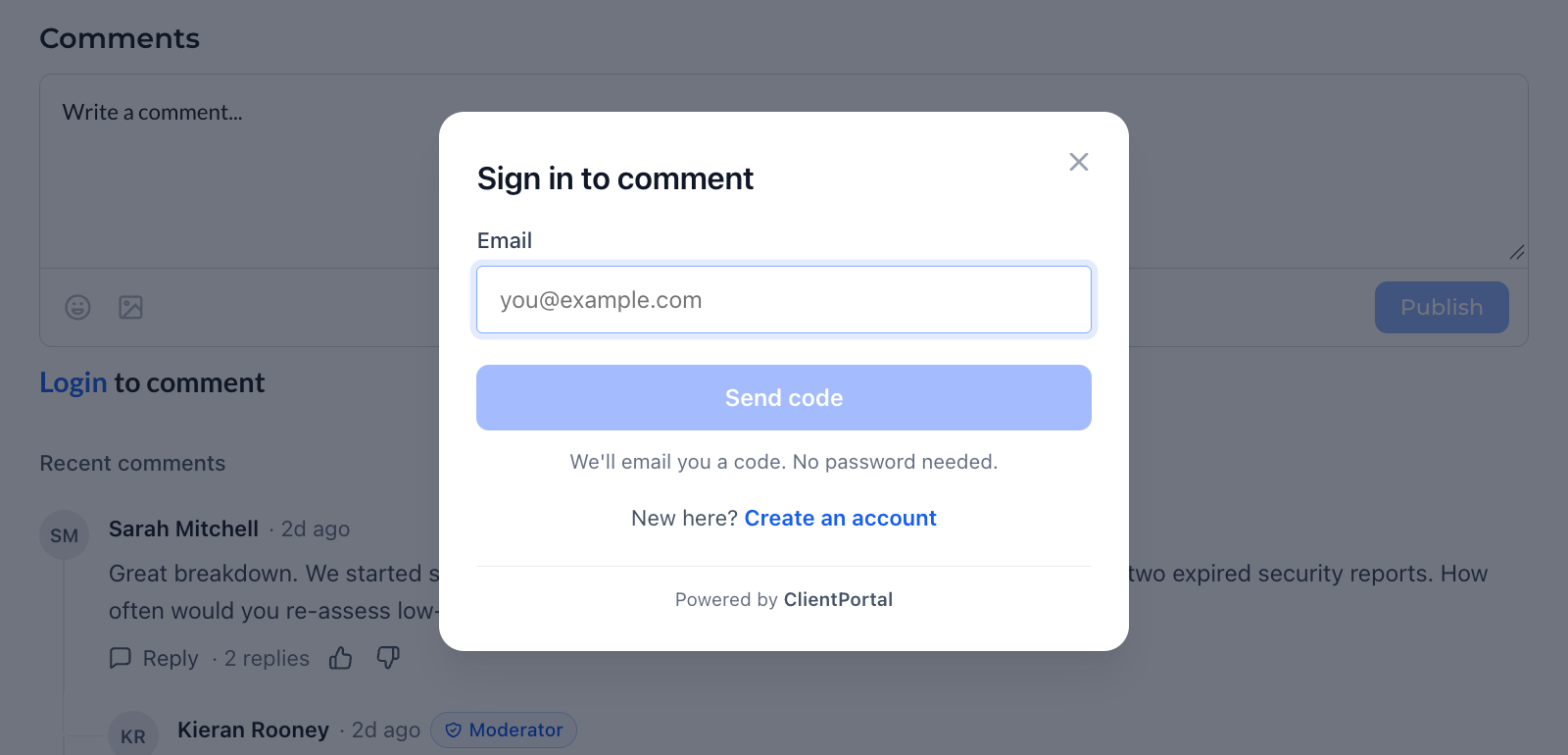
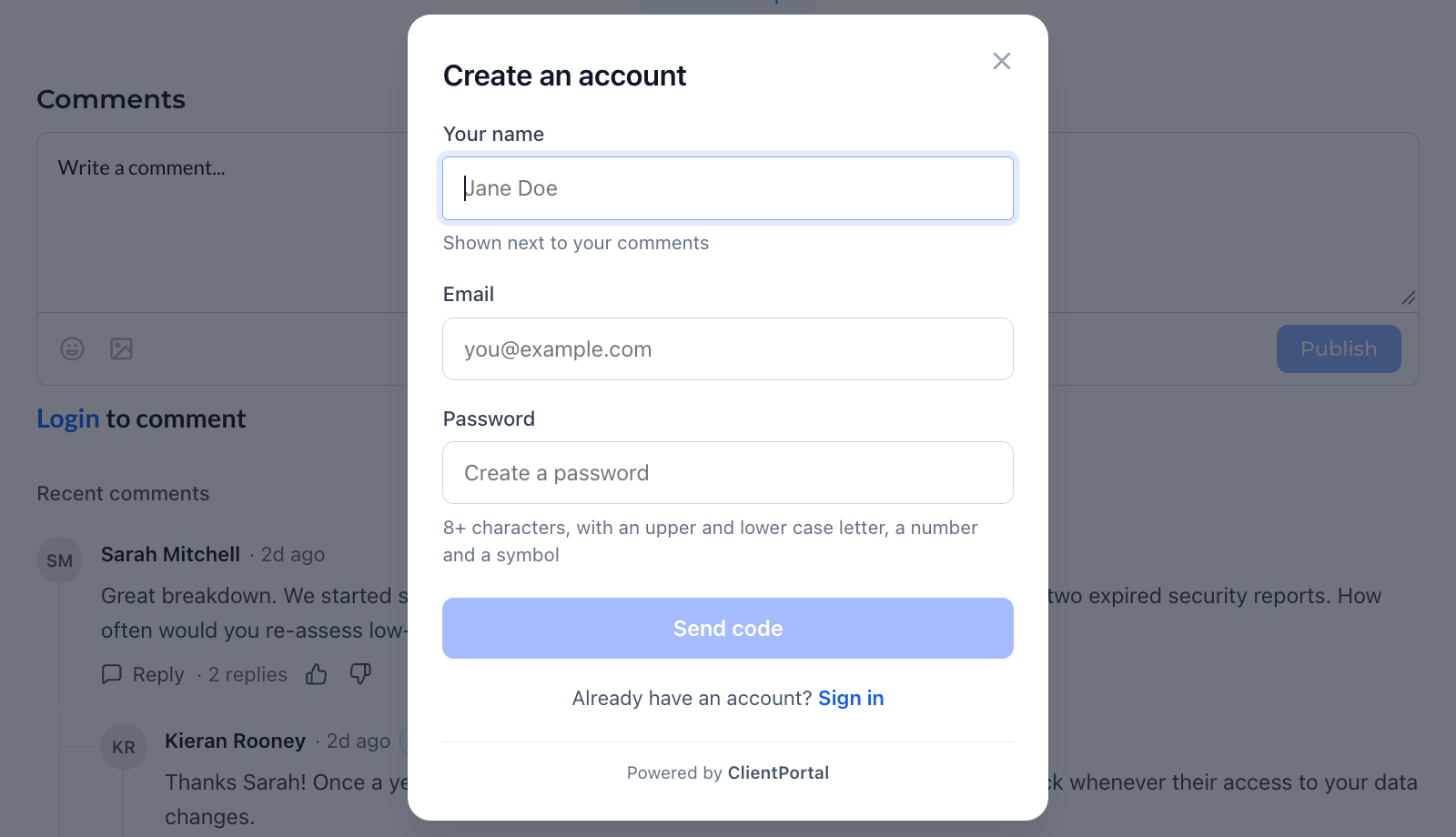
- Edit the heading and the sign in text displayed to readers.
- Style colors, fonts and sizes to match the site design.
- Click Save and then Publish.
- Note: The Comments element can only be placed on blog post pages; it is not available on the blog home page.
Manage comments
- Navigate to Sites > Blogs and open your blog site.
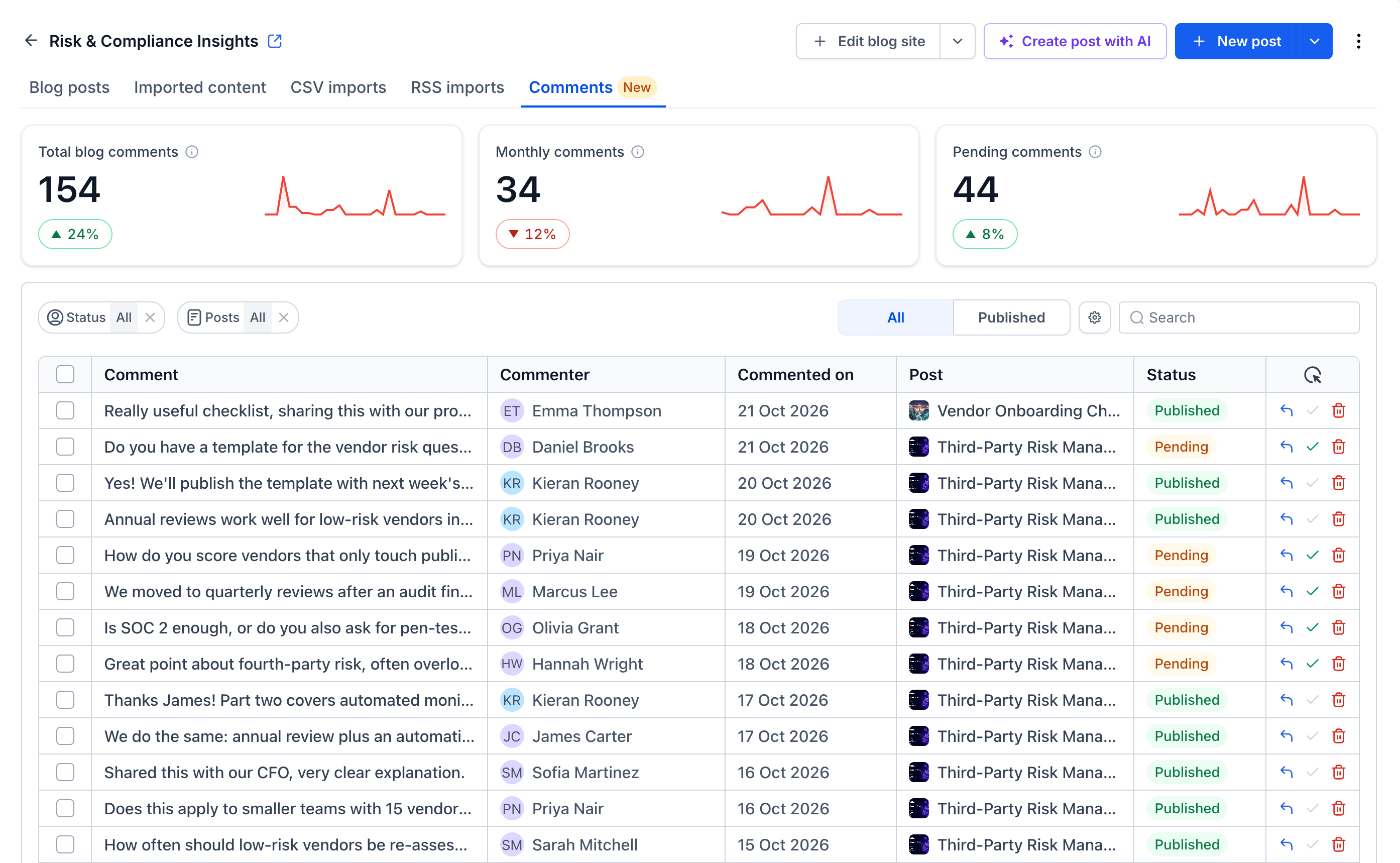
- Click the Comments tab.
- Use Status and Posts filters or the search box to locate specific comments.
- Click Reply, Approve or Delete on the comment row you want to act on.
- In the pending comment window, pick an author from the dropdown, type a reply, and click Reply.
Configure comment settings
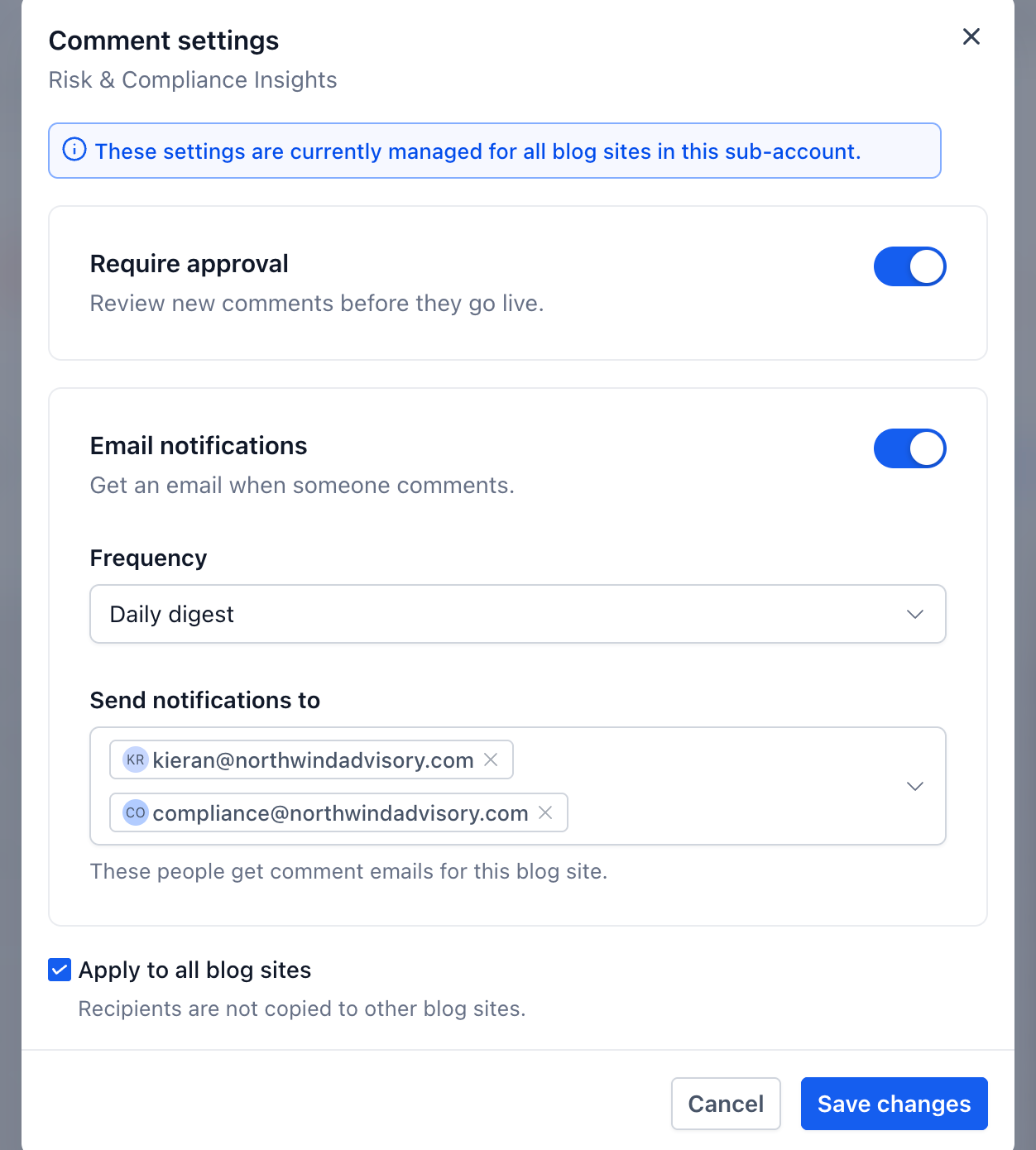
- In the Comments tab, click the settings icon next to the search bar.
- Turn on Require approval to hold new comments for review.
- Turn on Email notifications and choose a Frequency of Every comment or Daily digest.
- Under Send notifications to, select the people who should receive comment emails.
- Select Apply to all blog sites to use the same settings across the subaccount.
- Click Save changes.
07What it looks like in HighLevel
08Settings that matter
- Require approval. Controls whether new comments must be approved by the team before they become public.
- Email notifications. Enables email alerts for comment activity.
- Frequency. Determines if email notifications are sent for every comment or compiled in a daily digest.
- Send notifications to. Specifies which team members receive comment email alerts.
- Apply to all blog sites. Copies the current comment settings to every blog site within the subaccount.
09Things to know before you rely on it
- The Comments element can only be placed on blog post pages, not on the blog home page.
- You cannot turn off comments for an individual post; removing the element removes comments from every post in the site.
- Each comment can include only one image attachment.
- Reply nesting is limited to three levels.
- When approval is required, a new comment is visible only to its author until approved.
10How it connects to the rest of HighLevel
- Learn how to set up a blog site before adding comments. Blog setup guide
- Create an RSS feed for your blog to distribute posts. RSS feed article
- Review HighLevel pricing to ensure your plan includes blog features. Pricing page
Michael's take

I recommend setting Require approval first so you can review comments before they go live.
Enable email notifications or a daily digest so the team receives comment activity. Test the sign in flow and image attachment to ensure they work before publishing.