
01Who this is for
- Content marketers can plan their editorial calendar ahead of time and ensure posts appear at optimal moments.
- Small business owners can keep a steady flow of information without logging in daily to publish each article.
- Agency Founders can manage multiple client blogs from one dashboard while automating release times.
02Blog post scheduling, explained
Blog post scheduling is a feature in the Sites area of HighLevel. It lets you write a post, enter its metadata, and specify when it should become publicly visible. After choosing a date and time, HighLevel queues the post and publishes it at the exact moment you set. The feature is accessed via Sites > Blogs, where you open a blog, start a new post, complete the publishing fields, and select the Schedule option, which prompts for the desired date and time.
03How businesses use blog post scheduling
- Content marketing. Marketers create posts in advance, fill in SEO details, set the schedule, and let HighLevel publish them automatically.
- Local business updates. Business owners draft announcements, choose the optimal publishing time, and rely on the scheduler to go live without manual intervention.
- Agency client management. Agencies prepare blog content for multiple clients, set individual schedules, and let HighLevel handle the timed releases.
04Before you start
- A blog must already exist in the Sites > Blogs section before you can schedule a post.
05How to set up and use blog post scheduling in HighLevel
Schedule a blog post
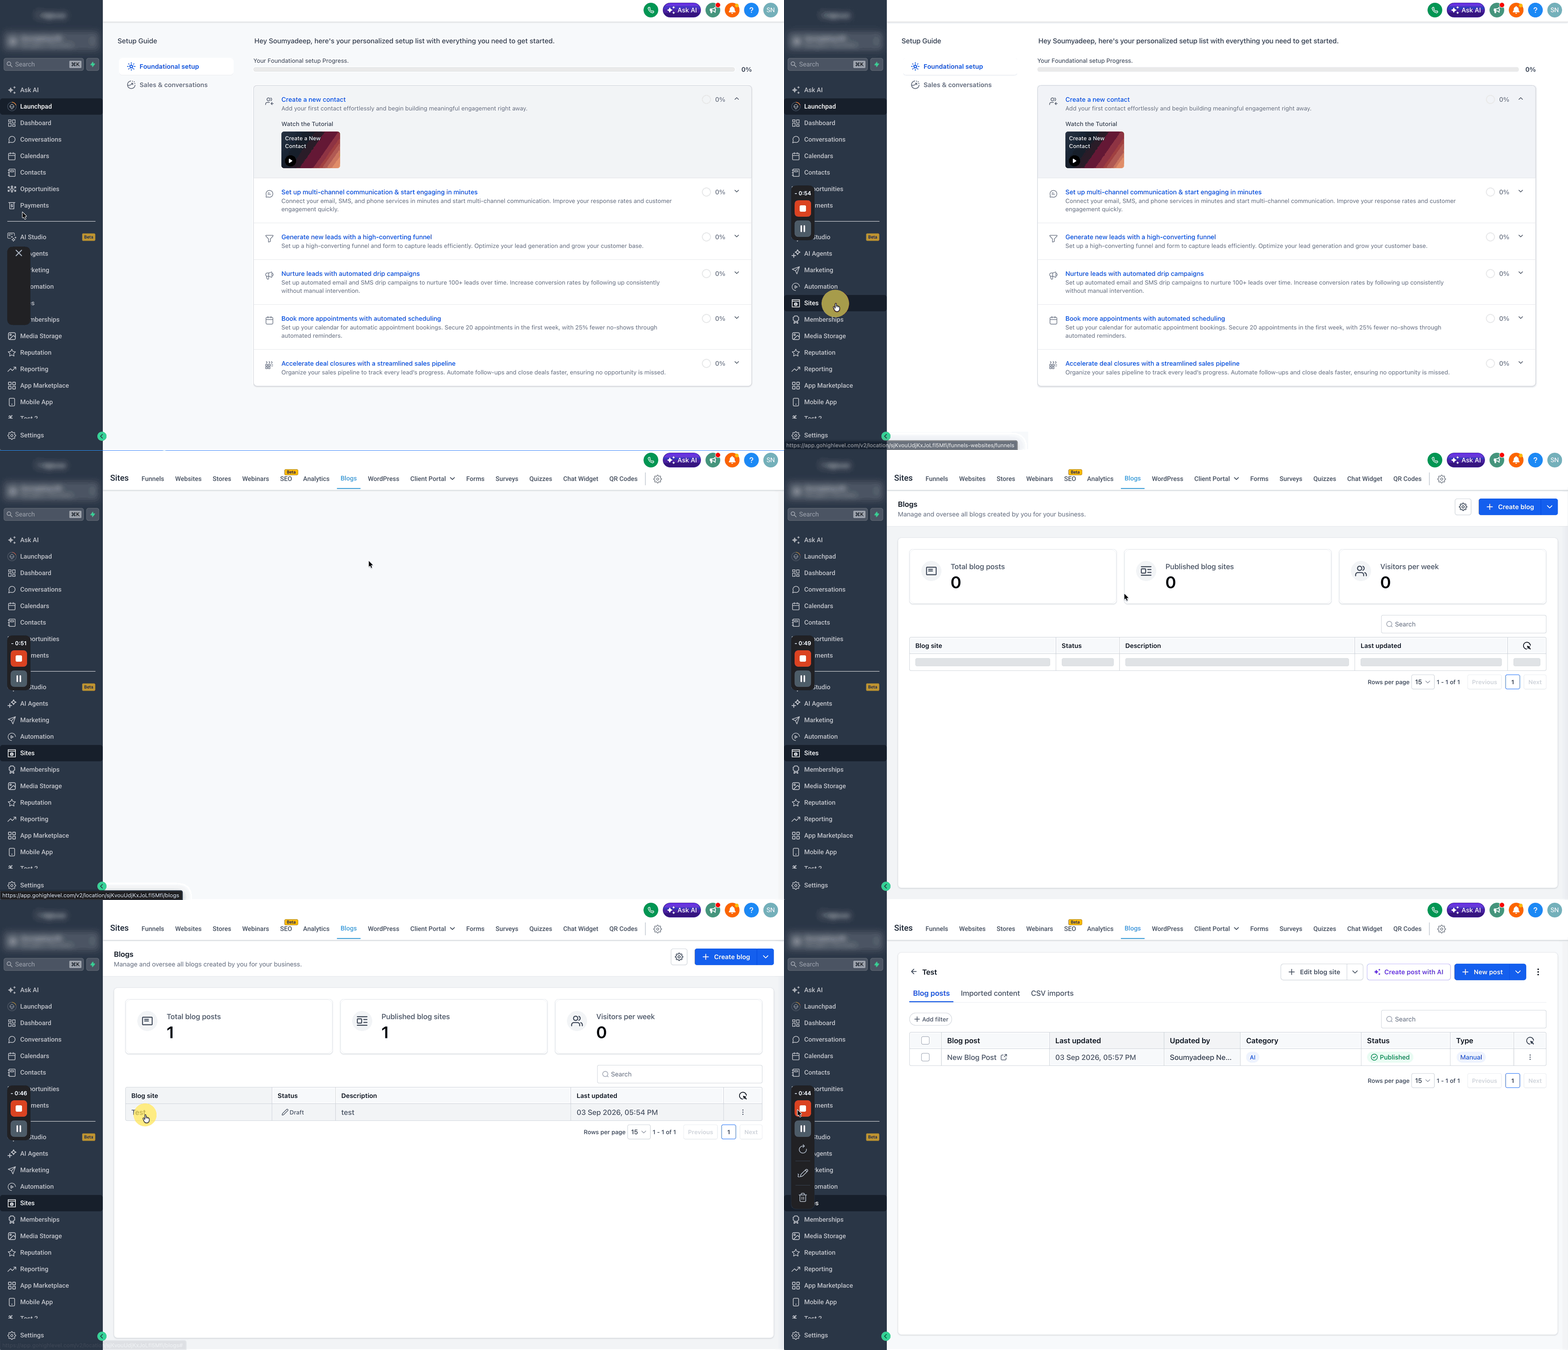
- Open Sites > Blogs in the HighLevel account.
- Select the blog where the new article will be added, or click + Create Blog if none exists.
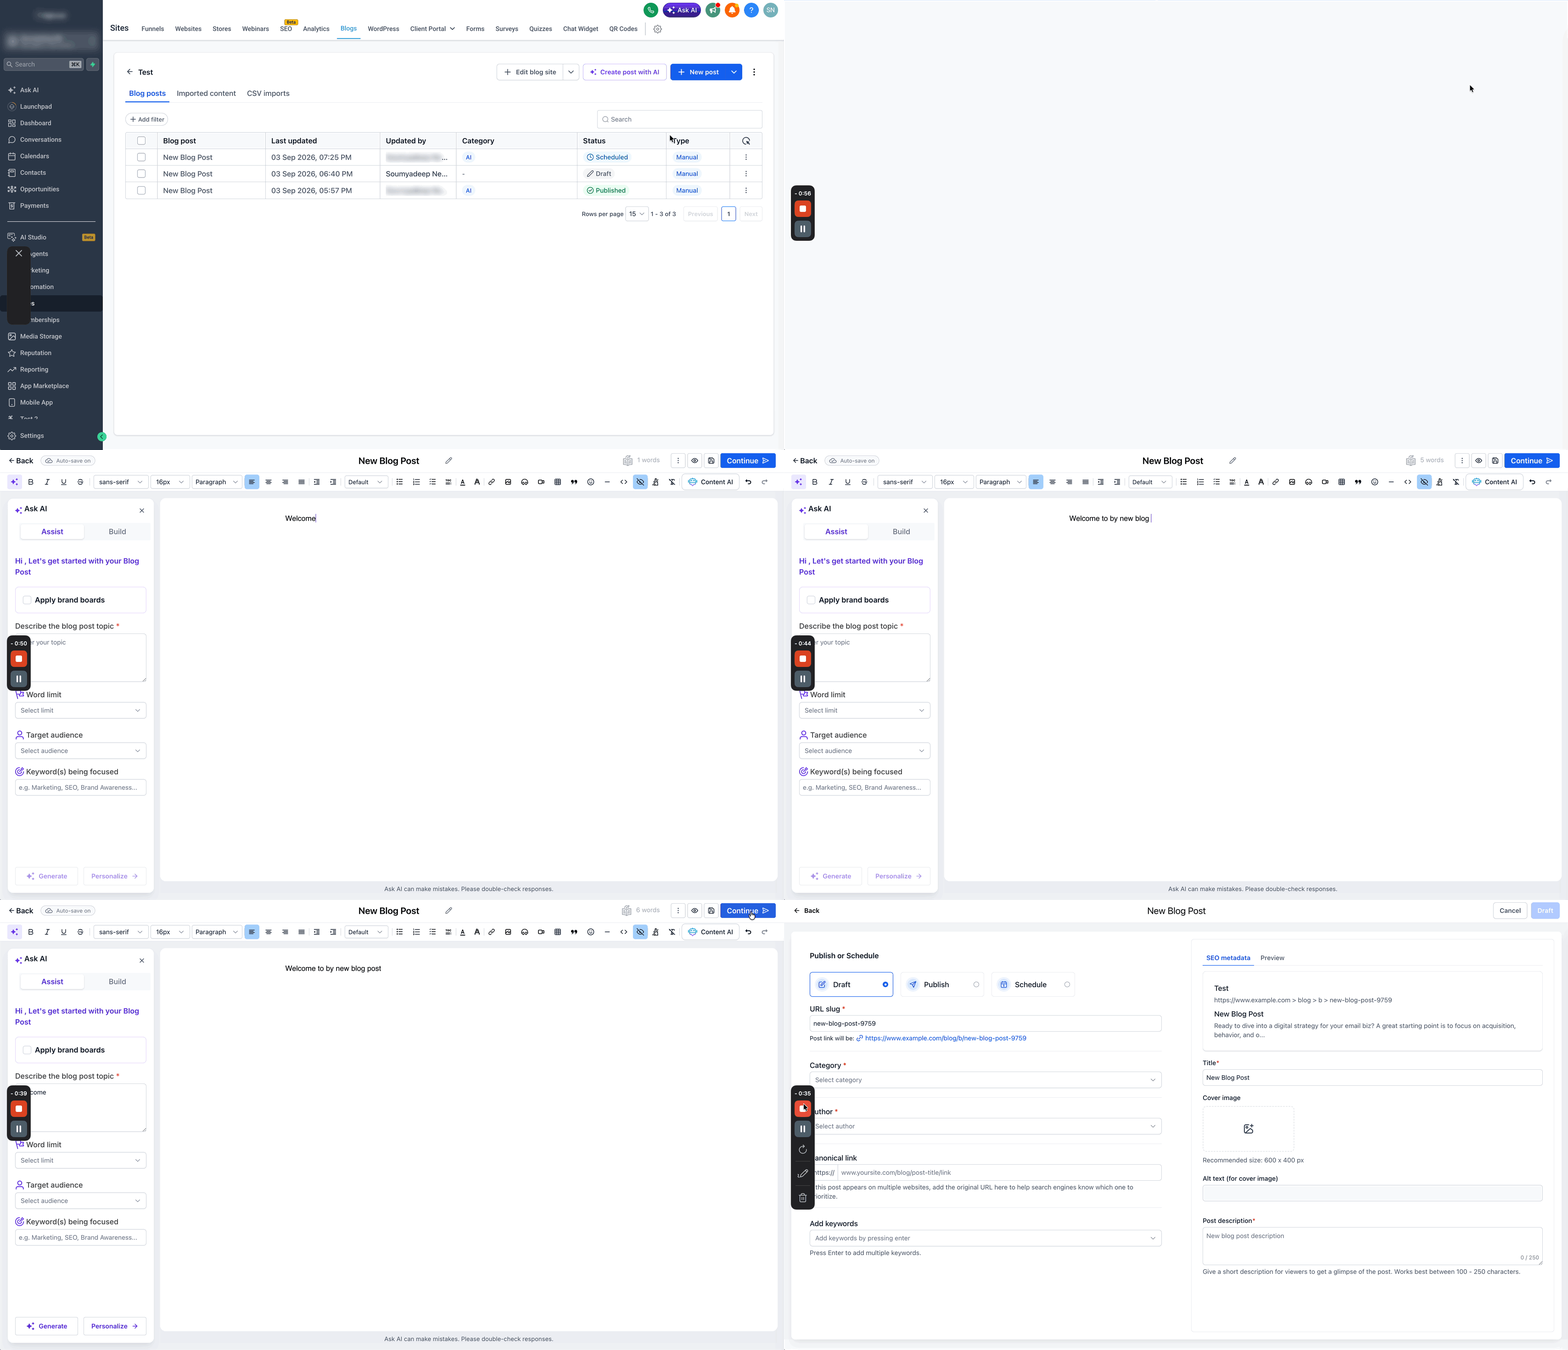
- Click the + New Post button.
- Write and format the blog content.
- Press the Continue button at the top right of the screen.
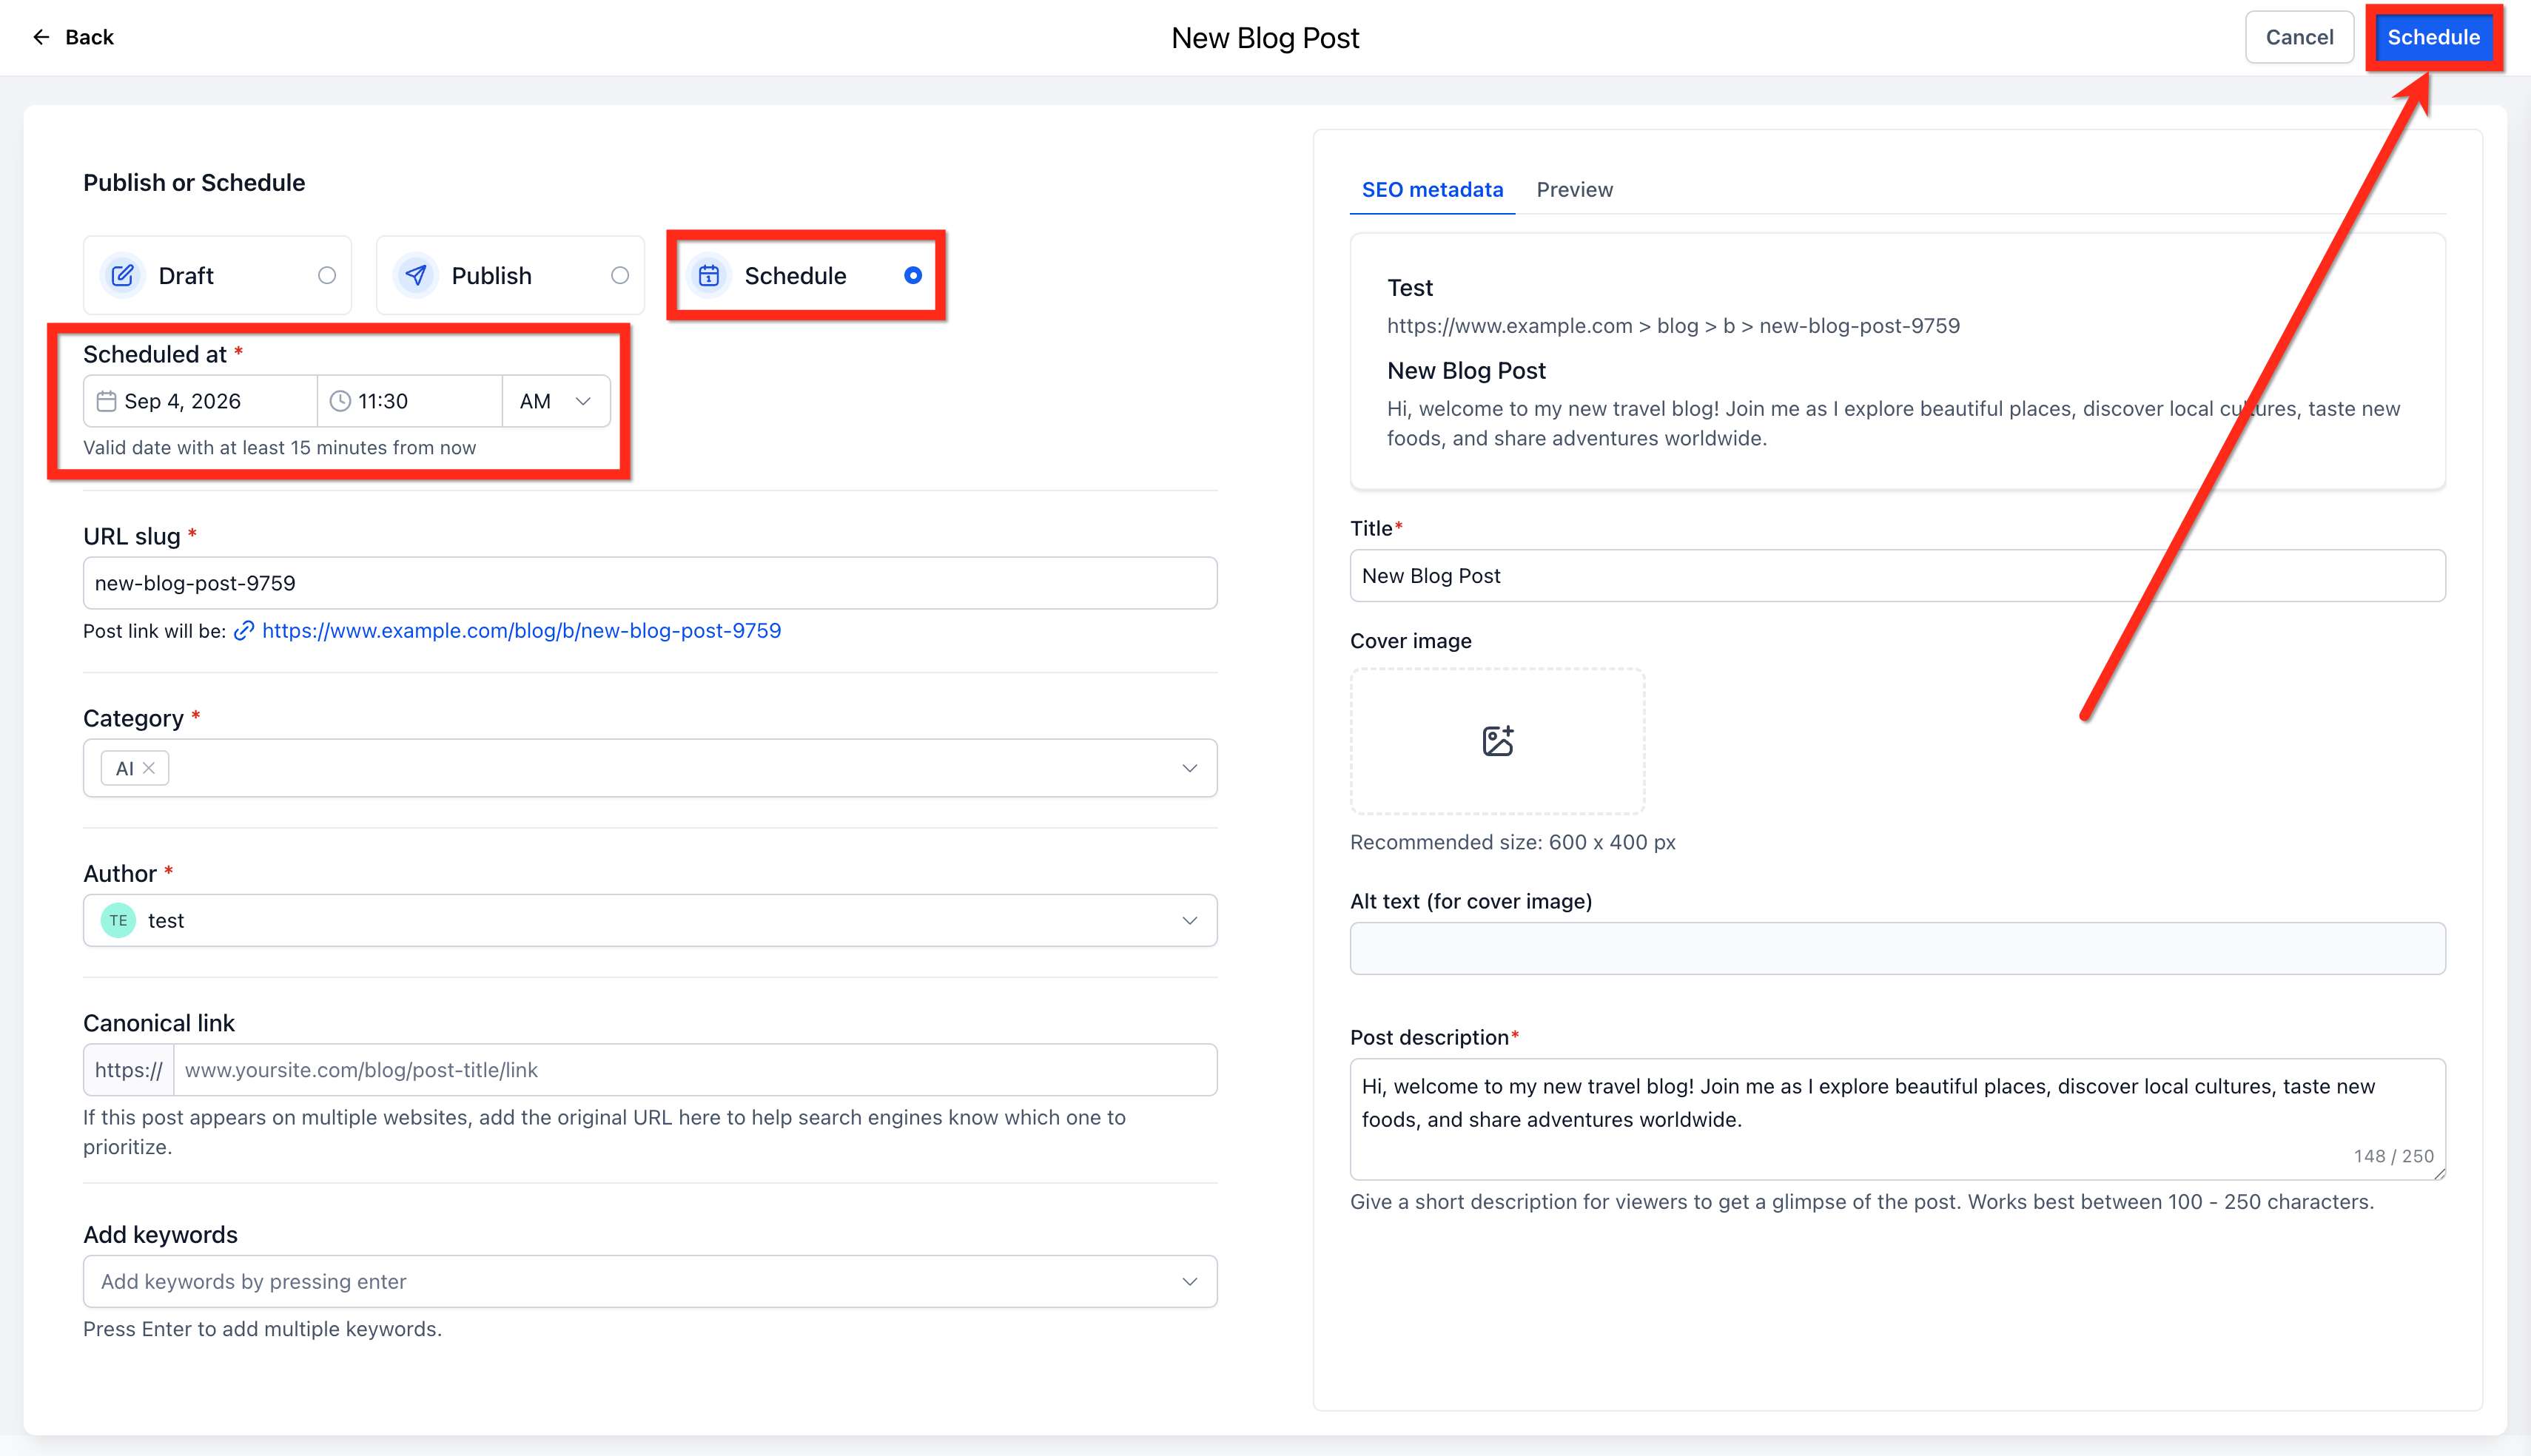
- Enter the required publishing information such as URL slug, category, author, canonical link, keywords and SEO metadata.
- Choose the Schedule option.
- Pick the desired publish date from the calendar.
- Set the publish time by selecting hour, minute and AM or PM.
- Click the Schedule button at the top right to confirm.
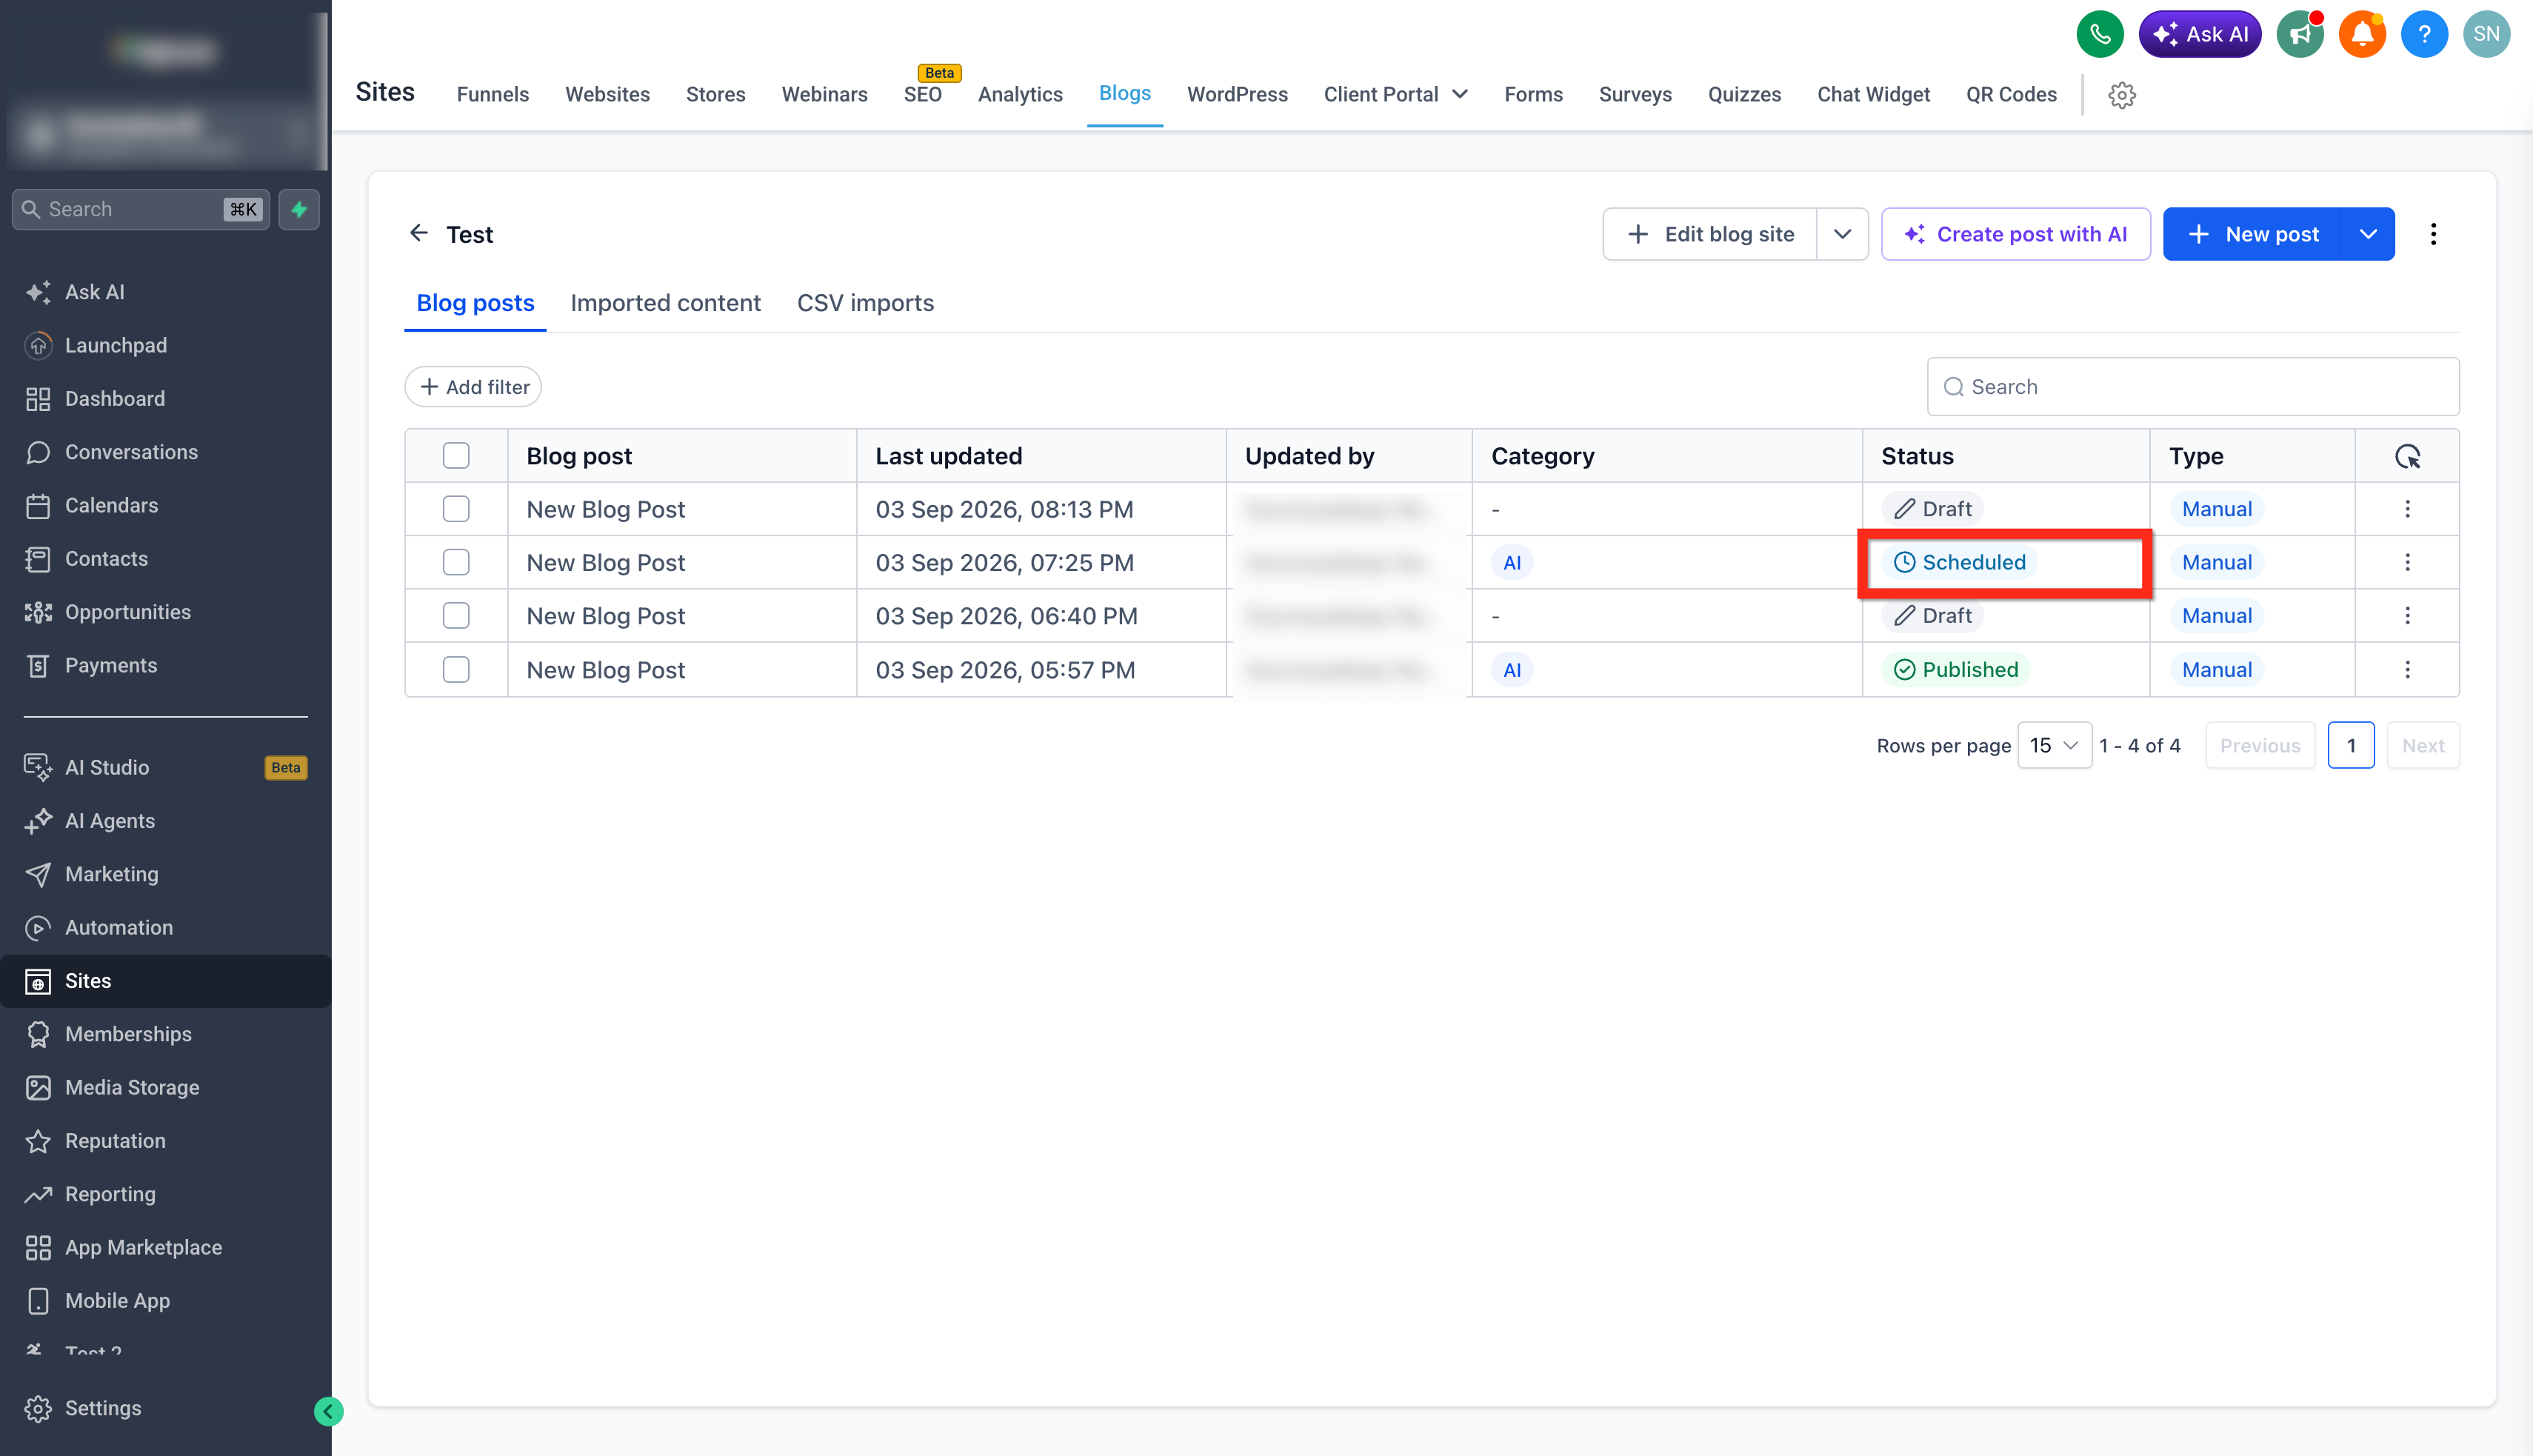
- View the post in the blog post list to verify it shows a scheduled status.
06What it looks like in HighLevel
07Settings that matter
- URL slug. Defines the path that appears after the domain for the blog post.
- Category. Assigns the post to a specific topic group for navigation and organization.
- Author. Specifies the name shown as the writer of the post.
- Canonical link. Provides a reference URL to avoid duplicate content issues.
- Keywords. Lists terms that help search engines understand the post content.
- SEO metadata. Contains title, description and other data that influence search engine results.
08How it connects to the rest of HighLevel
- Getting started with blogs and blog posts Blog setup guide
- Create blog posts manually Create posts
- Add and edit SEO information for blog posts SEO settings
Michael's take

When you have a regular flow of content and need to keep publishing without daily clicks, the time saved adds up quickly.
If your blog is occasional or you only publish a handful of pieces, the extra steps of scheduling may not outweigh the simplicity of pressing publish each time. In those cases, you might skip the scheduler and just use the standard publish button.