
01Who this is for
- Founders who need a single digital business card to share across networking events and email signatures.
- Small agencies that want to showcase client portfolios, booking calendars and social links in one QR driven page.
- Event organizers requiring a quick way for attendees to exchange contact info and capture leads.
02Profile card QR codes, explained
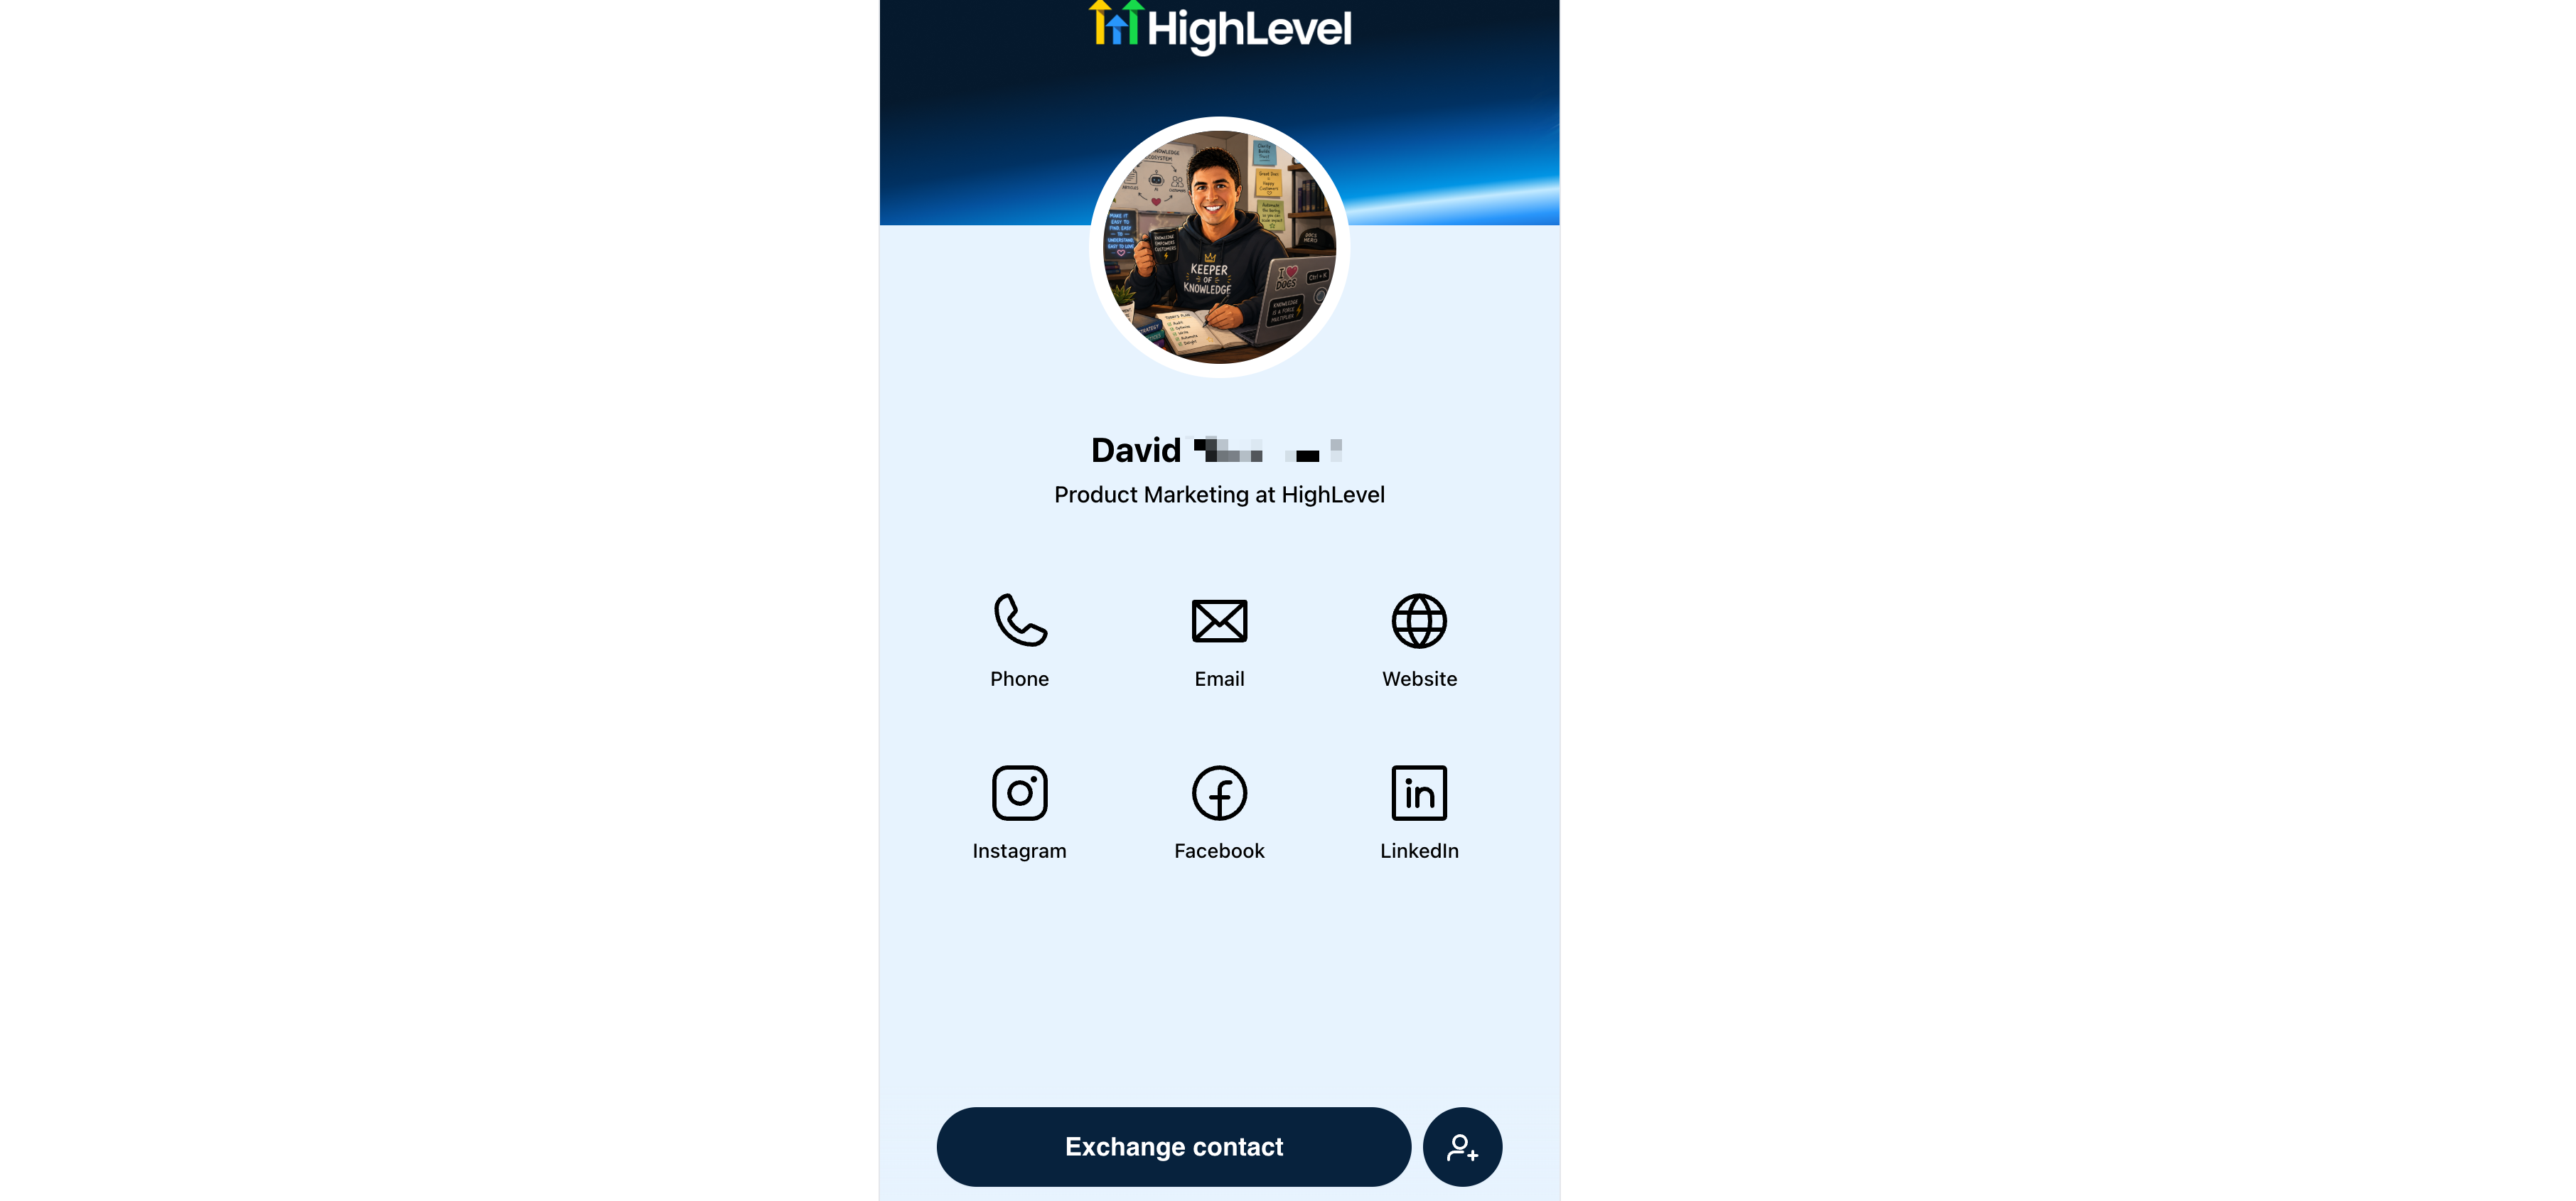
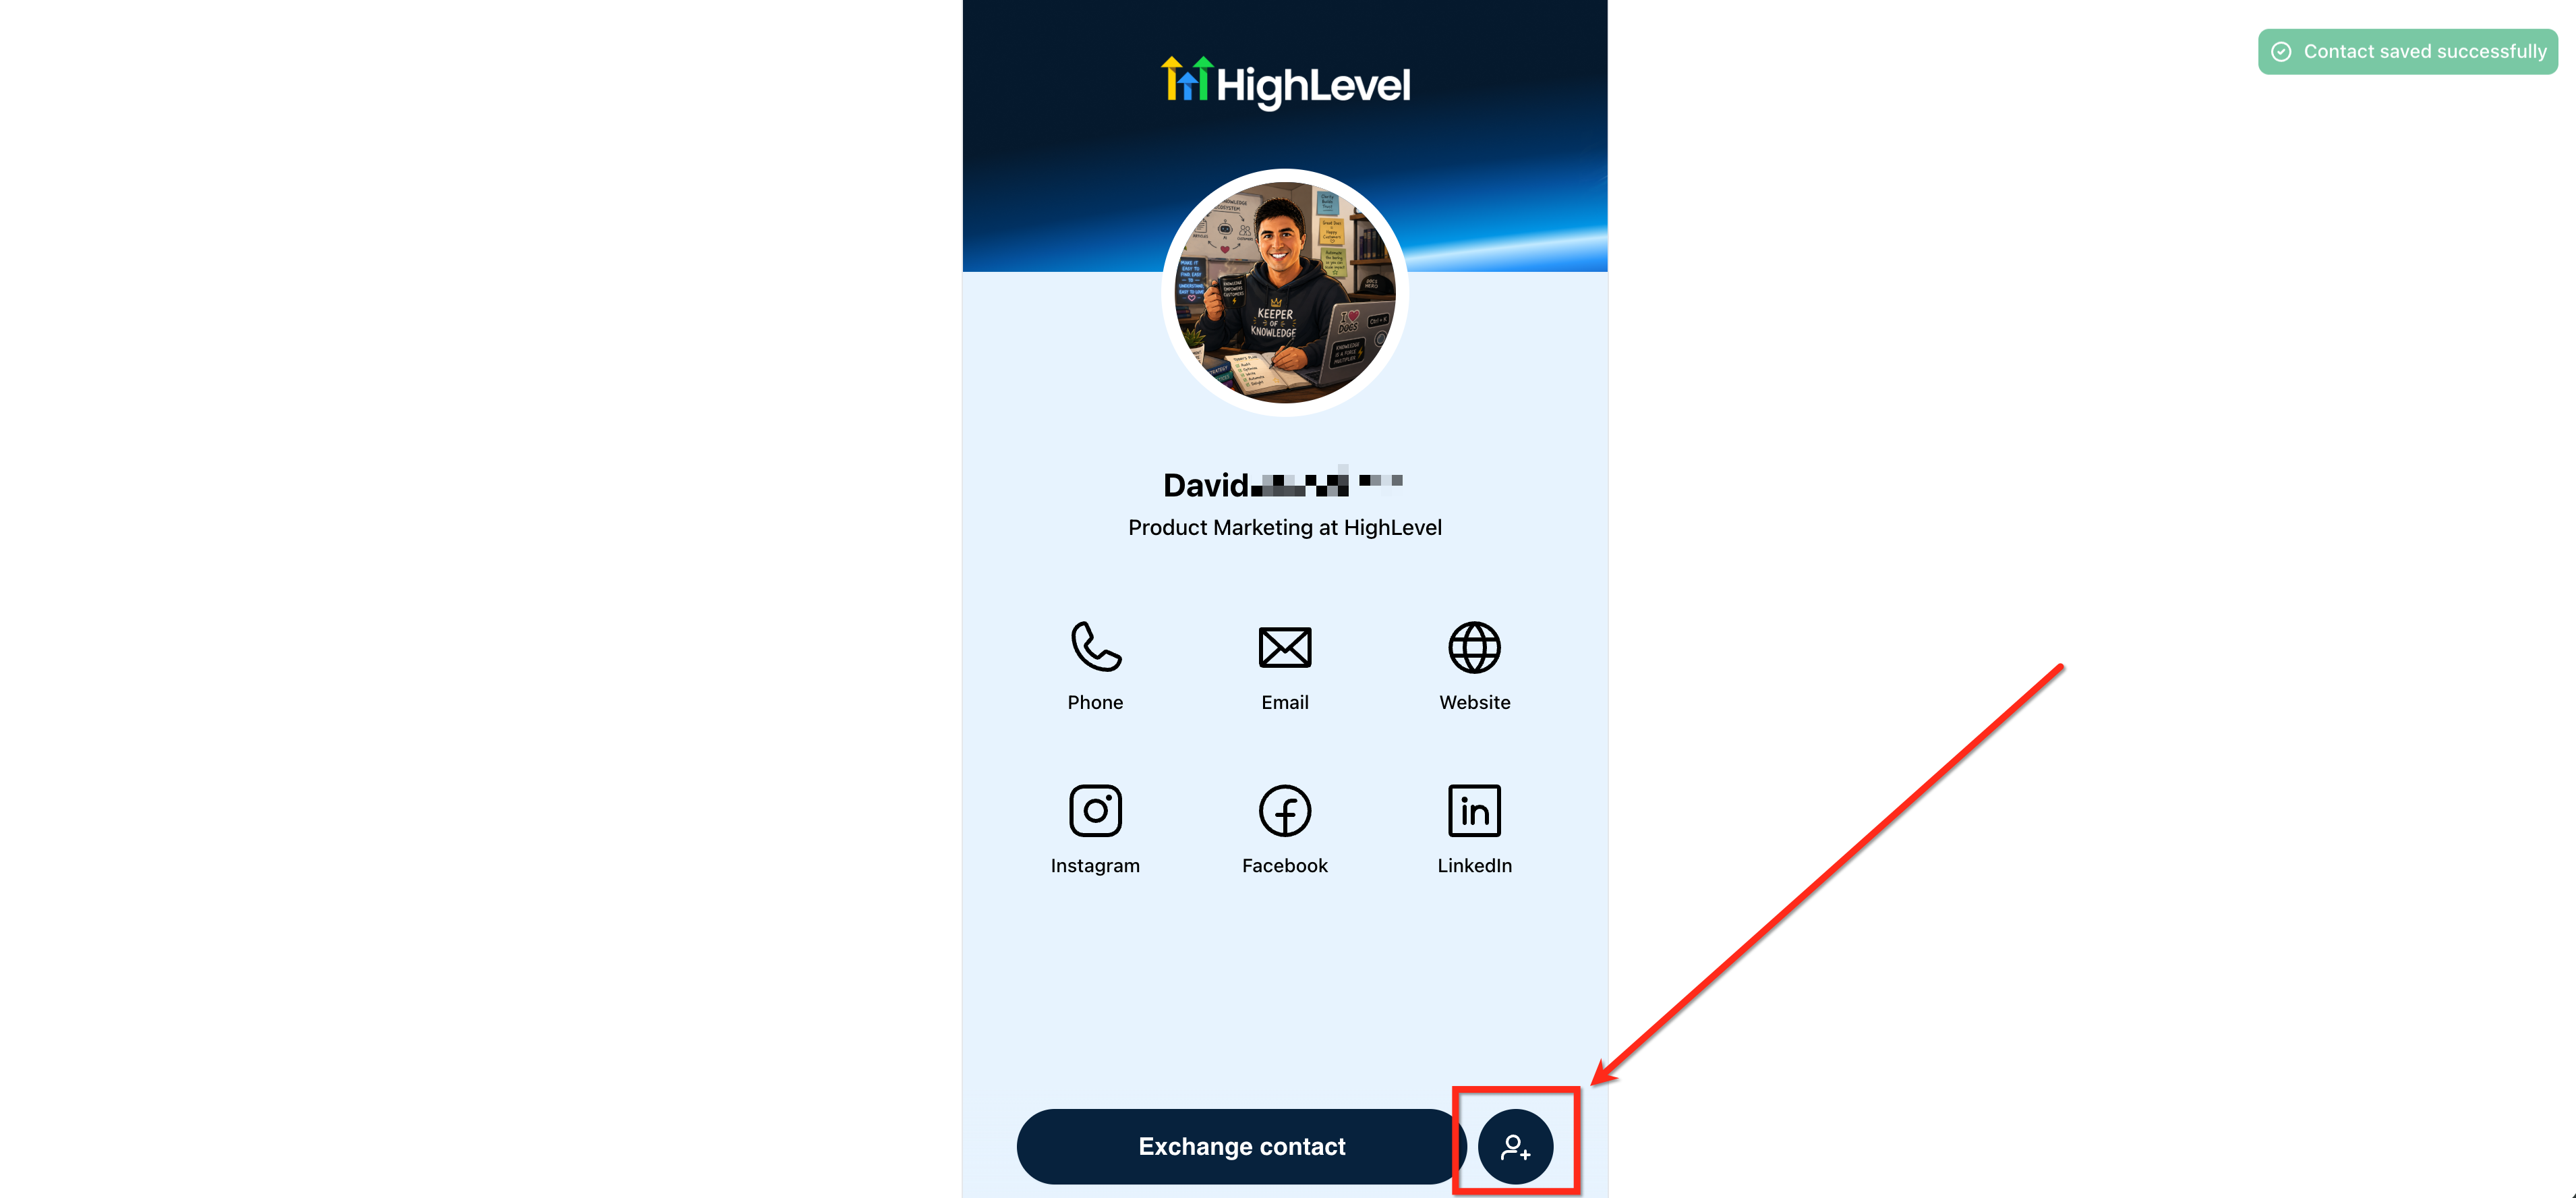
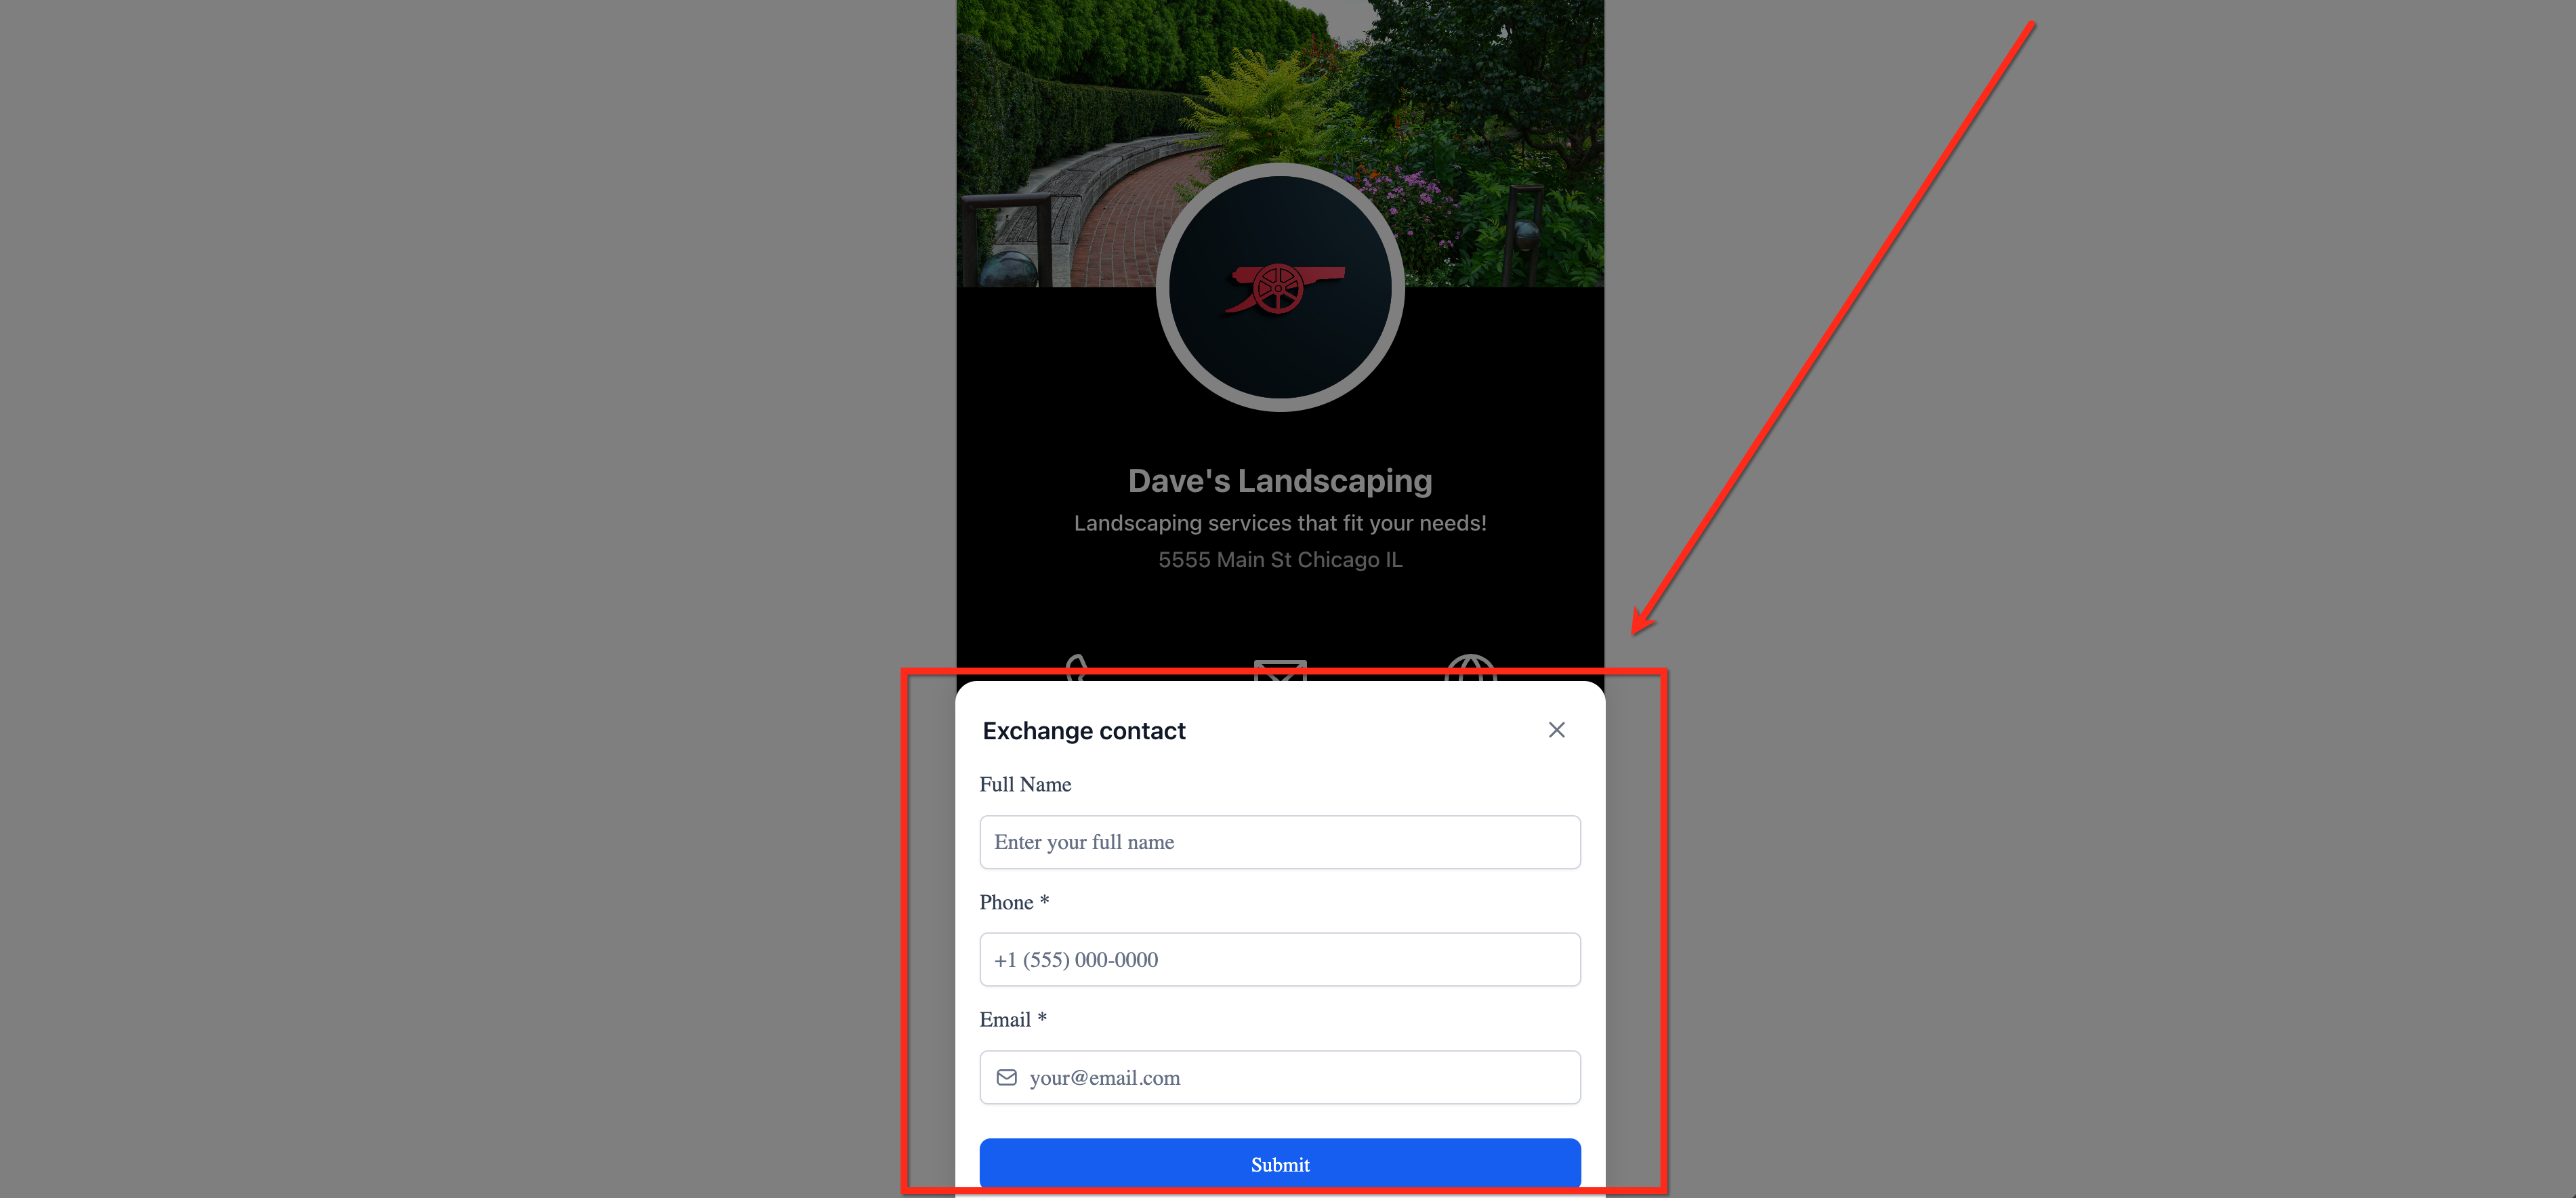
The feature creates a QR code that points to a Profile Card page hosted on the platform. When scanned, the page displays a photo, name, title, contact fields, social icons and any custom links you configure. A Save Contact button lets visitors add your details to their device, while an optional Exchange Contact form can collect their information and add it as a new contact in HighLevel.
You build the card inside the QR Code Builder, which is reached from the Sites section. The builder lets you input profile data, choose visual styles, add built in social links or custom destinations, and enable lead capture options. After saving, the QR code can be downloaded as PNG, SVG or PDF, or shared via a direct link.
All settings live within the QR Code Builder tabs: Info, Styles, Links, Exchange Contact and Contact Options. Adjustments to colors, fonts, icons and QR design affect only the scannable code, not the underlying Profile Card page.
03How businesses use profile card QR codes
- Real estate broker. The broker opens the QR Code Builder, fills in personal and office details, adds links to listings and a booking calendar, and enables the Exchange Contact form to capture prospective client info directly from the card.
- Fitness instructor. The instructor creates a profile card, uploads a portrait, sets up a link to the class schedule, adds social media icons, and turns on Automatically Download My Contact Info so clients can quickly save the instructor’s contact.
- Consulting firm. The firm builds a card that includes a link to a proposal PDF, a custom link to a payment page, enables an existing HighLevel intake form for lead capture, and customizes the QR code colors to match the corporate brand.
04How to set up and use profile card QR codes in HighLevel
Set up a profile card QR code
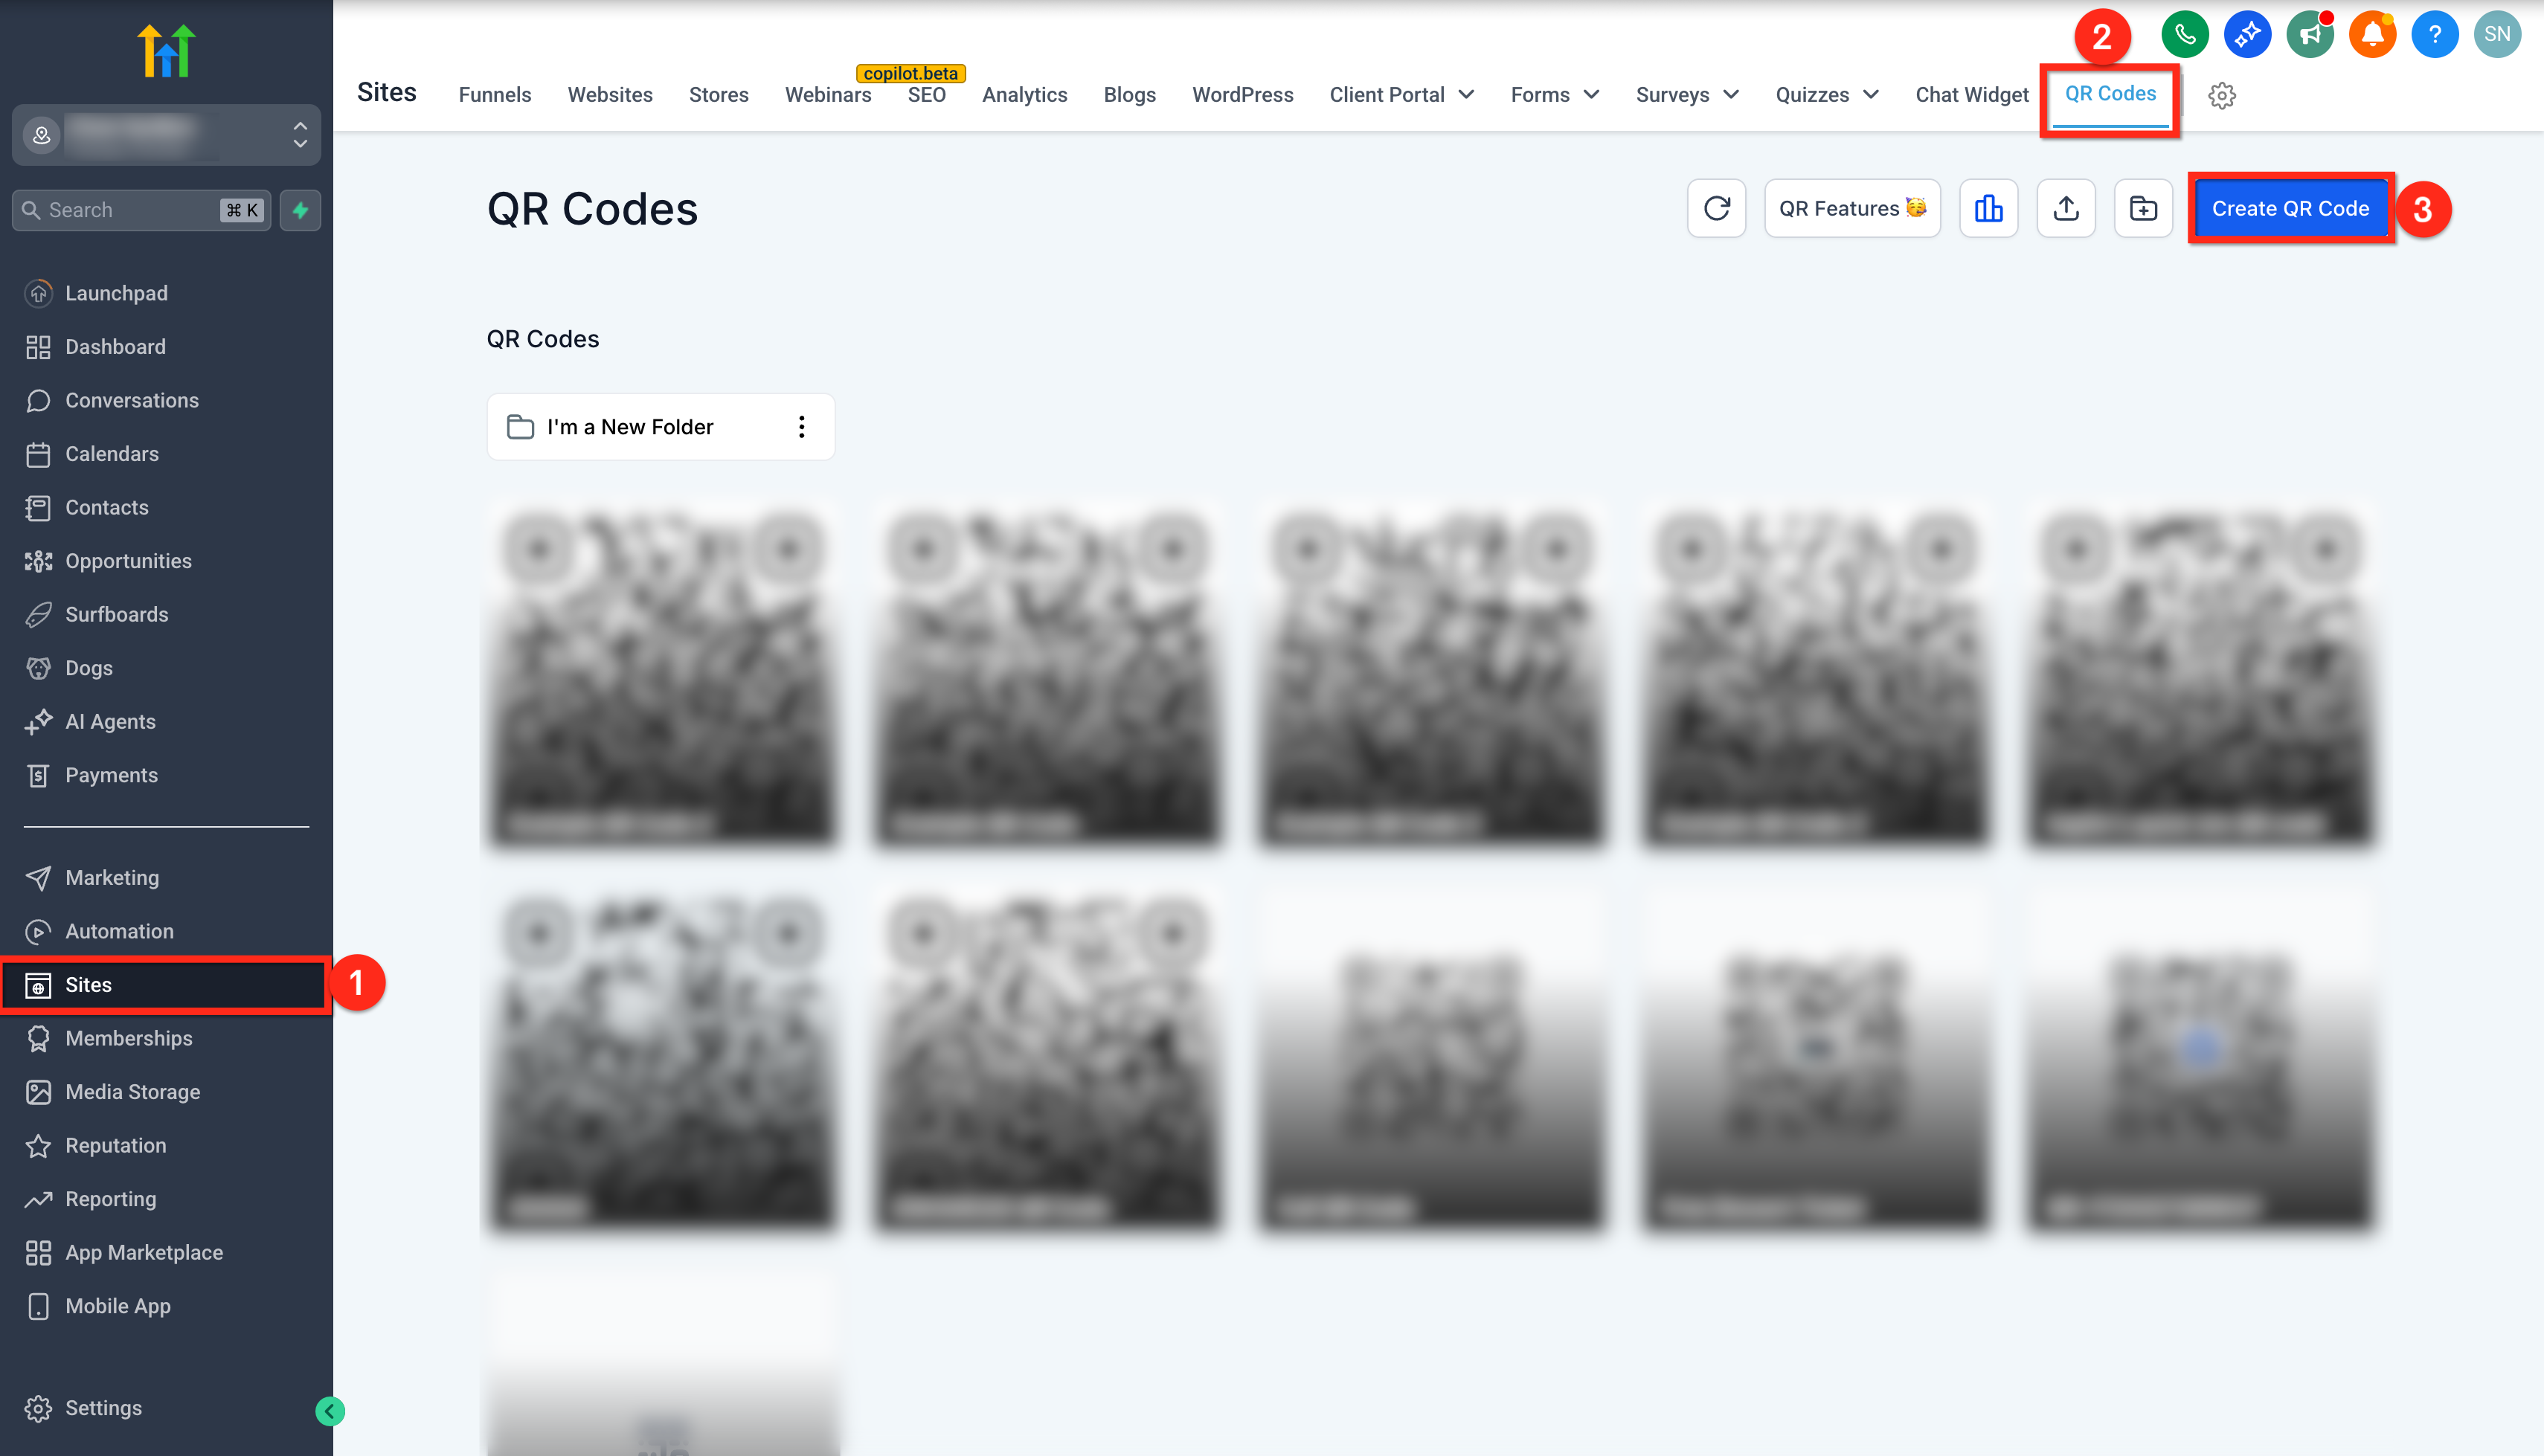
- Click Sites in the left navigation menu.
- Click QR Codes in the top navigation bar.
- Click Create QR Code in the upper right corner.
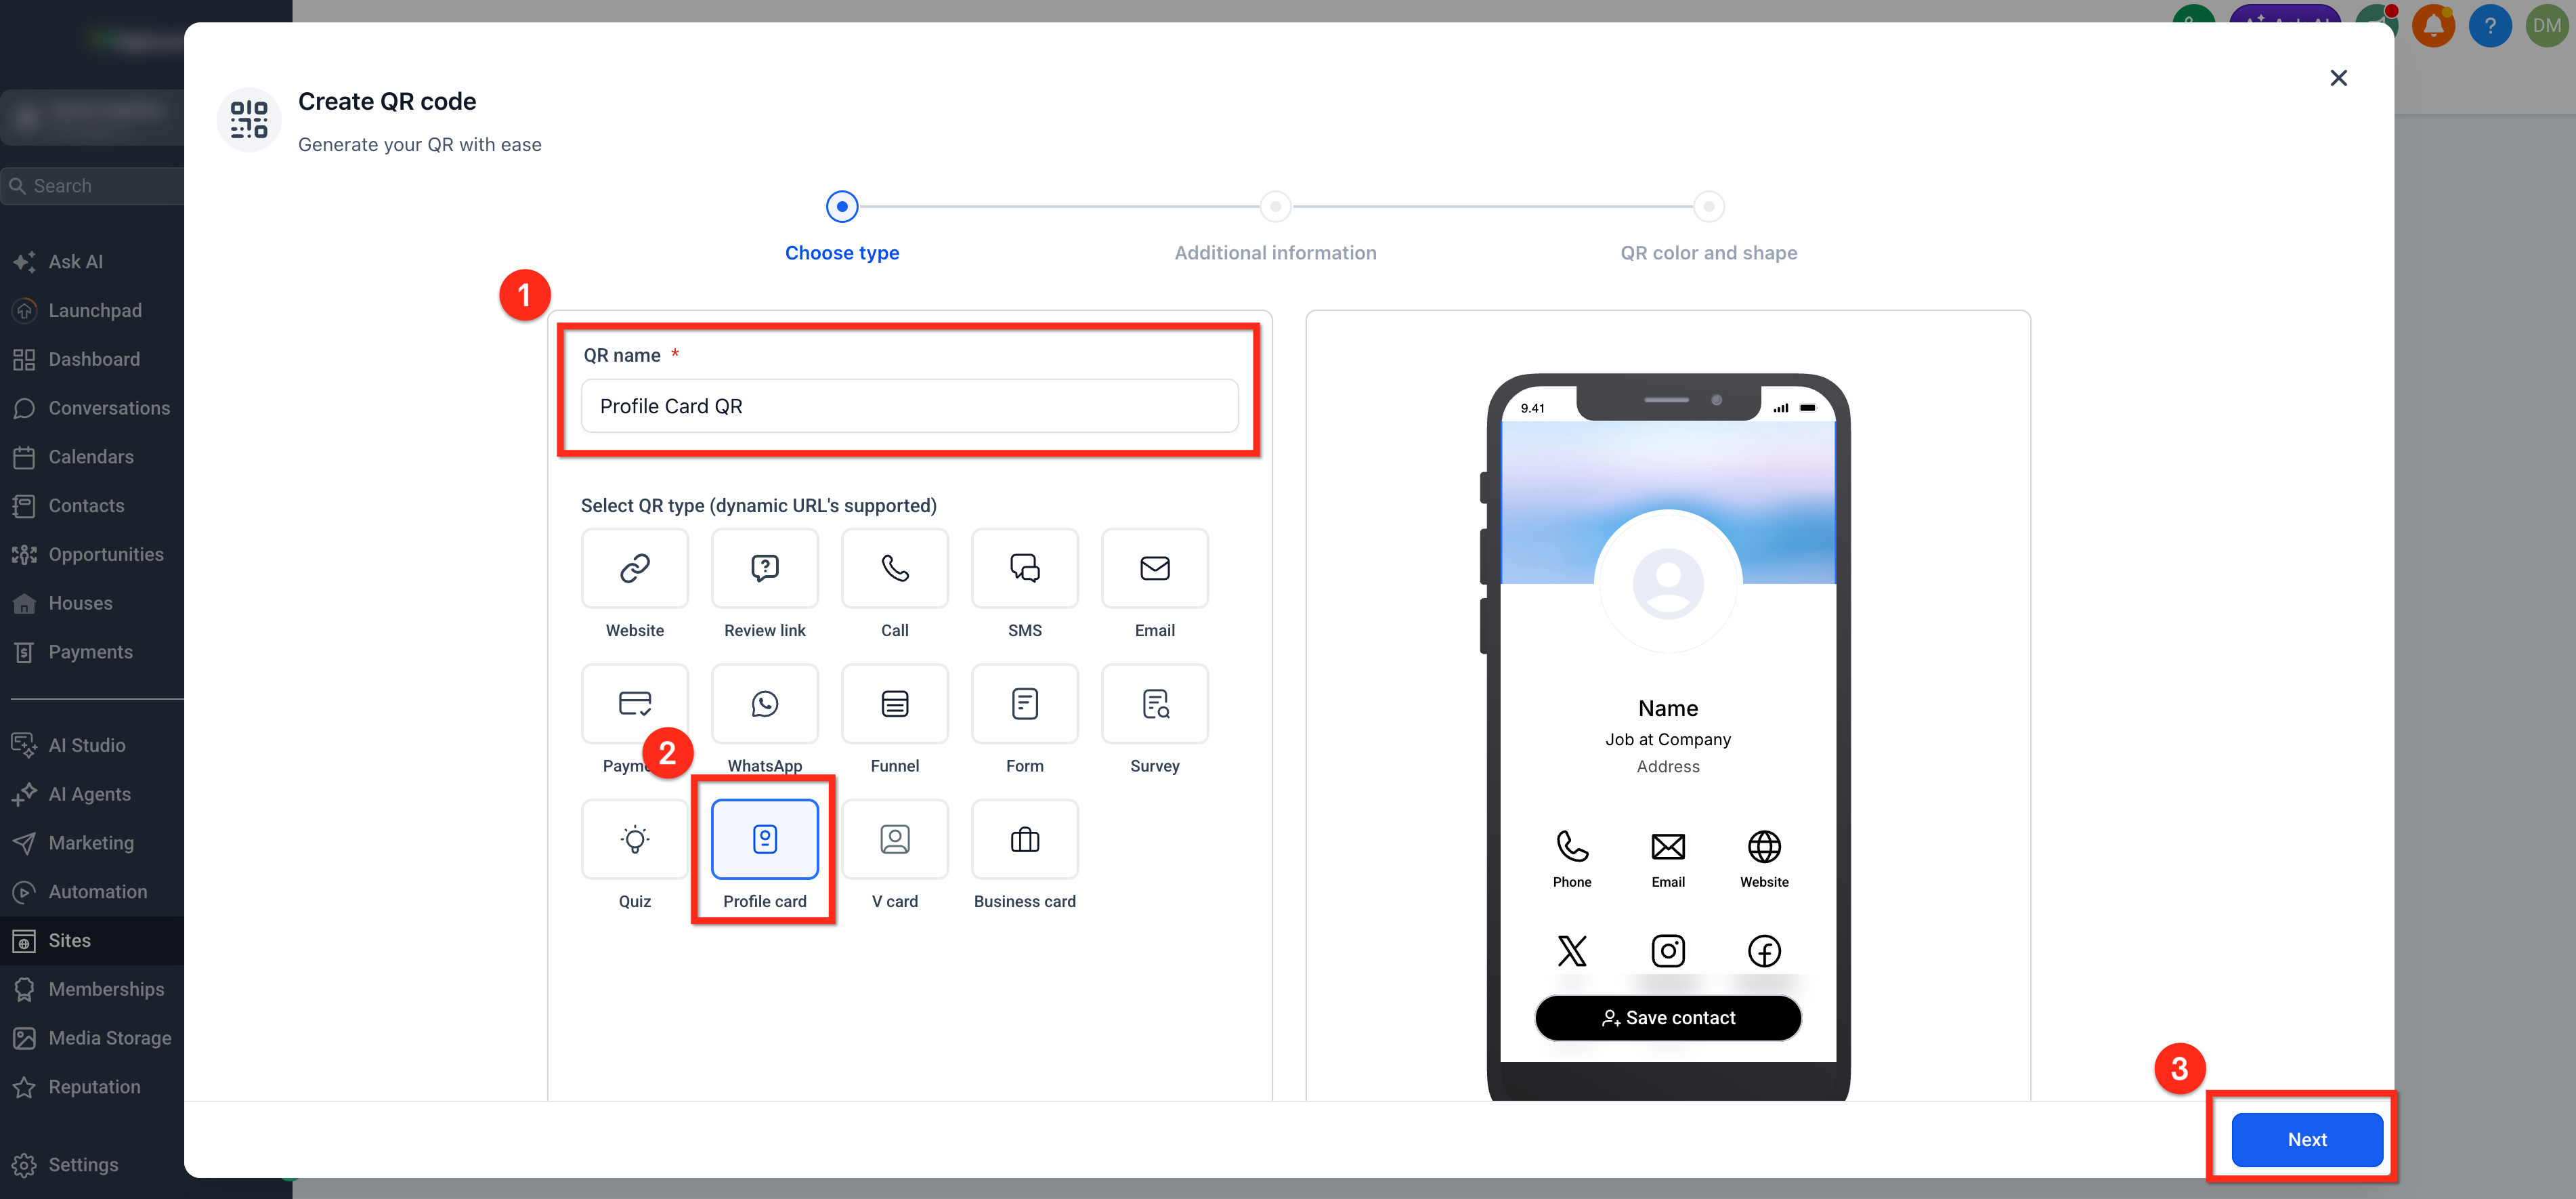
- Enter a recognizable name in the QR name field.
- Select Profile card from the available QR types.
- Click Next.
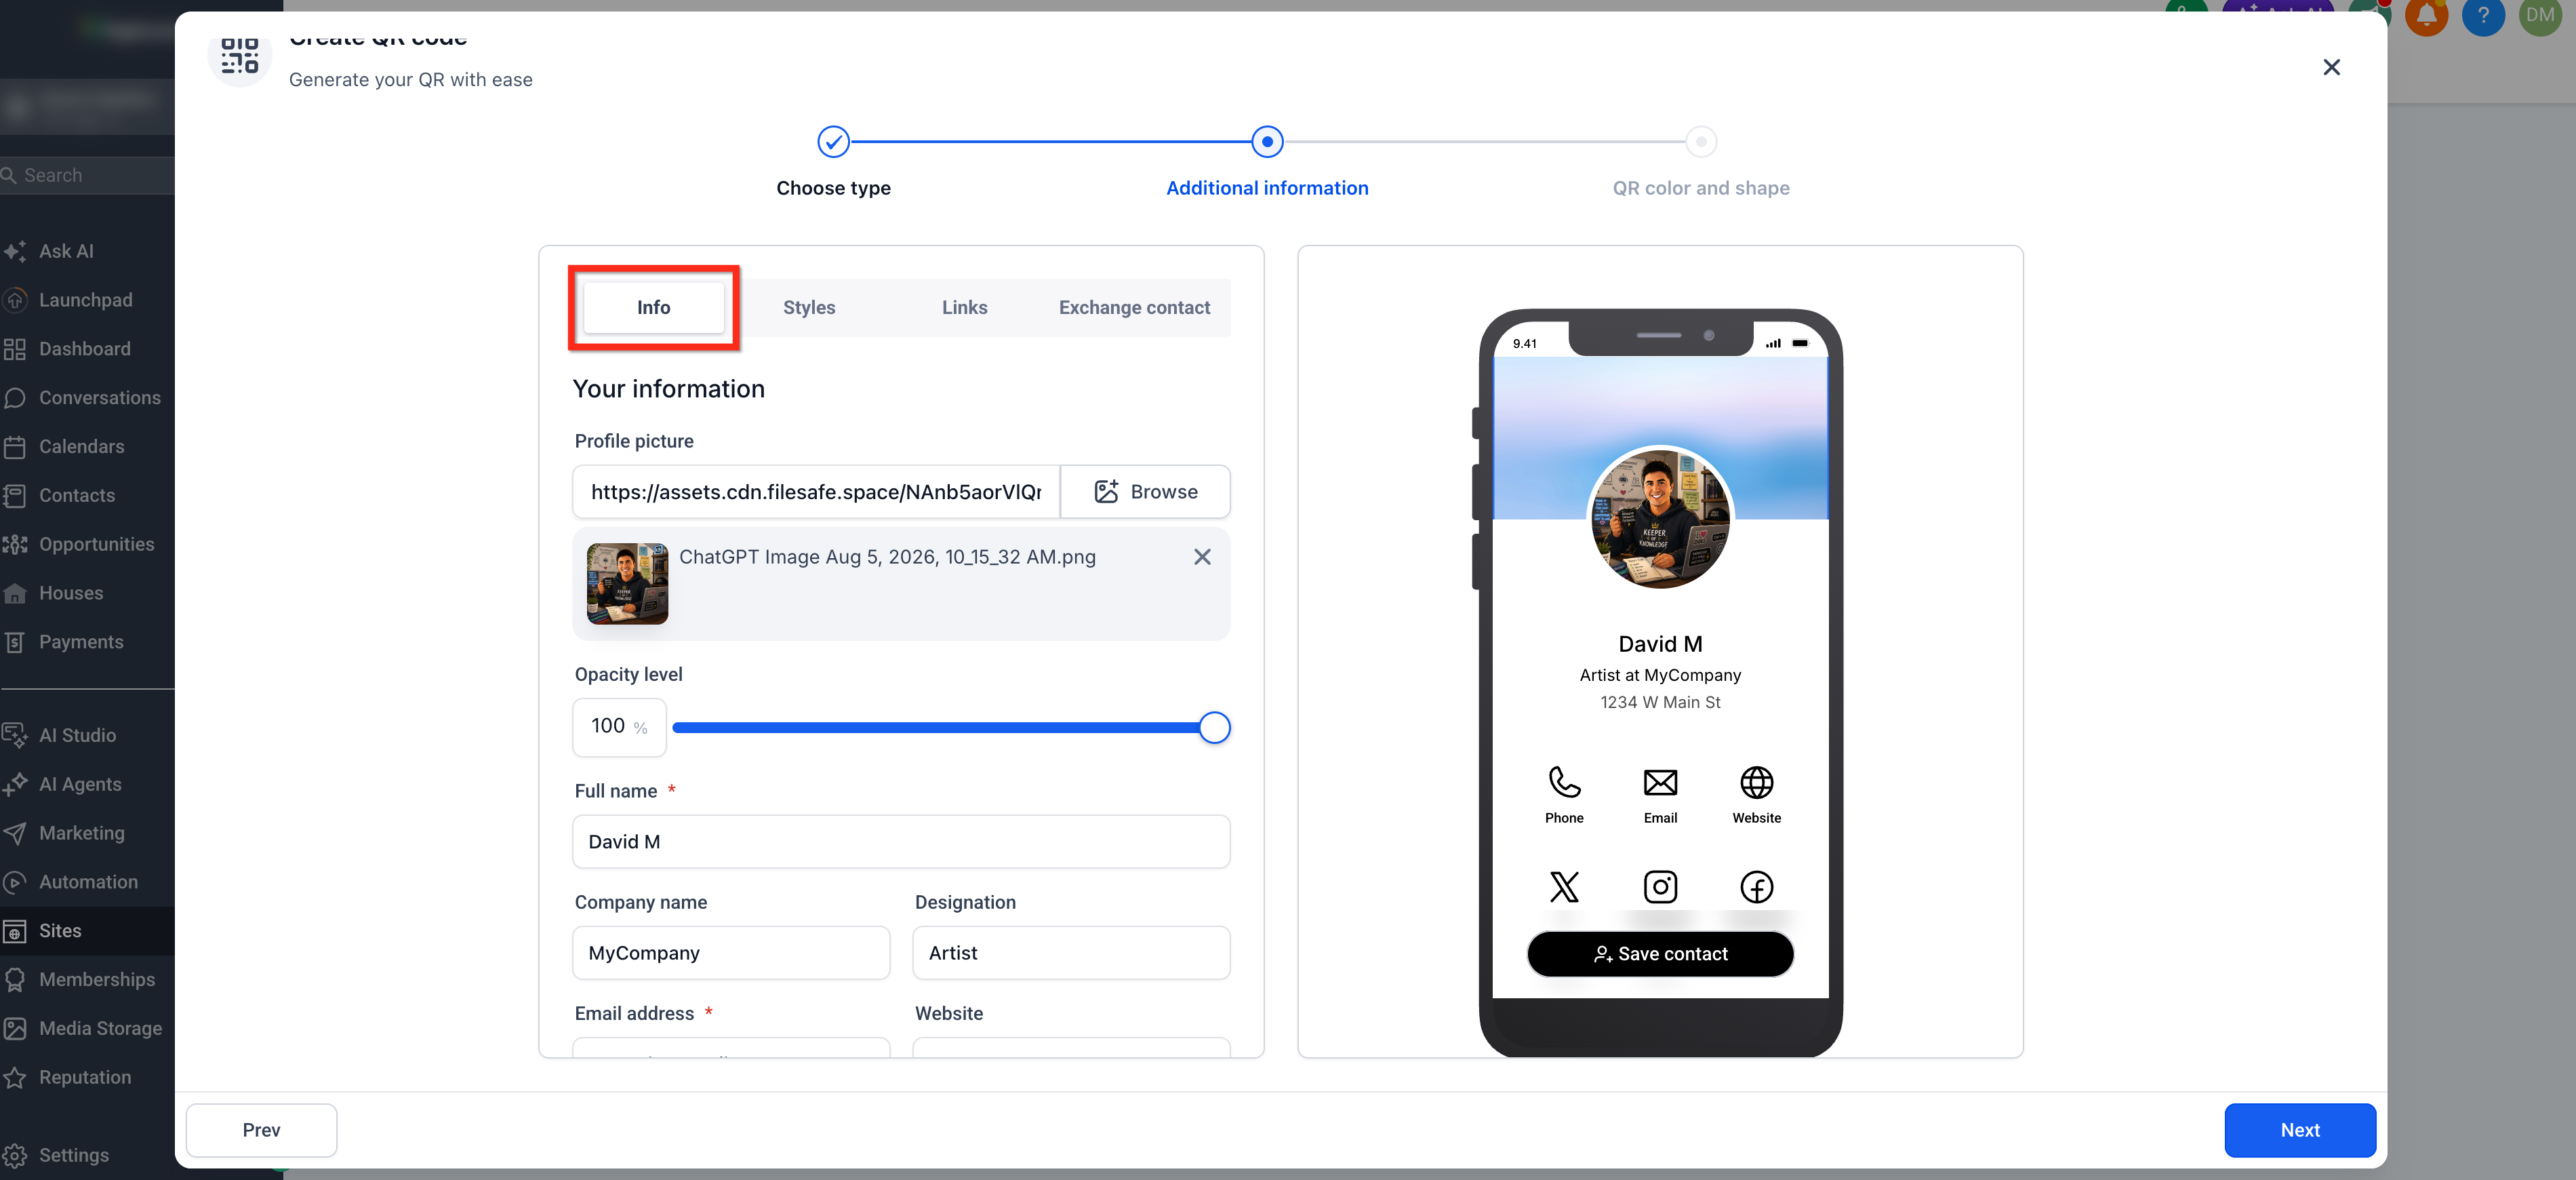
- Open the Info tab.
- Click Select to add a profile picture.
- Set the picture opacity level.
- Enter your full name, company name, designation, email address, website, phone number and address as needed.
- Open the Styles tab.
- Choose a cover image template or click Browse to add a custom image.
- Adjust the image opacity and set the colors for page, text, icons, buttons and button text.
- Turn Show icon label on or off.
- Open the Links tab.
- Select the built in social platforms to display.
- Enter the URLs or usernames for each selected platform.
- Click Add custom links to create another destination, provide its name and URL, and choose an icon.
- Use the drag handles to reorder links or click the trash icon to remove any.
- Open the Exchange Contact tab.
- Turn on Exchange contact.
- Choose New form to create a form or Use an existing form to select a previously built HighLevel form.
- Click Edit form to modify the form without leaving the builder and change the button text if desired.
- Turn on Open Exchange Contact Form by Default when the form should appear immediately.
- Turn on Automatically Download My Contact Info to start the contact saving process automatically.
- Test both settings on a mobile device before sharing the card.
- Click Next.
- Customize the QR code’s colors, dots, markers, border and frame.
- Add a center logo, adjust its background and set a page background image with the desired transparency.
- Enter supporting text such as “Scan Me”, choose the font and text color.
- Click Save.
- Open the saved QR code from Sites > QR Codes.
- Download the QR code in PNG, SVG or PDF format, or copy the Profile Card’s direct link.
- Place the QR code or link in email signatures, printed materials, websites, presentations, text messages or digital campaigns.
05What it looks like in HighLevel
06Settings that matter
- Exchange contact. Enables an Exchange Contact button and form on the Profile Card so visitors can submit their own details and become contacts in HighLevel.
- Open Exchange Contact Form by Default. Displays the Exchange Contact form automatically when the Profile Card loads, removing the need for visitors to click the button first.
- Automatically Download My Contact Info. Triggers the contact saving process as soon as the Profile Card opens, though the visitor’s device may still ask for confirmation.
- Show icon label. Controls whether text labels appear alongside the icons for each link on the Profile Card.
07Things to know before you rely on it
- The Save Contact button appears by default and does not depend on the Exchange Contact setting.
- Automatic contact download may still require user confirmation based on browser, operating system or device settings.
- QR code design options affect only the scannable code and not the appearance of the Profile Card page.
08How it connects to the rest of HighLevel
- Learn how to generate, customize and download QR codes in HighLevel. QR code generation guide
- Find instructions for building vCard QR codes within the QR code builder. Create vCard QR code
- Explore how to create custom business card QR codes for branding purposes. Custom business card QR code
Michael's take

How can I give people a single, branded way to grab my contact info and all my important links? A Profile Card QR code does exactly that. It turns a simple scan into a mobile friendly page that shows your name, title, contact details, social profiles and any custom links you add, plus optional lead capture.
If I were setting this up, I’d start by customizing the card’s look to match my brand, then enable the Save Contact button so anyone can add me with one tap. I’d also test the automatic download option on a phone to make sure the experience feels smooth before I put the code on business cards or event signage.