
01Who this is for
- Content marketers who need to shift existing blog articles into HighLevel without copying each post manually.
- Agency owners managing multiple client sites and looking for a faster way to migrate blogs during a platform change.
02Blog post importer, explained
The Blog Post Importer is a tool inside the Sites module that reads an external blog’s homepage URL, finds all available articles, and pulls their text and SEO fields into HighLevel. It shows a guided flow that moves from scanning the source site, through a review of detected posts, to a mapping screen where you assign missing metadata, and finally to the import step.
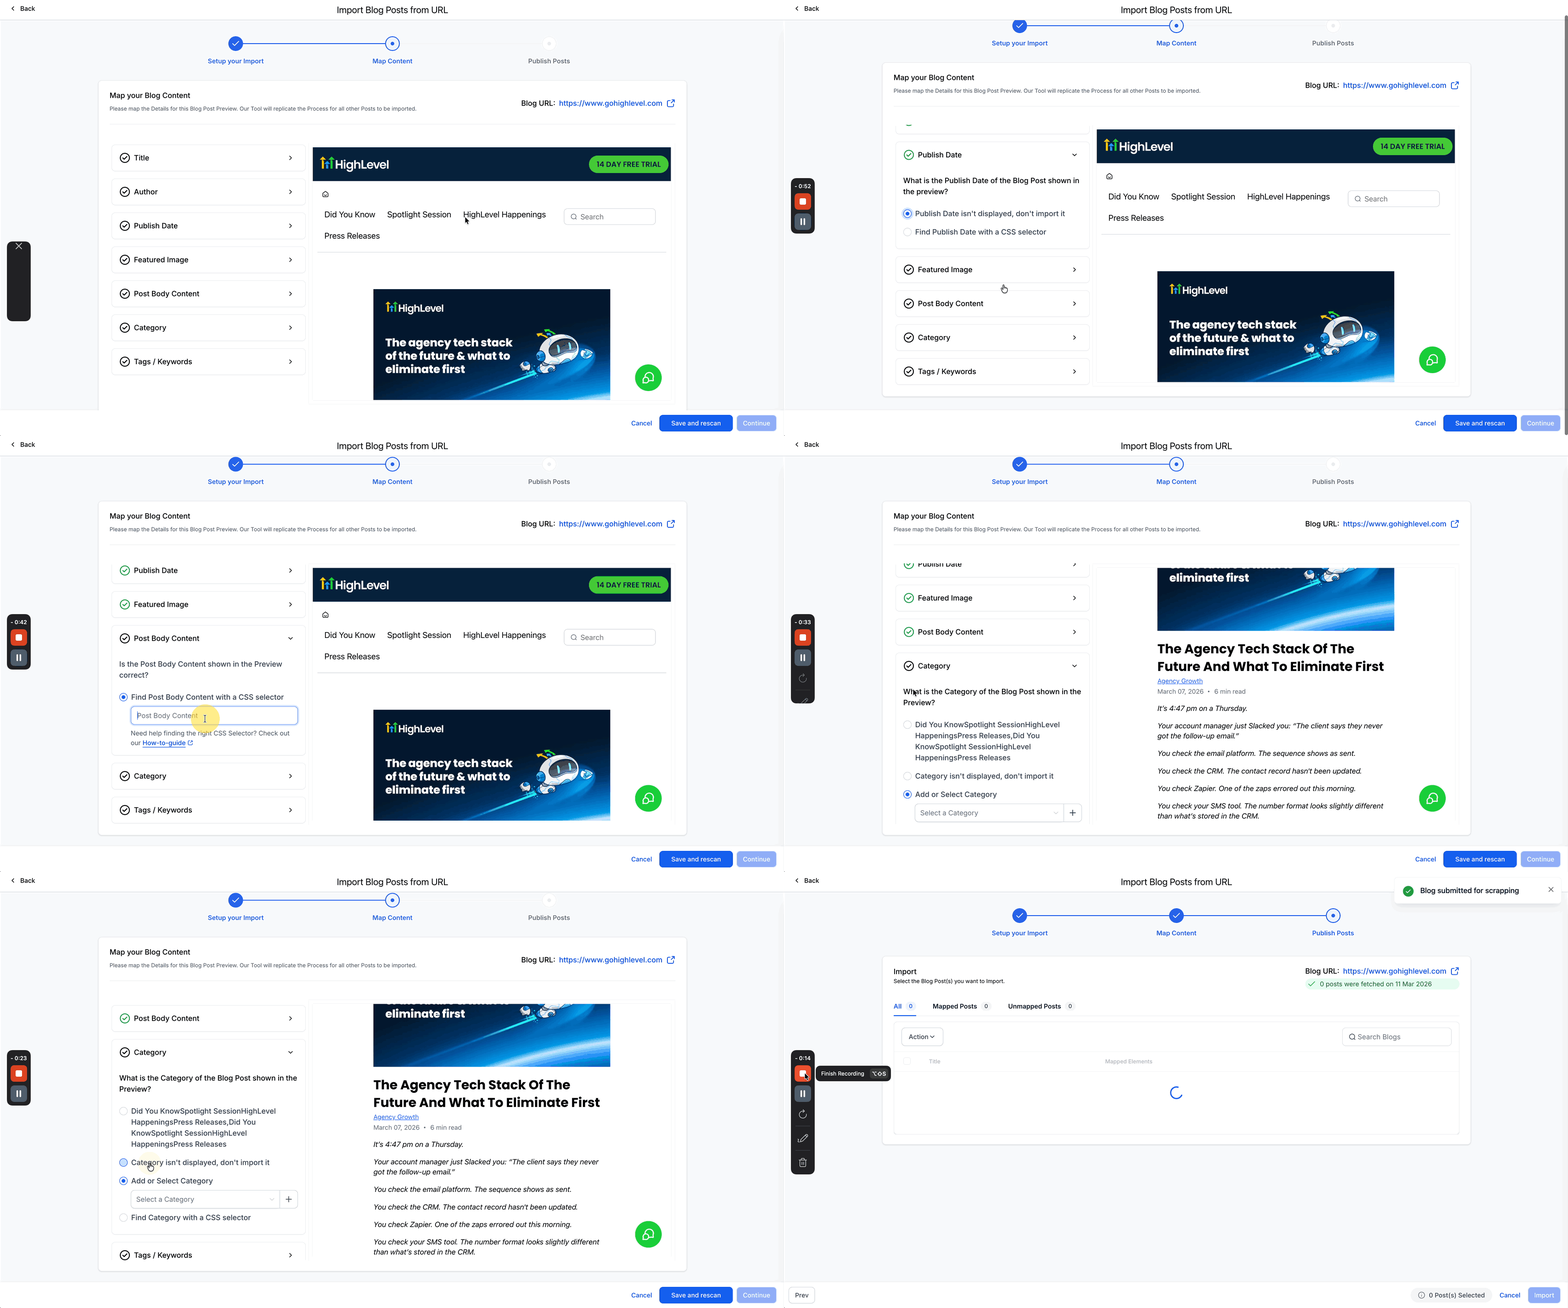
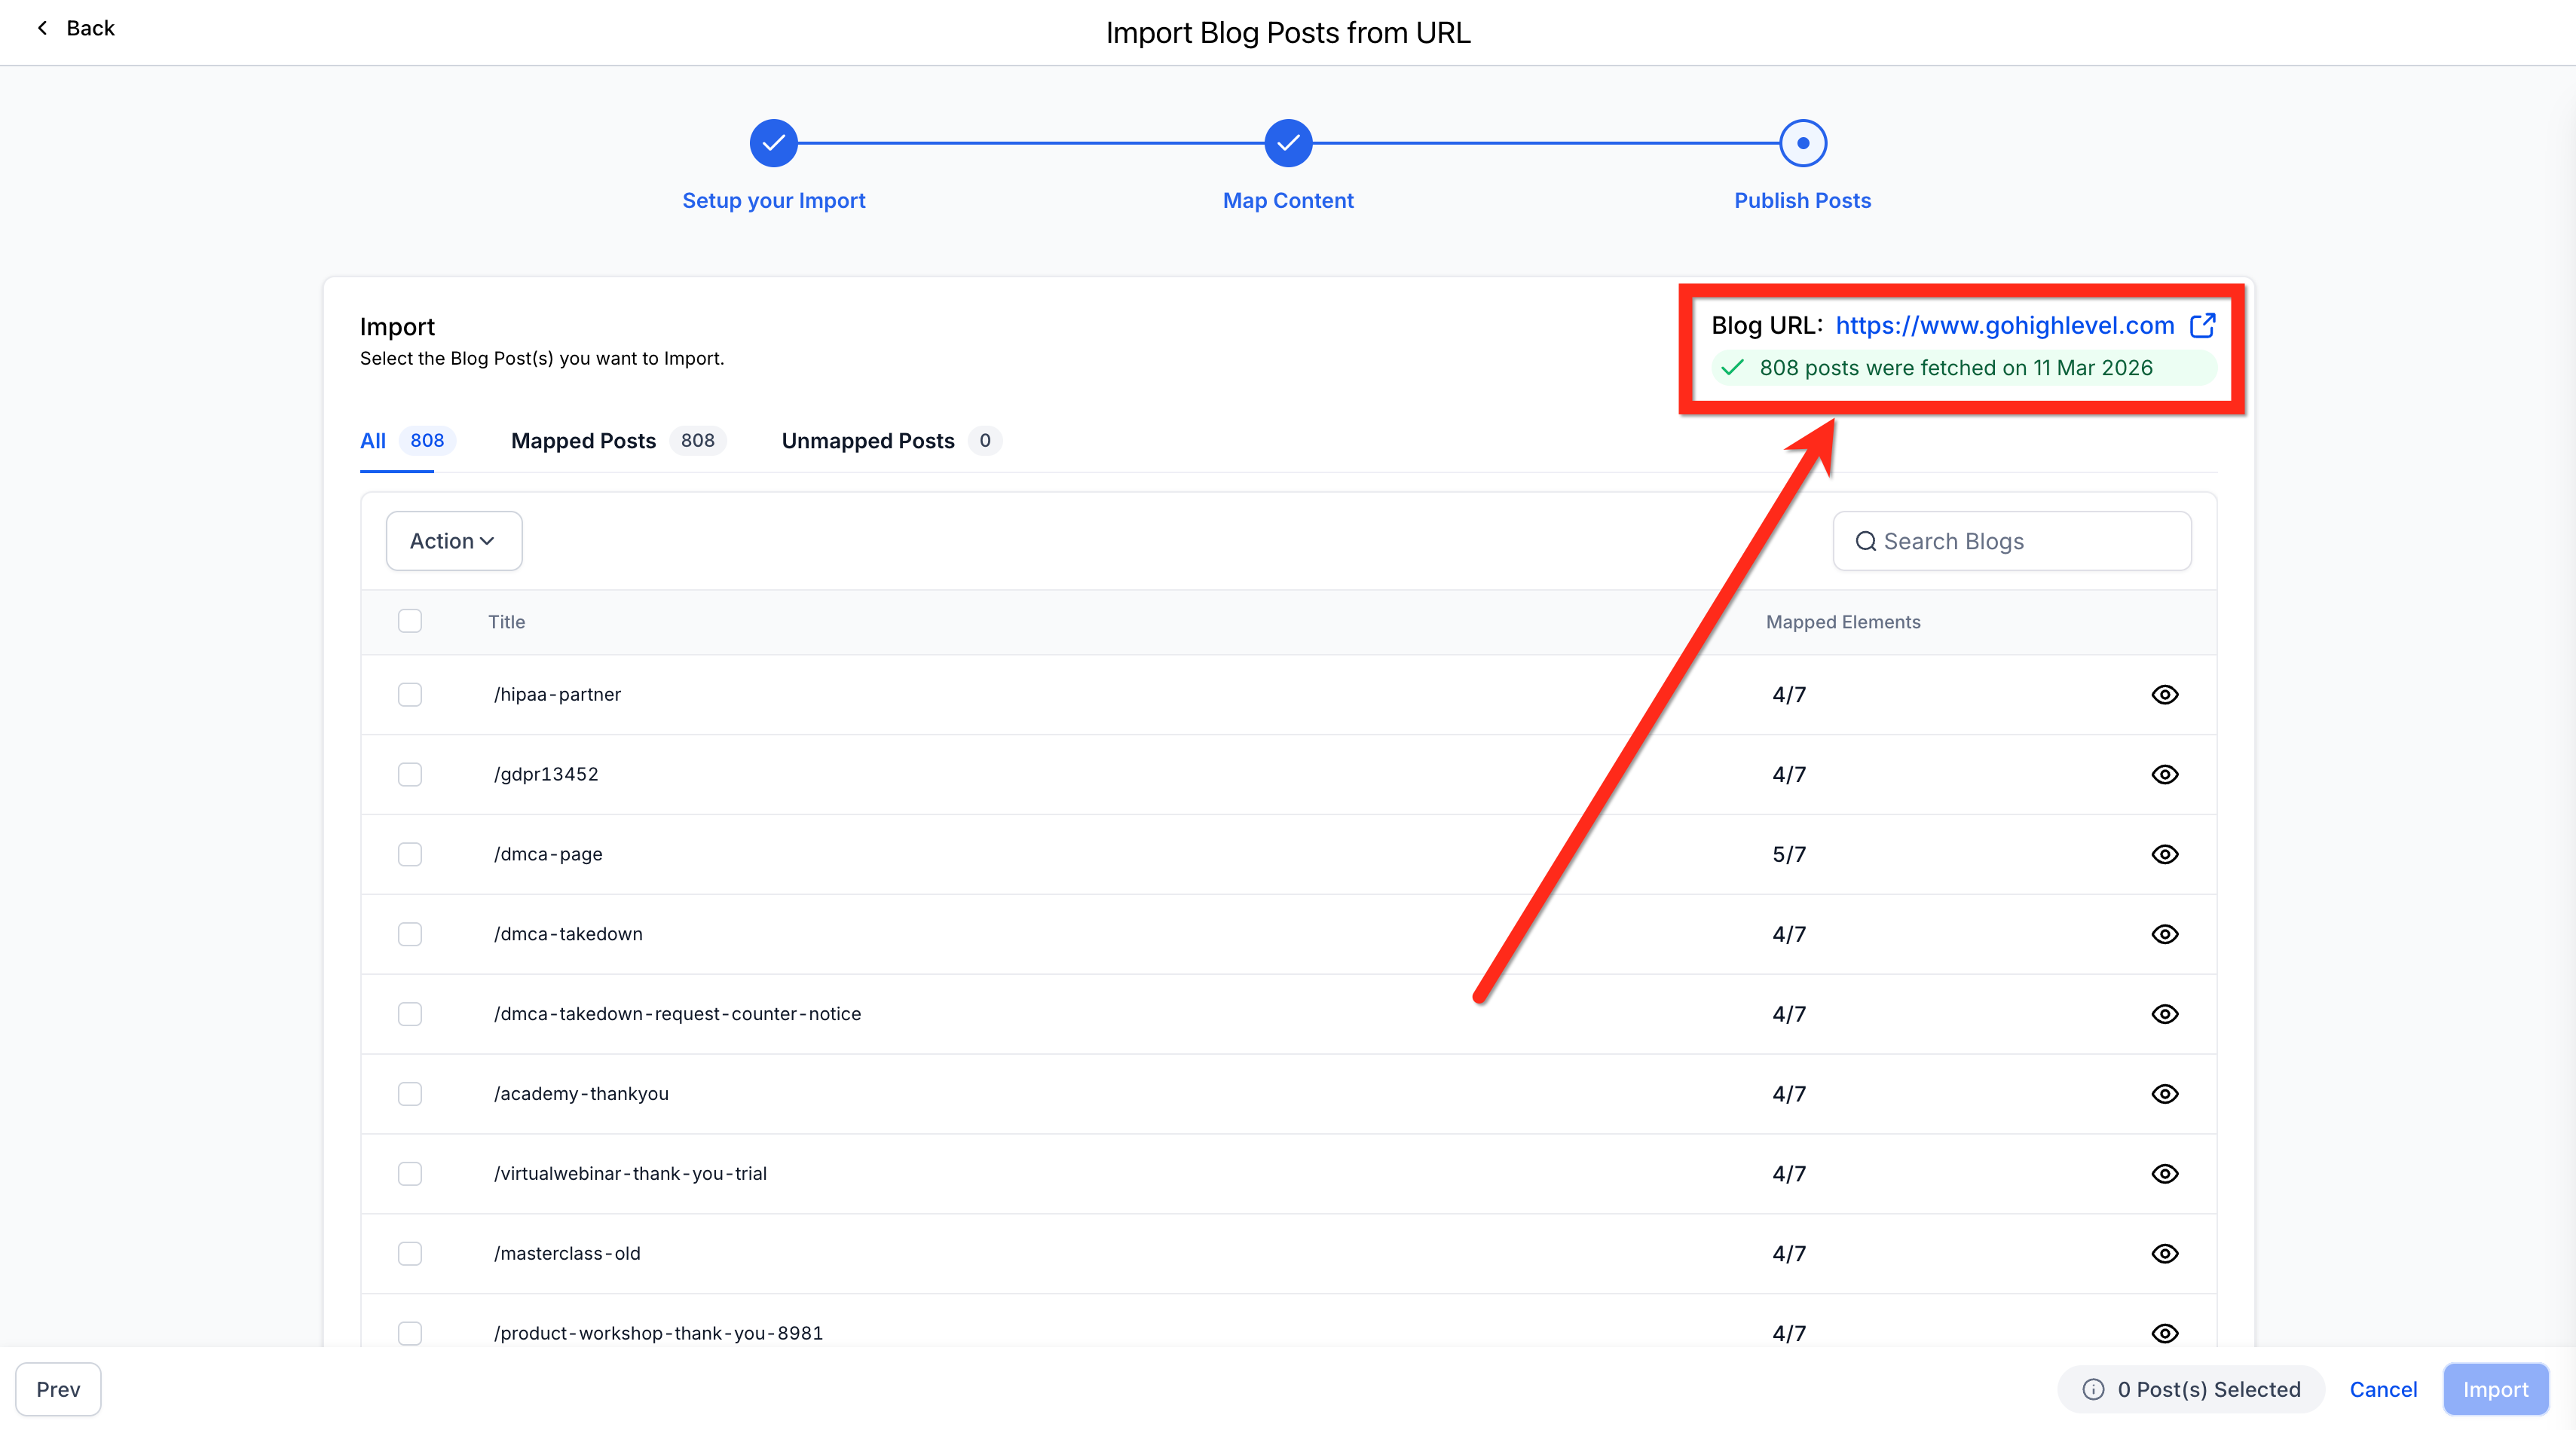
During the scan the system matches page elements to HighLevel fields such as title, description, author, category and tags. When every mapping item shows a green check, the import is ready. Fully mapped articles are added to your blog as published items, while any that lack required data are saved as drafts for later editing.
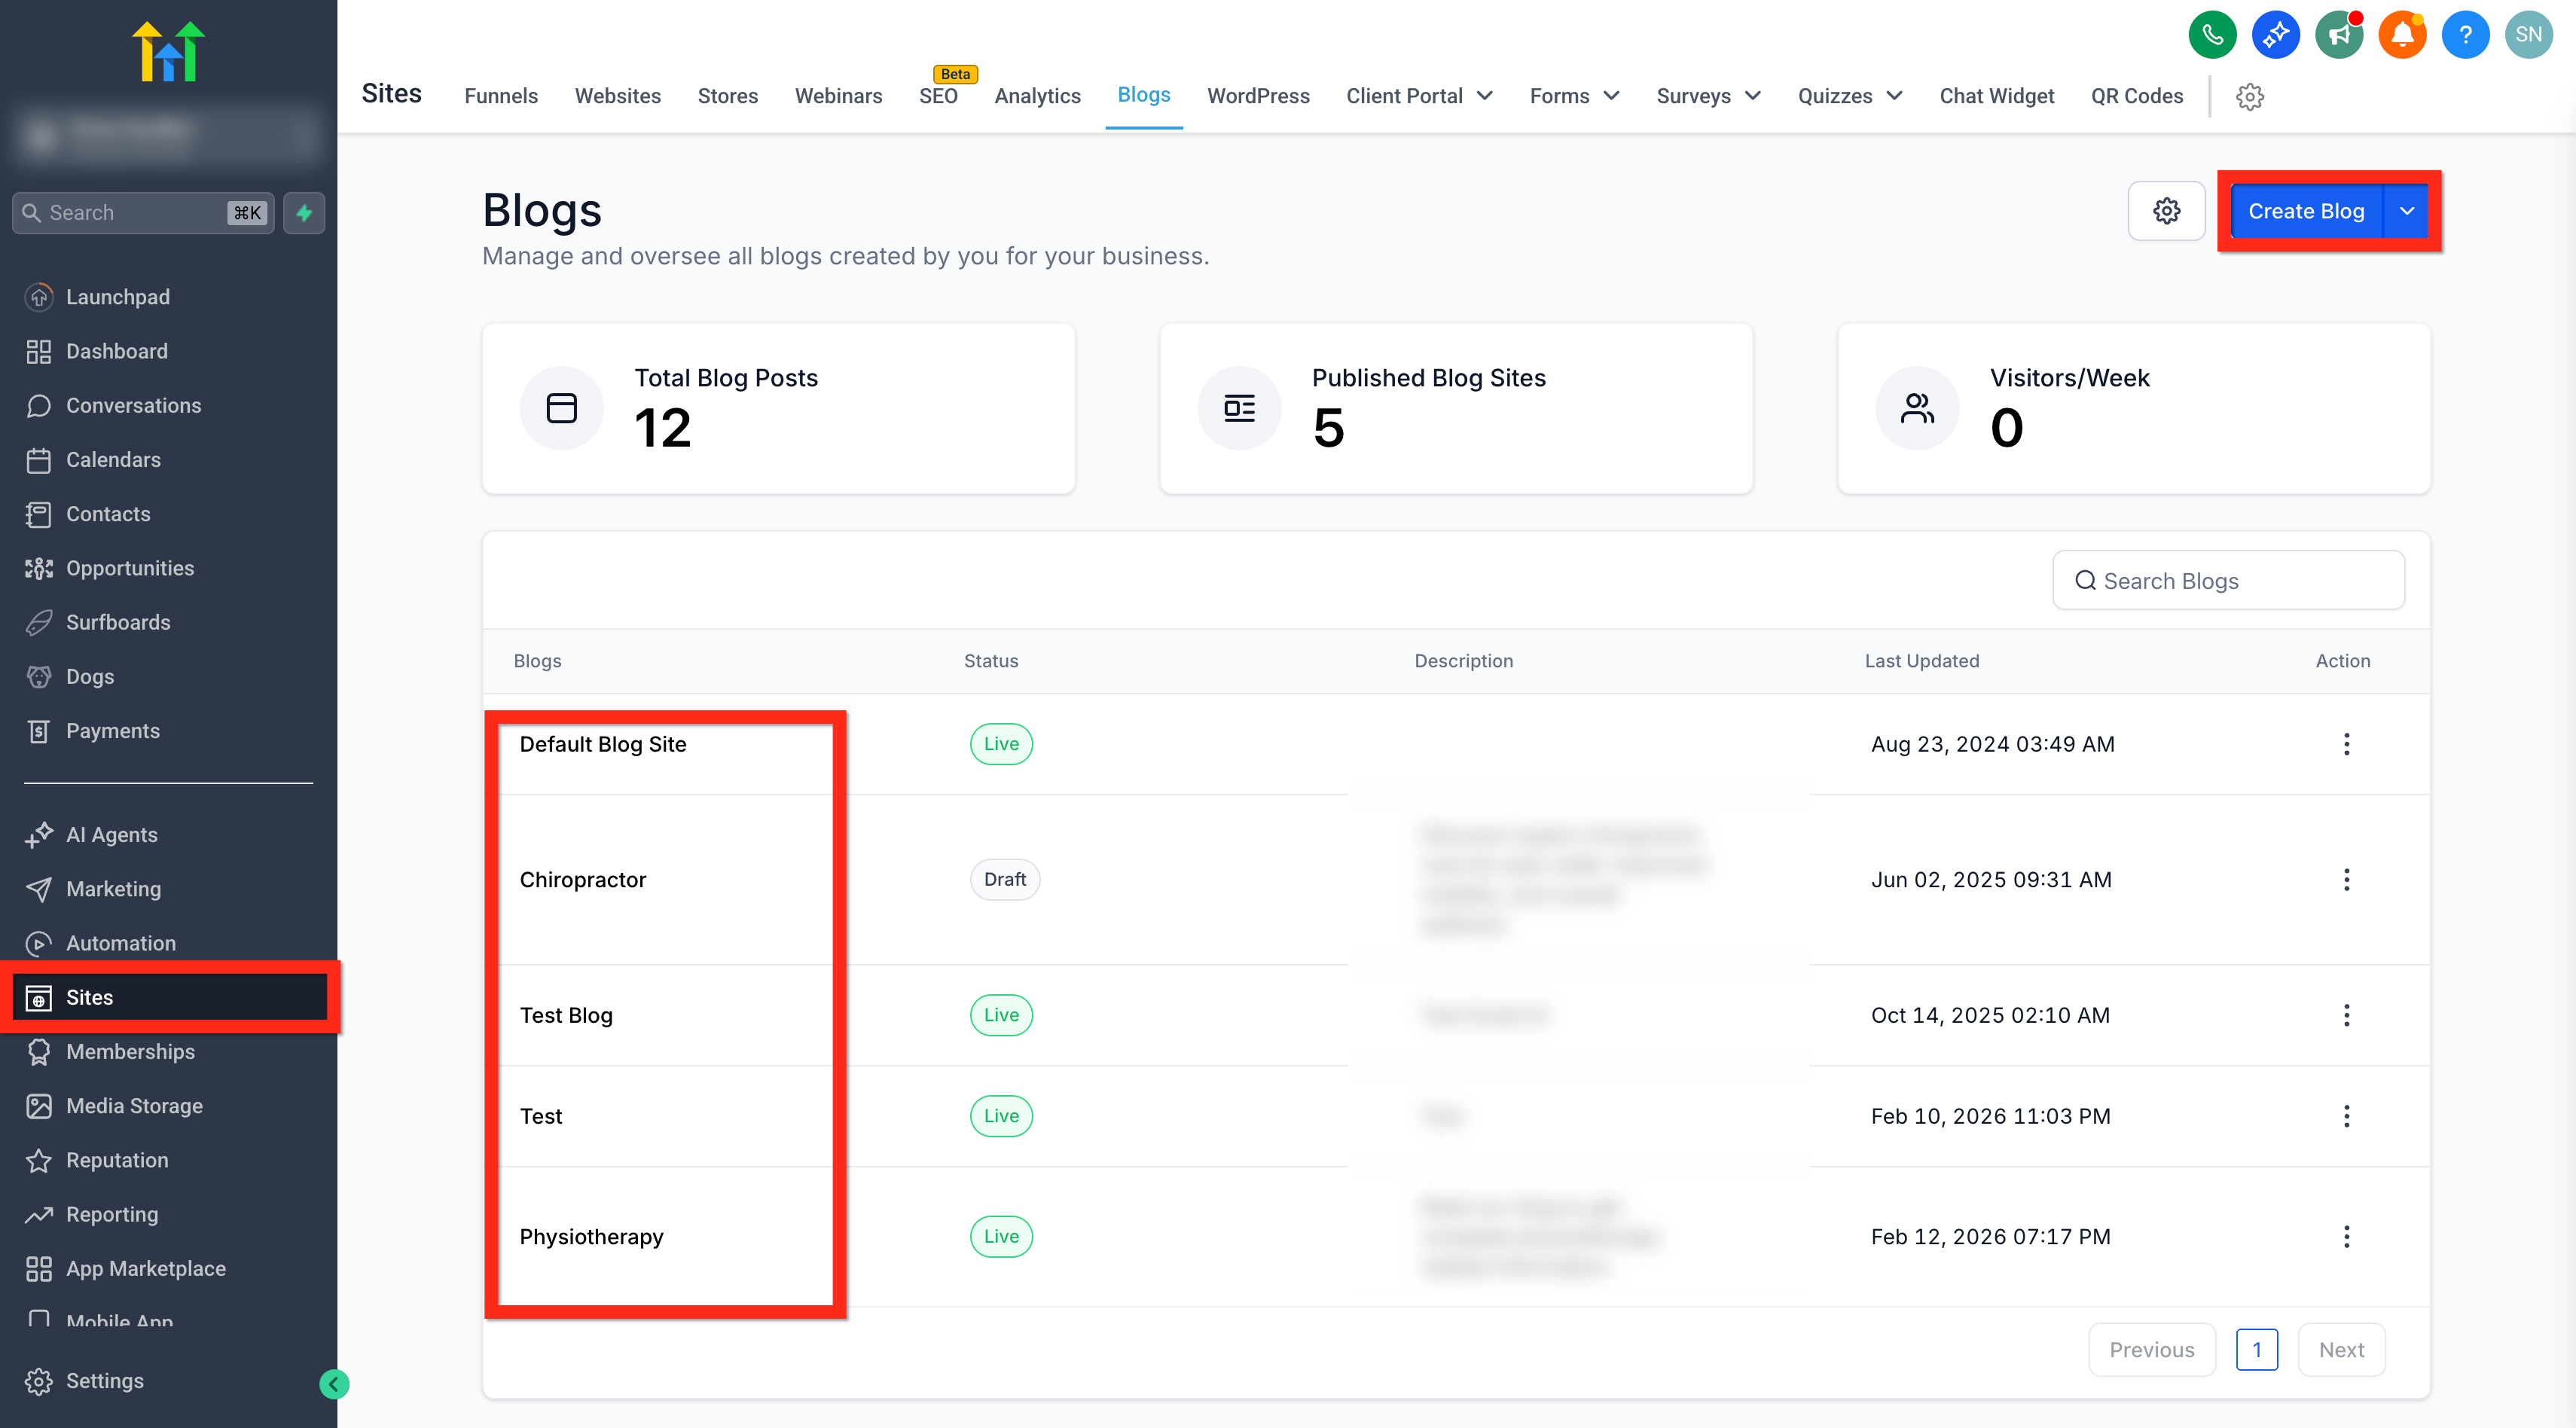
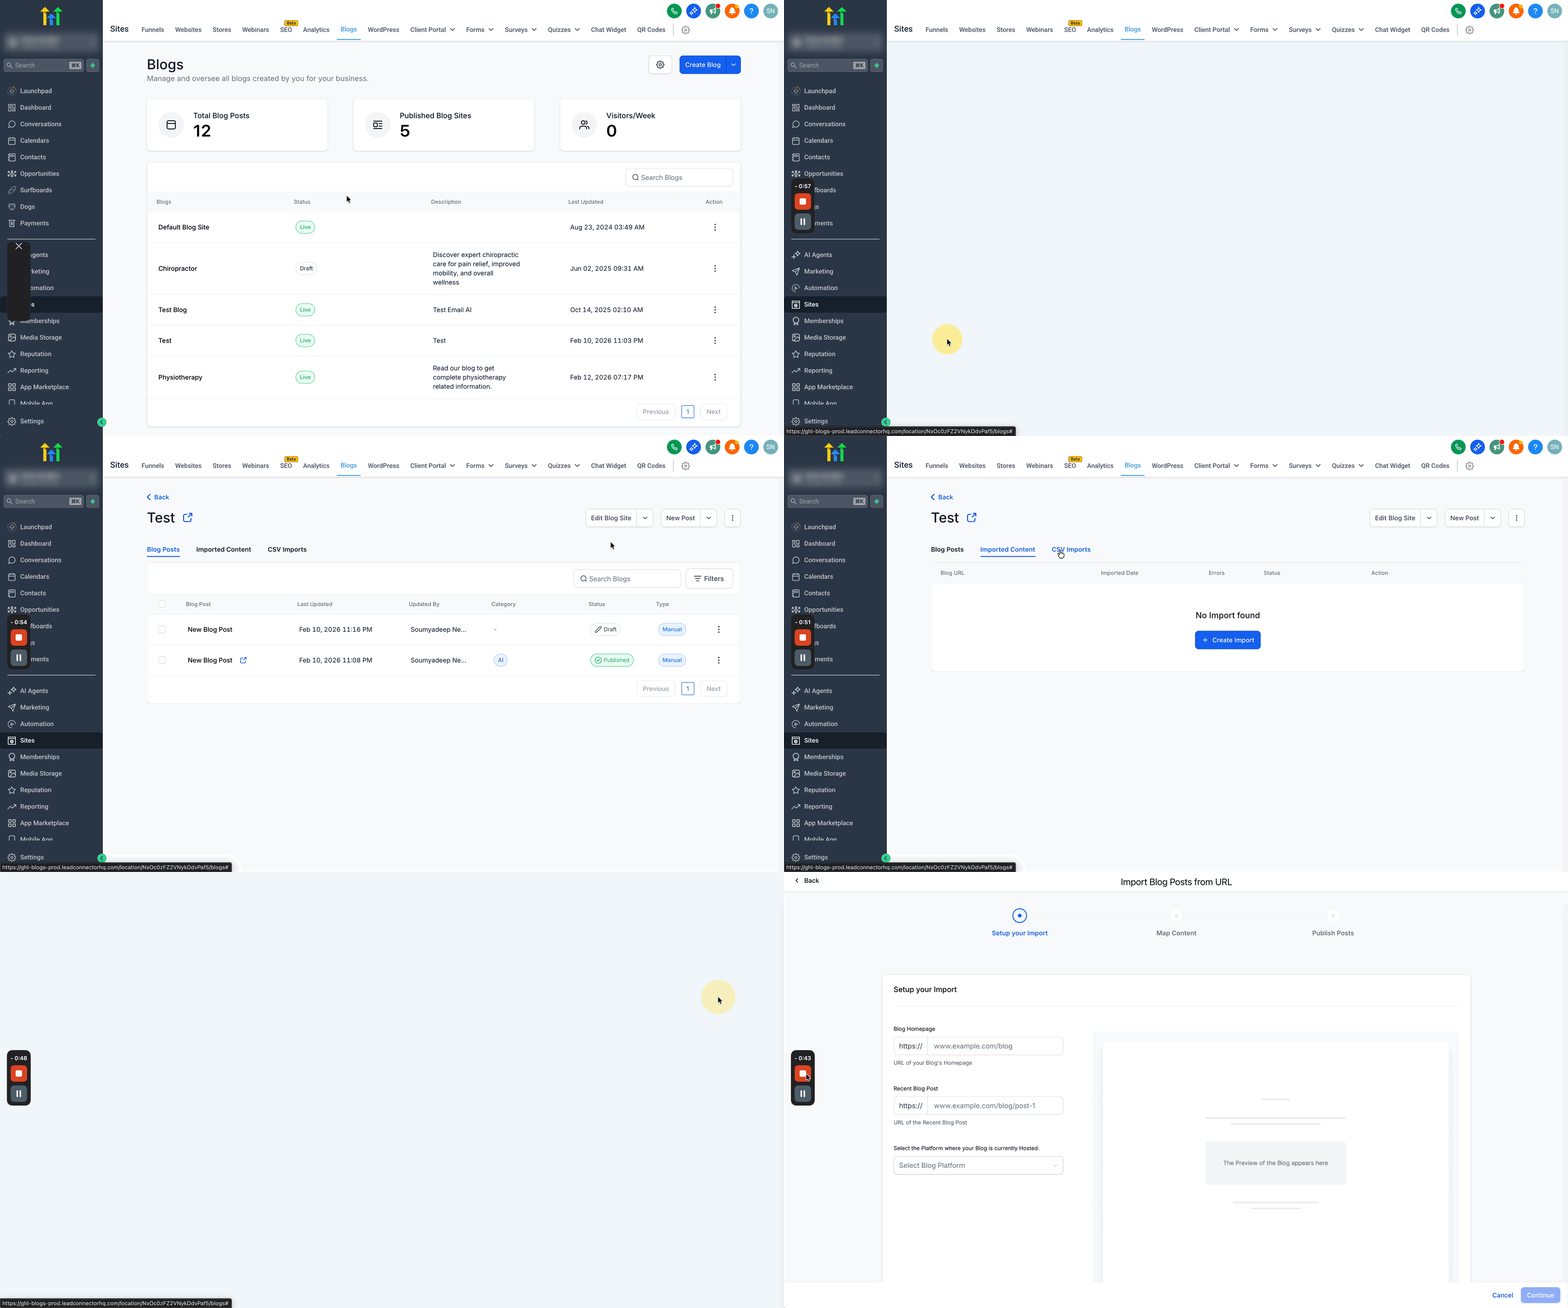
You start the process from Sites > Blogs, open the blog you want to fill, and choose New Post > Import Blog Posts from URL. All controls for the import live in the pop up importer window.
03How businesses use blog post importer
- Digital marketing agency. The agency opens the client’s HighLevel blog, runs the URL importer with the client’s old blog address, maps any missing author or tag fields, and imports the full set of articles. This moves the client’s content into the new platform with minimal manual effort.
- E learning platform. The platform manager provides the URL of the existing course blog, adds any needed category mappings during the import, and publishes mapped posts directly. Unmapped content appears as drafts, allowing the team to finish missing details later.
- Local service business. The business owner supplies the URL of their community news blog, maps the few missing tags, and imports the posts. Articles with complete metadata go live immediately, while the rest stay as drafts for quick follow up.
04The numbers and rules that matter
- Import time: About 10 to 20 minutes for 1,000 posts.
05Before you start
- A blog must already exist in Sites > Blogs, either created beforehand or chosen from the list.
06How to set up and use blog post importer in HighLevel
Import blog posts using a URL
- Navigate to Sites > Blogs and open an existing blog or create a new one.
- In the blog’s post list, select New Post then Import Blog Posts from URL.
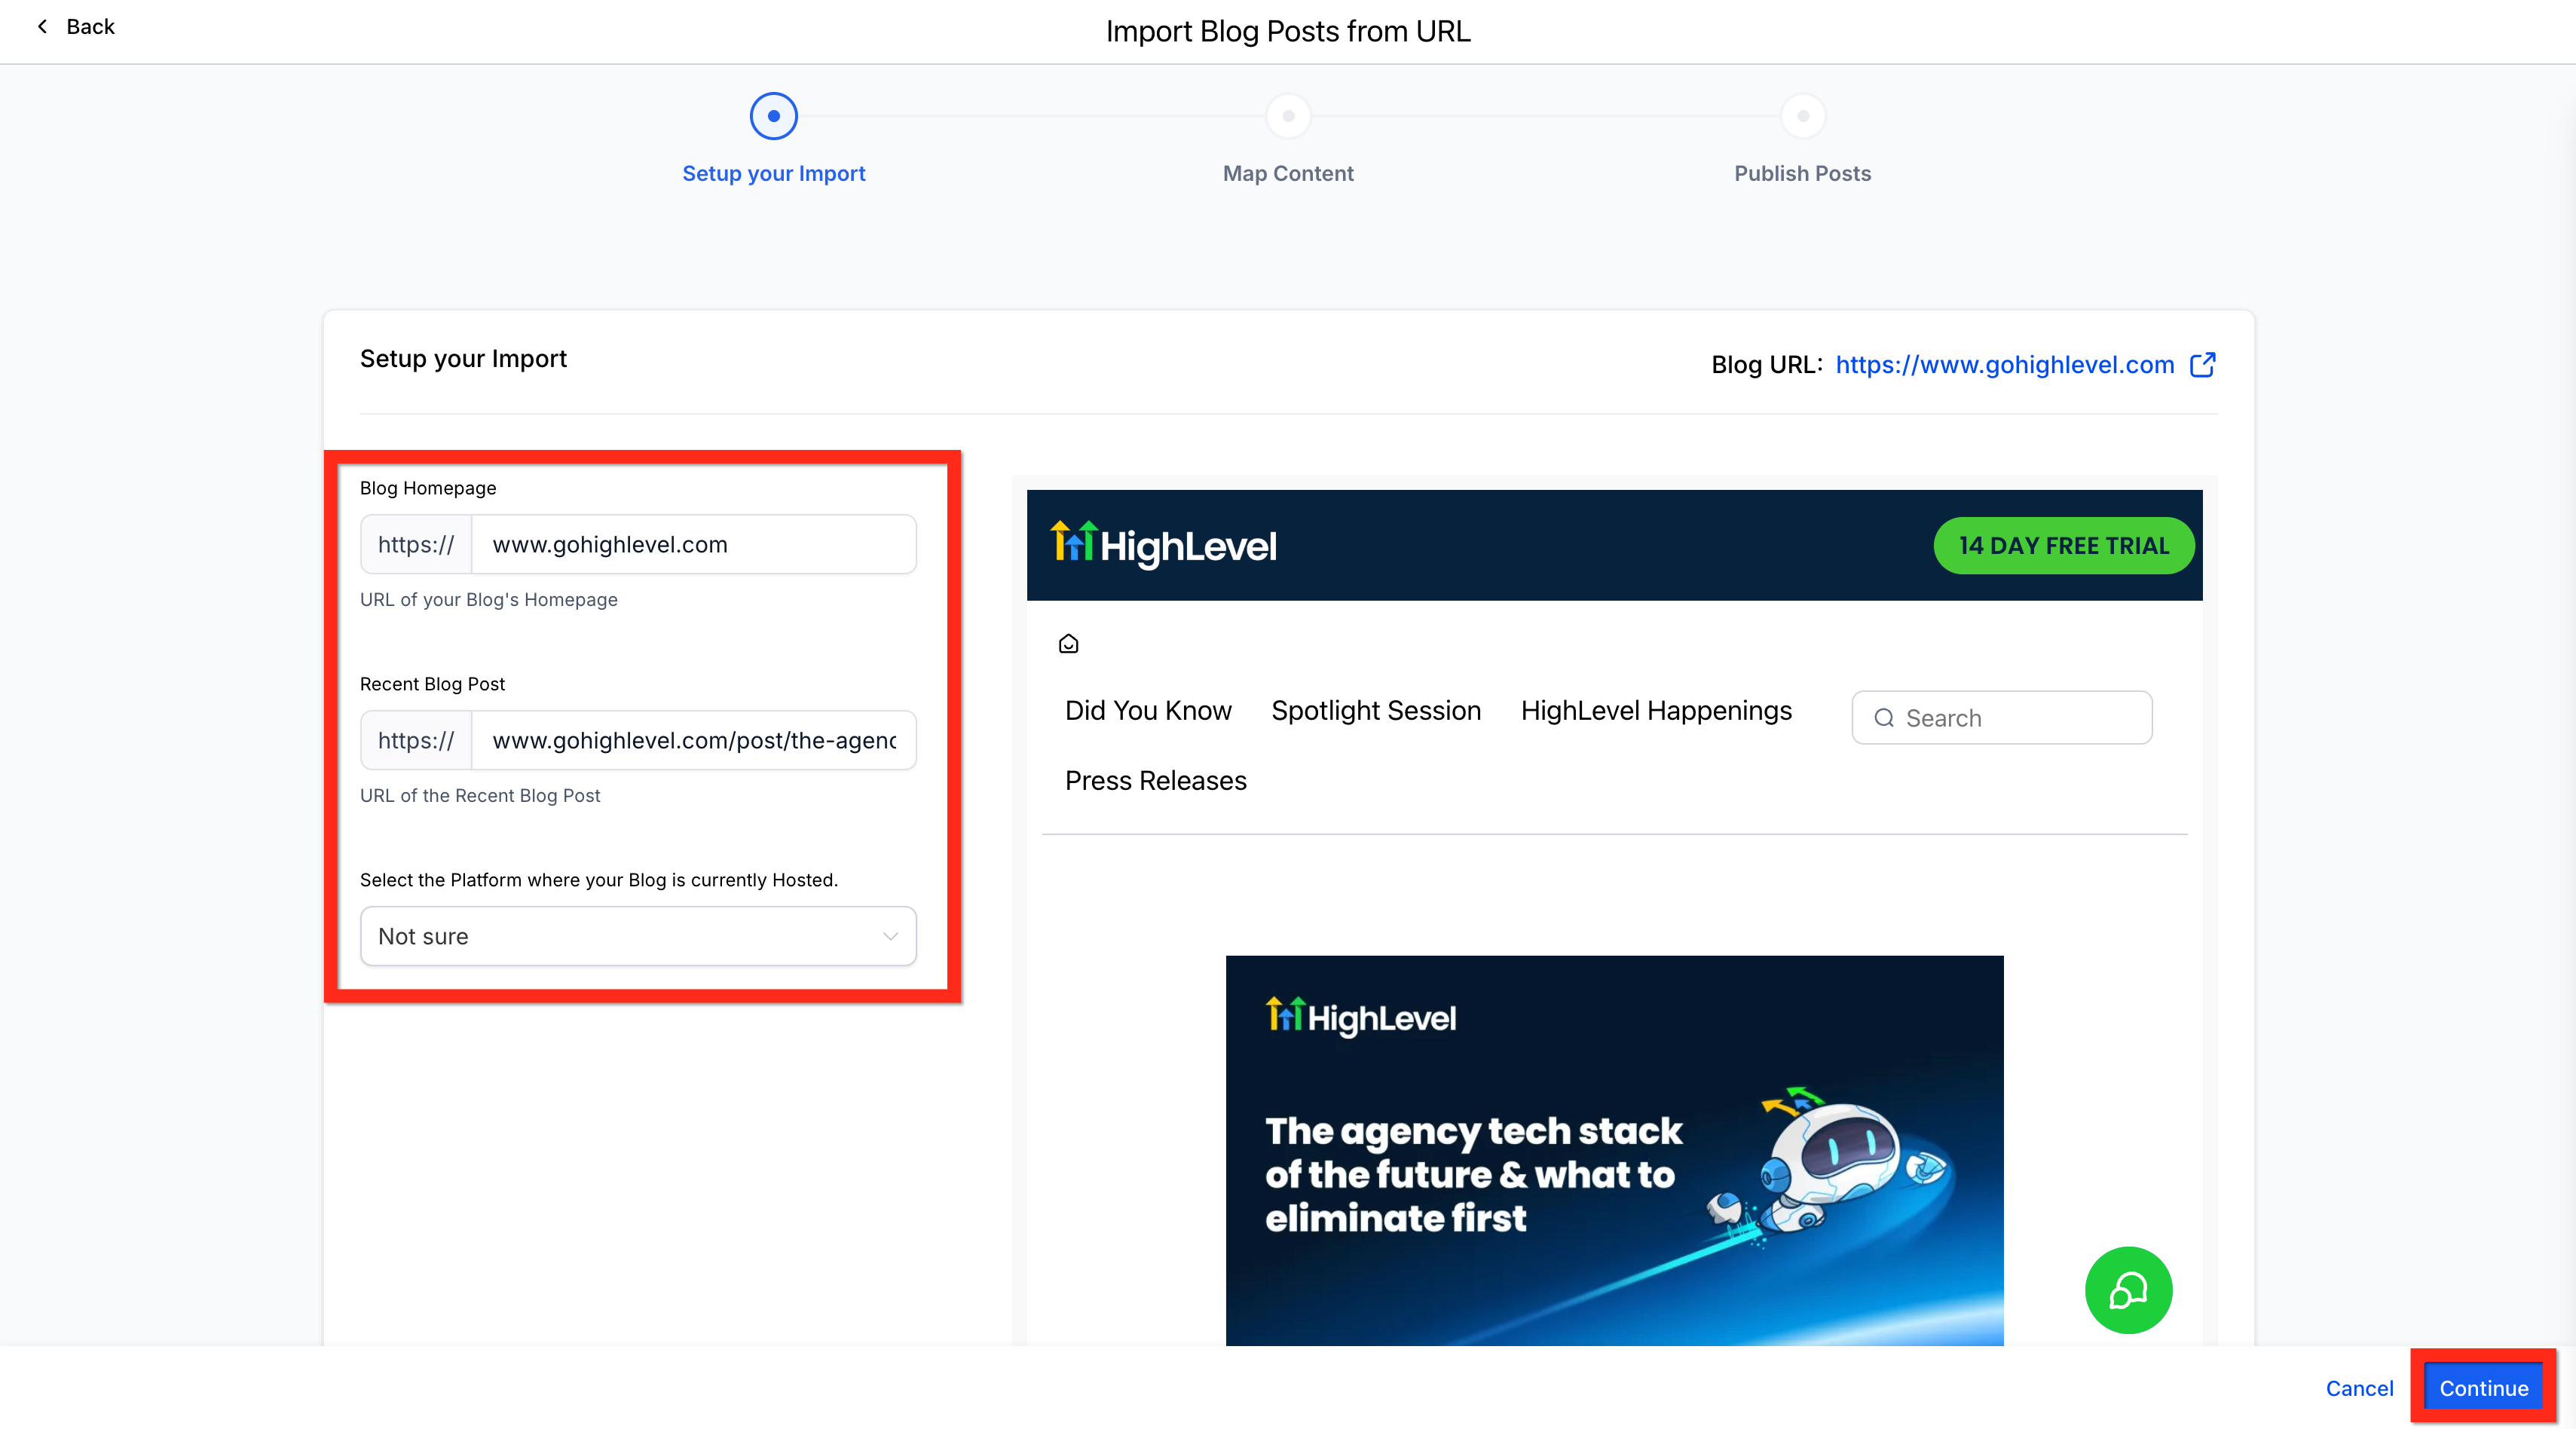
- Enter the blog homepage URL, optionally add a recent post URL, choose the source platform, and click Continue.
- Wait while the importer scans the site; this may take several minutes.
- If the blog’s sitemap does not contain URLs, the importer will show a Failure state and a blank page.
- When the scan finishes, verify that every mapping item shows a green check mark and note the number of fetched posts.
- If any metadata is missing, use the mapping screen to assign authors, categories or tags.
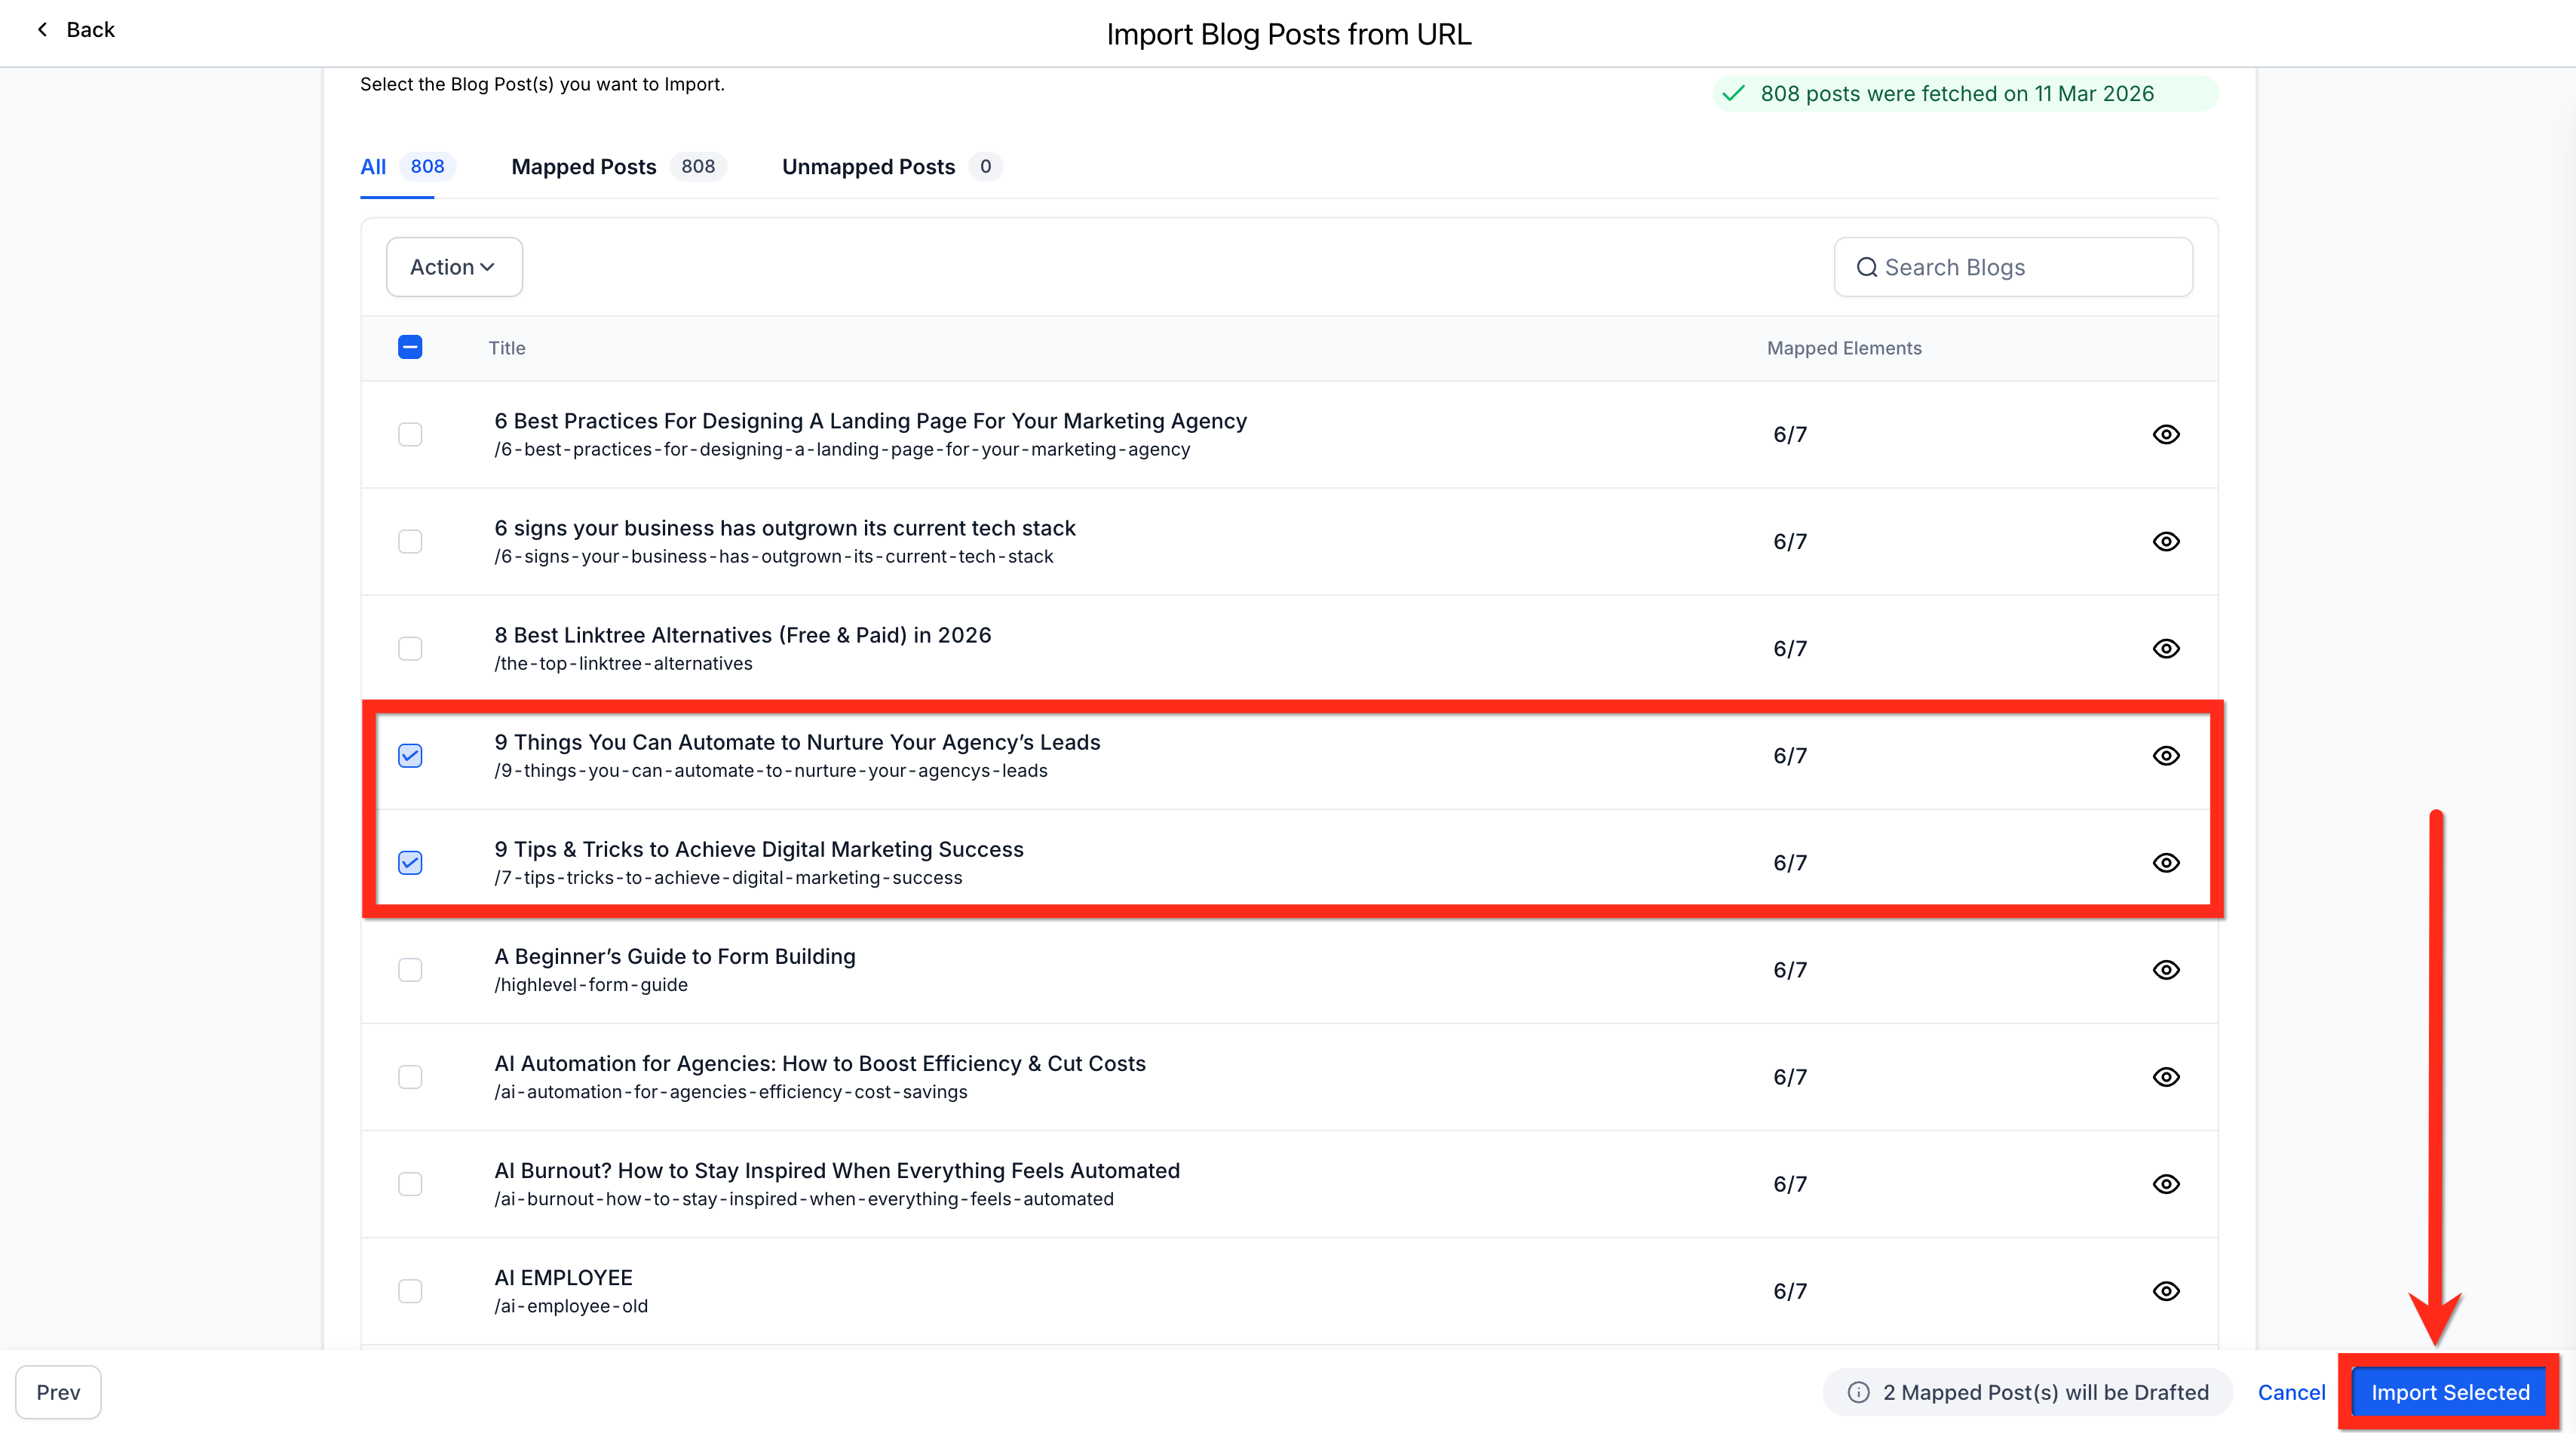
- Review the list of detected posts and select the ones you wish to bring into HighLevel.
- Click Import Selected to start the import process.
- After import, confirm that fully mapped posts appear as Published and unmapped posts appear as Draft.
- Close the importer window once all desired posts are imported.
07What it looks like in HighLevel
08Settings that matter
- Blog homepage URL. The address of the external blog that the importer will scan for articles.
- Recent post URL. An optional link to a specific article used to help the importer identify content structure.
- Platform. The type of blogging system the source site uses, which guides the importer’s parsing rules.
09Things to know before you rely on it
- Importing about 1,000 posts typically requires 10 to 20 minutes.
- If the blog’s sitemap lacks URLs, the importer cannot retrieve posts and will show a Failure state with a blank page.
- Mapped posts become Published; unmapped posts are saved as Drafts.
10If something goes wrong
- The scanner reports a Failure state and shows a blank page.. Confirm that the source blog’s sitemap includes URLs for the posts you want to import.
11How it connects to the rest of HighLevel
- Set up and manage blogs in HighLevel Blog setup guide
- Manually create and publish a blog post in HighLevel Create blog post
- HighLevel pricing and plans Pricing page
Michael's take

Moving a long standing blog to HighLevel often means copying hundreds of articles by hand, which drags down productivity and risks losing important metadata. The URL Blog Importer solves that by pulling the content automatically, letting you focus on refining the new site instead of retyping each post.
The first setting to get right is the platform selection during Step 3. Picking the correct source ensures the importer reads the page structure correctly and reduces the mapping work later.