
01Who this is for
- Founders who design landing pages and need precise motion control for better visual flow.
- Marketing agencies that build client funnels and want built in hover effects without custom CSS.
- Small business owners creating product showcase sites and require interactive button cues.
02Animation customizations, explained
Animation Customizations is a built in feature of the HighLevel Page Builder. It gives you controls for entrance animations on supported elements such as text, images and buttons. You can choose style, set scale, duration, delay and easing, and watch a live preview on the canvas.
The feature also supports hover animations for Button elements. From the Animations tab you can pick a hover effect, adjust its timing and effect specific properties like angle, distance, color or shadow, and preview the result without writing code.
Entrance animations now honor delay periods accurately, stay hidden until the delay ends, trigger only when the element scrolls into view, and no longer restart during builder actions like dragging, device switching, or editing. Hover animations automatically turn off on touch devices and screens under 1024 px.
03How businesses use animation customizations
- Digital marketing agency. Select headline text on a client’s funnel page, apply a slide in entrance animation, fine tune the duration and easing, then preview. For call to action buttons, choose a pulse hover effect and set a brief delay to create a responsive feel.
- Online course creator. Add a fade in entrance animation to course module cards, adjust the scale to emphasize each card, and set a staggered delay. Configure button hover animations for enrollment buttons with a color fill effect to draw attention.
- Restaurant owner. Apply a bounce entrance animation to menu images, set the duration for a quick effect, and use a shadow hover animation on reservation buttons, adjusting the blur and spread to match the brand style.
04The numbers and rules that matter
- Scale values range from 0.5× to 2×.
- Duration values range from 0.1 to 3 seconds.
- Delay up to 5 seconds.
- Hover animations disabled on touch devices and screens under 1024px.
05How to set up and use animation customizations in HighLevel
Set up entrance animation
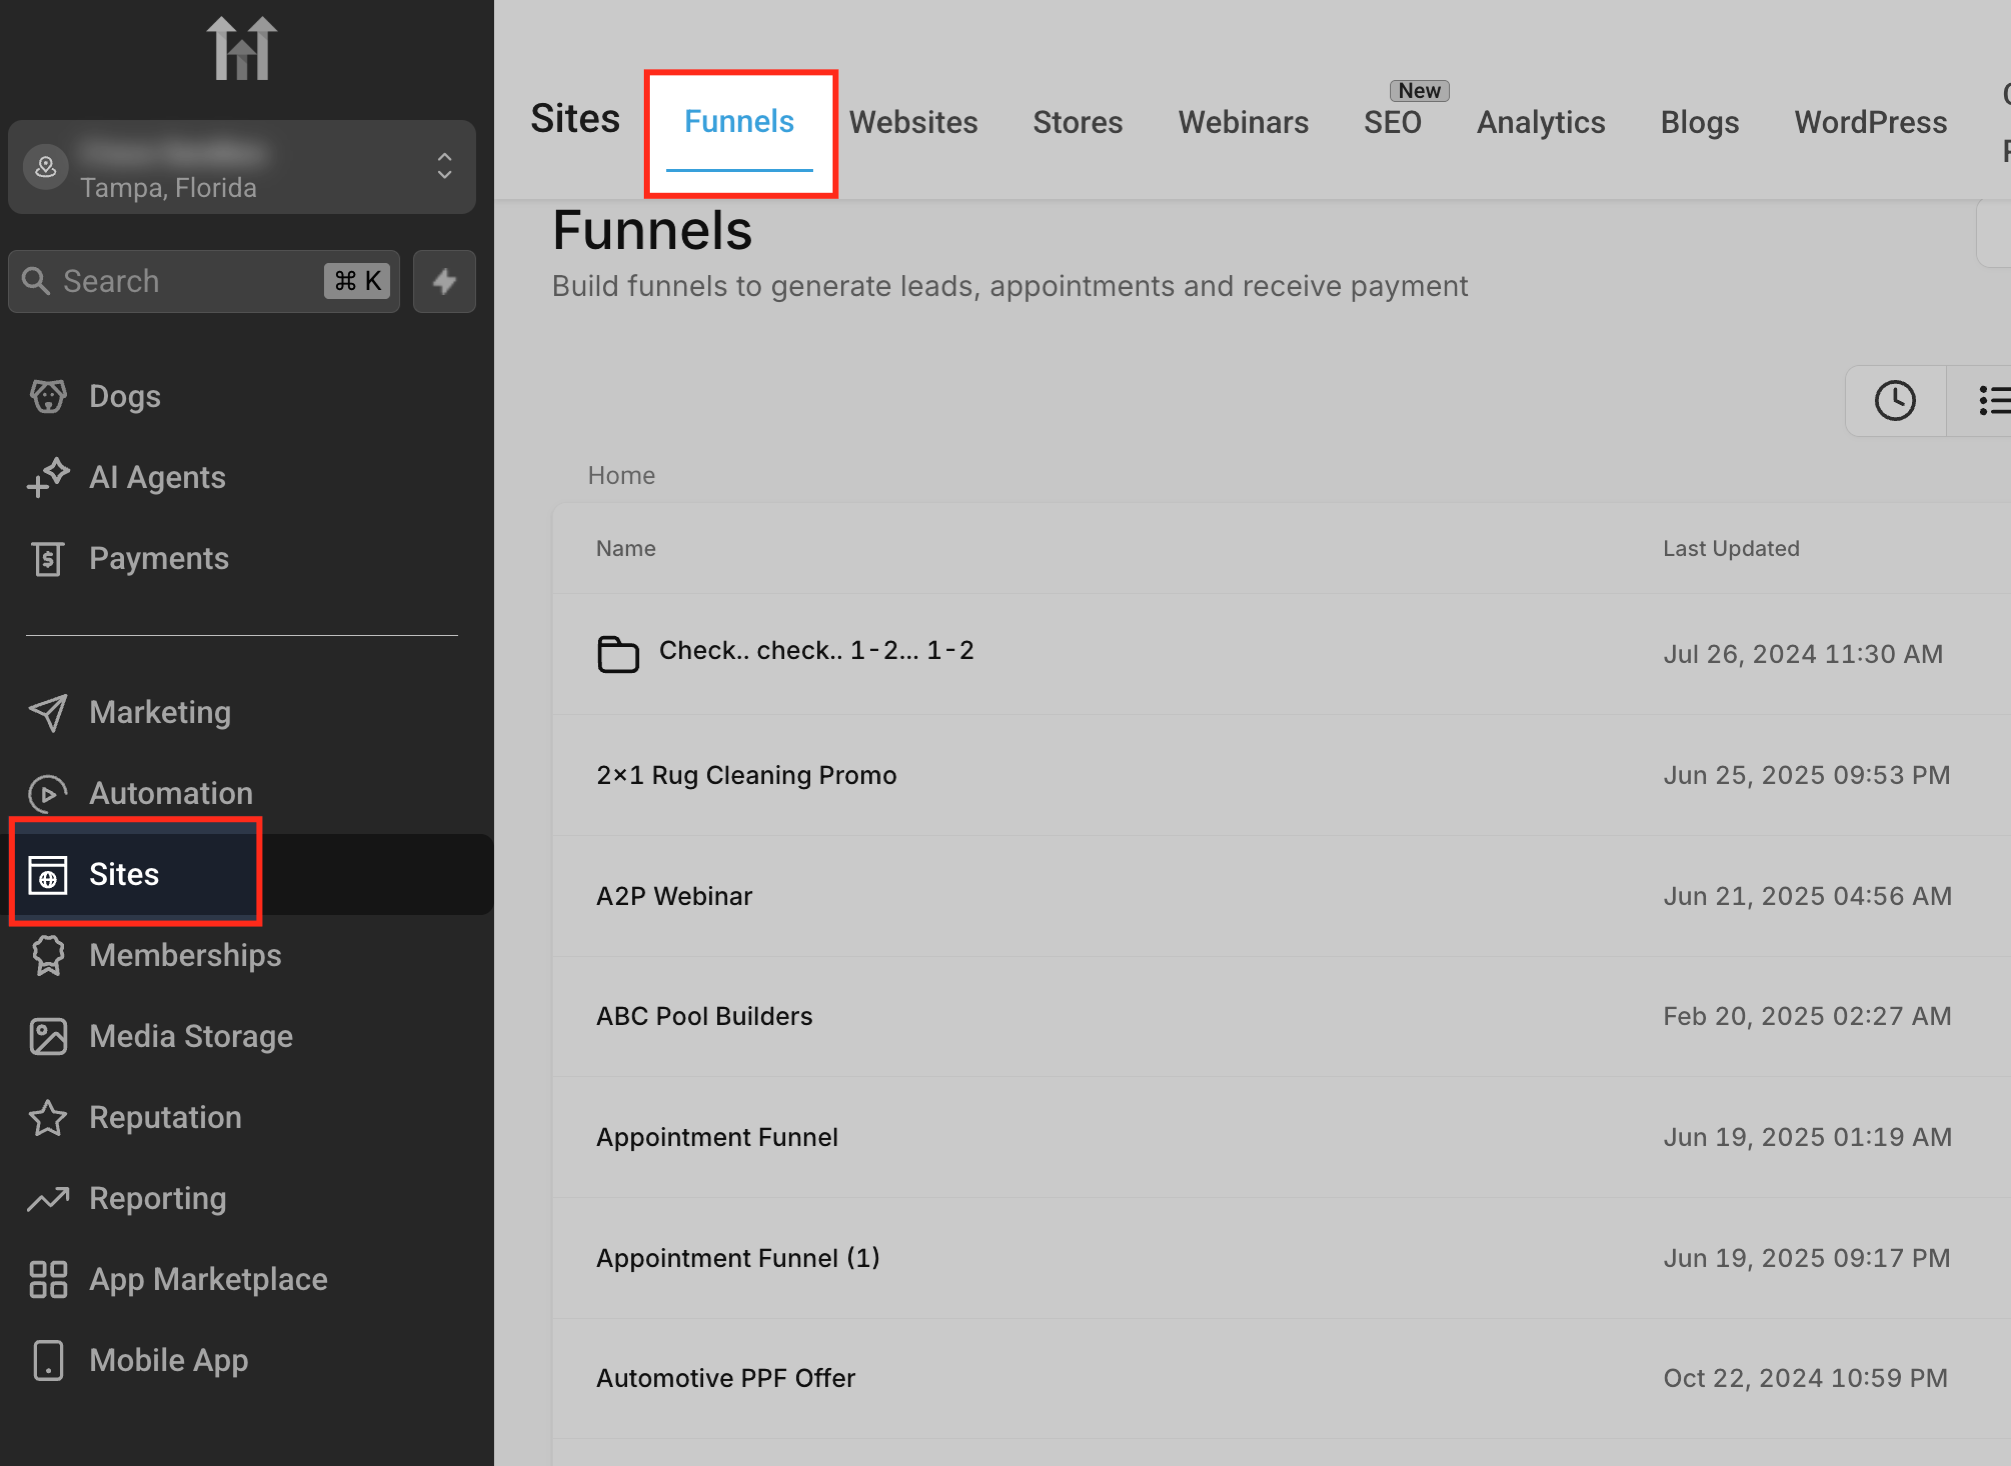
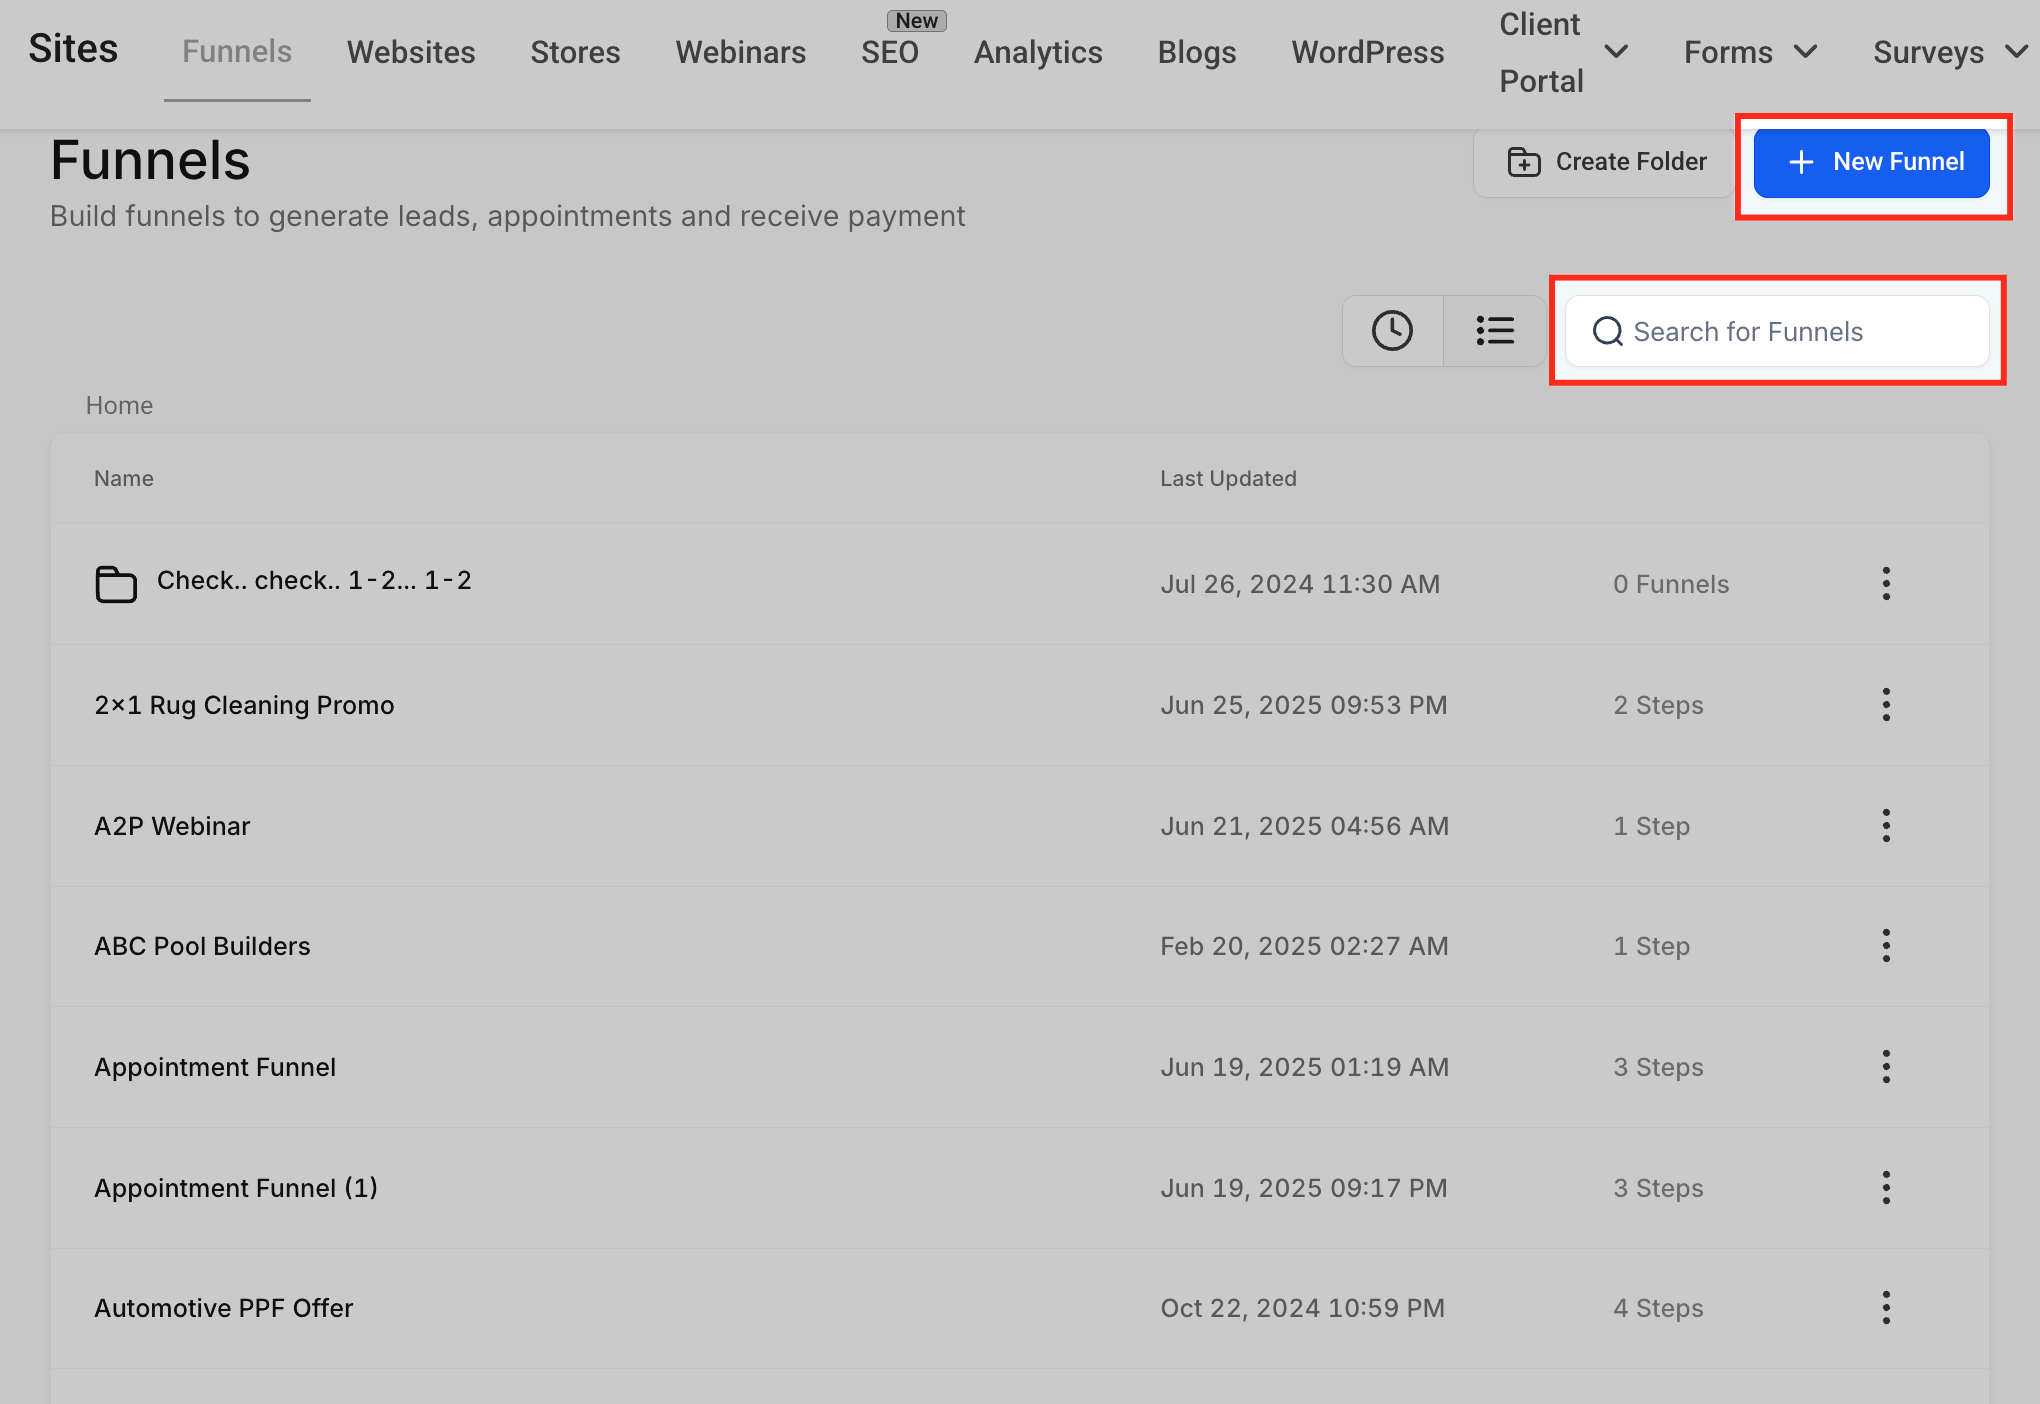
- Open the Subaccount View and navigate to Sites > Funnels.
- Search for an existing funnel or click + New Funnel to create one.
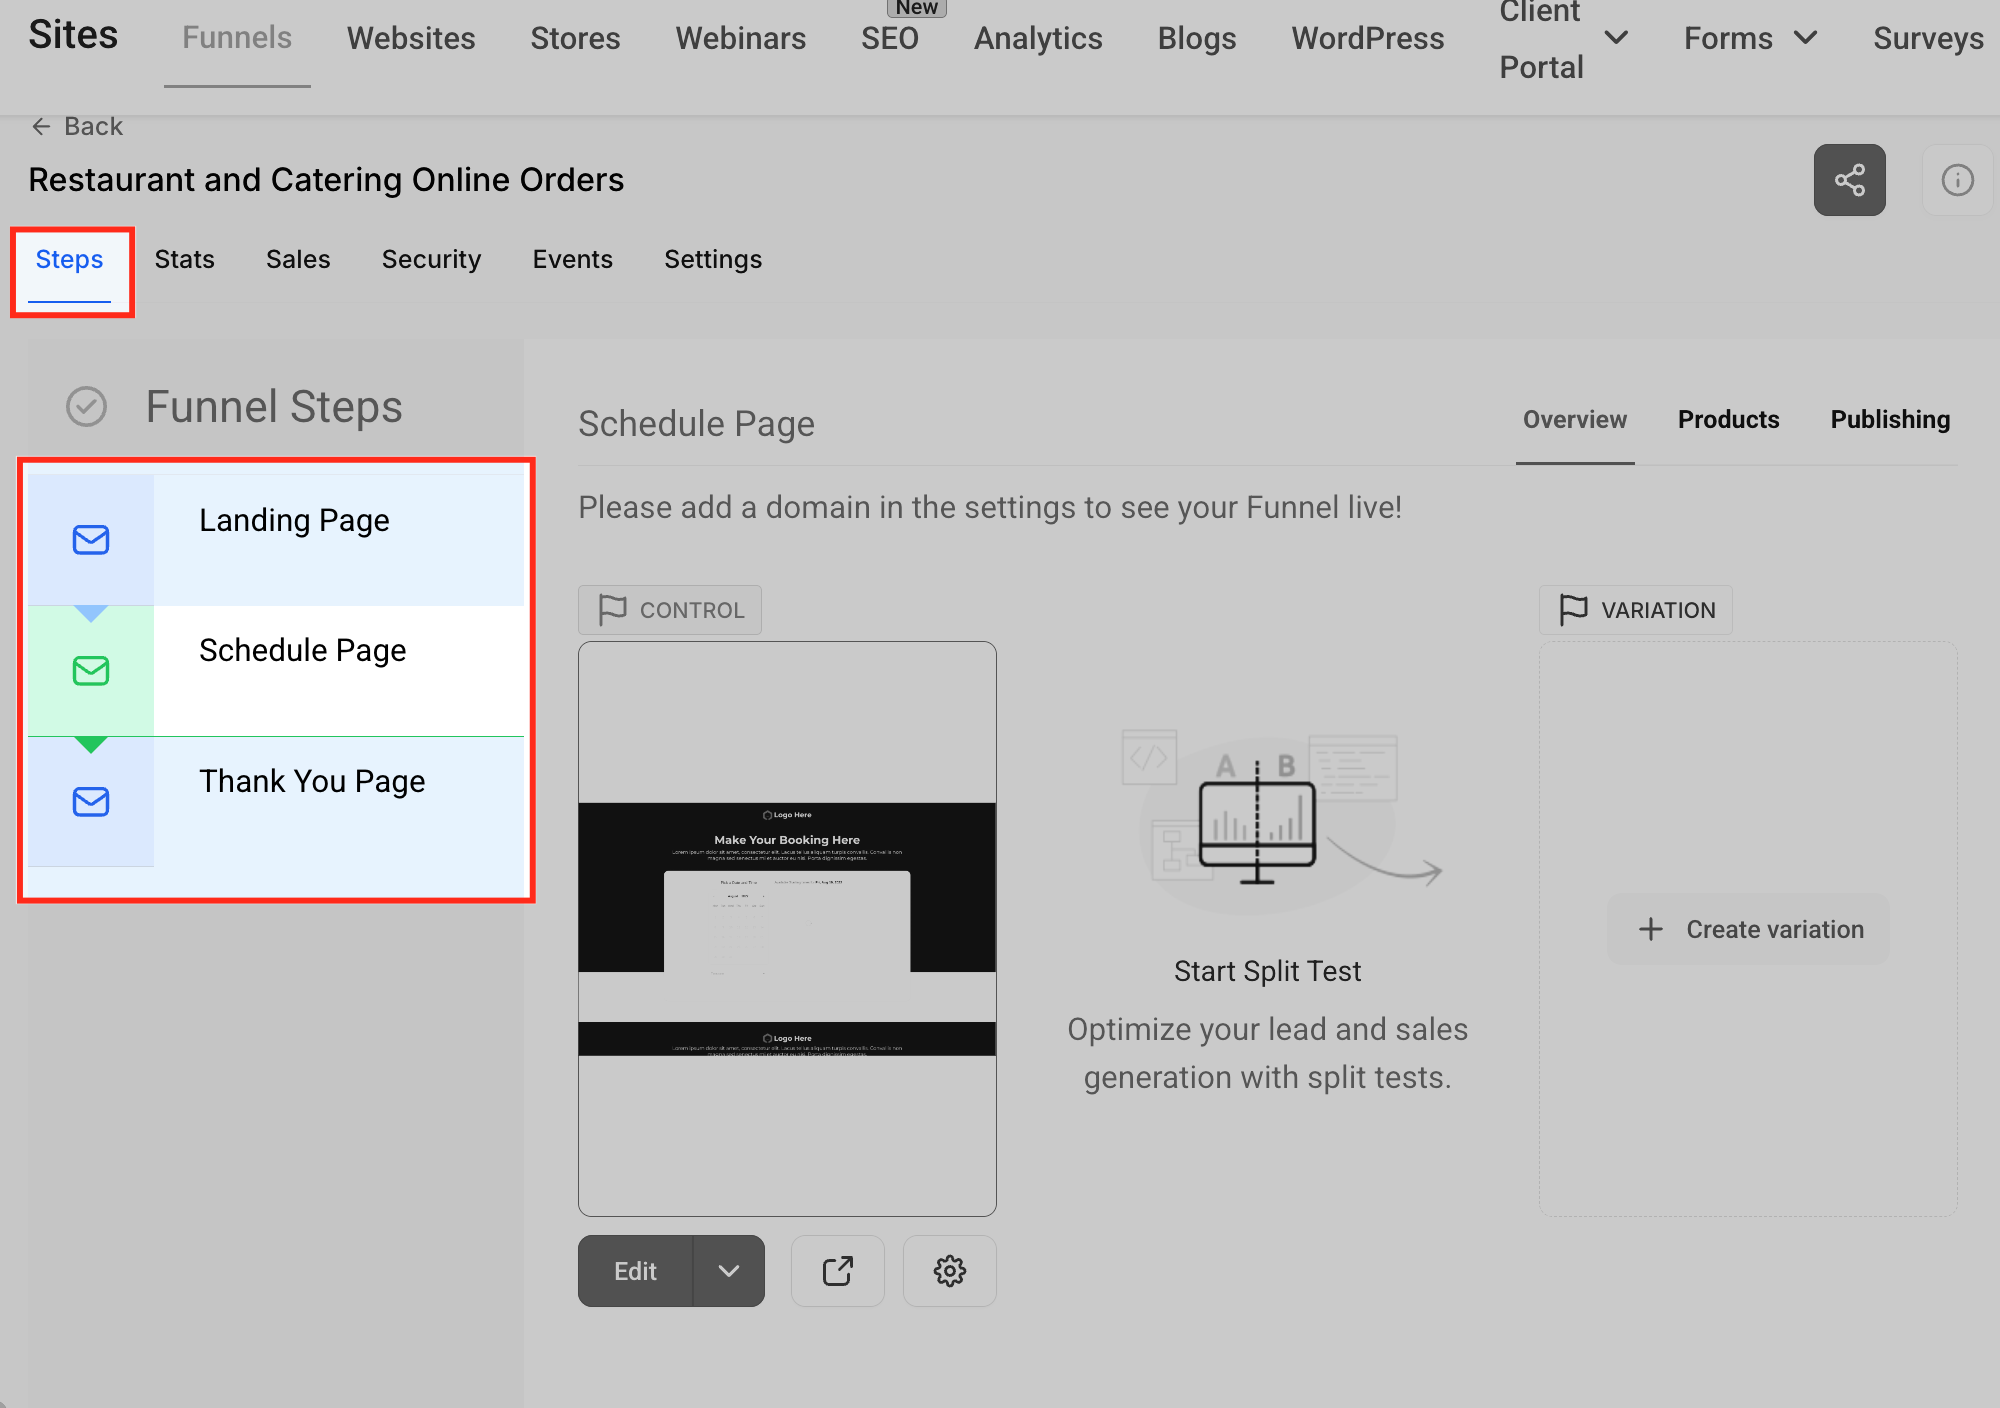
- Choose the funnel step that contains the page you want to animate.
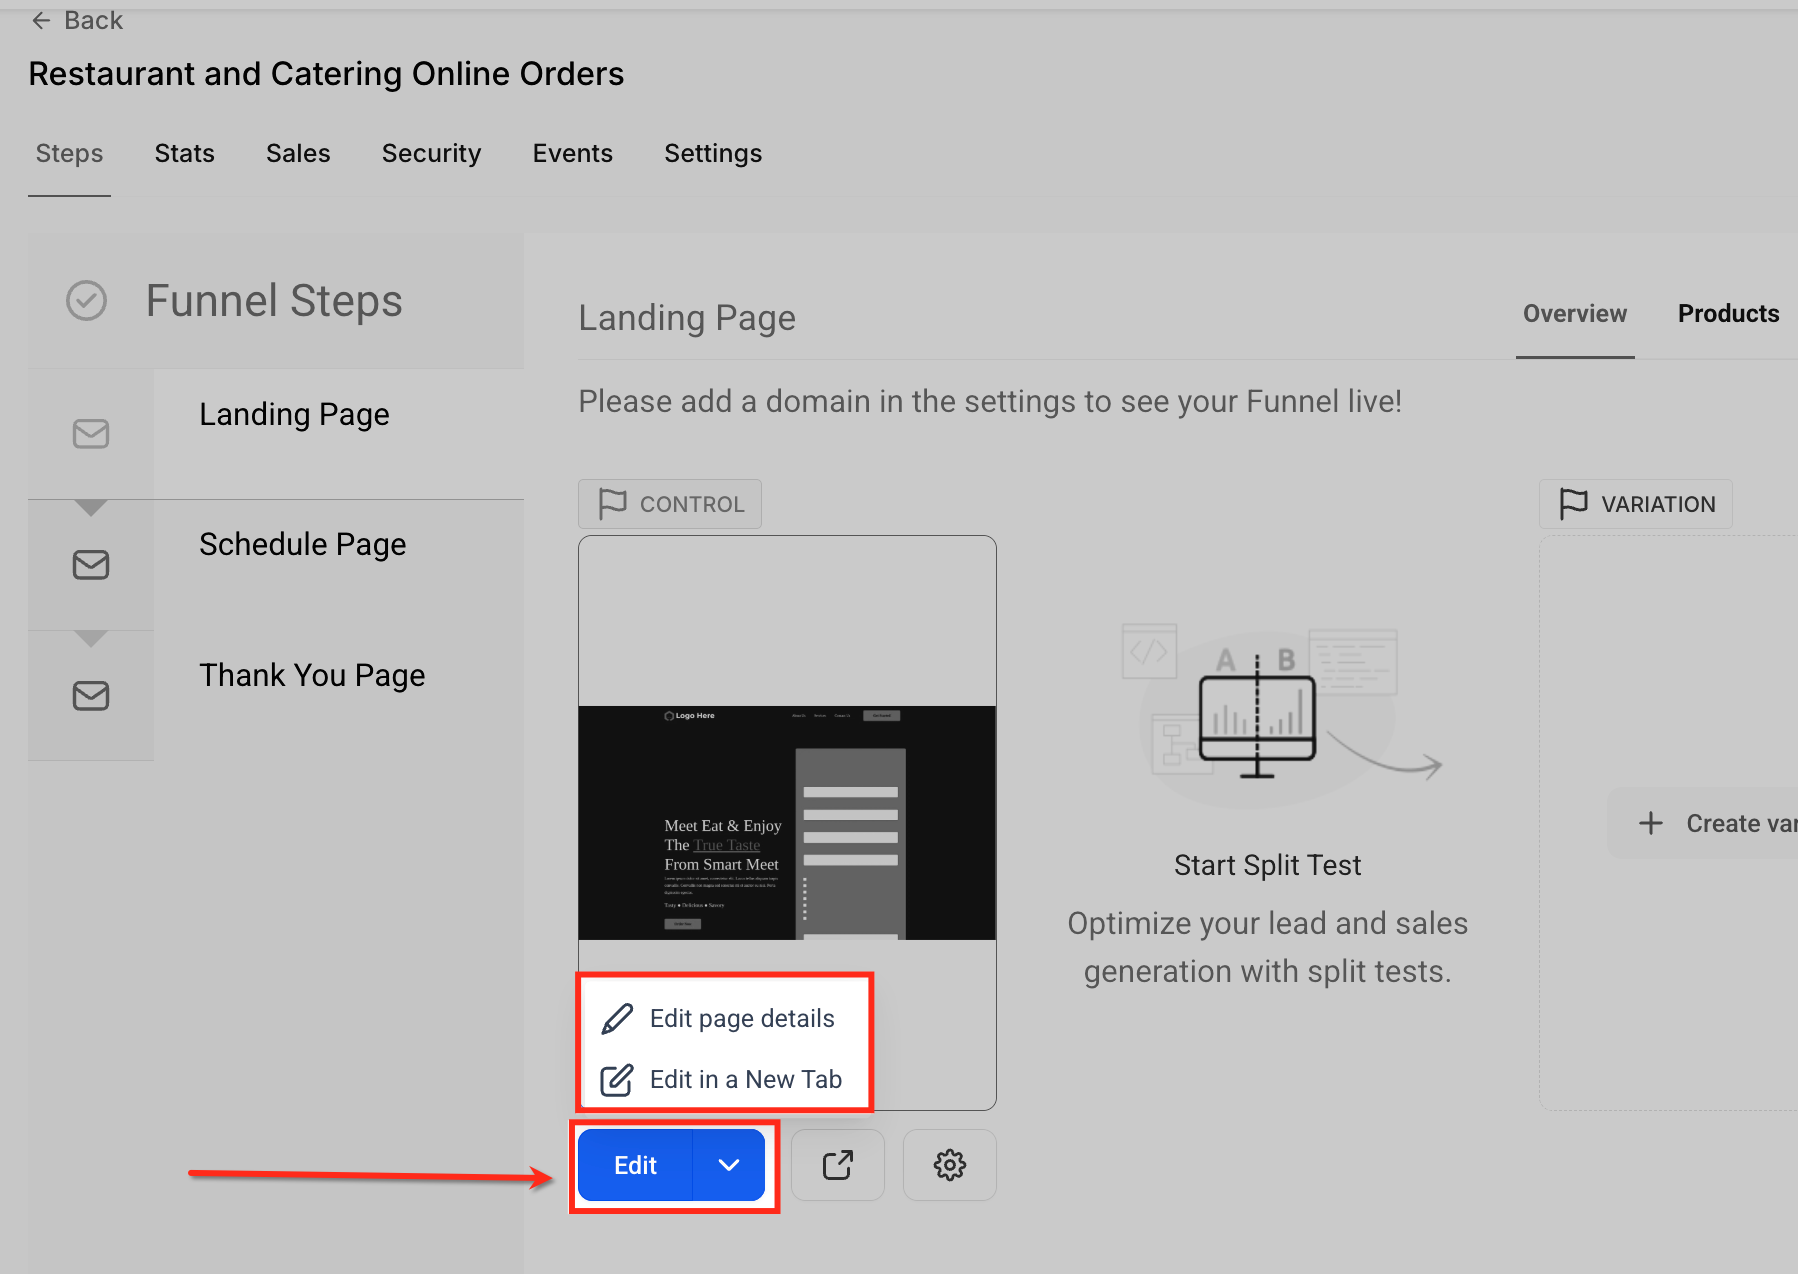
- Click the Edit button below the page preview, then select Edit in a New Tab.
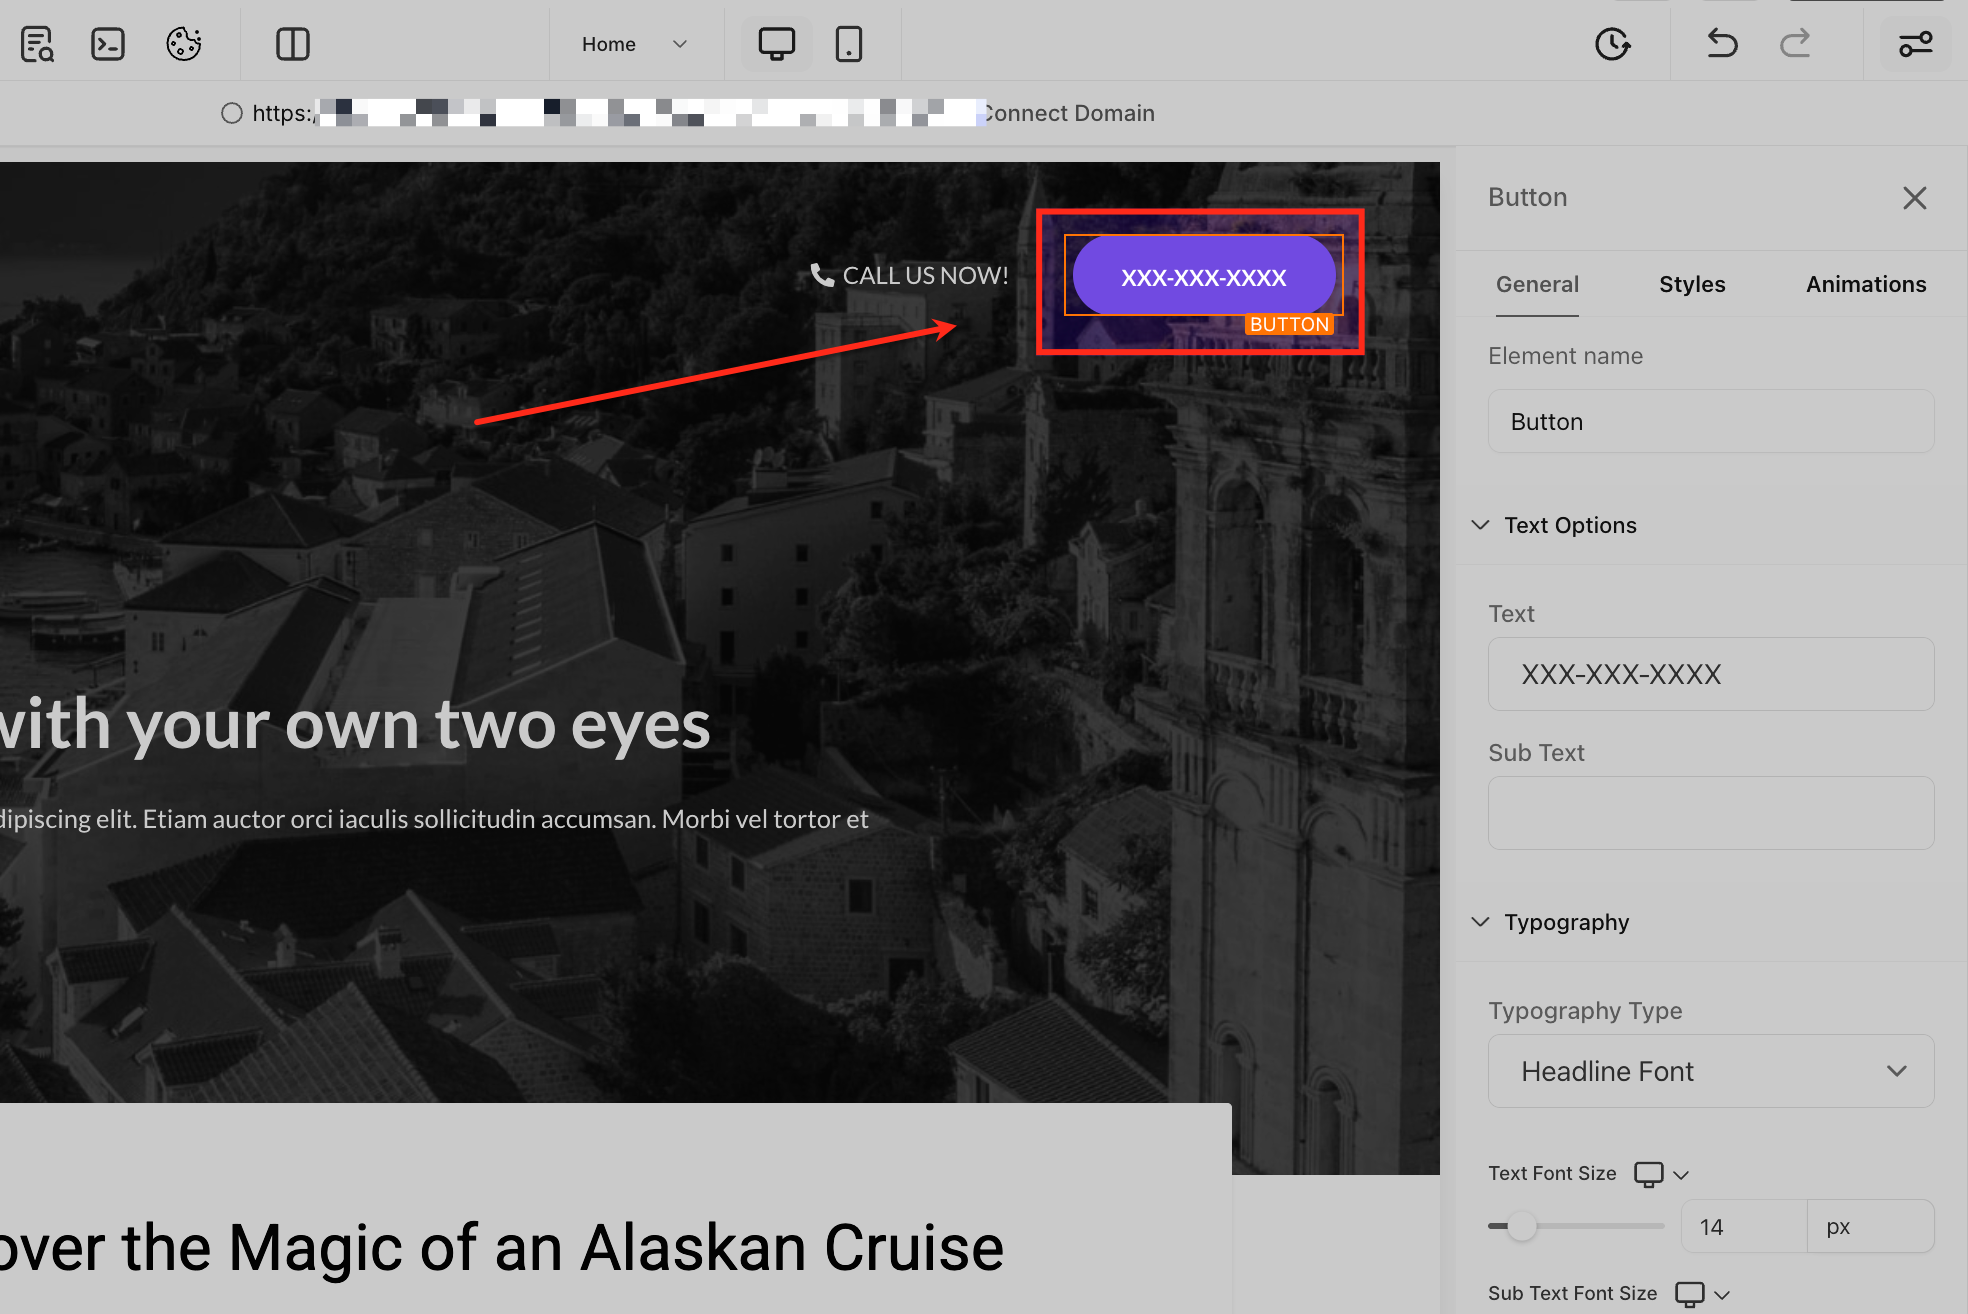
- Click the page element you wish to animate, such as a button, text block, or image.
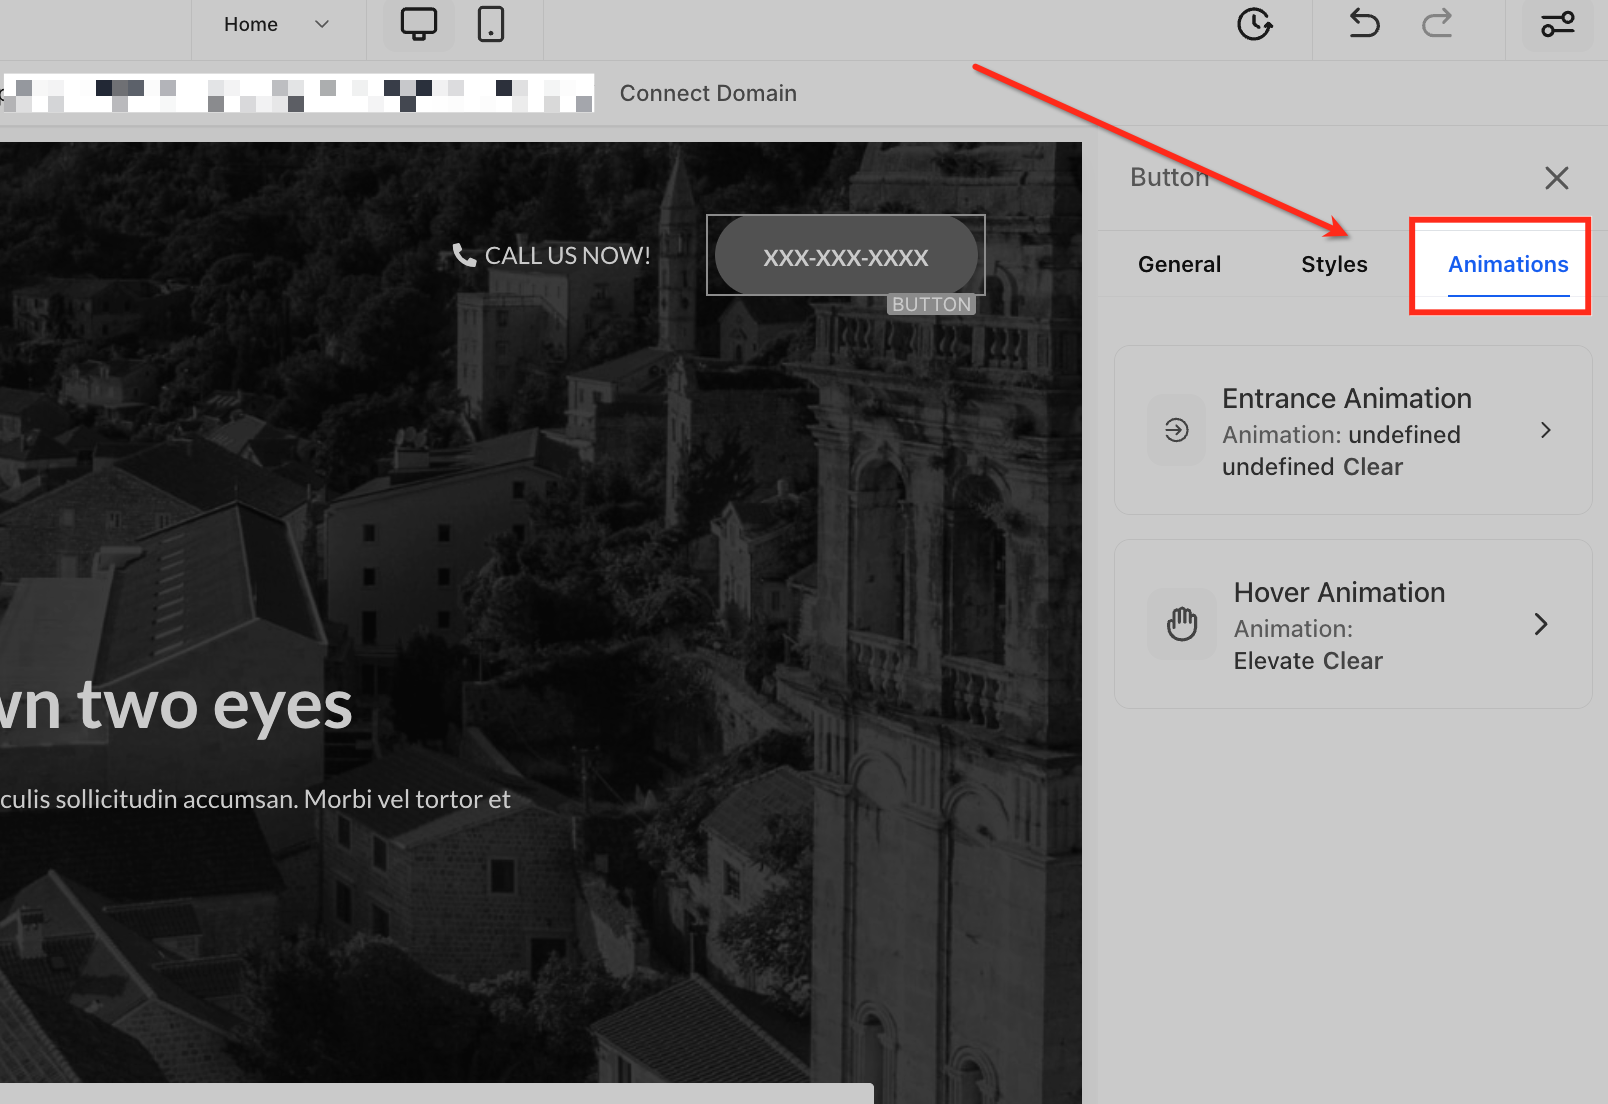
- In the right sidebar, open the Animations tab.
- Click Entrance Animation to open the style selection panel.
- Browse the Fade, Slide, Bounce groups and click the desired animation style.
- Click Adjust Animation to open the fine tuning panel.
- Modify Scale, Duration, Delay and Easing values as needed.
- Preview the element to confirm it remains hidden during the delay and only appears when the animation starts.
- Verify that the animation does not restart when you drag, switch device view, or edit other elements.
Configure button hover animation
- Select the Button element you want to animate in the Page Builder.
- Open the Animations tab in the right sidebar.
- Click Hover Animation to view available hover effects.
- Hover over each effect card to preview it on the selected Button.
- Click the effect you want to apply.
- Click Adjust Animation to open the effect’s settings.
- Set Duration, Delay, Easing and any additional controls such as Scale or Angle.
- Note that if the Button also has an entrance animation, the hover animation will become active only after the entrance animation finishes.
- Remember that hover animations are automatically disabled on touch devices and screens under 1024 px.
- Watch the Button animation on the canvas to verify it looks correct.
- Publish the page once the hover interaction meets your expectations.
06What it looks like in HighLevel
07Settings that matter
- Scale. Controls the size multiplier of the animation, ranging from 0.5× to 2×.
- Duration. Sets how long the animation runs, with values from 0.1 to 3 seconds.
- Delay. Adds a pause before the animation starts, up to five seconds.
- Easing. Determines the acceleration curve of the animation; options include Linear, Ease In, Ease Out and Ease In Out.
- Angle. Specifies the rotation angle for rotation type hover effects, from minus 180° to plus 180°.
- Distance. Defines how far an element moves for movement type hover effects, from 0 to 50 units.
- Fill Color. Sets the background color change for background type hover effects.
- Border Color. Changes the border hue for border type hover effects.
- Border Thickness. Adjusts the width of the border for border type hover effects, from 1 to 10 px.
- Shadow Color. Defines the color of the shadow for shadow type hover effects.
- Blur. Sets the blur radius of the shadow or glow, from 0 to 50 px.
- Spread. Controls how far the shadow extends outward, from 0 to 50 px.
08Things to know before you rely on it
- Scale values can only be set between 0.5× and 2×.
- Duration must be chosen between 0.1 and 3 seconds.
- Delay can be set up to a maximum of 5 seconds.
- Hover animations are automatically disabled on touch devices and screens smaller than 1024 px.
- When a Button appears in multiple places, such as sticky bars, the same hover animation is applied to all instances.
09How it connects to the rest of HighLevel
- HighLevel website setup: create pages, customize design, connect domain, and review mobile settings before launch Website setup guide
- Add tracking code to funnels and websites in HighLevel Tracking code guide
- How to set a page load popup in HighLevel Page load popup guide
Michael's take

Most folks try to sprinkle every element with a flashy animation, thinking more motion equals higher conversion. I would focus on a single call to action button and give it a subtle entrance and hover effect, then let the rest of the page breathe.
When I test a new animation, I watch it on both desktop and mobile previews to verify that the hover effect disappears where it should. A clean, purposeful motion adds polish without overwhelming the user.