
01Who this is for
- Users who need a single place to record legal entity and registration details for compliance.
- Teams who want to control duplicate contact handling and legacy feature visibility across their subaccount.
02Business Profile Settings, explained
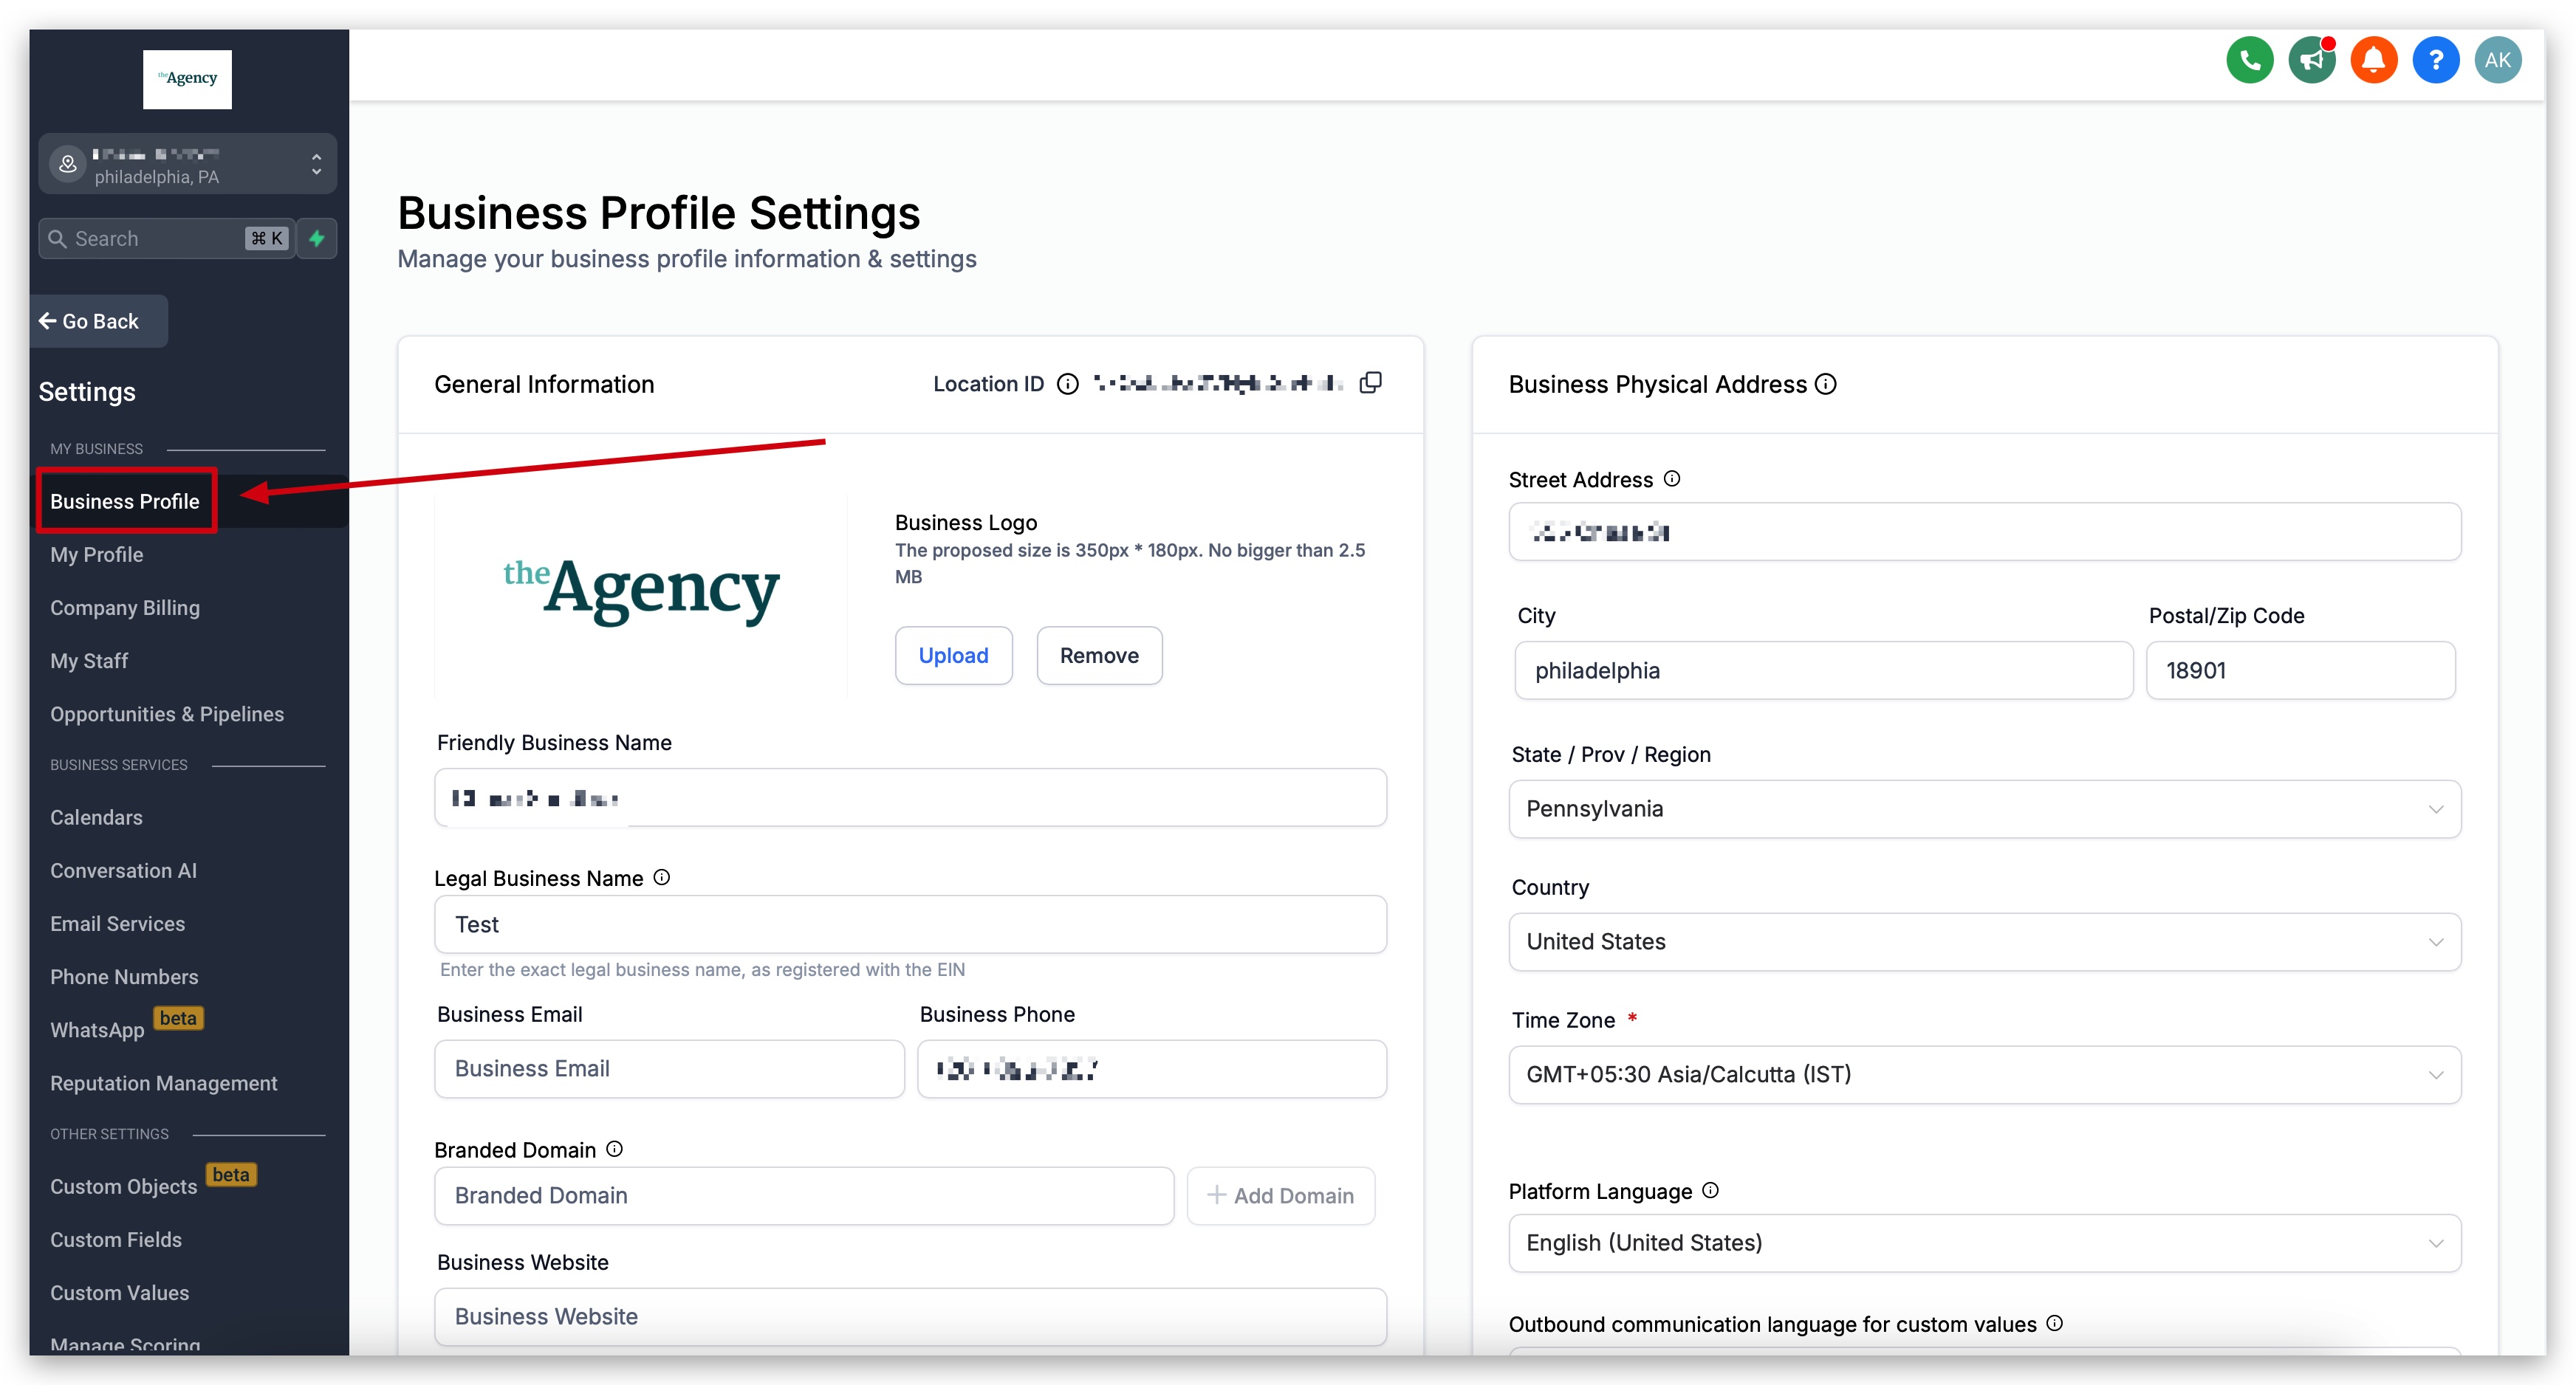
The Business Profile lives in the Settings area of every subaccount. It is the initial page you see after opening Settings and contains seven distinct sections that hold company wide data and behavior toggles.
Each section serves a purpose: General Information stores brand identity and API settings; Business Physical Address records the official address, time zone and language preferences; Business Information captures legal entity type and registration numbers; Authorized Representative defines a person who can verify the business; General holds switches for duplicate handling, booking time zones and bot detection; Contact Deduplication Preferences lets you allow or block duplicates and choose the primary matching fields; Enable / Disable Deprecated Features shows or hides legacy modules.
All changes affect the entire subaccount and are visible to every user, though some pages may display information in a user’s personal time zone.
03How businesses use the Business Profile Settings
- Dental practice. Enter the clinic’s official address and set the platform language under Business Physical Address, then add the dentist as the authorized representative so compliance reviews can verify the practice.
- Digital marketing agency. Upload the agency’s logo, set the default currency and branded API domain in General Information, and configure Contact Deduplication Preferences to keep client contacts from duplicating.
- Ecommerce retailer. Provide the retailer’s legal entity type and registration number in Business Information, and select the outbound communication language to match the primary customer locale for proper date and number formatting.
04The numbers and rules that matter
- 7 sections make up Business Profile Settings.
05Before you start
- Log in to HighLevel and select a subaccount.
06How to set up and use the Business Profile Settings in HighLevel
Navigate to Business Profile
- Log in to HighLevel.
- Select the desired subaccount.
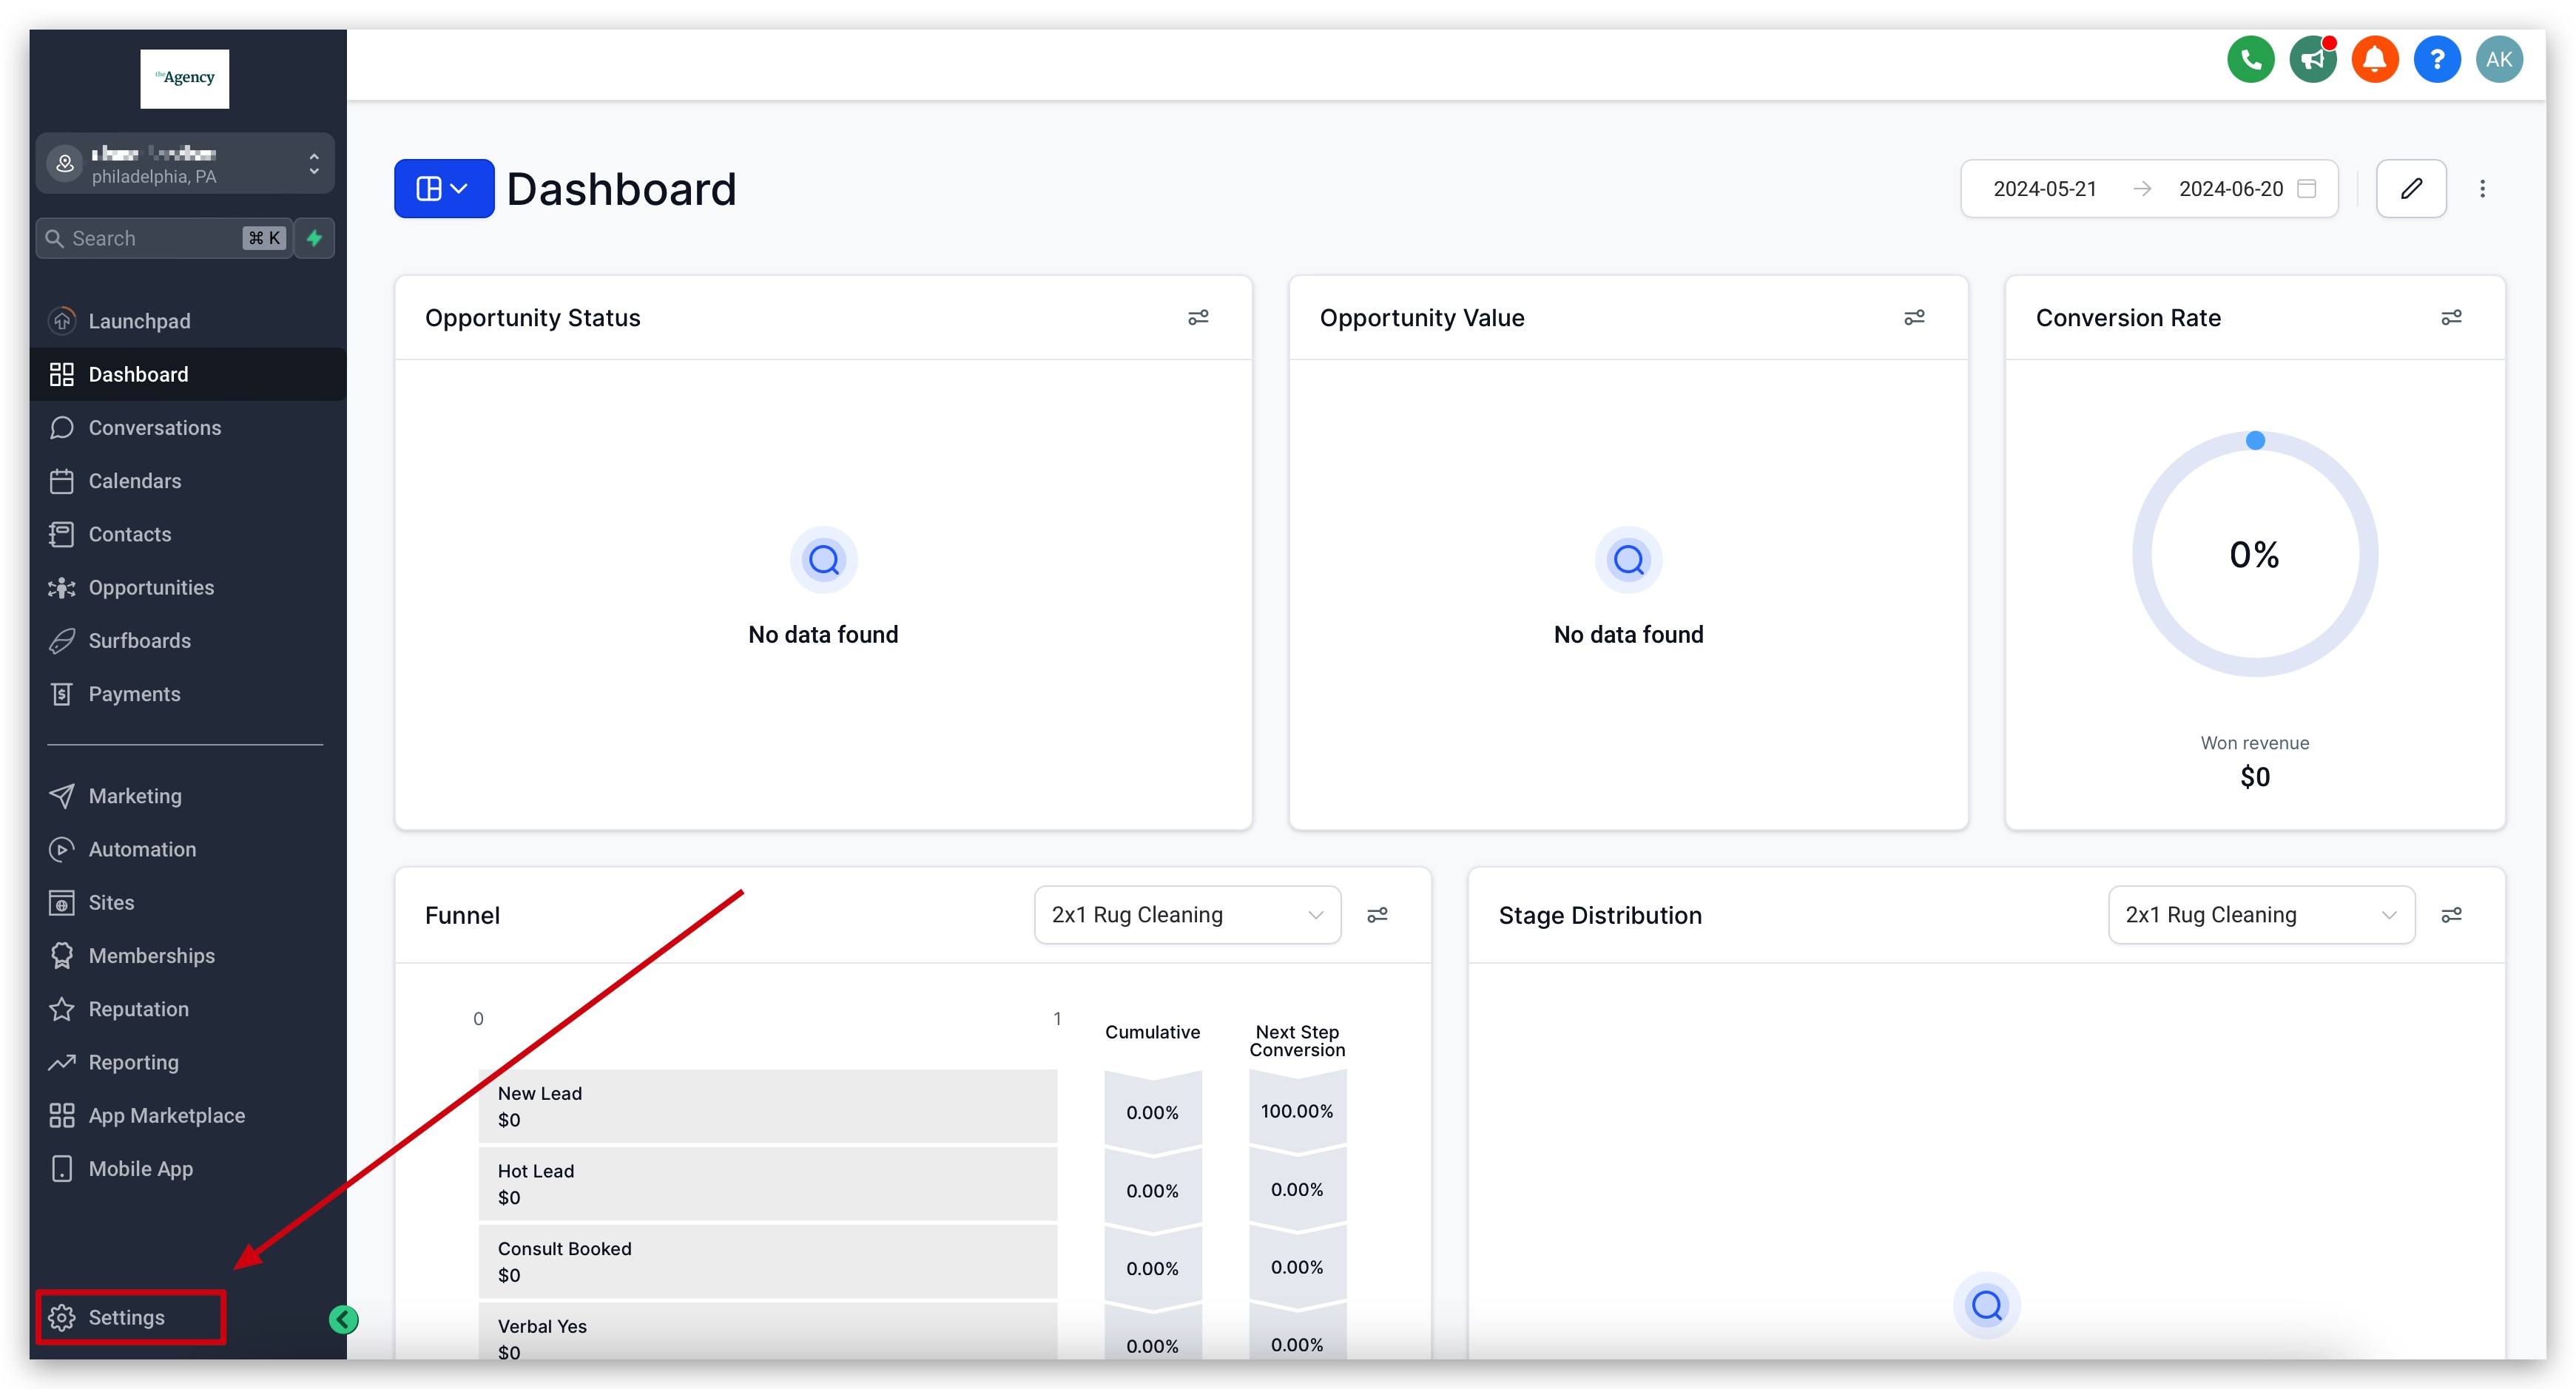
- Click Settings in the left hand navigation menu.
- Choose Business Profile, which appears as the first option in the Settings list.
07What it looks like in HighLevel
08Settings that matter
- Merge Facebook contacts by matching contact names from Messenger conversations. Merges a Messenger contact with an existing contact when the names are identical.
- Merge Facebook contacts by matching contact names from Facebook Lead Form submissions. Merges a lead form contact with an existing contact when the names match, reducing duplicate records.
- Contact Deduplication Preferences. Determines whether duplicate contacts are allowed and selects the primary fields, email or phone, used to match new submissions to existing contacts.
- Enable / Disable Deprecated Features. Shows or hides legacy modules so teams can audit or migrate old assets while using current platform features.
09Things to know before you rely on it
- All Business Profile settings apply across the entire subaccount.
- Some pages may display information in a user’s personal time zone, even though the settings are subaccount wide.
10How it connects to the rest of HighLevel
- Business Profile: duplicate contacts and missed call text back Duplicate contacts guide
- How to configure contact deduplication preferences in HighLevel Deduplication preferences
- How to enter business information in HighLevel Business information entry
Michael's take

When you have a new HighLevel subaccount, setting up the Business Profile helps avoid reentering information later.
If your account is already live and you’re only tweaking a few fields, you may not need to adjust every toggle.