
01Who this is for
- Users who manage multiple entities see the widget highlight incomplete locations and allow step by step completion.
- First time users benefit from guided setup that ensures accurate business data before Listings can publish.
02Listings self service onboarding, explained
The onboarding widget lives at the top of the Listings dashboard inside the Reputation > Listings area. It stays visible until every required step is finished for each incomplete entity in the subaccount. Users can click Start Setup to begin the guided flow, then work through the individual tasks in any order. Skipping a step is allowed; progress is saved and the widget updates with checkmarks or a percent complete indicator.
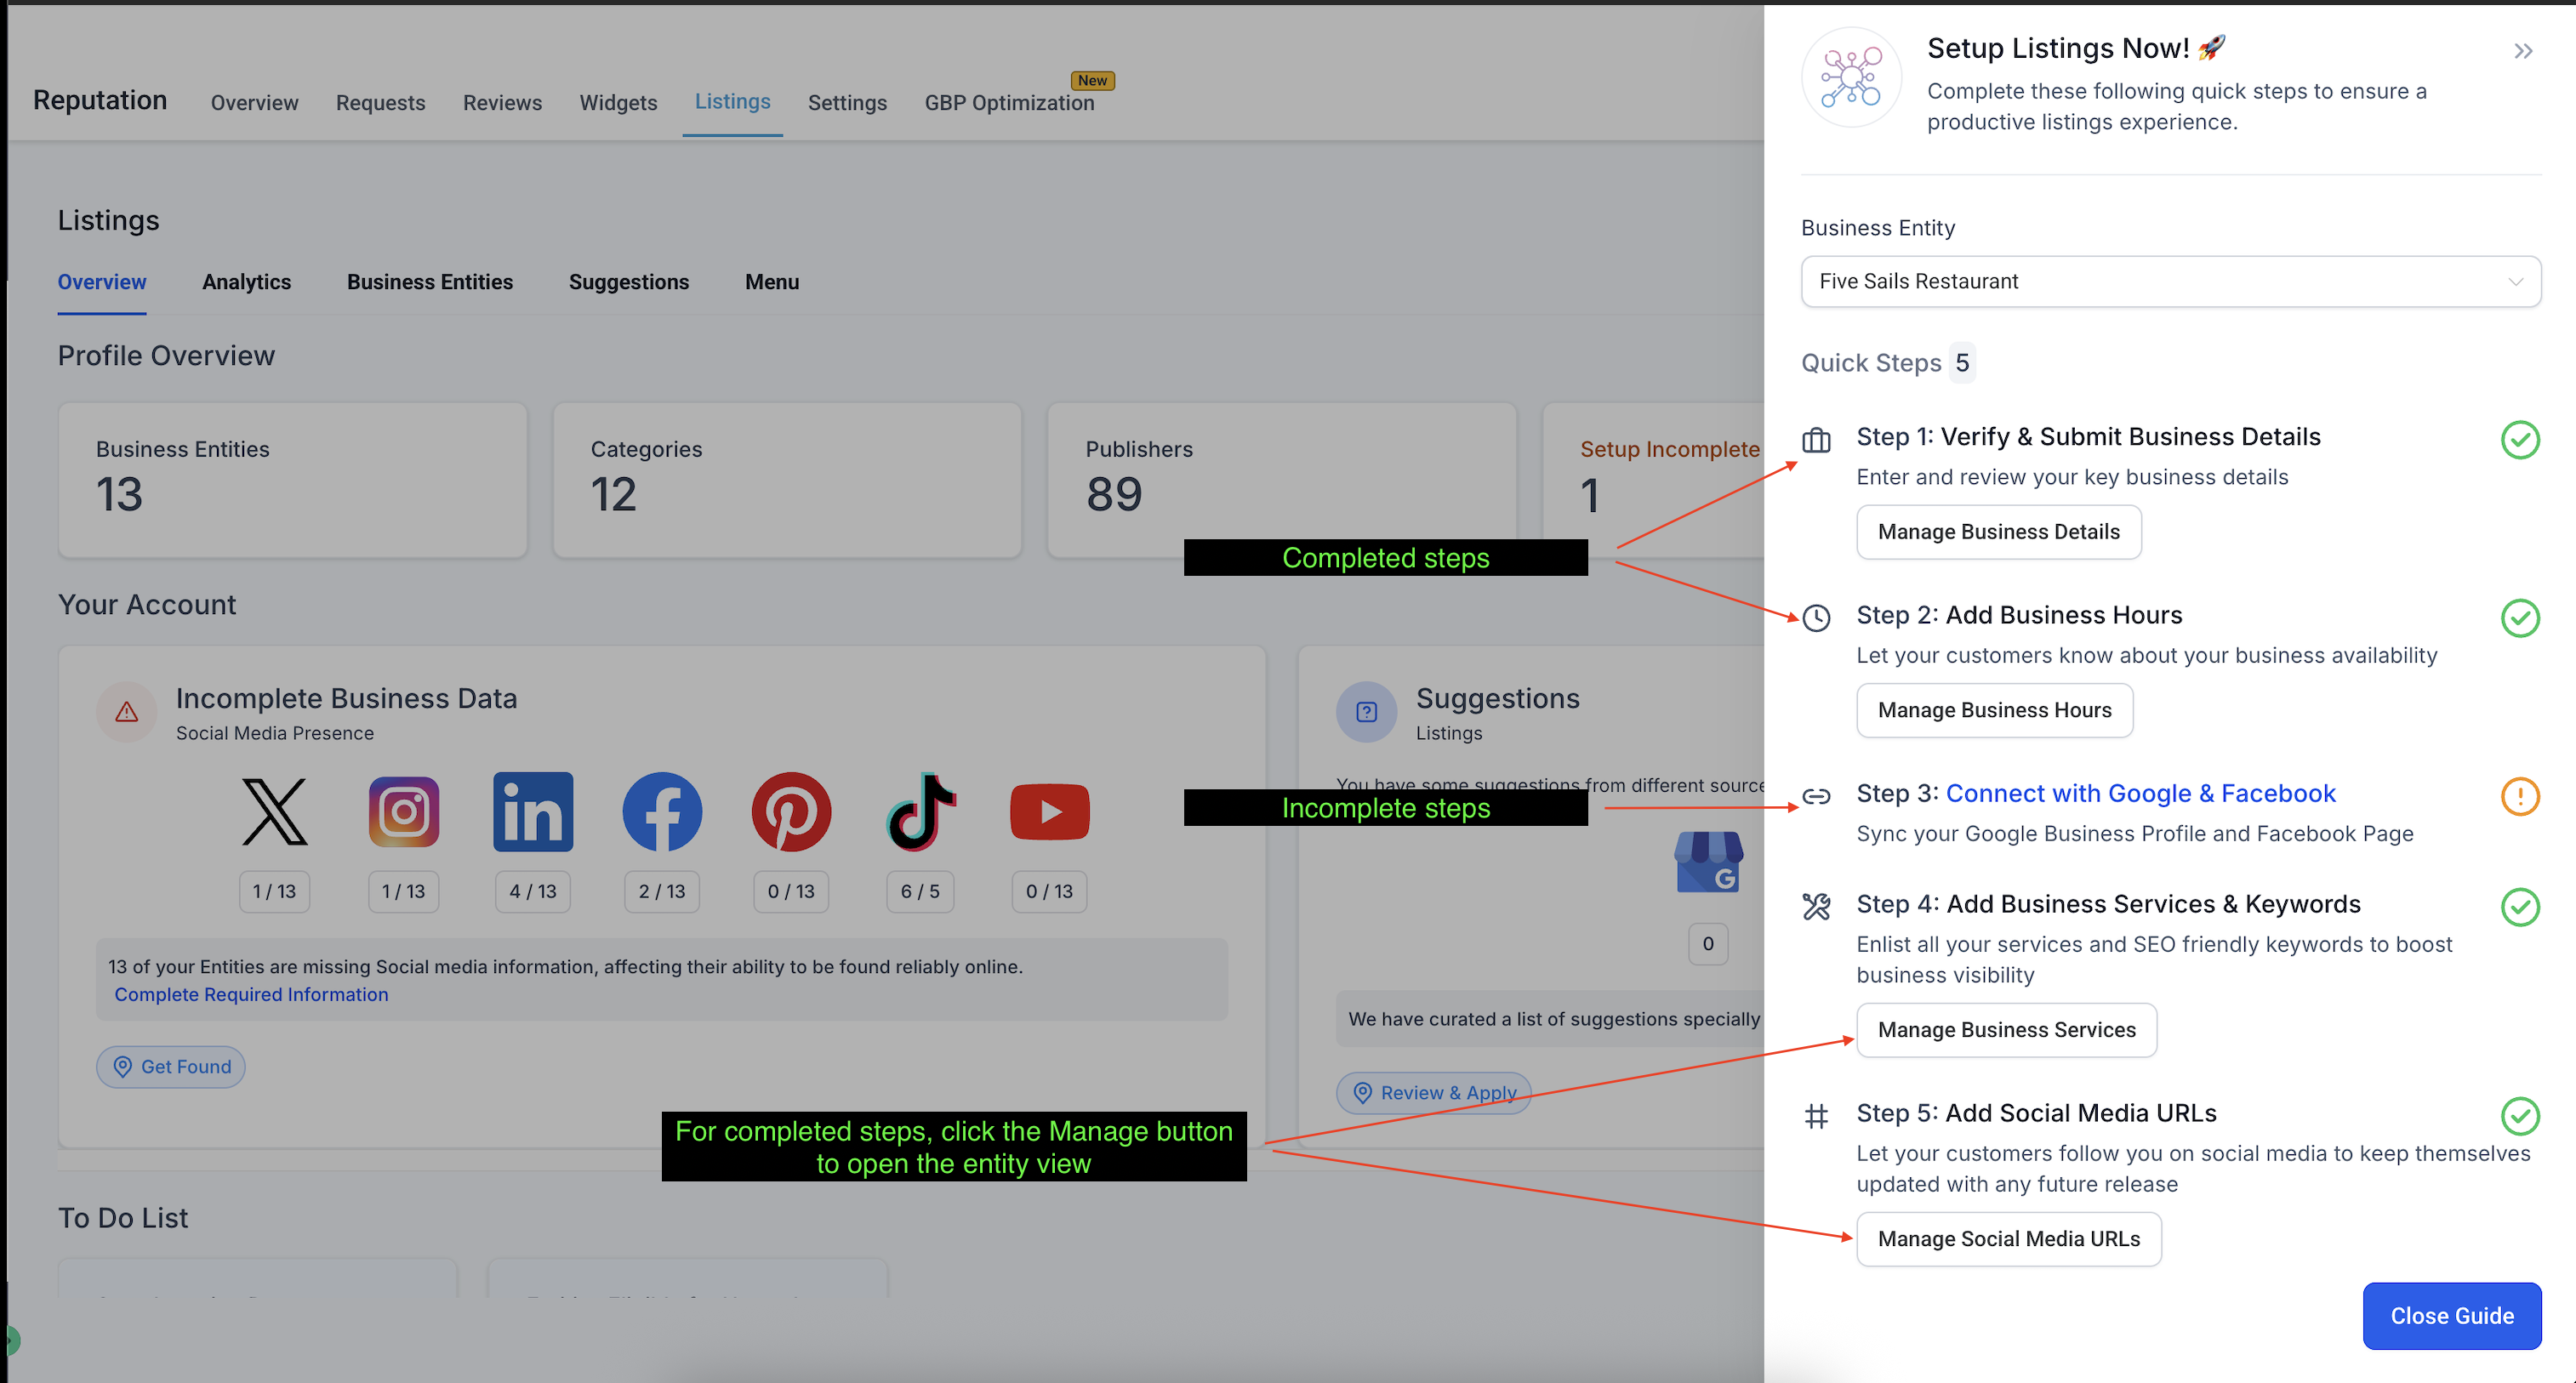
The widget creates the core business record, adds operating hours, links Google Business Profile and Facebook Page, records services and keywords, and stores social media URLs. Once all steps are completed for every entity, the widget disappears automatically.
03How businesses use listings self service onboarding
- Dental practice. The practice opens the widget, fills out the entity form with its clinic name, address, and dental categories, adds regular office hours, connects its Google Business Profile and Facebook Page, lists services like cleaning and orthodontics, and inputs its Instagram and Facebook URLs.
- Restaurant chain. For each restaurant location, the manager uses the widget to submit the specific address and menu category, records split lunch and dinner hours, connects the location’s Google profile, adds cuisine keywords, and links the brand’s social media pages.
- Retail boutique. The boutique owner launches the onboarding flow, enters the store’s legal name and contact details, sets daily opening hours, links the Google Business Profile, defines product related services and keywords, and adds the shop’s Facebook and X URLs.
04Before you start
- An active paid Listings subscription must be enabled in the subaccount.
- Users need permission to view and edit Listings.
- Owner/Admin access is required for any Google Business Profile to be connected.
- Admin access is required for any Facebook Page to be connected.
- Feature availability depends on the subaccount’s country.
05How to set up and use listings self service onboarding in HighLevel
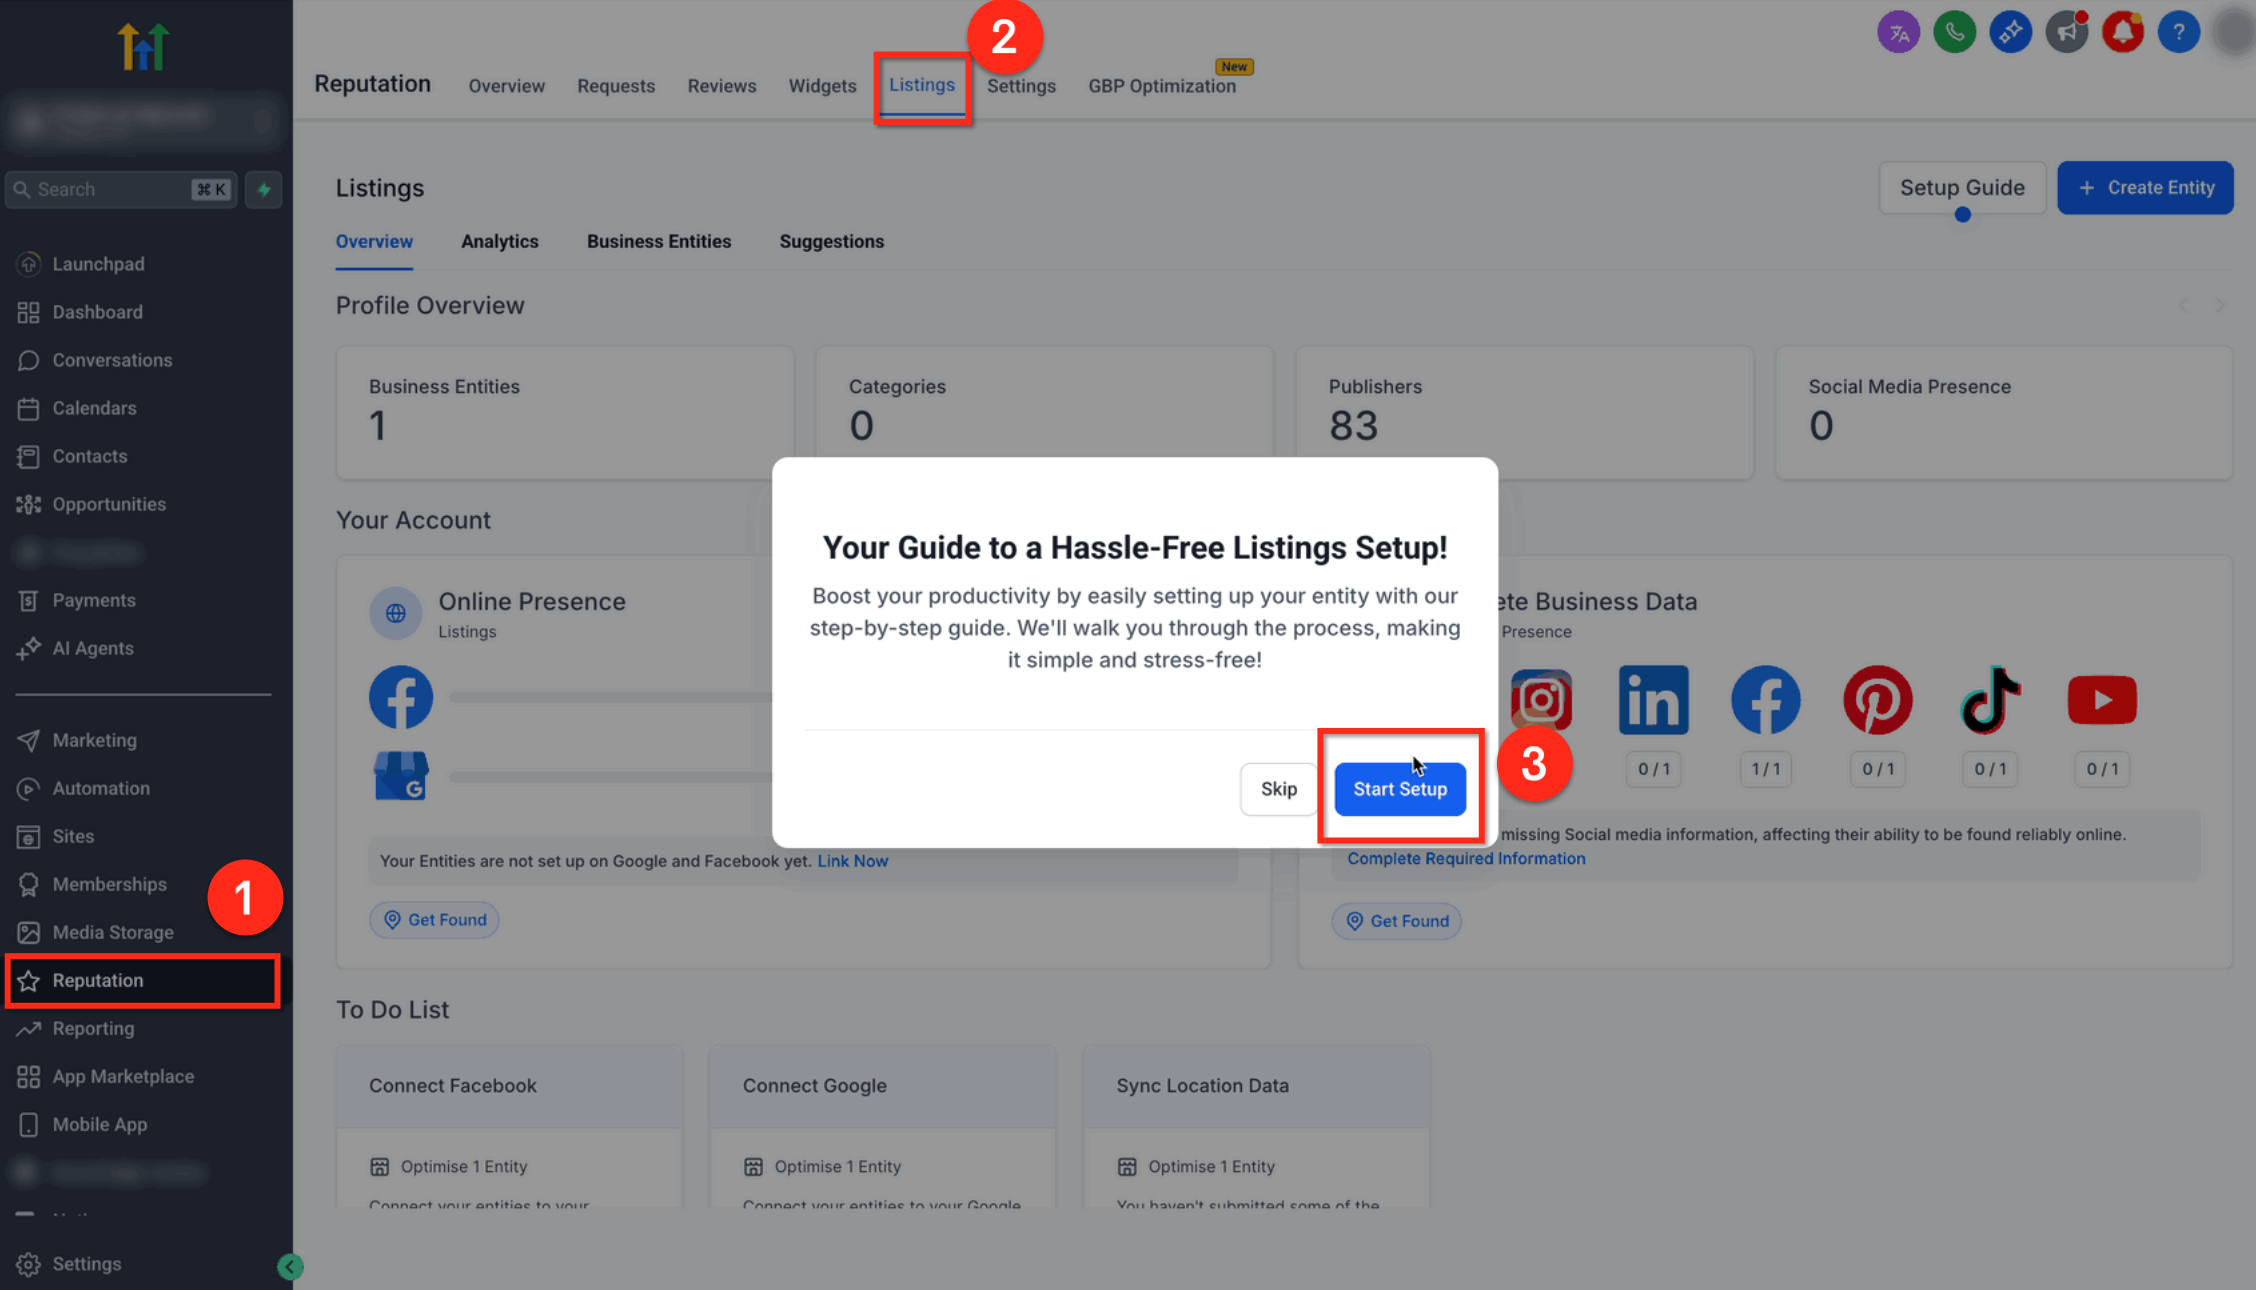
Find and start the widget
- Log in to the HighLevel subaccount.
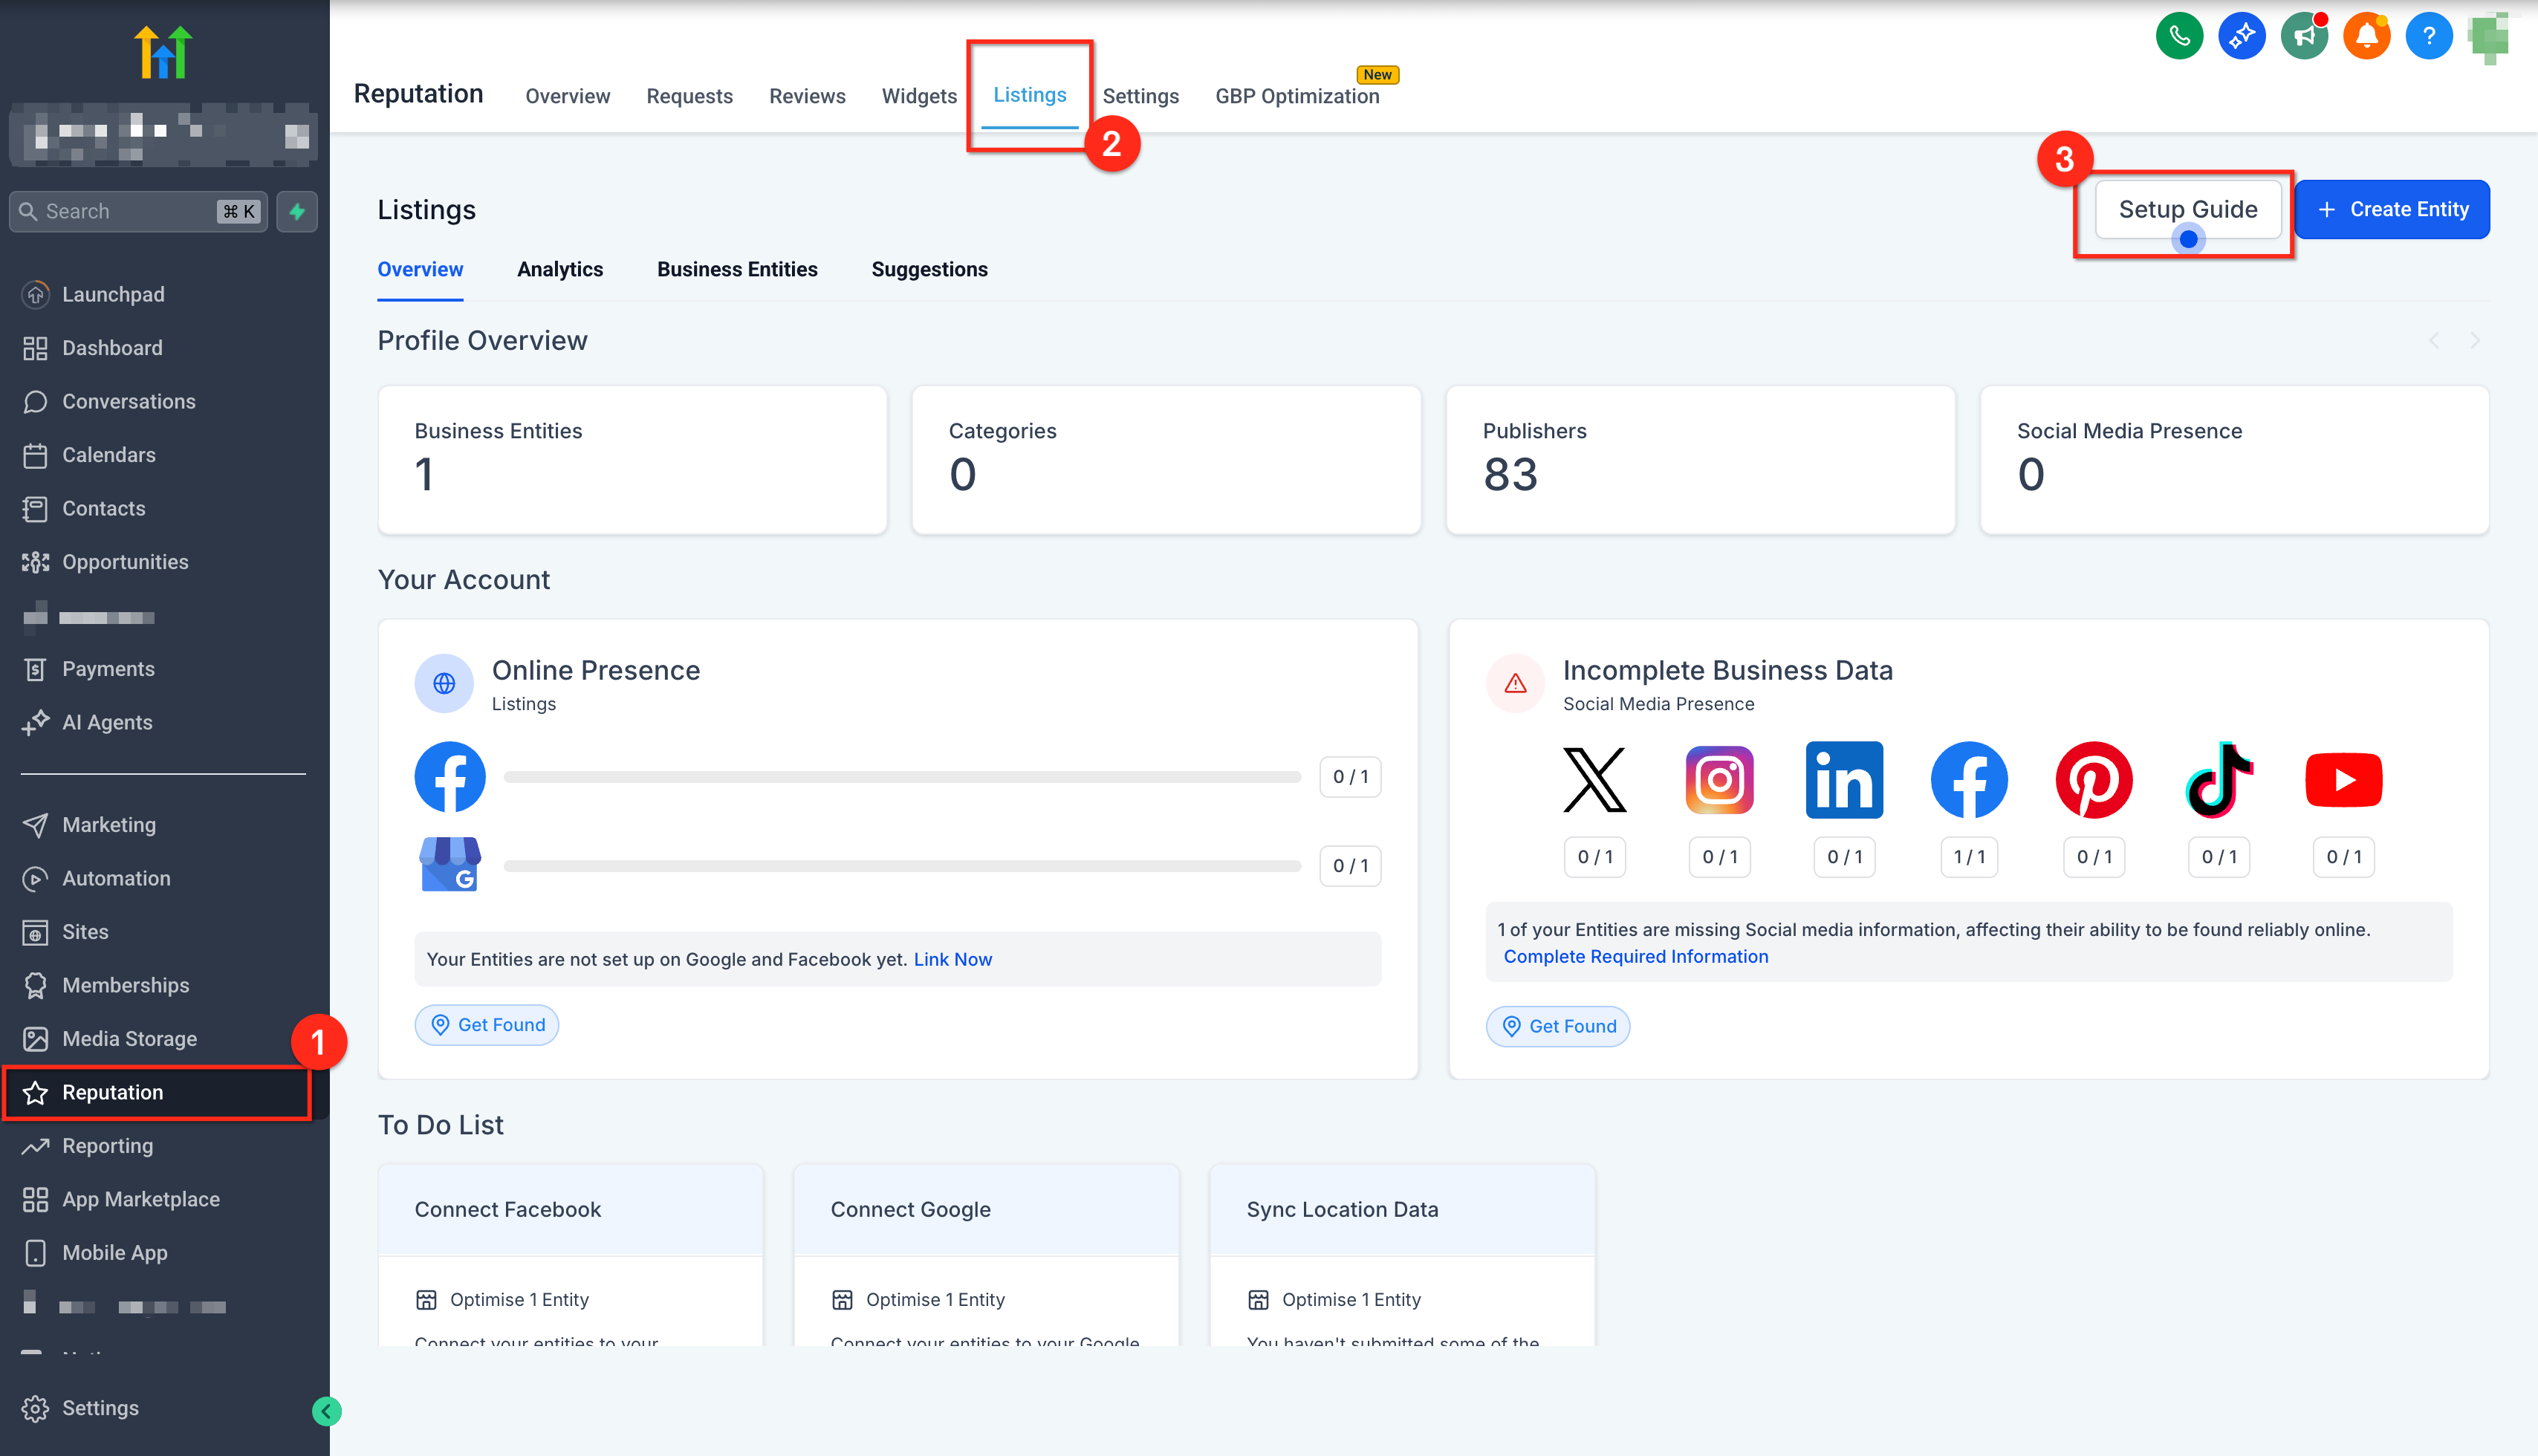
- Navigate to Reputation > Listings.
- Locate the Self Service Onboarding widget at the top of the Listings dashboard.
- Click the Start Setup button inside the widget.
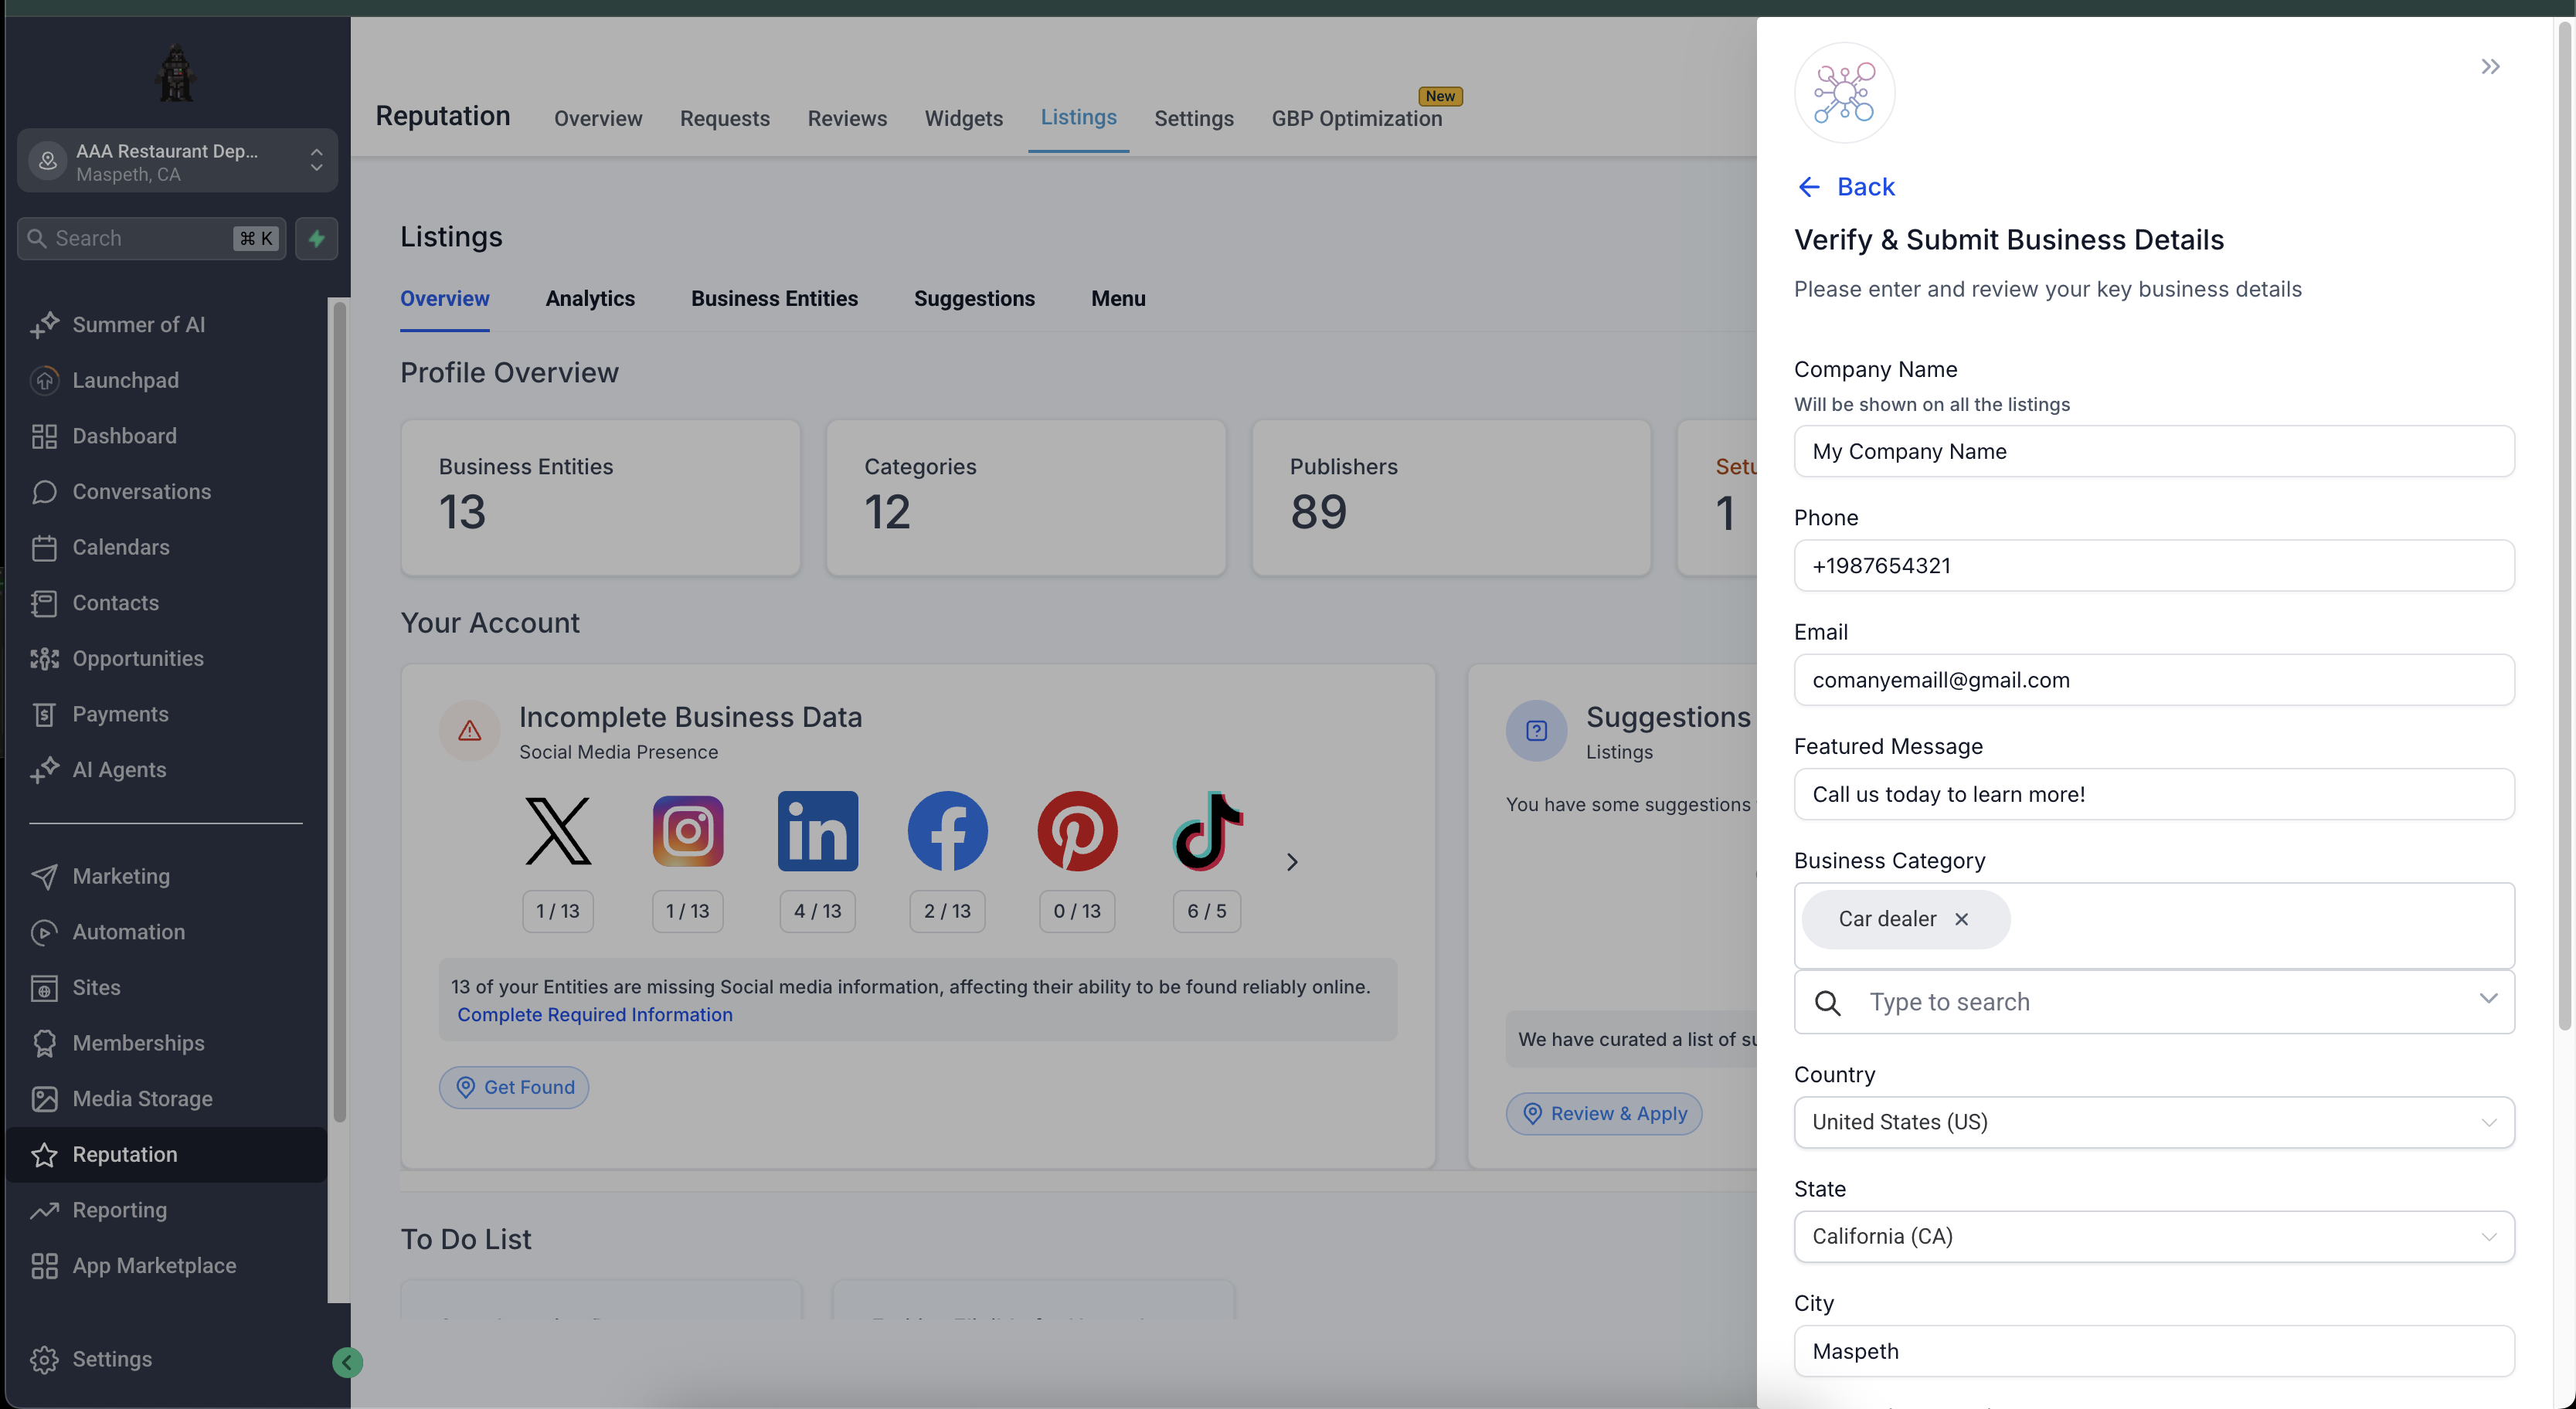
Submit entity form
- Open the onboarding widget and select the option to submit the entity form.
- Enter required business details such as legal name, display name, address, phone, website, primary category, and any optional additional categories.
- Save and submit the form to create the business record.
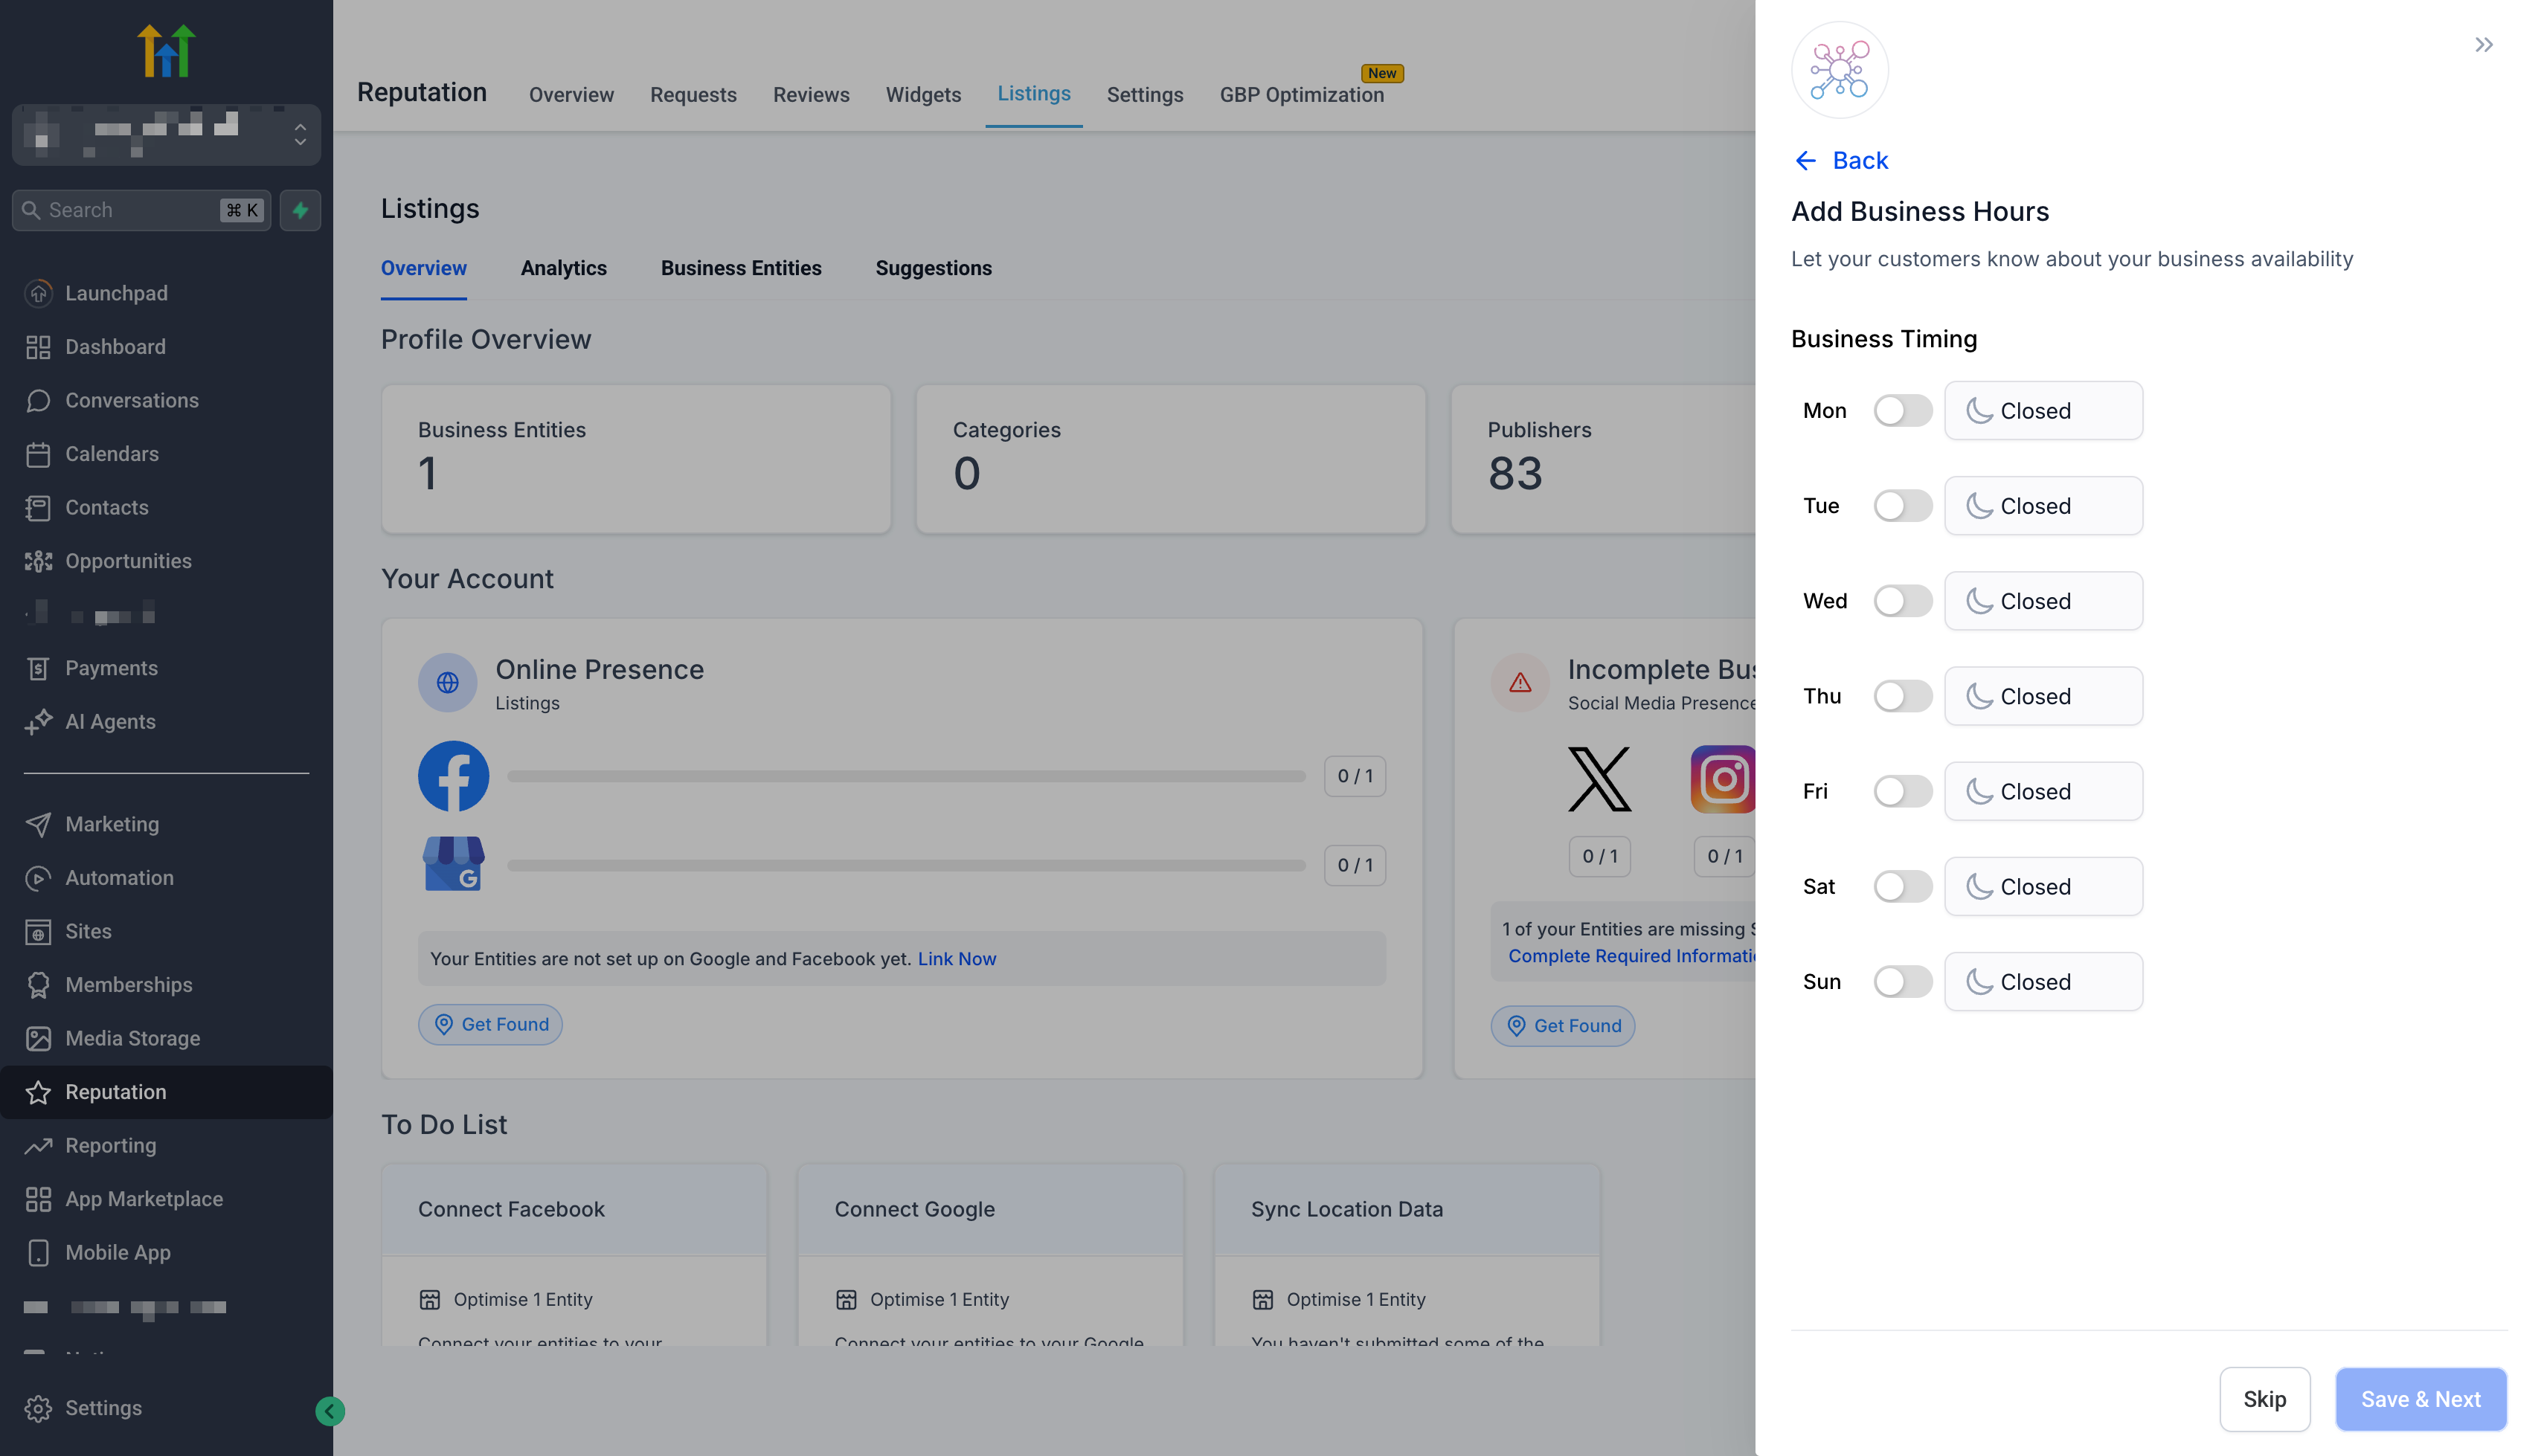
Add business hours
- Within the widget, choose the Add Business Hours action.
- Enter regular operating hours and, if needed, special or holiday hours.
- Save the hours to update the widget status.
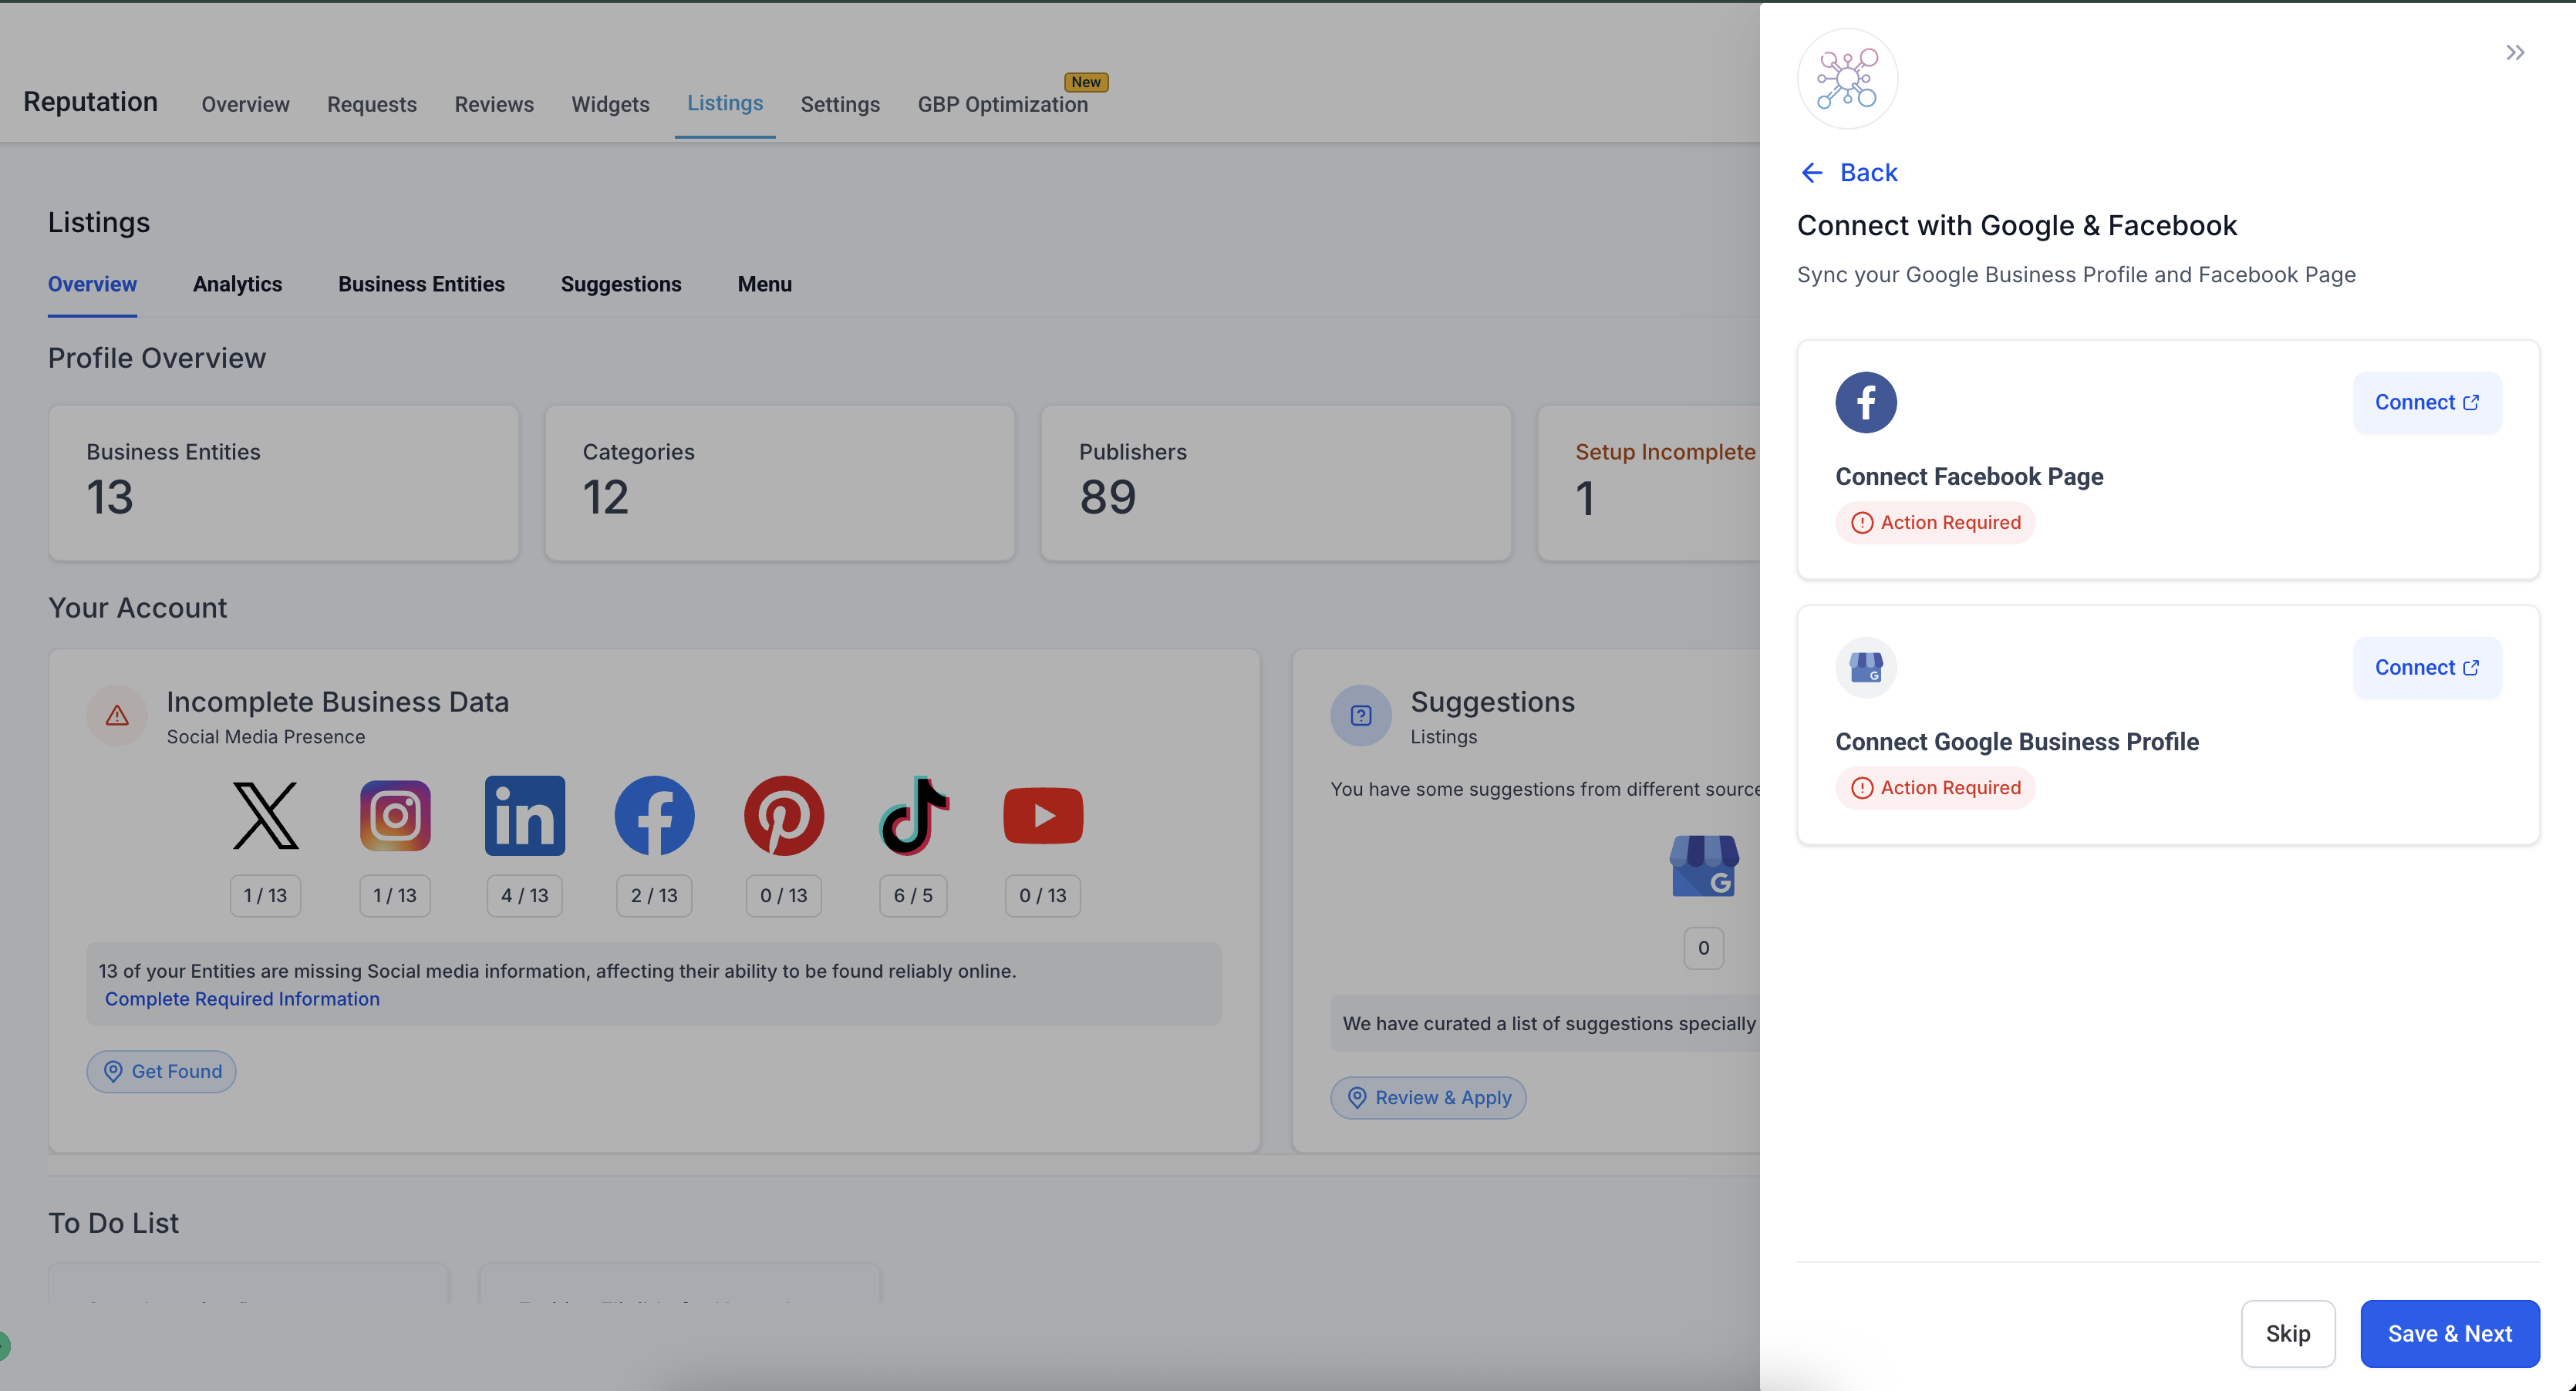
Connect Google & Facebook
- From the widget, click Connect Google and complete the OAuth prompts using an account with Owner/Admin access.
- Click Connect Facebook and grant the requested permissions with a Page admin account.
- Return to the widget and verify that Connected status appears for each publisher.
Add services & keywords
- Select Add Business Services & Keywords in the widget.
- Enter the primary services and relevant keywords that describe the business.
- Save the entries to reflect progress.
Add social media URLs
- Choose Add Social Media URLs from the widget.
- Paste the full URLs of the business’s official social profiles.
- Save the URLs and observe the completion indicator.
06What it looks like in HighLevel
07Things to know before you rely on it
- The onboarding widget appears only for entities that have incomplete required steps.
- It is available only when a paid Listings subscription is active in the subaccount.
- The widget disappears automatically after all required steps are finished for every incomplete entity.
- Feature availability depends on the country coverage of Listings.
- Split hours are supported for both Yext and Uberall publishing engines.
08How it connects to the rest of HighLevel
- Set up Listings for local SEO and learn how to sell them to clients. Listings setup guide
- Check which countries support online listings and any regional restrictions. Supported countries
- Understand pricing and client activation steps for reselling Listings. Resell Listings pricing
Michael's take

The biggest trap is assuming the wizard will finish itself. If any required data is missing or a connection token expires, the step pops back up and blocks completion. You have to keep the underlying accounts active and the information accurate.