
01Who this is for
- Restaurant owners who need structured menus and reservation details to attract diners.
- Medical clinics and professionals seeking to display credentials, insurance acceptance, and provider bios for patient trust.
- Marketing teams managing multiple locations that require consistent industry fields across all listings.
02Listings for Food & HealthCare Add Ons, explained
The add on transforms a generic listing into a Food or HealthCare entity when the business category matches an eligible type. Once upgraded, the profile shows new sections for industry specific data and a new set of controls for publishing that information. The feature lives within the Listings area under Reputation in the side navigation.
For Food entities the upgrade unlocks menu creation tools, attire choice, reservation toggle, and meal service options. HealthCare entities receive fields for NPI, provider education, insurance networks, and facility details. Both entity types share general purpose fields like payment methods and a featured message.
After saving, HighLevel automatically distributes the enriched profile to publisher networks that focus on the respective industry, such as MenuPix, OpenTable, WebMD, or Vitals. Distribution timing follows each publisher’s sync schedule.
03How businesses use listings for Food & HealthCare Add Ons
- Restaurant. In HighLevel the owner opens the listing, upgrades to the Food add on, and builds multiple menus with sections and item details. The completed menus are then published, allowing diners to see the latest offerings on partner platforms.
- Dental practice. The practice edits its listing, upgrades to the HealthCare Professional add on, and fills in NPI, insurance accepted, and treatment specialties. The profile is saved and sent to health focused publishers for patient discovery.
- Urgent care clinic. The clinic selects the HealthCare Facility add on, enters operating hours, departments, and accepting new patients status. After publishing, the enriched data appears in directories that list urgent care locations.
04The numbers and rules that matter
- Industry specific fields include Attire, Meals Served, NPI, Insurance Accepted.
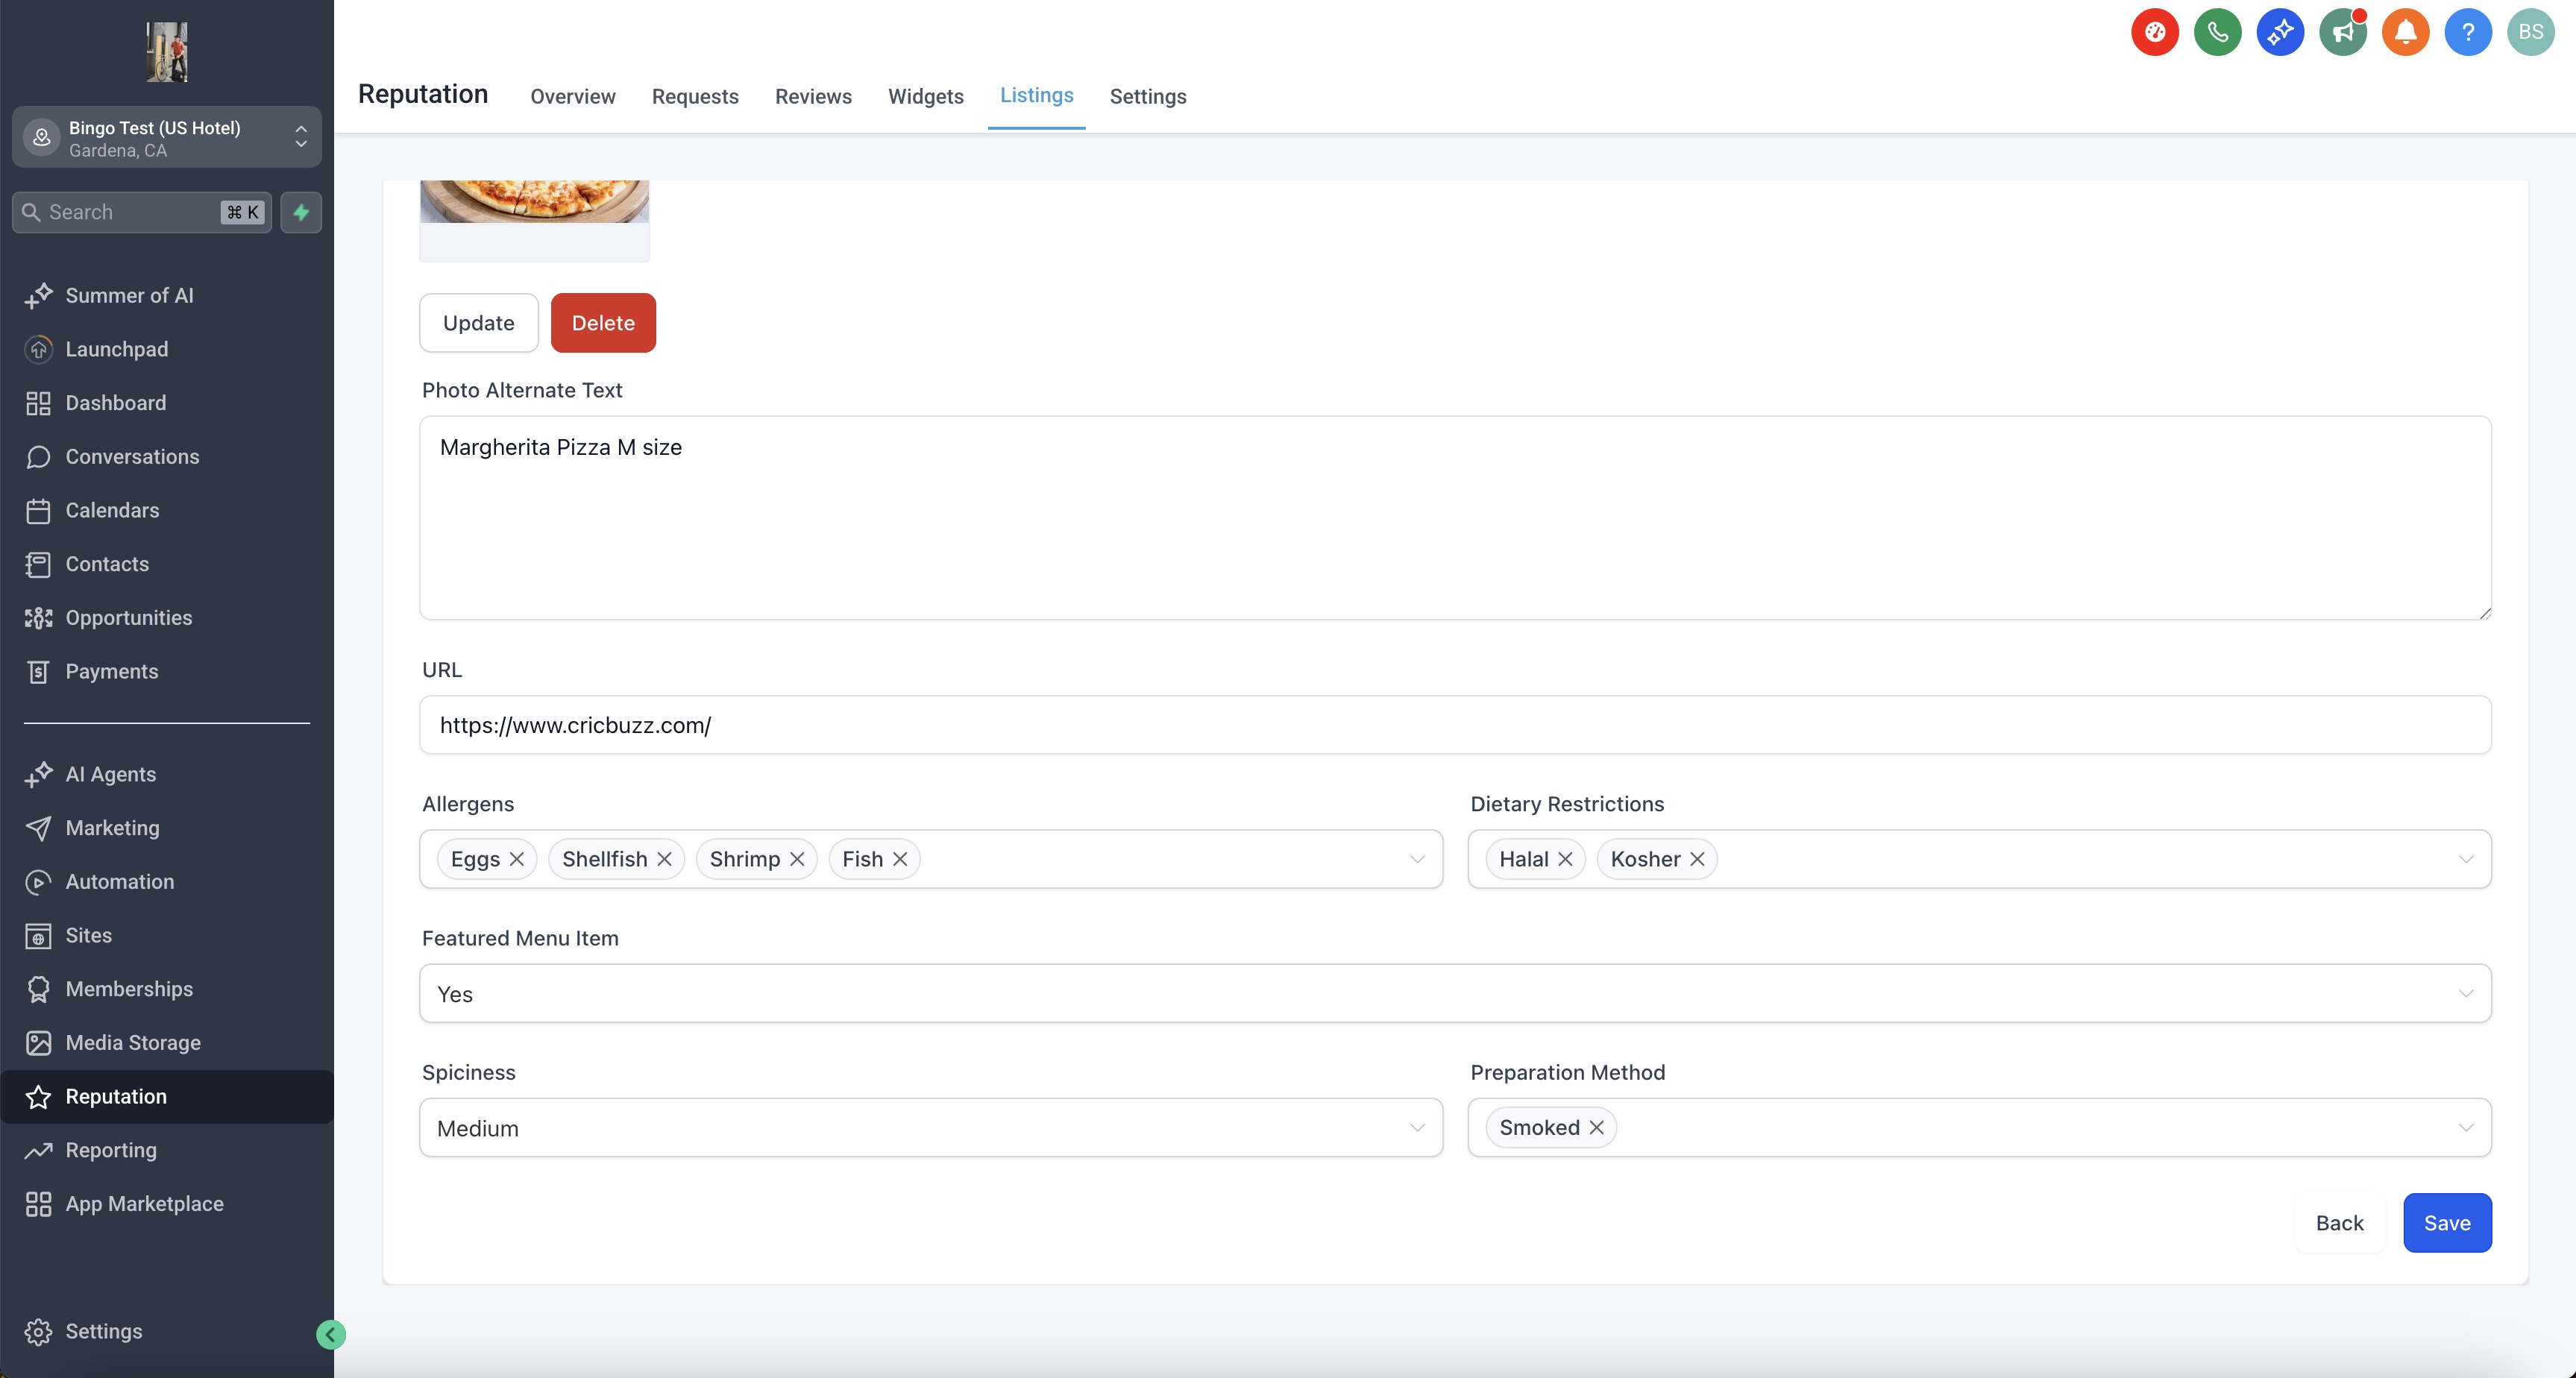
- Menu items can include name, price, description, calories, allergens, spice level, and an item photo.
05Before you start
- You must have permission to create or edit Listings in the subaccount.
- Prepare current menus with item details or gather provider/facility information such as NPI and insurance lists.
06How to set up and use listings for Food & HealthCare Add Ons in HighLevel
Step 1, Create or edit a listing
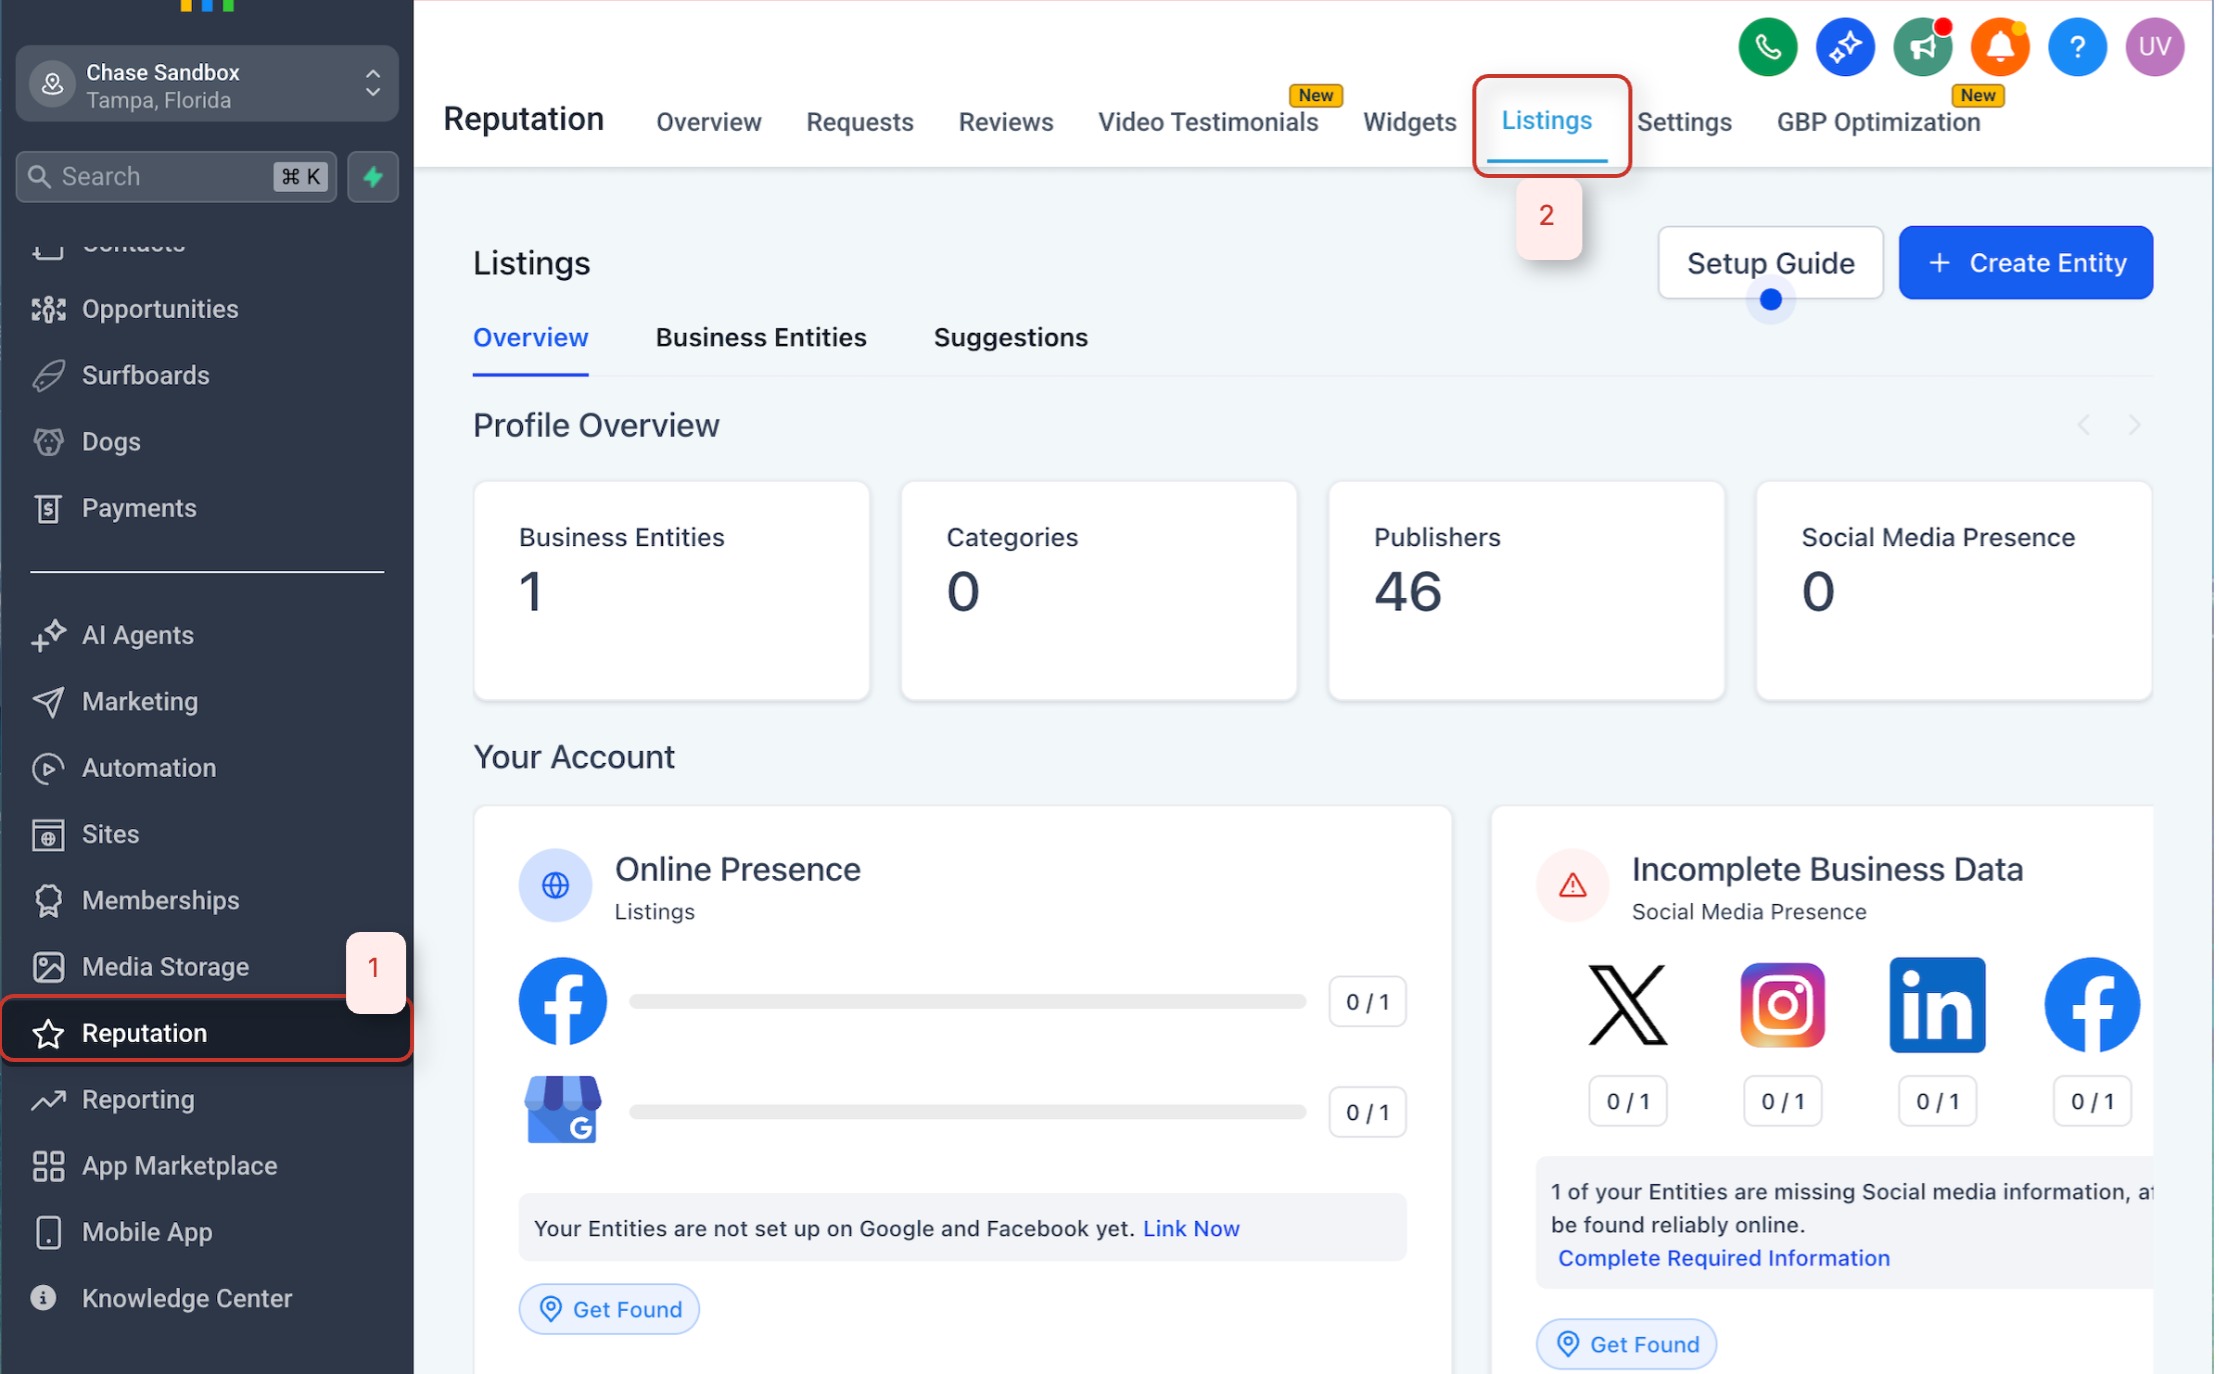
- Open the subaccount and select Reputation from the sidebar.
- Click Listings to open the listings page.
- Choose to create a new listing or select an existing one.
- If editing, click the Edit button on the chosen listing.
- Set the business category to Food or HealthCare as appropriate.
- Save the basic profile information.
Step 2, Confirm eligibility
- After saving, look for the Upgrade prompt that mentions Food or HealthCare add on availability.
- If the prompt is missing, verify the category selection matches a supported type.
- Check that the listing contains a valid address and phone number.
- Save any changes and refresh the page to re evaluate eligibility.
Step 3, Upgrade the listing (entity transformation)
- Click the Upgrade button shown in the prompt.
- Review the summary of changes that will occur.
- Select the desired entity type: Food, HealthCare Facility, or HealthCare Professional.
- Confirm the upgrade to apply the transformation.
- Note: This change is not reversible; if the wrong type is chosen, archive the listing and create a new one.
Step 4, Configure industry specific fields for Food
- Open the Food Details panel that appears after upgrade.
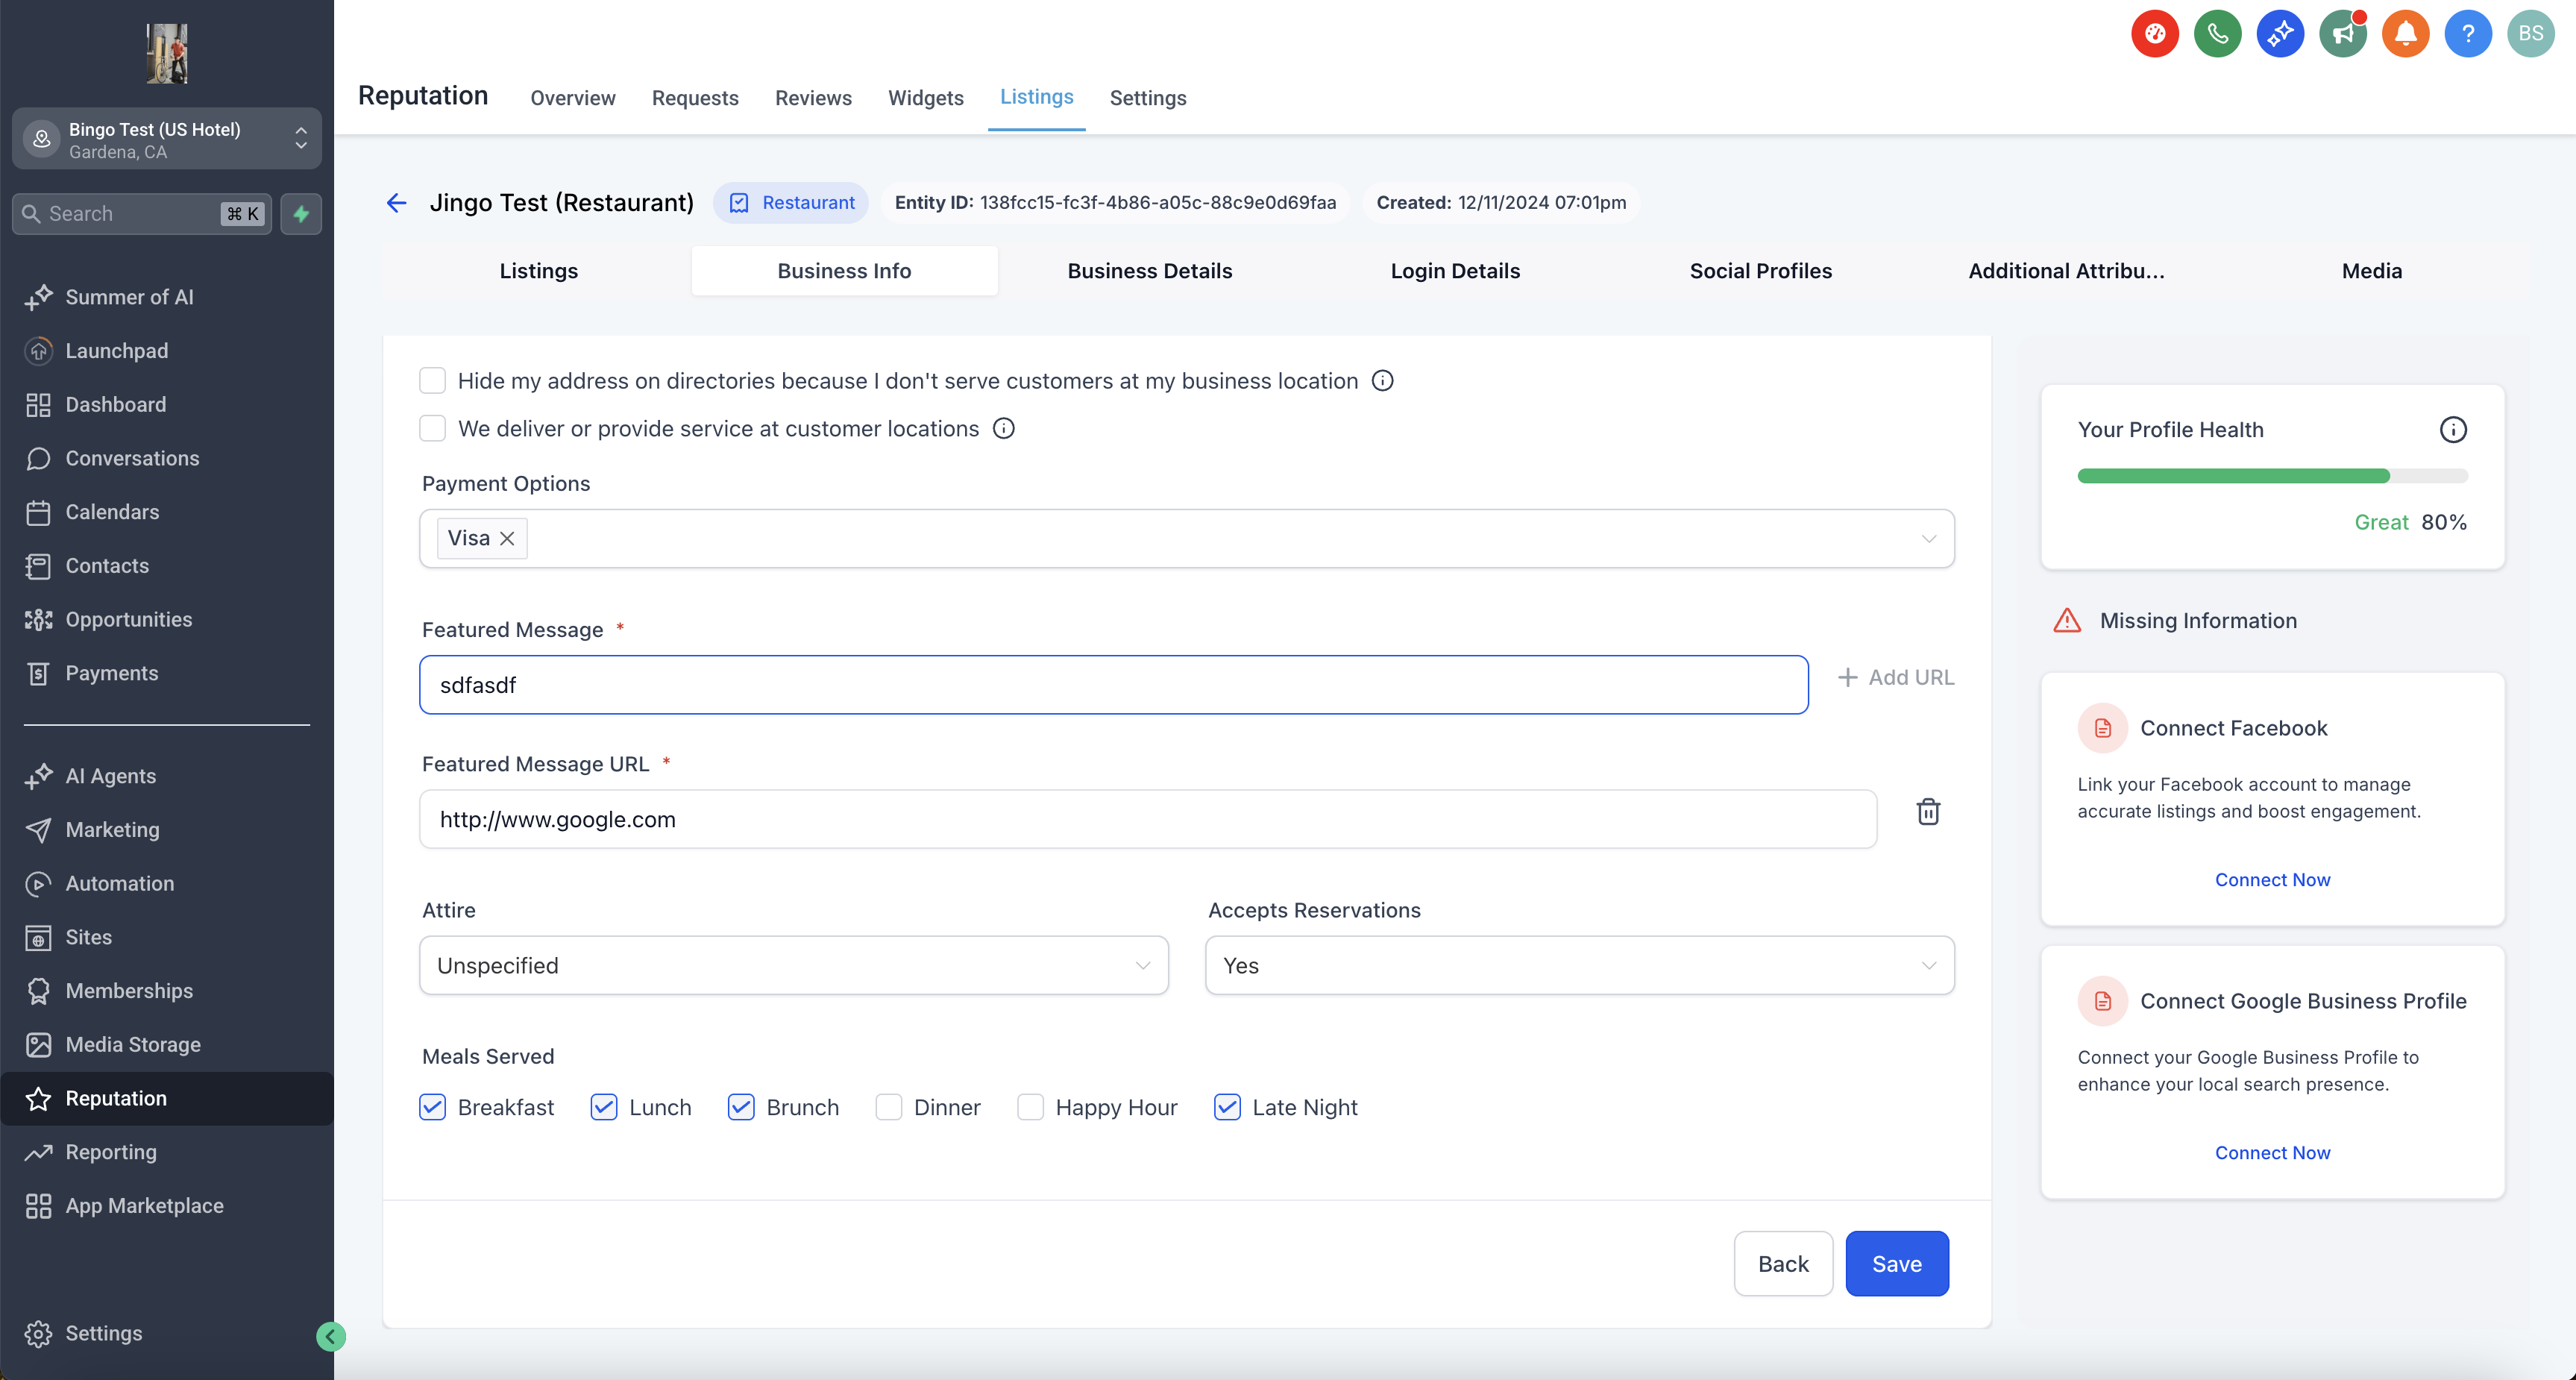
- Select an attire option from the list.
- Toggle the Accepts Reservations setting and add a reservation link if needed.
- Choose all applicable Meals Served categories.
- Click Add Menu and name the menu (e.g., Lunch).
- Inside the menu, click Add Section and name the section (e.g., Appetizers).
- For each menu item, enter name, price, description, calories, allergens, spice level, and upload a photo.
- Reorder sections or items using drag and drop if available.
- Enter accepted Payment Options.
- Write a concise Featured Message for promotions or notices.
Step 5, Configure industry specific fields for HealthCare
- Open the HealthCare panel and choose Facility or Professional fields as appropriate.
- For a Professional, enter NPI, first and last name, and office or practice name.
- Upload a headshot and write a provider bio.
- Toggle Accepting New Patients and list Insurance Accepted.
- Add Education & Training details, degrees, and conditions treated.
- If applicable, specify Admitting Hospitals.
- For a Facility, enter facility name, departments or services, and operating hours.
- Provide contact information and location details.
- Enter accepted Payment Options.
- Add a Featured Message for access or notice information.
Step 6, Publish and distribute
- Click Save or Publish to commit all changes.
- Allow HighLevel to automatically send the enriched profile to supported publisher networks.
- Wait for the standard sync window for each publisher to reflect the updates.
07What it looks like in HighLevel
08Settings that matter
- Attire. Specifies the typical dress code expected at the venue.
- Accepts Reservations. Indicates whether customers can make reservations and allows a link to a reservation system.
- Meals Served. Lists the meal periods the restaurant provides, such as Breakfast or Dinner.
- Payment Options. Lists the payment methods accepted by the business.
- Featured Message. Shows a short promotional or informational note on the listing.
- NPI. Collects the National Provider Identifier for U.S. health professionals.
- Insurance Accepted. Lists health insurance plans the provider or facility accepts.
09Things to know before you rely on it
- The entity transformation cannot be reversed; a mistaken upgrade requires archiving the listing and creating a new one.
- Only listings with a supported Food or HealthCare category can see the upgrade prompt.
- Distribution to industry publishers varies by country and individual publisher sync schedules.
- Add on pricing may differ per account; contact your HighLevel representative for details.
10If something goes wrong
- Upgrade prompt did not appear. Confirm the listing category matches a supported Food or HealthCare type, ensure the address and phone are valid, then save and refresh the page.
11How it connects to the rest of HighLevel
- Explore all Reputation Management & Reviews features Reputation features
- View HighLevel pricing and plan options Pricing
- Start a 30 day trial of HighLevel Free trial
- Learn how to customize review request messages Customize review requests
- Set up automated listings performance reports Performance reports
Michael's take

In my experience, the Add Ons can help a small restaurant or clinic reach diners or patients through platforms like OpenTable and WebMD.
Don’t forget that once you change the entity type you can’t revert it.