
01Who this is for
- Users who manage subaccounts can set up a verified caller ID for outbound calls.
- Teams that place calls through LC Phone can use their own number to improve call recognition.
02Verified caller IDs, explained
The feature allows a subaccount to verify a personal phone number and use it as the caller ID for outgoing voice calls made through LC Phone. Verification is done by entering the number, receiving a call with a code, and confirming the code.
After verification, the number appears under the Verified Caller ID tab. The user then edits a Twilio number’s configuration, selects the option to use the verified number as the caller ID, chooses the verified number, and saves the change.
03How businesses use verified caller IDs
- Consulting firm. The firm verifies its main office line, then assigns that line as the caller ID for the Twilio numbers used by consultants. Outbound calls to clients display the familiar office number.
- Home services company. The company adds the business contact number, verifies it, and links it to the Twilio number used by field technicians. Calls from technicians show the company's contact number instead of a generic Twilio ID.
- Healthcare clinic. The clinic verifies its patient service number, selects it for the clinic’s Twilio outbound line, and ensures all reminder calls present the clinic’s own number.
04The numbers and rules that matter
- A limit of 10 verified caller IDs per subaccount is placed by default to avoid misuse.
- Due to local regulations on domestic calls in India, effective from August 1, 2024, calls placed from +91 caller ID to +91 destination will not work.
05Before you start
- You must be using LC Phone; personal Twilio accounts are not supported for verified caller ID.
- You need access to the subaccount where the verified caller ID will be created.
06How to set up and use verified caller IDs in HighLevel
Set up verified caller ID
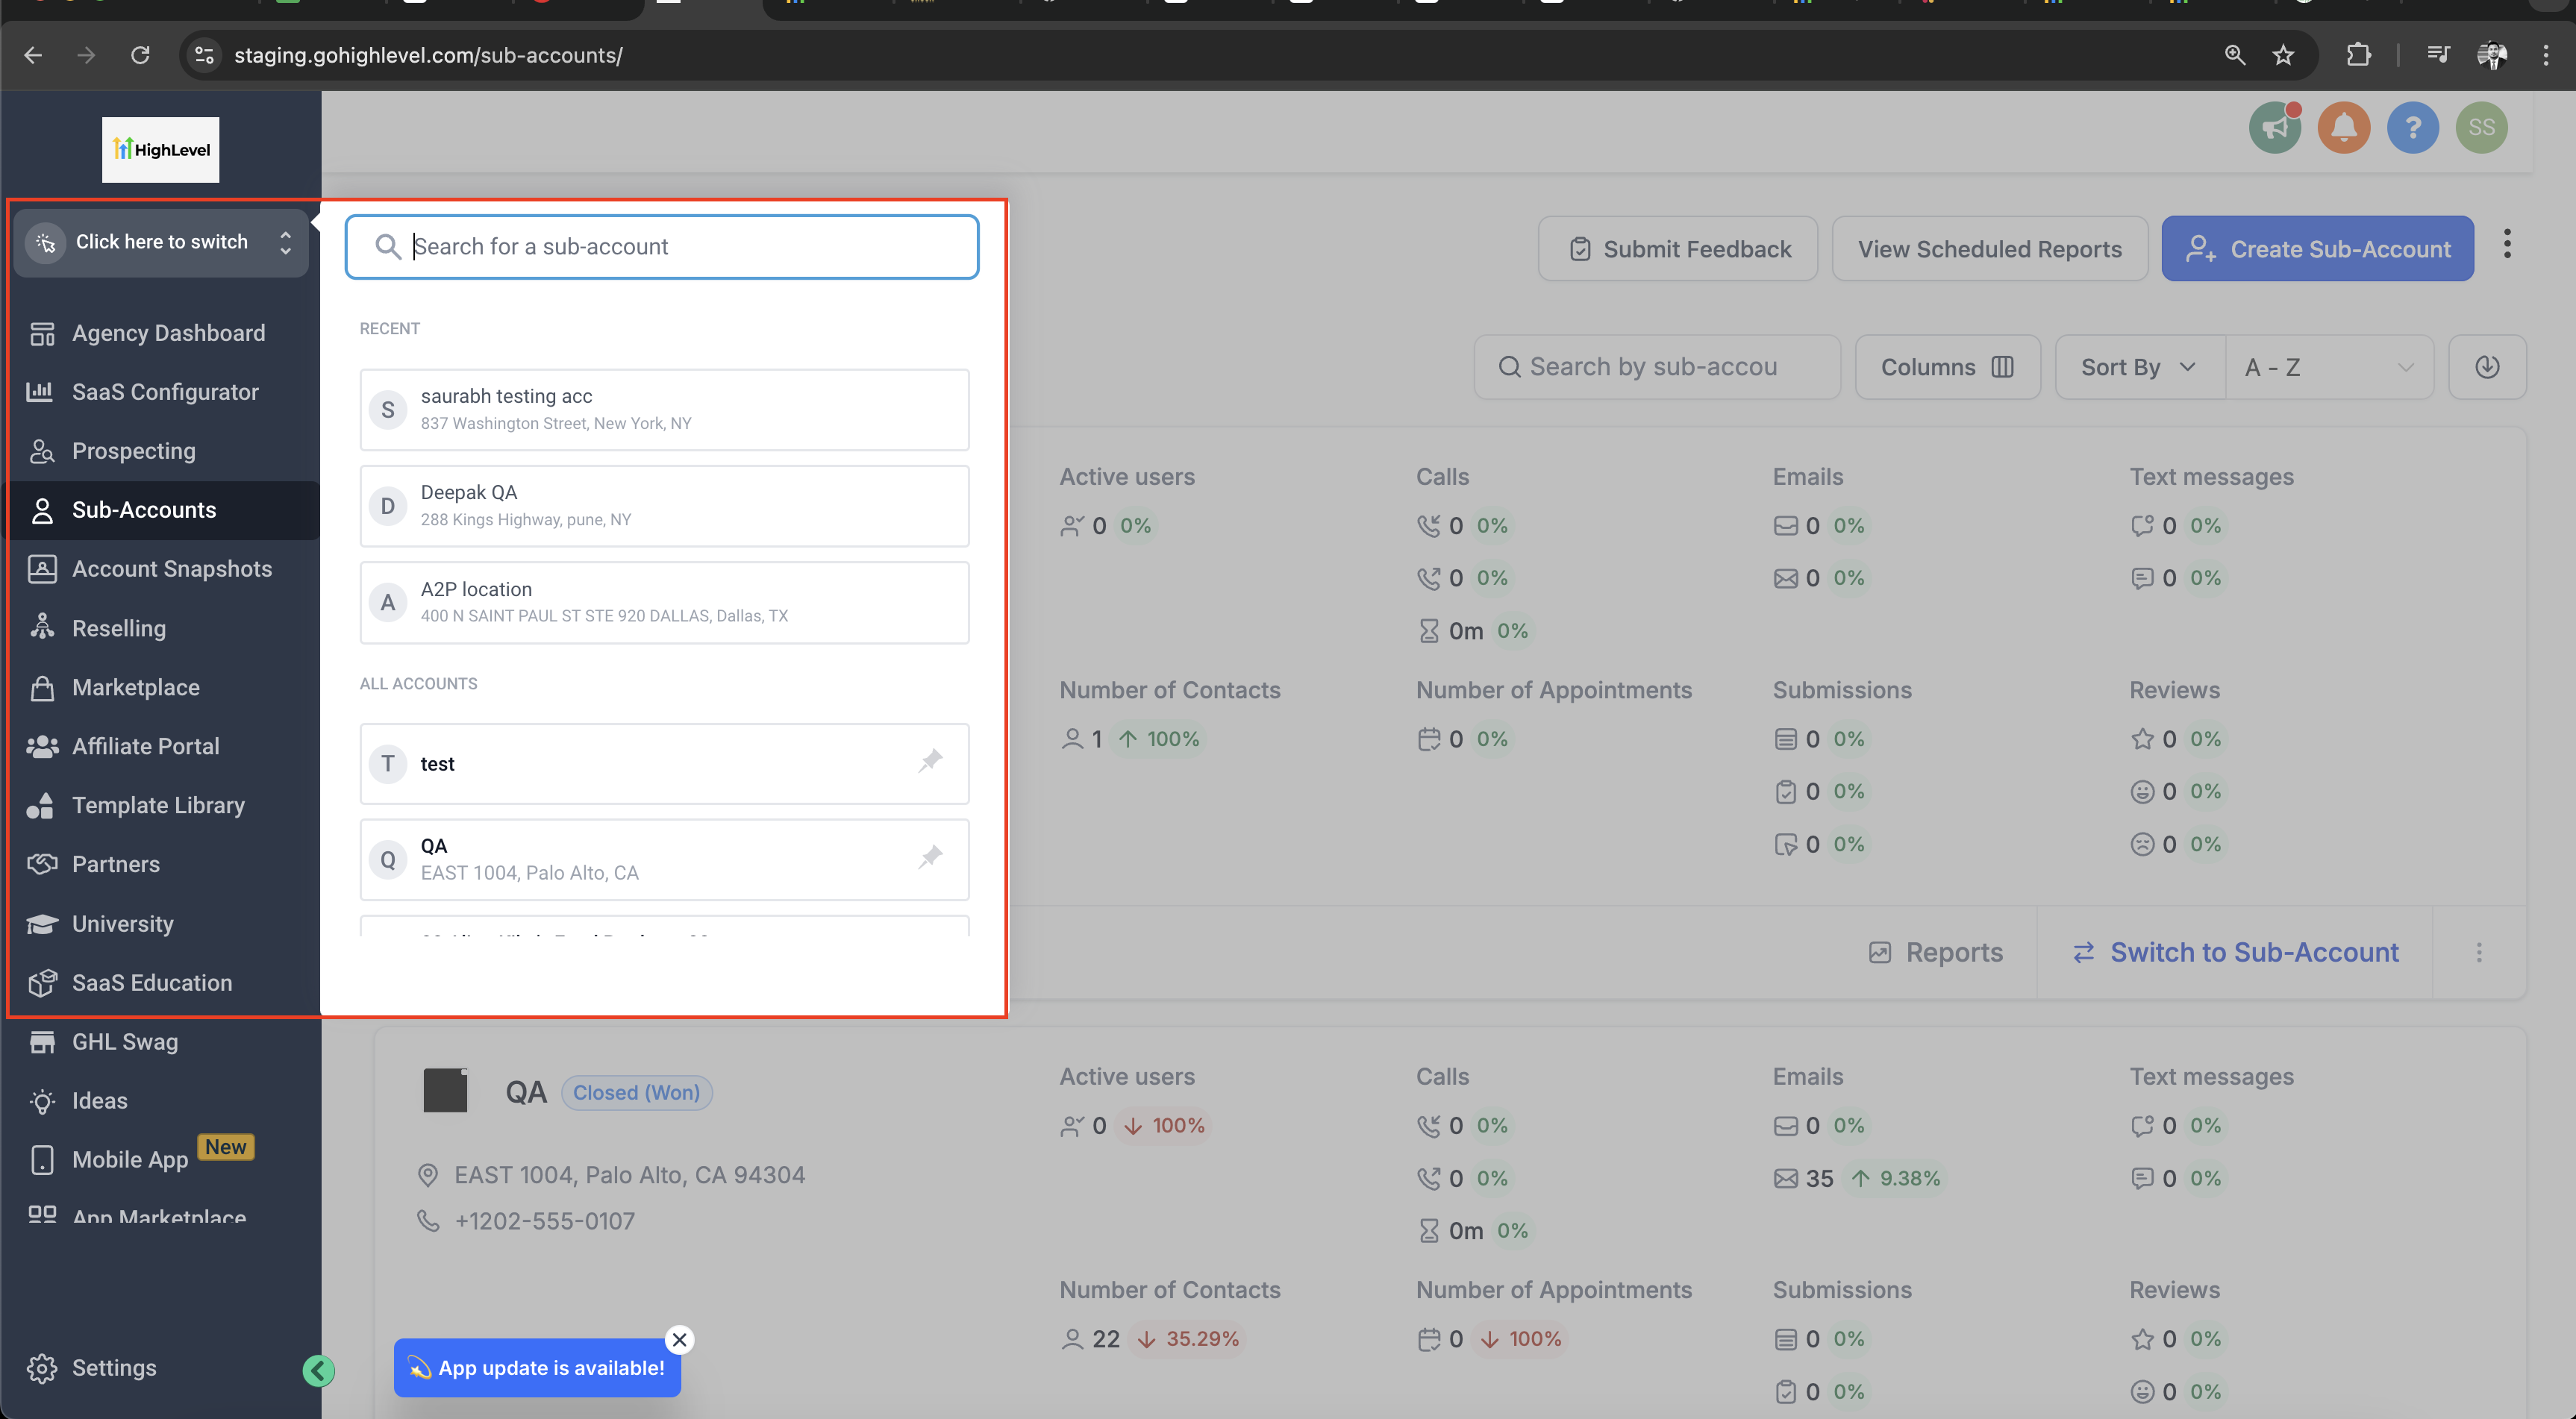
- Switch to the target subaccount using the top left switch option and select it.
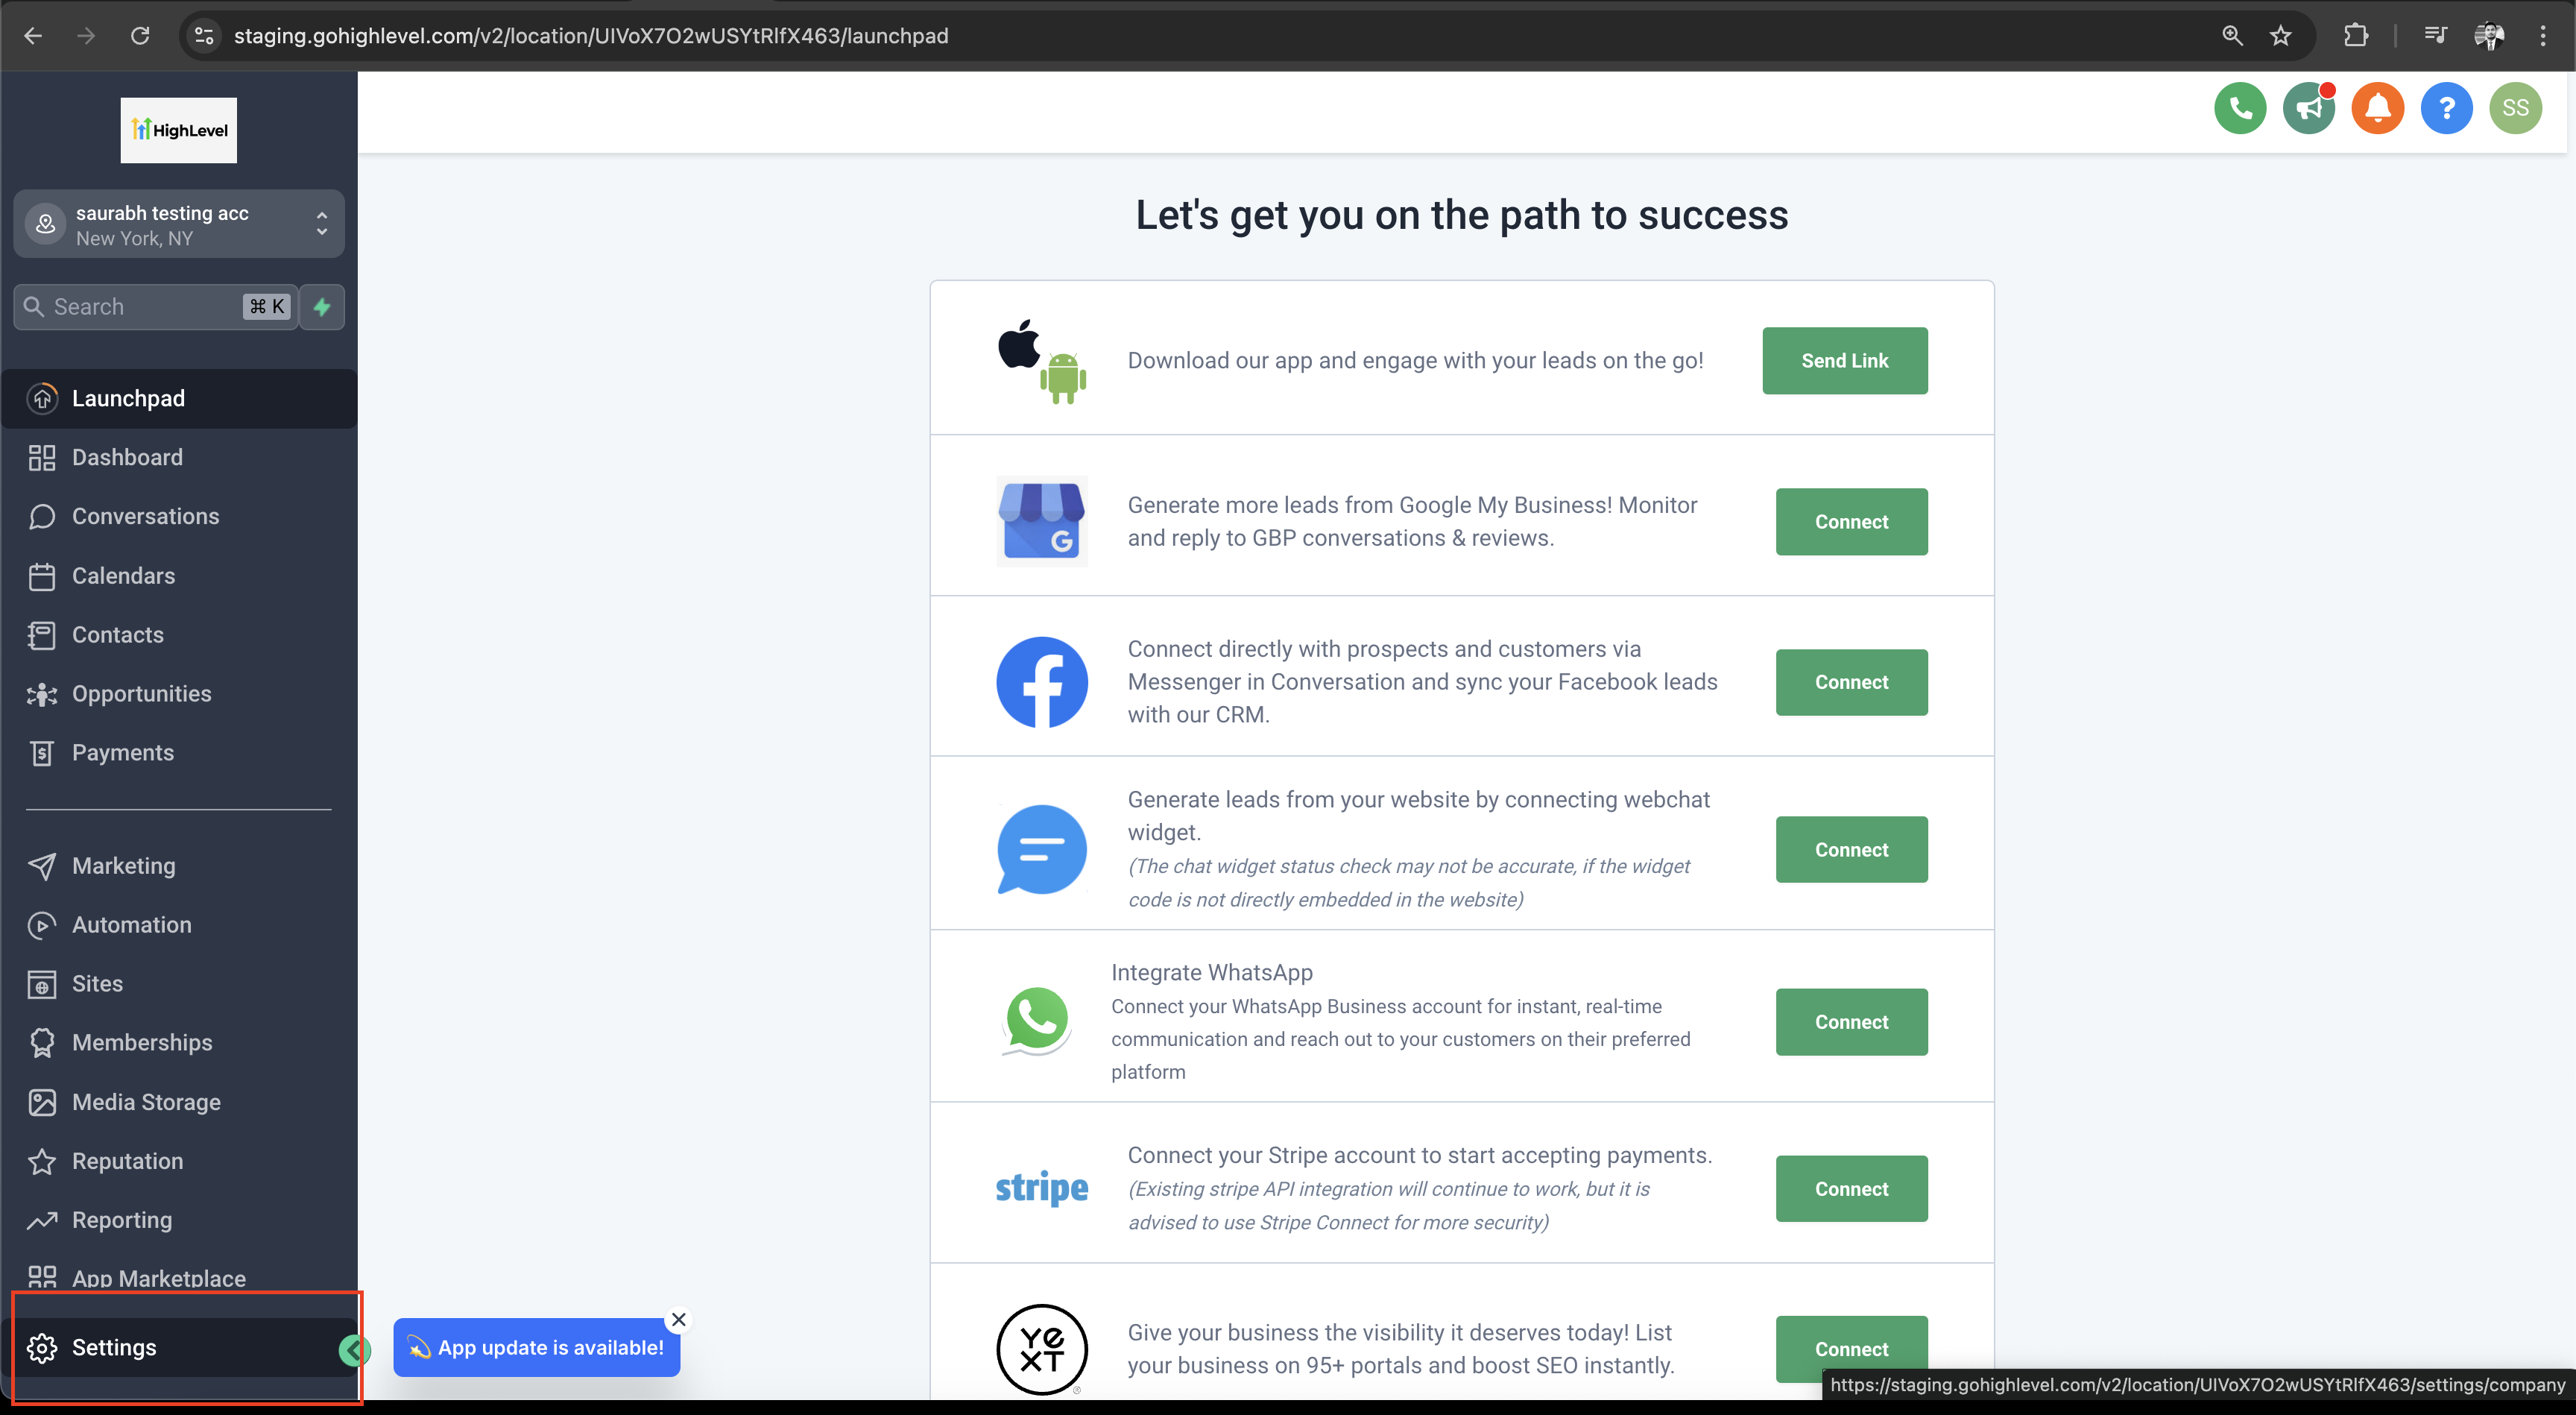
- Open the Settings menu within that subaccount.
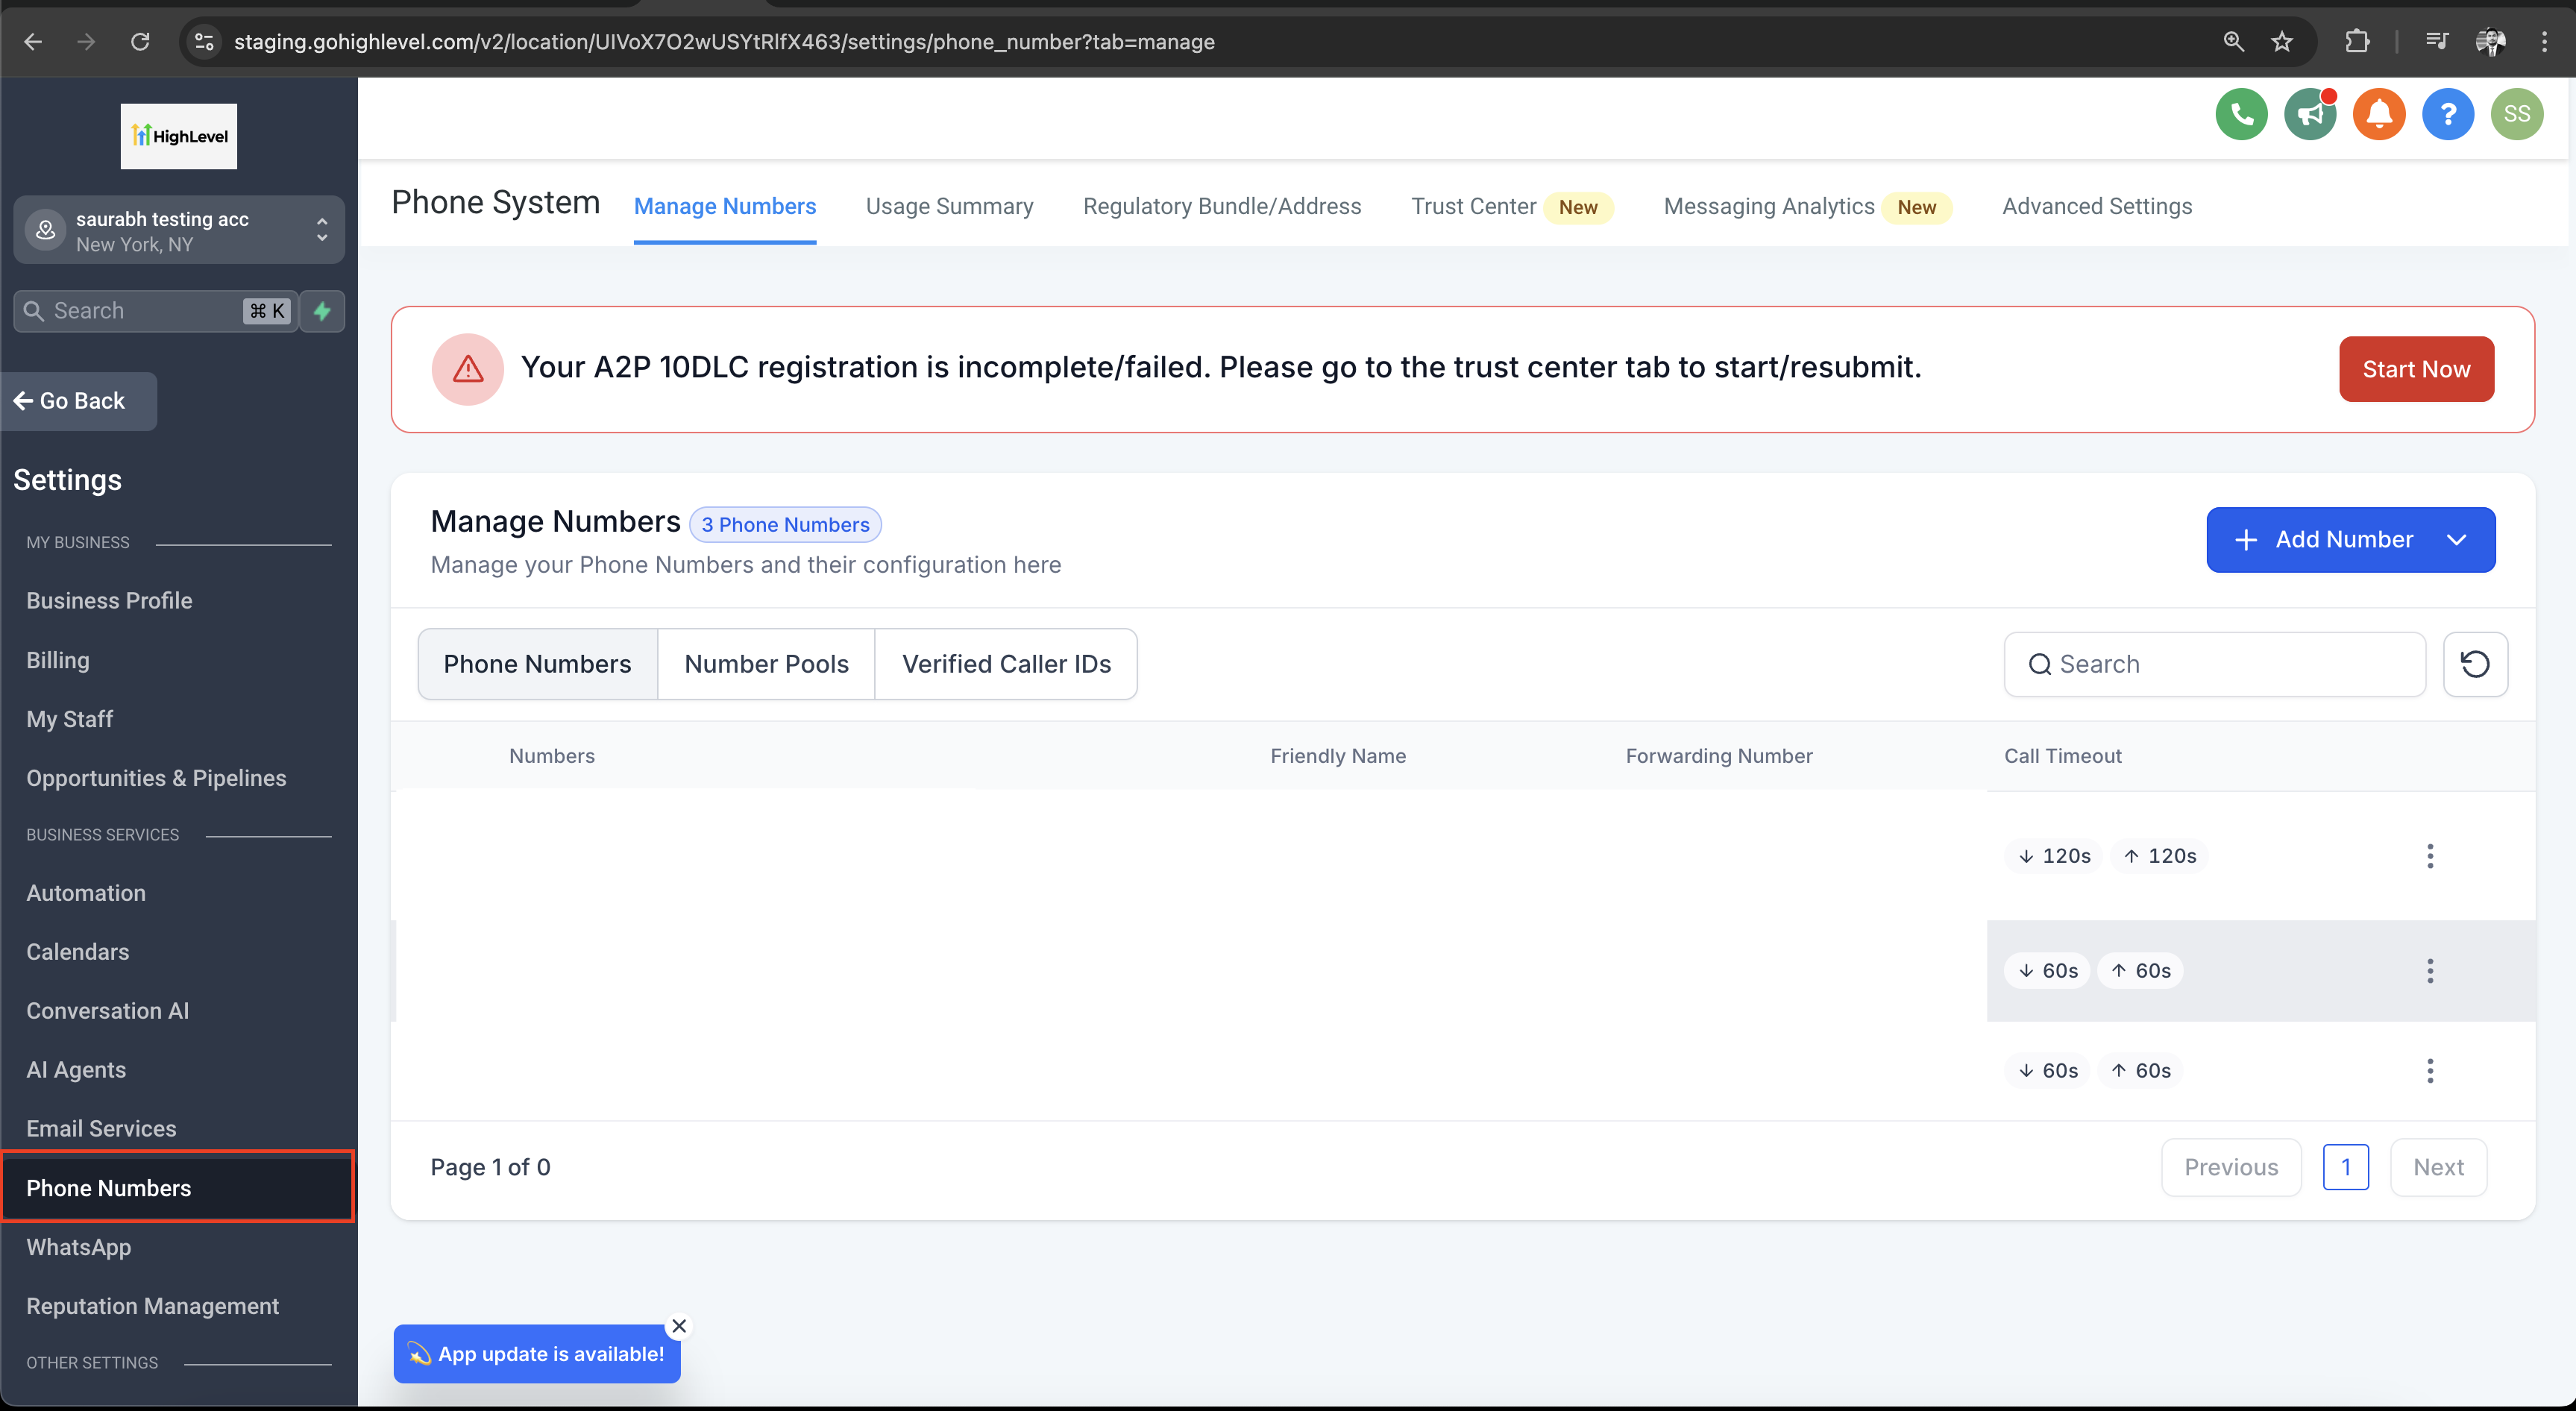
- Navigate to the Phone Numbers section.
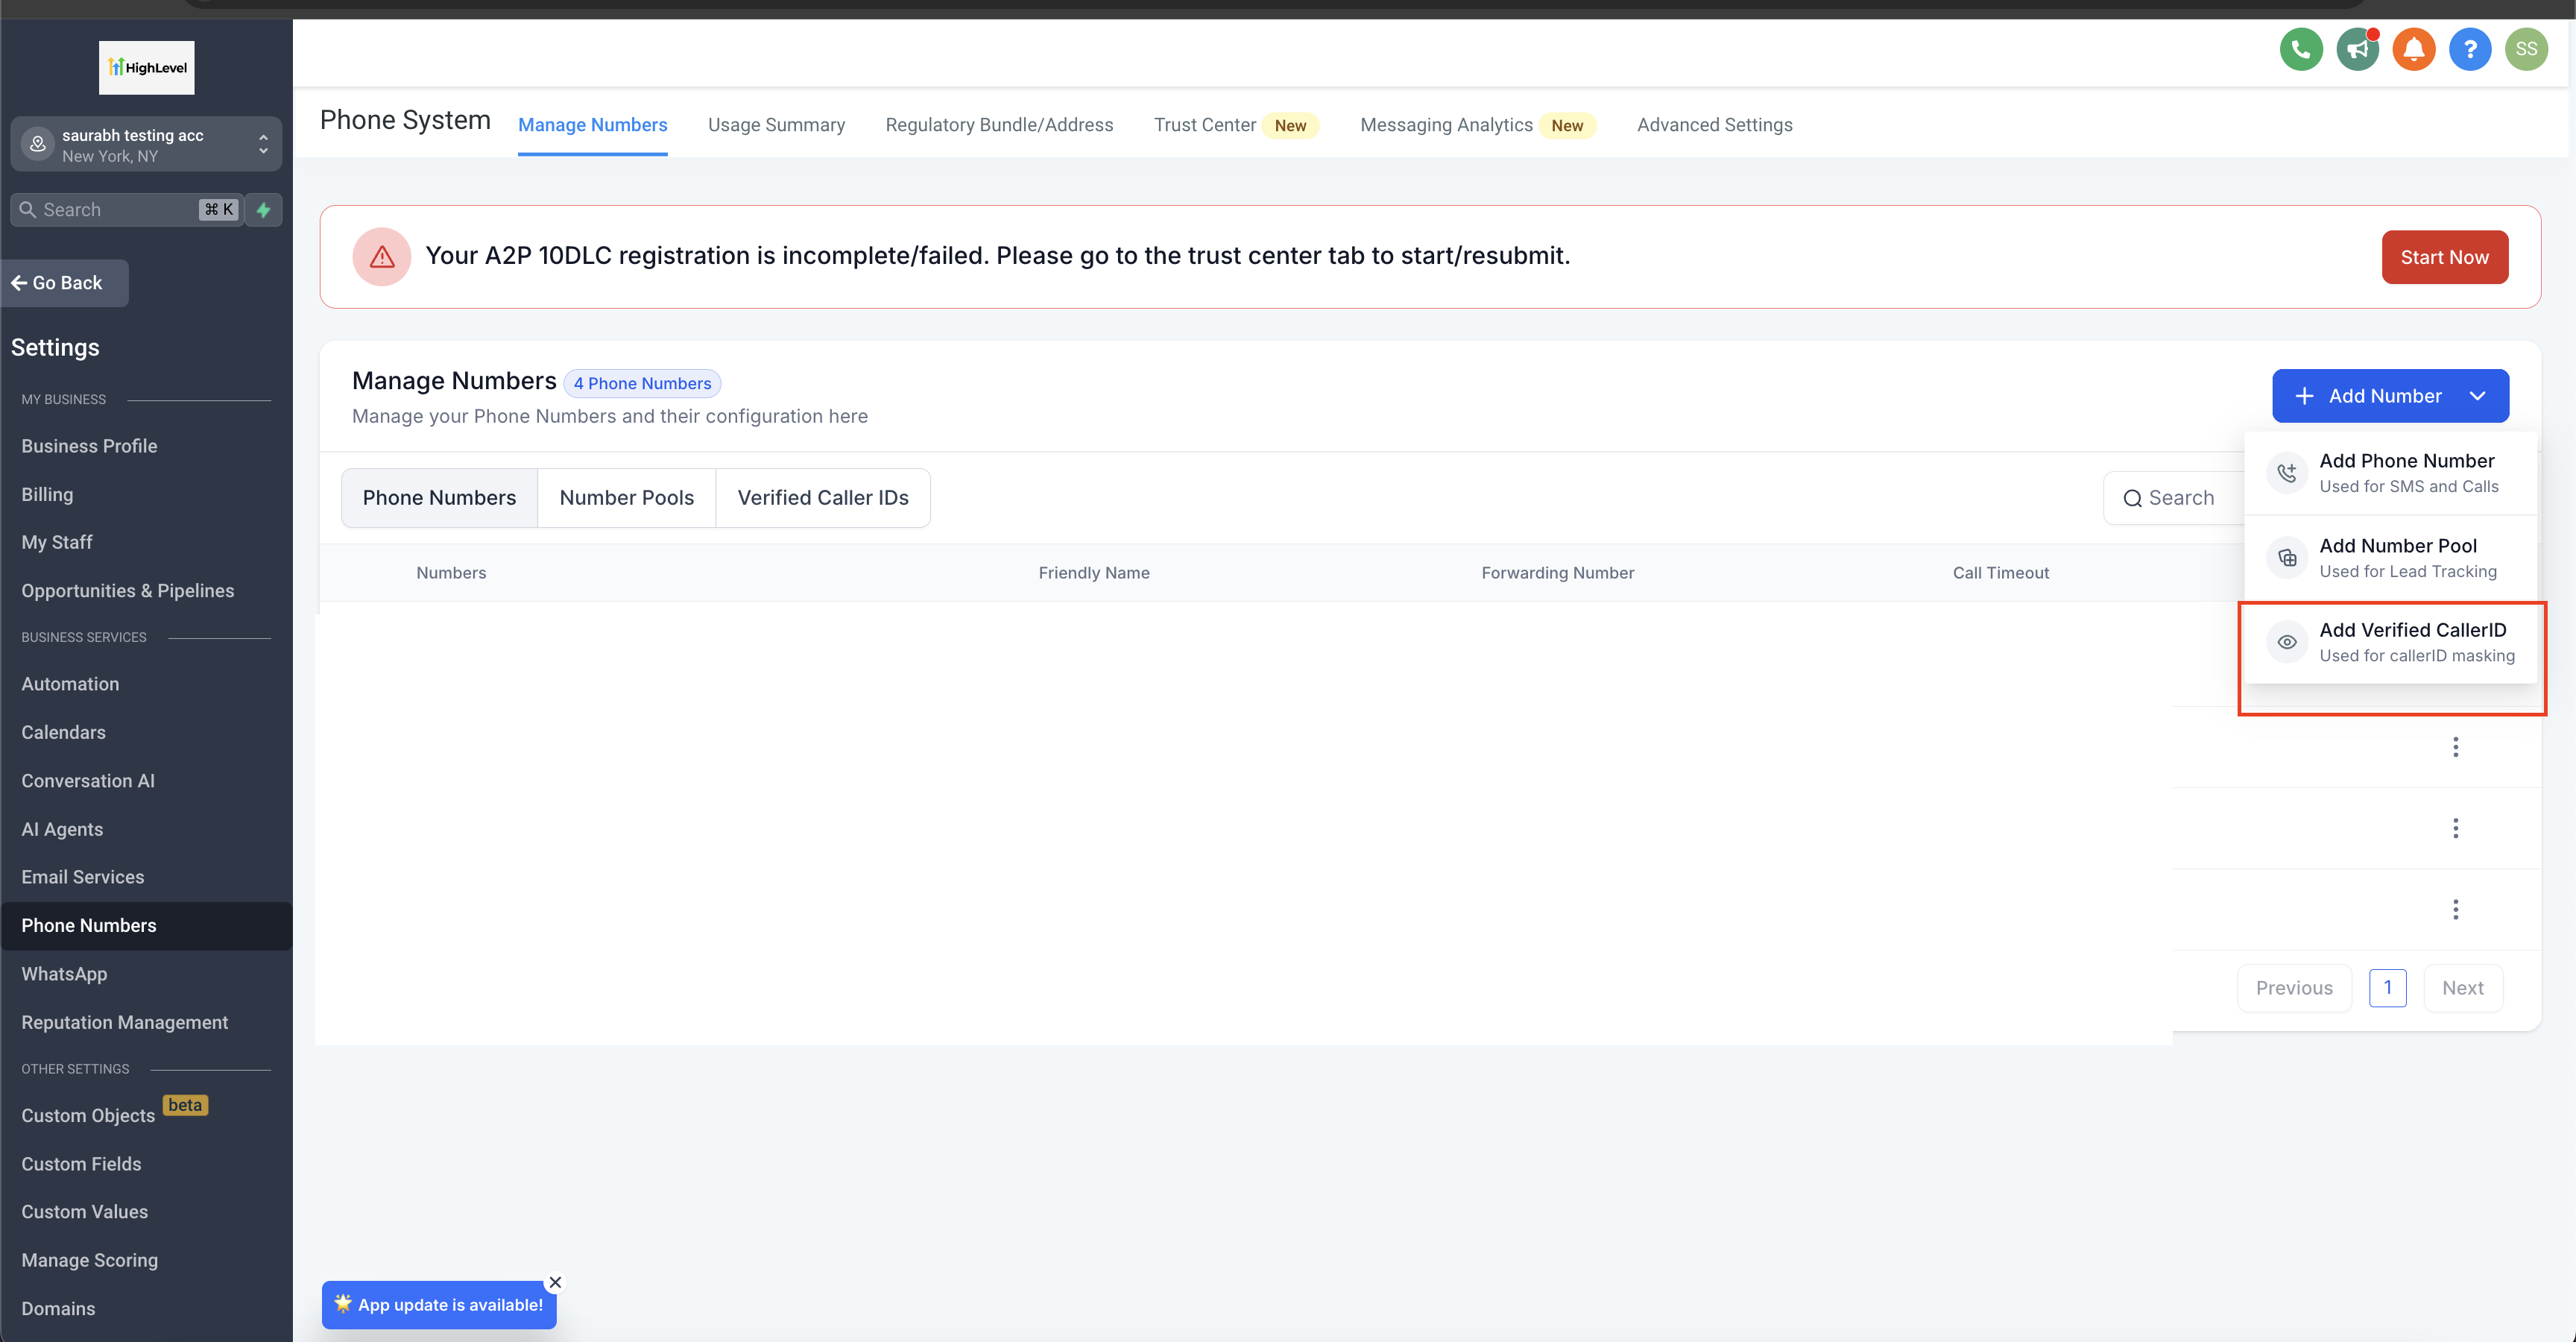
- Click Add Verified Caller ID under the Add Number tab.
- Enter your phone number, click Verify Number, answer the verification call, and enter the code.
- In the Phone Number tab, open the three dot menu for the desired Twilio number, choose Edit Configuration, enable Use your Verified Number as caller ID, select the verified number, and save.
07What it looks like in HighLevel
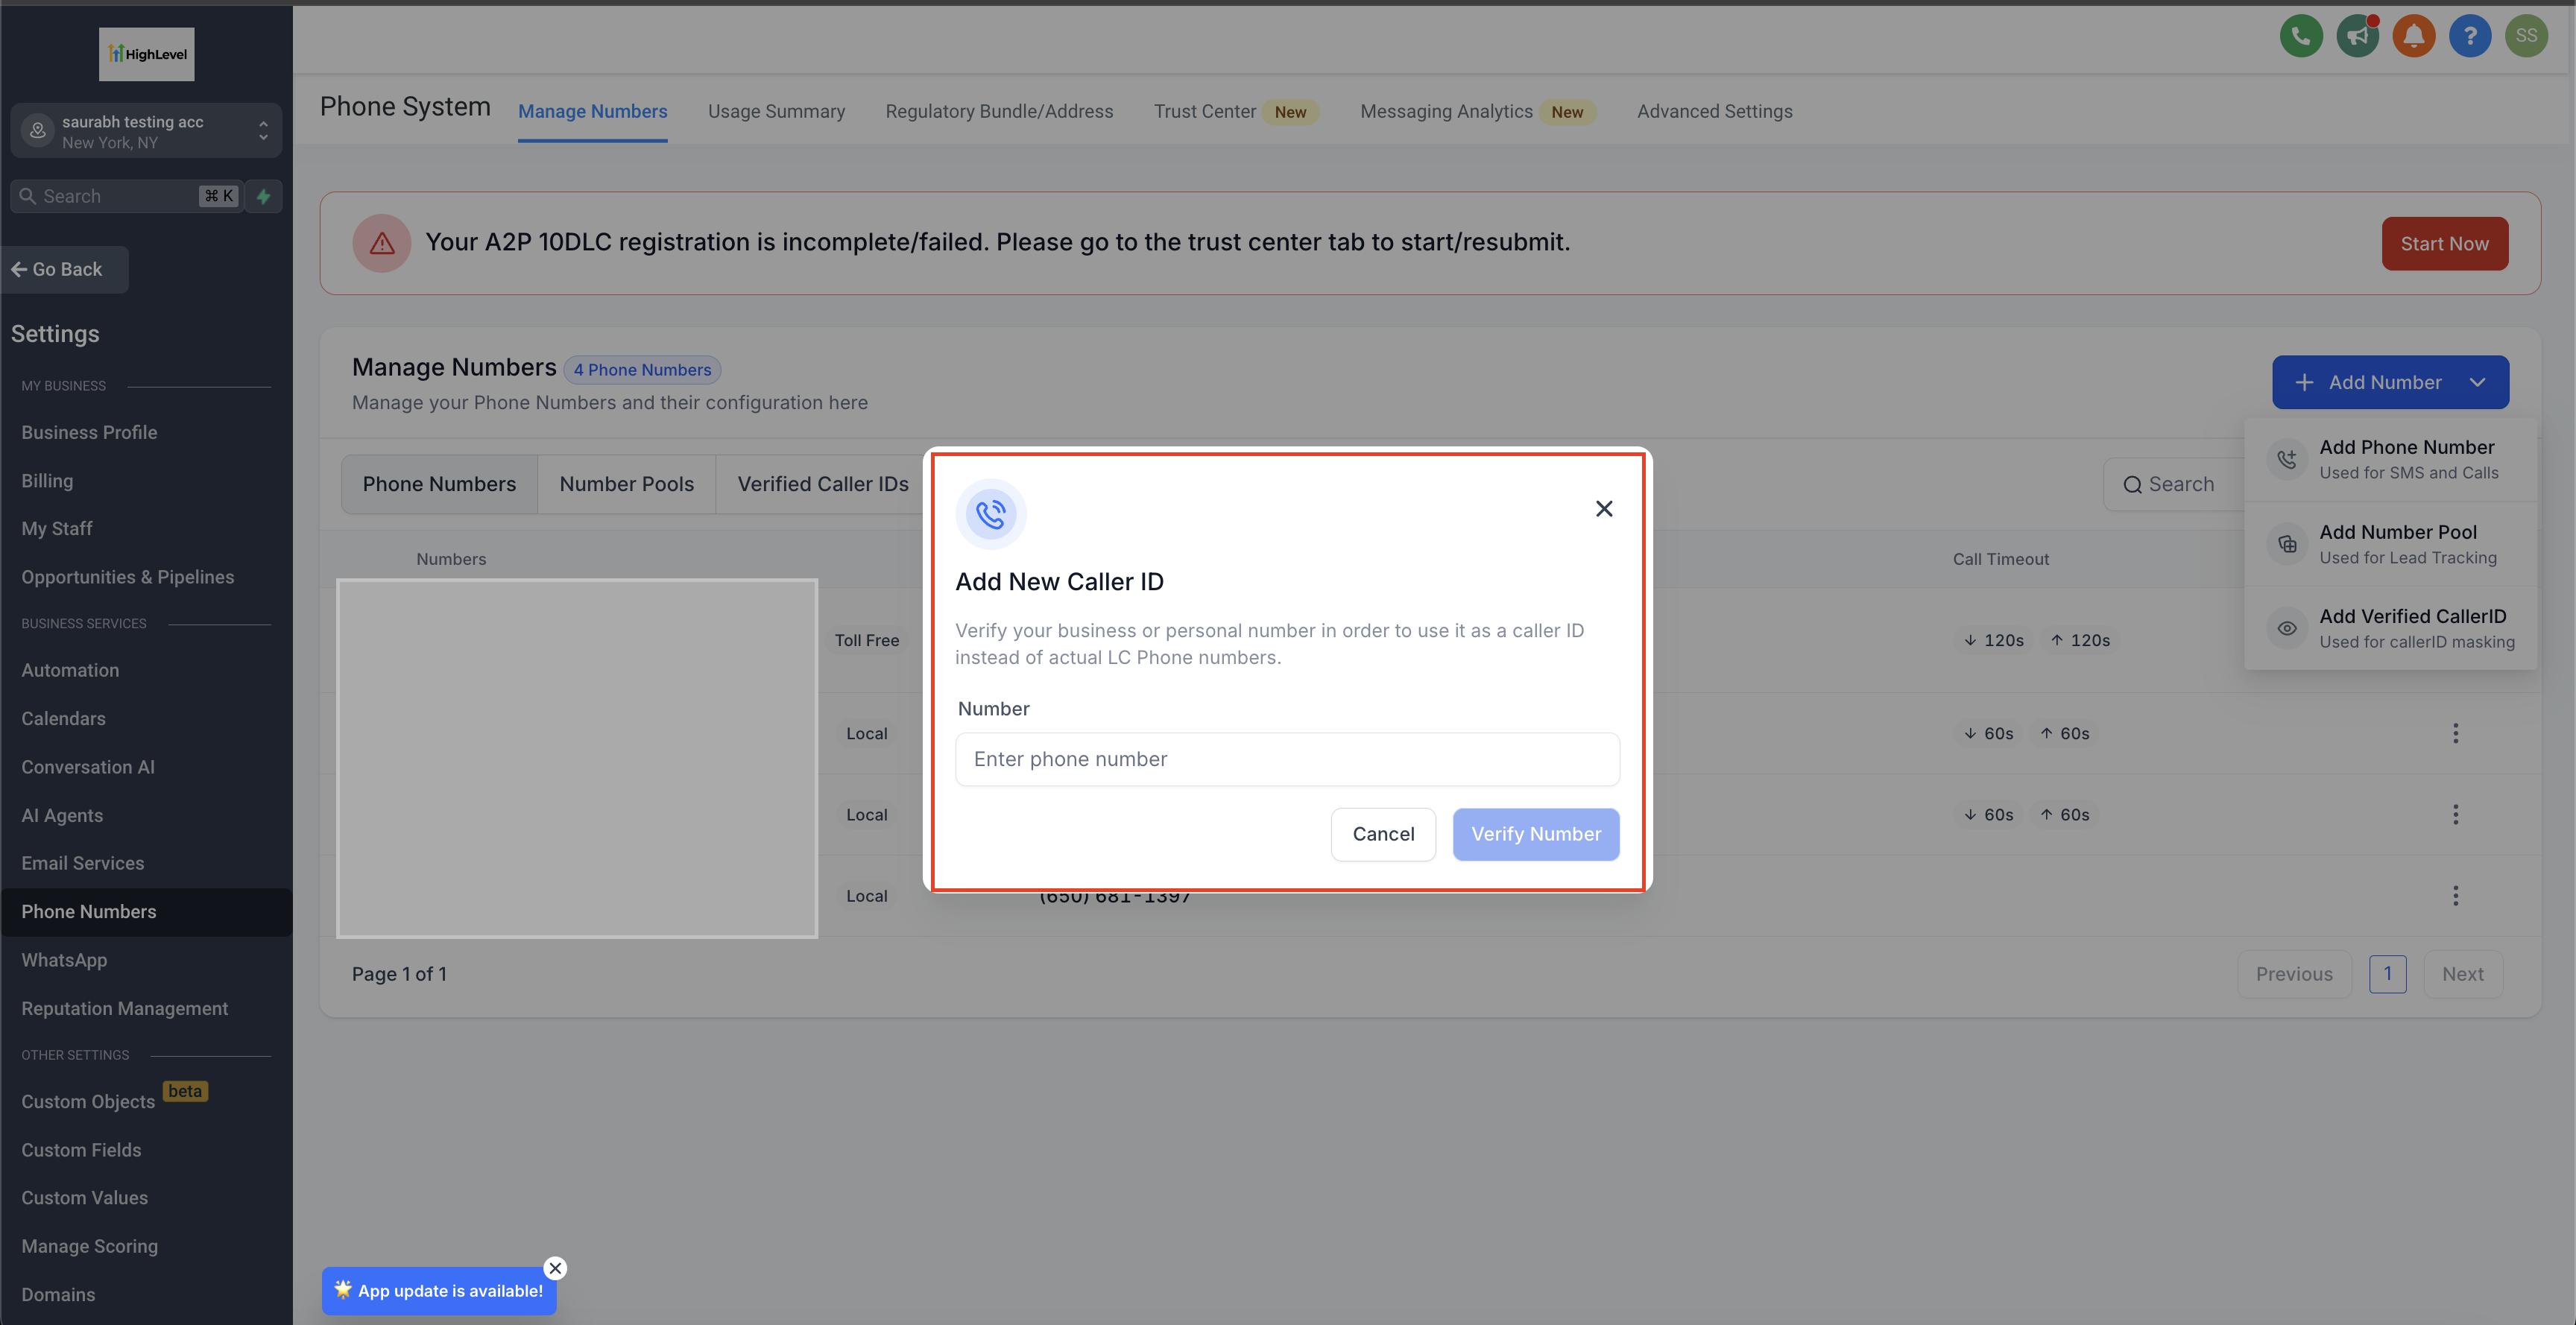
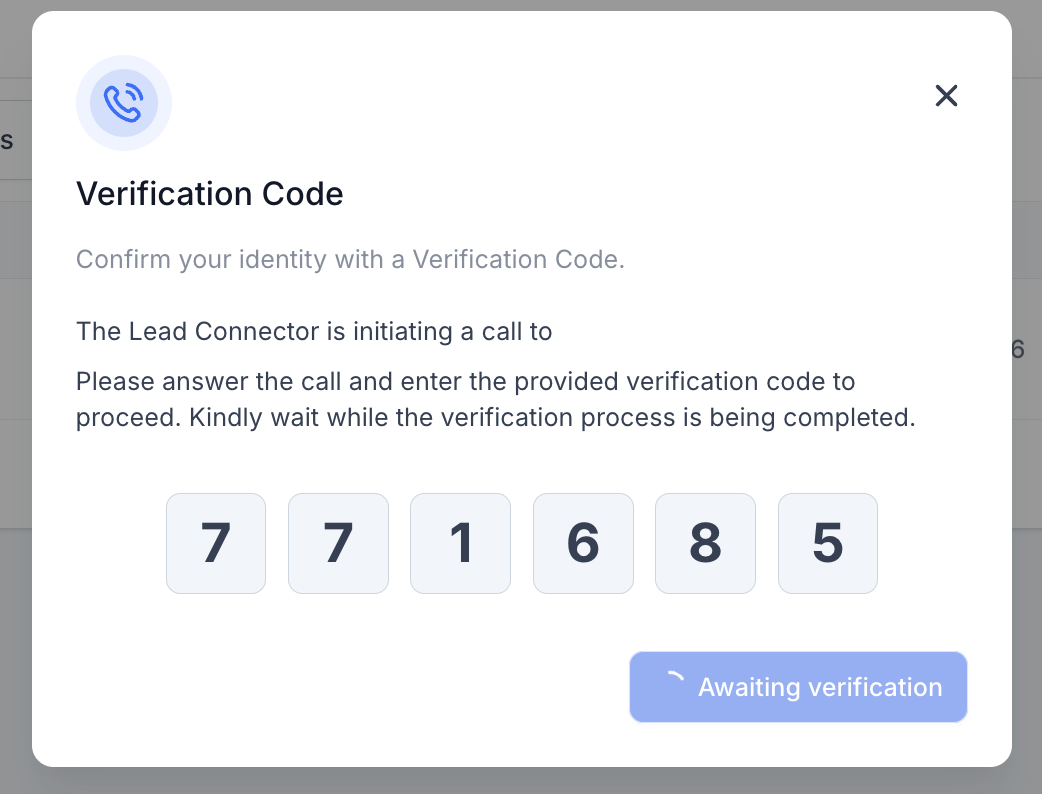
08Settings that matter
- Use your Verified Number as callerID for outbound calls. Controls whether outbound calls from the selected Twilio number display the previously verified personal number as the caller ID.
09Things to know before you rely on it
- A default limit of 10 verified caller IDs per subaccount is applied; request an increase through support if needed.
- Calls from a +91 caller ID to a +91 destination in India will not work after August 1, 2024 due to local regulations.
10How it connects to the rest of HighLevel
- HighLevel phone system pricing and rebilling guide Pricing guide
- HighLevel’s LC Phone: built in SMS and calling for agencies LC Phone overview
- HighLevel guide to creating and managing regulatory and address bundles Regulatory bundles
Michael's take

Michael ReimerFounder of CRM Pros, HighLevel Commander and Certified Admin
Verified caller IDs are useful but not essential for every business.
Skip it if you don’t need to display a custom number on outbound calls.
Get More InformationOpens on HighLevelPublished November 2, 2026 · Updated November 16, 2026