
01Who this is for
- Founders moving from another ecommerce platform who need past sales reflected in HighLevel dashboards.
- Finance managers of subscription businesses who want to backdate payments for accurate reporting.
- Operations teams that require a single source of truth for all historical revenue data.
02Transactions and orders import, explained
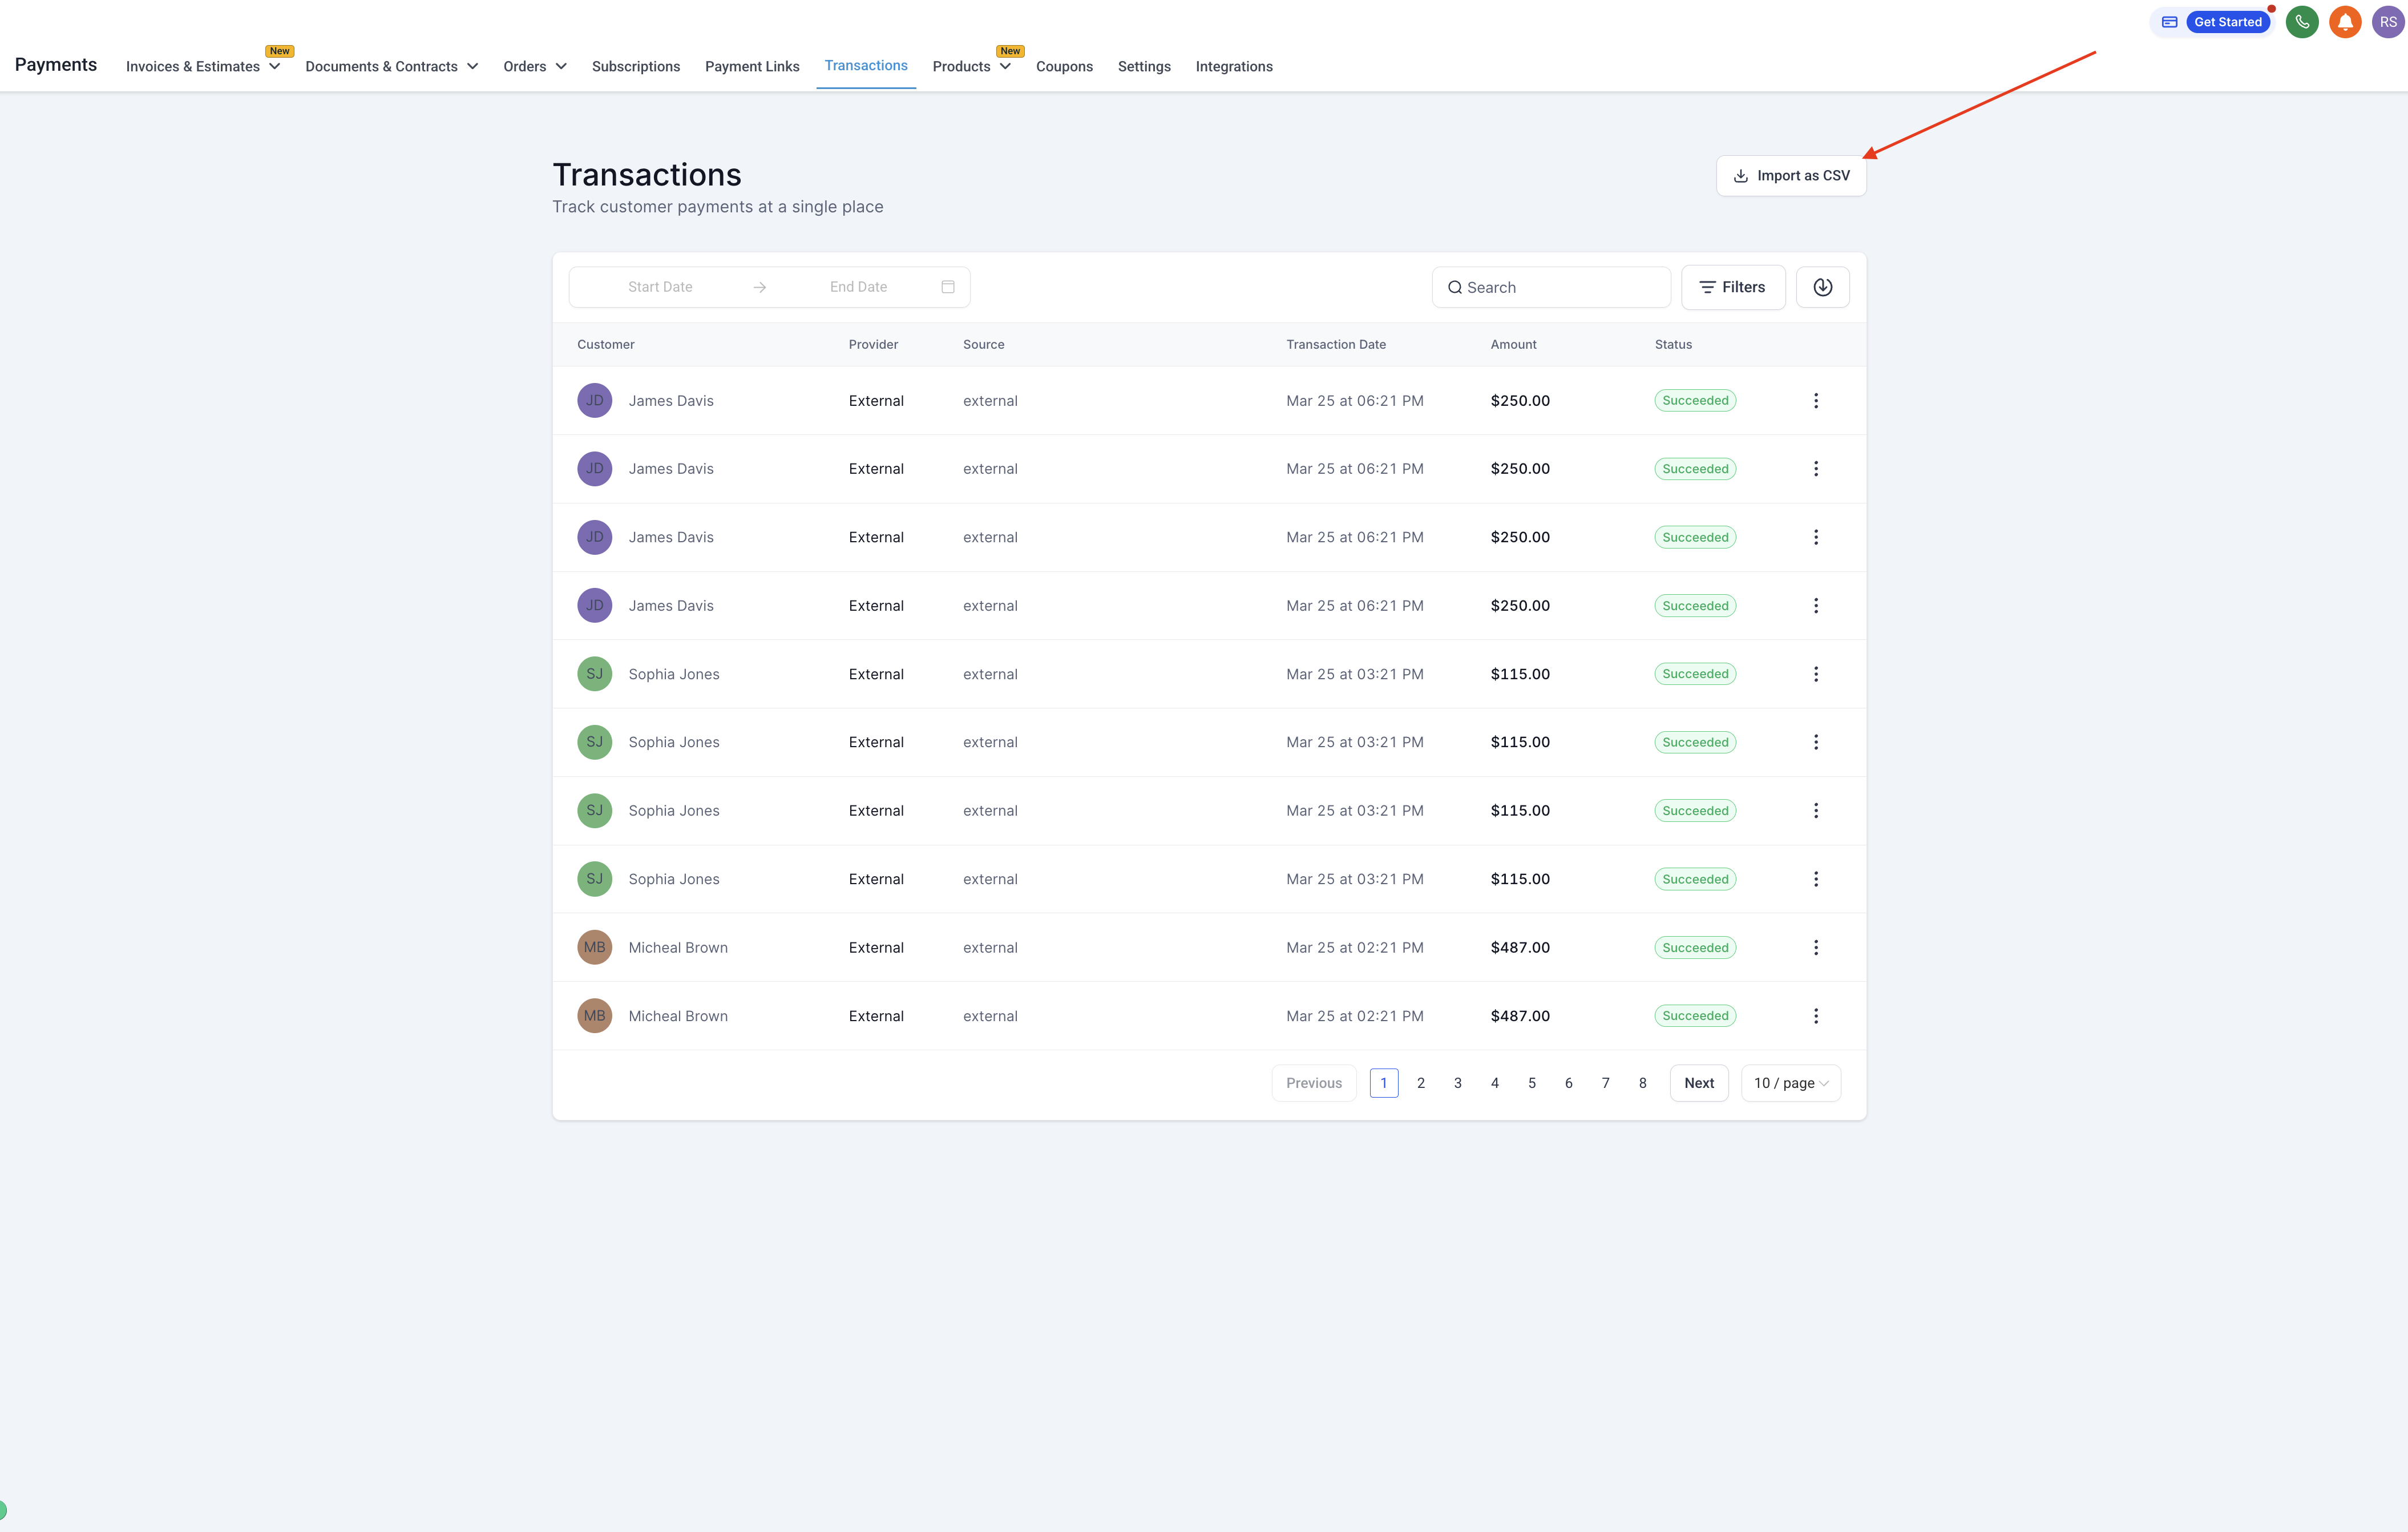
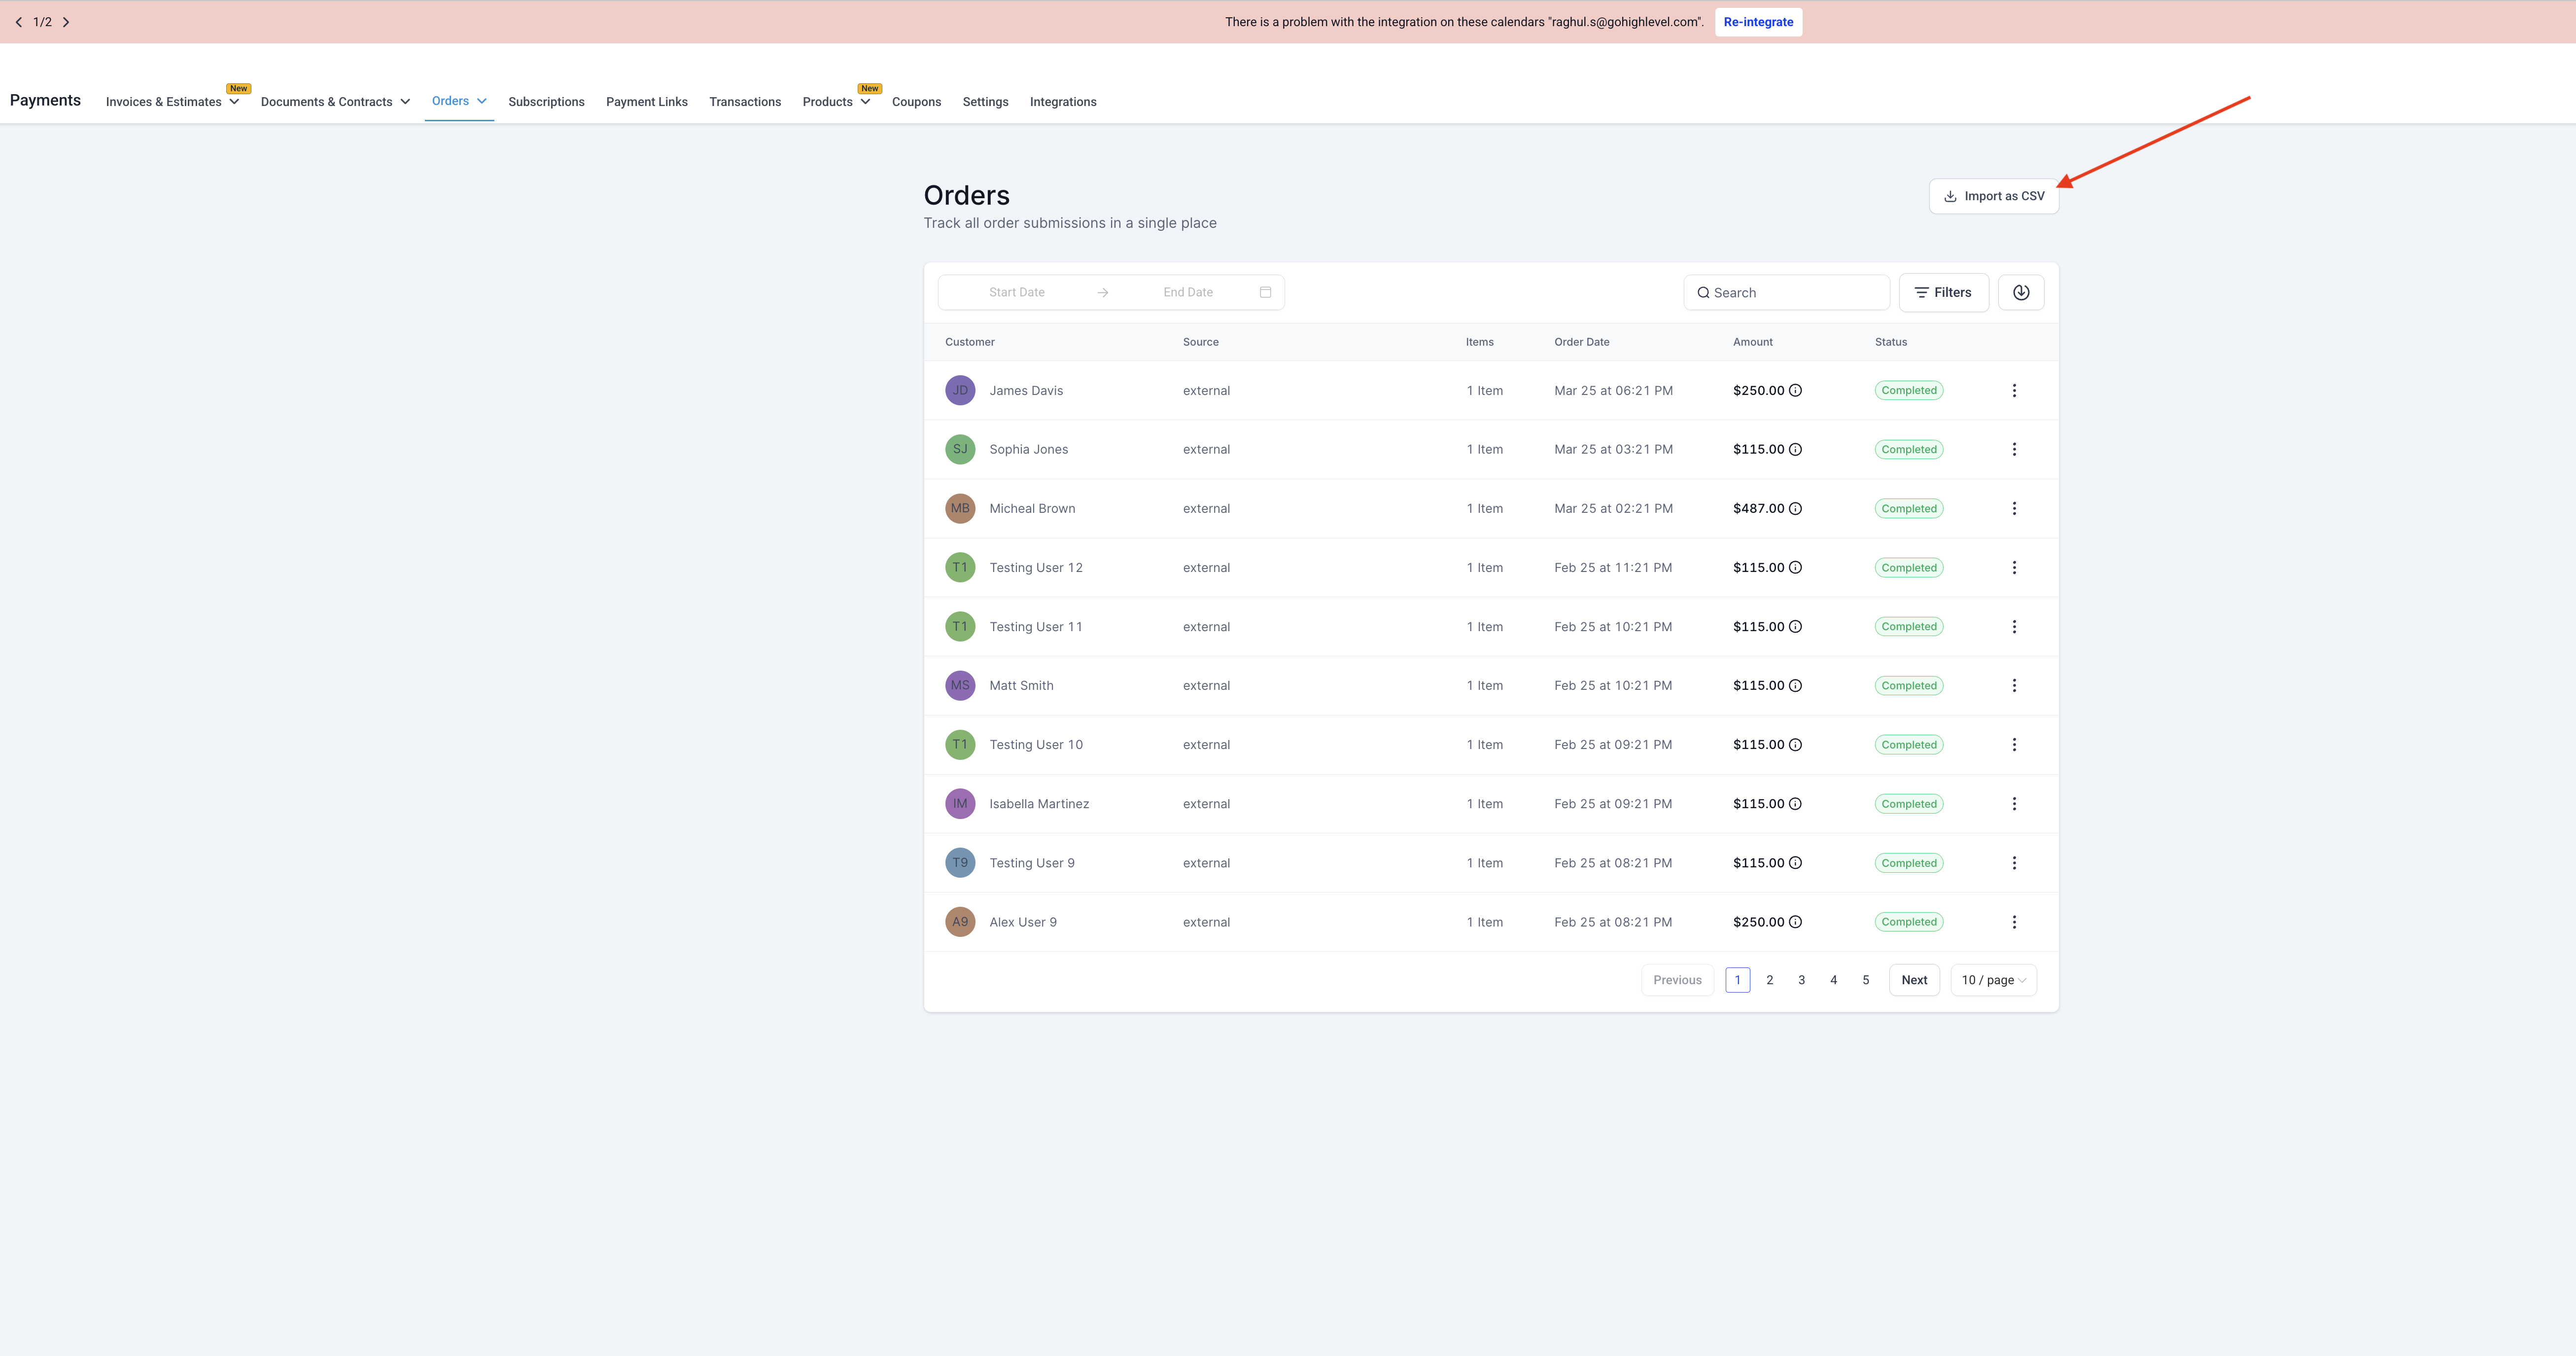
The import feature is located under the Payments area of a subaccount. It accepts CSV files that follow a strict column layout, including customer identifiers and dates. When a file is uploaded, HighLevel shows a preview screen that highlights any format problems before the data is saved.
For transactions, the import adds payment entries without creating linked order items. For orders, each row generates an order record and automatically creates a matching transaction record. Both types of records feed revenue metrics and appear on the Revenue Dashboard as soon as the import is confirmed.
03How businesses use transactions and orders import
- Ecommerce store. Export past sales from the previous platform as a CSV that matches the sample format. Upload the file through Payments > Orders, validate the preview, and confirm to generate orders and corresponding transactions in HighLevel.
- SaaS subscription business. Download a list of historic subscription payments, format it as the transaction CSV, and import via Payments > Transactions. The back dated execution dates let revenue reports reflect the original billing timeline.
- Consulting firm with event ticket sales. Create a CSV of ticket purchases, including client contact details. Import the file through Payments > Orders to create order records, automatically matching contacts and updating the firm’s revenue dashboards.
04How to set up and use transactions and orders import in HighLevel
Import transactions
- Open the Payments > Transactions section.
- Select the Import button.
- Download the provided sample CSV and arrange your data to match its columns.
- Upload your prepared CSV file and examine the preview for any validation messages.
- Approve the import to add the transactions to the account.
Import orders
- Navigate to Payments > Orders.
- Click Import and choose a correctly formatted CSV file.
- Review the preview screen to confirm the data passes validation.
- Confirm the import, which creates order records and linked transactions.
05What it looks like in HighLevel
06Things to know before you rely on it
- Only successful, completed transactions and orders can be imported; refunds or voided entries are not supported.
- Field names in the CSV must match the exact names defined in the sample file.
- Customer information is matched by email or phone before creating new contacts.
07If something goes wrong
- CSV validation errors appear in the preview.. Edit the CSV to correct the highlighted issues, ensuring all required fields and exact column names are present, then re upload.
08How it connects to the rest of HighLevel
- Export transactions as CSV for reference Export transactions
- Export orders as CSV for reference Export orders
- All Payments features overview Payments features
Michael's take

Importing historical transactions and orders can give a small business the financial visibility it needs without rebuilding every record manually. One mistake to avoid is uploading a CSV that doesn’t follow the exact field names. The import will fail.