
01Chart of accounts, explained
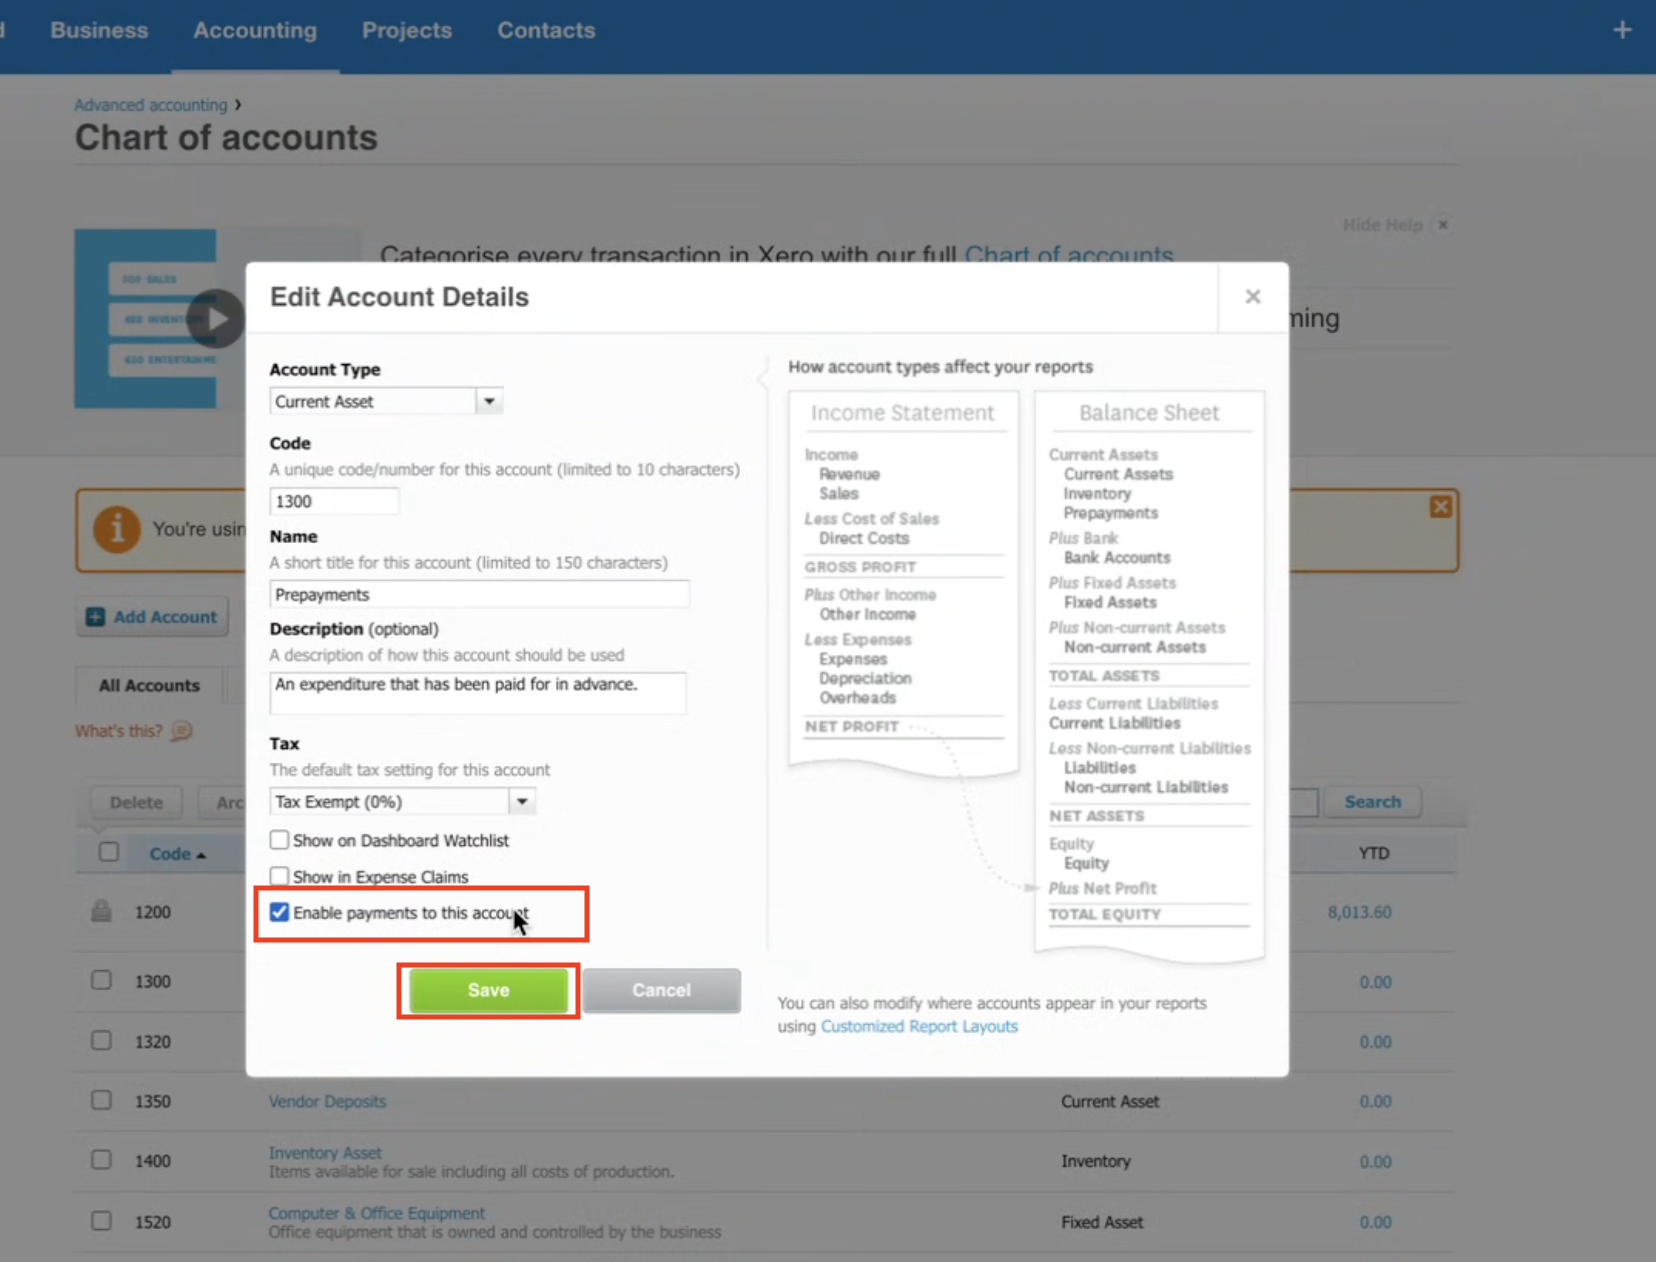
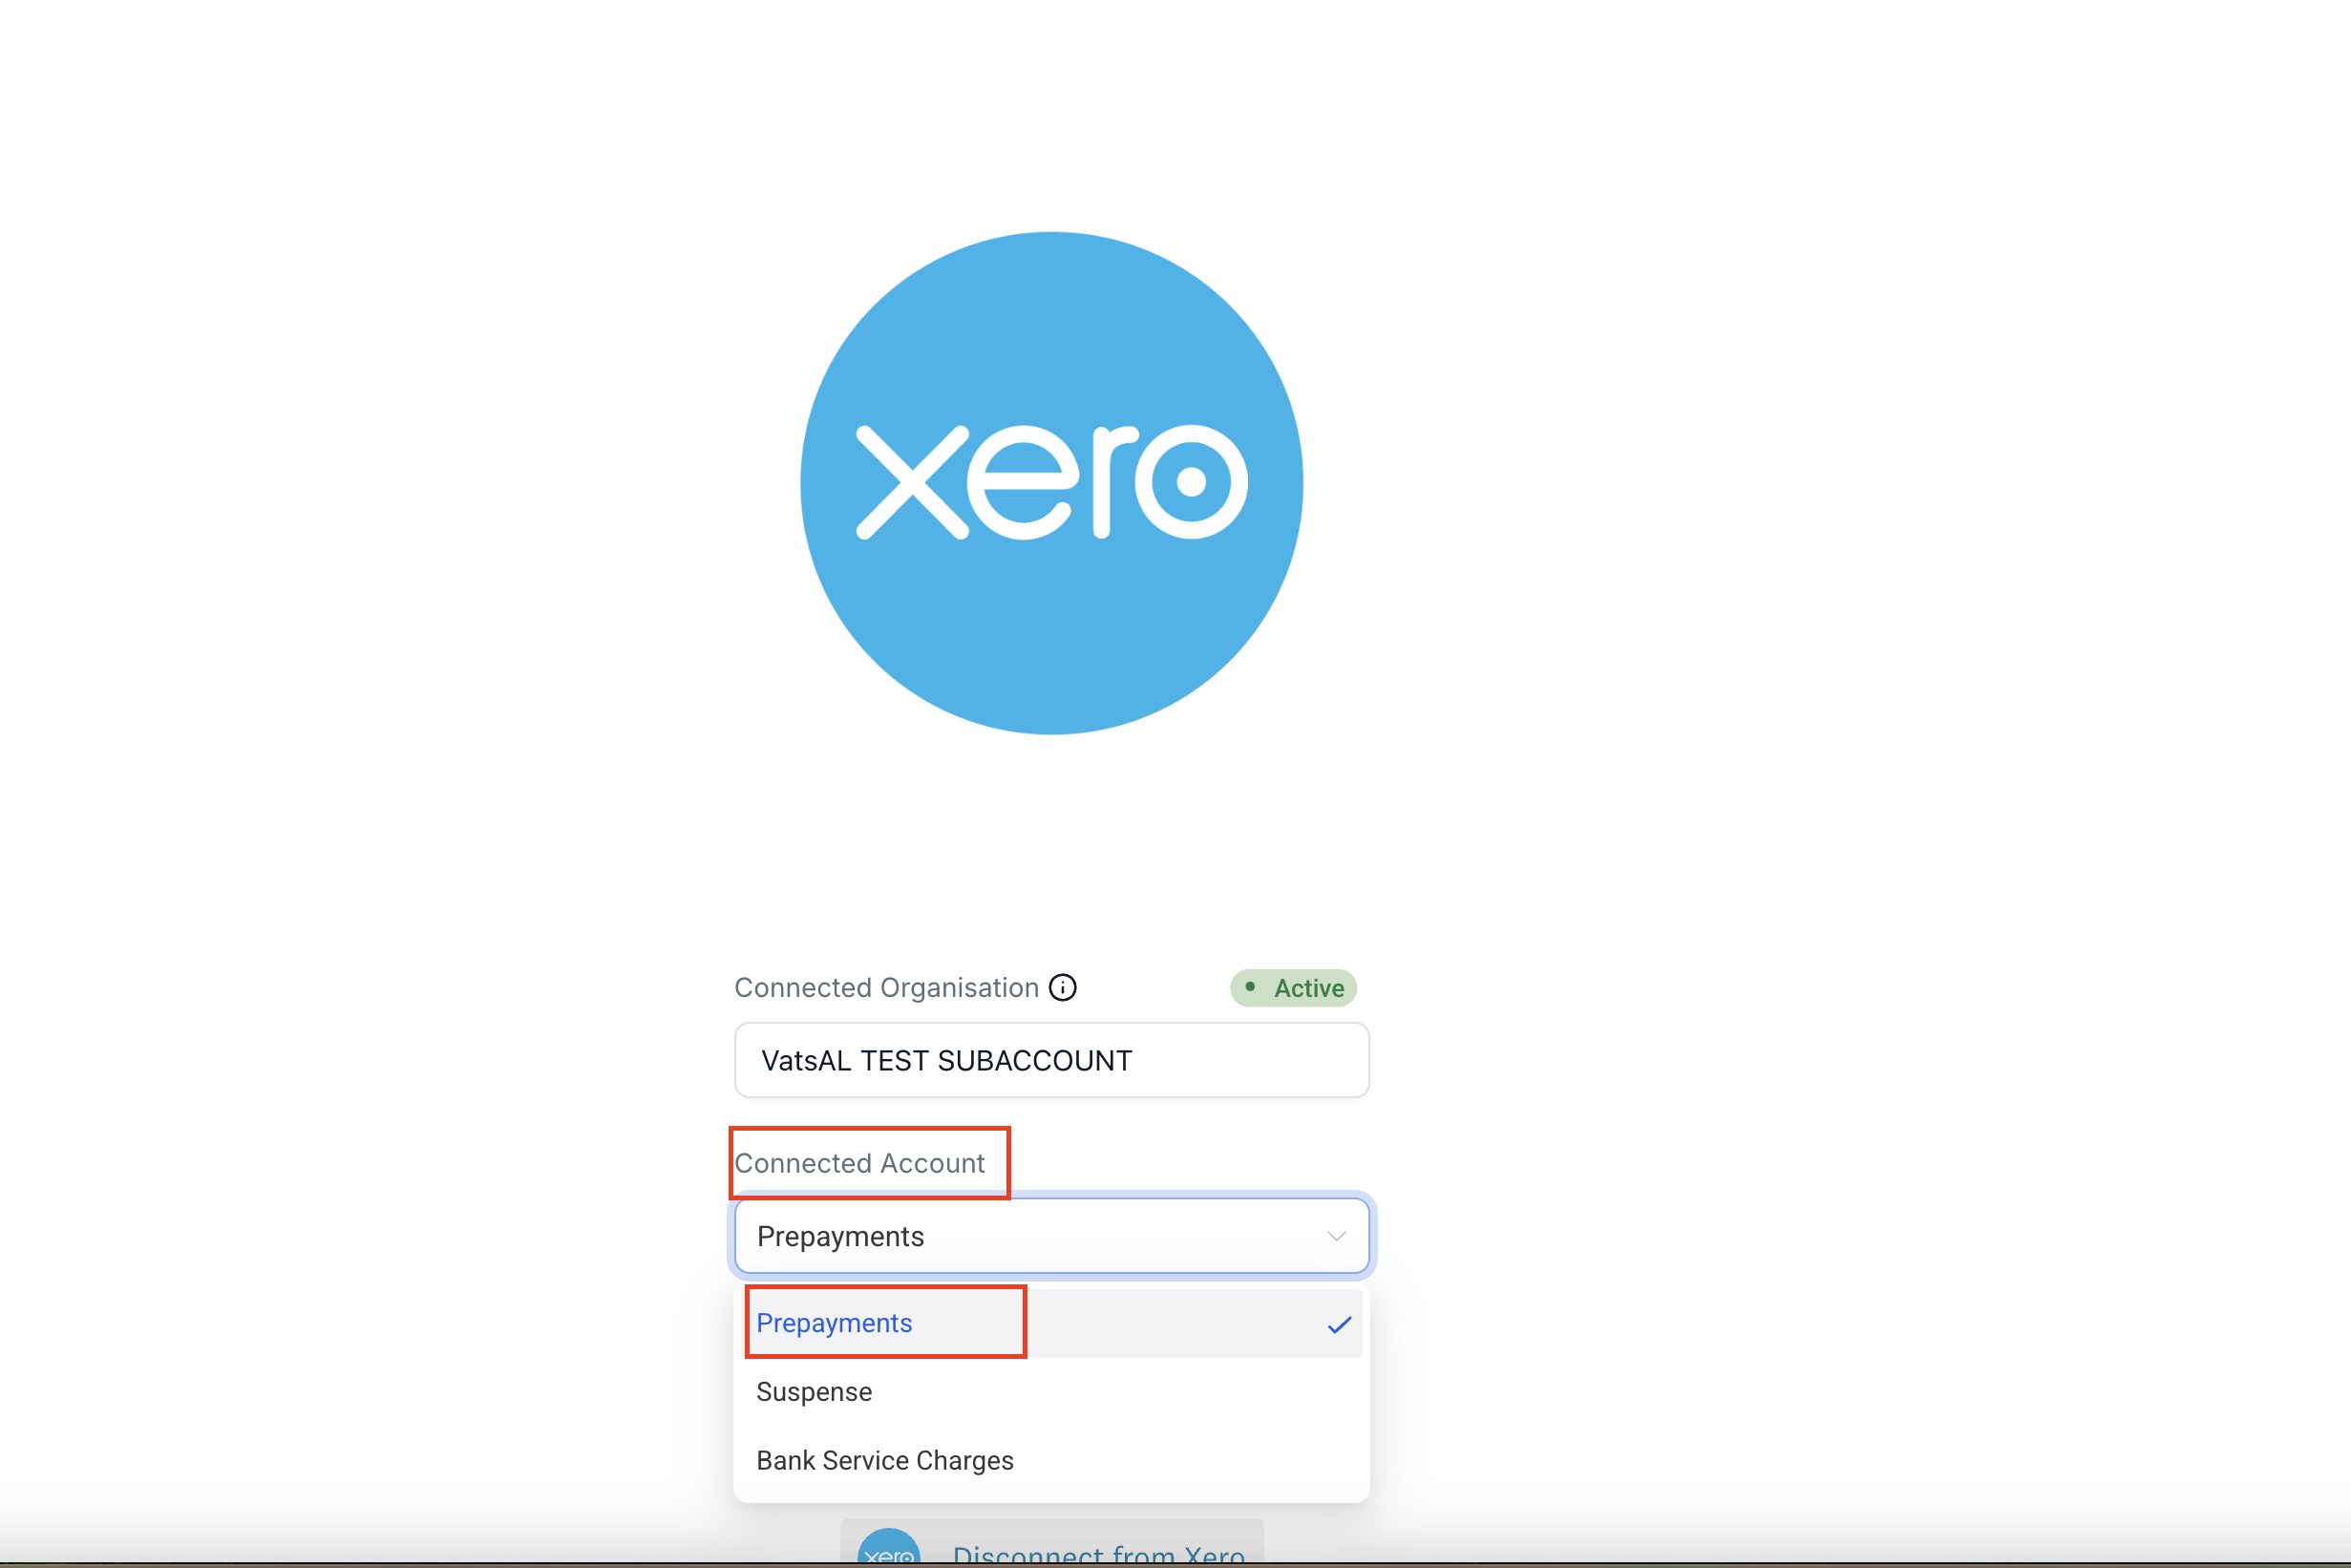
When payments are enabled for a Xero account, it appears in the Connected Account list in the HighLevel Xero integration.
02How businesses use the Chart of accounts
- Enable payments on a Xero account. Open the account in Xero, tick the Enable payments option, and save. The account then appears in HighLevel’s integration settings for selection.
- Connect the enabled account to HighLevel. Return to the HighLevel Xero integration, choose the newly enabled account from the Connected Account list, and save.
03Before you start
- If you are unable to view your Chart of Accounts in your CRM after connecting with Xero.
04How to set up and use the Chart of accounts in HighLevel
Enable chart of accounts visibility
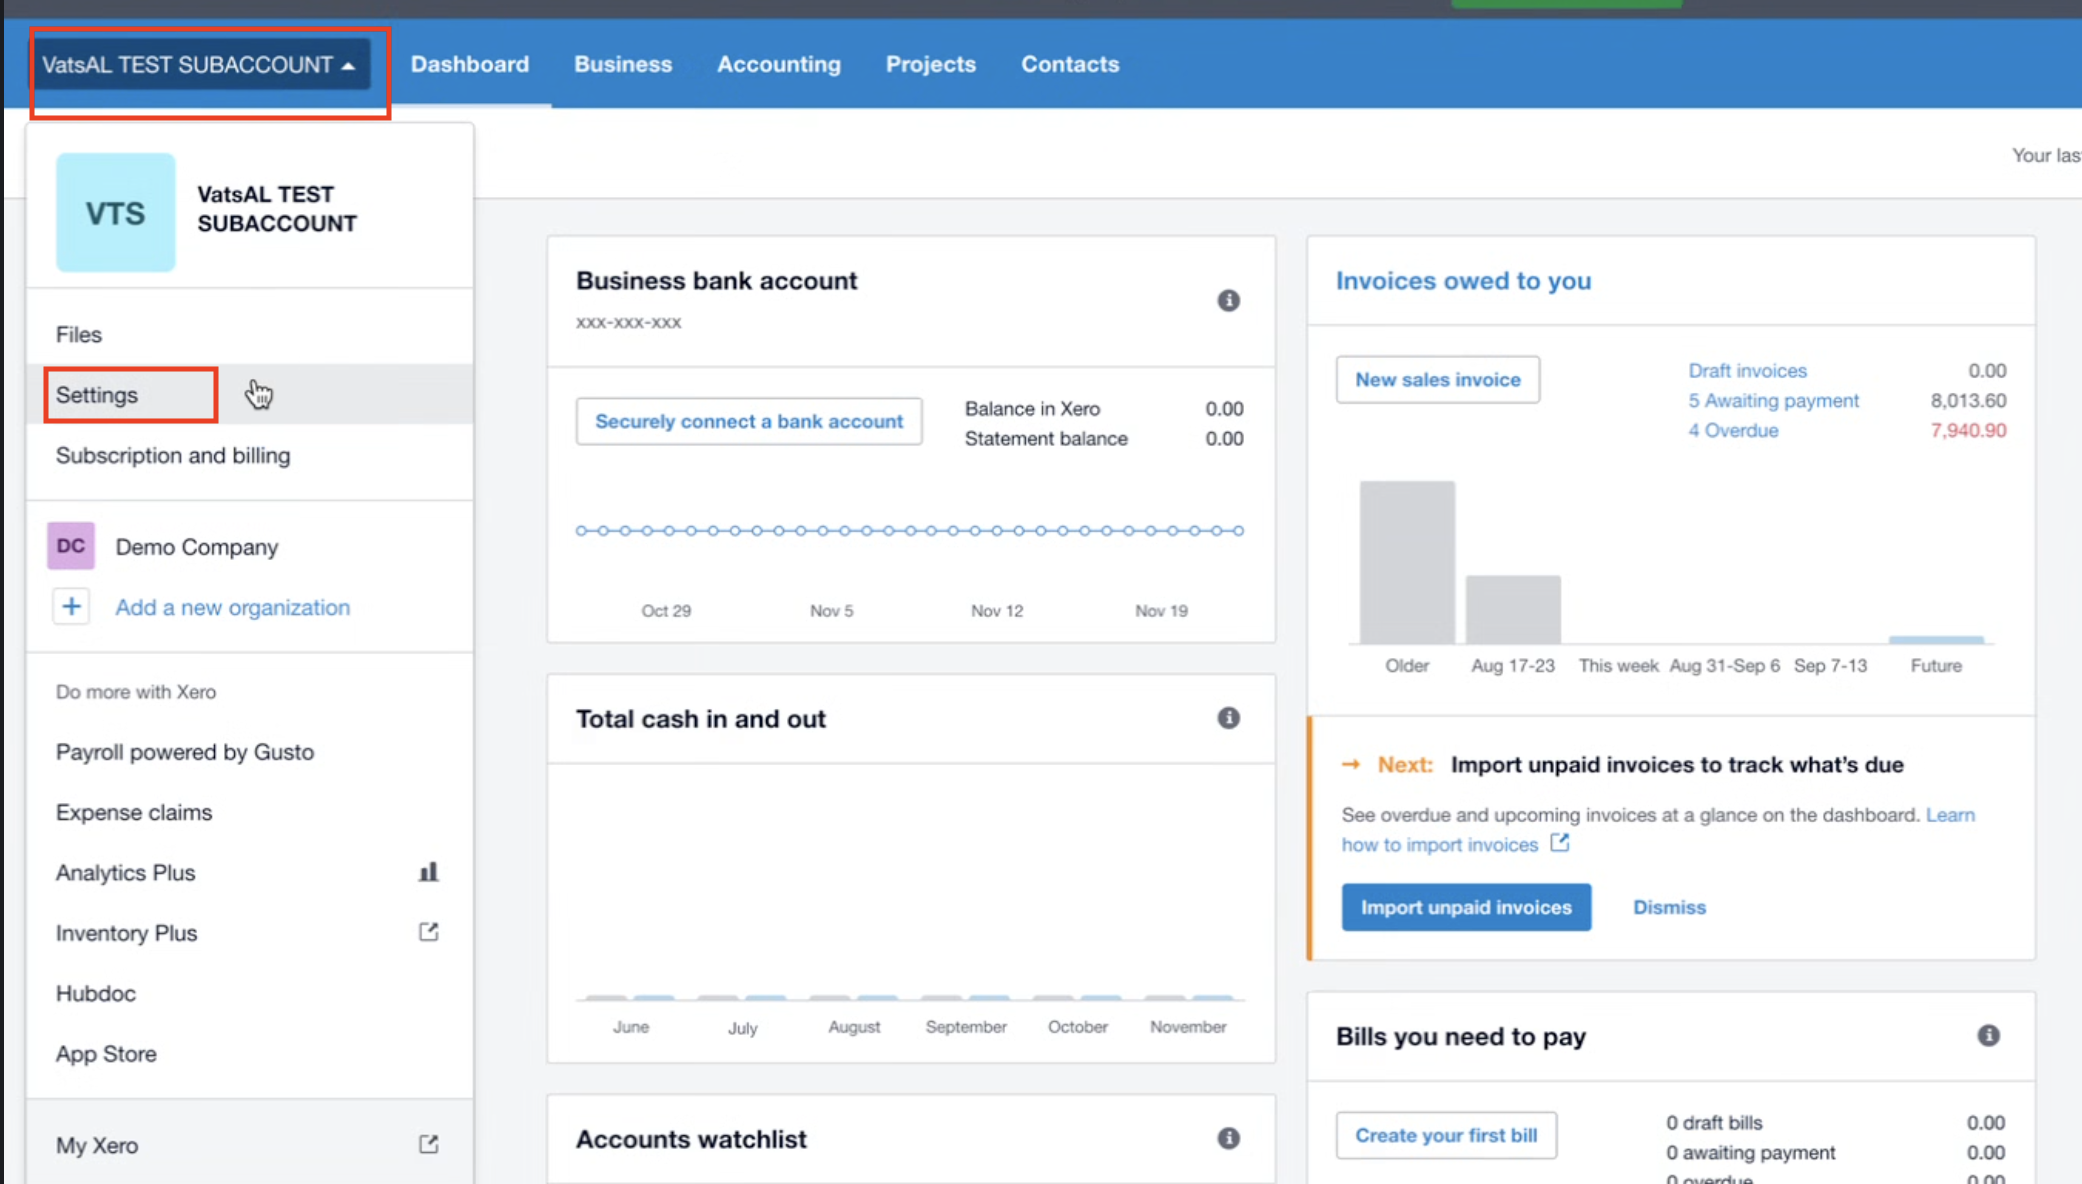
- Go to Settings in Xero.
- From your Xero dashboard, select your organization.
- Click Settings from the dropdown menu.
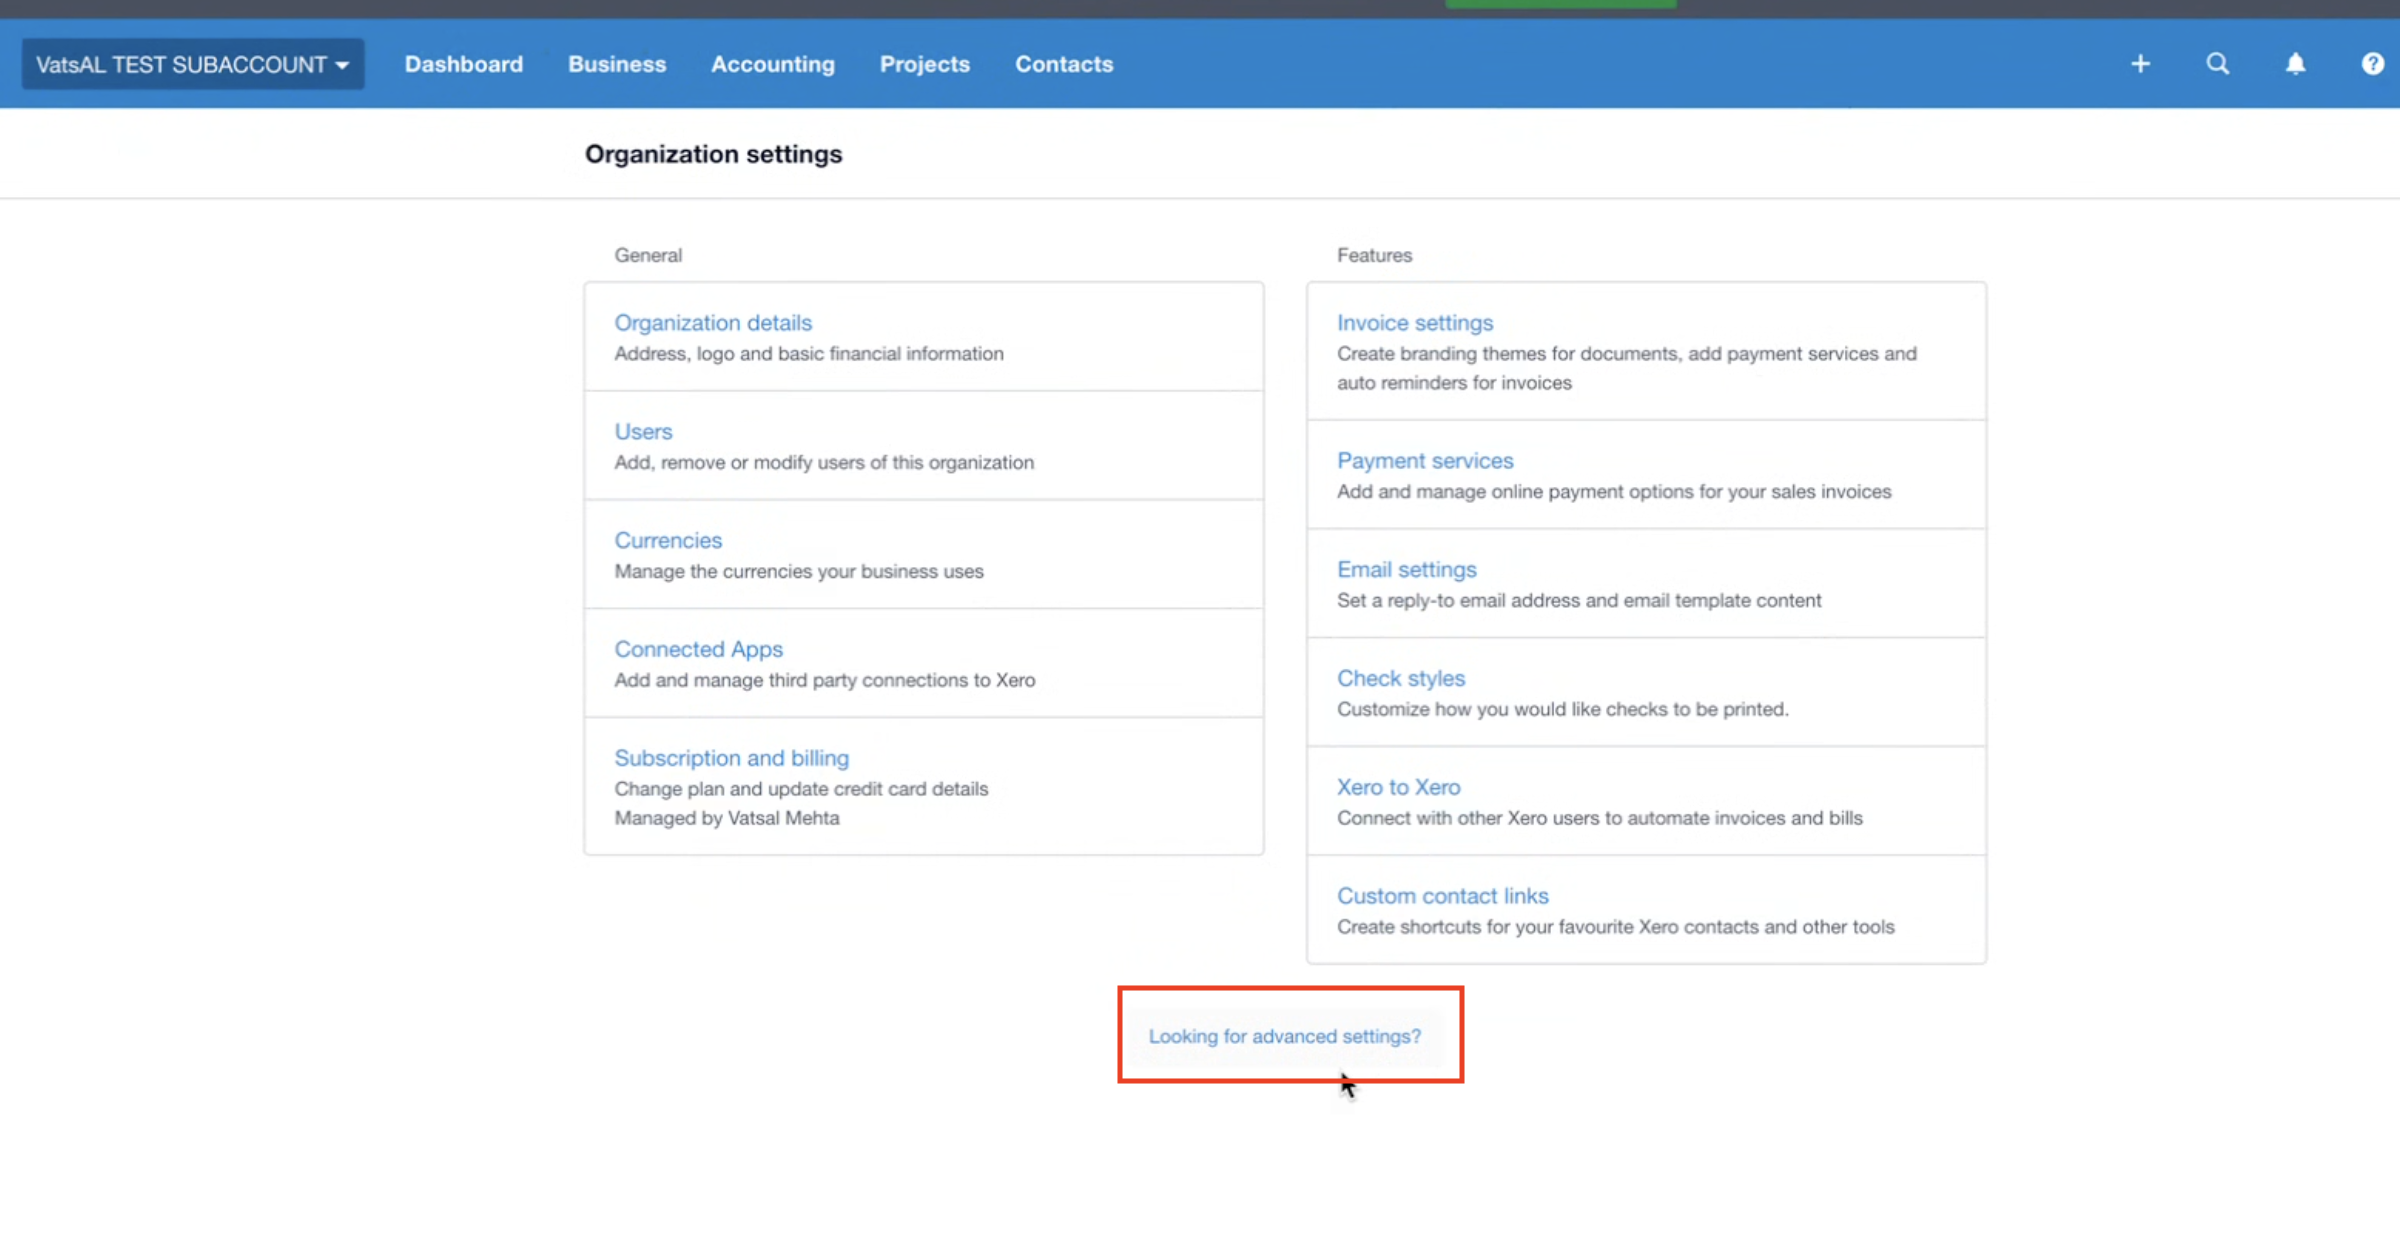
- In Organization settings, scroll down and click Looking for advanced settings?
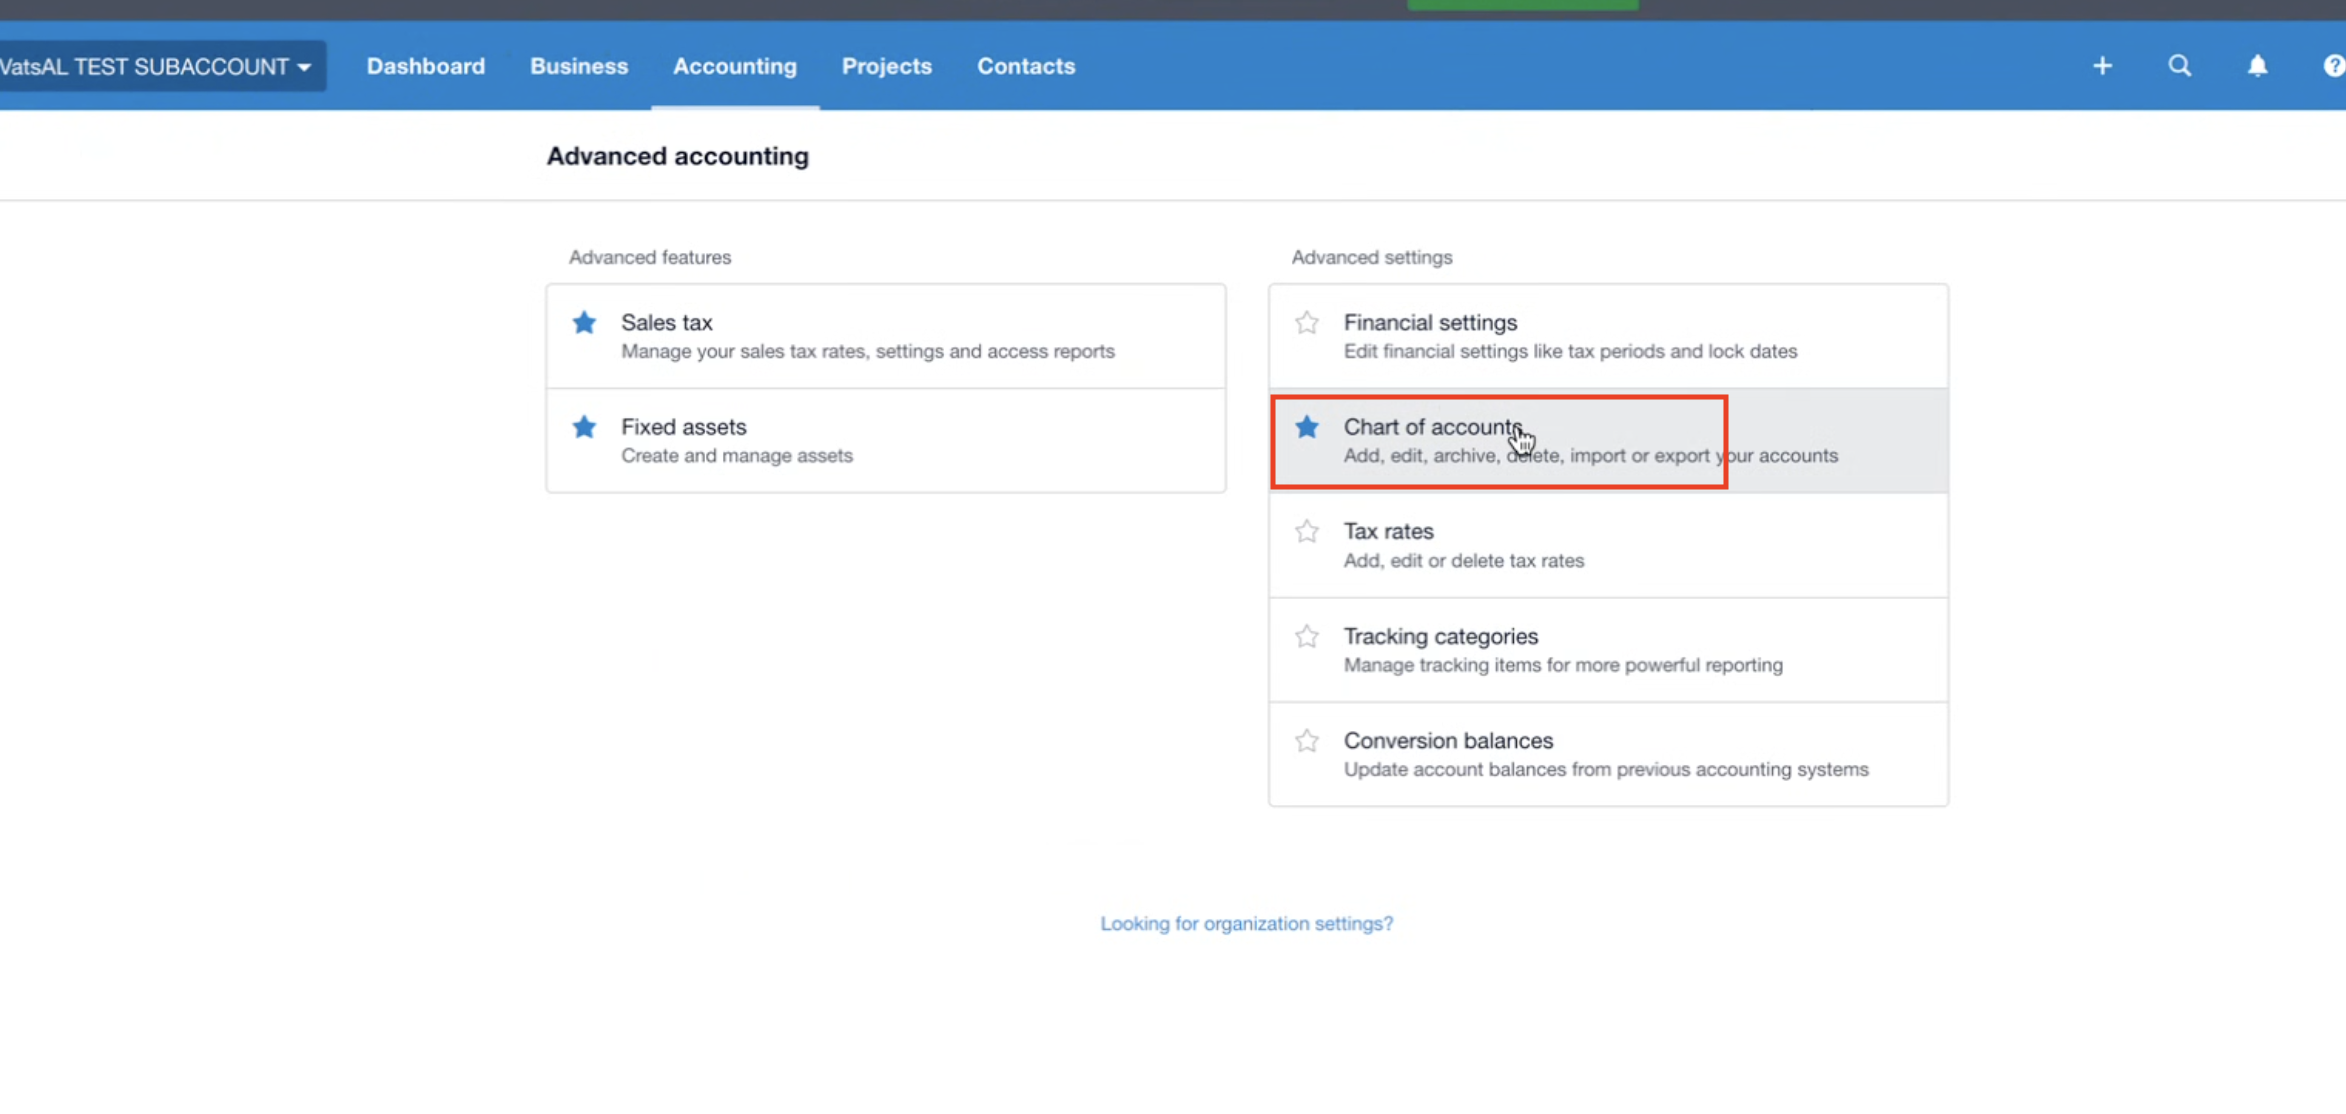
- Under Advanced Accounting, click Chart of accounts.
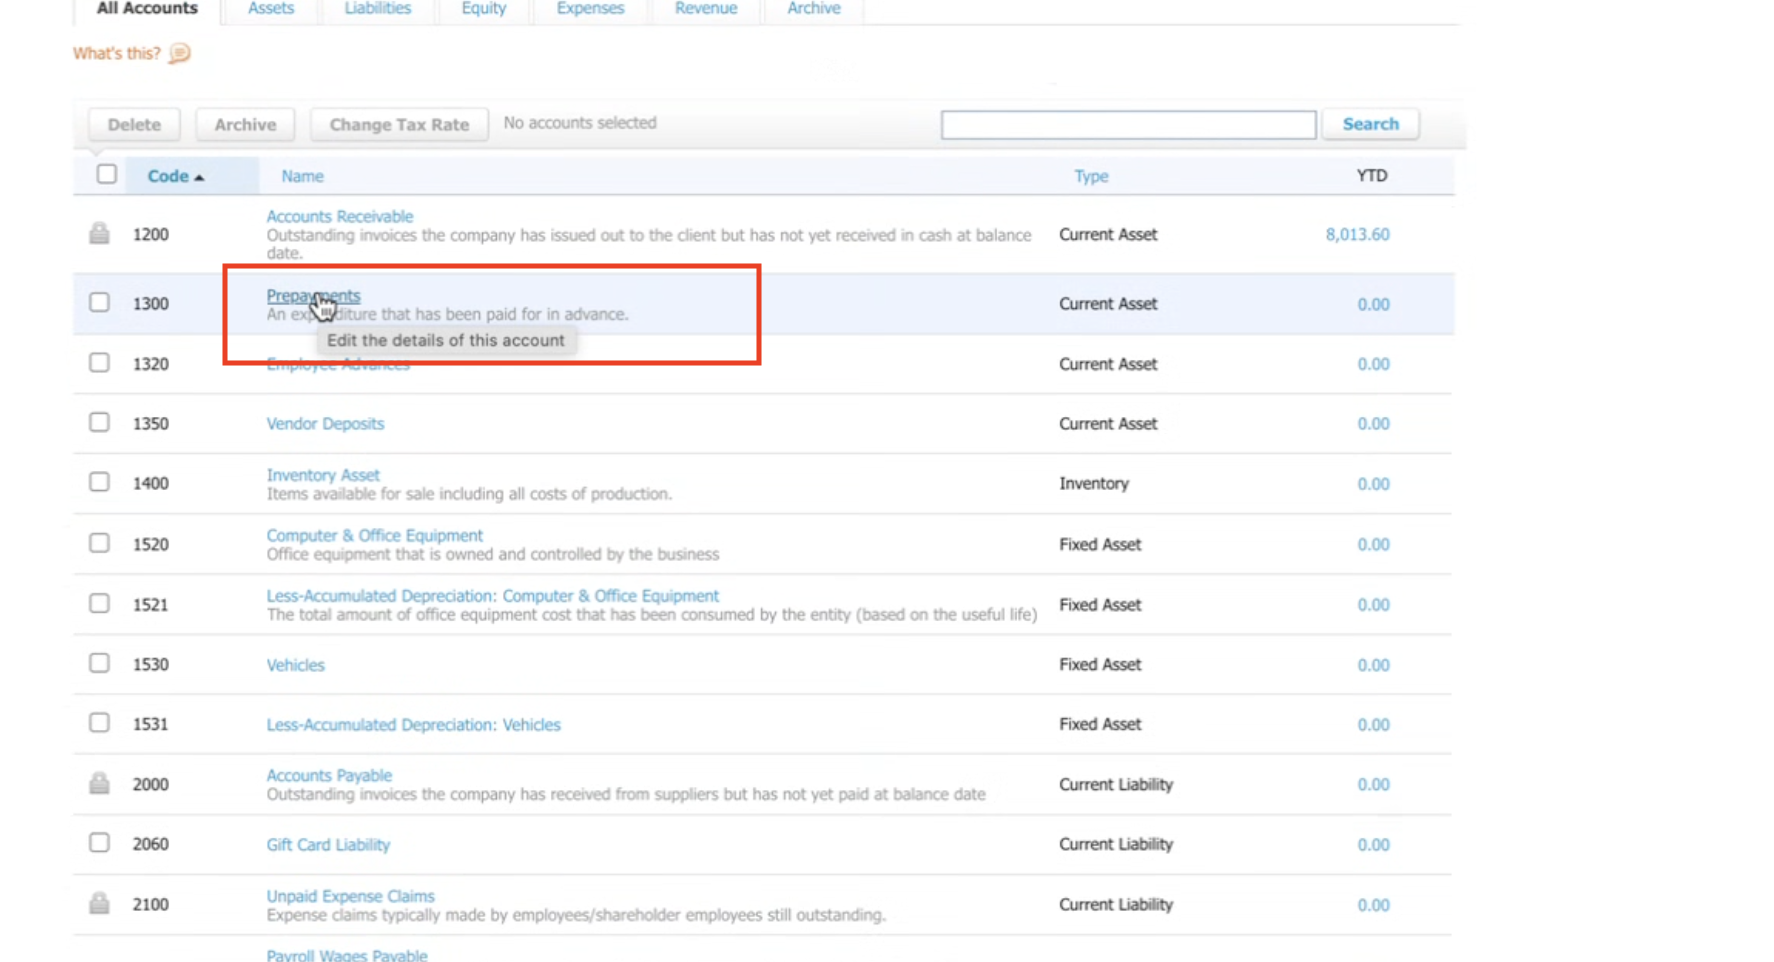
- From the list of accounts, choose the account you want to connect (e.g., Prepayments).
- Click to Edit the details of this account.
- In the edit popup, tick Enable payments to this account.
- Click Save.
- Go back to your CRM Xero integration.
- Under Connected Account, select the account you just enabled (e.g., Prepayments).
05What it looks like in HighLevel
06Settings that matter
- Enable payments to this account. When checked, the account appears in HighLevel’s Connected Account list.
Michael's take

Michael ReimerFounder of CRM Pros, HighLevel Commander and Certified Admin
Turning on payments for a Xero account feels like a useful convenience for businesses that manage invoices in both systems.
A boutique accounting firm that prepares statements for multiple clients may find the ability to enable a Xero account helpful when linking invoices from HighLevel.
Read the full details on HighLevel →Published November 2, 2026 · Updated November 3, 2026