
01Who this is for
- Founders who send regular newsletters and need assurance that dynamic content renders correctly.
- Marketing managers at agencies who create client email campaigns and must avoid layout errors before launch.
- Small business owners using HighLevel for promotions, who want to verify links and personalization without skewing metrics.
02Preview and test emails, explained
Preview & Test is a set of tools inside the Email builder that shows how an email looks on desktop, tablet and mobile screens. It also allows you to email a test copy to any address, letting you see the final inbox rendering.
The feature lives under Marketing > Emails > Campaigns/Templates. When you click Preview you stay in the design editor; when you choose Test Email you fill in sender and receiver details, then send a single copy that does not count toward opens or clicks. Unsubscribe links are disabled in test messages to protect your list.
03How businesses use preview and test emails
- Ecommerce store. The store opens its promotional campaign in the Design Editor, previews the layout on mobile, then sends a test email to the marketing manager to verify product images and discount merge fields before the sale launch.
- Real estate agency. Agents select a listing email template, use Preview to ensure property details appear correctly on tablets, and send a test to their own address to confirm that custom values for agent name and property address populate.
- Fitness studio. The studio opens its class schedule campaign, checks the design on a desktop view, then sends a test email to the owner to verify that class times and trainer names display as expected before notifying members.
04How to set up and use preview and test emails in HighLevel
Preview an email and send a test copy
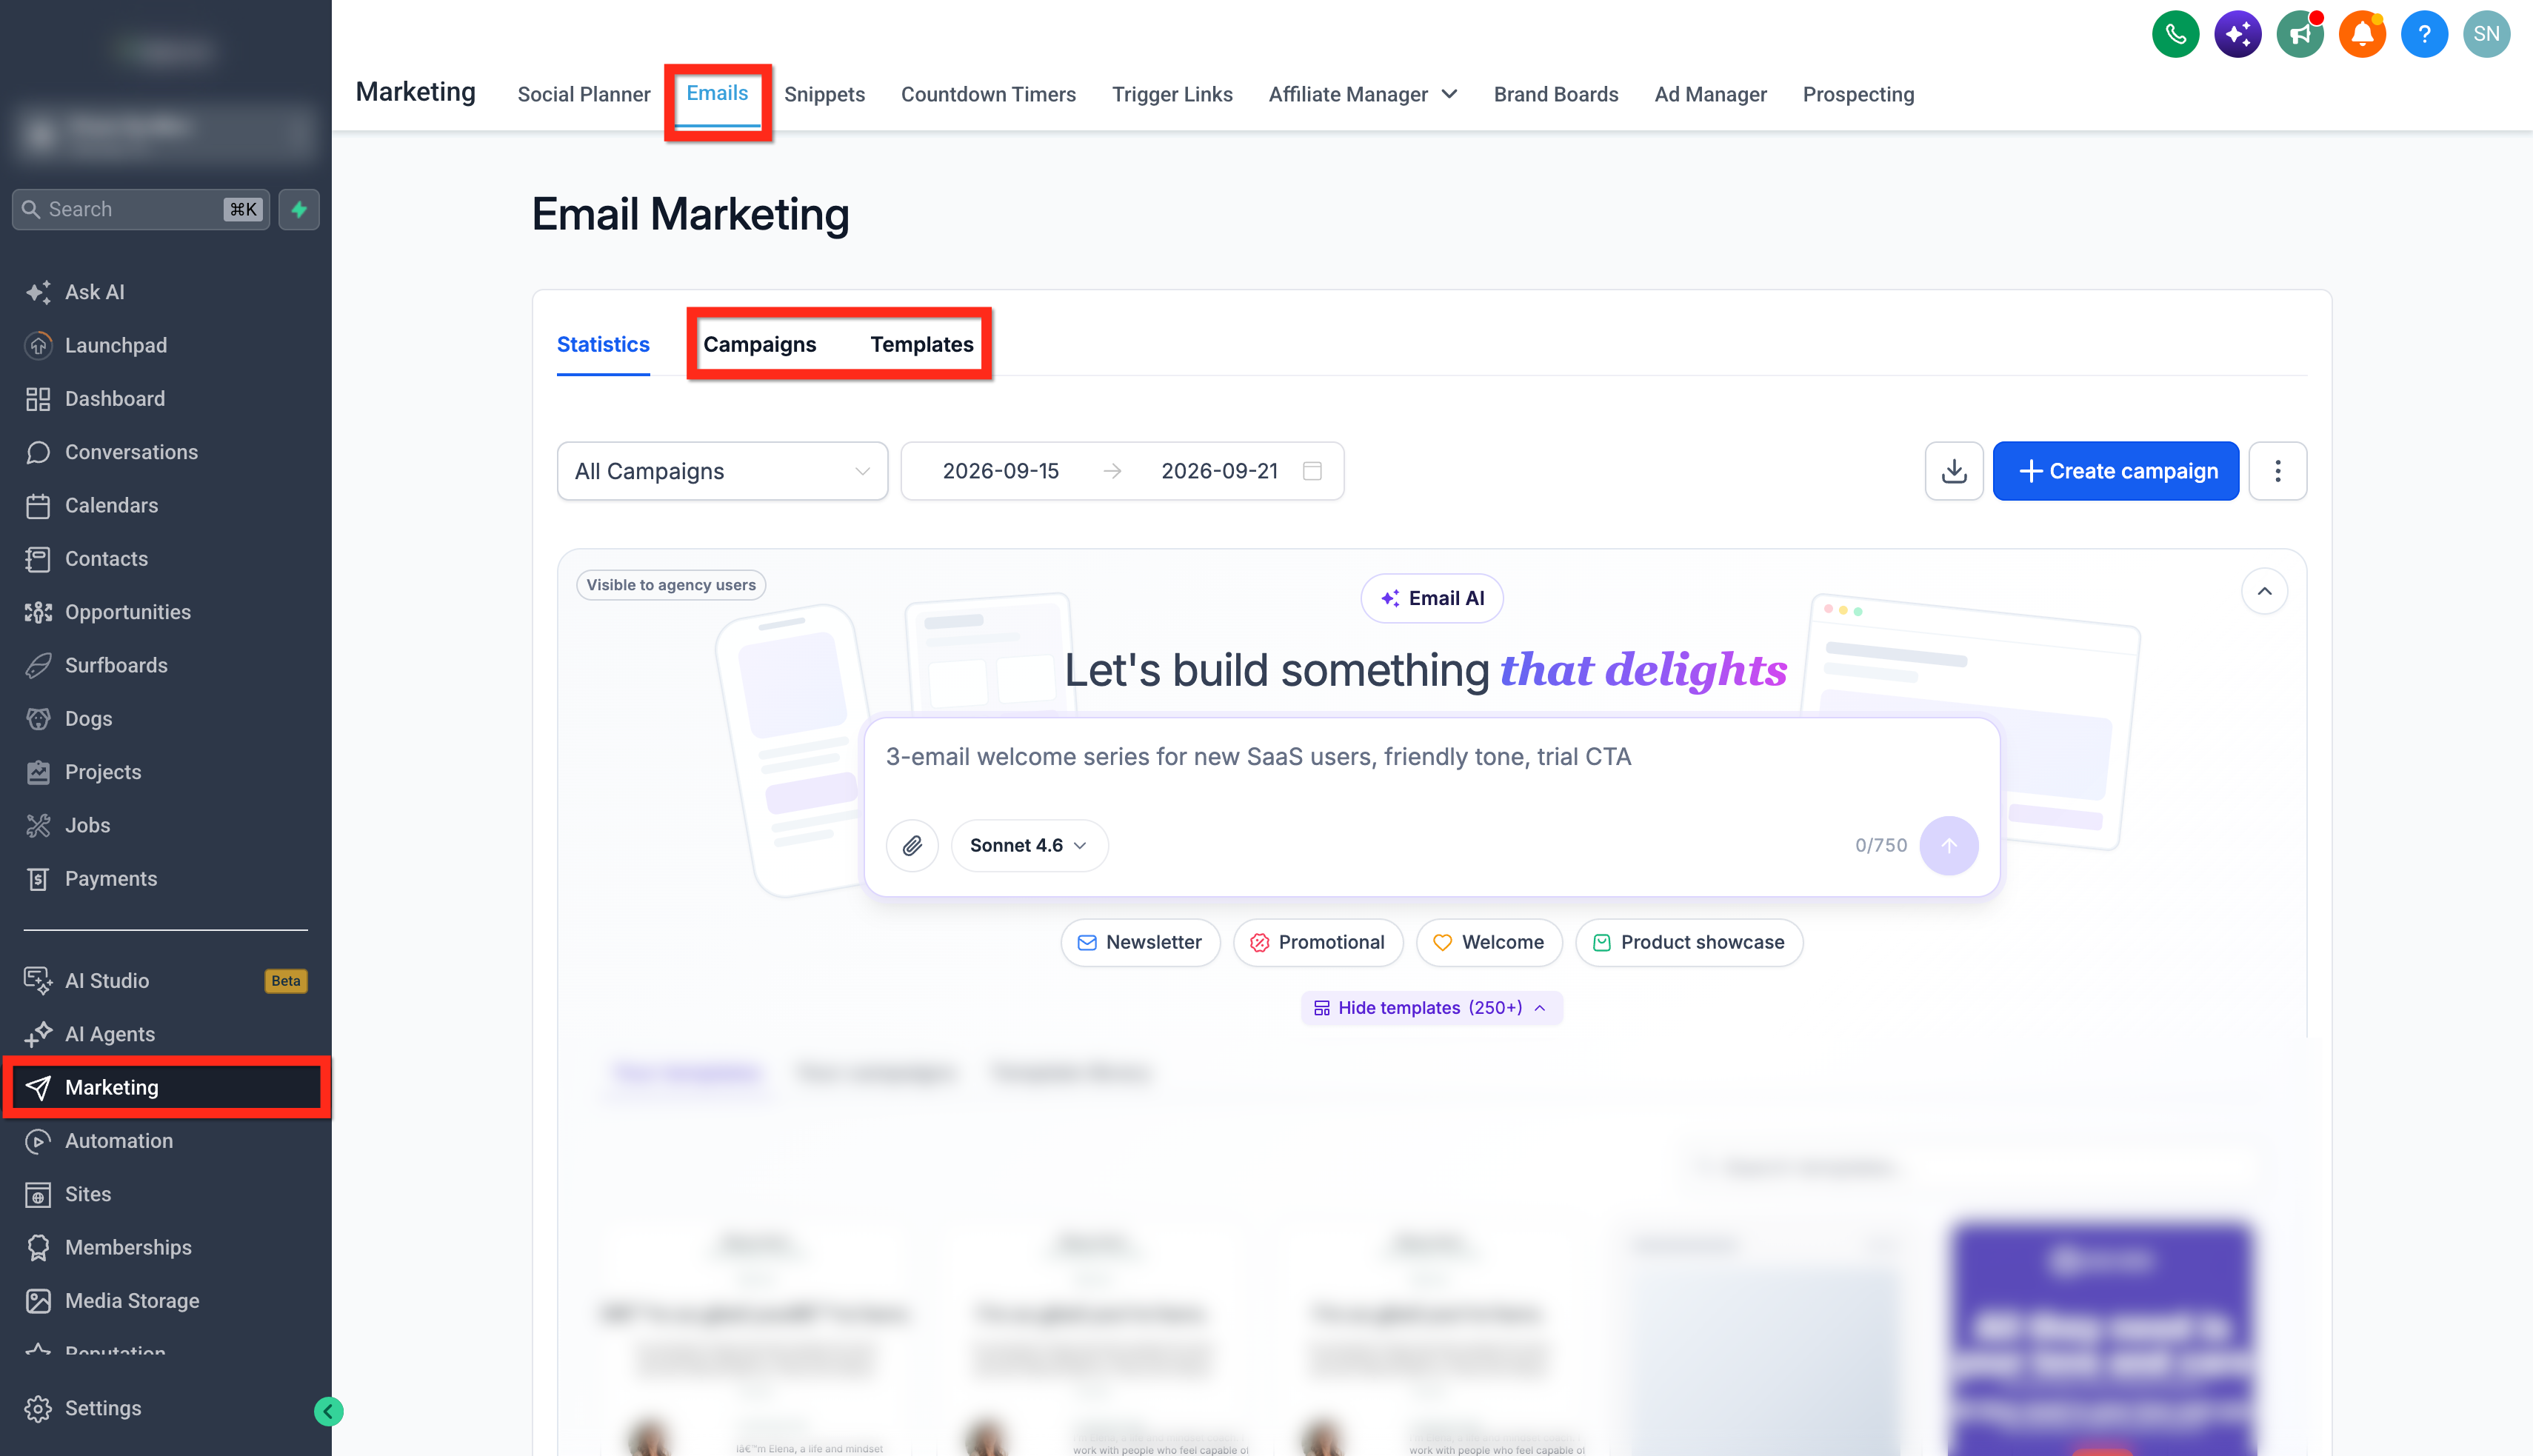
- Navigate to Marketing > Emails > Campaigns/Templates.
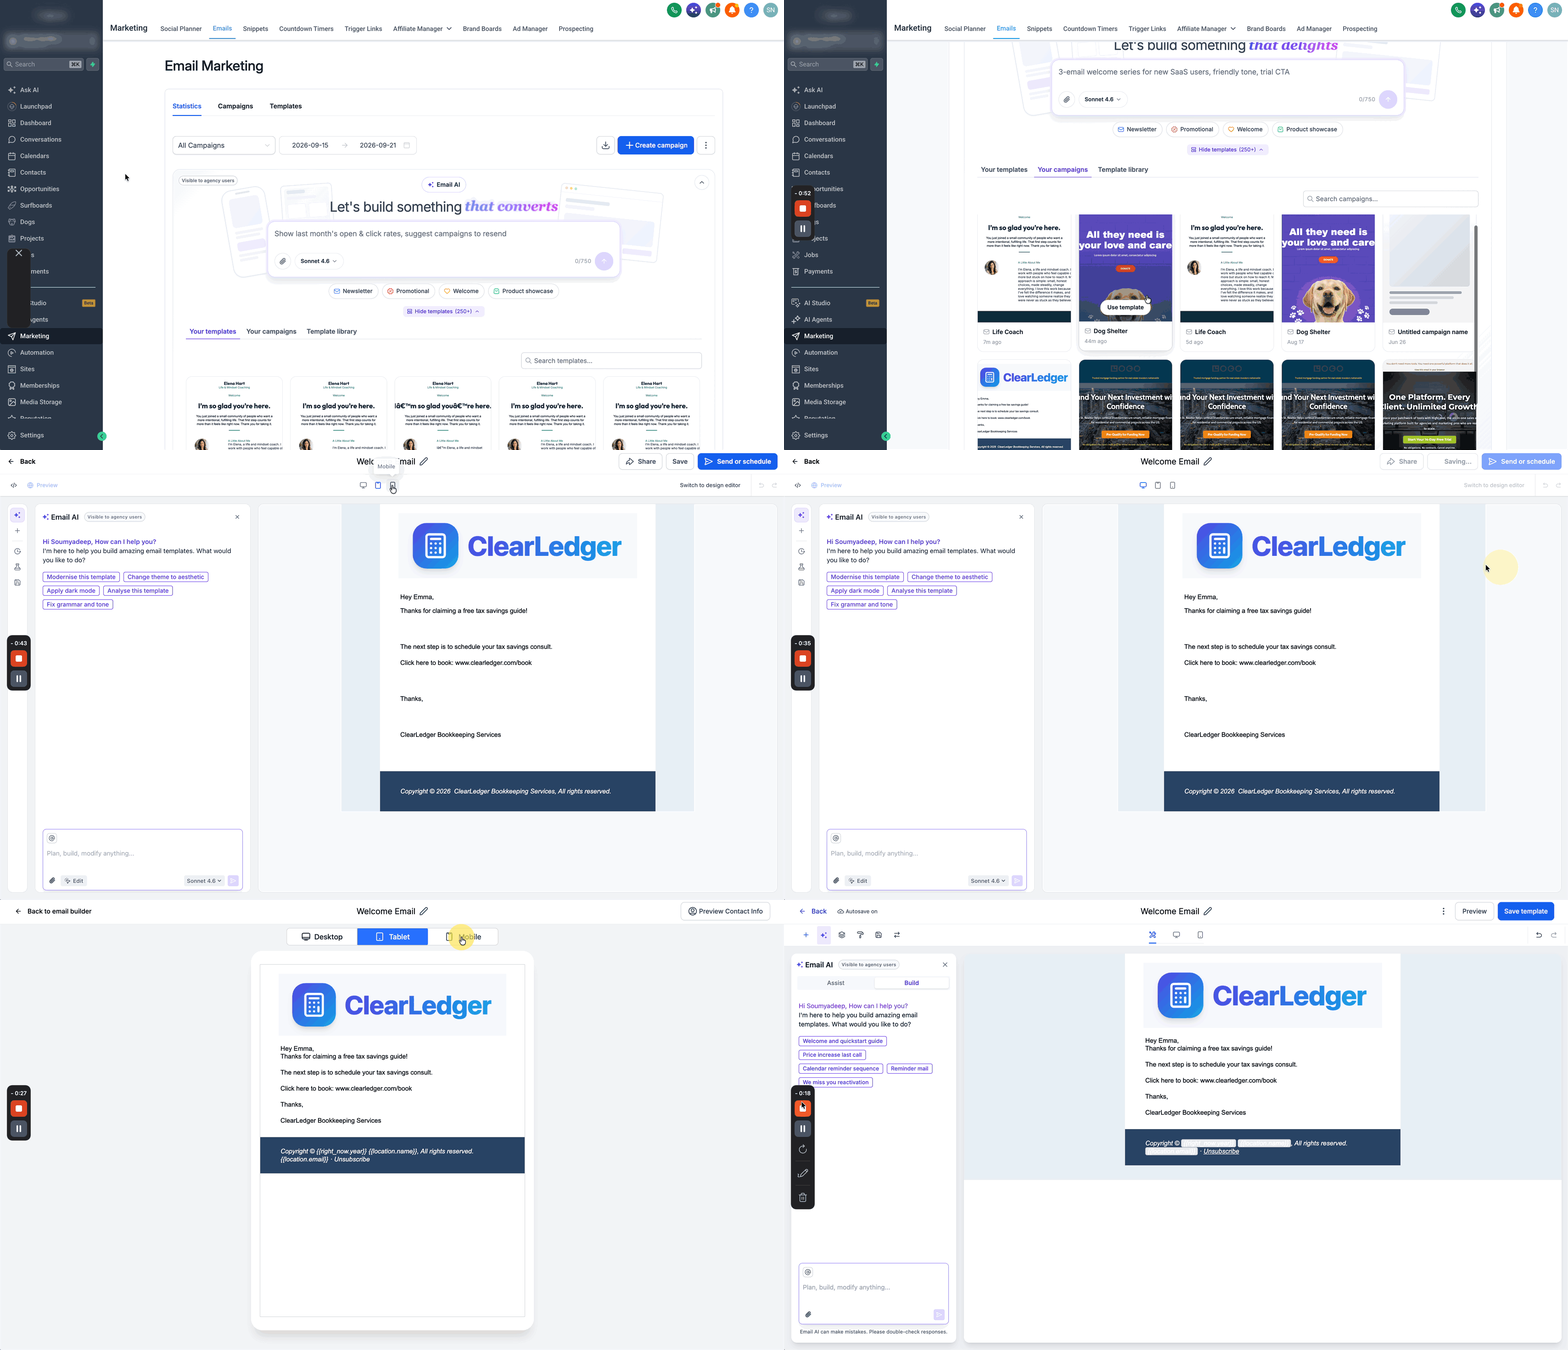
- Select the desired campaign or template and switch to the Design Editor.
- Click the Preview button at the top right and toggle Desktop, Tablet, and Mobile views.
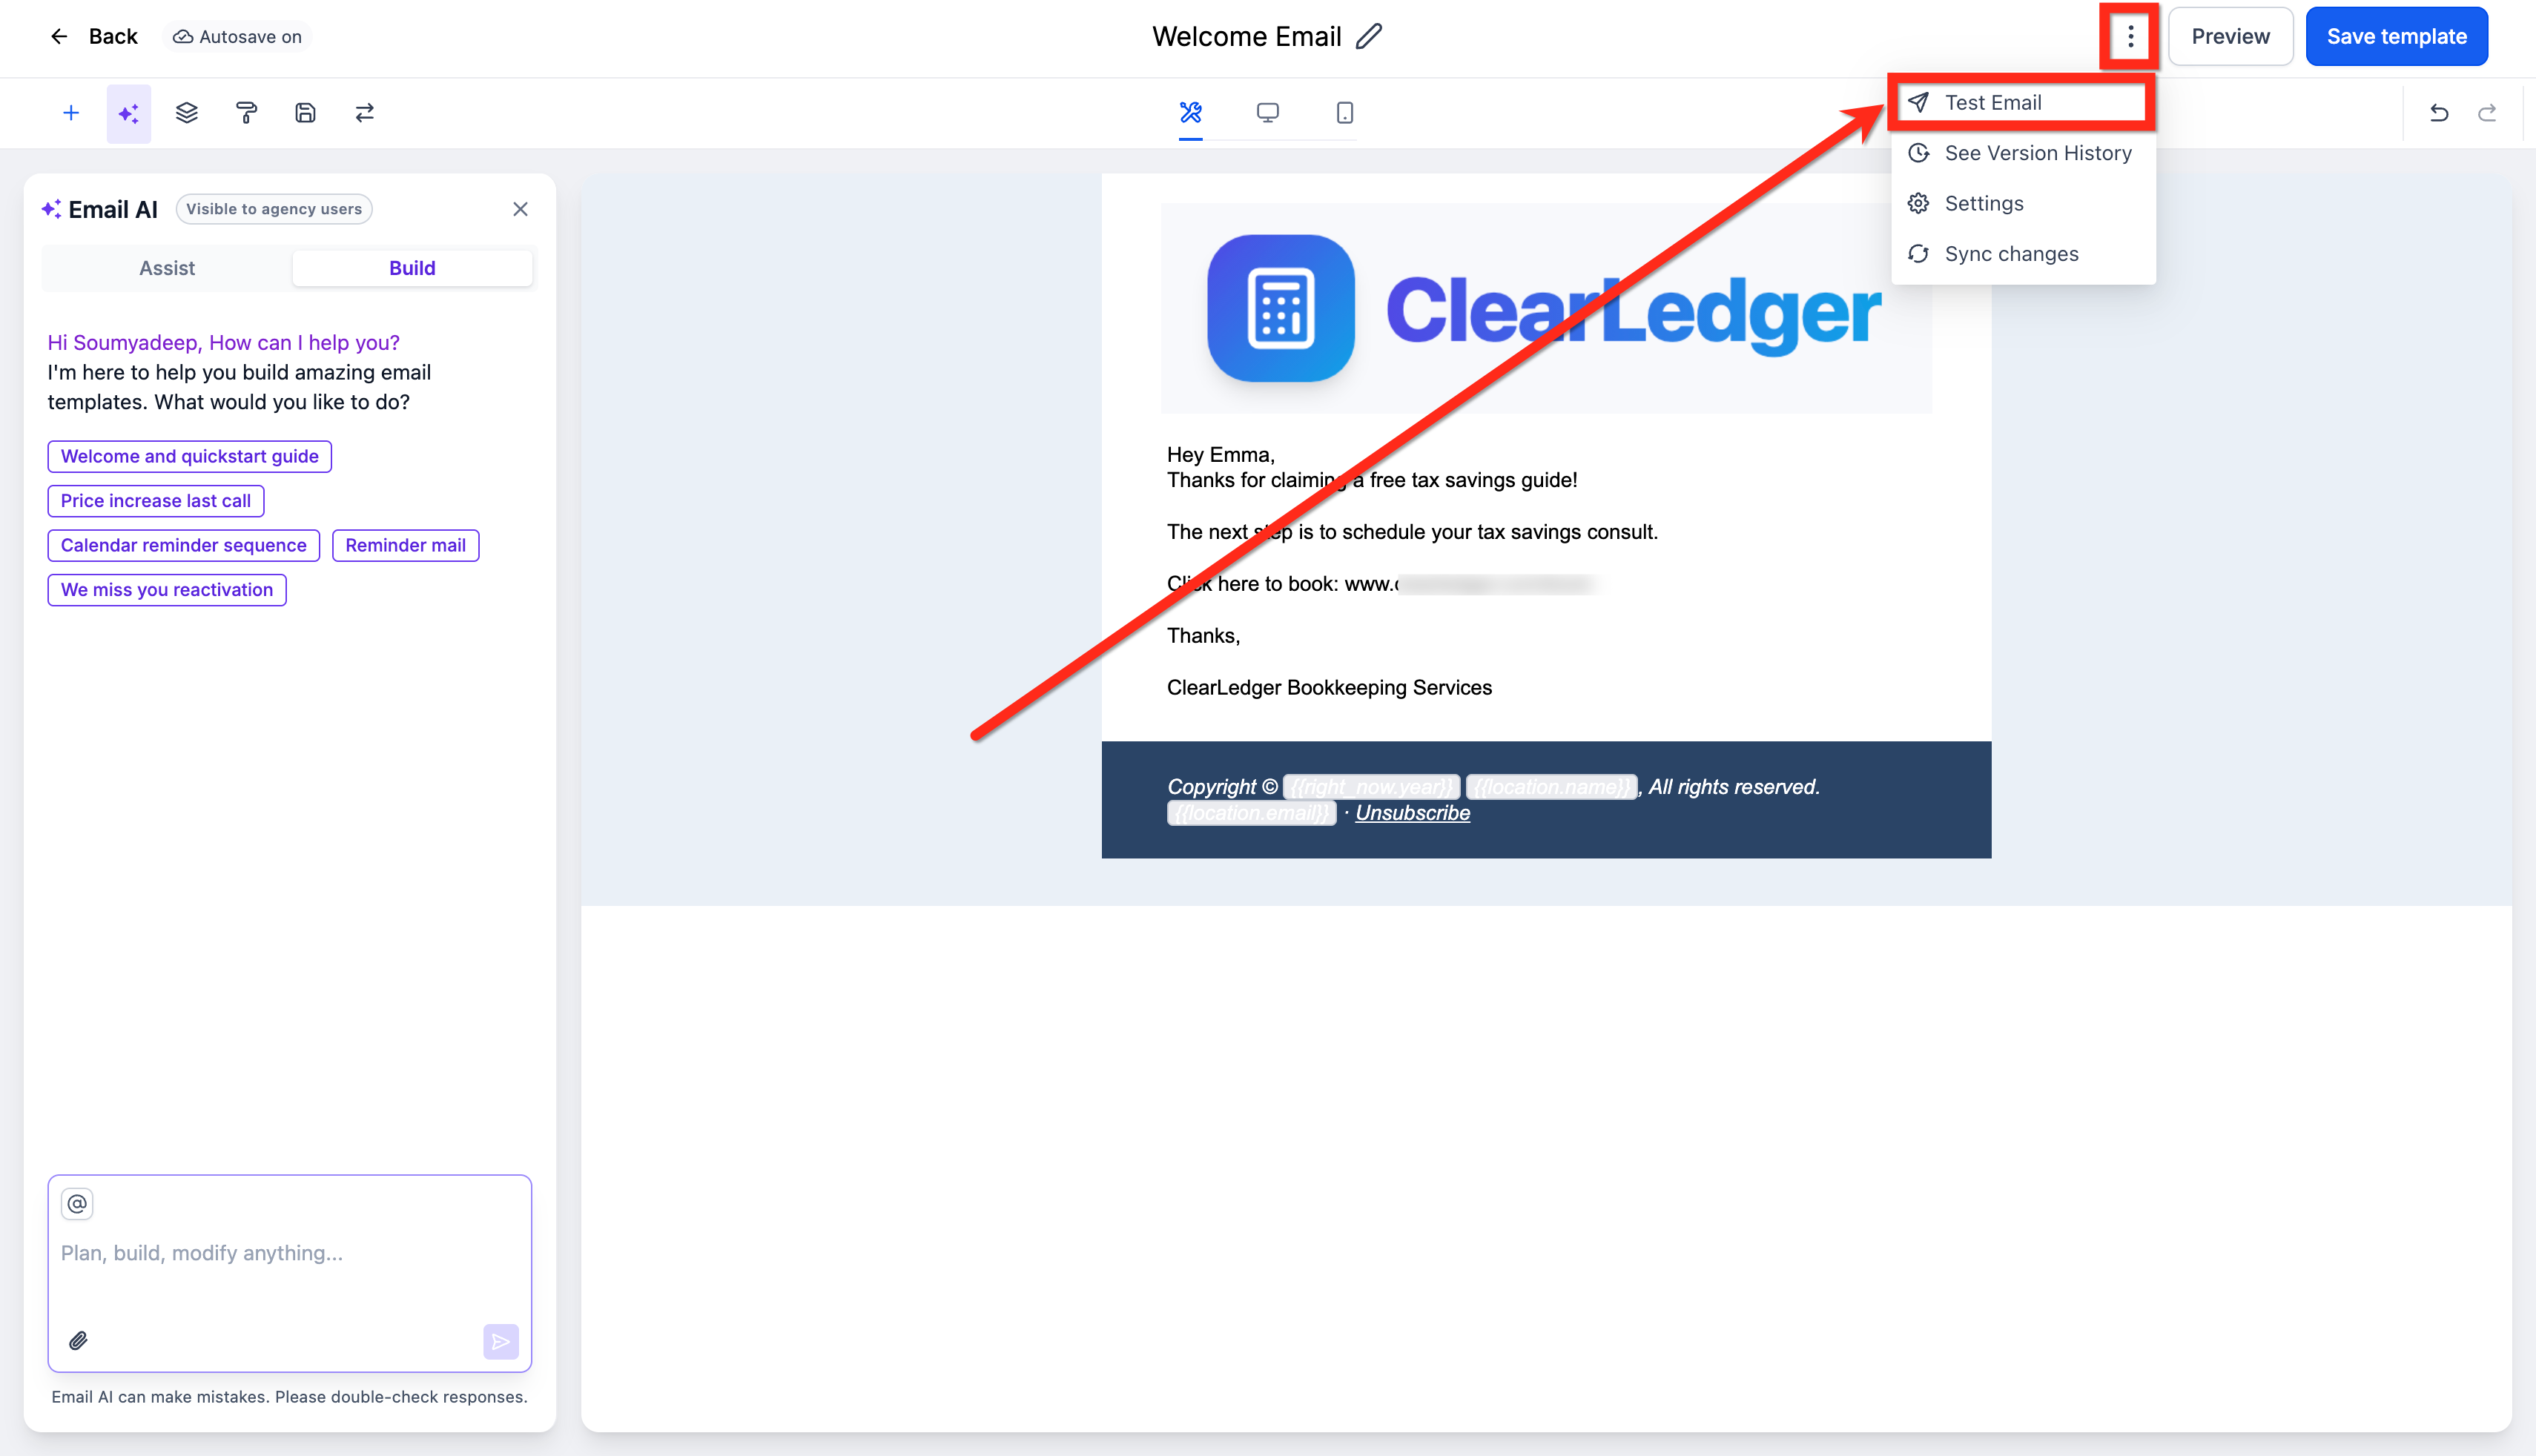
- Open the three dot menu next to Preview and choose the Test Email option.
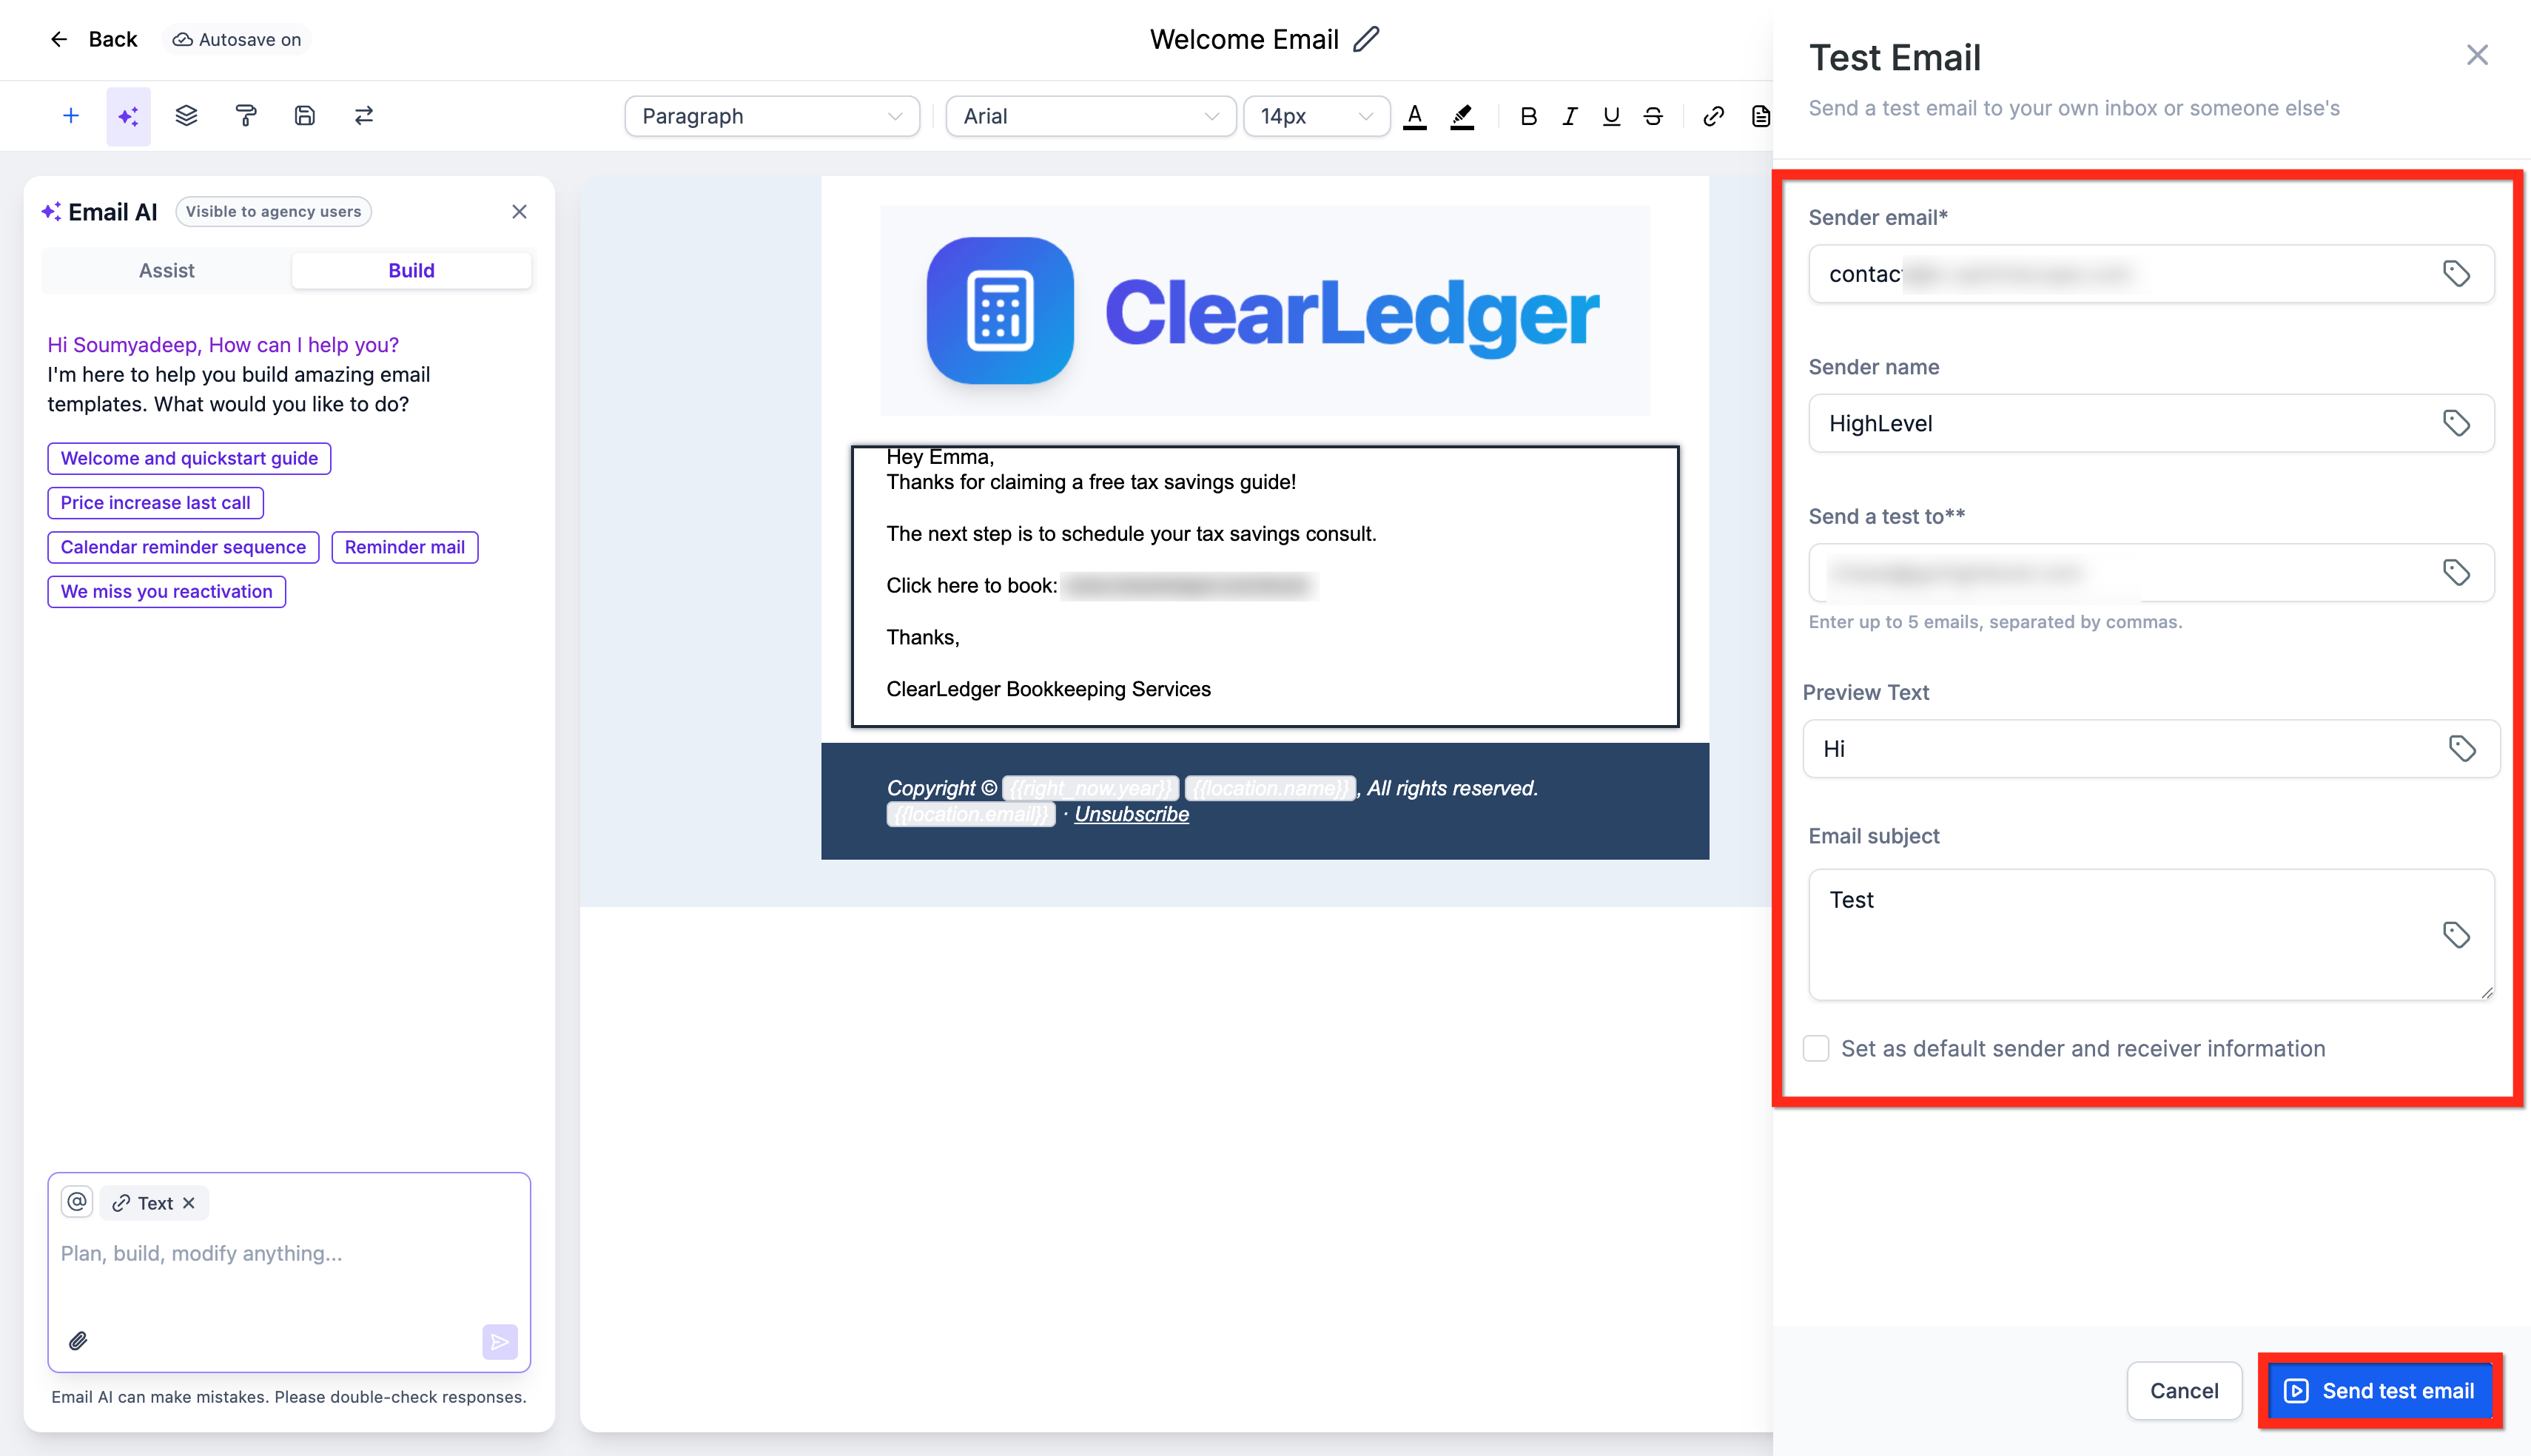
- Enter the sender email, sender name, receiver email, preview text, and email subject.
- Press Send Test Email to deliver the sample to the chosen inbox.
05What it looks like in HighLevel
06Settings that matter
- Sender Email. Specifies the email address that appears in the From field of the test message.
- Sender Name. Defines the display name that accompanies the sender email in the test email.
- Receiver Email. The target address where the test email is delivered.
- Preview Text. A short snippet that shows as preview text in the recipient’s inbox.
- Email Subject. The subject line used for the test email.
07Things to know before you rely on it
- The unsubscribe link is disabled in test emails; it works only in live sends.
- Opens and clicks from test emails do not populate campaign analytics.
- If a test email fails to arrive, check spam folders, sender configuration, suppression status, or use a different address.
08If something goes wrong
- Test email didn't arrive. Check the spam or junk folder, verify the From address settings, ensure the recipient is not on a suppression list, and try sending to a different email address.
09How it connects to the rest of HighLevel
- Send or schedule a regular email campaign in HighLevel Send or schedule email
- How to set up and use the HighLevel template library Template library
- HighLevel pricing and plans Pricing
Michael's take

Michael ReimerFounder of CRM Pros, HighLevel Commander and Certified Admin
When a campaign looks perfect in the builder but you’re not sure it renders correctly for your contacts, sending a test email lets you see the final result before a live send.
Get More InformationOpens on HighLevelPublished November 2, 2026 · Updated November 16, 2026