
01Who this is for
- Marketing managers who need a quick way to share short video content without leaving the platform.
- Small business owners who want to plan and schedule visual posts in advance to stay consistent online.
02Facebook reels, explained
The Social Planner includes a Reel post type that appears when a Facebook Page is linked. In the post composer you can attach a single video, write a caption with emojis or hashtags, and preview the Reel before it goes live. Optional fields let you add a follow up comment, assign categories, or tag the post for internal organization. Publishing options include immediate posting, scheduled posting, sending for approval, or setting up recurring publication.
All Reel actions occur inside HighLevel under the Marketing > Social Planner area. The feature respects Facebook’s video limits, up to 1 GB, 3 to 90 seconds, and a vertical aspect ratio, and does not support custom thumbnails or group publishing.
03How businesses use Facebook reels
- Fitness studio. The studio uploads a 45 second workout clip, adds a caption with a class schedule, and schedules the Reel for the upcoming weekend. An optional follow up comment includes a link to the booking page.
- Real estate agency. An agent posts a short home tour video, writes a caption highlighting key features, and sends the Reel for approval to the team manager before it goes live.
- Restaurant. The restaurant creates a Reel showing a new dish preparation, adds a caption with a seasonal hashtag, and schedules the post to appear during the lunch rush.
04The numbers and rules that matter
- Video file size maximum 1 GB.
- Video duration 3, 90 seconds.
- One video per Reel.
- Recommended resolution 1080 × 1920 pixels.
- Minimum resolution 540 × 960 pixels.
- Recommended aspect ratio 9:16.
05Before you start
- A Facebook Page must be connected to the Social Planner.
- A video file that meets the size, duration and resolution specifications must be ready.
06How to set up and use Facebook reels in HighLevel
Create and schedule Facebook Reel
- Navigate to Marketing > Social Planner, connect the desired Facebook Page and grant the requested permissions.
- Click New Post > Create New Post to open the post composer.
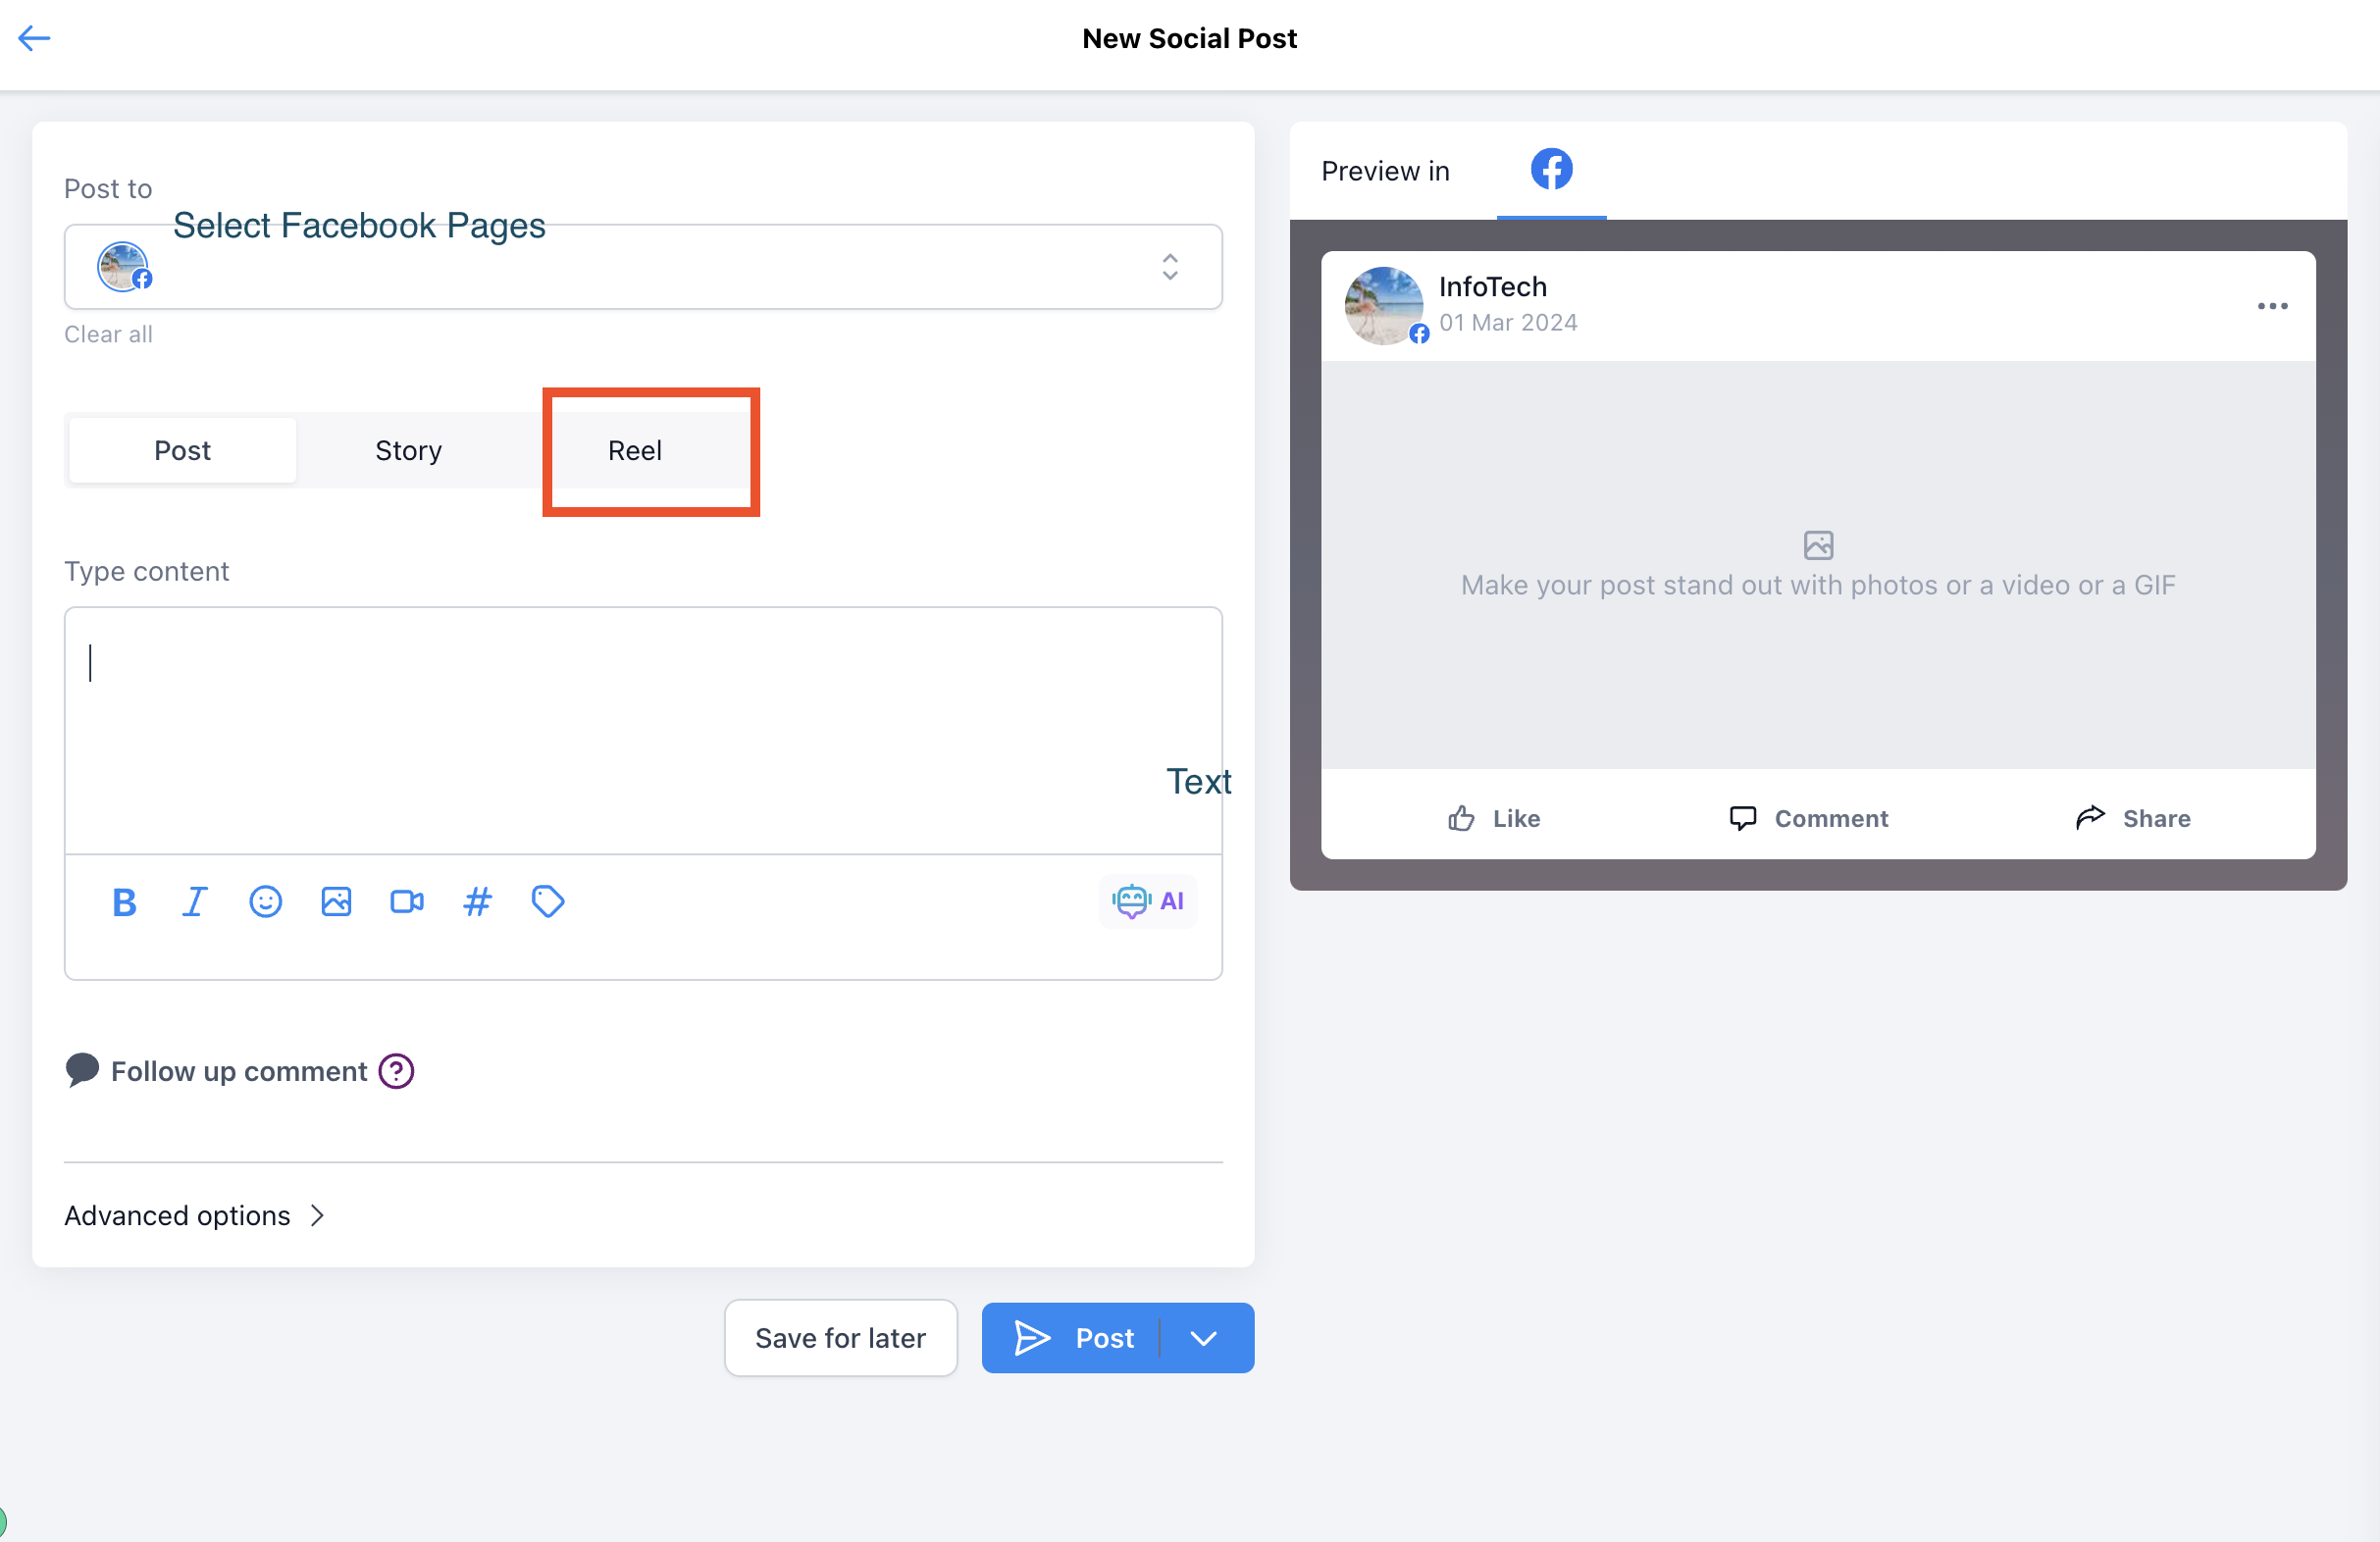
- In the Post to field, select the connected Facebook Page and choose Reel from the Facebook Options menu.
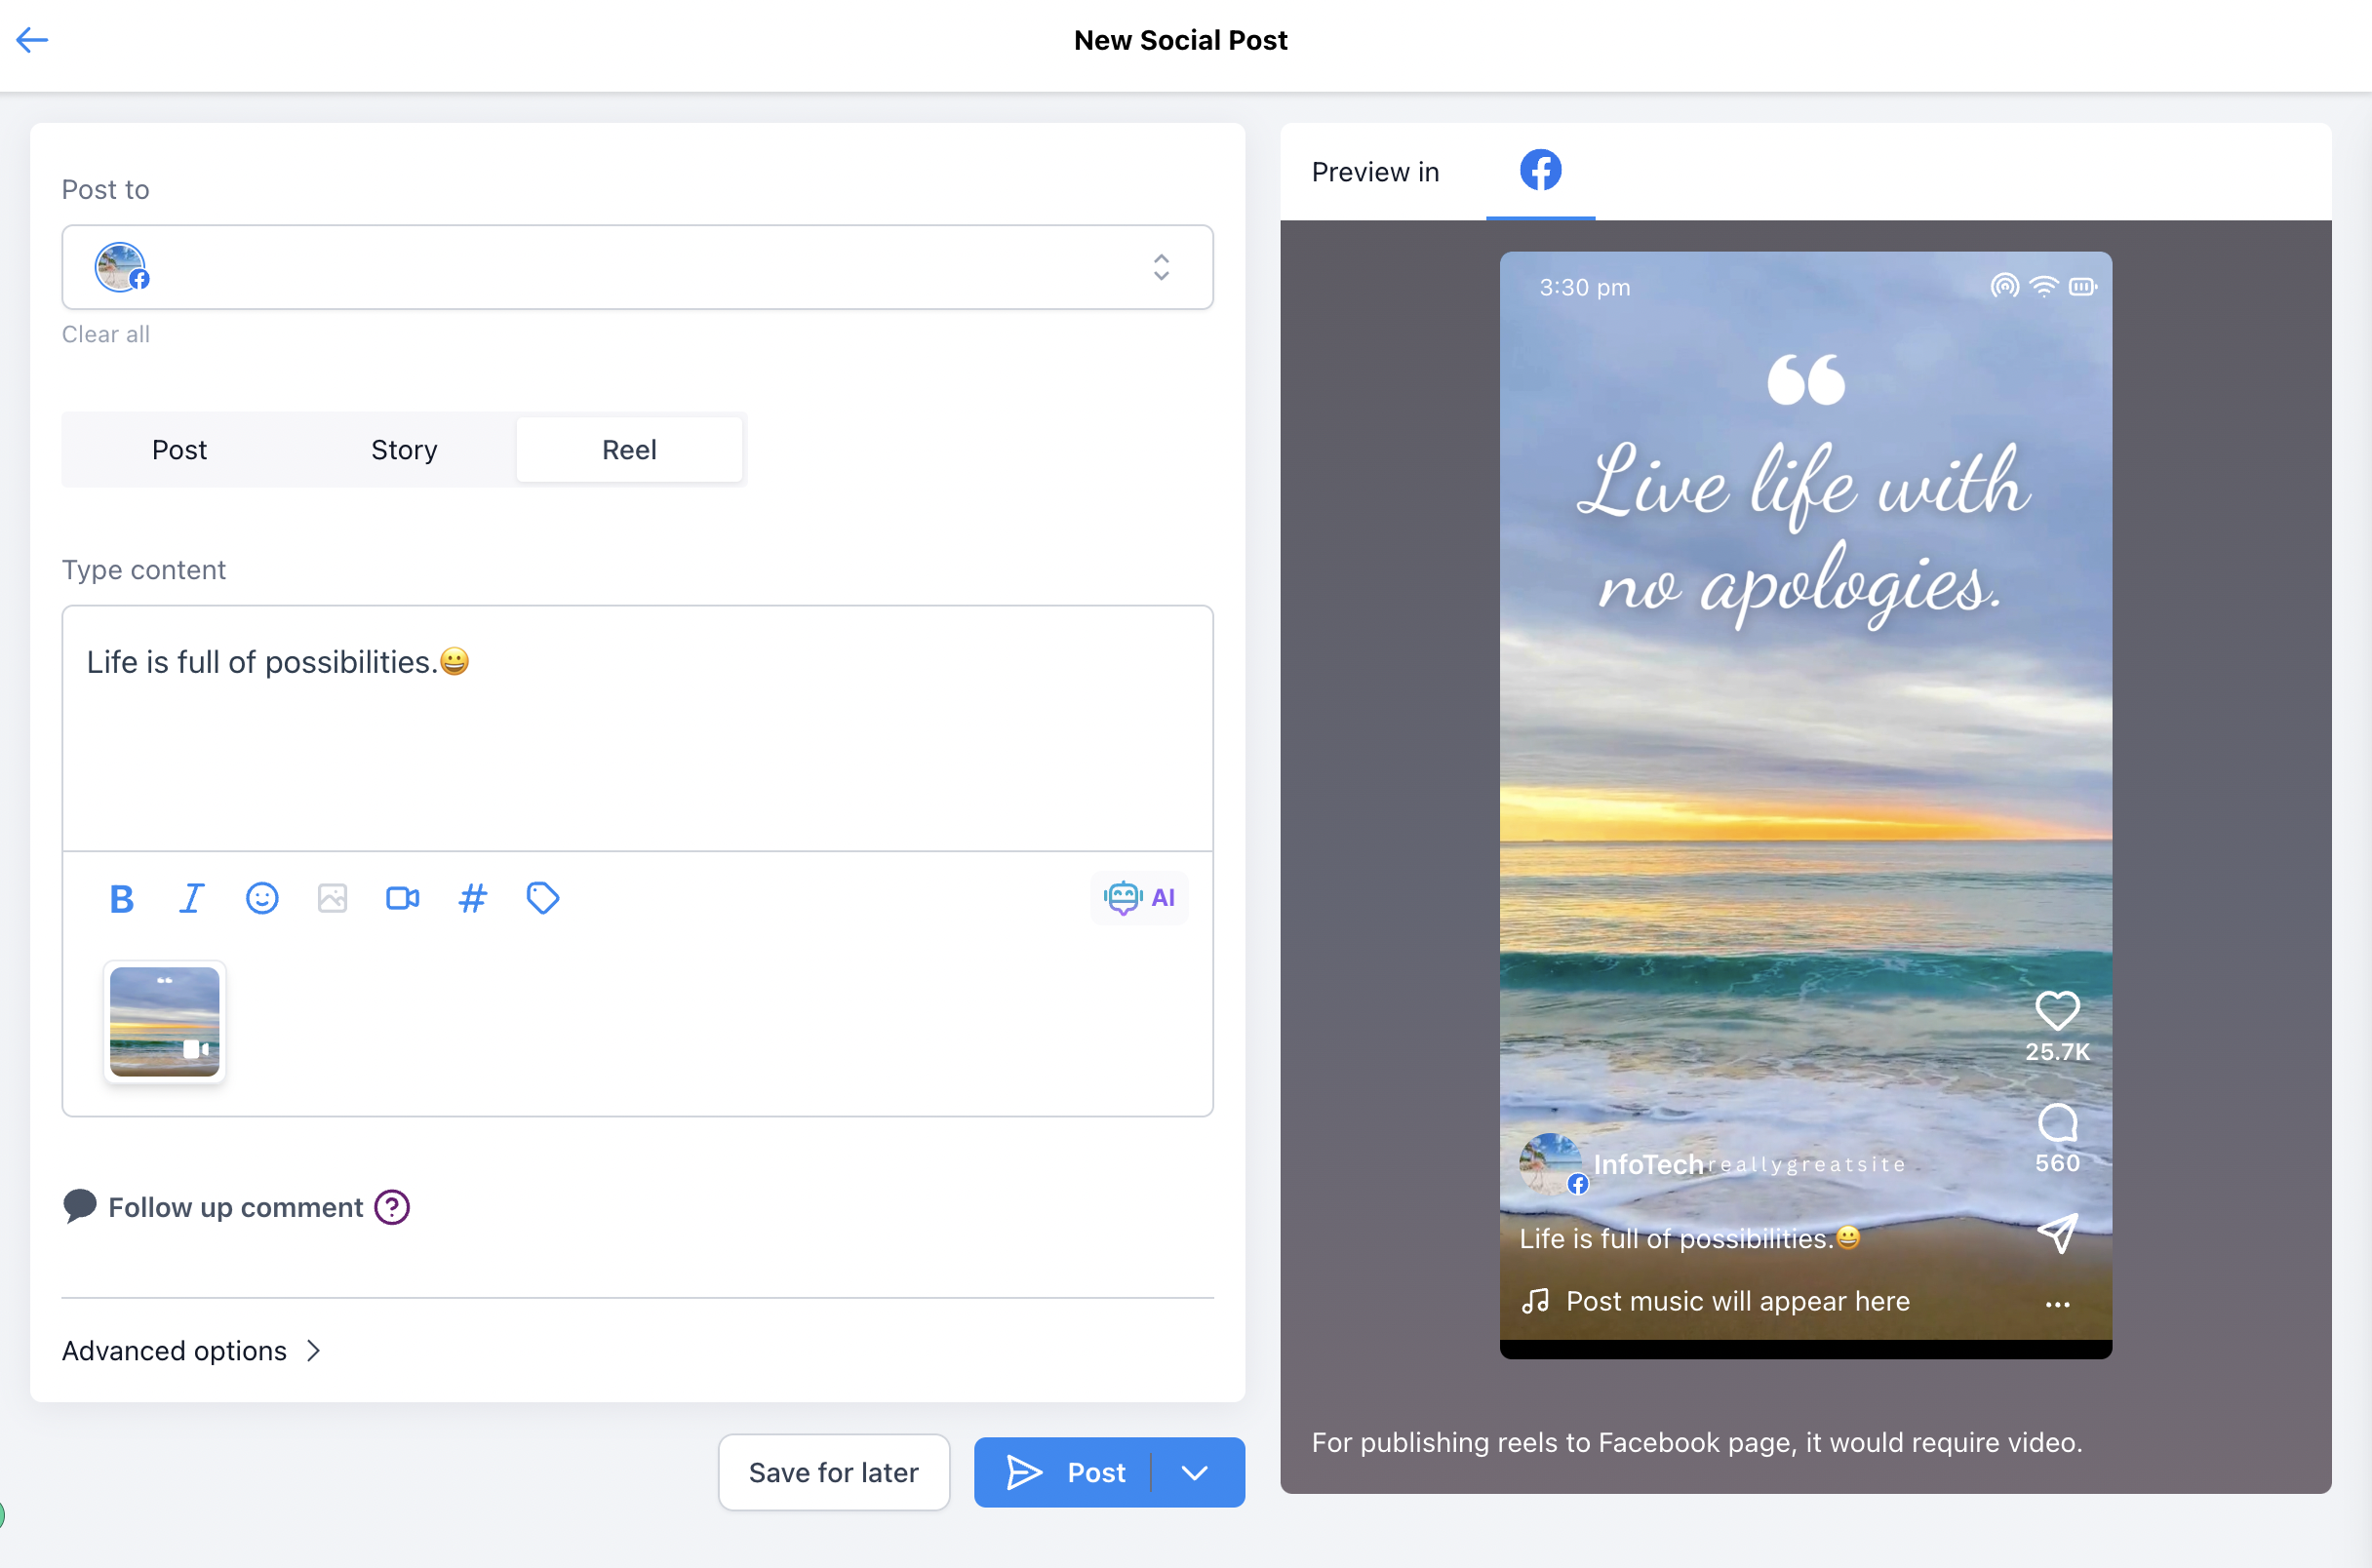
- Click the video icon, upload a single MP4 or MOV video, then type a caption, add hashtags or emojis, and review the preview.
- Optionally click Follow up comment and enter the text you want to appear as a comment after the Reel publishes.
- Optionally expand Advanced options and assign a category or tags to the Reel.
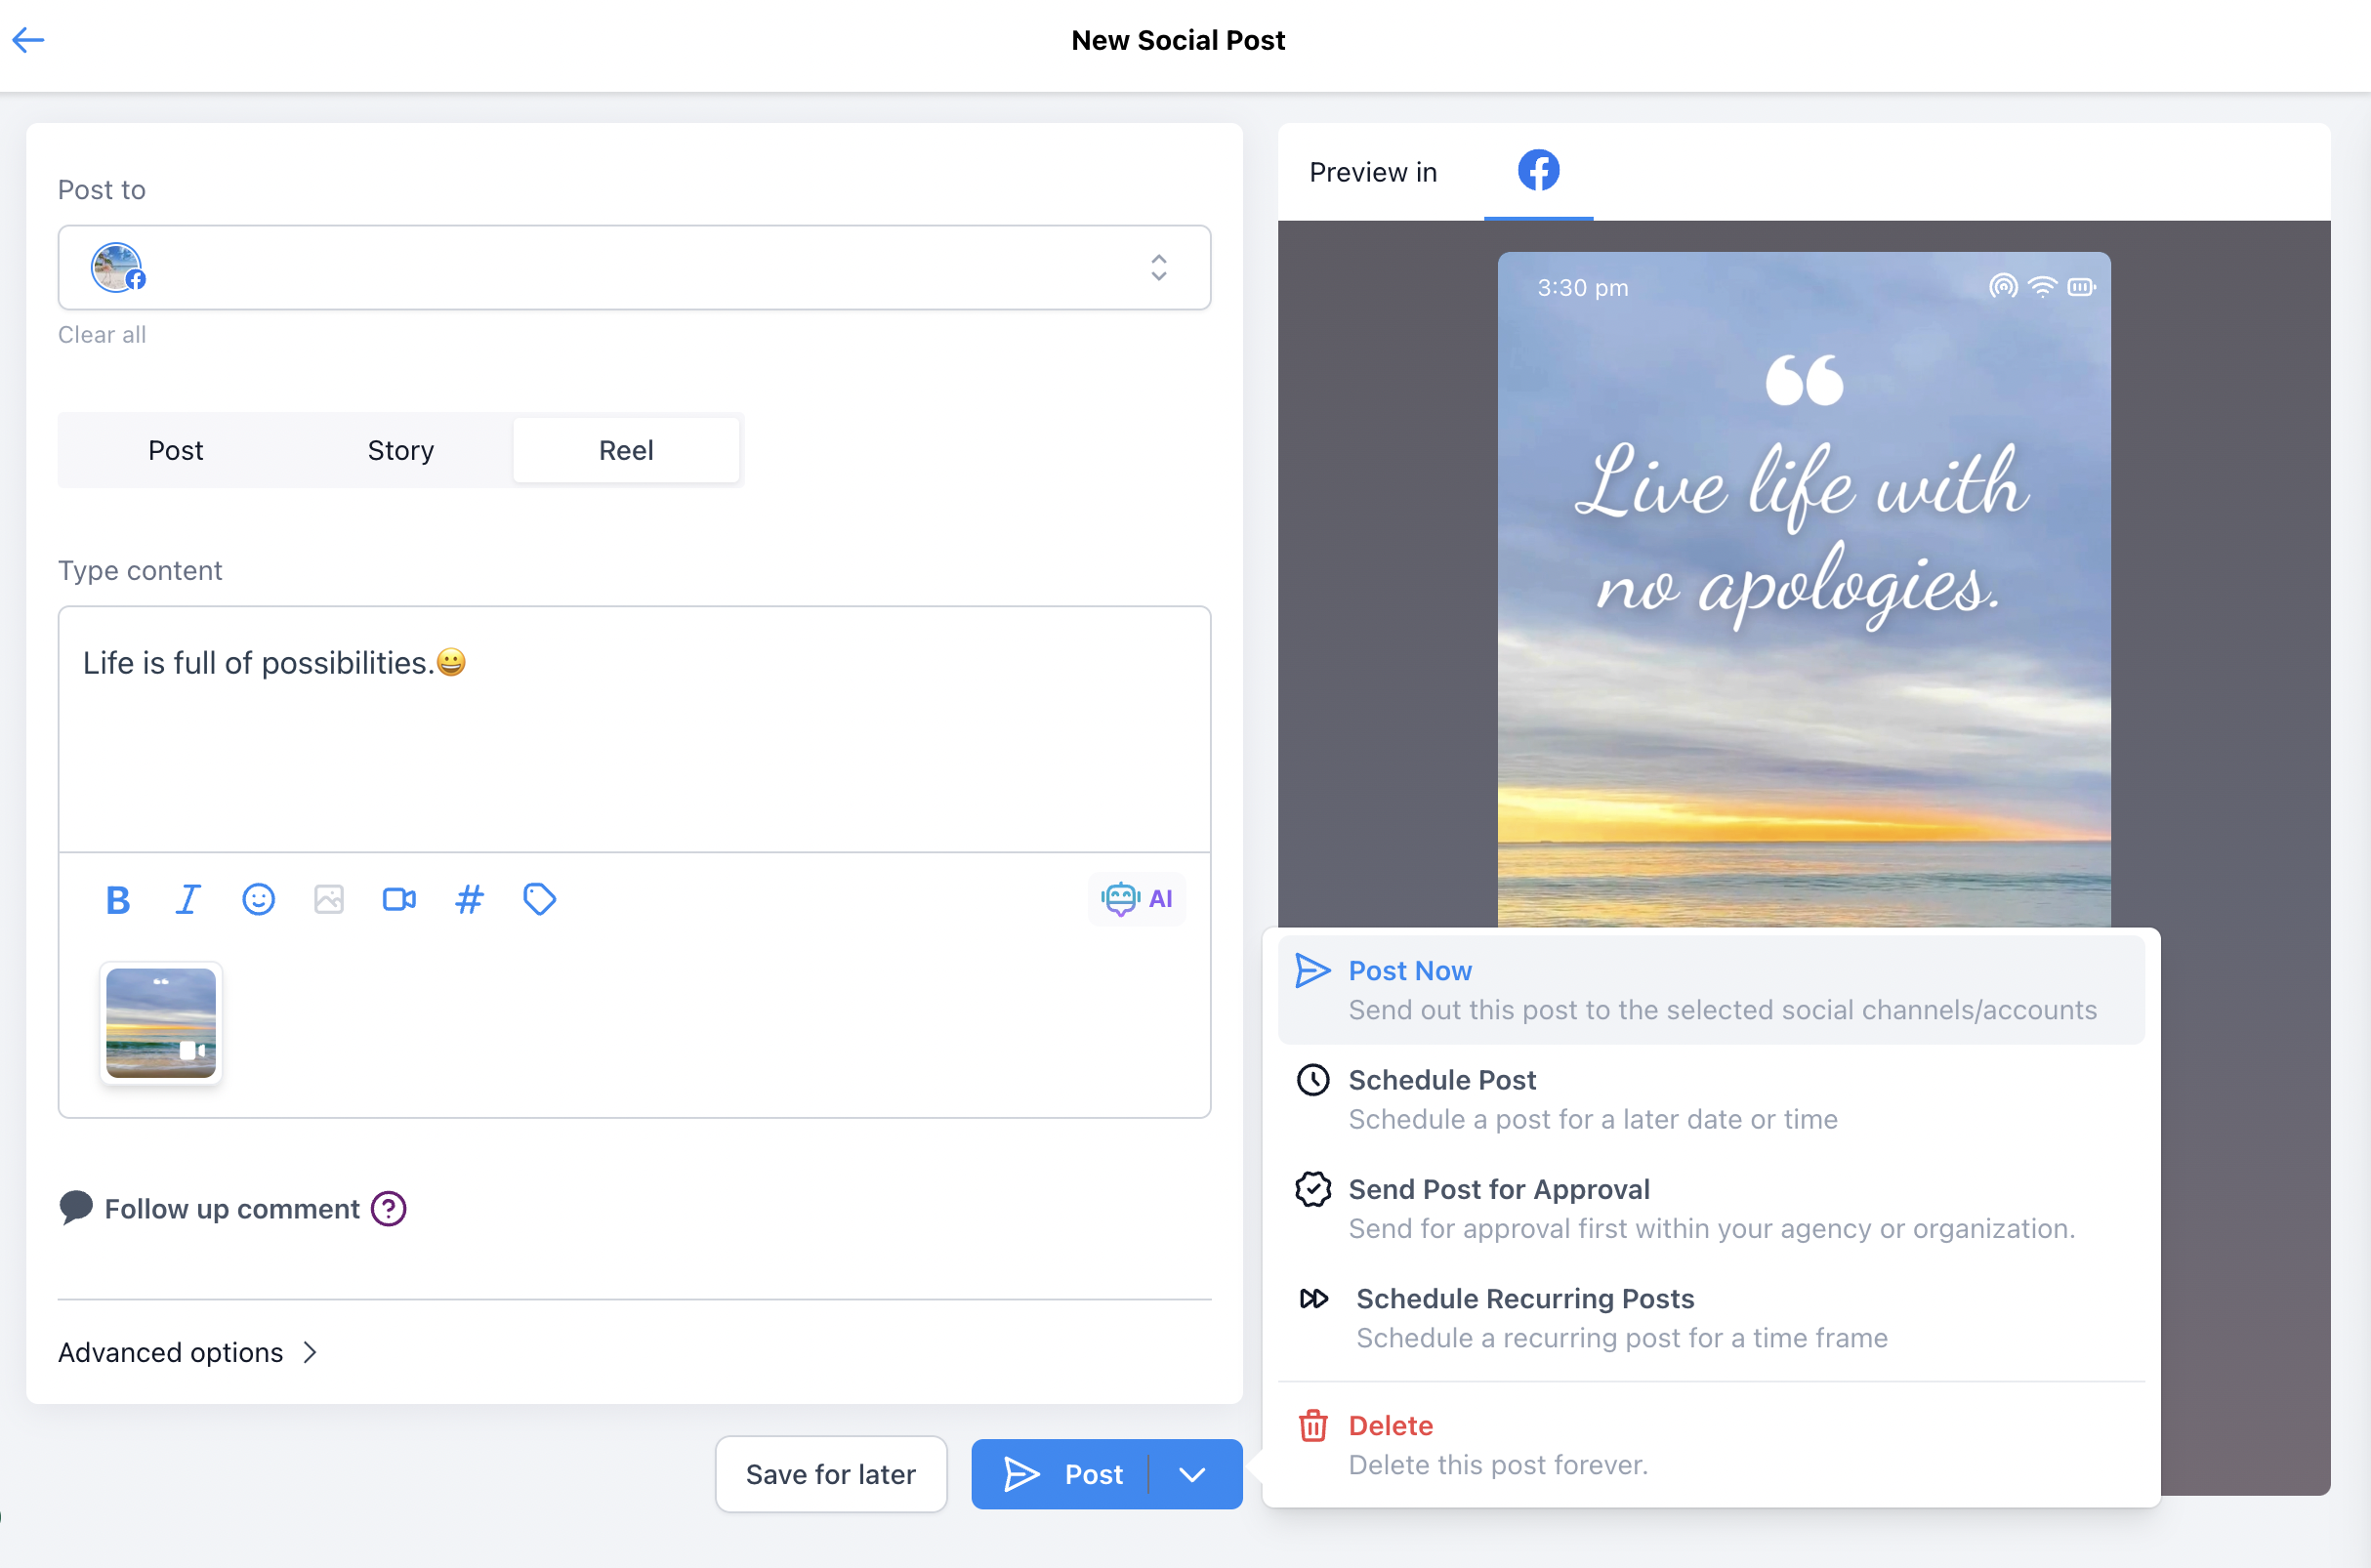
- Open the Post dropdown and select Post Now, Schedule Post, Send Post for Approval, or Schedule Recurring Posts as needed.
07What it looks like in HighLevel
08Settings that matter
- Facebook Options. Allows you to choose the type of Facebook content you are creating, such as Reel, Feed or Story.
- Follow up comment. Enables you to add text that will appear as a comment on the Reel after it is published.
- Advanced options. Provides fields to assign a category or tags for organizing the Reel within Social Planner.
09Things to know before you rely on it
- Video file size cannot exceed 1 GB.
- Video duration must be between 3 and 90 seconds.
- Only one video can be attached to a Reel.
- Resolution should be at least 540 × 960 pixels; 1080 × 1920 pixels is recommended.
- Aspect ratio of 9:16 is recommended.
- Custom thumbnails are not supported for Reels.
- Reels can be published only to Facebook Pages, not to Groups.
10If something goes wrong
- Reel does not publish. Check the post status, verify the Facebook Page is still connected, and ensure the video meets the size, duration and resolution limits.
11How it connects to the rest of HighLevel
- How to connect a Facebook Page to Social Planner Connect Facebook Page
- Video and image specifications for Social Planner content Content guidelines
- Using post approvals in Social Planner Post approvals
Michael's take

The short form video format can be a quick way to get in front of your audience, and the Social Planner makes the upload and scheduling steps pretty straightforward once your page is linked.
I’d start by linking the Facebook Page, then upload a 30 second video that fits the 9:16 ratio. Add a concise caption and a follow up comment with a link to a lead magnet. Test the schedule for a low traffic time first.