
01Who this is for
- Marketers who need consistent brand visuals in every campaign benefit from quick logo placement.
- Design teams can maintain brand guidelines without editing HTML code.
- Small businesses can link their logo to a landing page for easy navigation.
02Logo elements, explained
The Logo Element lives inside the Email Builder under the Elements panel. After dragging it onto the canvas, the left hand Edit tab appears with options to upload an image file or provide a hosted URL. You can set the logo’s width, height, alignment and add a clickable link.
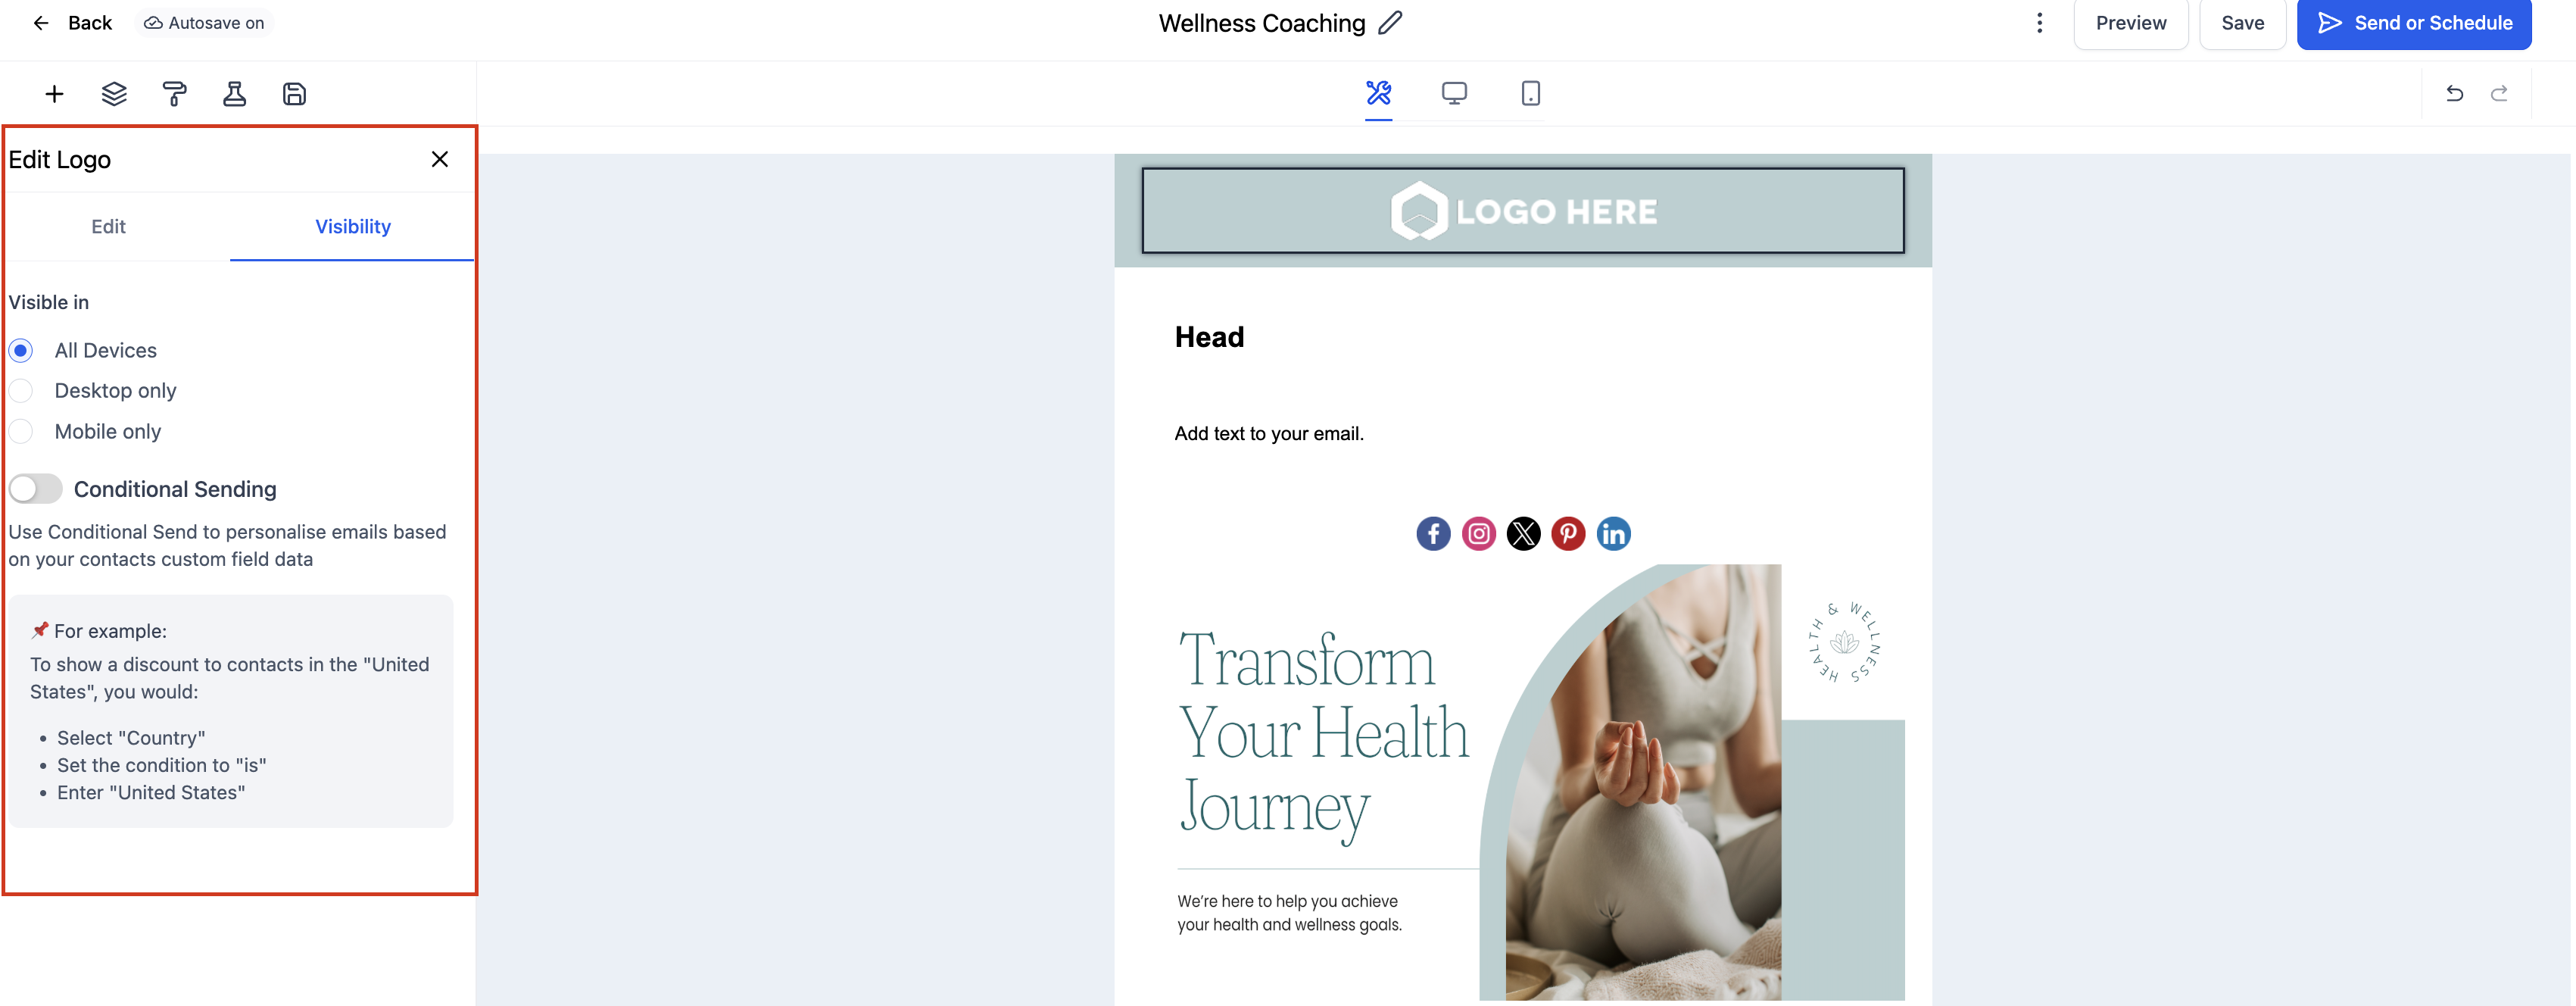
The element is responsive; it automatically scales for mobile screens. Padding controls let you add space around the logo, and the Visibility tab lets you hide or show the logo based on device type or conditional sending rules. All changes are previewed in real time before saving the template.
03How businesses use logo element
- Real estate agency. A real estate agency drops the Logo Element at the top of its newsletter, uploads a transparent PNG, aligns it centre and links it to its property listings page. The logo resizes for mobile viewers, preserving brand identity.
- Fitness studio. The studio adds the Logo Element to class schedule emails, sets a custom width, adds right alignment and links the logo to the studio’s membership portal. Padding ensures the logo does not crowd surrounding text.
- SaaS startup. The startup places the Logo Element in product update emails, uploads a high resolution JPG, adjusts size for readability, and links it to the company’s blog. Visibility settings hide the logo on mobile if a different layout is used.
04The numbers and rules that matter
- Supported file types: PNG, JPG, GIF.
05How to set up and use logo element in HighLevel
Add and configure logo element
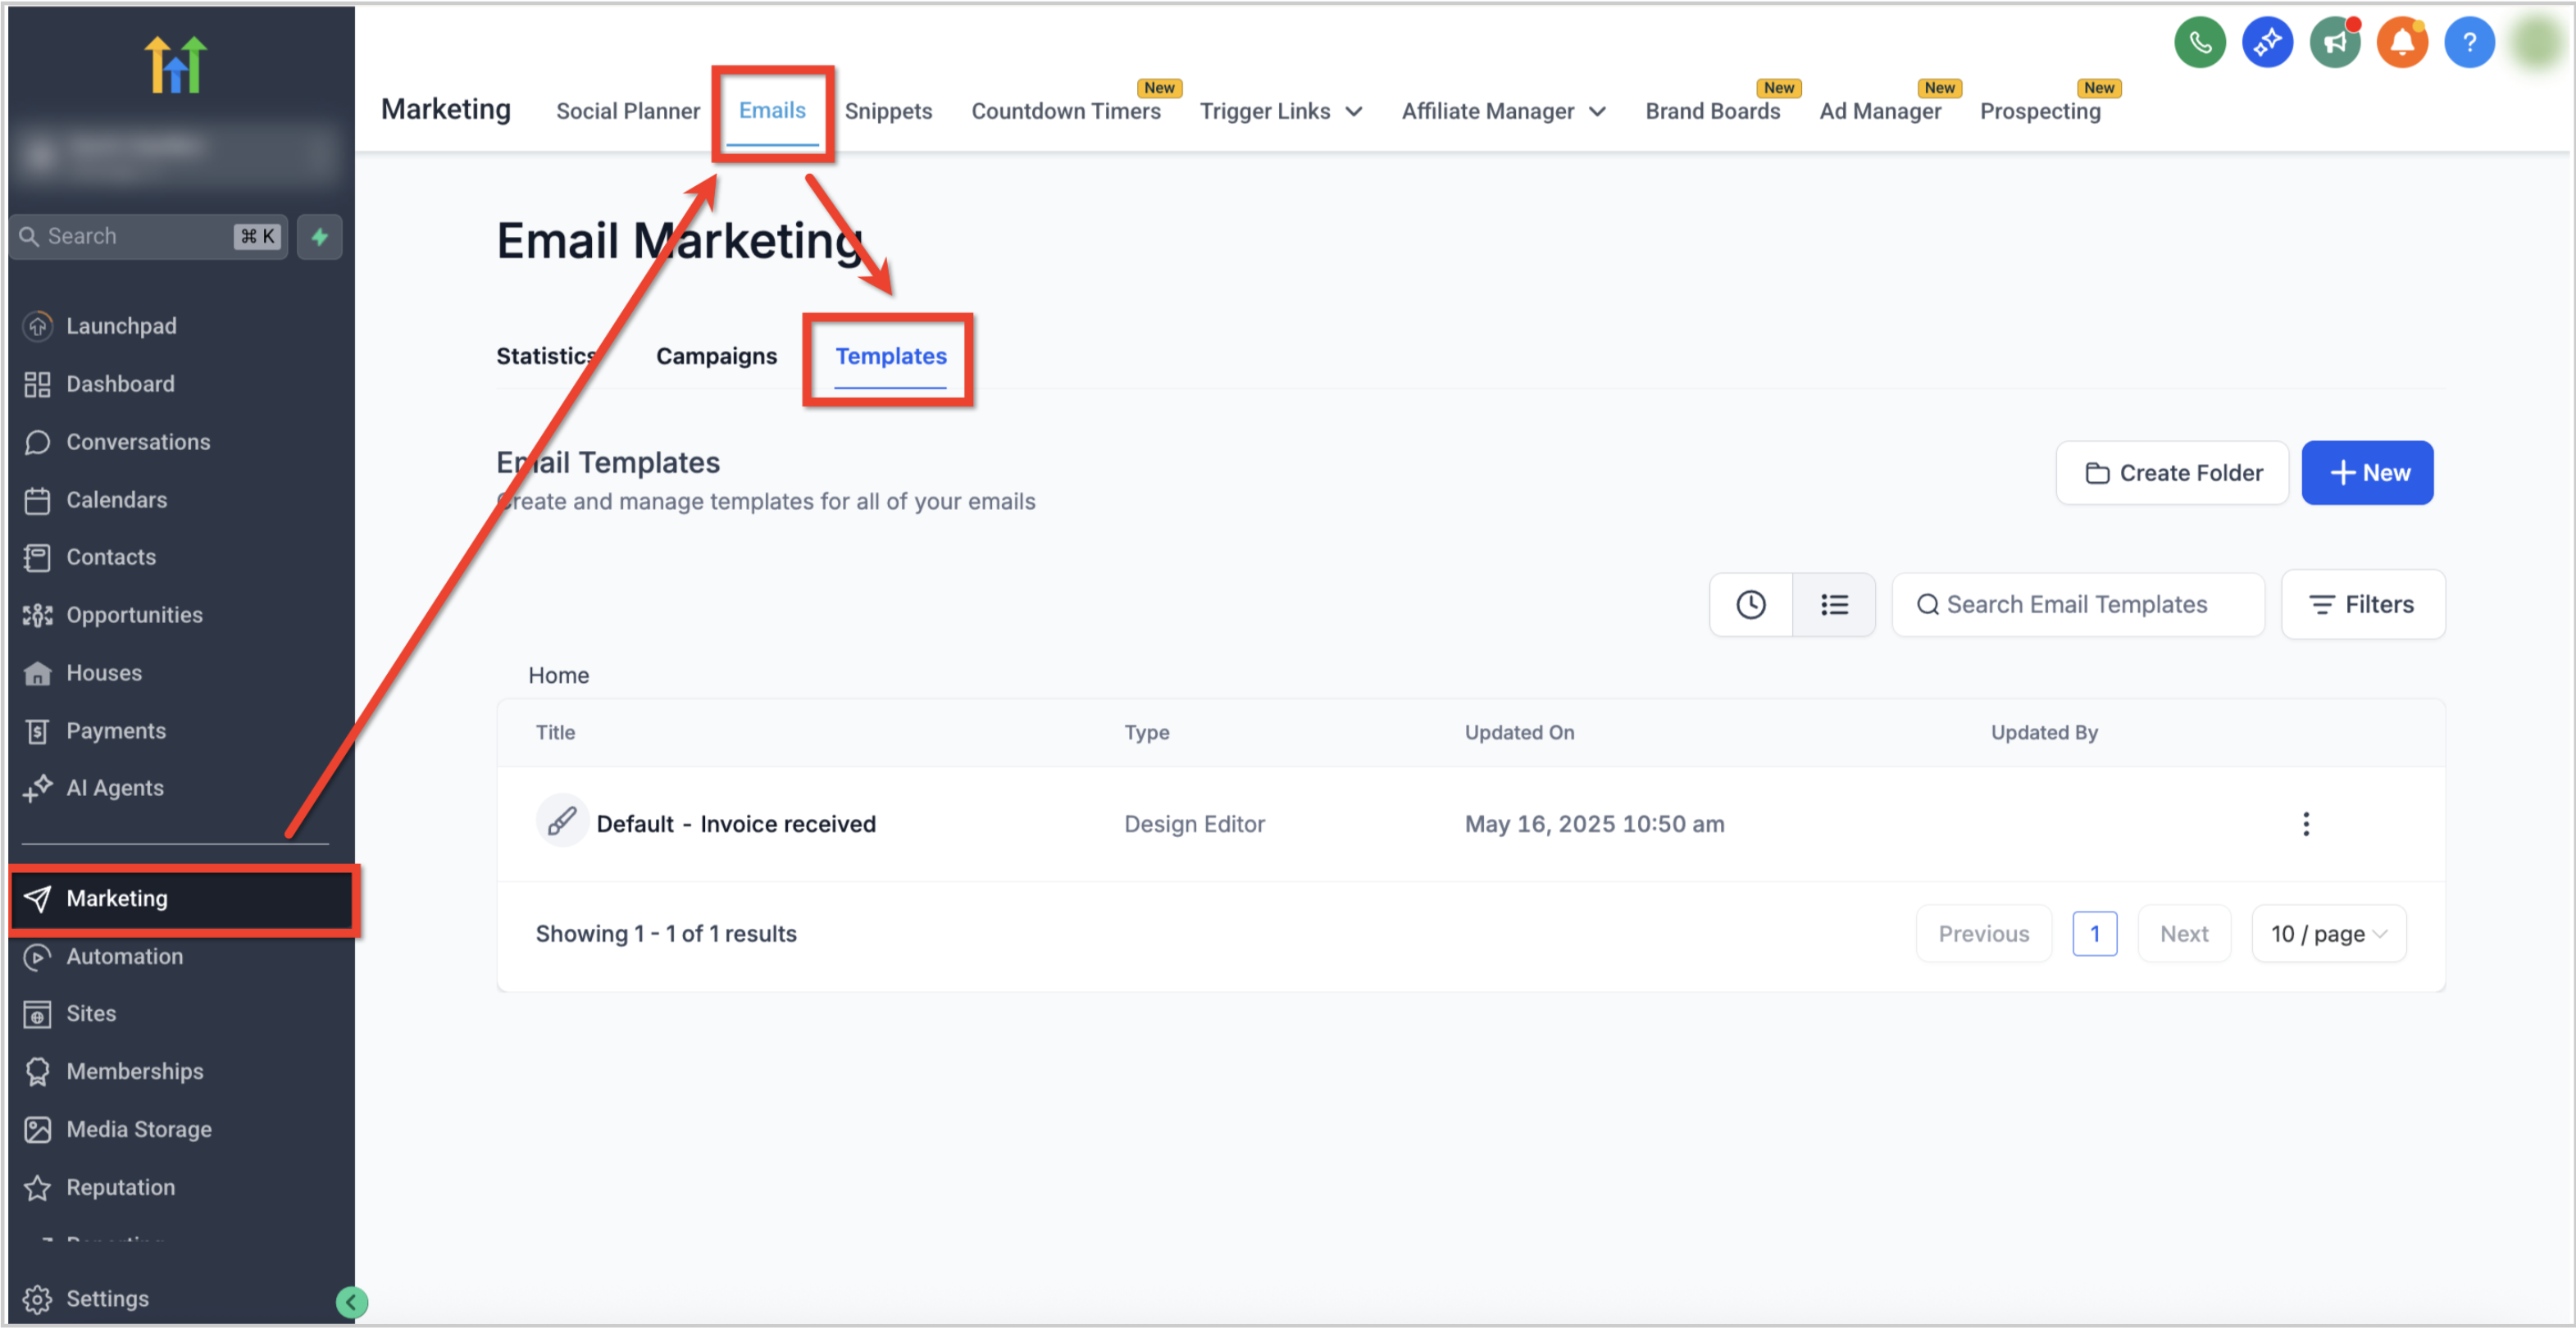
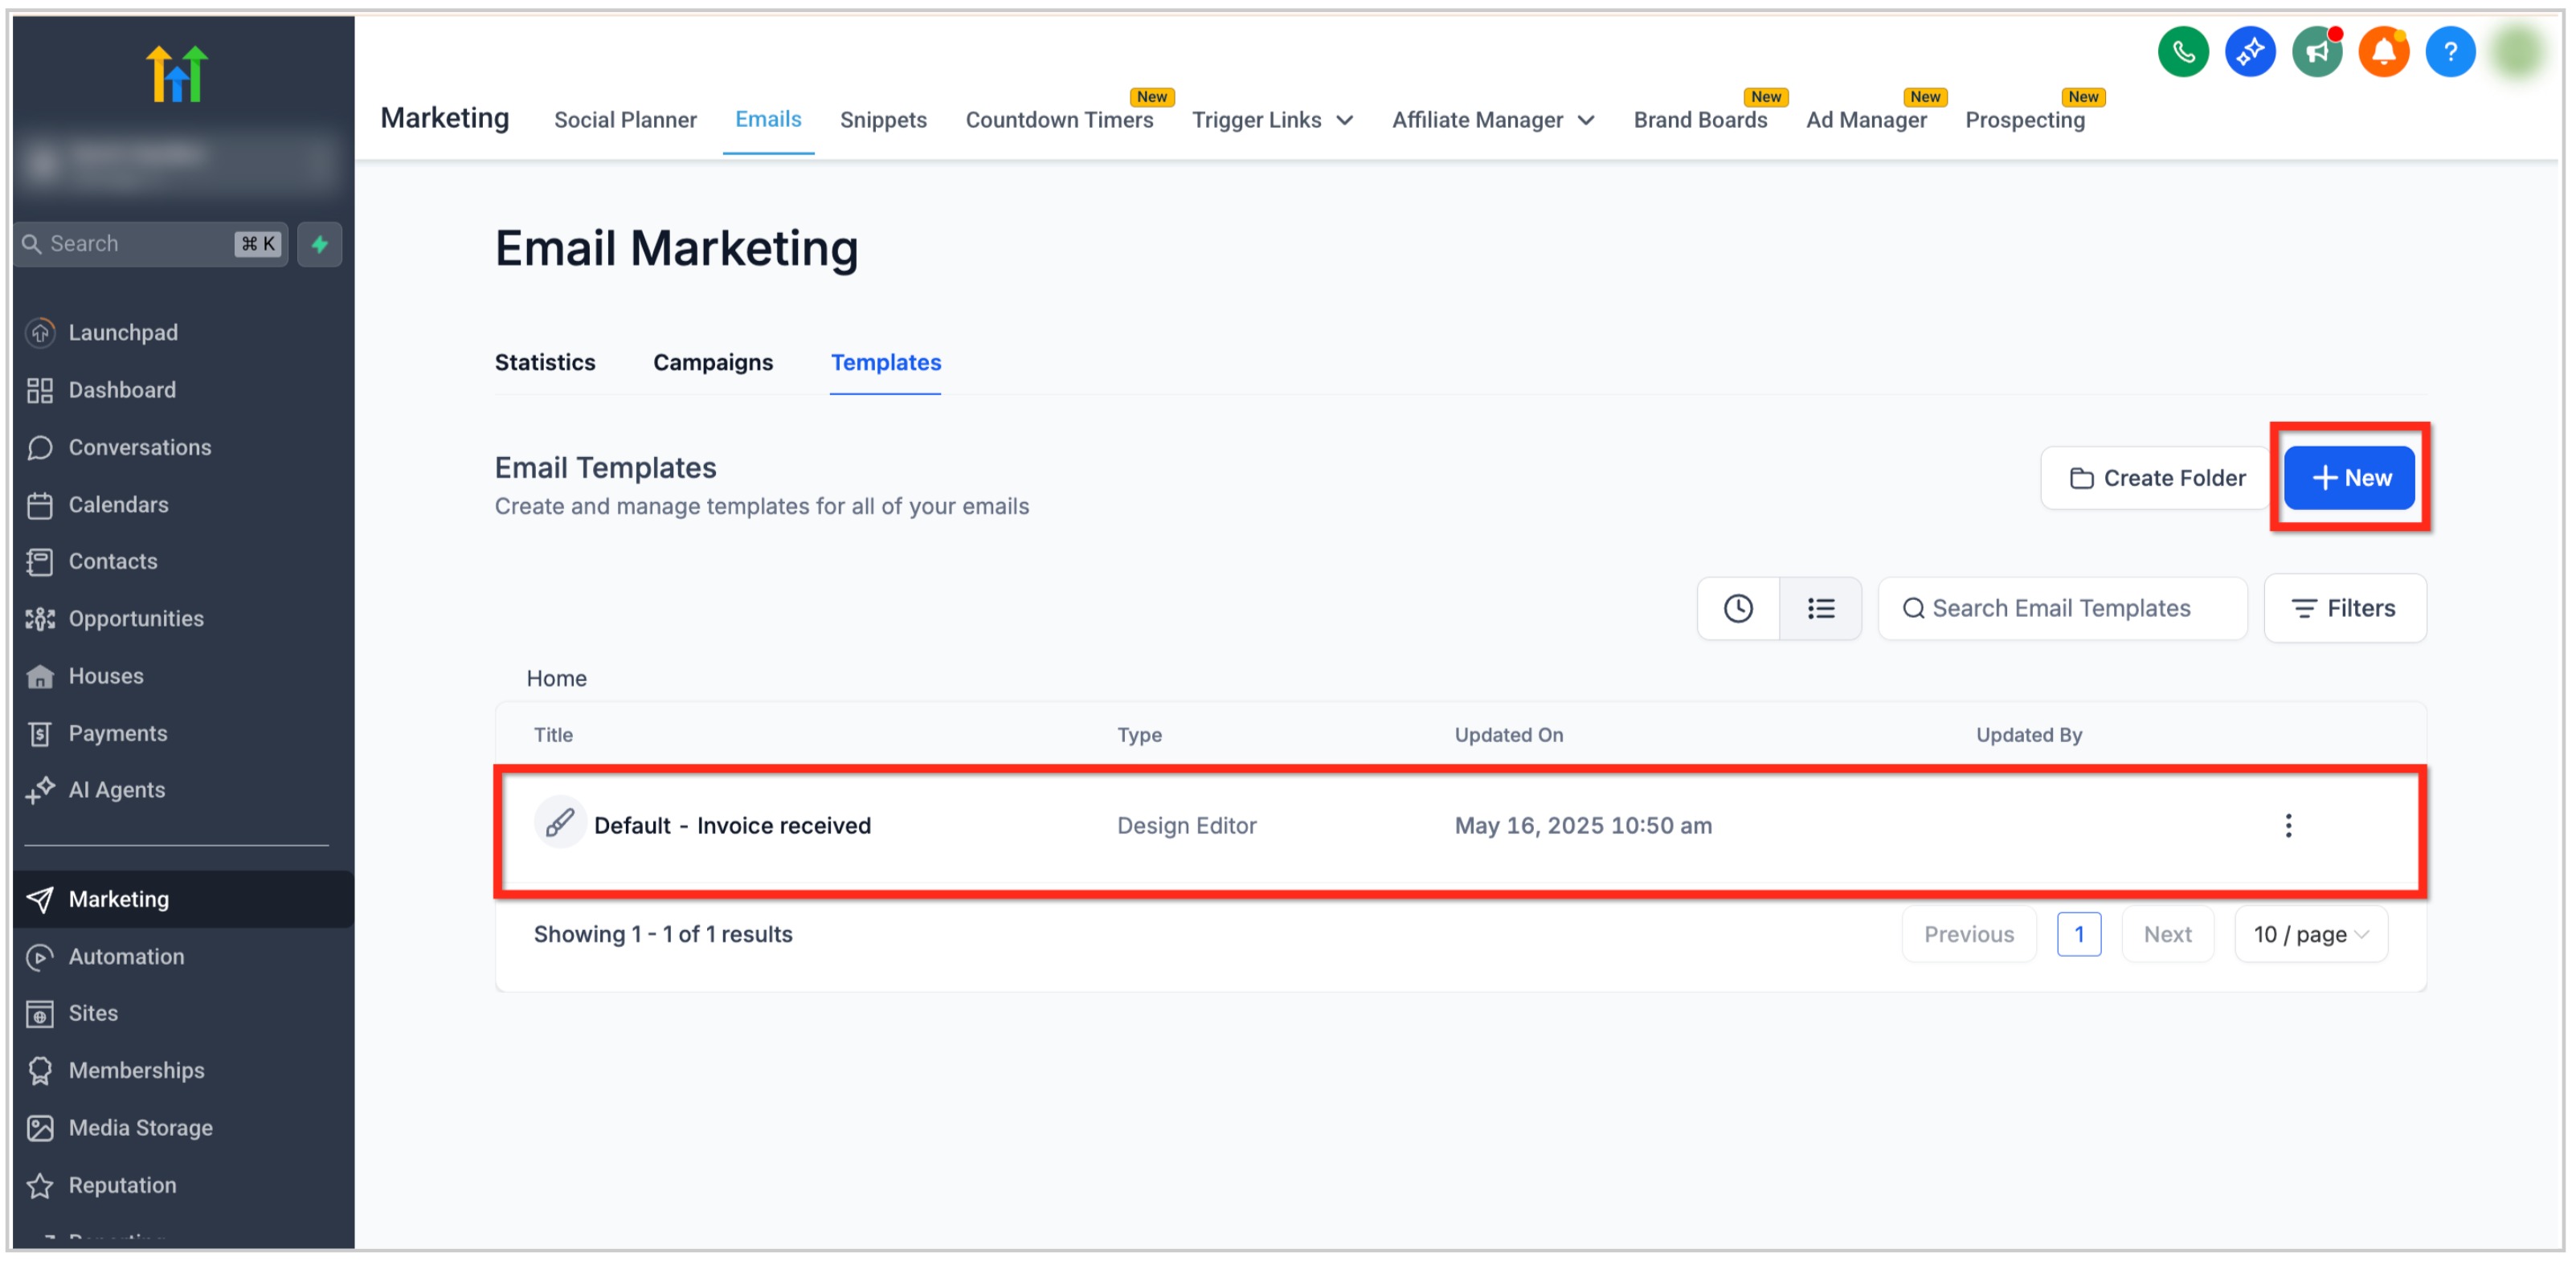
- Navigate to Marketing > Emails > Templates from the subaccount dashboard.
- Open an existing email template or click the + New button to create a new one.
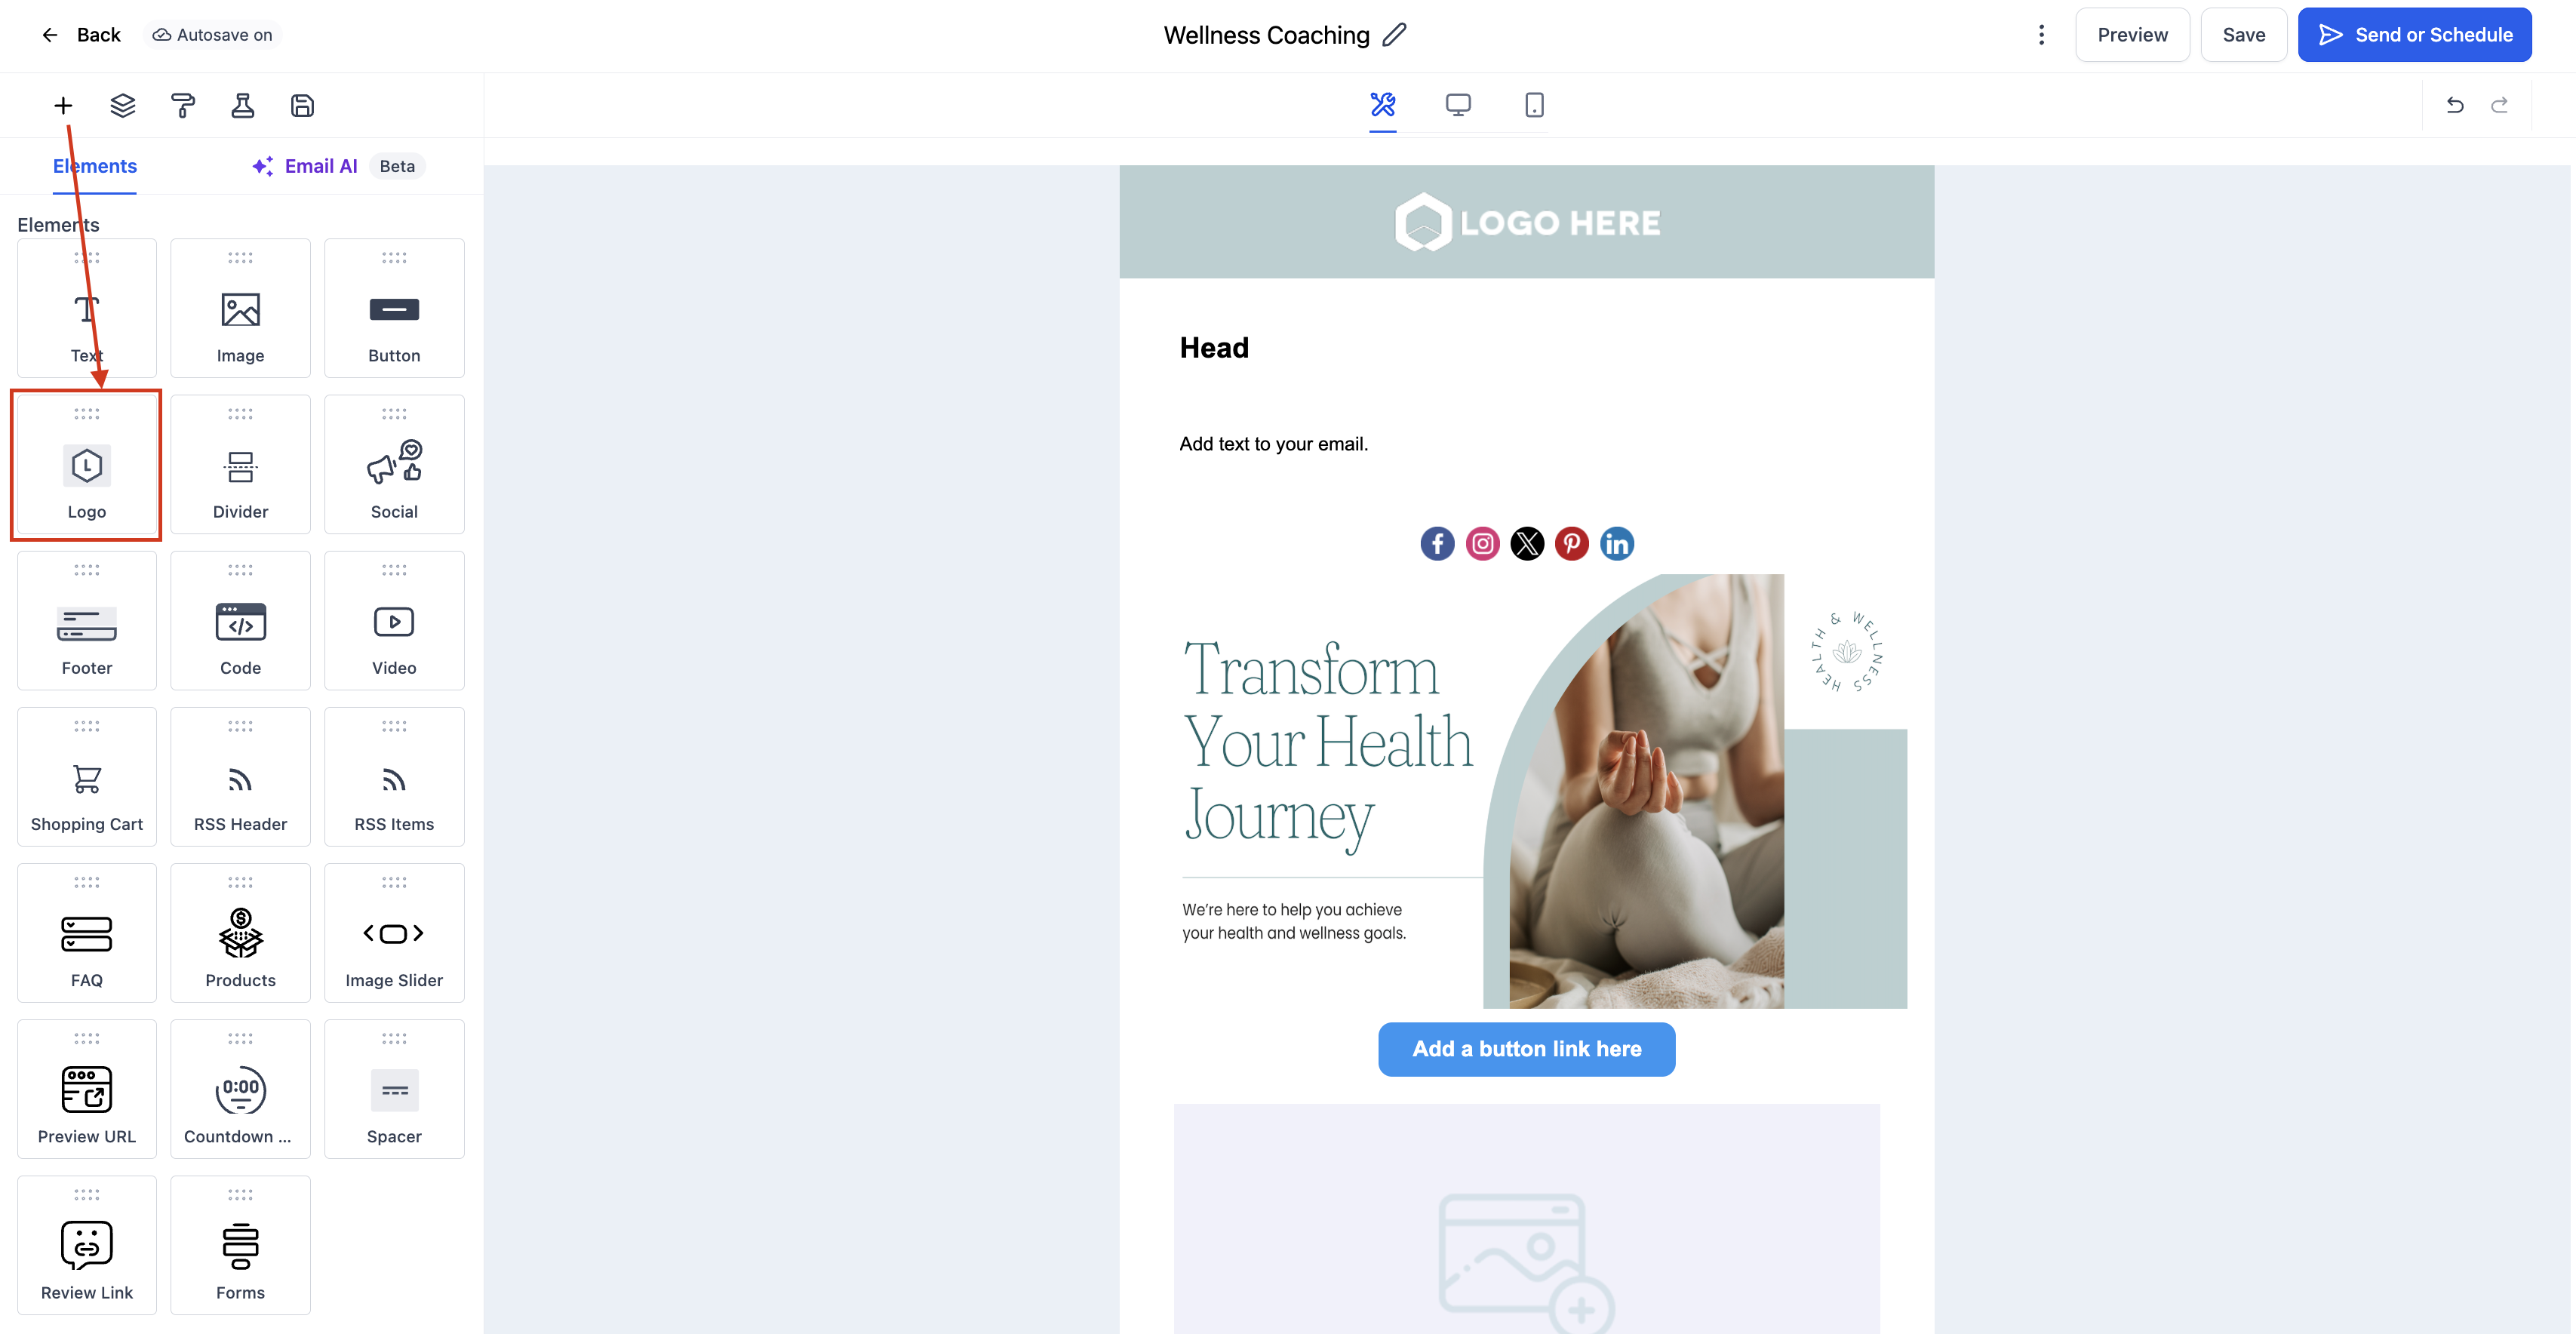
- In the Email Builder, click the Add Elements (+) icon in the left sidebar.
- Locate the Logo Element under the Elements section.
- Drag and drop the Logo Element to the desired position, usually at the top of the layout.
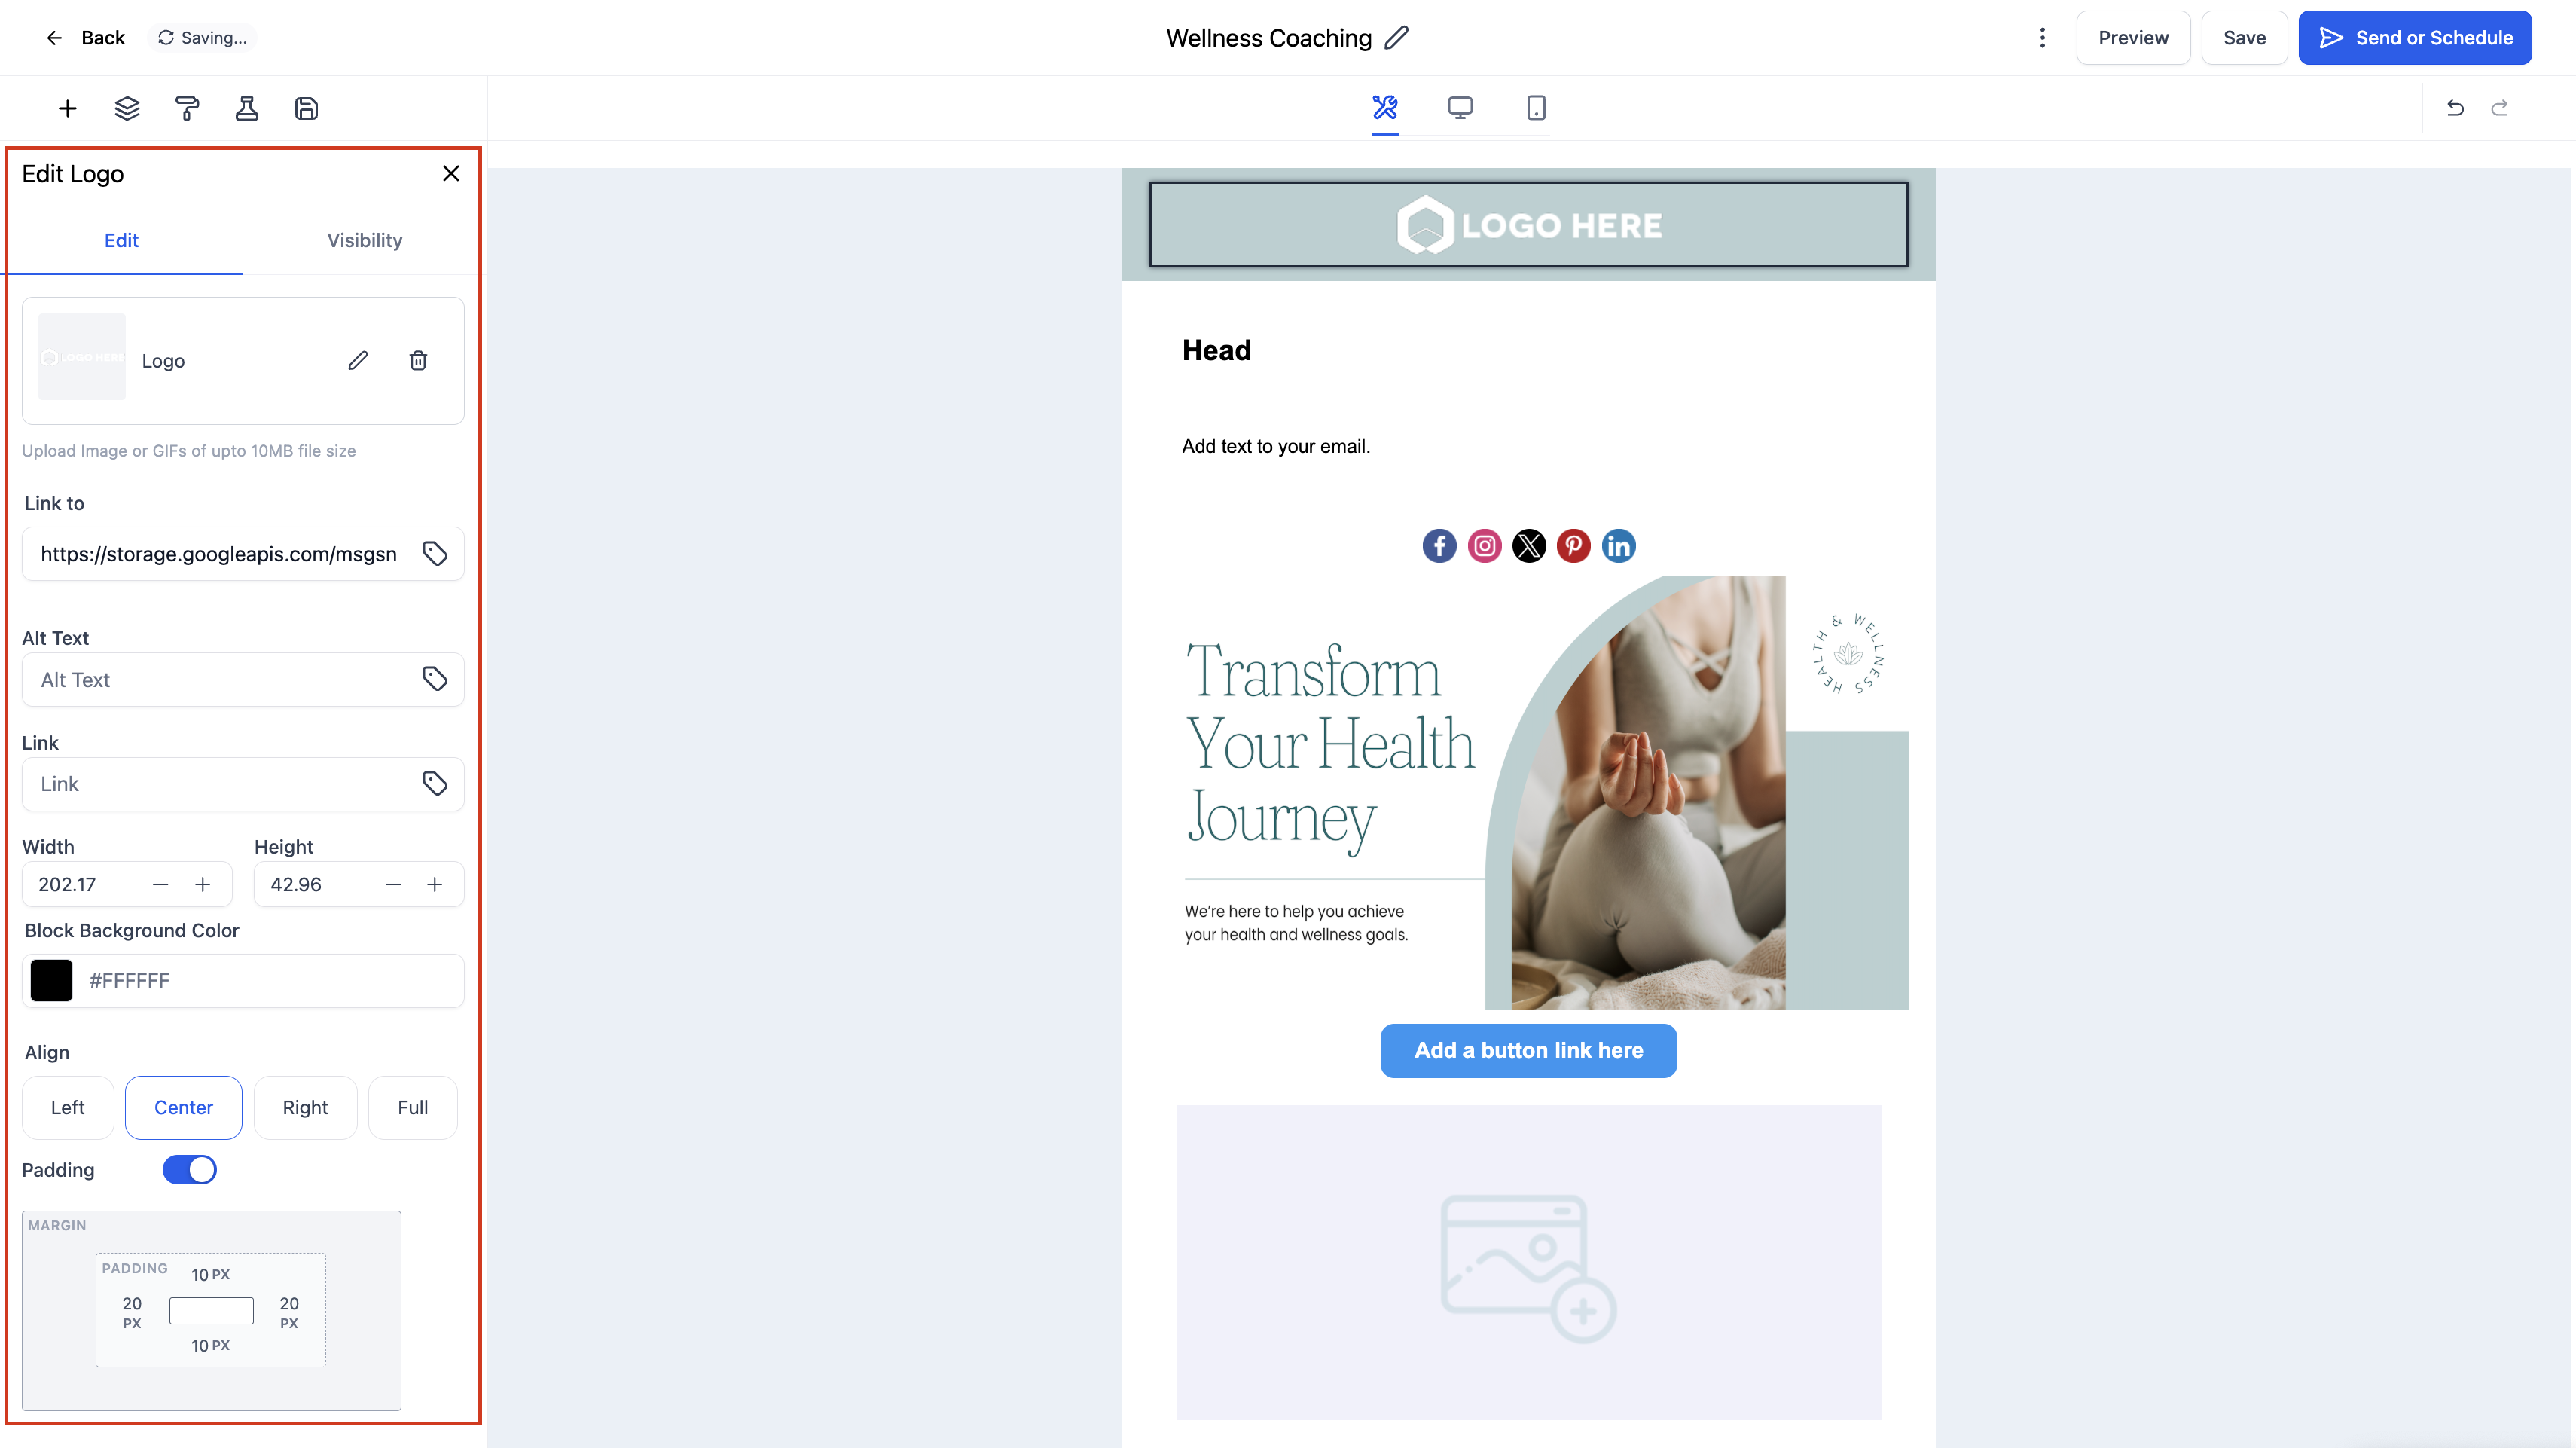
- Click on the placed Logo Element to open the Edit tab on the left panel.
- Upload a logo image from your device.
- Paste a direct image URL if you prefer a hosted logo.
- Set custom width and height values to resize the logo.
- Choose left, centre, or right alignment for the logo.
- Add a hyperlink so the logo clicks through to a website or landing page.
- Adjust padding to add spacing around the logo for a balanced appearance.
- Click the Visibility tab to configure device based visibility or conditional sending settings if needed.
- Preview the email on both desktop and mobile to confirm the logo displays correctly.
06What it looks like in HighLevel
07Settings that matter
- Upload a Logo. Select an image file from your computer to use as the logo.
- Use an Image URL. Enter a direct link to a hosted logo image.
- Adjust Size. Define custom width and height to control the logo’s dimensions.
- Set Alignment. Position the logo left, centre, or right within the email layout.
- Add a Link. Attach a hyperlink so the logo becomes clickable.
- Control Padding. Add spacing around the logo to separate it from other elements.
- Visibility. Set device based visibility or conditional sending rules for the logo.
08Things to know before you rely on it
- Supported file types are PNG, JPG, and GIF; PNG is recommended for transparent backgrounds.
09How it connects to the rest of HighLevel
- Add a video element to the same email template for richer content. Video element
- Use custom fonts in the email builder to match your brand typography. Custom fonts
Michael's take

I find the Logo element handy for adding consistent branding to emails without extra design steps.
If you already use custom HTML for your emails, you might not need this feature.