
01Who this is for
- Ecommerce owners who need to collect credit card payments without leaving HighLevel.
- Service based freelancers who want a simple way to charge clients directly from their subaccount.
- Coaches and consultants selling digital products who require a built in payment gateway.
02Stripe integration, explained
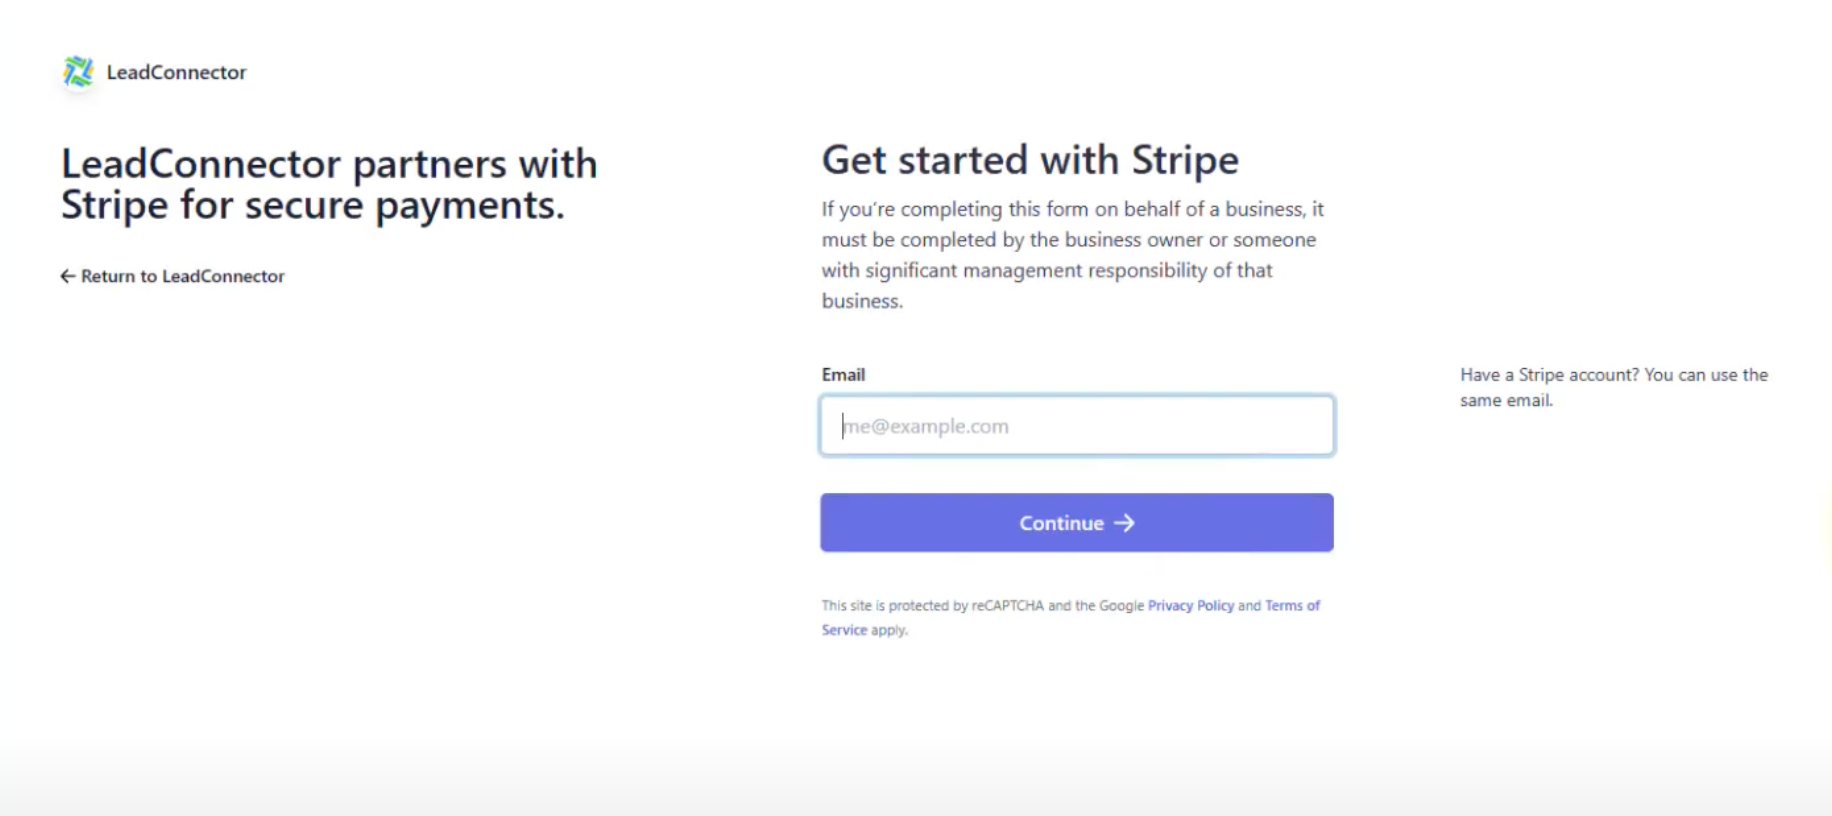
The integration adds Stripe as a payment processor to a specific subaccount. It appears in the subaccount’s navigation under Launchpad, Settings ▶ Integrations, or Payments ▶ Integrations. Once linked, the subaccount can receive payments through Stripe’s checkout flow. The connection follows Stripe’s standard OAuth flow. After selecting the Stripe option, the platform redirects to Stripe where you grant permission. When the process finishes, HighLevel marks the integration as enabled, allowing you to start collecting payments immediately.
03How businesses use Stripe integration
- Online retailer. The retailer opens the Launchpad in the subaccount, selects the Ecommerce guide, and starts the Stripe connection. After authorizing, they check the status and begin receiving orders directly.
- Digital marketing agency. The agency navigates to Settings ▶ Integrations, clicks Continue beside Stripe, completes the Stripe authorization, and confirms the integration is active to bill clients for services.
- Fitness coach. The coach goes to Payments ▶ Integrations, presses Connect for Stripe, follows the Stripe prompts, and verifies the integration before offering class subscriptions.
04Before you start
- Your business must be located in a country where Stripe is supported.
05How to set up and use Stripe integration in HighLevel
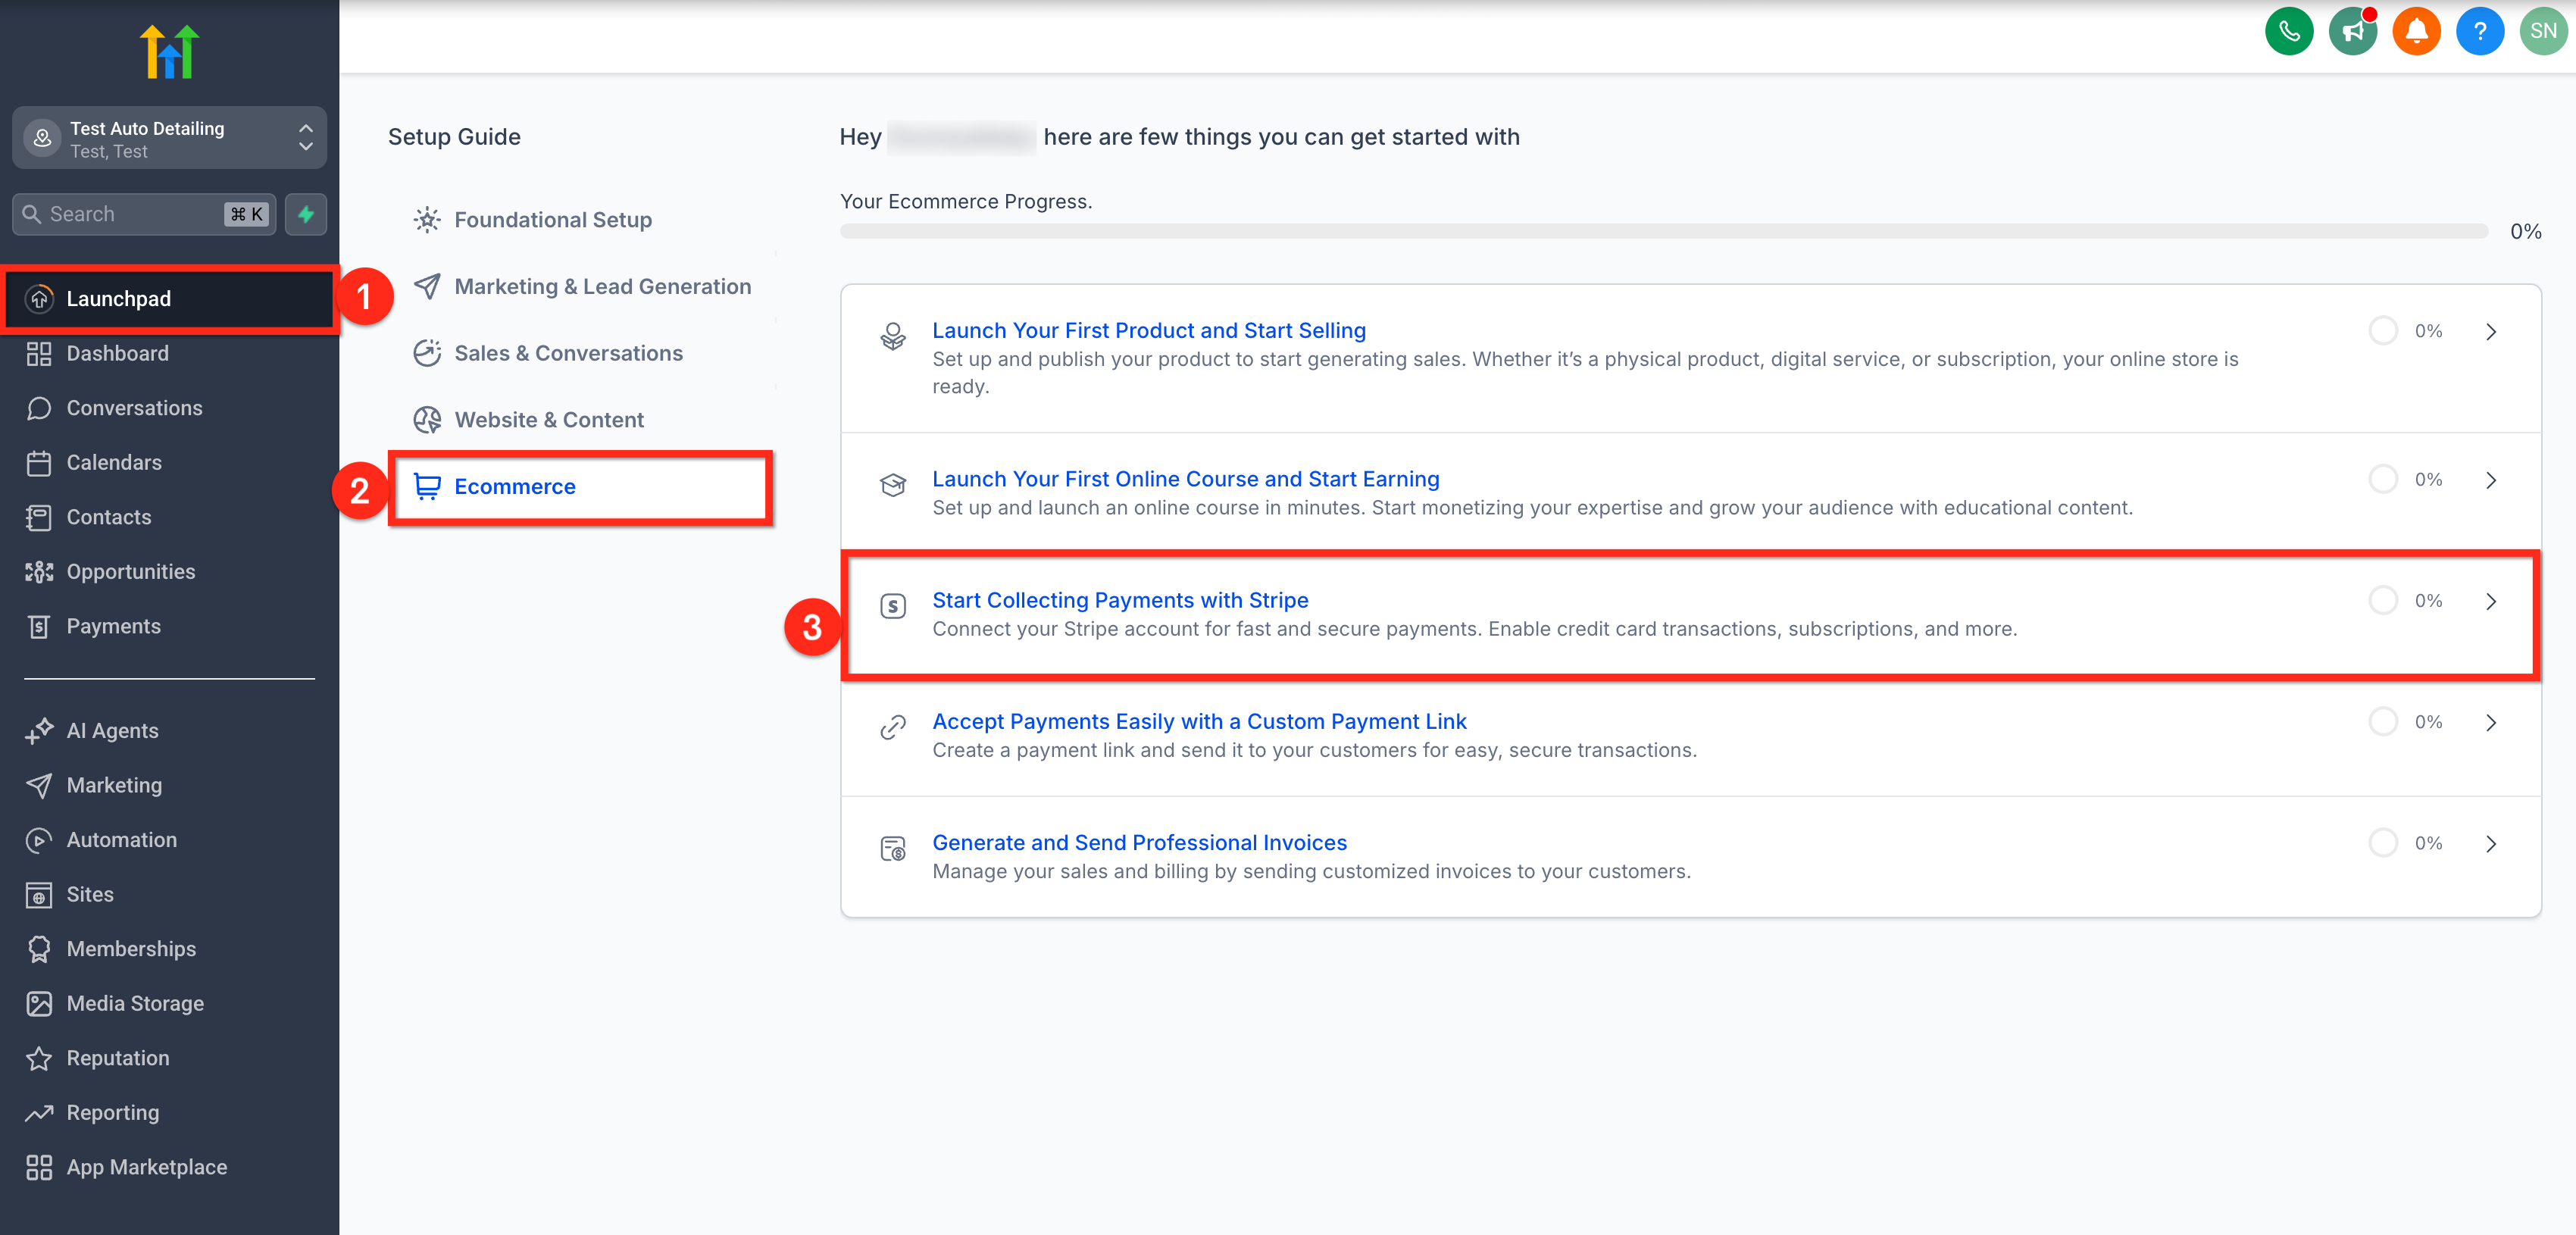
Connect Stripe via Launchpad
- Open the Launchpad inside the subaccount.
- Choose the Ecommerce option from the Setup Guide.
- Tap the Start Collecting Payments with Stripe button.
- Complete the authorization steps shown by Stripe.
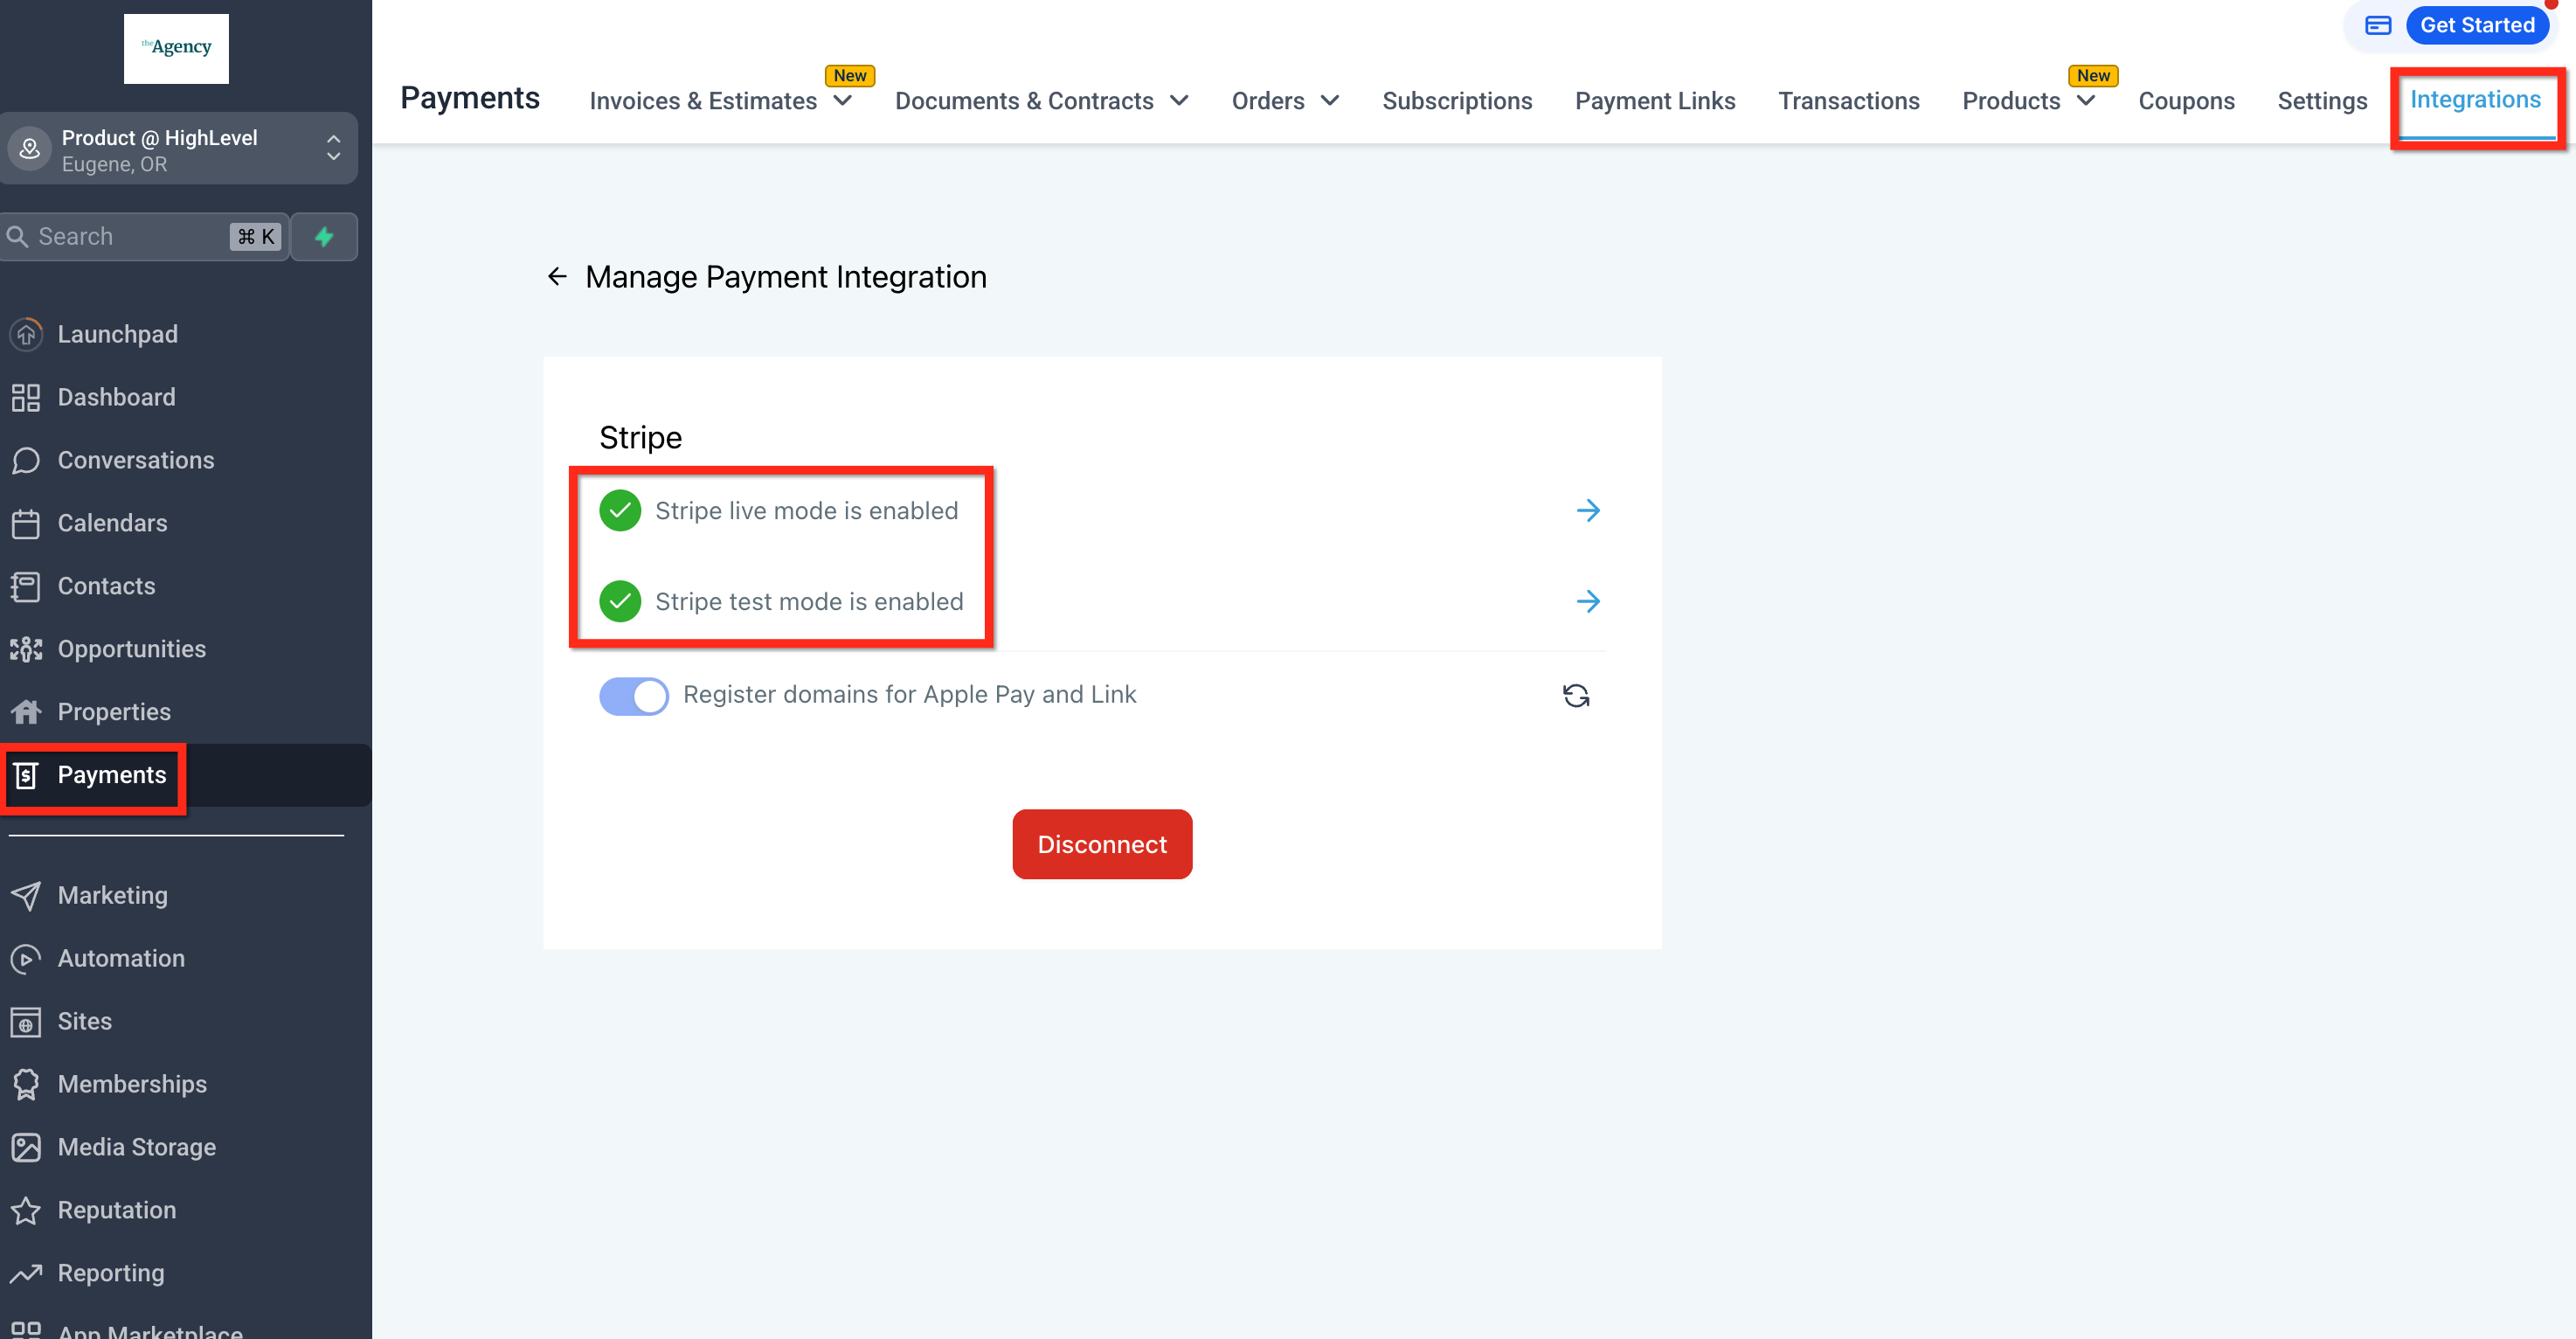
- Check that the Stripe integration shows as enabled.
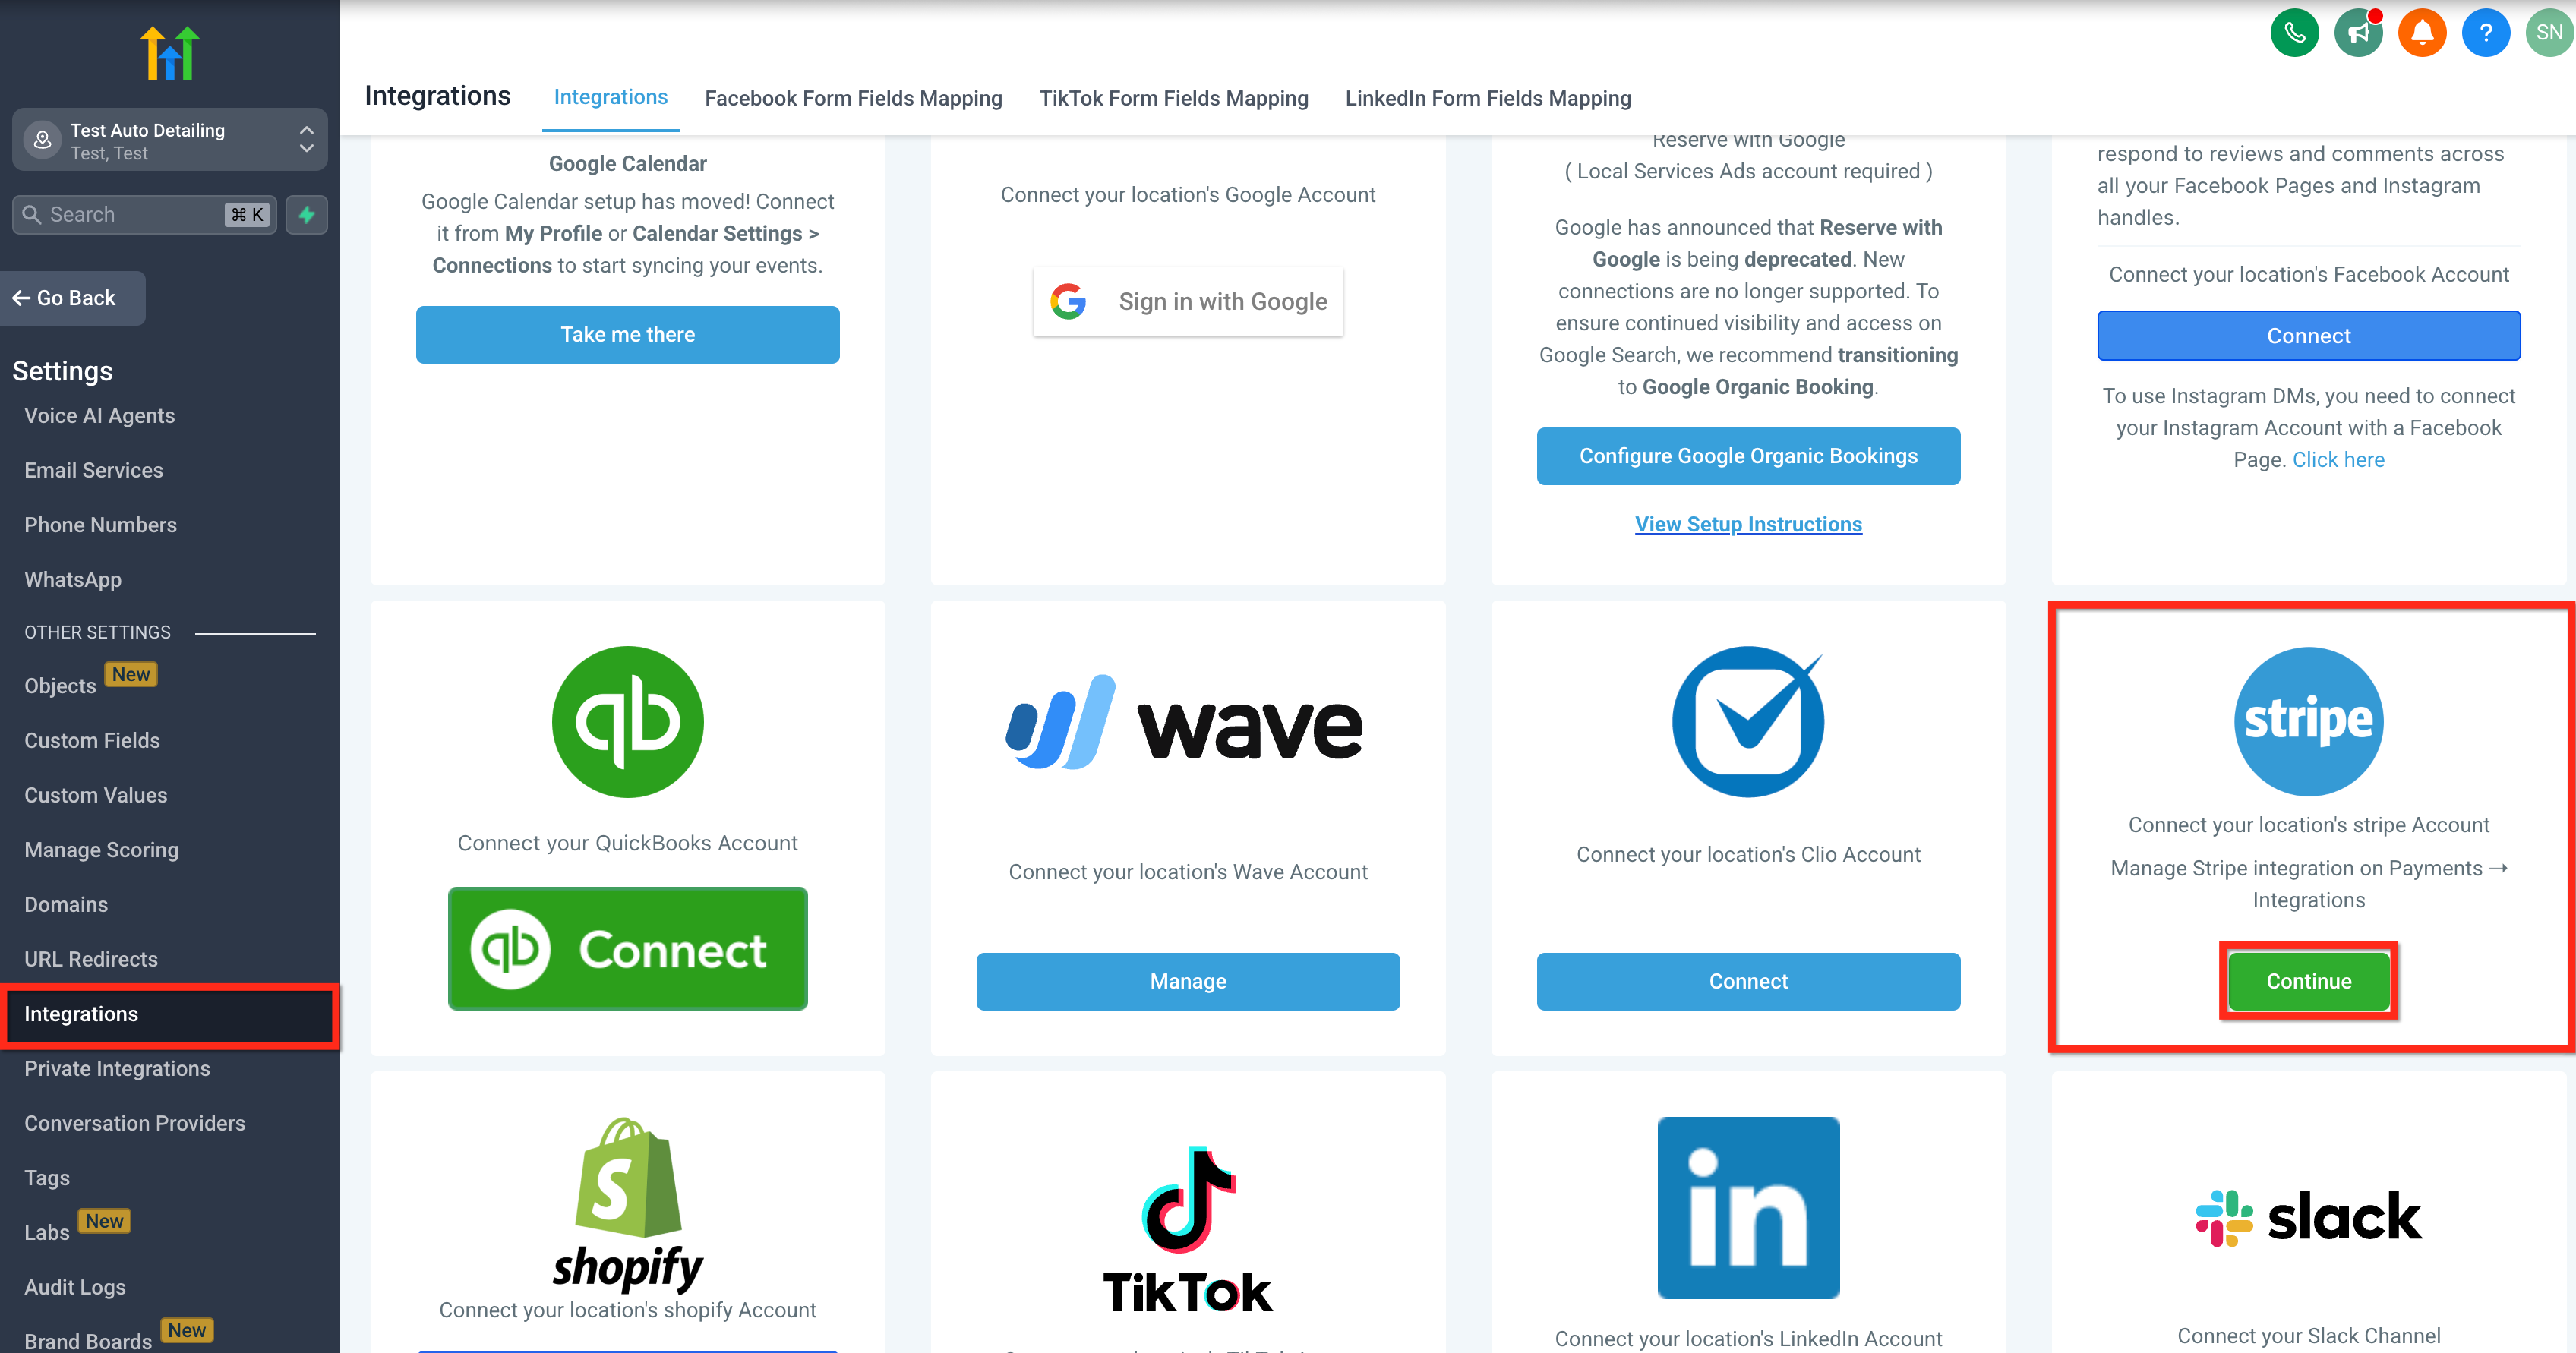
Connect Stripe via Integrations
- Open Settings in the subaccount.
- Select Integrations.
- Press the Continue button next to Stripe.
- Complete the authorization steps shown by Stripe.
- Check that the Stripe integration shows as enabled.
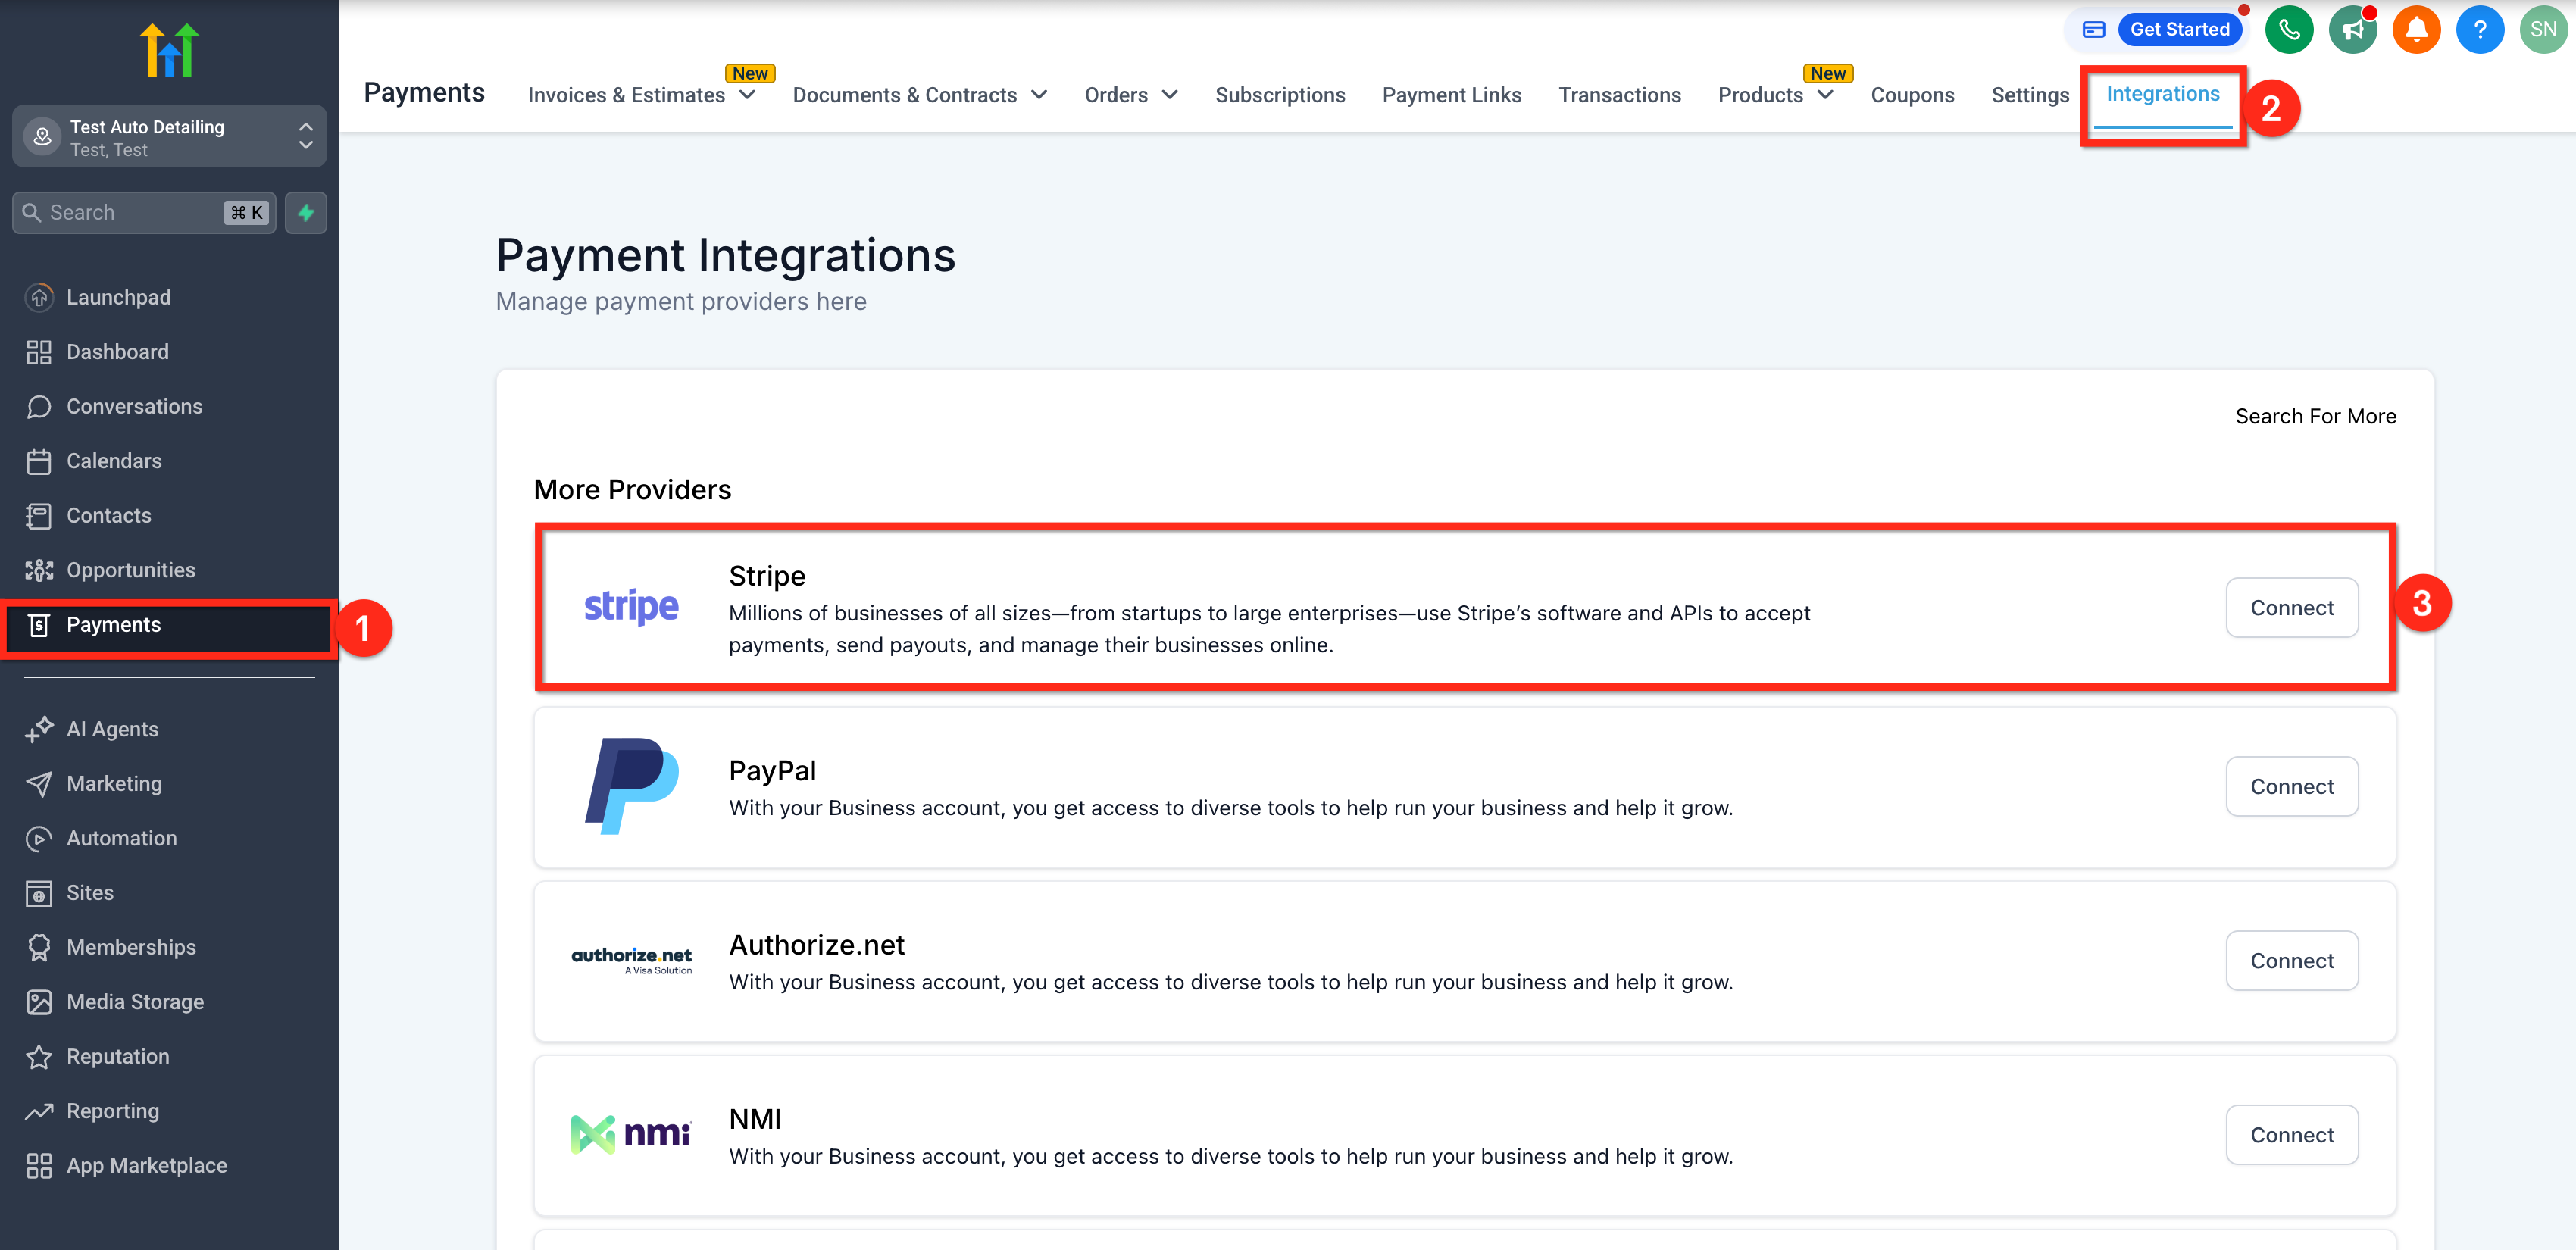
Connect Stripe via Payments
- Go to Payments in the subaccount.
- Open the Integrations tab.
- Press Connect for Stripe.
- Complete the authorization steps shown by Stripe.
- Check that the Stripe integration shows as enabled.
06What it looks like in HighLevel
07Settings that matter
- Stripe integration. Controls whether the subaccount can process payments through Stripe after a successful connection.
08Things to know before you rely on it
- Stripe can only be linked if it is supported in the country where the business operates.
- Availability of Stripe in additional countries may be added in the future.
09How it connects to the rest of HighLevel
- Explore all integration options available in HighLevel. All Integrations
- Review HighLevel pricing and plan requirements for subaccount features. Pricing
- Start a free trial to test the Stripe connection process. 30 day trial
Get More InformationOpens on HighLevelPublished November 2, 2026 · Updated November 17, 2026