
01Who this is for
- Restaurant owners who want an online presence without building a site from scratch, because the tool pulls in their existing menu and details.
- Marketing managers who need to apply a brand template, colors and fonts to keep the visual identity consistent across ordering and booking experiences.
02Restaurant website, explained
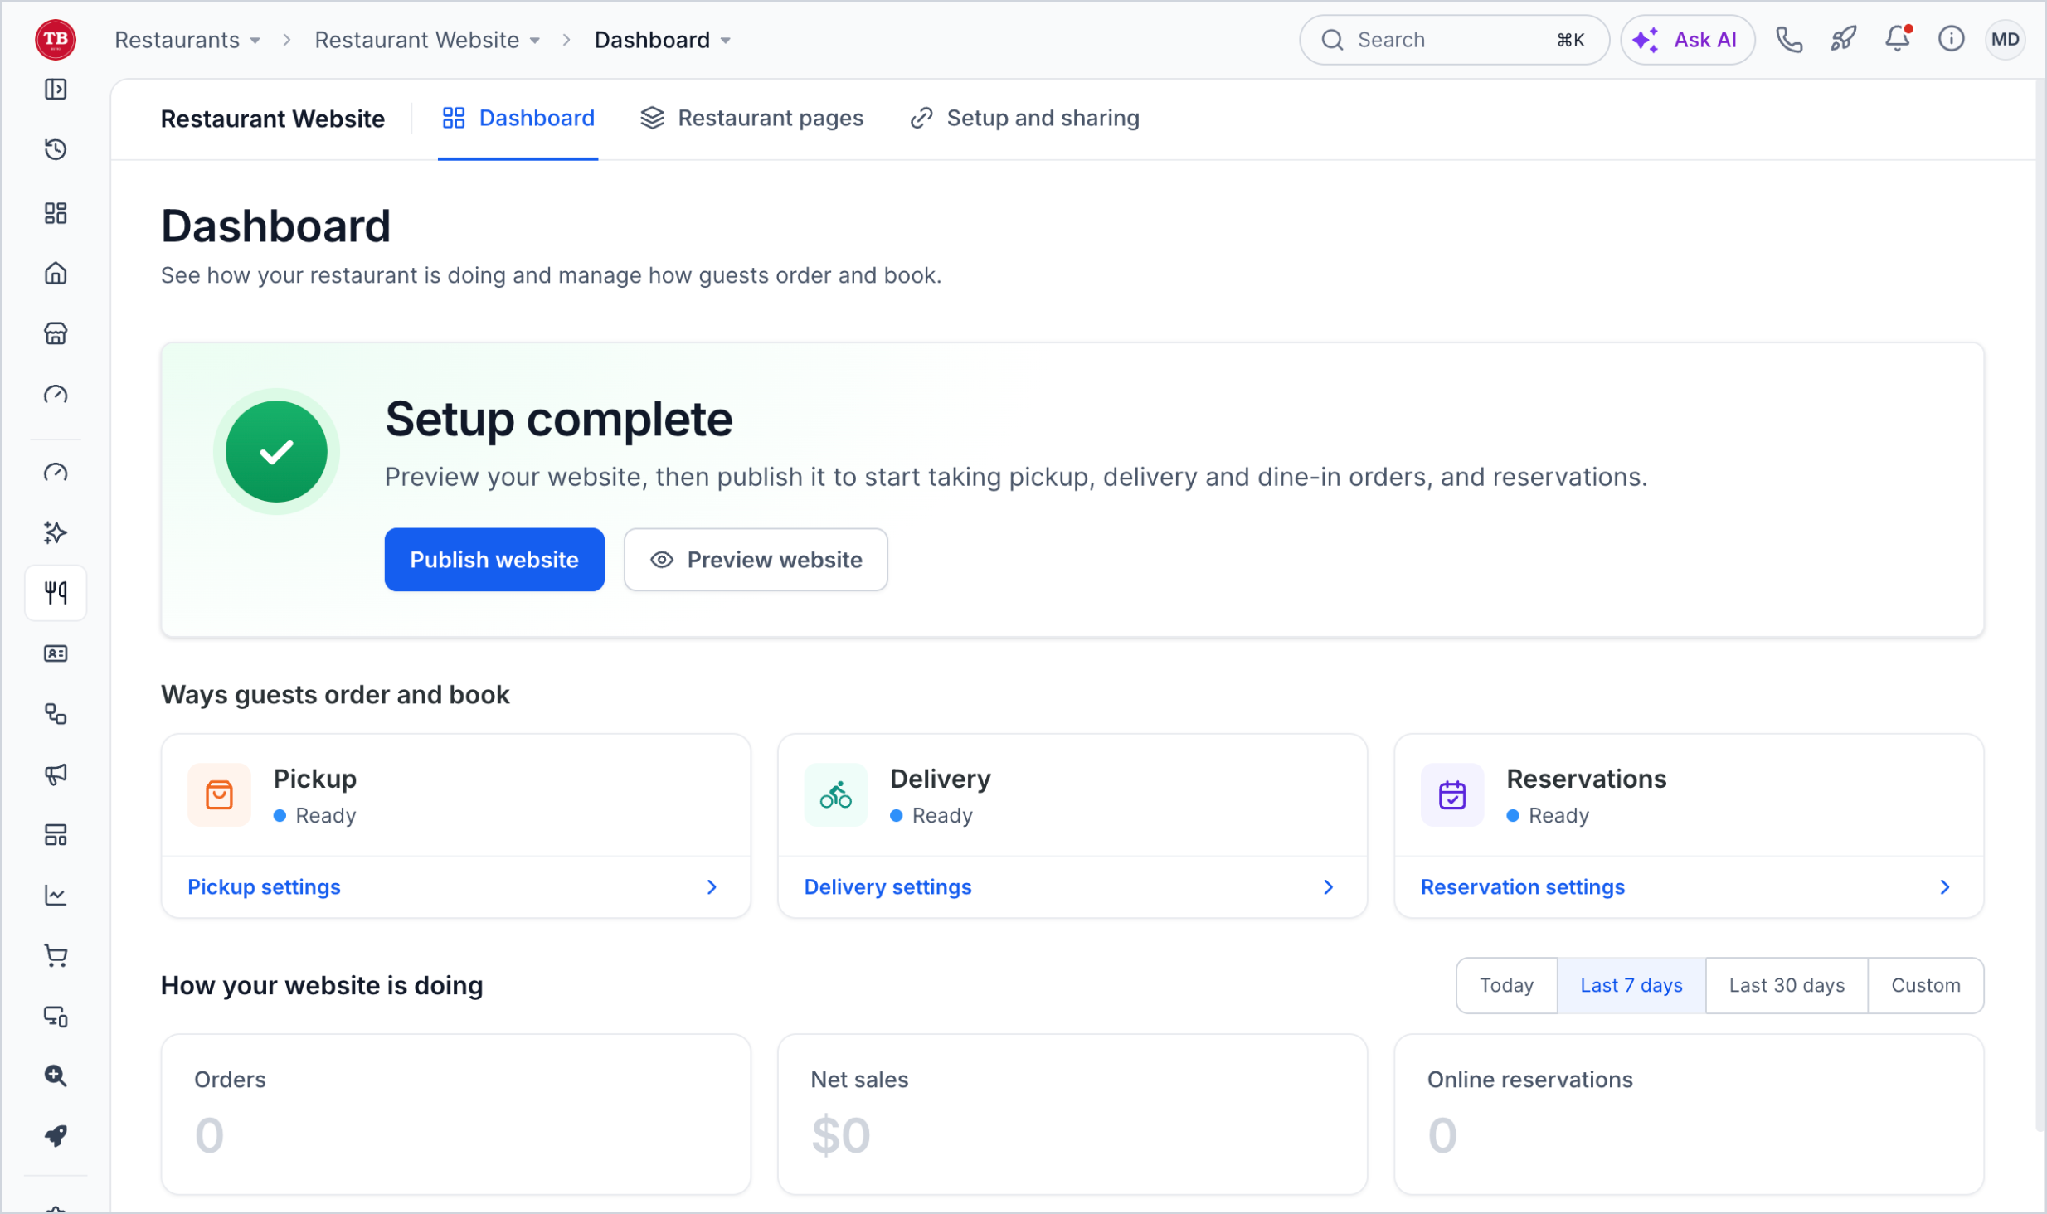
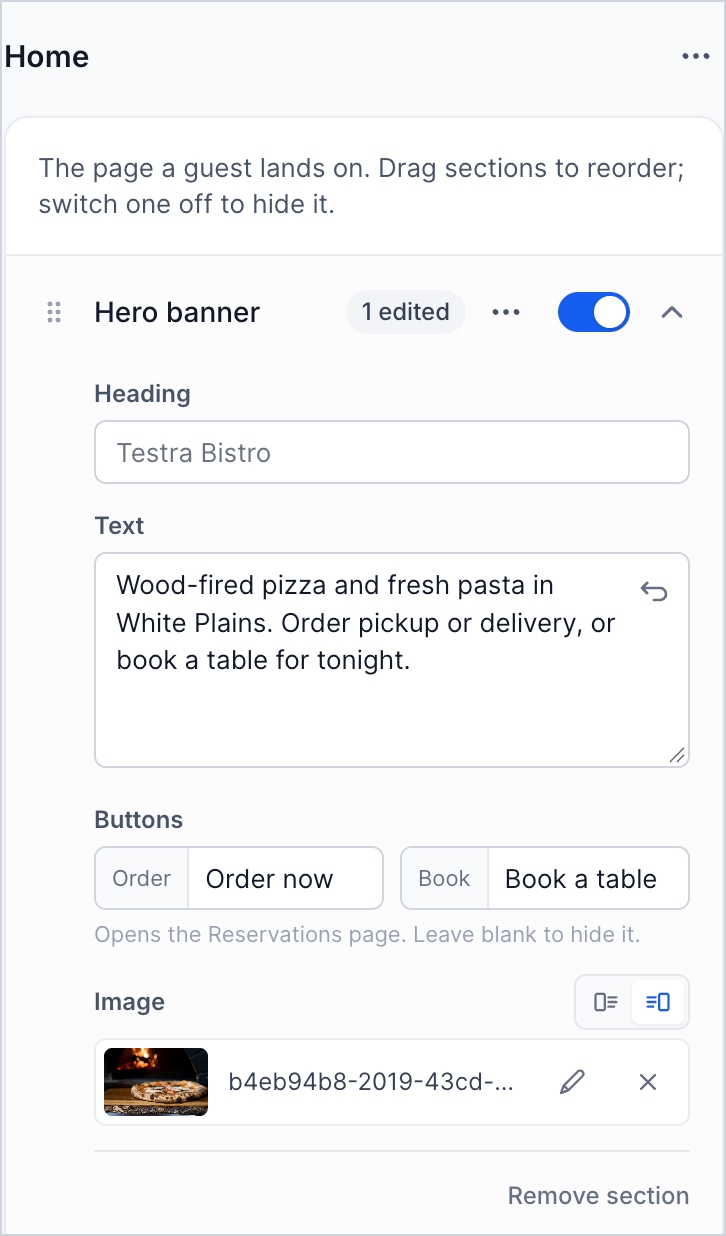
Restaurant Website lives inside the HighLevel platform under the Restaurants section. It aggregates the restaurant's menu, hours, address and payment settings, then presents them on a live previewable site. The dashboard tab shows readiness of pickup, delivery and reservation features and lets you preview or publish the site.
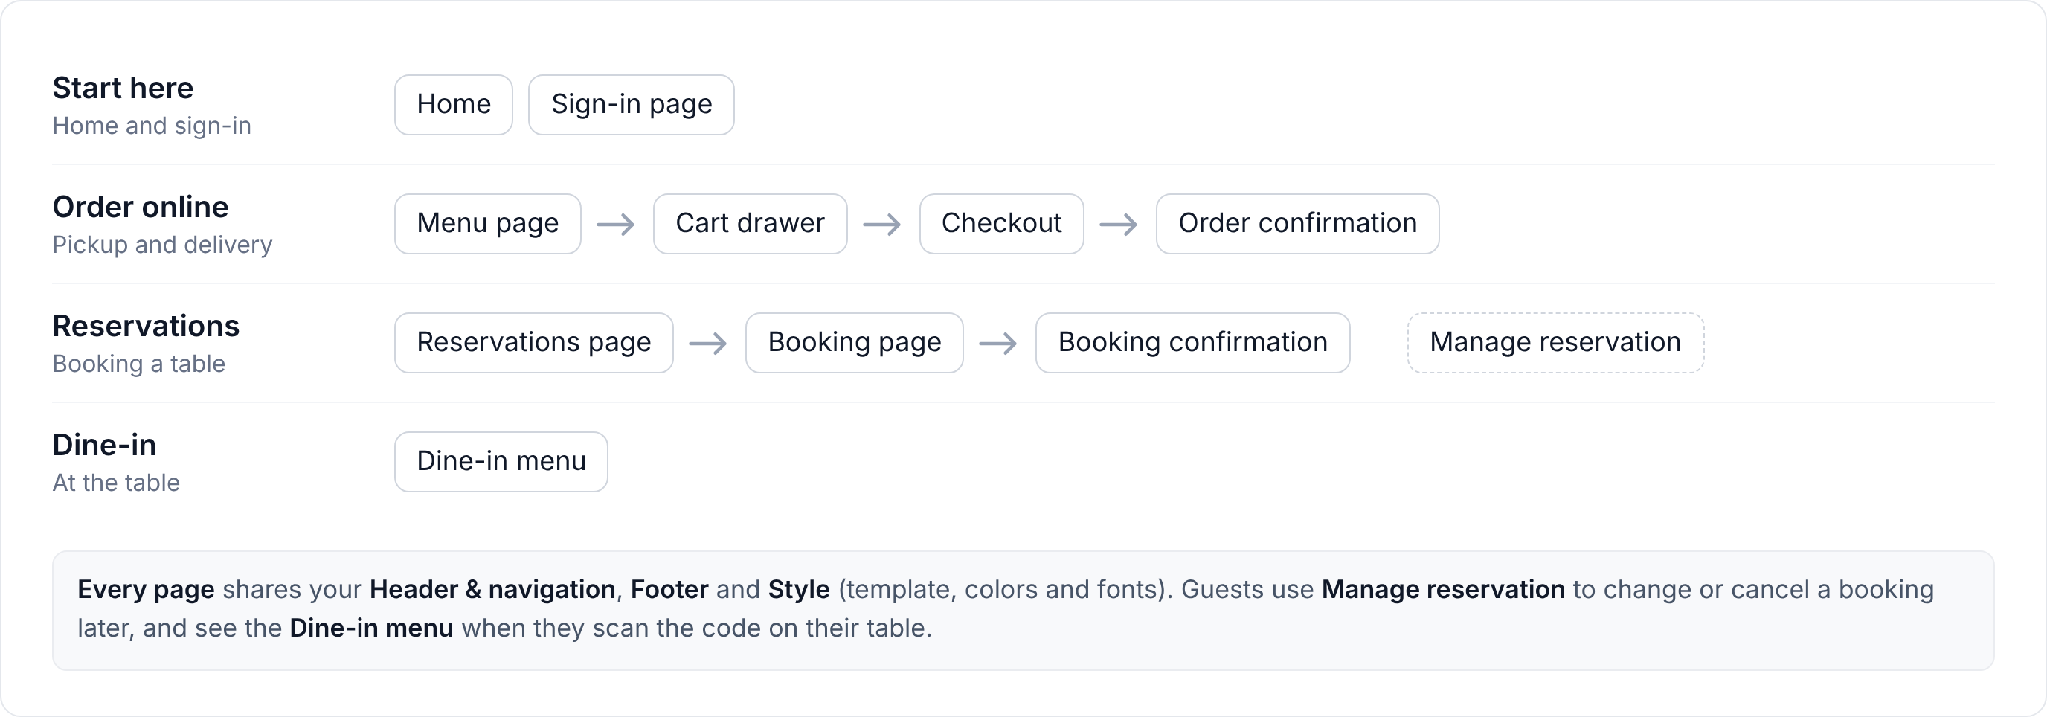
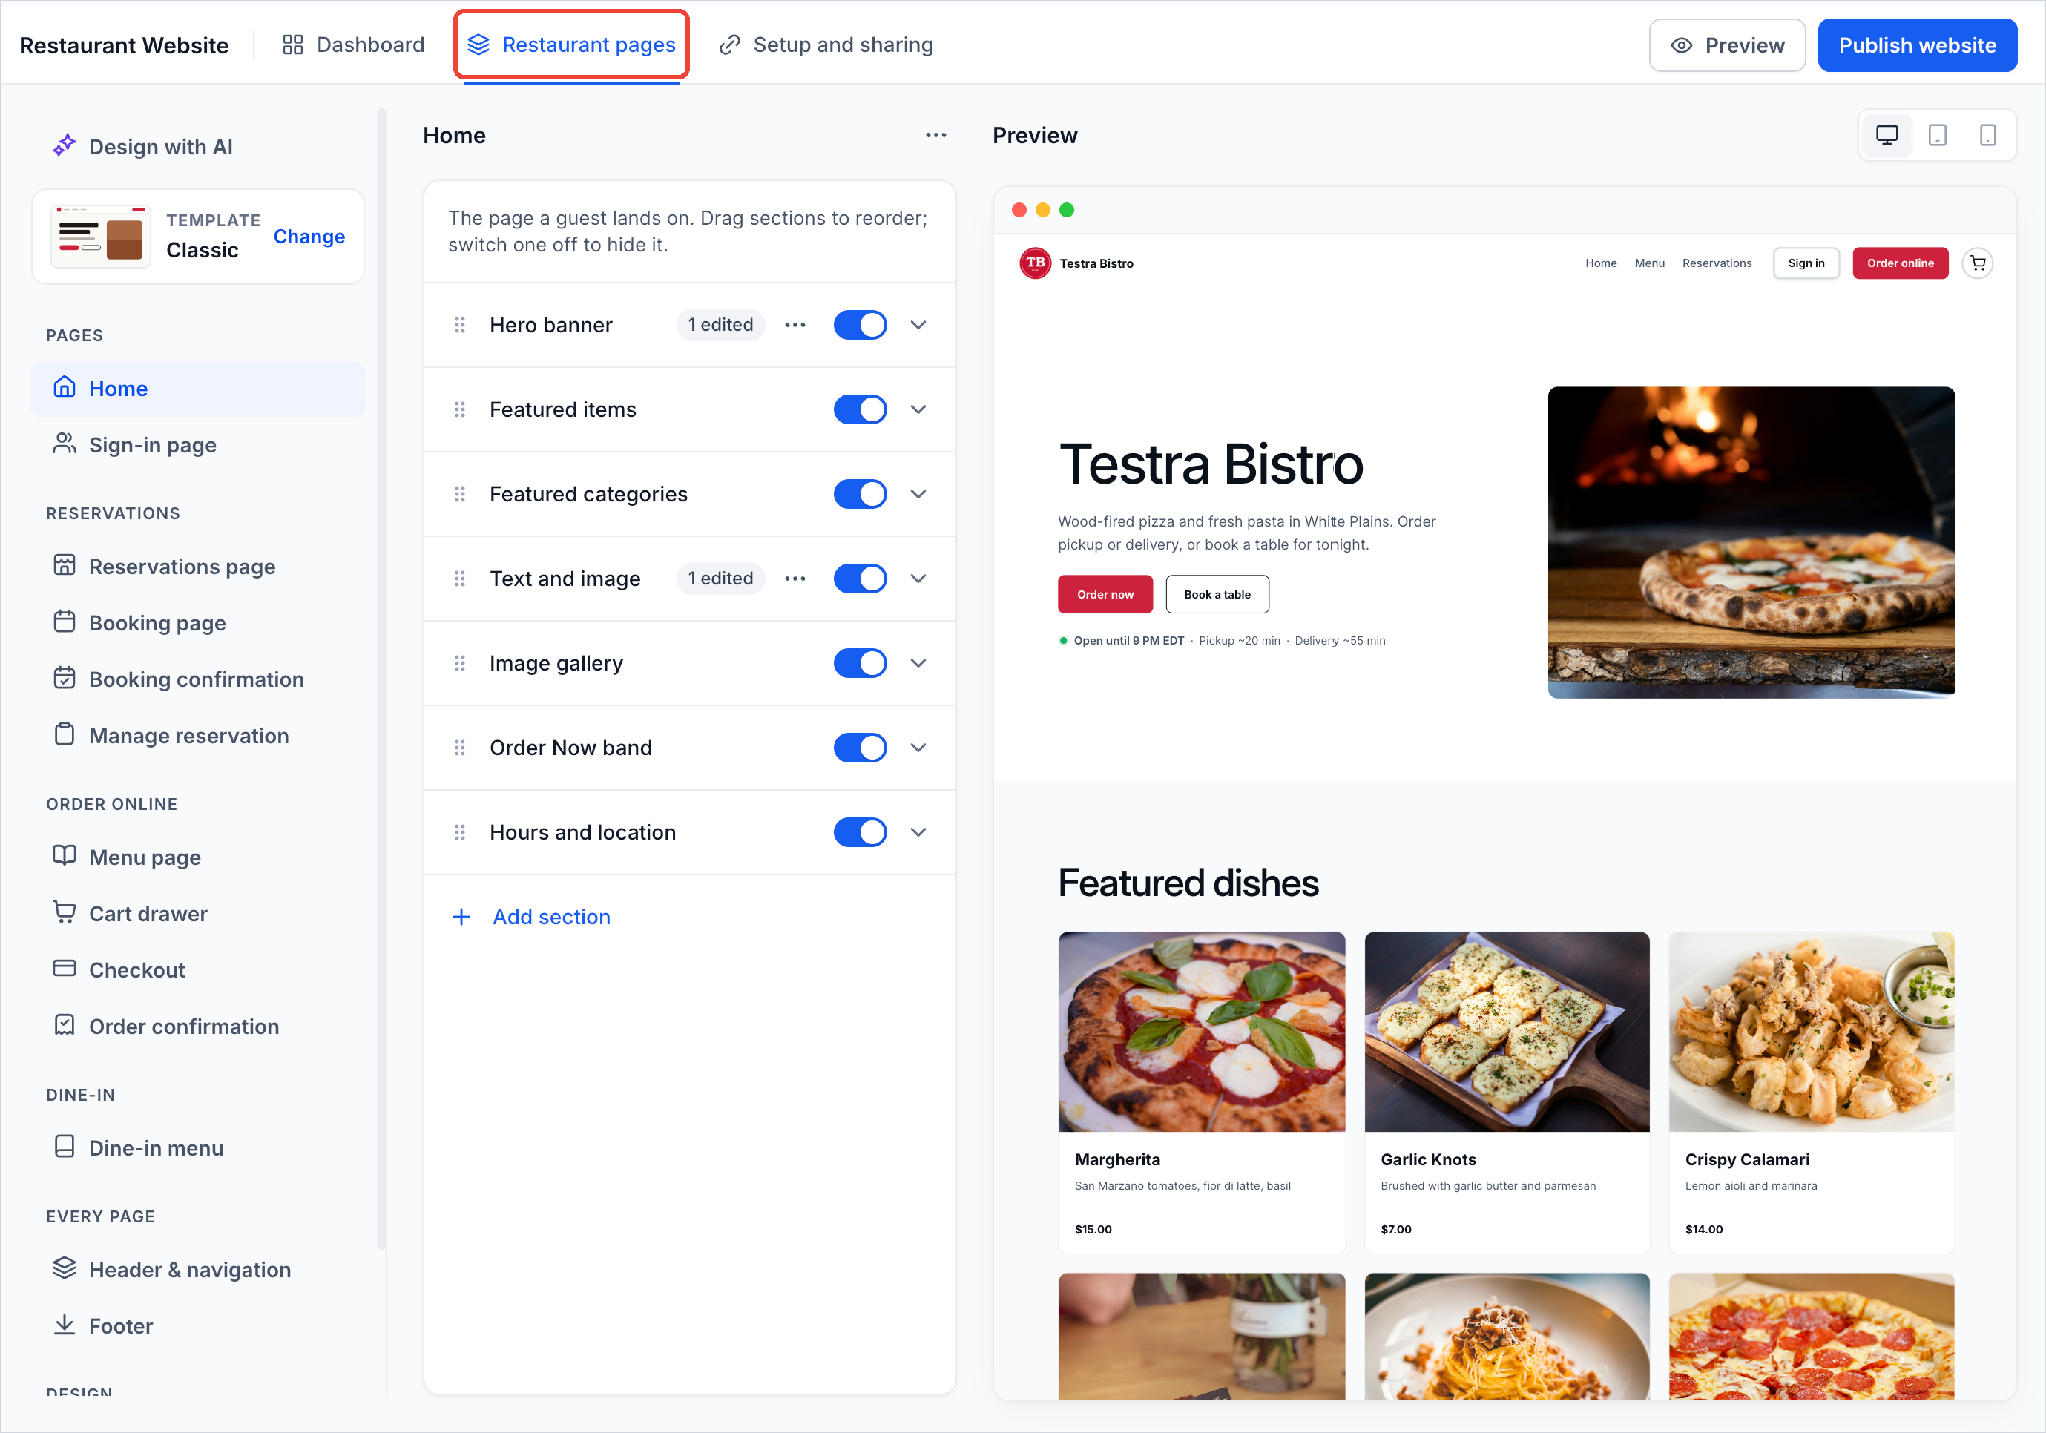
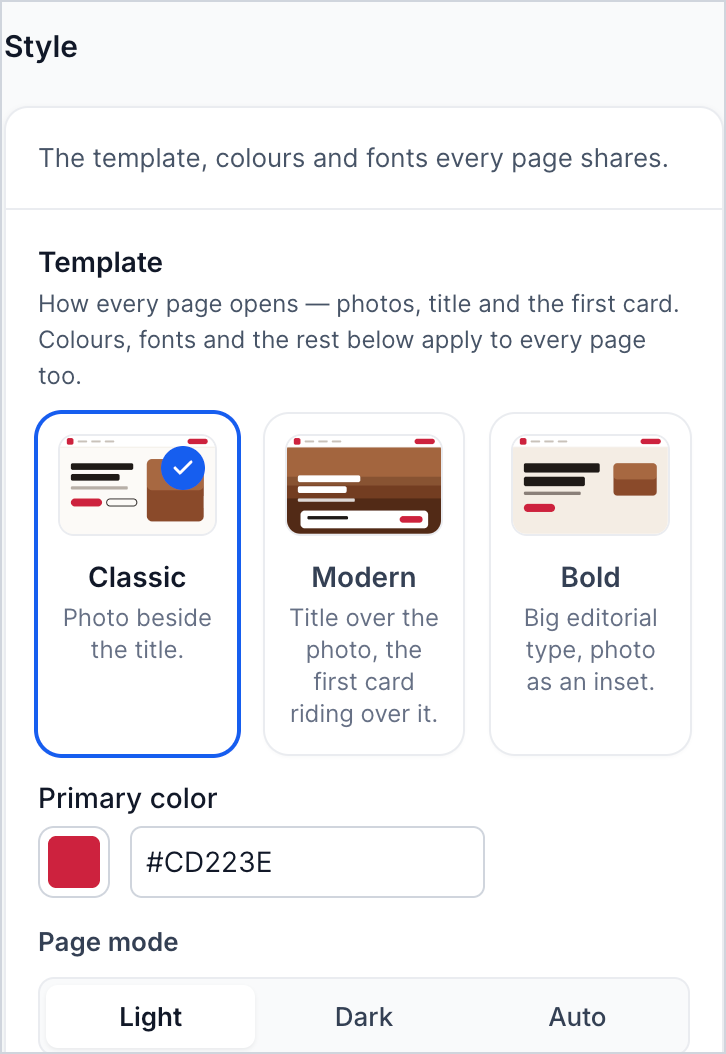
Page content lives in the Restaurant pages tab, where each page can be edited independently while a side preview updates in real time. Design styles are set in the Design > Style area, offering template choices and brand colors, mode, density, corner style and font pairings. Domain and SEO options are configured in the Setup and sharing > Link and SEO tab, letting you choose a subdomain or custom domain and define the title, share image and favicon. Meta Pixel tracking is added via Setup and sharing > Tracking, where the pixel ID and event mapping are entered. After all changes are saved, the site can be previewed and then published to go live.
03How businesses use restaurant website
- Fast casual restaurant. The owner edits the Home page to showcase top dishes, selects the Modern template, sets the primary color to match the logo, and connects a custom domain. After previewing, the site is published so guests can order pickup or delivery.
- Fine dining establishment. The manager updates the Reservations page text, chooses the Classic template with a dark page mode, adds a favicon, and enables Meta Pixel tracking to monitor booking events. Publishing makes the reservation system live on the restaurant’s branded URL.
- Café with pickup only. The staff removes the delivery sections, toggles off the Reservations page, sets the subdomain address, and saves the changes. A preview confirms the ordering flow before publishing, allowing guests to place pickup orders directly.
04The numbers and rules that matter
- Supported image formats: PNG, JPG, GIF, WEBP.
- Maximum image file size: 5 MB.
- Recommended image resolution: 2160 × 1080 pixels.
- Website title limit: 70 characters.
05Before you start
- Complete Restaurant Setup, including restaurant details, menu, payment provider and the appropriate pickup, delivery and reservation settings.
- Enable Live mode in Restaurant Settings > Checkout and payments before publishing.
06How to set up and use restaurant website in HighLevel
Access restaurant website
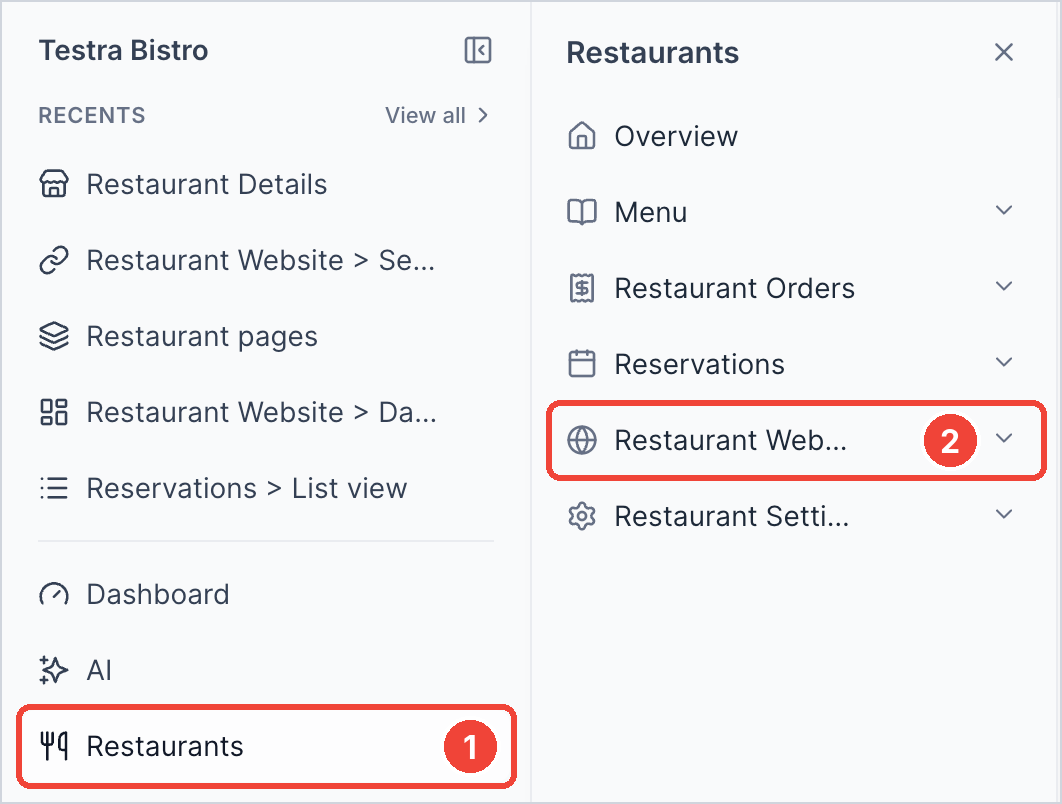
- Click Restaurants in the left navigation menu.
- Select Restaurant Website.
- The Dashboard tab opens automatically.
- Tip: Select the arrow next to Restaurant Website in the navigation panel to jump directly to its tabs.
Edit website pages
- Click the Restaurant pages tab.
- In the left list, choose the page you want to modify, such as Home.
- Make the desired edits.
- Watch the live preview on the right update as you edit.
Customize website design
- Open Restaurant pages > Design > Style.
- Select a template and adjust the primary color, page mode, density, corners and fonts.
- Apply the changes to update the site’s appearance.
Configure domain and SEO
- Navigate to Setup and sharing > Link and SEO.
- Edit the subdomain portion or add a custom domain you own.
- Enter a website title up to 70 characters.
- Choose a share image for when the link is posted.
- Upload or keep the favicon and click Save changes.
Set up Meta Pixel tracking
- Open the Setup and sharing tab and choose Tracking.
- Enter your Meta Pixel ID.
- Review the Event mapping list to see which site actions send Meta events.
- Click Save changes.
- Important: Enter the Pixel ID only in the dedicated Tracking settings, not in Custom code, to avoid duplicate tracking.
Preview and publish website
- Click Preview in Restaurant pages or use Preview website on the dashboard.
- Save any unsaved edits if prompted.
- Click Publish website.
07What it looks like in HighLevel
08Settings that matter
- Template. Determines the overall layout of pages, with options Classic, Modern or Bold.
- Primary color. Sets the main brand color used throughout the site, initially taken from the logo.
- Page mode. Controls the light, dark or automatic color scheme for the site.
- Density. Adjusts the spacing of elements to be compact, comfortable or spacious.
- Corners. Selects the shape of element corners: sharp, soft or rounded.
- Fonts. Chooses preset font pairings or individual heading and body fonts.
- Landing page. Specifies which page guests see first when they open the website address.
- Sign in settings. Defines how guests sign in during checkout, using an email sent one time code.
- Contact and footer. Provides fields for a support email and a copyright line that can use variables.
- Require. The only currently available option for checkout sign in; other options are marked Coming soon.
- Web Address. Lets you configure either a free subdomain or a custom domain for the site.
- Website title. Sets the text shown in browser tabs and shared links, limited to 70 characters.
09Things to know before you rely on it
- Supported image formats are PNG, JPG, GIF and WEBP, with a maximum file size of 5 MB.
- A recommended resolution for hero images is 2160 × 1080 pixels.
- Meta Pixel events fire only from the published website, not while editing.
- Only the Require option is currently available for checkout sign in; other choices are Coming soon.
- Menu items, prices and categories are managed separately under Restaurants > Menu, and their visibility depends on availability and channel settings.
10How it connects to the rest of HighLevel
- Learn how to build your restaurant menu in HighLevel. Create restaurant menu
- Manage orders, payments and reservations for restaurant websites. Restaurant orders
- Step by step guide to set up online ordering and reservations. Restaurant setup guide
Michael's take

Restaurants that want a quick online presence often struggle with building a site from scratch, keeping menus up to date and adding a reservation flow. The first thing I would lock in is the landing page choice. It decides the first impression every guest gets when they type in your address.
Once the landing page is correct, I’d make sure the design matches your brand colors and fonts before publishing. I’d run a quick preview on a phone and a desktop to verify the order and booking steps work, then flip the live mode on to start taking real orders.