
01Who this is for
- Restaurant owners who need a single place to enter branding, location, and hours for their online presence.
- Café managers that want to offer pickup or delivery options alongside a digital menu.
- Dining room supervisors who must organize tables and reservation windows for walk ins and online bookings.
02Restaurant setup guide, explained
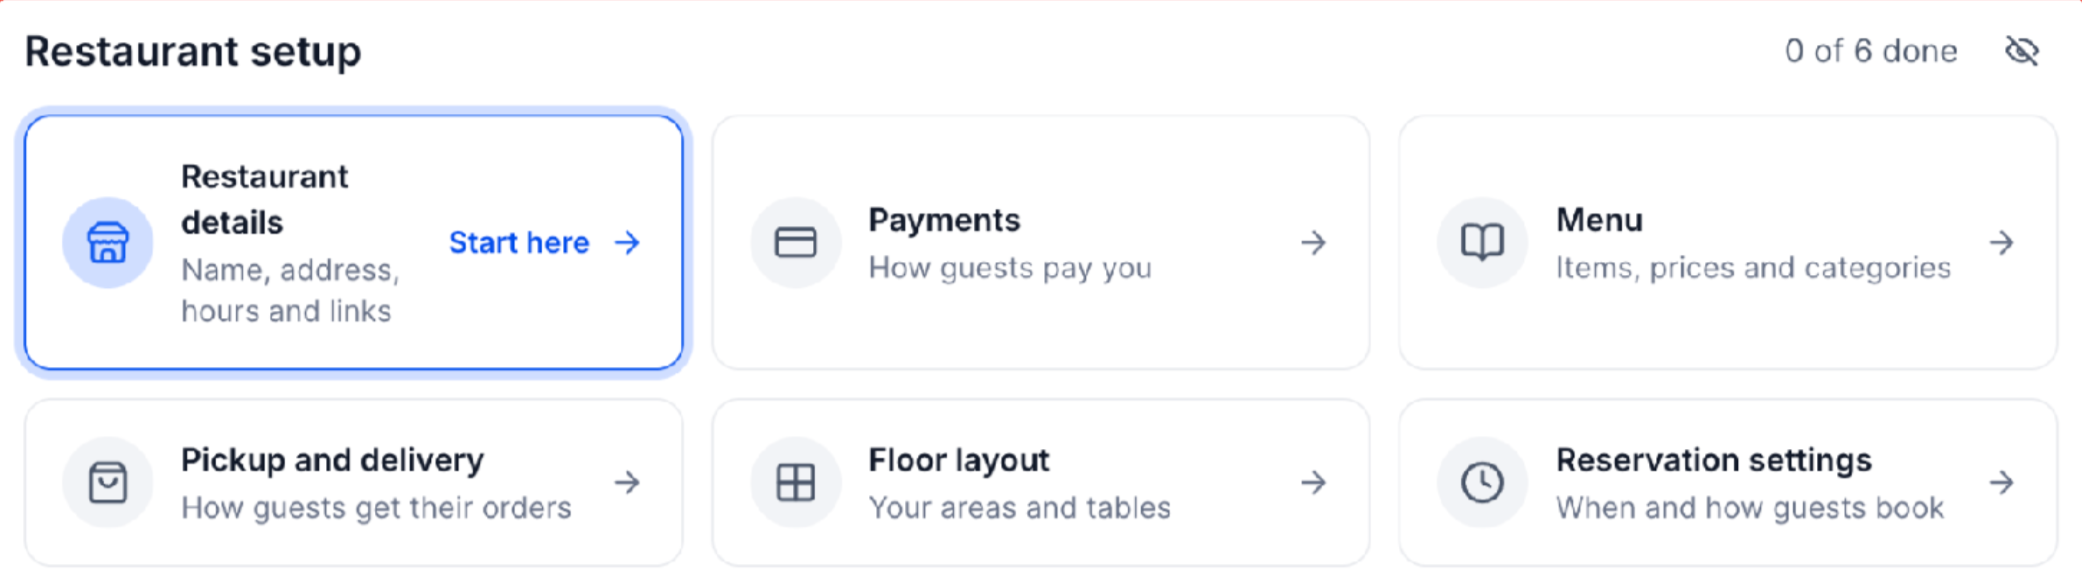
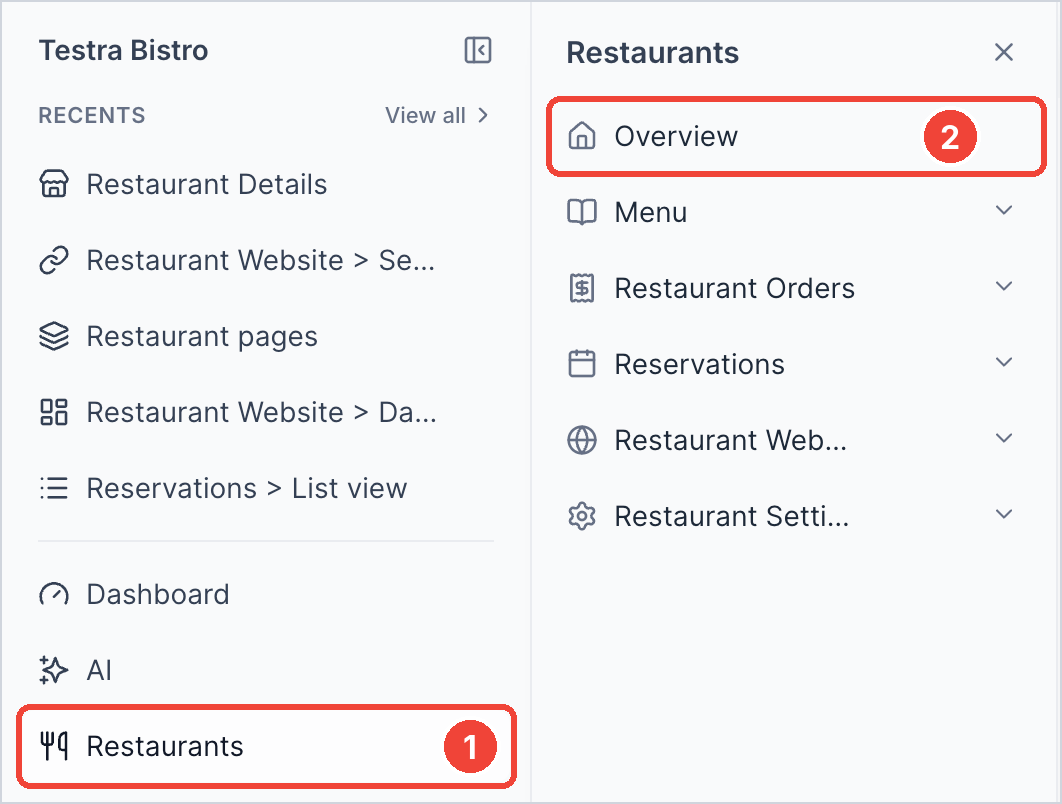
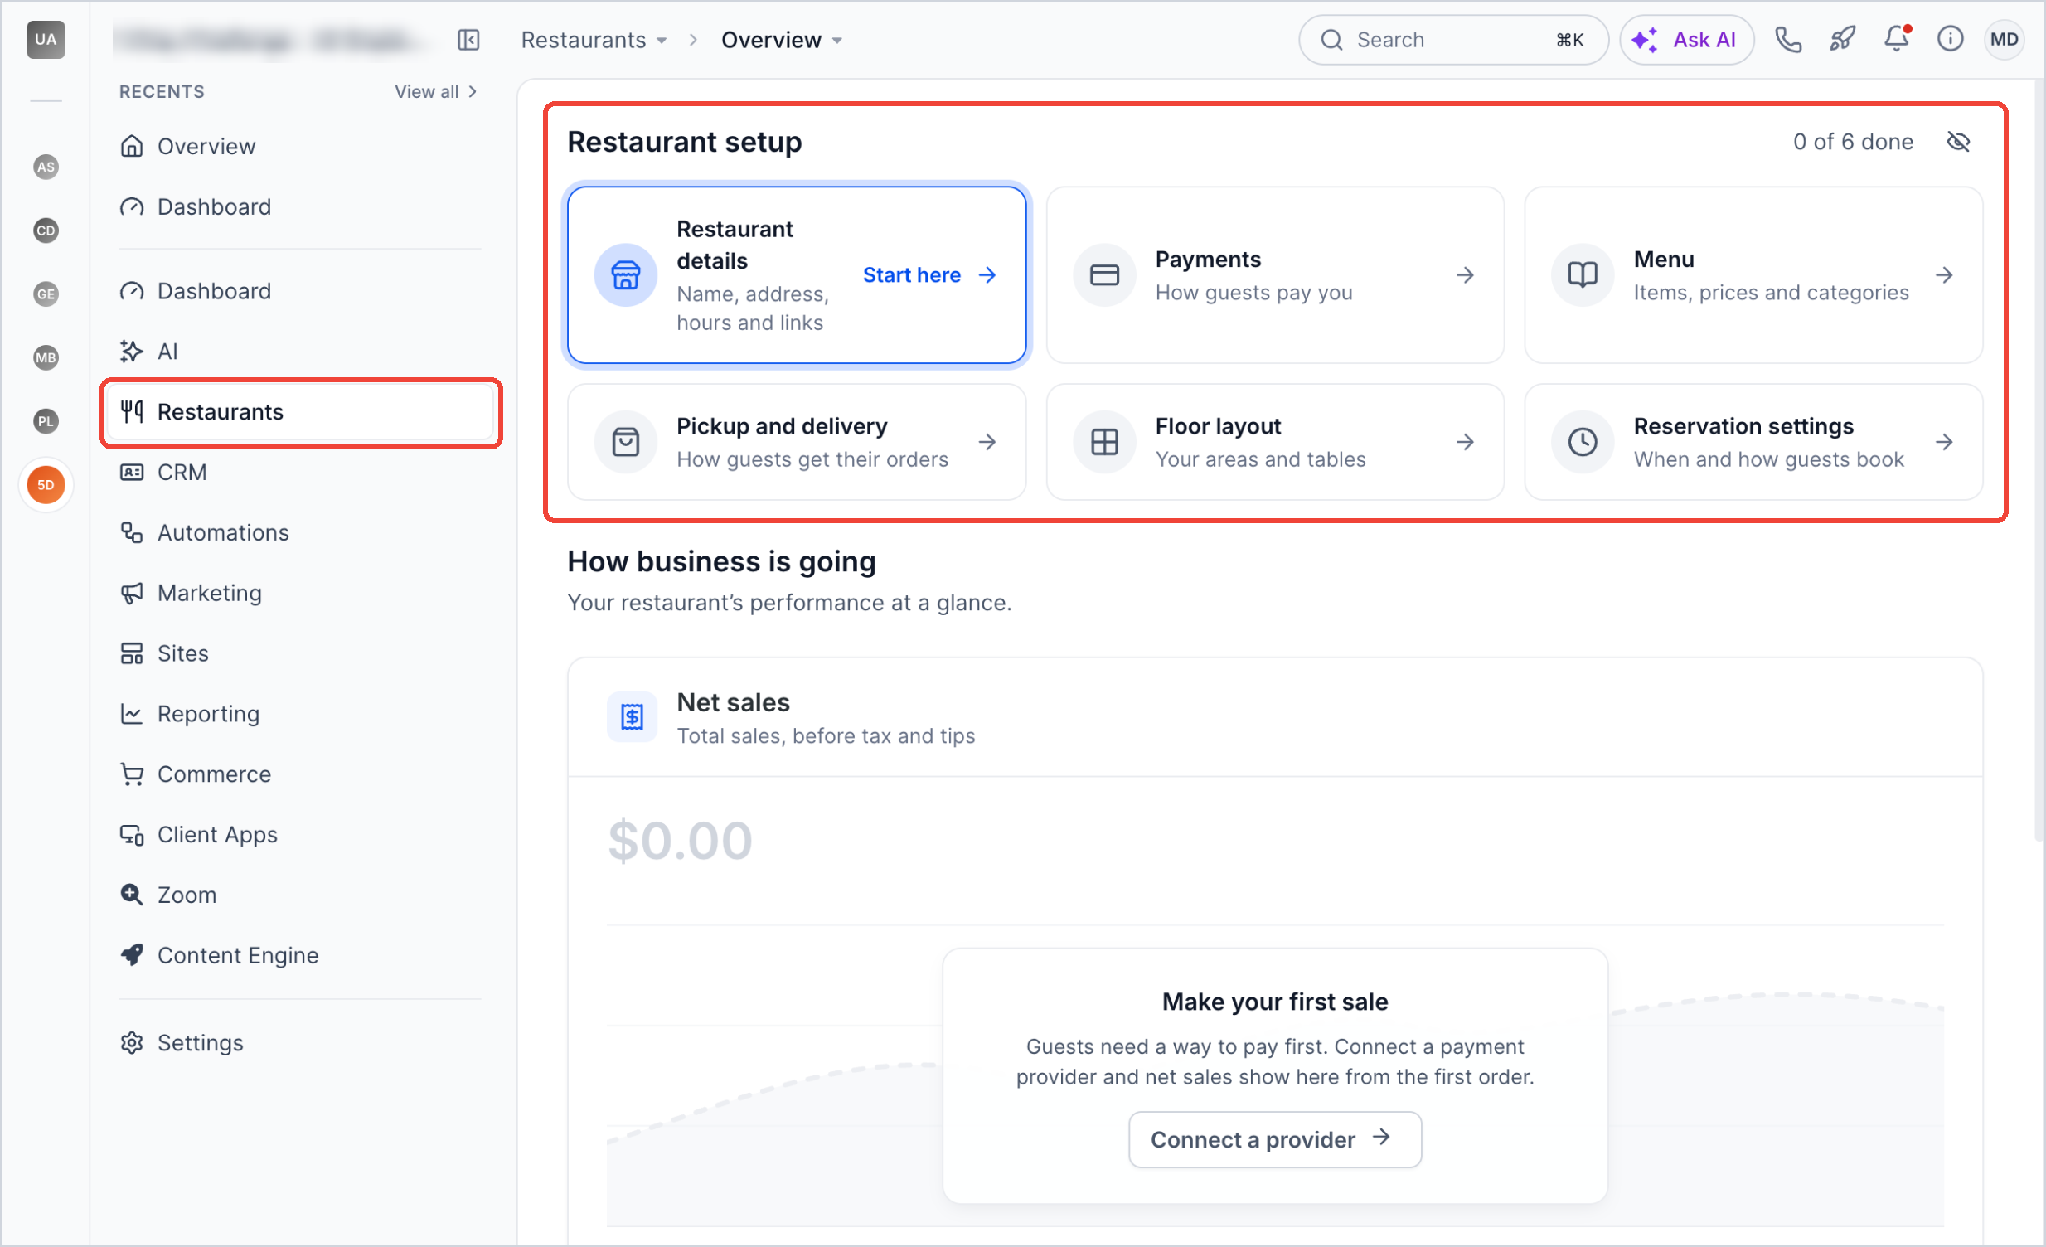
Restaurant Setup appears under Restaurants > Overview and presents a six step checklist grouped into Business, Ordering, and Reservations. Each step opens a card where you enter specific details such as branding, menu items, fulfillment options, floor layout, and booking rules. The checklist tracks progress with green checks, allowing you to skip steps and return later.
The feature stores the information within the HighLevel platform, so the same business details are used across the website, emails, invoices, and subaccount profile. Once every required step is saved, you can preview the restaurant site and publish it to enable customer facing ordering and reservations.
03How businesses use the restaurant setup guide
- Family restaurant. The owner adds the restaurant name, logo, address, and hours in the Business cards, then connects Stripe as the payment provider. A full menu is uploaded from a spreadsheet, and pickup and delivery options are configured with preparation time and delivery areas. Seating is defined to match the floor, and reservation windows are set before publishing the site.
- Fast casual eatery. The manager enables only pickup, sets specific pickup hours, and applies a markup percentage to cover extra costs. A simple menu is built manually within the platform, and the reservation settings are left disabled if the eatery does not take bookings.
- Boutique bakery with takeout. The baker uploads a PDF menu, adjusts item details, and configures a minimum order amount under advanced settings. Delivery is turned off, while pickup is offered with a 15 minute preparation time. The bakery publishes the website to let customers place orders online.
04The numbers and rules that matter
- Logo files may be PNG, JPG or GIF up to 2.5 MB.
- Menu upload supports PDF, JPG, PNG, WEBP, CSV and XLSX up to 50 MB each, 15 files per upload.
- Default prep time is 20 minutes and can be adjusted per order.
- Time slots for table rules can be 15, 20, 30, 45, 60 minutes or a custom value.
05Before you start
- Access to the Restaurants menu and permission to edit business and payment settings.
- Logo file (PNG, JPG, or GIF) up to 2.5 MB, address, contact information, and operating hours.
- Menu content in a photo, PDF, spreadsheet, or webpage format.
- If delivery is offered, distance coverage, fees, and estimated times.
- Details of dining areas, tables, and seat counts for the floor layout.
06How to set up and use the restaurant setup guide in HighLevel
Add restaurant details
- Open Restaurants > Overview and click the Restaurant details card.
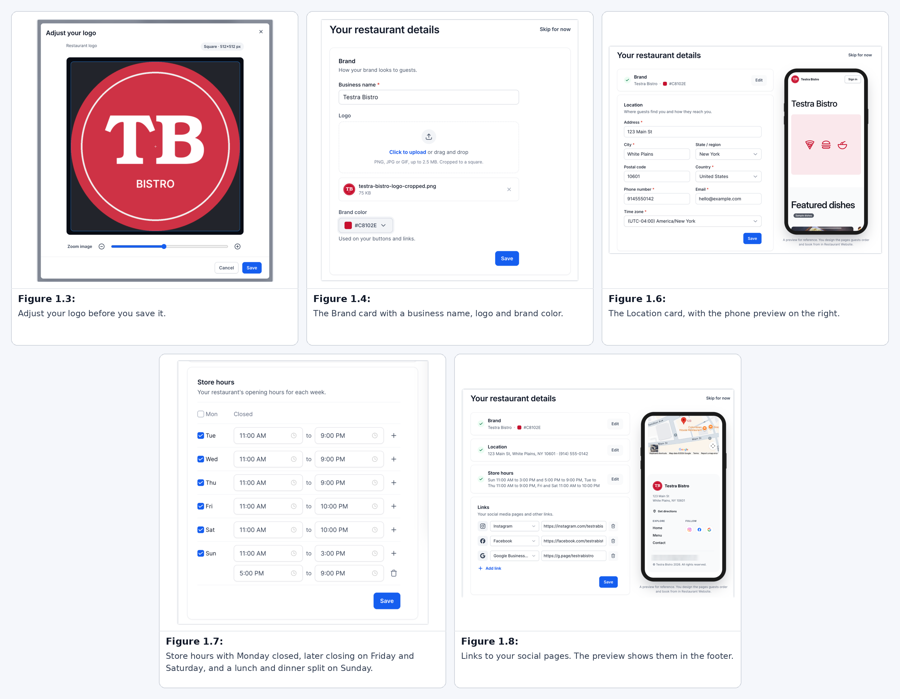
- Enter the business name, upload a PNG/JPG/GIF logo, adjust its square crop using Zoom image, choose a brand colour, and save the Brand card.
- Fill address, city, state/region, postal code, country, phone, email, and time zone, then save the Location card.
- Select open days, set opening and closing times, add extra shifts with the + button, and save the Store hours card.
- Add external URLs in the Links card and save the card.
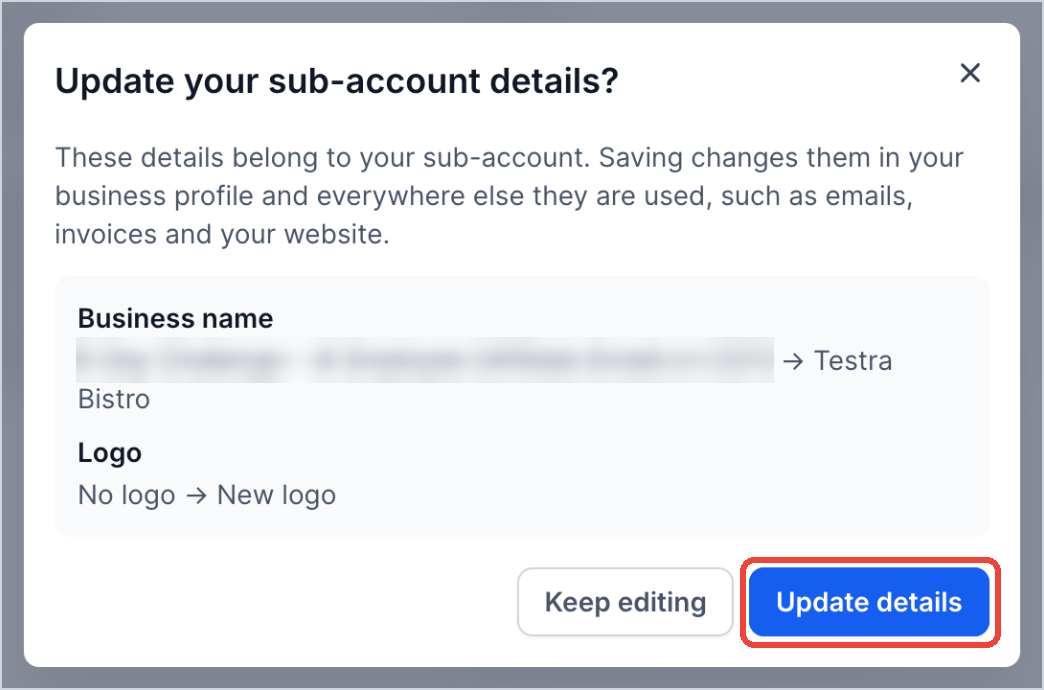
- Note: Changing name, logo, or location updates the subaccount’s business profile and may affect emails, invoices, and the website. Choose Update details to confirm.
Connect a payment provider
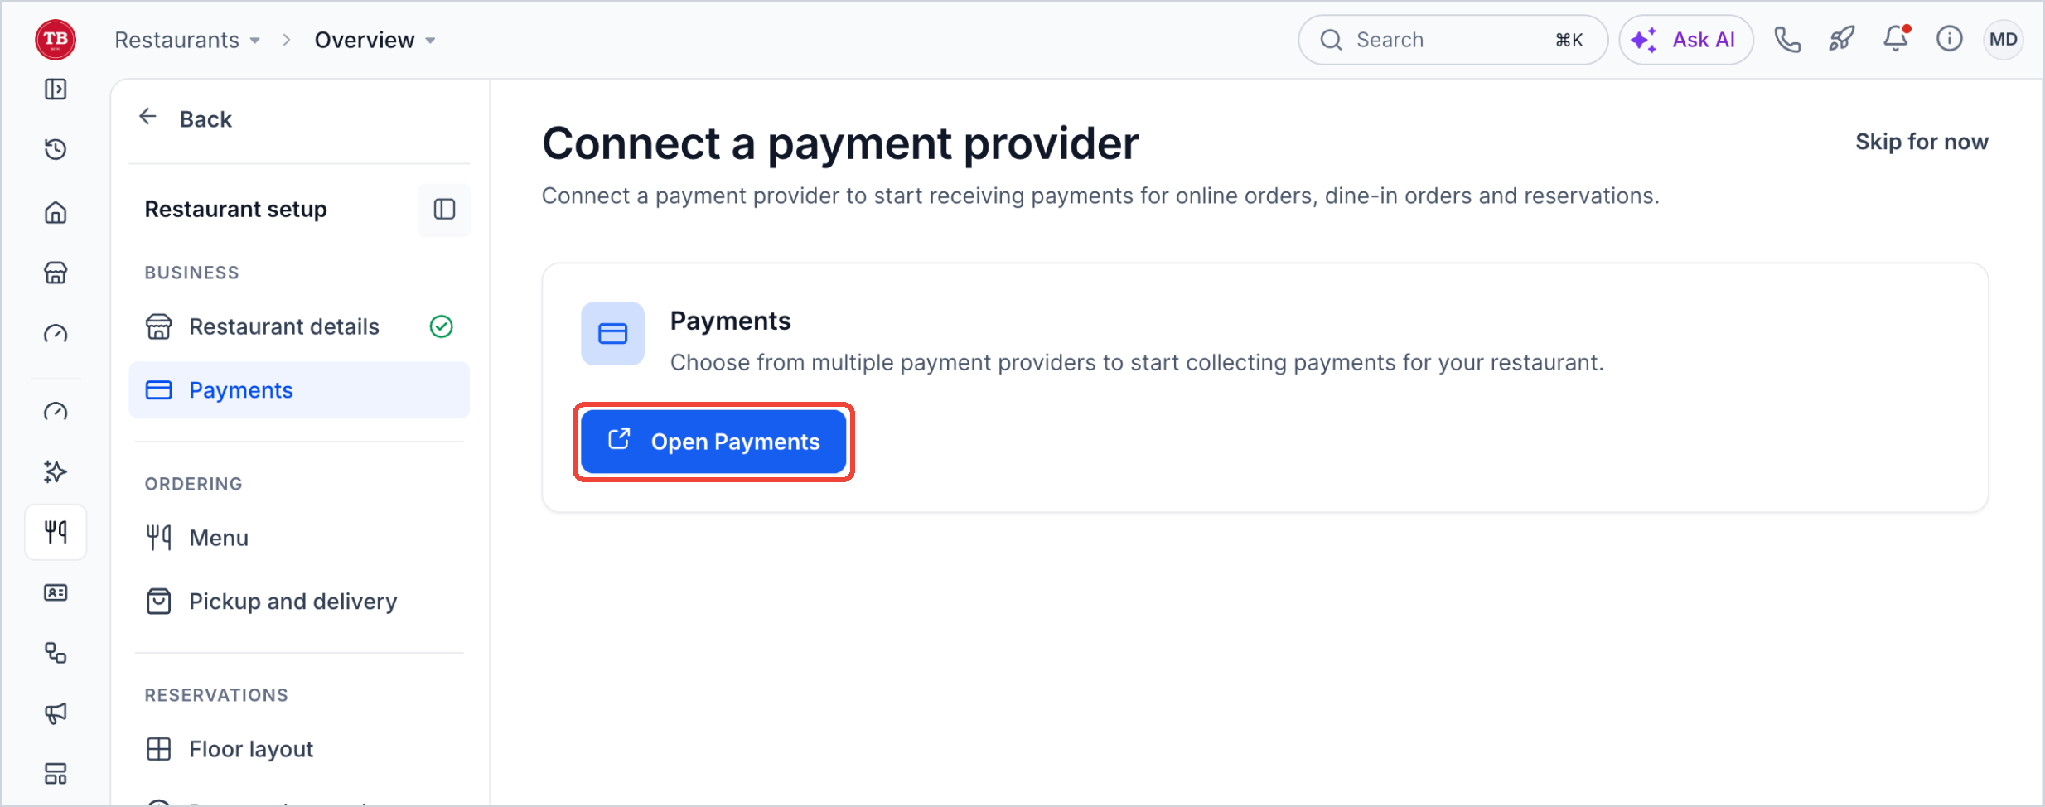
- In the setup panel choose Open Payments.
- In Payment Integrations click Connect beside the desired provider and follow the prompts.
- Return to the checklist, verify the provider status, and click Continue.
Add your menu
- Select Upload your menu and choose the menu files to upload.
- Click Upload menu and wait while the draft is generated.
- Review the draft; use the three dot menu to Edit item, Move to category, or Remove from draft.
- When the draft is correct, click Add items to menu and then Continue.
- If the draft is incorrect, use Discard draft to start over.
Set up pickup and delivery
- Set the default preparation time (initially 20 minutes) for orders.
- Turn on Do you want to offer pickup?, configure pickup hours, allow scheduled orders, set any markup, and optionally add a minimum order amount.
- Turn on Do you want to offer delivery?, add at least one delivery area with distance range, fee, free delivery threshold, and estimated time.
- Use Test an address to preview delivery coverage, fee, and time before saving.
- Save the settings and click Continue. Delivery cannot be activated without a connected payment provider.
Add your areas and tables
- Rename the default dining area if needed.
- Set each table’s name, seat count, and shape (Round, Square, Rectangle, Booth, or Bar seat).
- Use Add table or the trash icon to create or delete tables, and Add another area to add more dining areas.
- Optionally select Edit with canvas to drag tables, add walls or labels, and adjust layout tools.
- Save the floor layout and continue.
Set up reservations
- Open the reservation settings panel (requires a completed floor layout).
- Choose whether to use store hours or set separate reservation hours.
- Enable Online booking for website reservations.
- Set the earliest and latest times guests may book, the largest party size online, and which dining areas are offered.
- If deposits are needed, turn on Deposits, select amount type, and configure deposit rules (requires a payment provider).
- Save the reservation settings and click Save and complete setup.
Publish website
- Select Preview website to review the restaurant site.
- Select Publish website to make ordering and booking live.
- Confirm that the setup status shows completed on the Restaurant Website dashboard.
07What it looks like in HighLevel
08Settings that matter
- Brand. Controls the restaurant name, logo image, and brand colour that appear on the website and communications.
- Location. Stores address, city, state/region, postal code, country, phone, email, and time zone for the restaurant.
- Store hours. Defines the days and times the restaurant is open, including multiple shifts per day.
- Links. Adds external URLs such as social media or ordering pages that are shown on the restaurant site.
- Prep time. Sets the default kitchen preparation time applied to each order.
- Pickup. Enables guest pickup, configures pickup hours, scheduled orders, price markup and optional minimum order amount.
- Delivery. Enables guest delivery, defines distance bands or per mile pricing, fees, free delivery thresholds, estimated times and delivery hours.
- Floor layout. Organises dining areas and tables, including names, capacities and shapes, for reservation matching.
- Reservation settings. Controls reservation hours, online booking toggle, earliest/latest booking windows, maximum party size and area selection rules.
09Things to know before you rely on it
- Logo files must be PNG, JPG, or GIF and cannot exceed 2.5 MB.
- Menu uploads accept PDF, JPG, PNG, WEBP, CSV, or XLSX files up to 50 MB each, with a maximum of 15 files per upload.
- Delivery distance bands are measured in a straight line from the restaurant; ZIP code based areas are marked as Coming soon.
- At least one delivery area must be created before delivery can be activated.
- A connected payment provider is required for both delivery and deposit features.
- Changing the name, logo, or location updates the subaccount’s business profile and may affect emails, invoices and the website.
10How it connects to the rest of HighLevel
- Create and edit a restaurant menu Menu guide
- Manage restaurant orders and payments Orders guide
- View HighLevel pricing and plans Pricing
Michael's take

Setting up a restaurant in HighLevel feels like a small convenience that can turn a modest café into a fully online ordering and reservation hub. The guided checklist removes the guesswork and lets you get the storefront live without juggling multiple platforms.
A take away joint that already has a simple menu and a few tables fits perfectly. I would launch the menu upload first, make sure the delivery area covers the nearby office park, and then publish. Before going live I’d double check the payment link and run a test order to confirm the flow.