
01Who this is for
- Restaurant owners who need a single place to keep menu information consistent across dine in, pickup and delivery.
- Front of house staff who take orders at tables and need quick access to item details and modifiers.
- Web managers who publish the menu on the restaurant website and want to control visibility and pricing per channel.
02Restaurant menus, explained
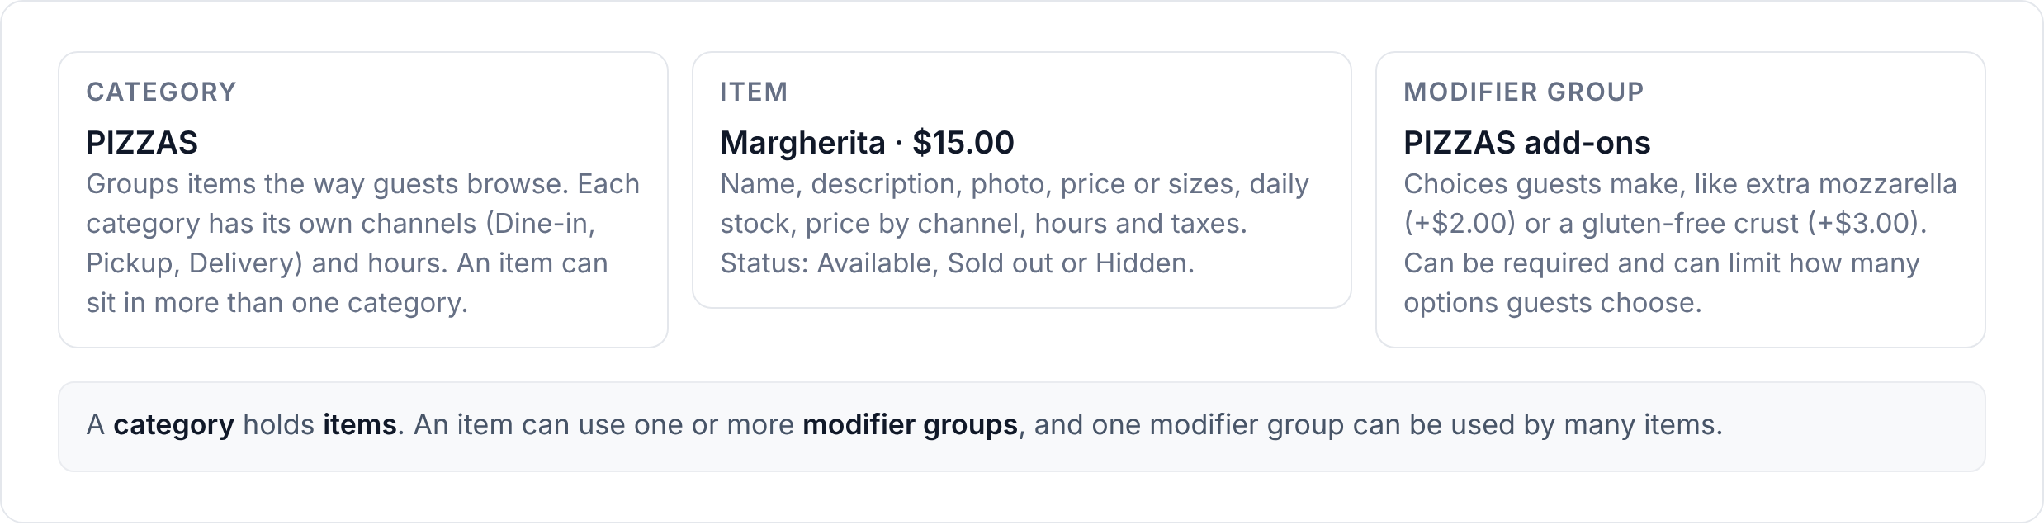
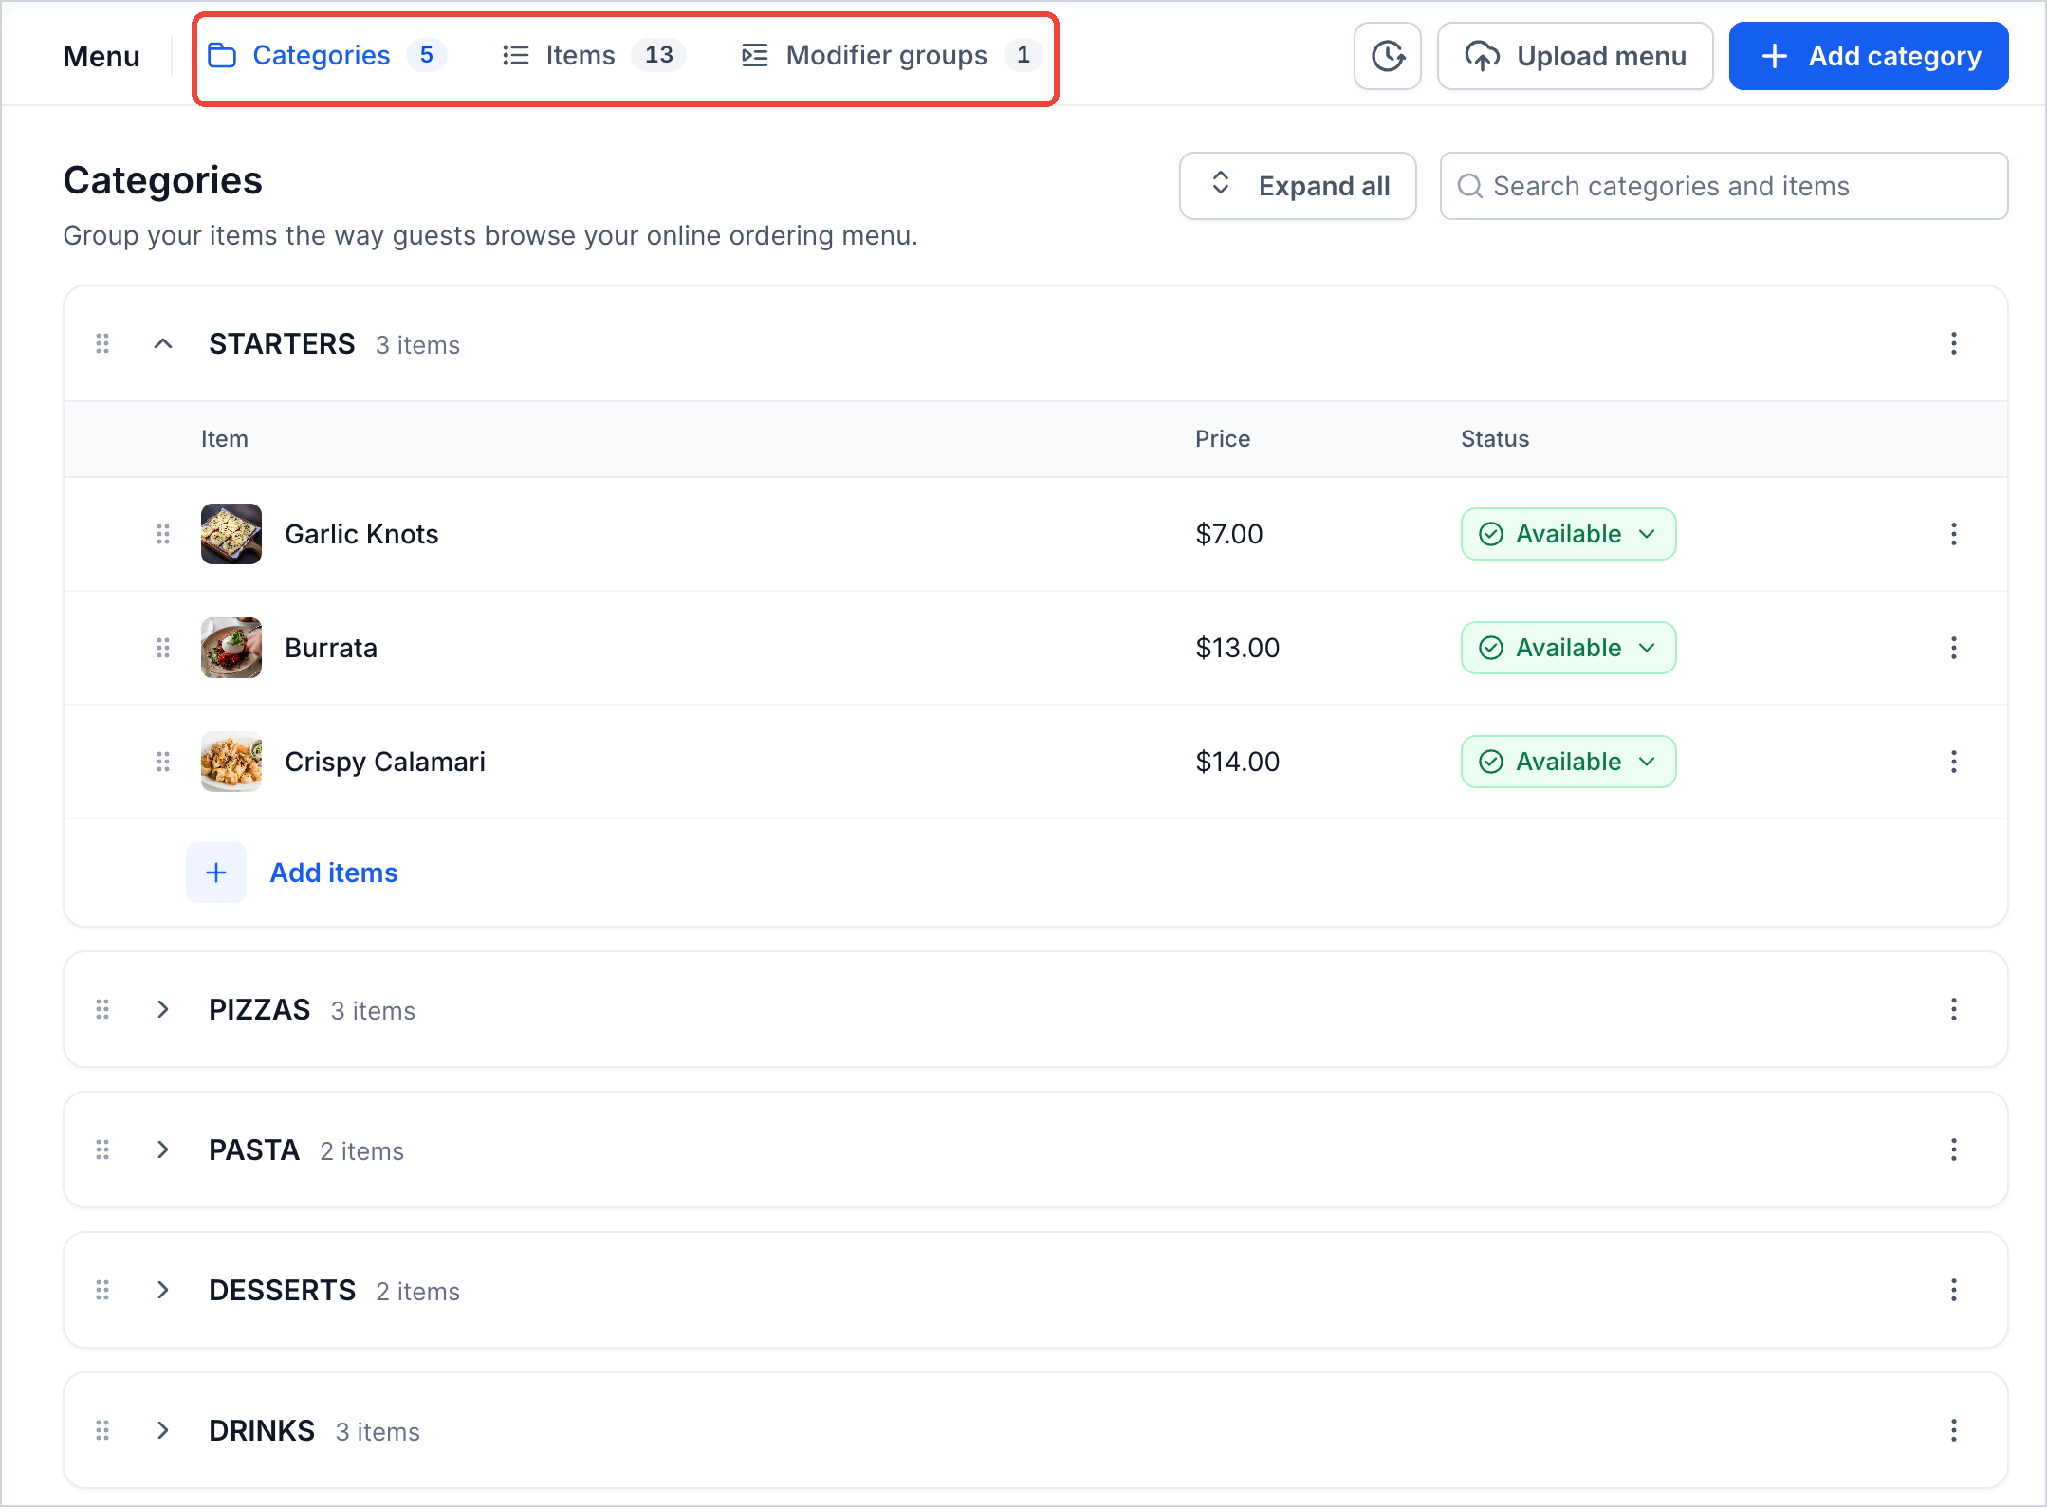
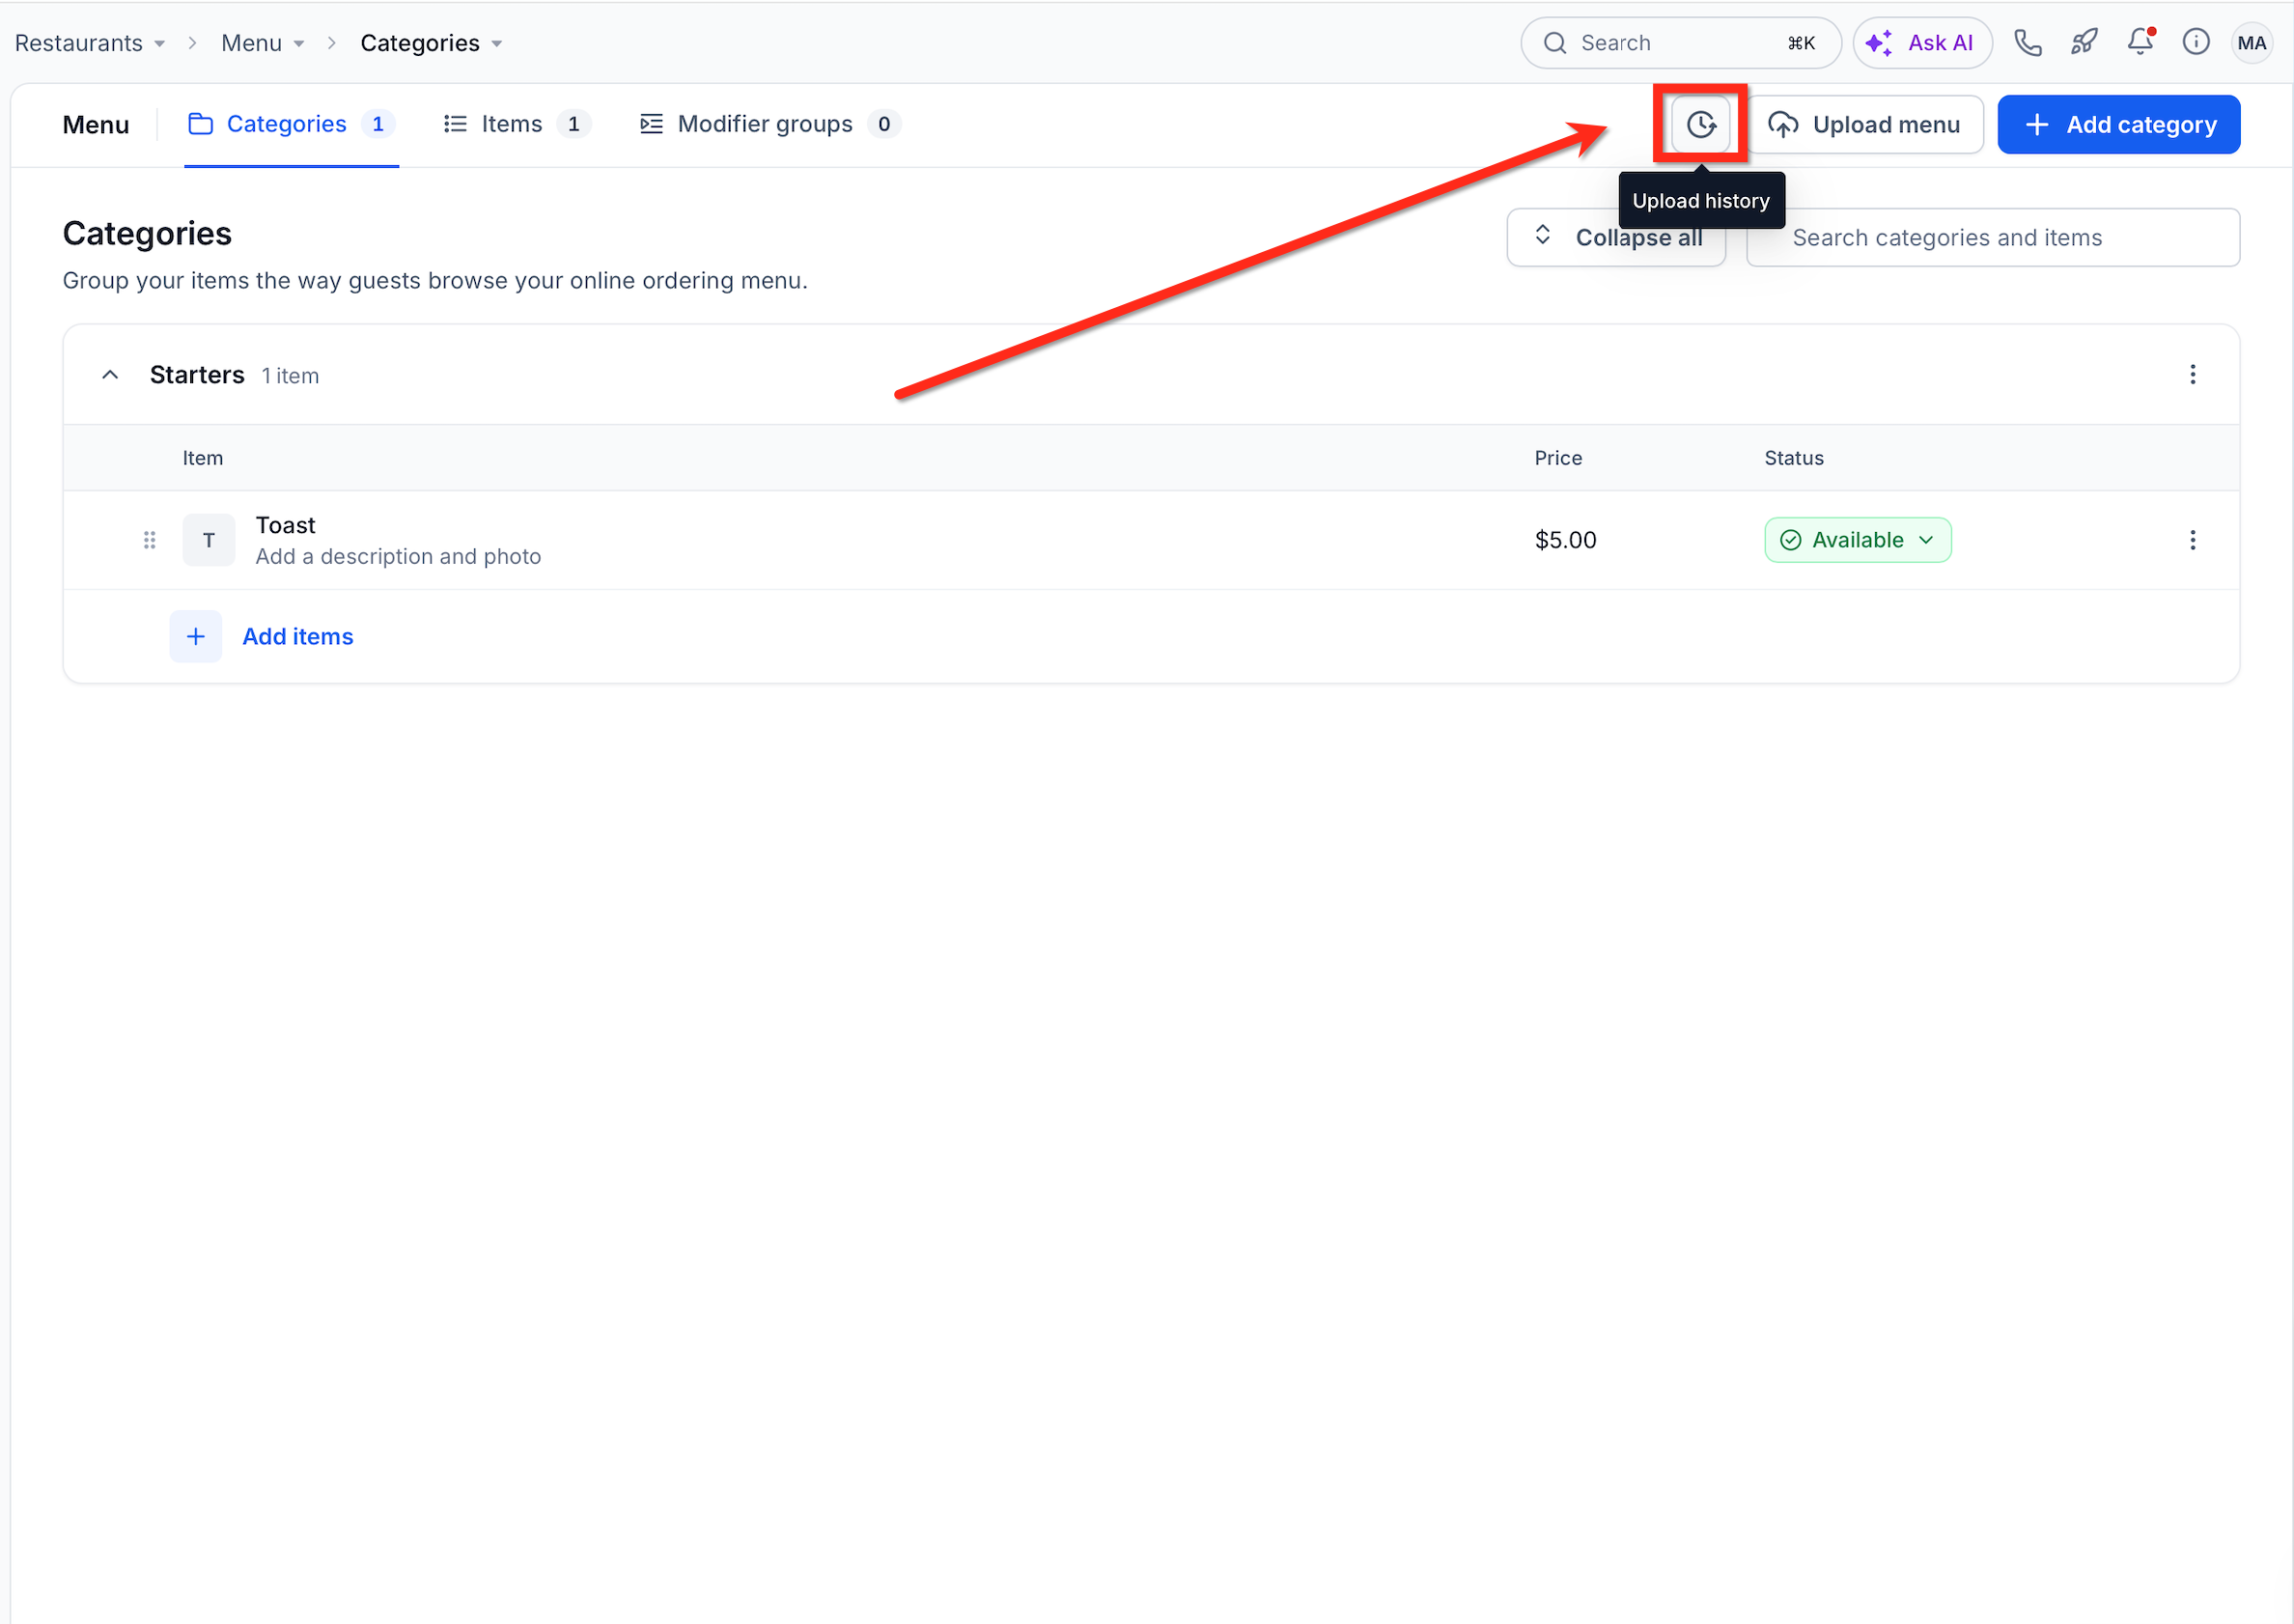
Menu holds one menu for each ordering channel, dine in, pickup and delivery. The page shows three tabs: Categories, Items and Modifier groups. Categories group items for browsing, Items list every dish with its price and status, and Modifier groups define sides, sauces and toppings.
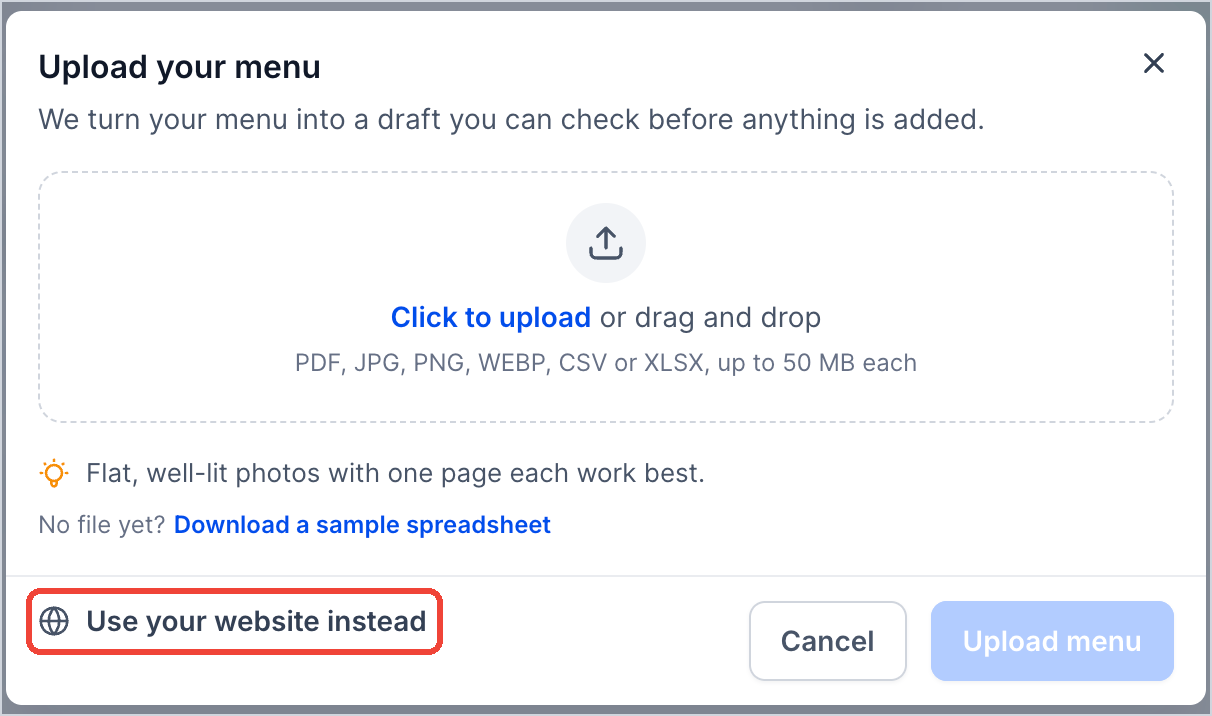
You can import a menu from a PDF, photo, spreadsheet or website link. A draft is generated for you to review; you can edit, discard or add the items to the live menu. You can also create categories, add items to multiple categories, attach photos, set popularity, define prices and stock, and attach modifier groups.
All changes are made within the Menu section, reachable from the left navigation under Restaurants > Menu. The interface provides search, expand/collapse and upload history tools for managing uploads.
03How businesses use restaurant menus
- Family style restaurant. Upload a PDF of the printed menu, let HighLevel build a draft, review each dish, then add items to the live menu. The owner can set which categories appear for dine in, pickup or delivery.
- Coffee shop with a rotating menu. Create a category for daily specials, upload a spreadsheet with the day's items, and assign a specific time window using the Use your store hours setting so the specials only appear when the shop is open.
- Take out pizza place. Add a modifier group for crust type and toppings, attach it to pizza items, then set a markup for delivery channel directly in the item editor.
04The numbers and rules that matter
- Upload files up to 50 MB each.
- Upload up to 15 files at a time.
- Supported file types: PDF, JPG, PNG, WEBP, CSV, XLSX.
- Item photo upload limit: 2.5 MB.
- Supported photo types: PNG, JPG, GIF.
05How to set up and use restaurant menus in HighLevel
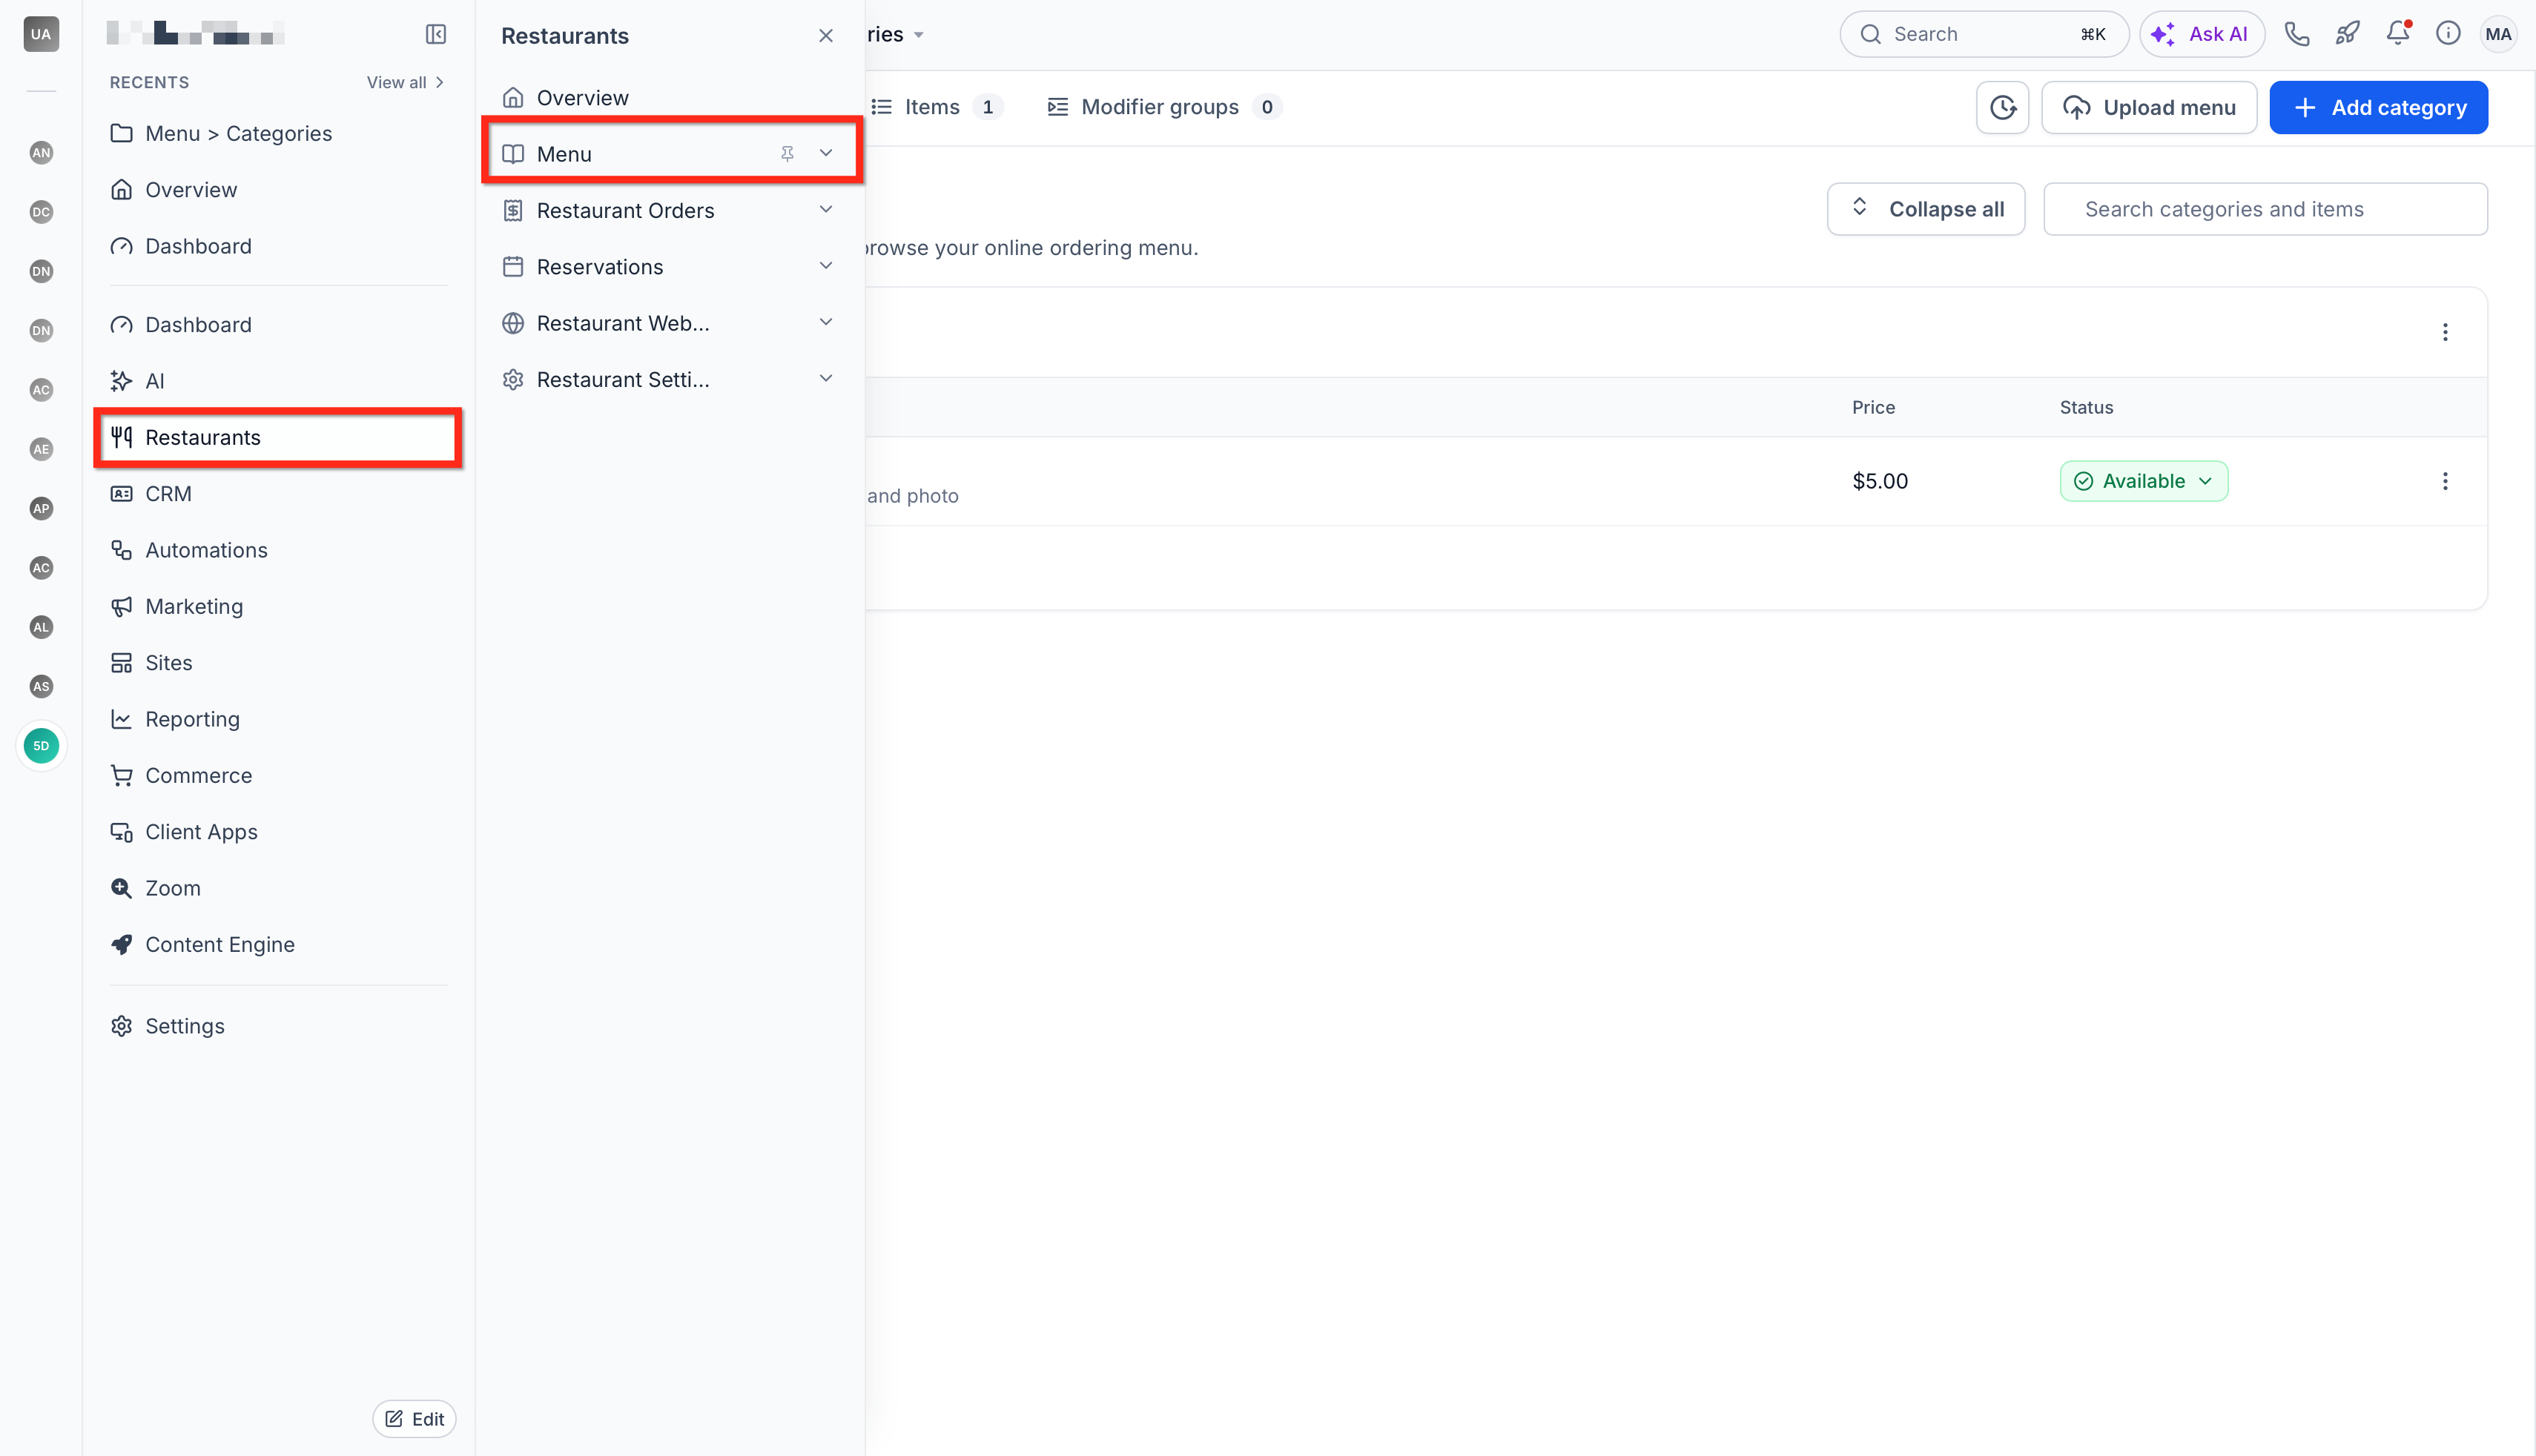
Open the Menu page
- Click Restaurants in the left navigation.
- In the Restaurants panel, click Menu.
- Menu loads showing the Categories tab.
Import a menu from a file or web link
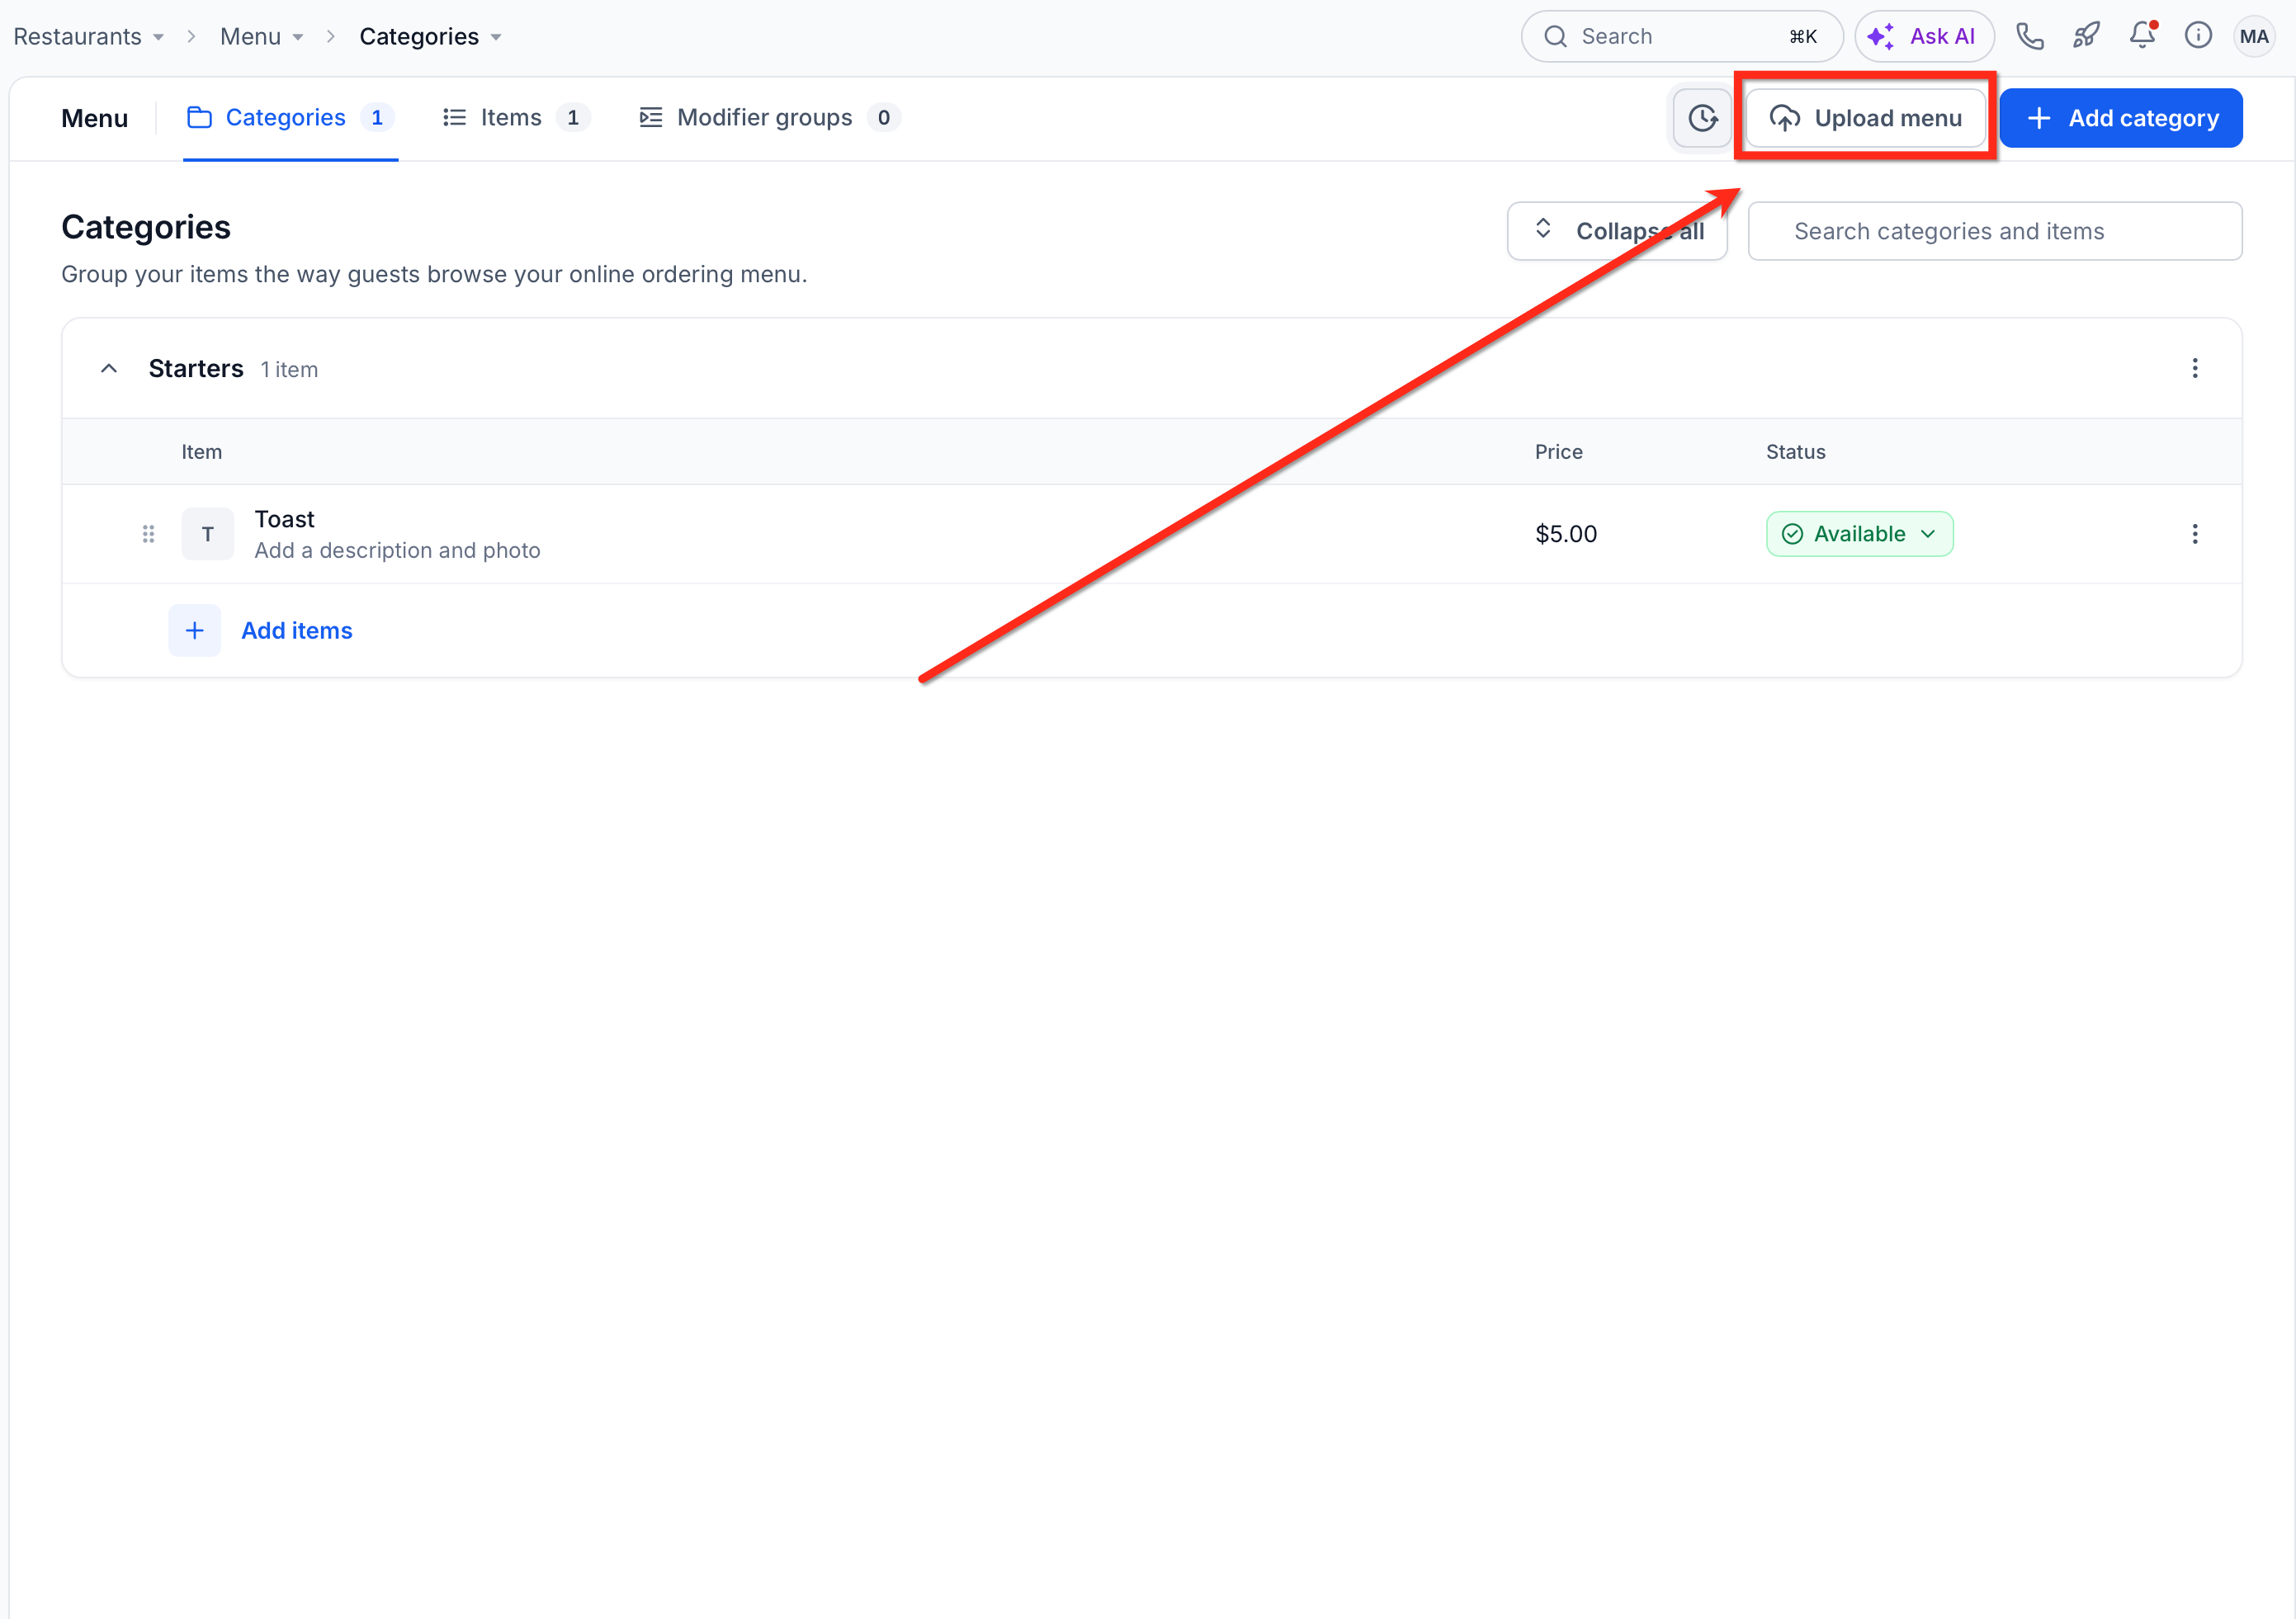
- Click the Upload menu button at the top right.
- Select Click to upload, then drag or choose PDF, JPG, PNG, WEBP, CSV or XLSX files (up to 50 MB each, max 15 files).
- Or click Use your website instead, paste the menu page URL into the Link to your menu page field, and click Use website.
- Wait for HighLevel to generate the draft and review any items marked Needs review.
- Click Add items to menu to publish the approved items.
Create a new category
- On the Categories tab, click Add category.
- Enter a Name and an optional Description.
- Choose the channels where the category is offered under Sold on.
- Leave Use your store hours on, or turn it off to define custom hours.
- Click Add category to save the new group.
Add an item to a category
- On the Items tab, click Add item.
- Enter the item Name and a short Description under Details.
- Select one or more Categories for the item.
- Upload or drag a PNG, JPG or GIF (up to 2.5 MB) under Photo.
- Toggle Popular on to highlight the item.
- Set the price and stock values under Price and stock.
- Optionally add modifier groups, set availability times and choose tax settings.
- Review the summary card and click Add item to save.
06What it looks like in HighLevel
07Settings that matter
- Sold on. Determines which ordering channels (Dine in, Pickup, Delivery) the category or item appears in.
- Use your store hours. Controls whether the category follows the restaurant’s regular hours or uses custom daily time ranges.
- Popular. Marks an item as featured so it shows prominently on both online ordering and dine in menus.
- Price and stock. Sets the selling price for the item and defines inventory limits.
- Upload menu. Button that starts the process of importing a menu from a file or a web page.
- Modifier groups. Defines optional add ons such as sides, sauces or toppings that can be attached to items.
08Things to know before you rely on it
- File uploads accept PDF, JPG, PNG, WEBP, CSV or XLSX formats only.
- Each uploaded file may be up to 50 MB and you can upload up to 15 files at one time.
- Item photos are limited to PNG, JPG or GIF files up to 2.5 MB.
- Items are not added to the live menu until you click Add items to menu.
- Drafts can be discarded by clicking Discard draft.
09How it connects to the rest of HighLevel
- Set up your restaurant to enable online ordering and reservations. Restaurant setup guide
- Customize and publish your restaurant website to display the menu. Restaurant website
- Manage orders and payments that come from the menu you create. Restaurant orders