
01Who this is for
- Restaurant owners who need a single place to change address, hours and service options, so staff always work with the latest information.
- Managers responsible for online ordering and pickup, because they can toggle availability and pricing without leaving the platform.
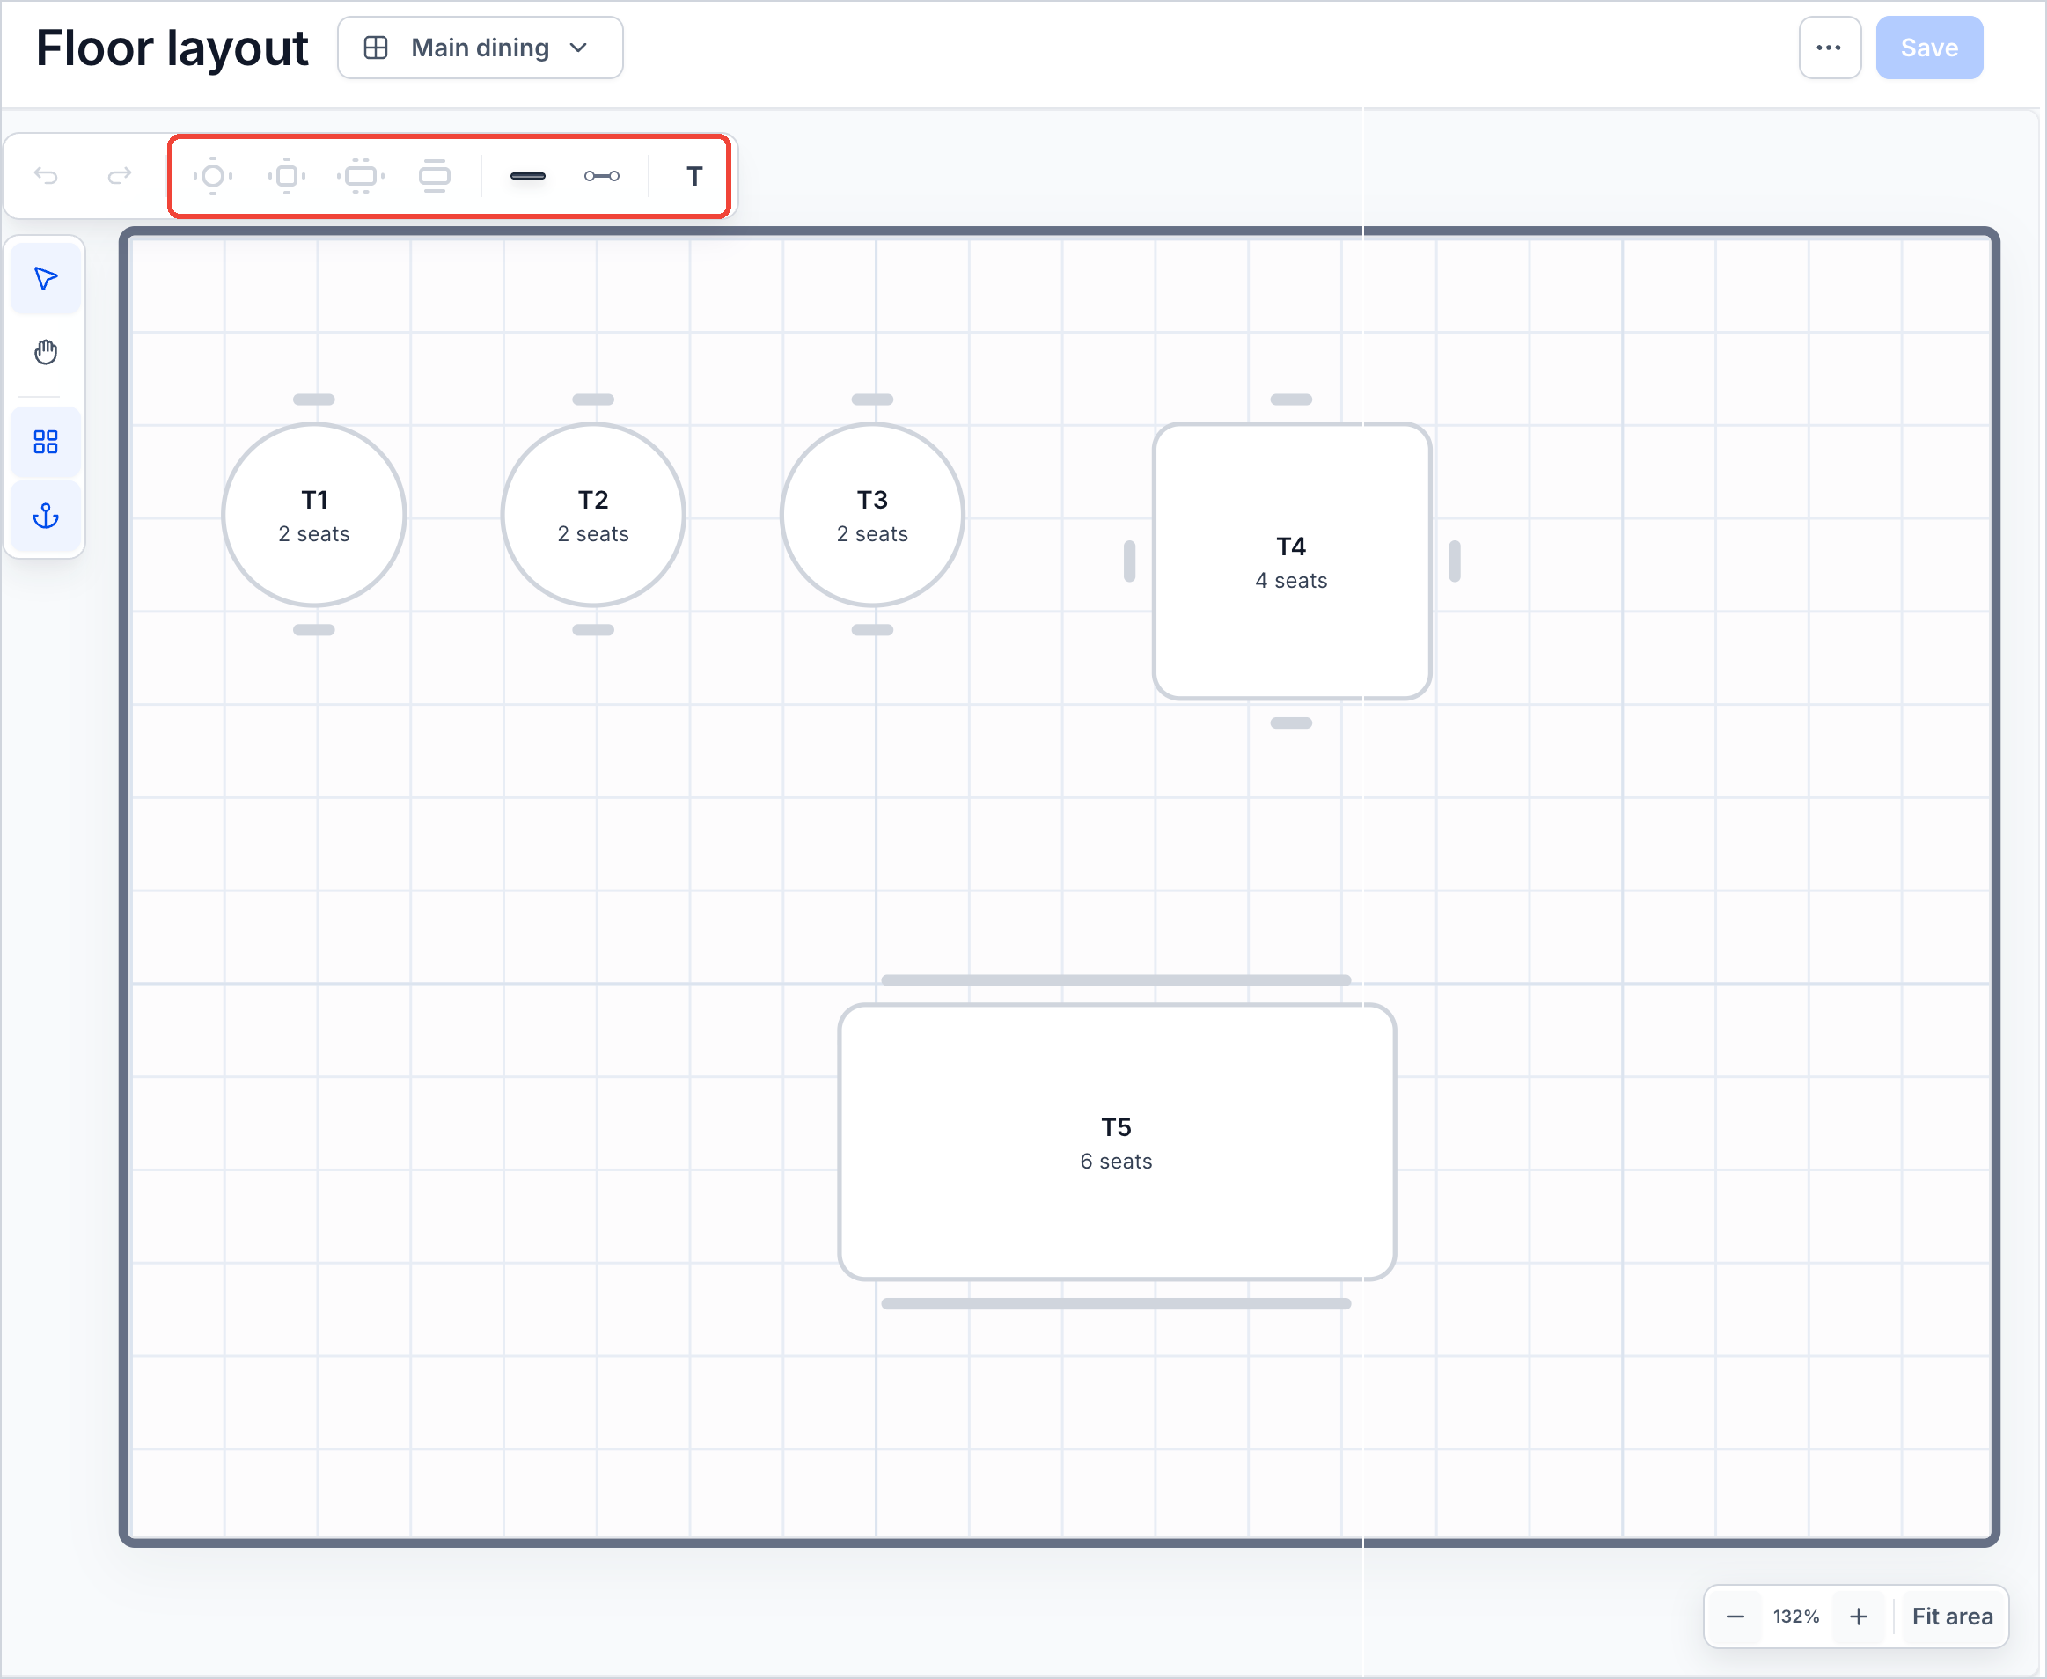
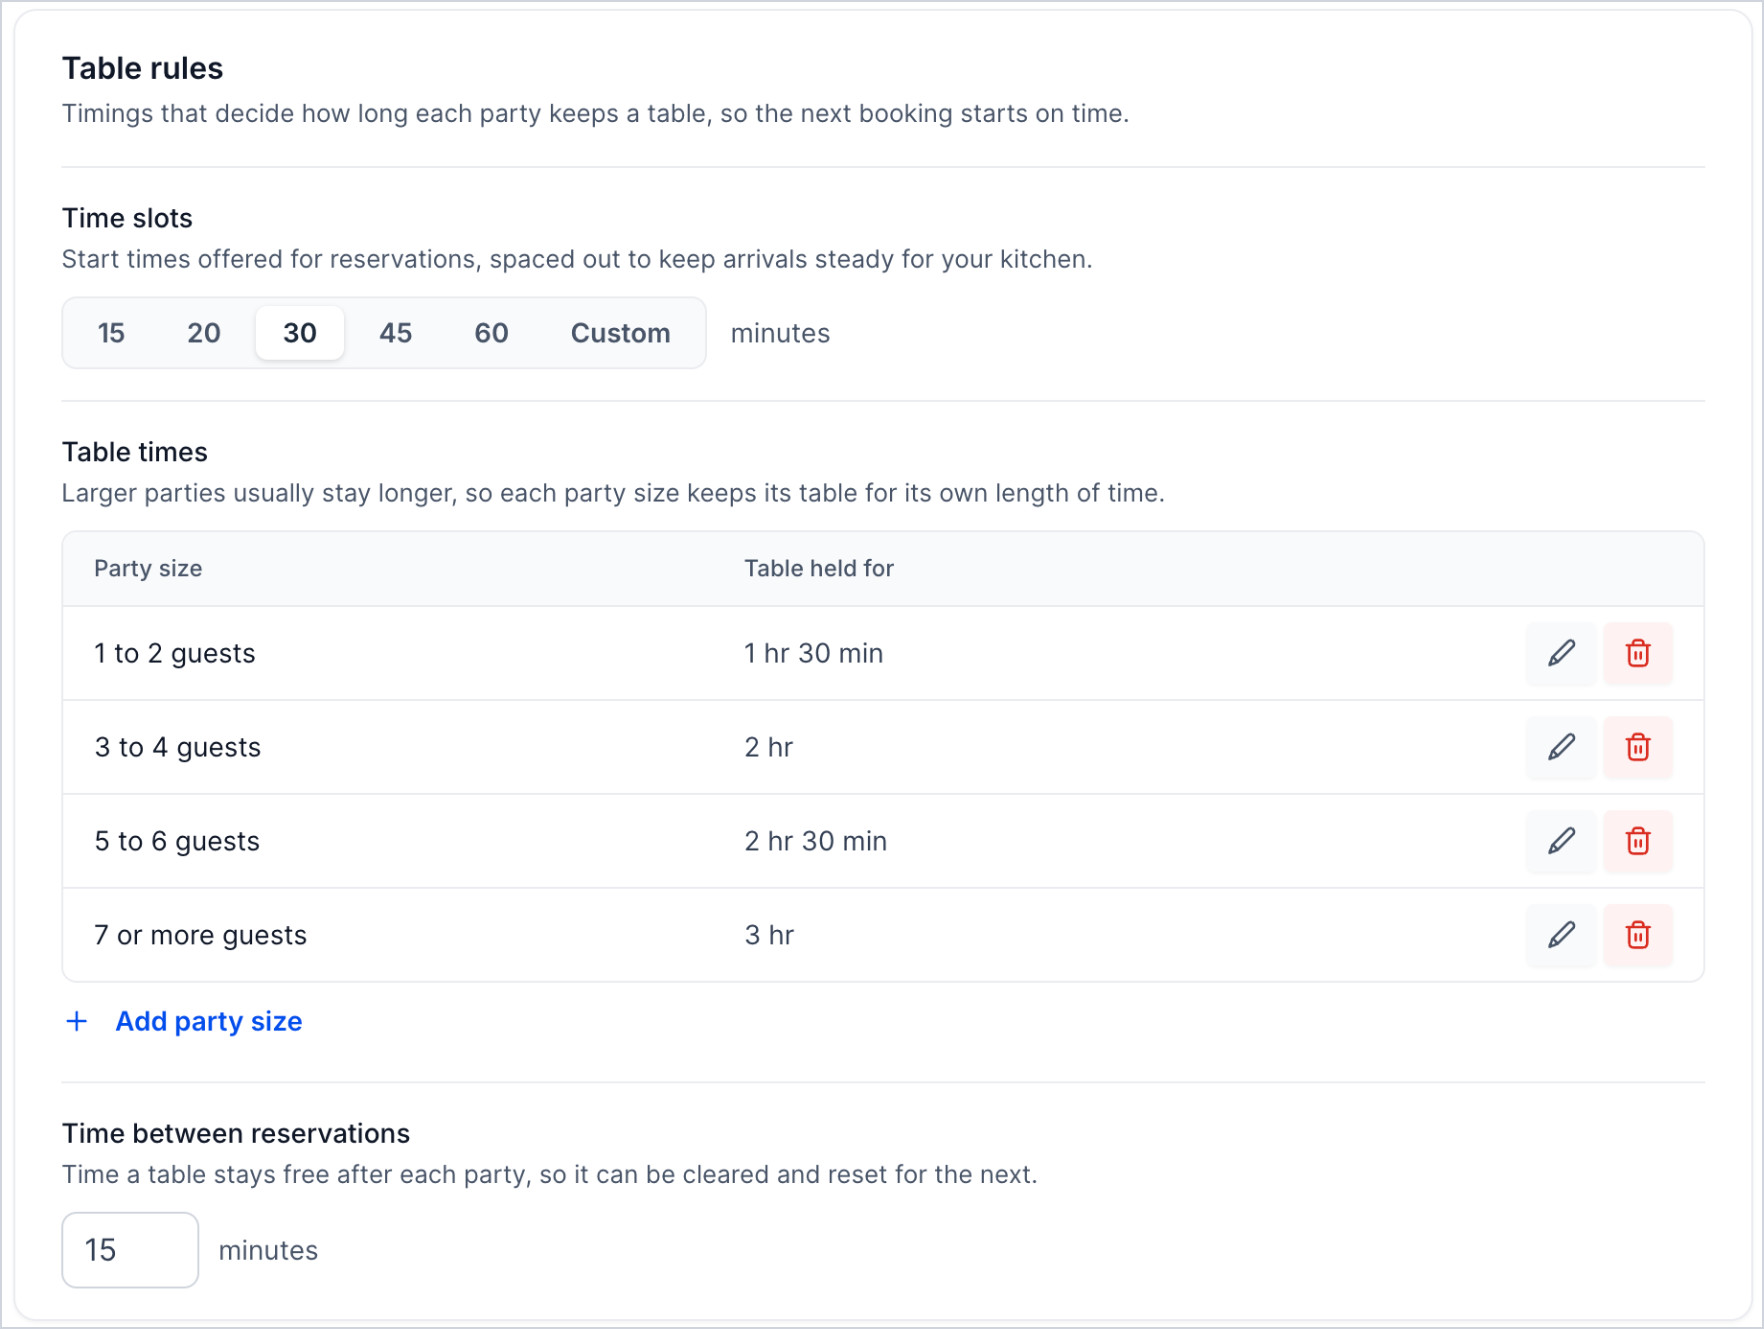
- Reservation coordinators who must set table capacities, booking windows and deposit rules to match floor layout and staffing.
02Restaurant settings, explained
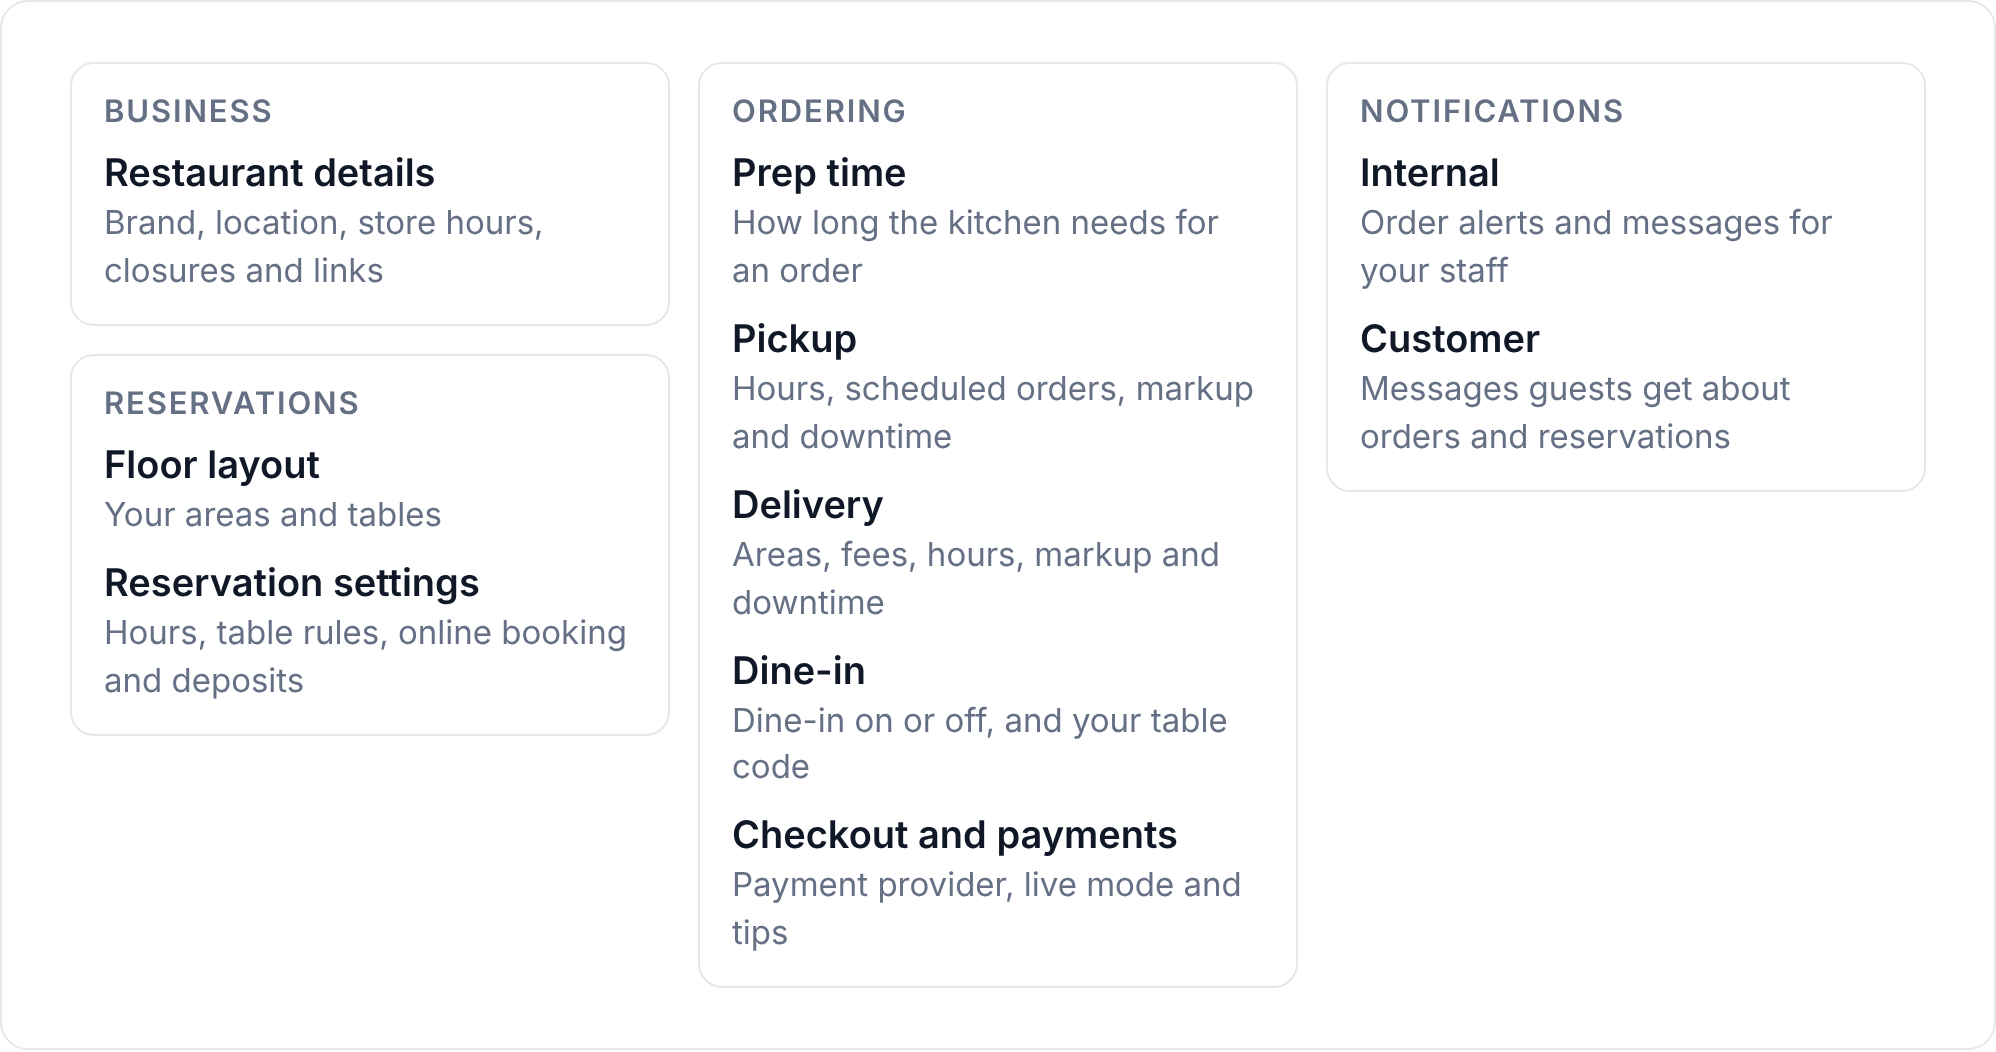
Restaurant Settings groups all operational details for a venue. It contains sections for restaurant details, closures, preparation time, pickup, delivery, dine in, floor layout, reservation rules, checkout, payments and notifications. Each section appears in a left hand menu within the Restaurant Settings page.
Changes made in any section flow to all parts of the system that use them. For example, updating the address updates the business profile, invoices and guest facing pages. Enabling or disabling pickup right away affects the ordering page on the restaurant website. The feature lives under the Restaurants heading in a HighLevel subaccount.
03How businesses use restaurant settings
- Family style restaurant. The owner adds a closure for a holiday, sets a default prep time, and configures a delivery fee based on distance bands. Guests see the correct hours and fees on the website, and staff receive alerts for new orders.
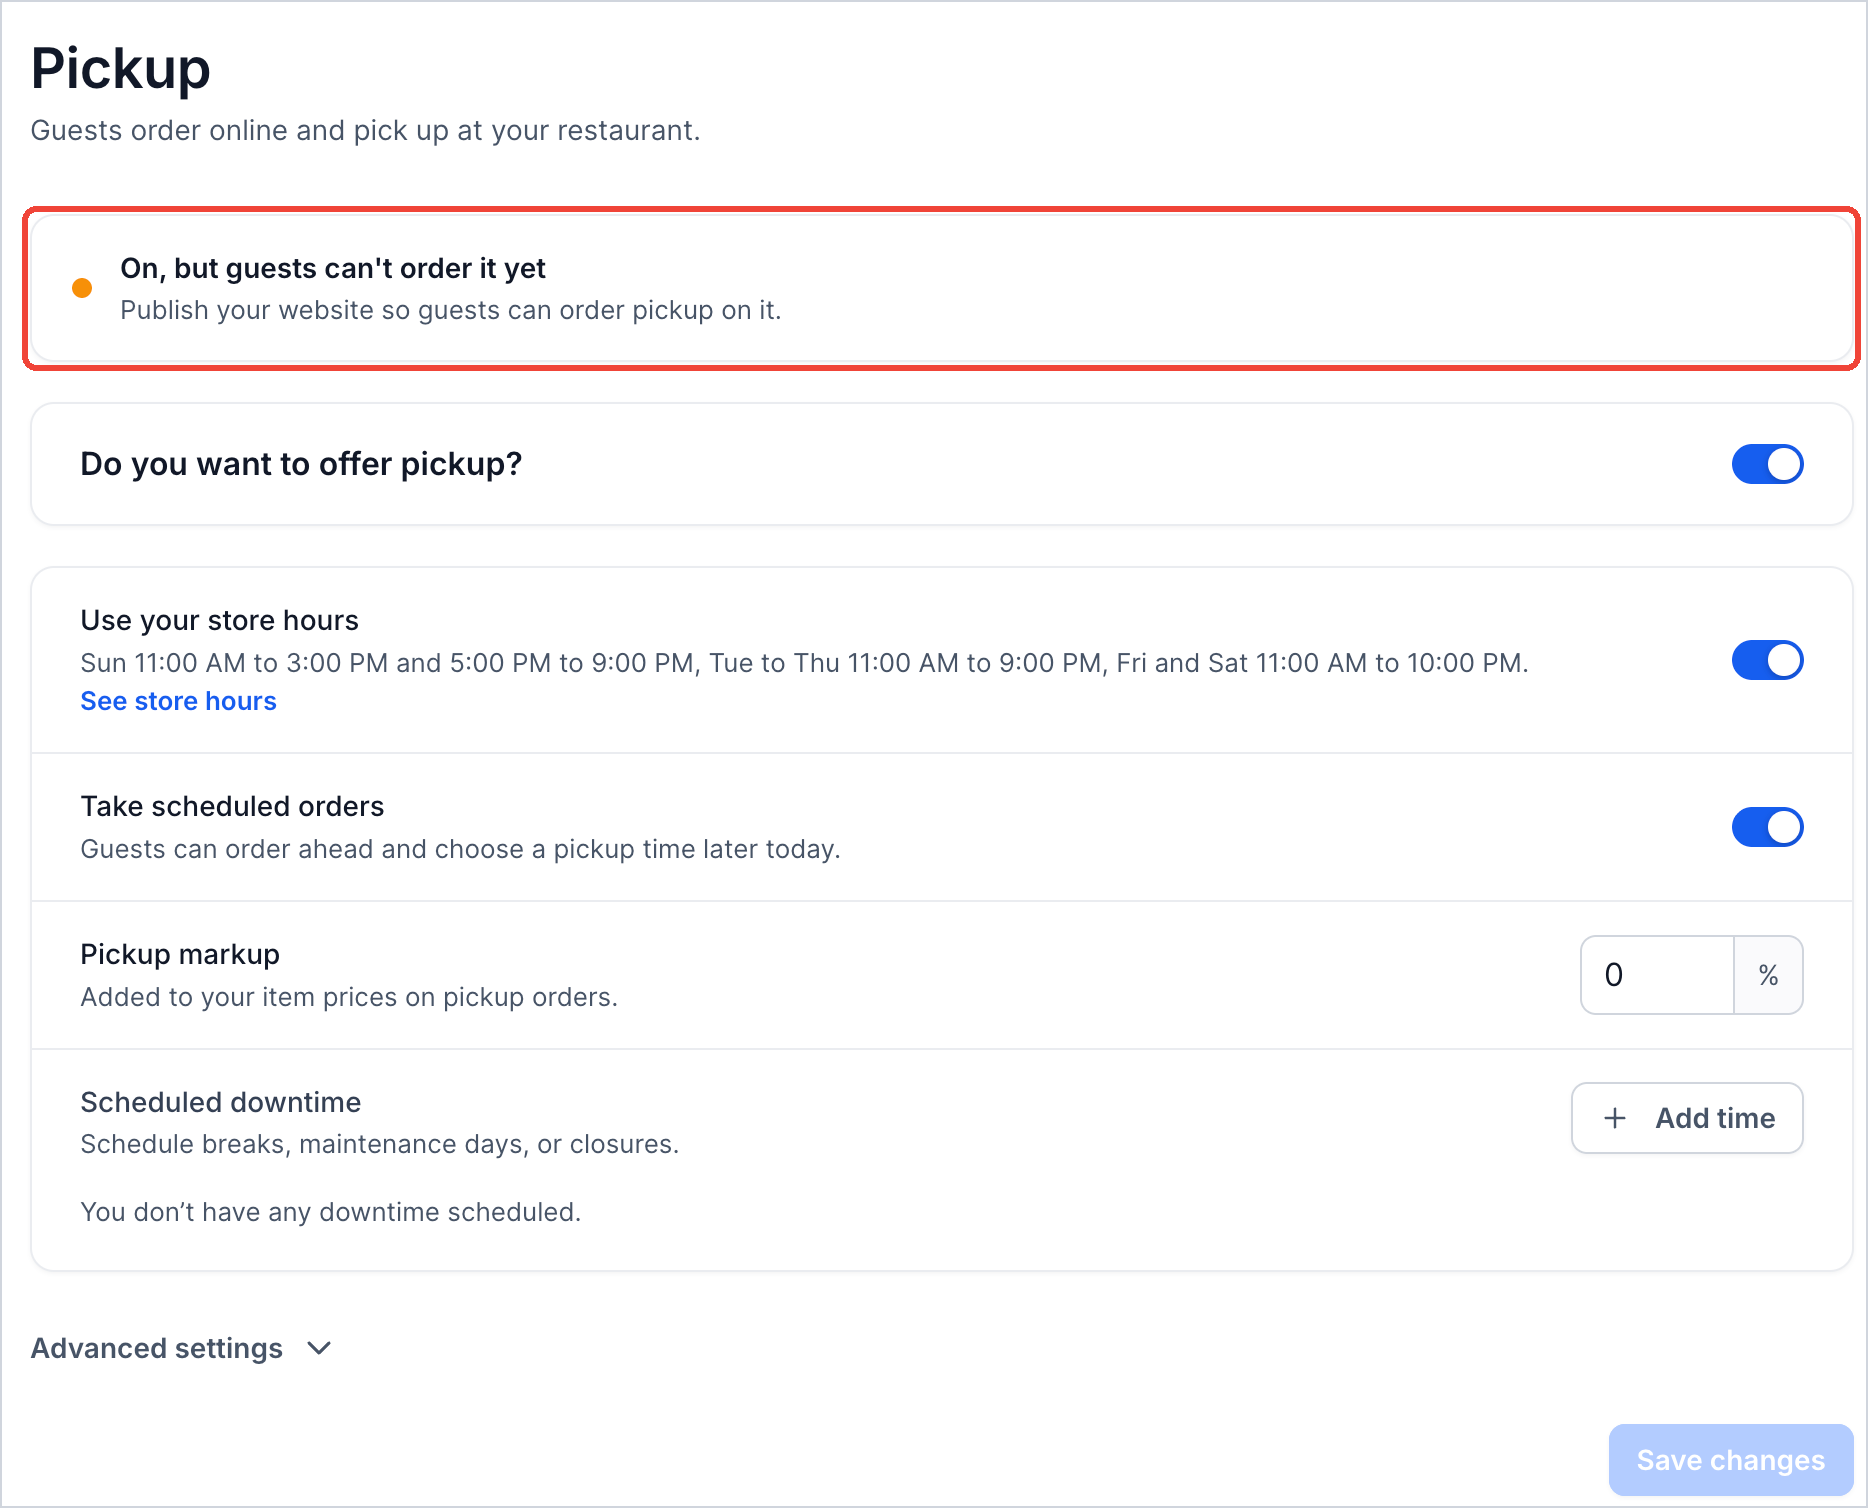
- Quick service coffee shop. The manager turns on pickup, enables scheduled orders, and applies a 0% markup so menu prices stay unchanged. When the website is published, customers can place orders for immediate or later pickup.
- Fine dining venue. The reservation coordinator defines a floor layout with tables, sets party size limits and a minimum spend for online bookings, and activates deposit collection. Guests receive confirmation and reminder messages via email or SMS.
04The numbers and rules that matter
- Pickup markup adds a percentage to item prices; enter 0 for menu prices.
- Order limits set an optional minimum order amount before tax.
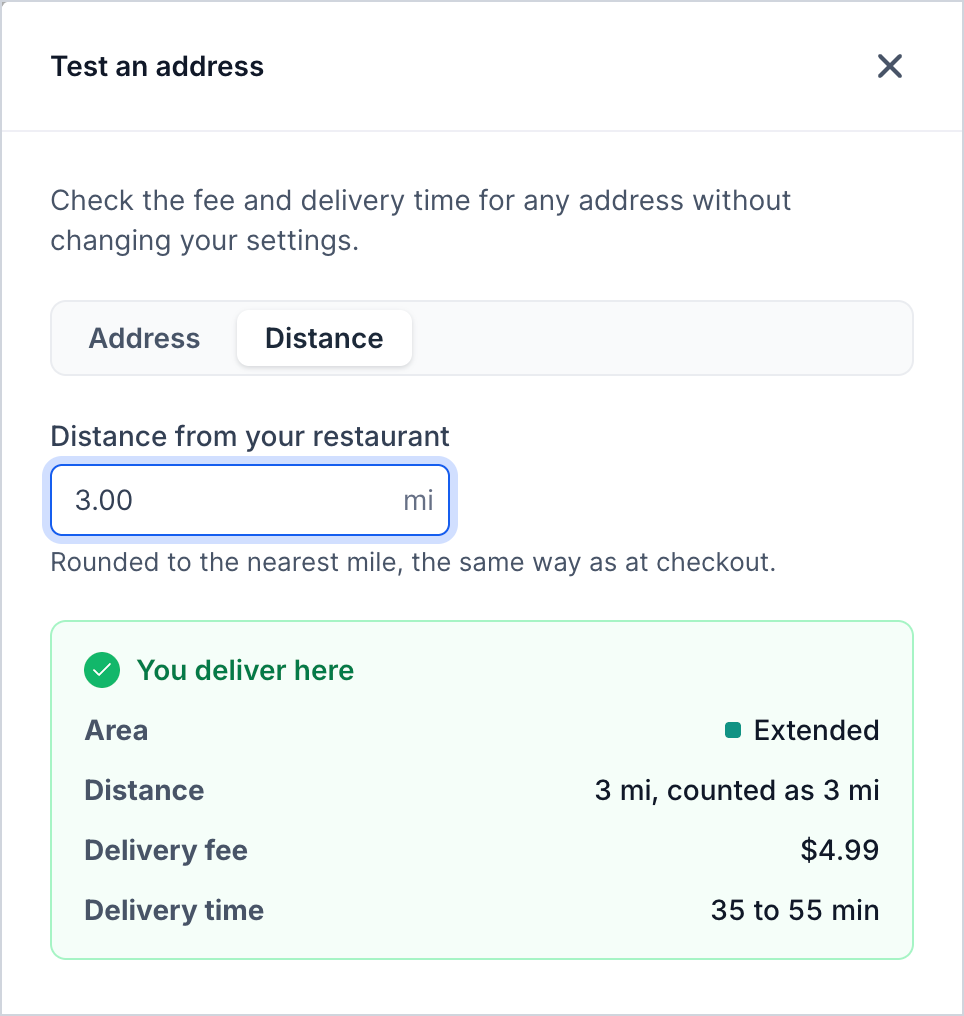
- Delivery pricing can use Distance bands or Per mile.
- Default tip can be set (e.g., 15%) and guests may enter a custom amount.
05Before you start
- You must be signed in to a HighLevel subaccount that has the Restaurants feature enabled.
- A restaurant website must be published if you want pickup or QR code menus to be active.
- A payment provider must be connected before enabling deposits or live payments.
06How to set up and use restaurant settings in HighLevel
Set up restaurant settings
- In the subaccount menu, select Restaurants on the left.
- Click the Restaurant Settings option in the Restaurants panel.
- Pick a page from the left hand list; the Restaurant details page opens first.
- Modify the needed fields and press the Save button for that page.
Add a closure
- Locate the Closures section and press Add closure.
- Choose the date and optionally type a reason for the closure.
- Press Add closure to store the entry.
Add a delivery area
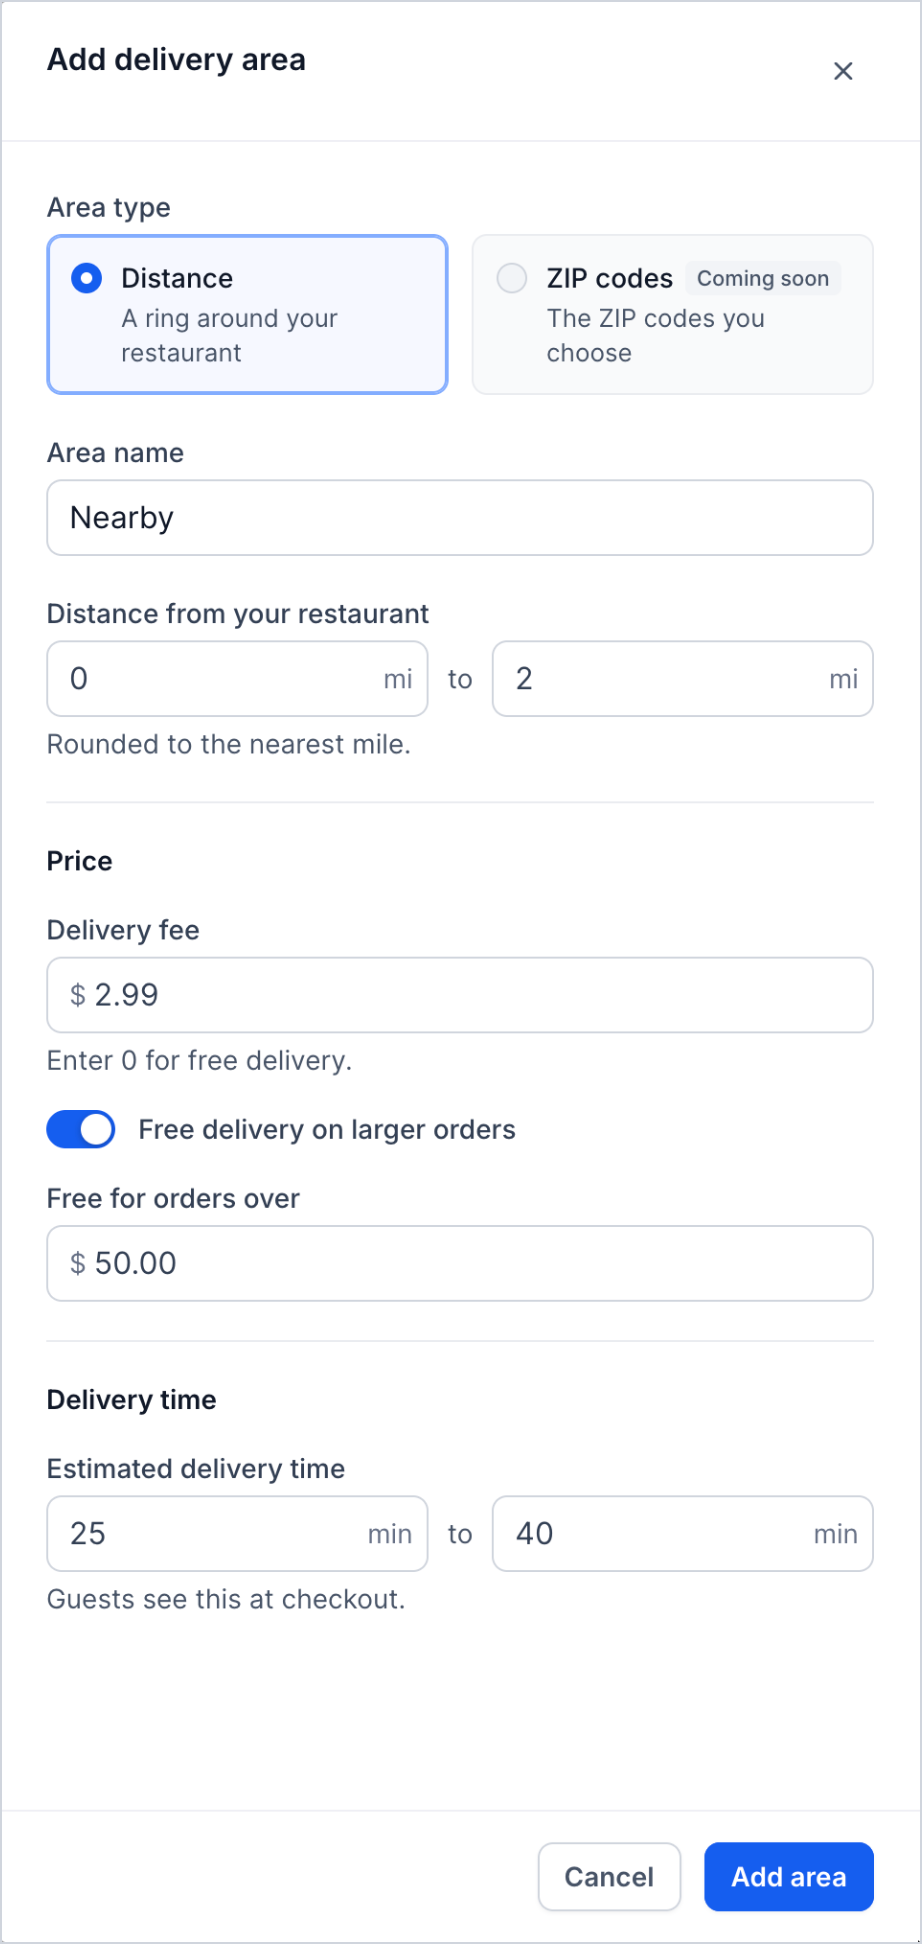
- Press Add area and select Distance as the area type.
- Enter a name for the area and define the start and end distances.
- Specify the delivery fee; enter 0 for free delivery.
- Optionally activate Free delivery for larger orders and set the qualifying amount.
- Set the estimated delivery time and click Add area.
07What it looks like in HighLevel
08Settings that matter
- Brand. Controls the restaurant’s displayed name, logo and brand colour across the platform.
- Location. Holds the address, phone, email and time zone that appear on guest facing pages.
- Store hours. Defines the weekly opening times that affect pickup, delivery, reservations and menu availability.
- Pickup markup. Adds a percentage to item prices for pickup orders; entering 0 keeps menu prices unchanged.
- Delivery markup. Applies a separate percentage increase to item prices for delivery orders.
- Live mode. When on, the restaurant processes real card payments; turning it off puts the system in test mode.
- Tips. Sets the suggested tip amounts, default selection and whether guests can enter a custom tip.
- On, screen order alert. Shows a pop up and sound on staff devices when a new order arrives.
09Things to know before you rely on it
- Delivery areas currently support radius based zones; ZIP code area support is marked as coming soon.
- If pickup is enabled but the restaurant website is not published, the page may indicate On while guests cannot place orders.
- Live mode must be switched on before accepting real orders; otherwise only test transactions are processed.
10If something goes wrong
- Pickup shows “On, but guests can’t order it yet”.. Publish the restaurant website through the Restaurant Website settings.
- Need to close for a holiday without disabling all services.. Add a closure in Restaurant Details or use Scheduled downtime for pickup or delivery.
- Want to test payments before going live.. Turn off Live mode under Checkout and Payments, run test orders, then re enable Live mode.
11How it connects to the rest of HighLevel
- Guide for building and editing a restaurant menu Restaurant menu guide
- How to manage restaurant orders and payments Orders and payments
- Restaurant setup guide for online ordering and reservations Setup guide
- HighLevel pricing and plans Pricing
- Start a 30 day HighLevel trial Free trial
Michael's take

Keeping your restaurant settings up to date makes sure the information shown to guests and staff aligns with how you actually operate.