
01Who this is for
- Email marketers who want a brand consistent unsubscribe experience for their subscribers.
- Agencies that manage multiple client campaigns and need automated opt out handling.
- Compliance officers who must ensure every email contains a working unsubscribe mechanism.
02Custom unsubscribe links, explained
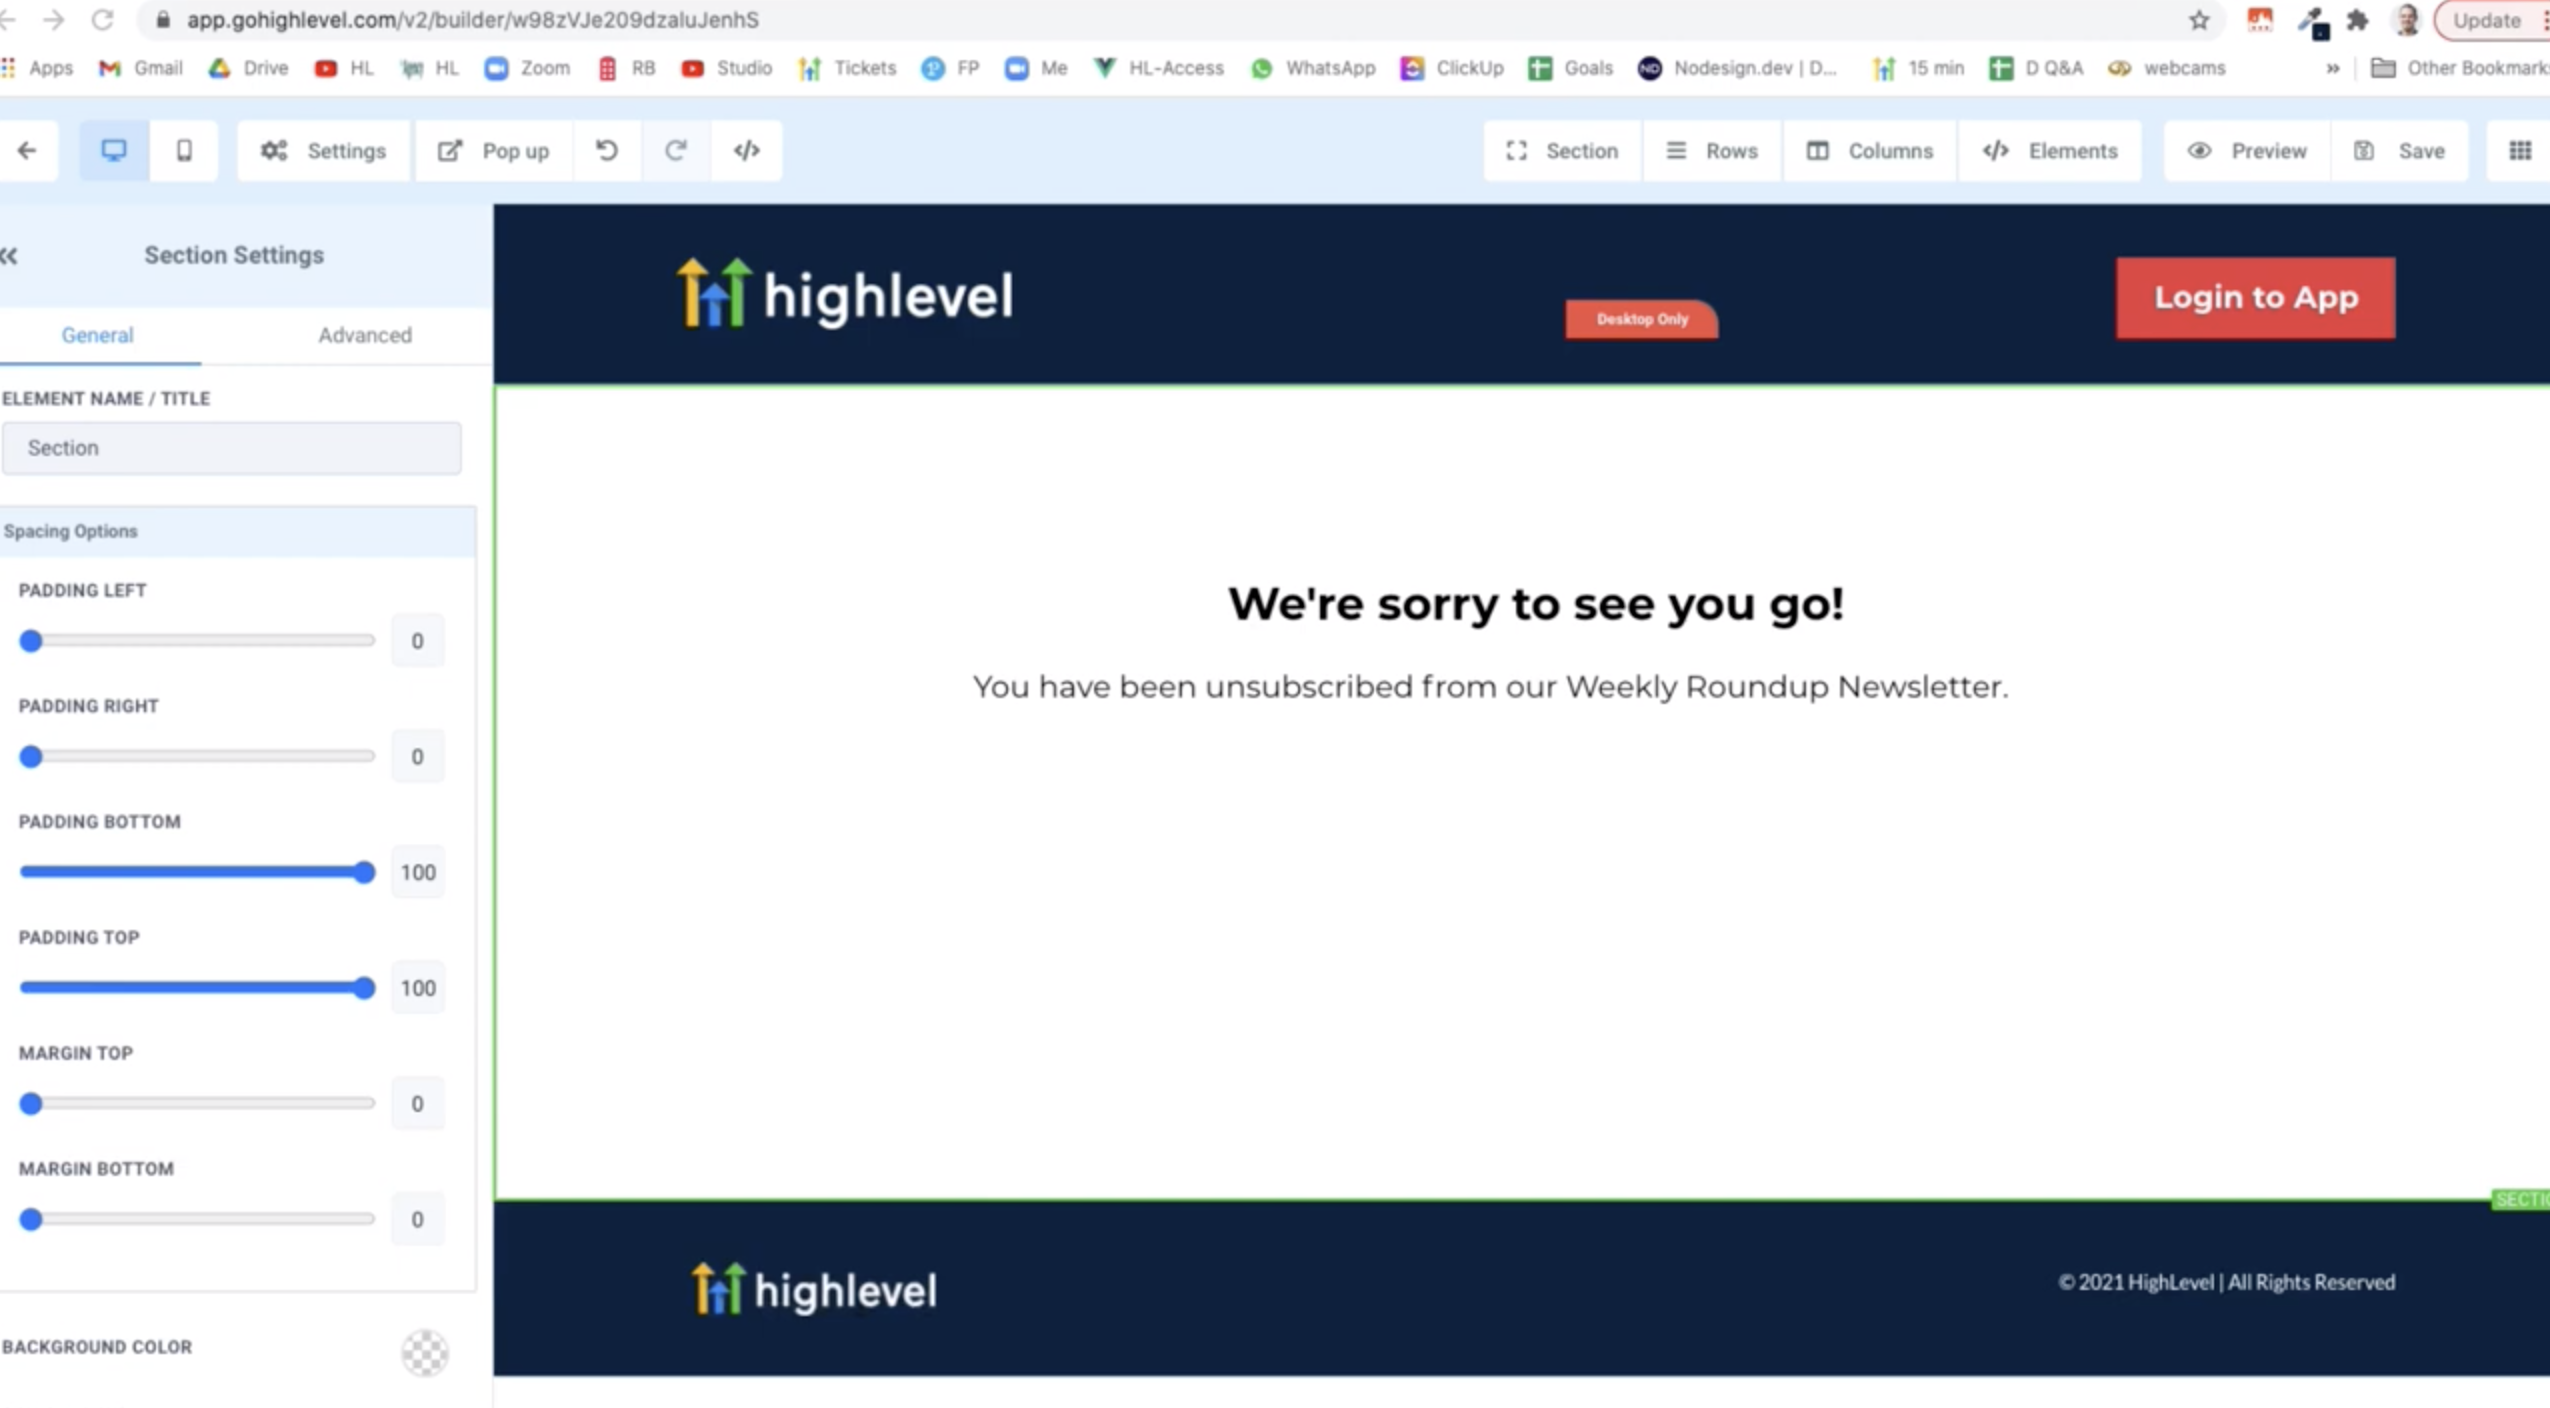
The feature replaces the platform’s default unsubscribe URL with a Trigger Link. A Trigger Link is a trackable URL that can fire events inside the platform when clicked. By linking the Trigger Link to a published landing page, contacts see a custom message after opting out.
A workflow listens for the Trigger Link Clicked event and runs the Set Contact DND action. This action marks the contact as Do Not Disturb for the Email channel, preventing future email sends. The workflow must be saved and published for the automation to run.
All settings are found under Marketing > Trigger Links for link creation and Automation > Workflows for the DND automation. The custom link is inserted into email footers via the email editor’s link dialog.
03How businesses use custom unsubscribe links
- SaaS company. Create a landing page that thanks users for unsubscribing, generate a Trigger Link to that page, and add it to newsletter footers. The workflow then automatically sets unsubscribed users to DND for email, keeping the list clean.
- Real estate agency. Build a simple page confirming opt out from property alerts, point a Trigger Link to it, and embed the link in all email footers. When contacts click, the workflow tags them as DND, stopping further property email blasts.
- Online education platform. Design a preference management landing page, create a Trigger Link, and place it in course update emails. The associated workflow marks the contact DND for email and can also add an “Unsubscribed” tag for reporting.
04The numbers and rules that matter
- Action = Set Contact DND, Enable DND for Specific Channels, Email.
05Before you start
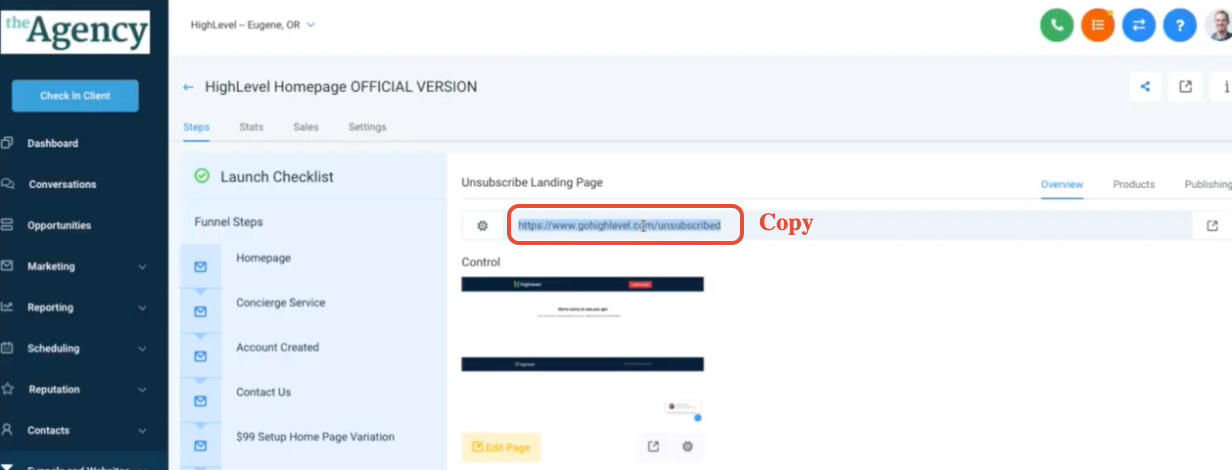
- Publish the unsubscribe landing page and copy its URL.
- If using a custom domain, complete domain setup under Settings > Domains before creating the Trigger Link.
- Ensure the workflow will be published before sending any campaigns.
06How to set up and use custom unsubscribe links in HighLevel
Create a trigger link for the custom unsubscribe page
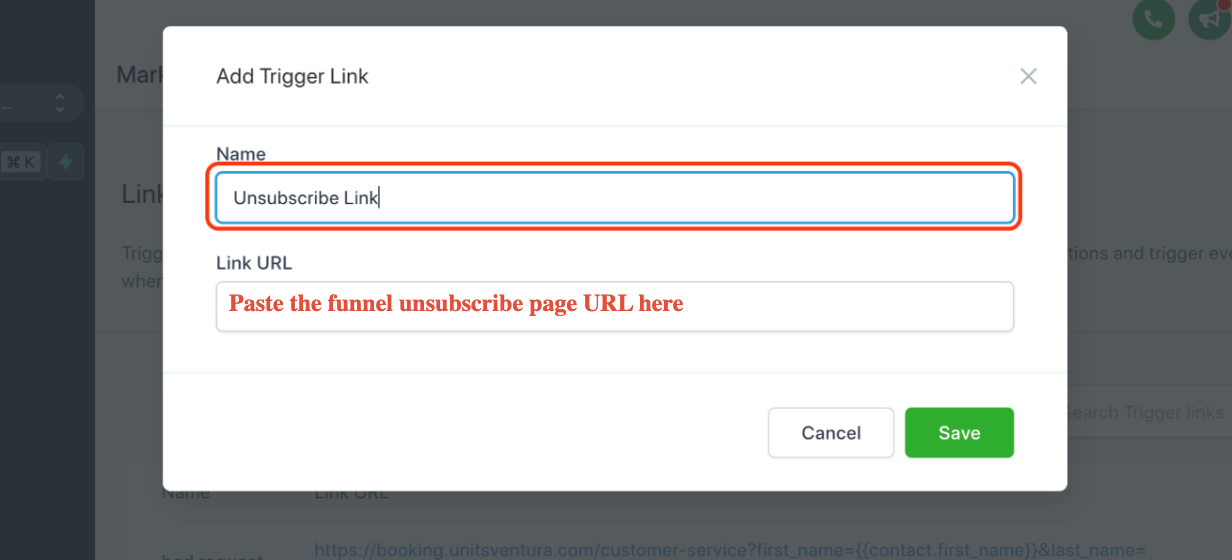
- Open Marketing > Trigger Links.
- Click Add Link.
- Enter Unsubscribe Link as the Name.
- Paste the published landing page URL into the Link URL field and click Save.
Create a workflow that sets contacts to DND when the trigger link is clicked
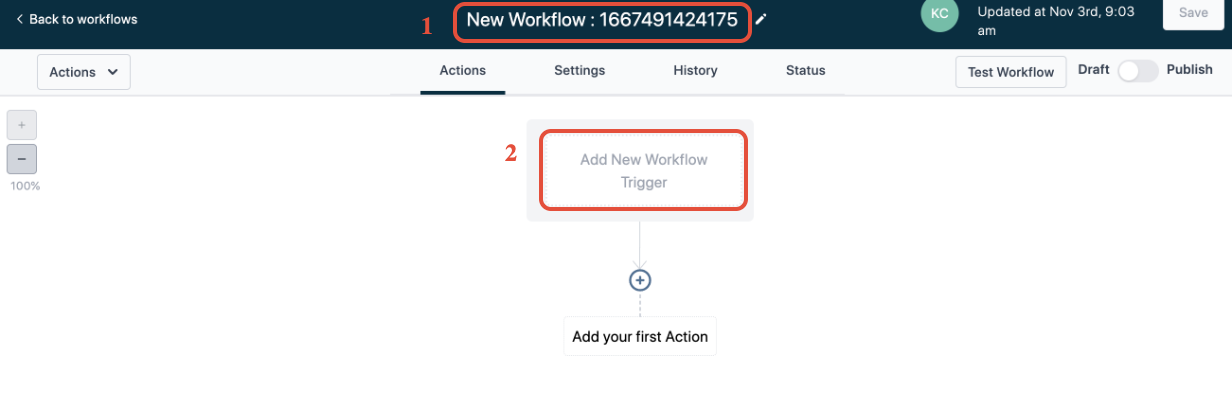
- Navigate to Automation > Create Workflow and select Start from Scratch.
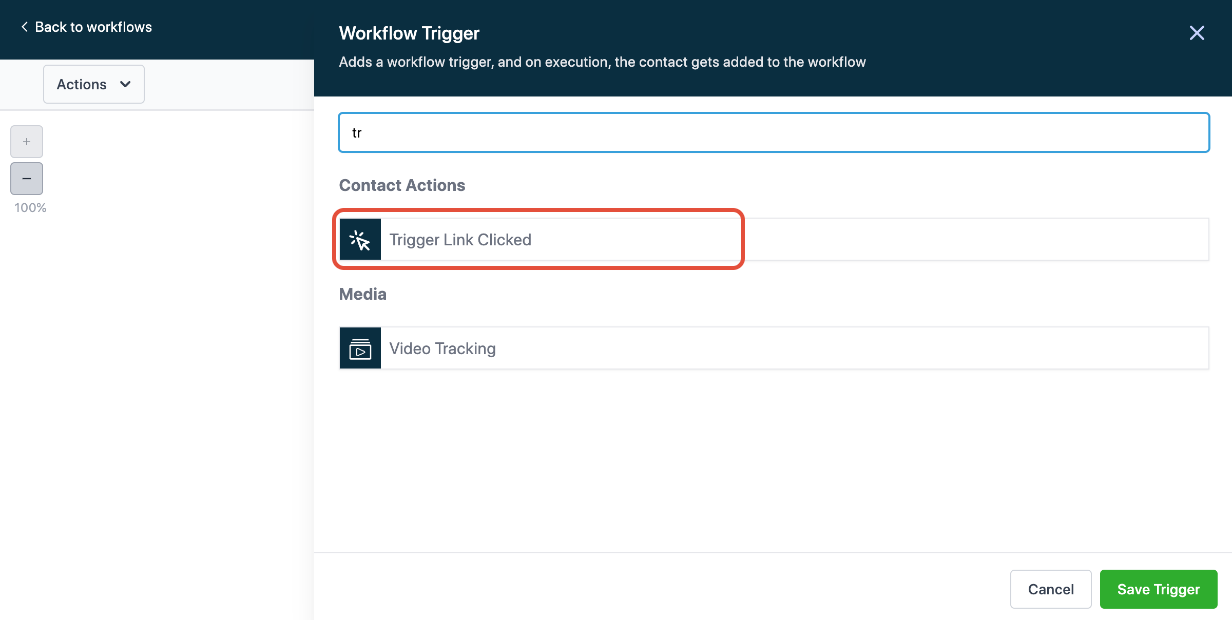
- Name the workflow Trigger Link Unsubscribe and add a new workflow trigger.
- Search for Trigger Link Clicked and select it.
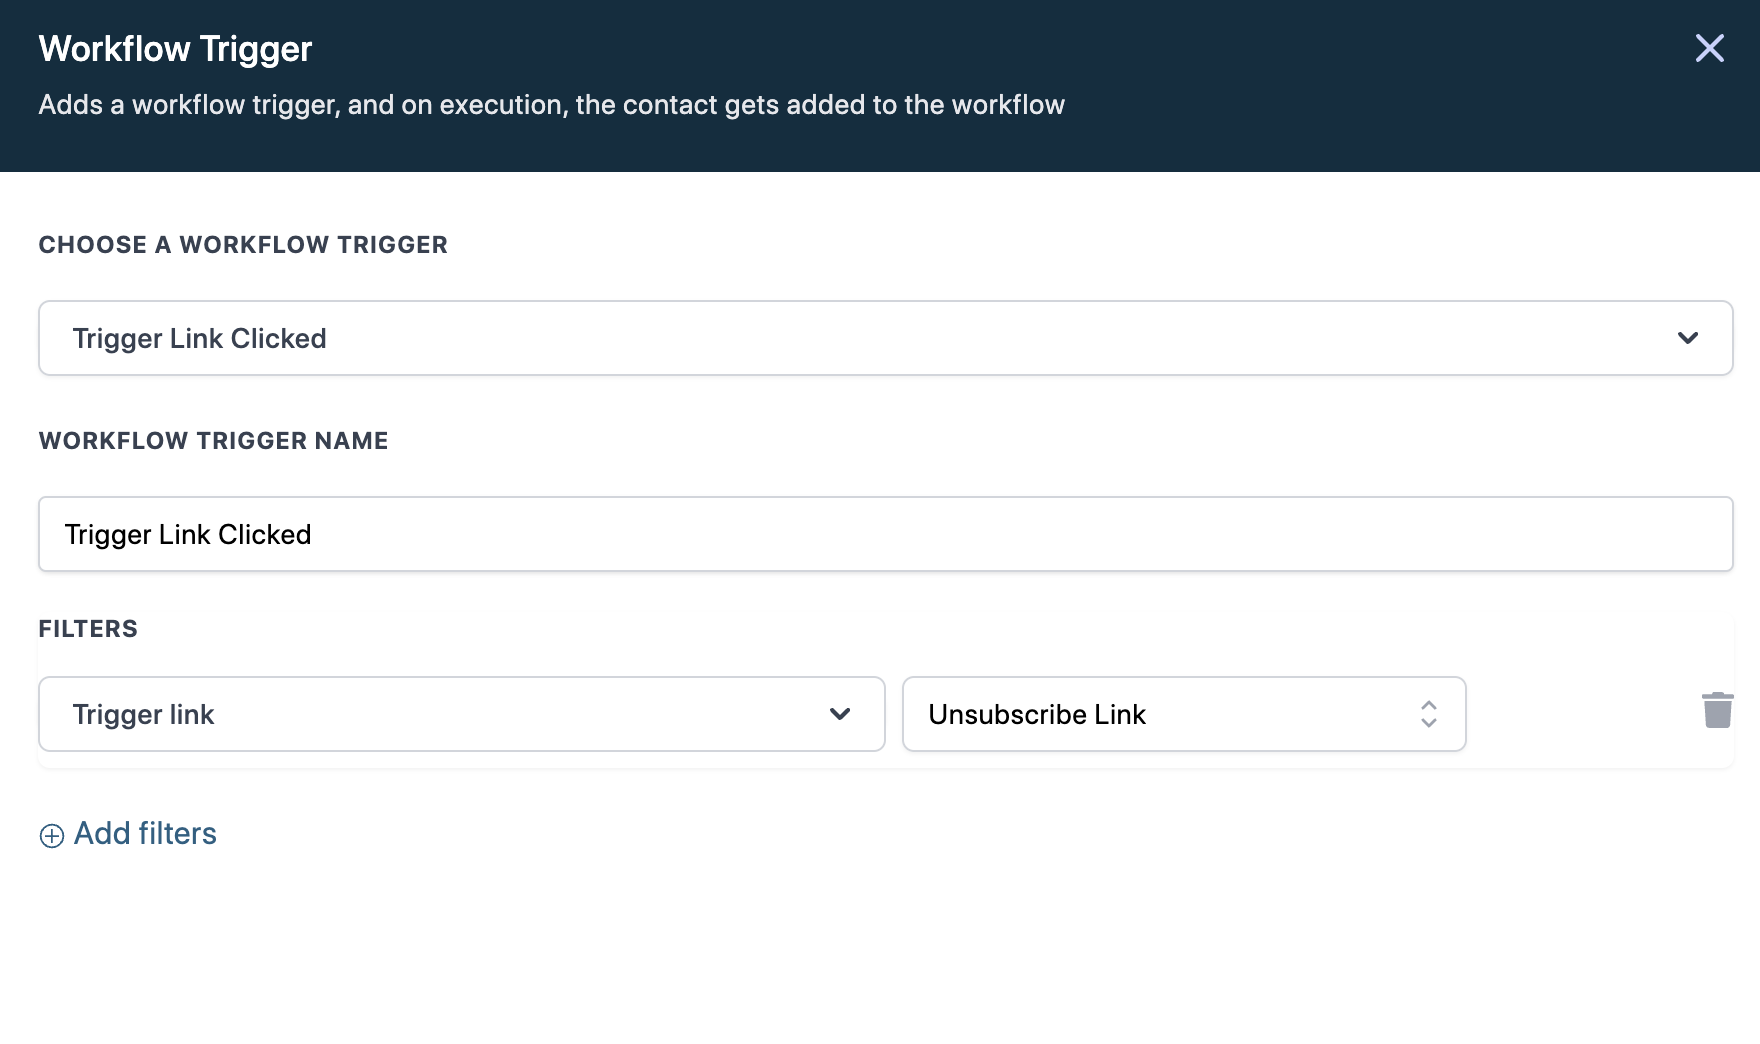
- Add a filter where Trigger Link equals Unsubscribe Link.
- Add the Set Contact DND action, choose Enable DND for Specific Channels, select Email, and save the action.
- Save the workflow and toggle it to Published.
Add the trigger link to the email footer
- Highlight the unsubscribe anchor text in the email template.
- Click the Link icon in the editor toolbar.
- Select Unsubscribe Link from the Link List and click Save.
07What it looks like in HighLevel
08Settings that matter
- Name. Defines the label used to identify the Trigger Link in the system.
- Link URL. Specifies the destination address that the Trigger Link directs contacts to.
- Trigger Link Clicked. Sets the workflow to start when a contact clicks the specified Trigger Link.
- Set Contact DND. Changes the contact’s Do Not Disturb status for selected communication channels.
- Enable DND for Specific Channels. Allows selection of which channels (e.g., Email) become DND when the action runs.
09Things to know before you rely on it
- The custom Trigger Link replaces the default unsubscribe URL in the email footer.
- The workflow only triggers for clicks that occur after it is published; earlier clicks do not update DND status.
- Contacts who unsubscribed using the original link keep their existing DND status.
- Only the channels chosen in the Set Contact DND action are affected.
10If something goes wrong
- Contact lands on the unsubscribe page but DND is not applied.. Verify the workflow is saved and toggled to Published.
- Unsubscribe link in the email does not work.. Make sure the Trigger Link is selected from the Link List in the email editor.
- Landing page URL is incorrect or page is not visible.. Confirm the page is published, accessible on the internet, and the correct URL is entered in the Link URL field.
11How it connects to the rest of HighLevel
- Understand how the List Unsubscribe header boosts email deliverability. List Unsubscribe header
- Explore Preference Management for handling email opt outs. Preference Management
- Review pricing options for accessing Trigger Links and automation features. Pricing
Michael's take

Most people swap the default unsubscribe link without thinking about the brand experience. They end up with a generic message that looks out of place and they still have to manually manage unsubscribes.
I would build a simple landing page that thanks the contact, then link it with a Trigger Link and a small workflow that sets DND for email. That way the unsubscribe feels on brand and the system does the heavy lifting automatically.