
01Who this is for
- Founders who run email newsletters and need to keep their lists clean without manual scrubbing.
- Marketing managers responsible for automated campaigns who want to protect sender reputation.
- Customer support teams that send transactional emails and must avoid wasted sends.
02Email dnd on bounce, explained
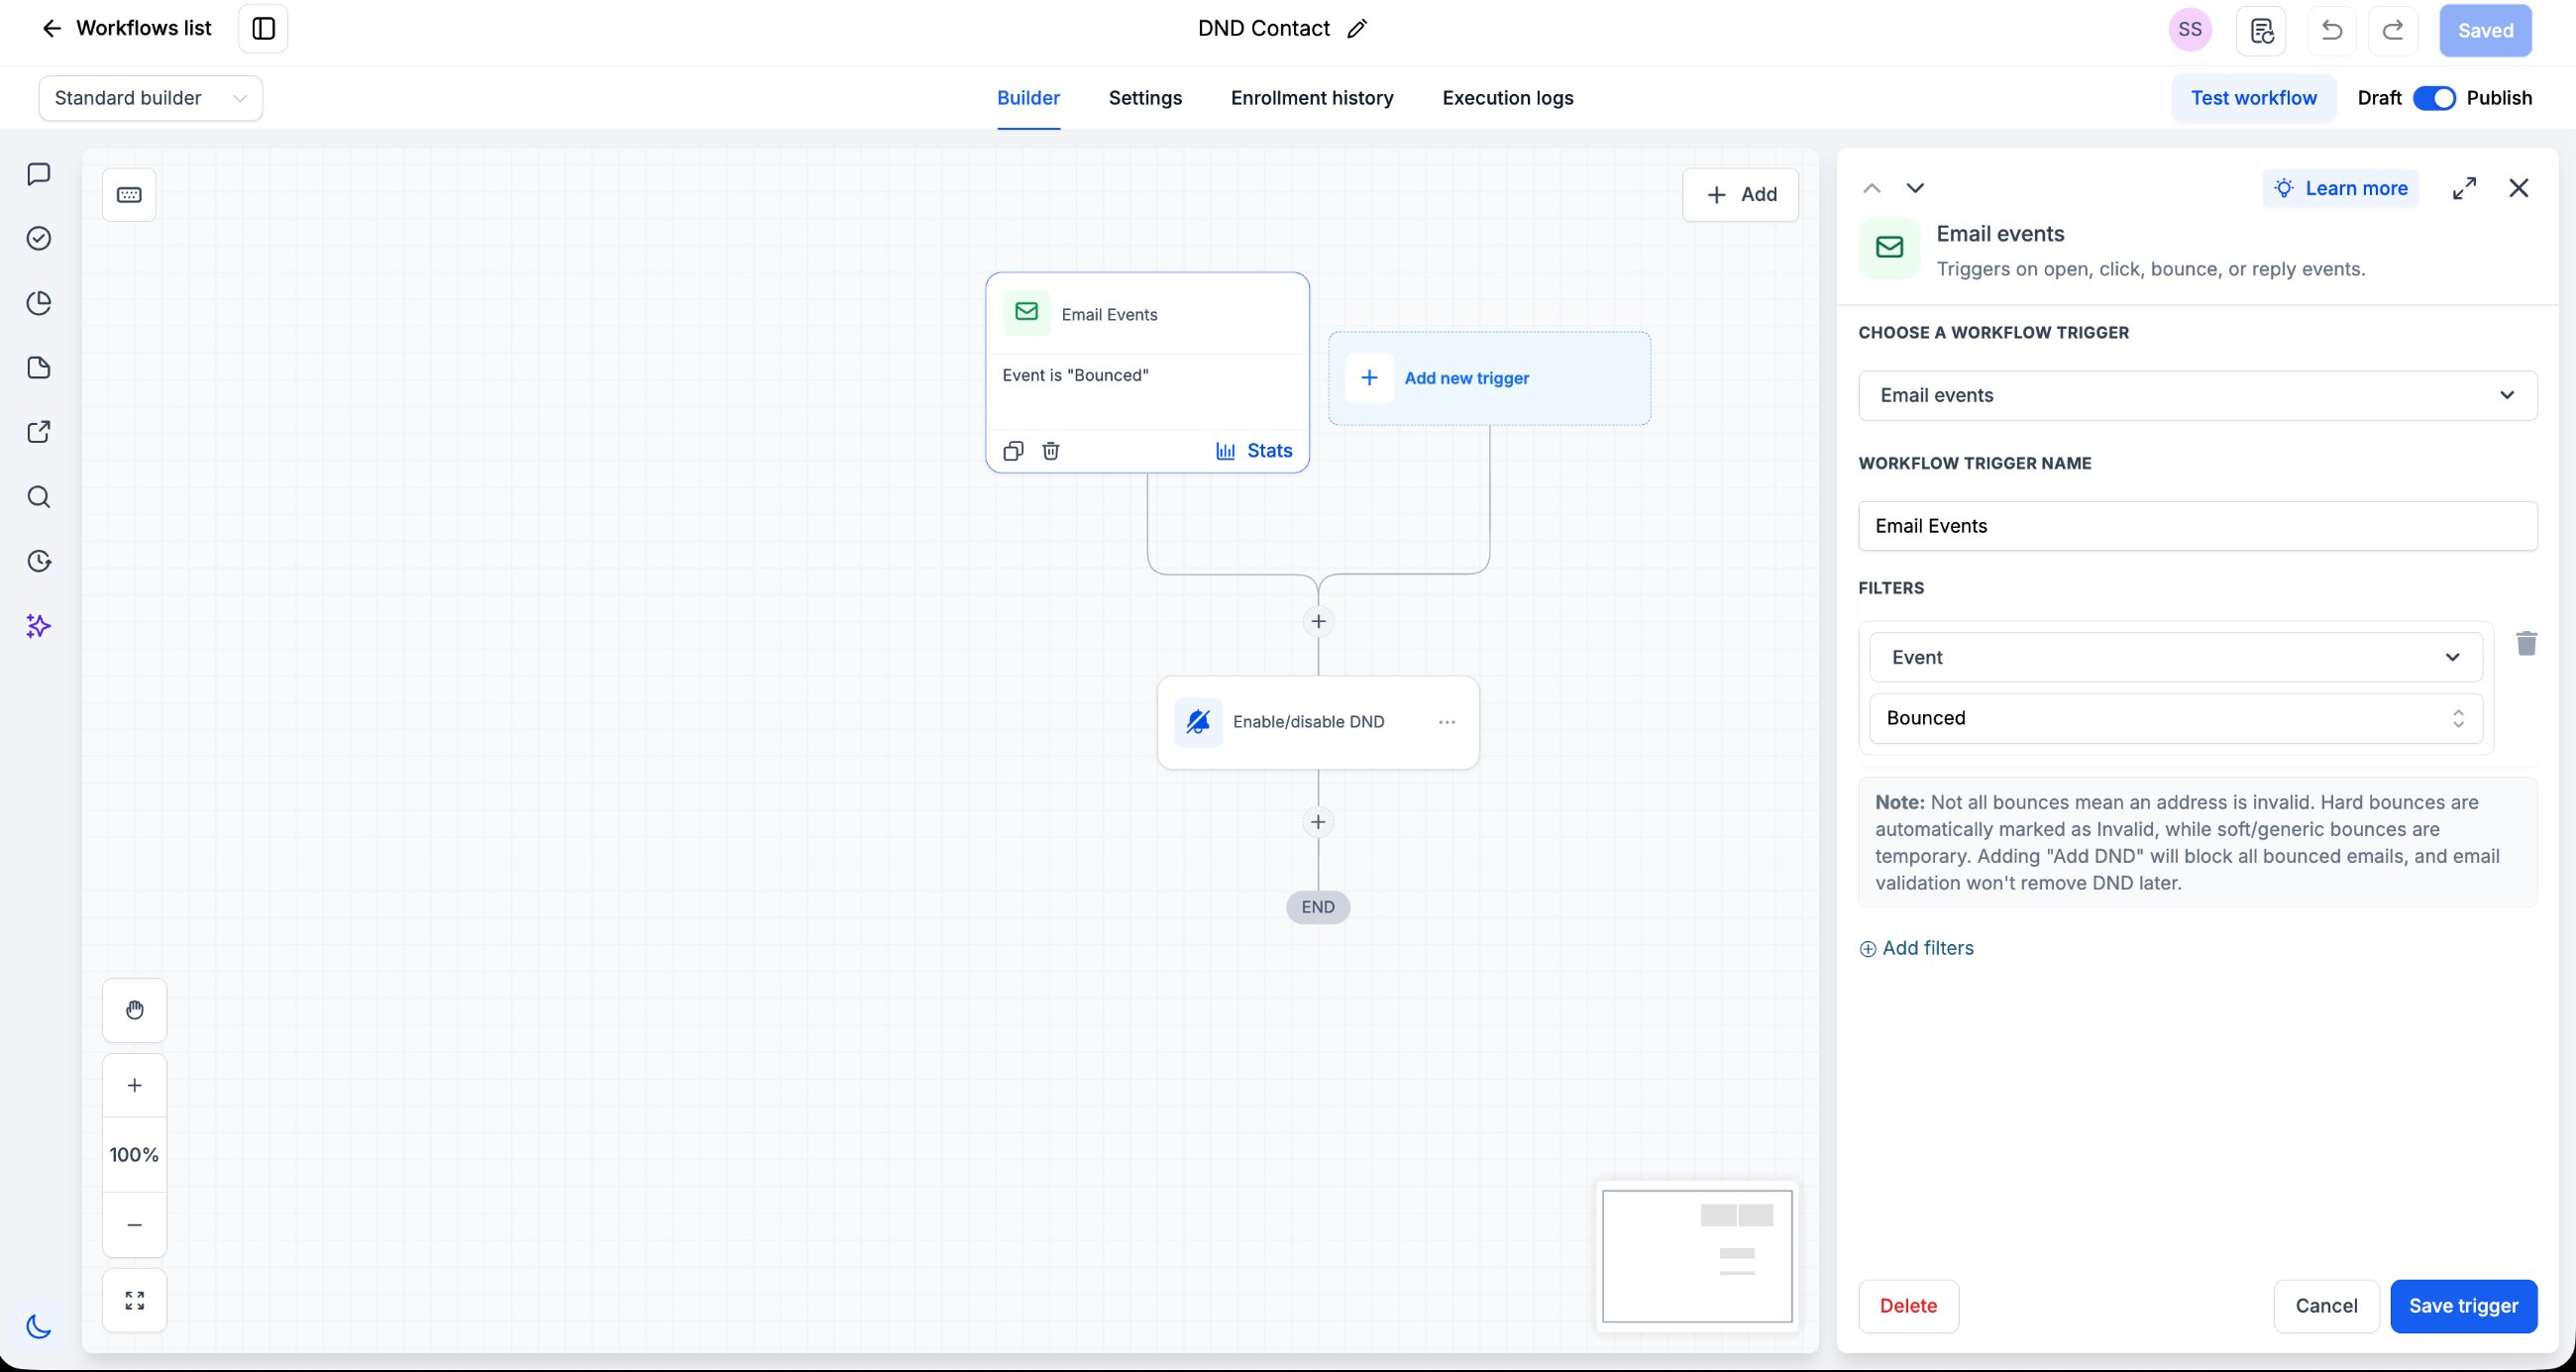
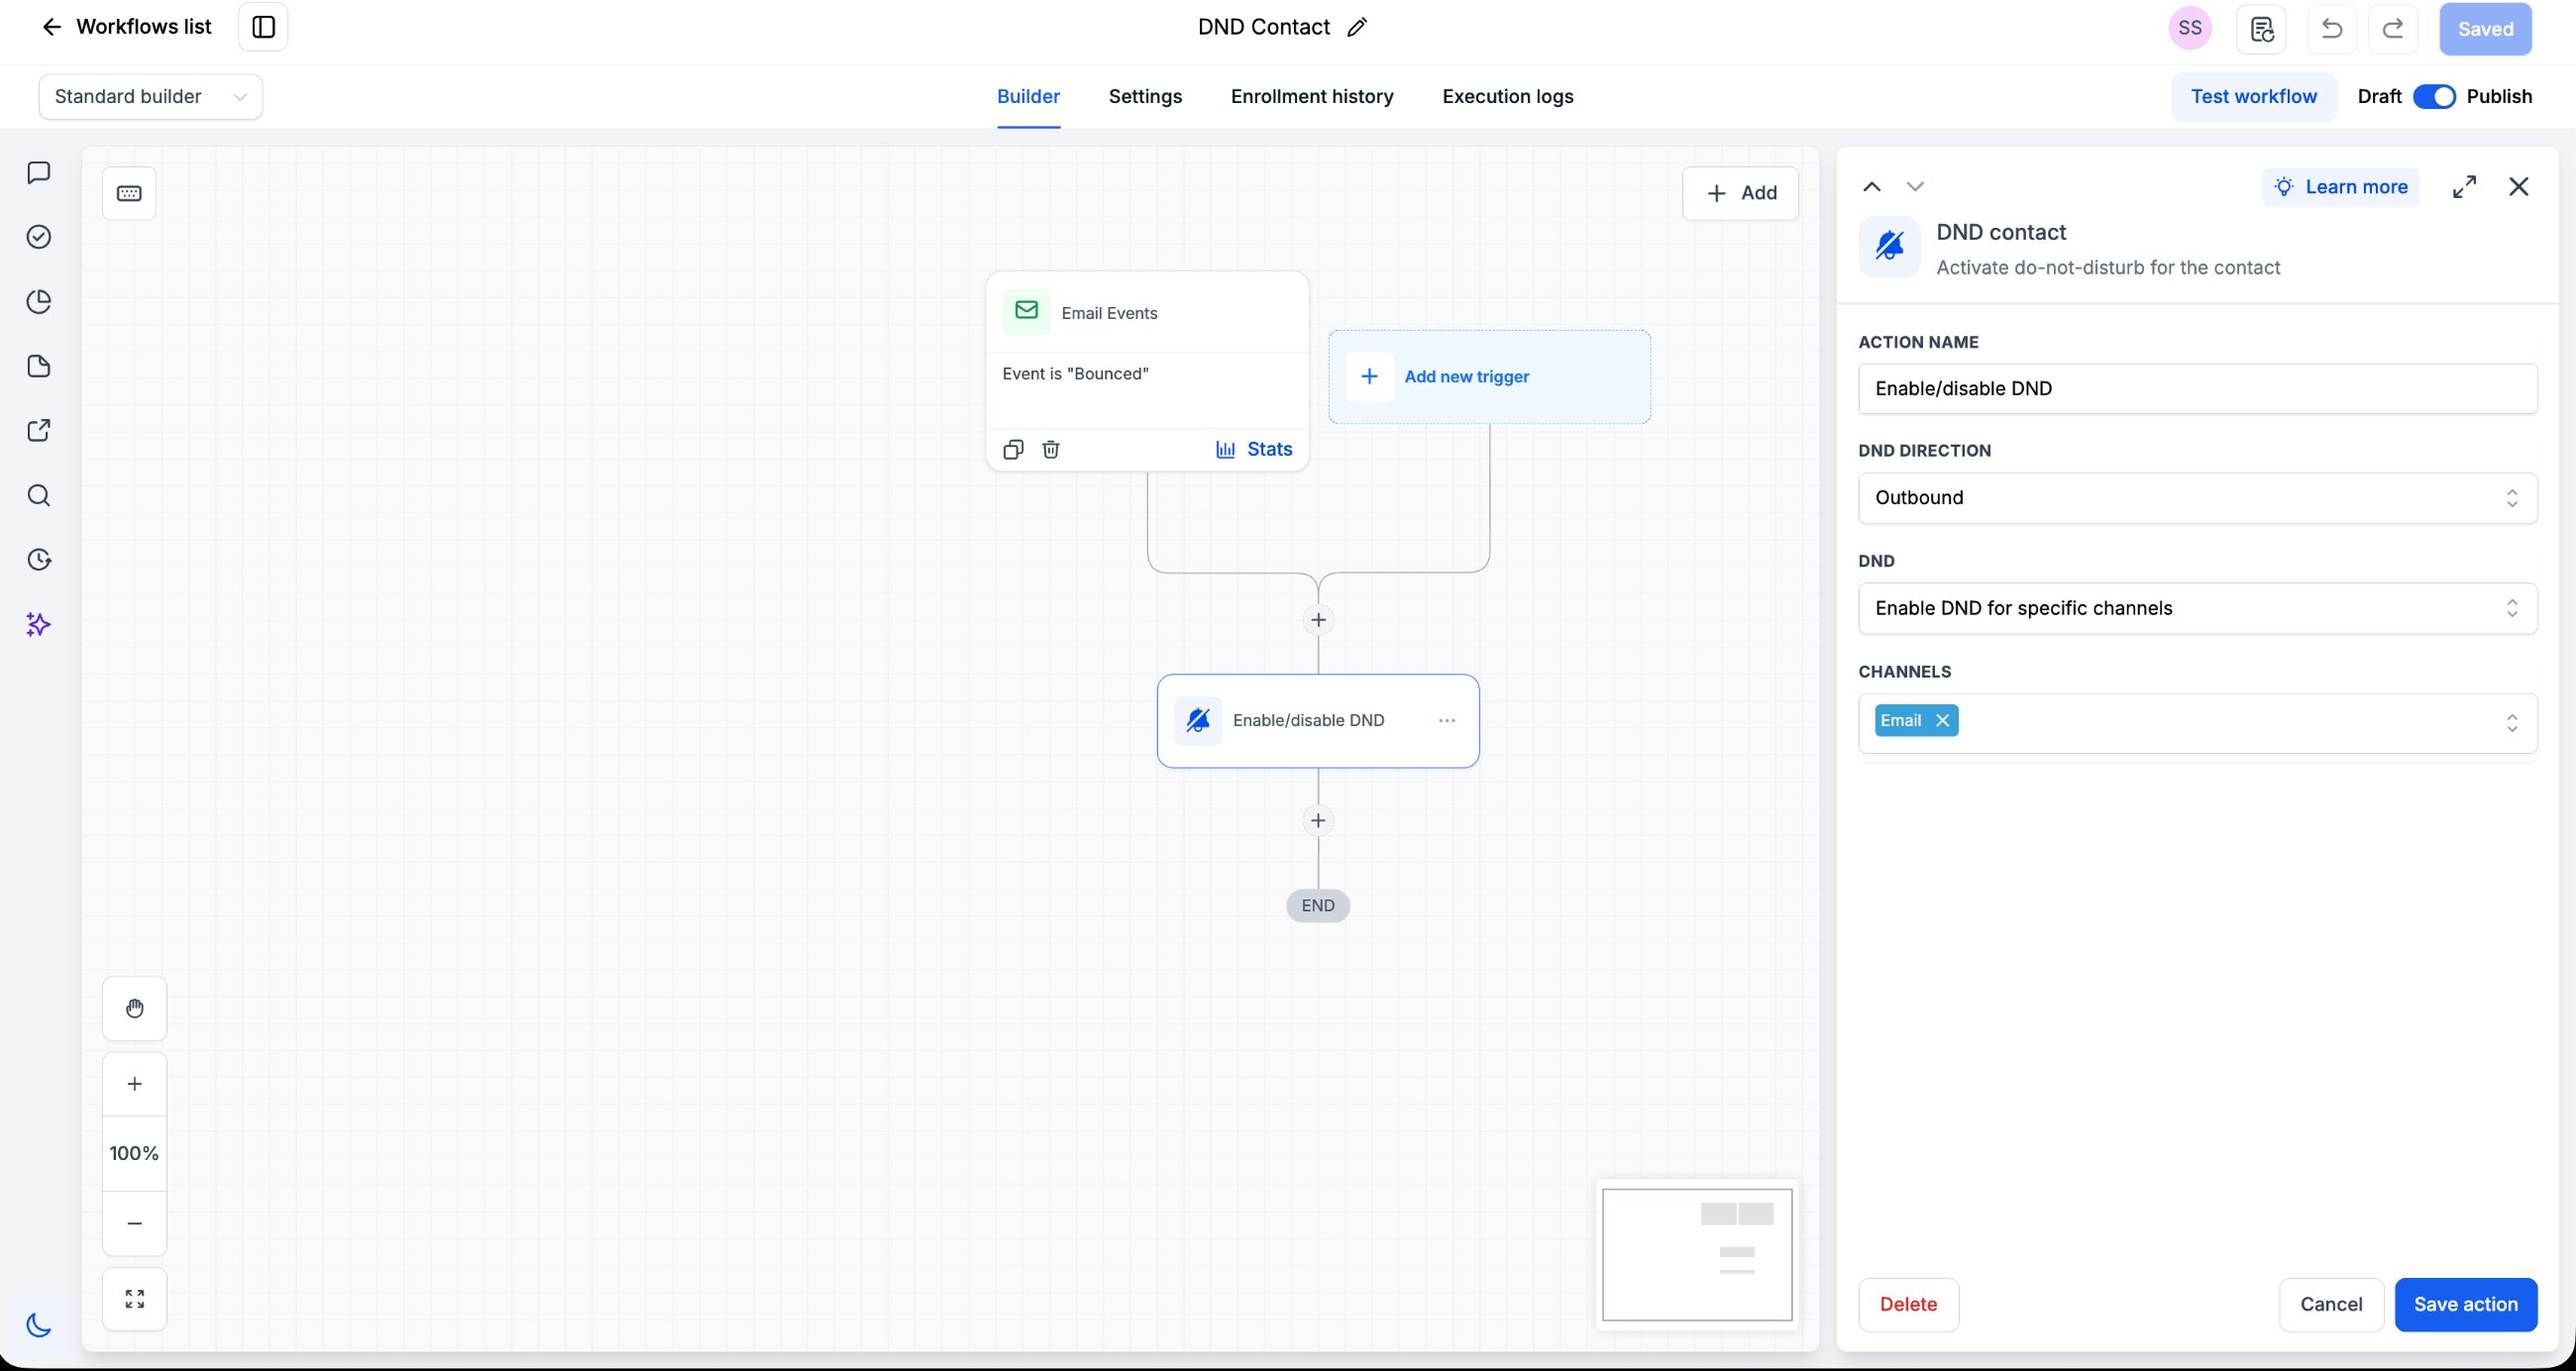
The feature is a workflow that reacts to bounce events captured by the Email Events trigger. It filters the trigger so only bounced messages pass through, then applies the DND Contact action to stop outbound email for that contact. The DND setting is limited to the Email channel, so SMS, calls and other outreach remain functional.
You build the workflow in the Automation > Workflows area. The only required components are the Email Events trigger with a Bounced filter and the DND Contact action set to Outbound direction, Enable DND for specific channels, and Email as the channel. Once published, any future email step that targets a contact with DND enabled is automatically skipped.
03How businesses use email dnd on bounce
- Digital marketing agency. The agency creates a workflow that flags any client contact whose email bounces. By enabling Email DND automatically, the agency avoids sending further campaign emails to invalid addresses, keeping client sender scores healthy.
- Ecommerce store. When order confirmation emails bounce, the store’s workflow turns on Email DND for those shoppers. This prevents repeat order notifications from being sent while the store can still reach the shopper via SMS for urgent updates.
- Co working space community. The community sends monthly event newsletters. By adding the bounce triggered DND workflow, any member with a bounced address is automatically excluded from future newsletter sends, reducing wasted email credits.
04How to set up and use email dnd on bounce in HighLevel
Build auto enable Email DND workflow
- Open Automation > Workflows.
- Click Create New Workflow or open an existing one.
- Click Add New Trigger.
- Search for Email Events and select it.
- Give the trigger a name such as Email Events.
- Add a filter where Event equals Bounced.
- Click the plus icon below the trigger and choose DND Contact (Enable/disable DND).
- Name the action something descriptive like Enable/disable DND.
- Set DND Direction to Outbound.
- Set DND to Enable DND for specific channels.
- Select Email as the channel.
- Save the trigger.
- Save the action.
- Change the workflow status from Draft to Publish.
05What it looks like in HighLevel
06Settings that matter
- Event filter. Limits the Email Events trigger to fire only when the event type is Bounced.
- DND Direction. Specifies that the Do Not Disturb state applies to outbound communications.
- DND. Enables Do Not Disturb for the selected channels rather than disabling all channels.
- Channels. Determines which communication channel the DND restriction applies to; in this workflow Email is selected.
07Things to know before you rely on it
- The workflow blocks all bounced emails equally; it does not differentiate hard from soft bounces.
- Enabling DND through this action is not automatically removed by later email validation or successful sends.
- Only outbound email is suppressed; SMS, calls and other channels remain unaffected.
- To require multiple bounces before setting DND, an additional Condition step must be added.
08How it connects to the rest of HighLevel
- Filter contacts by bounce statistics to review DND enabled addresses. Contact bounce filter
- Reference the list of system generated emails to understand which messages generate bounce events. System email list
Michael's take

Most people think turning on DND for every bounce protects them fast, but the catch is that soft bounces get treated the same as hard bounces. That means a temporary full inbox can lock you out of a contact forever unless you have a process to review and lift the flag.
If I were setting this up, I would add a tag on the bounce and then schedule a weekly review to check for any contacts that may have become reachable again. That way you keep your list clean without permanently losing a potentially valuable lead.