
01Who this is for
- Sales teams gain a secure way to collect signed contracts and proposals without email exchanges.
- Service providers receive client forms, receipts, or insurance documents directly into each client record.
02Document uploads, explained
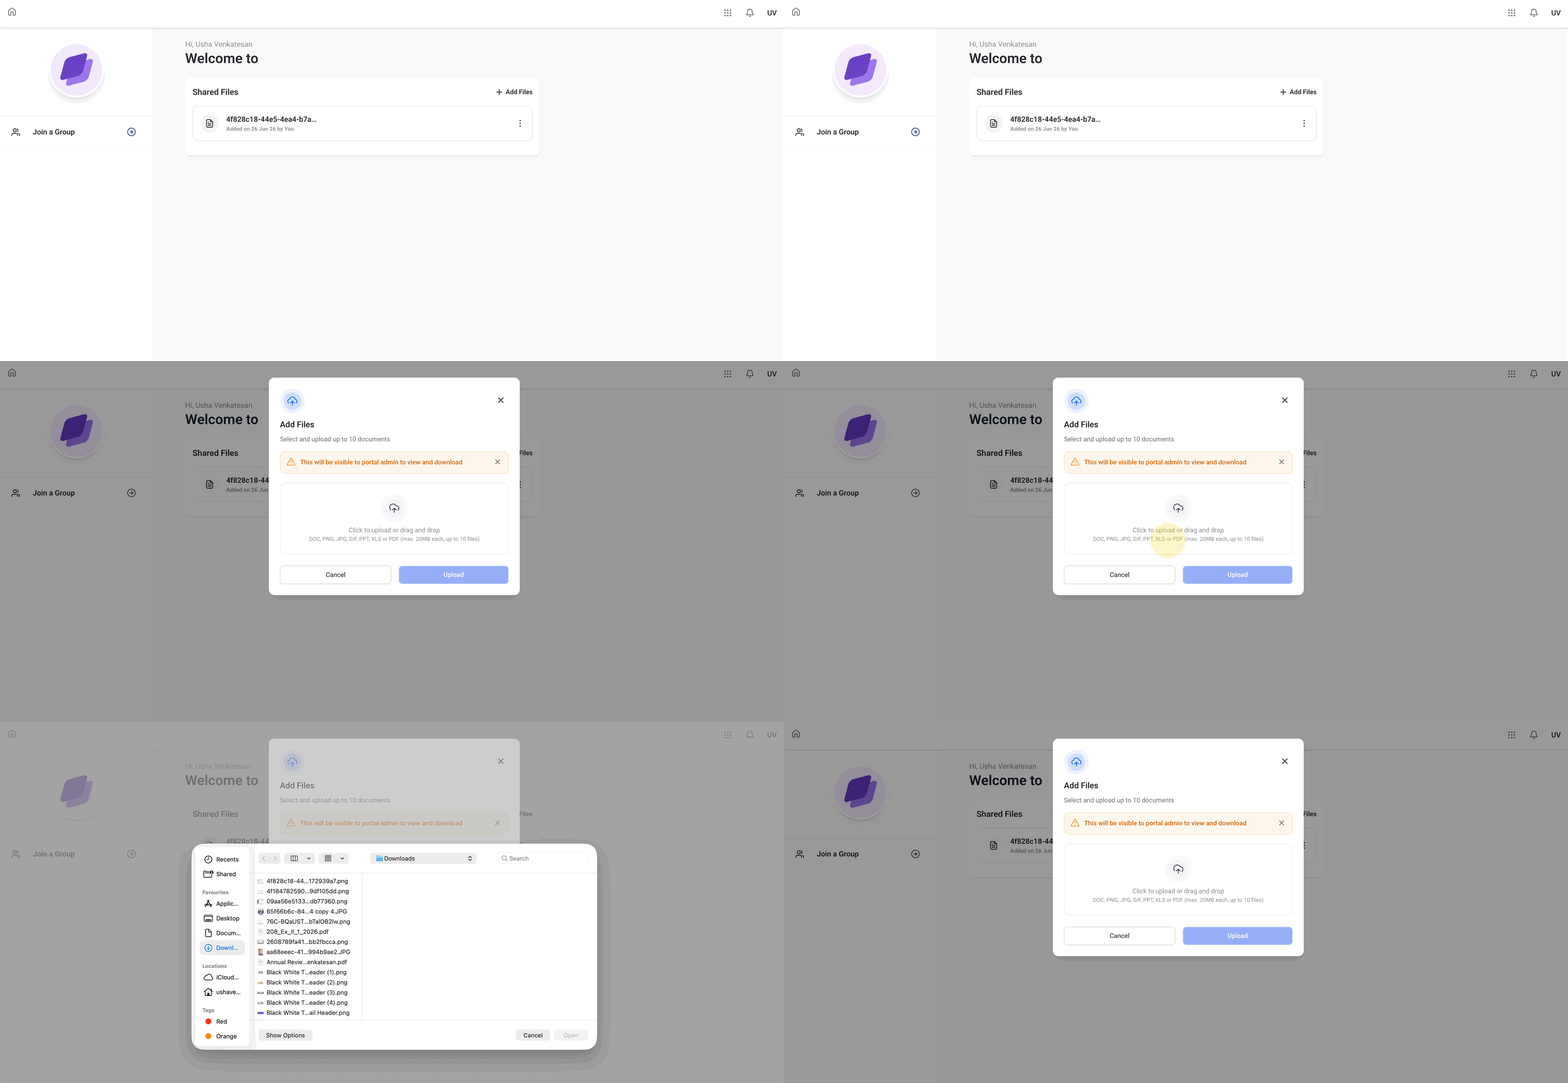
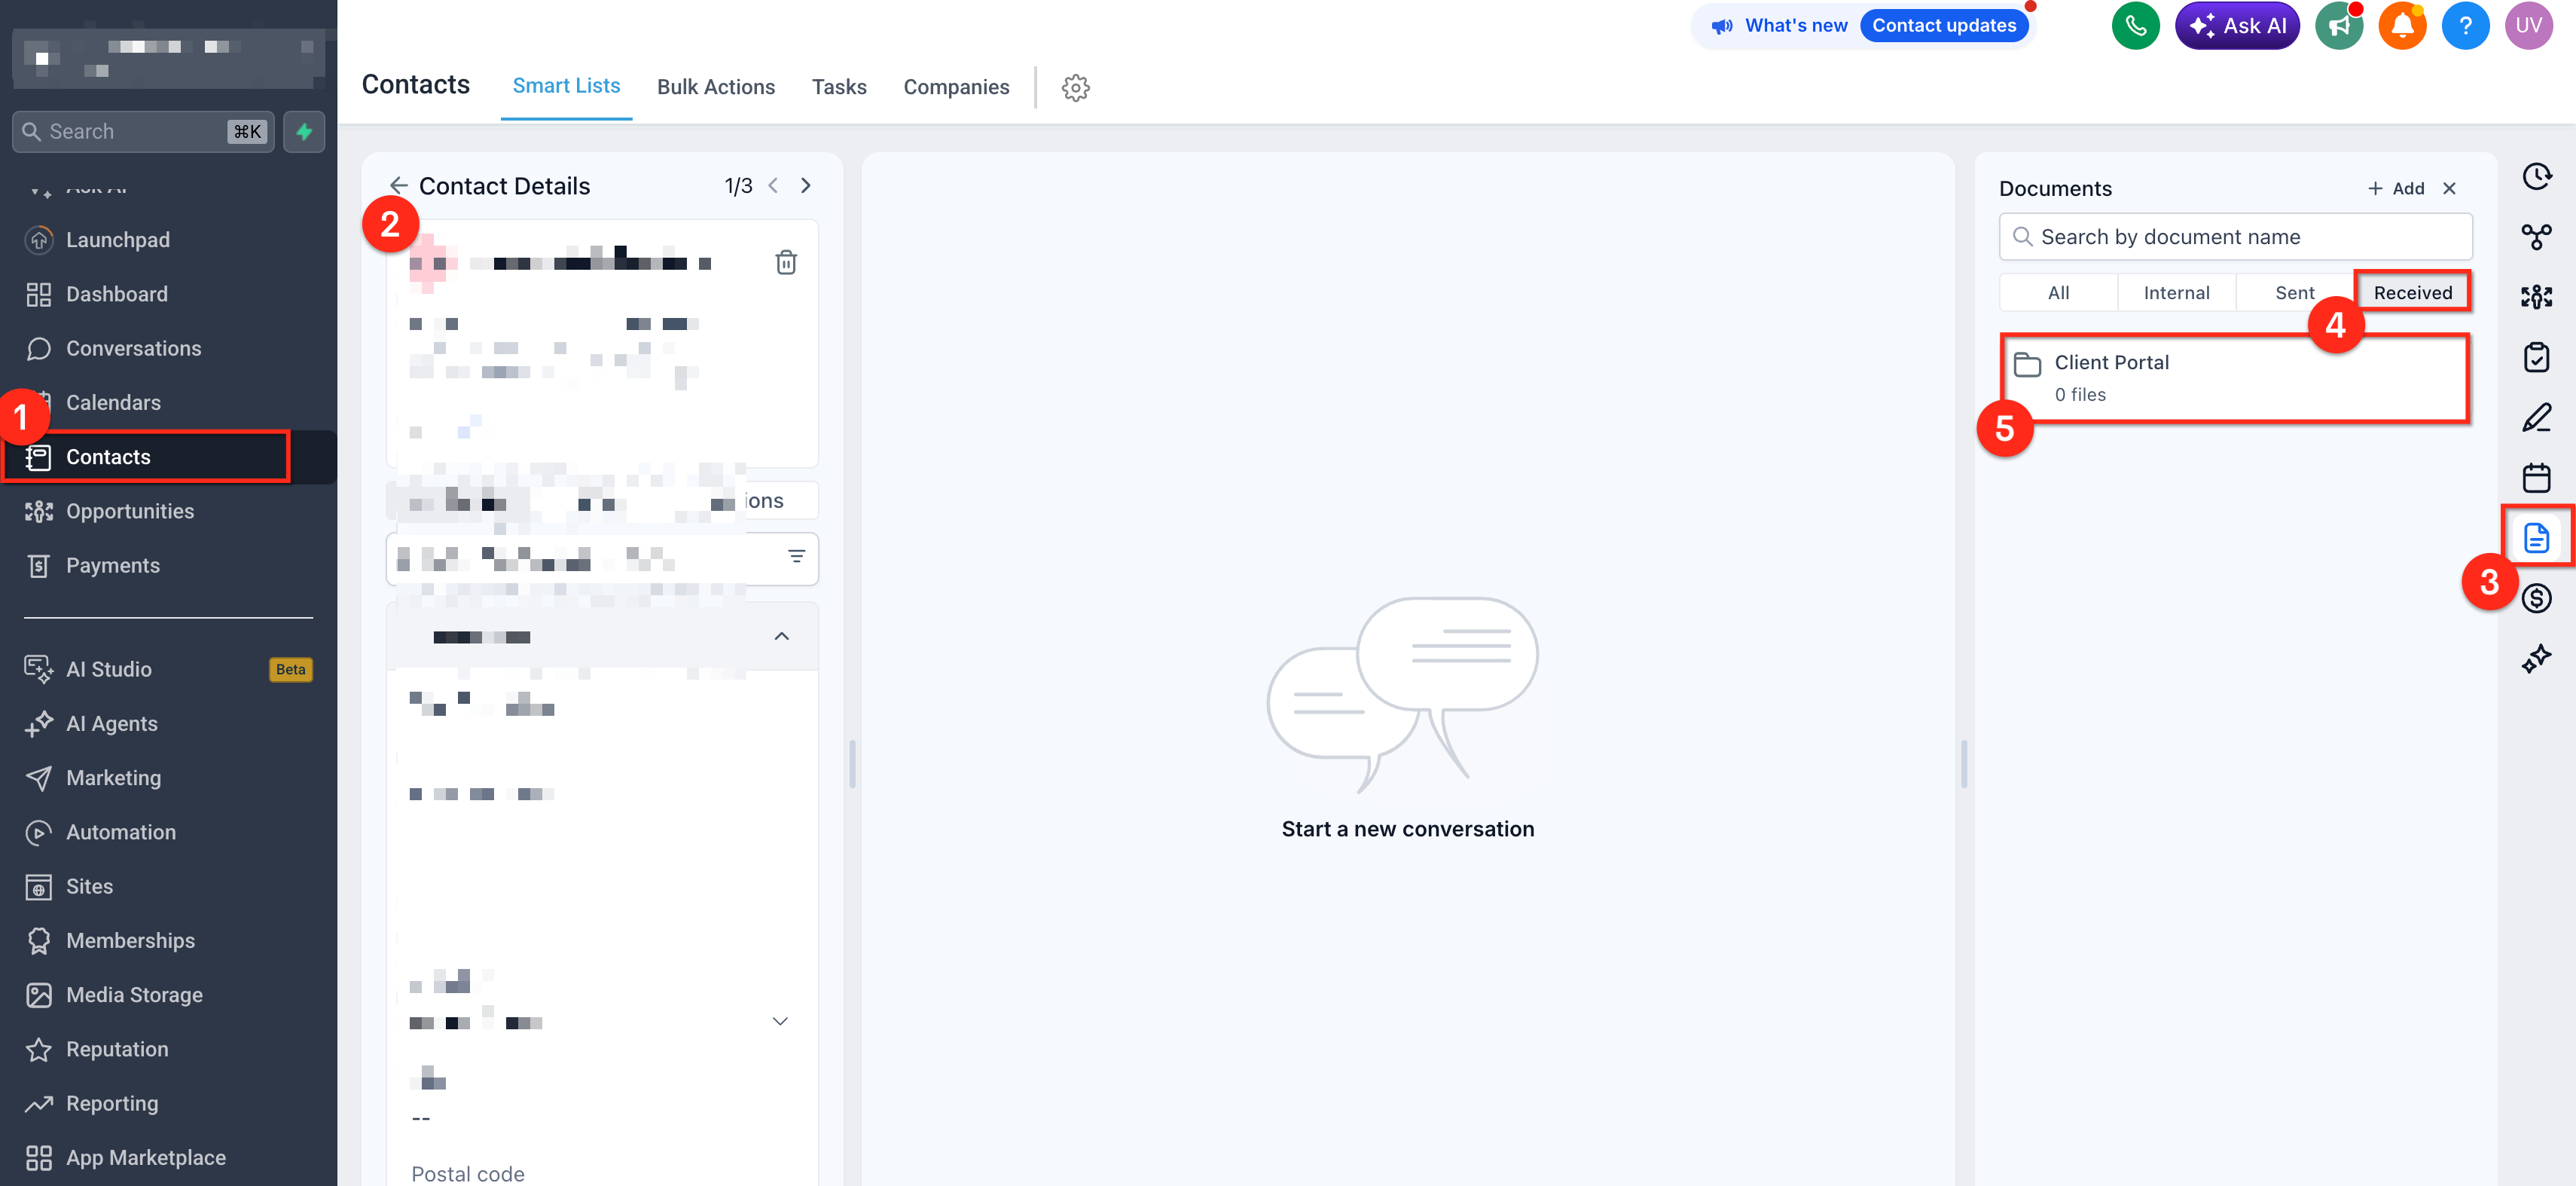
The document upload tool lives inside the Client Portal that each contact can access. When a client selects a file and confirms the upload, HighLevel stores the file under Contacts > Documents > Received > Client Portal. Users in the platform can then open, download, or manage the file from that location.
Only certain file formats are accepted. The system accepts common document types such as PDFs, Word, Excel, PowerPoint, plain text, and rich text files, as well as image formats like JPEG, PNG, and GIF. Video files are excluded from this upload path.
03How businesses use document uploads
- Legal practice. A law firm can ask clients to upload signed agreements or identification scans through the portal. The files land on the client’s contact record, giving the firm quick access for review.
- Real estate brokerage. Agents can request property disclosures or mortgage documents from buyers via the portal. Uploaded PDFs are stored with each buyer’s profile, simplifying the paperwork workflow.
- Health clinic. Patients can submit health questionnaires or insurance cards as images. The clinic staff view the received documents directly from the patient’s record in HighLevel.
04The numbers and rules that matter
- Supported document formats: PDF, DOC, DOCX, XLS, XLSX, PPT, PPTX, TXT, RTF.
- Supported image formats: JPG, JPEG, PNG, GIF.
- Video formats such as MP4, MOV, AVI, MKV, WMV are not supported.
05Before you start
- Grant the contact permission to enter the Client Portal.
- Send an invitation or magic link so the client can open their portal.
06How to set up and use document uploads in HighLevel
Enable client portal access
- Assign portal permission to the contact in HighLevel.
Share the client portal
- Send an invite or magic link to the client so they can log in.
Upload a document
- Log in to the Client Portal.
- Open the Documents section.
- Press the Upload Document button.
- Choose a supported file from the device.
- Wait until the upload finishes.
View uploaded documents
- Navigate to Contacts > select the contact > Documents > Received > Client Portal.
07What it looks like in HighLevel
08Things to know before you rely on it
- Only document and image formats are accepted; video formats such as .mp4, .mov, .avi, .mkv, and .wmv cannot be uploaded.
- Supported document types include PDF, Word, Excel, PowerPoint, plain text, and rich text files.
- Supported image types are JPEG, PNG, and GIF.
09If something goes wrong
- Unable to upload a file. Confirm the file uses a supported format, is not corrupted, the upload completed, and the internet connection is stable.
10How it connects to the rest of HighLevel
- Step by step guide to set up the Client Portal Client portal setup
- How customers can sign in and use the portal Customer access
- Manage invites, magic links, and portal permissions Portal dashboard
Michael's take

Michael ReimerFounder of CRM Pros, HighLevel Commander and Certified Admin
Document uploads in the Client Portal are a clear win for anyone who dreads chasing email attachments.
Teams that don’t need a formal file request workflow can skip this feature.
Get More InformationOpens on HighLevelPublished November 2, 2026 · Updated November 17, 2026