
01Who this is for
- Founders of online education platforms, they can give students a branded hub for courses and community.
- Marketing agency owners, they can provide each client a custom branded portal that reflects the client’s brand.
- SaaS Founders with affiliate programs, they can let affiliates view commissions and resources in a unified space.
02Client portals, explained
The client portal lives inside each HighLevel subaccount and appears on the default subdomain clientclub.net. It aggregates learning tools, community areas, billing information and shared files so clients have a single interface.
You control the portal’s look, address and language from the Memberships > Client Portal > Settings area. After you adjust settings, the portal updates automatically and redirects visitors to any new domain after a short pause.
All configuration steps are performed within the HighLevel web interface; no external code changes are required.
03How businesses use Client Portal
- Online education business. Create a custom domain that matches the school’s brand, upload the school’s logo and colors, then set the default language for international learners. Invite students by sharing the portal URL in enrollment emails.
- SaaS company with affiliates. Add the company’s logo and brand colors in the portal settings, enable Google sign in for affiliate convenience, and copy the affiliate signup link from the Affiliate Manager to share with partners.
- Fitness coaching service. Brand the portal with the gym’s icon and primary colors, set the language to the local market, and invite members by distributing the portal link through text messages or the welcome email.
04The numbers and rules that matter
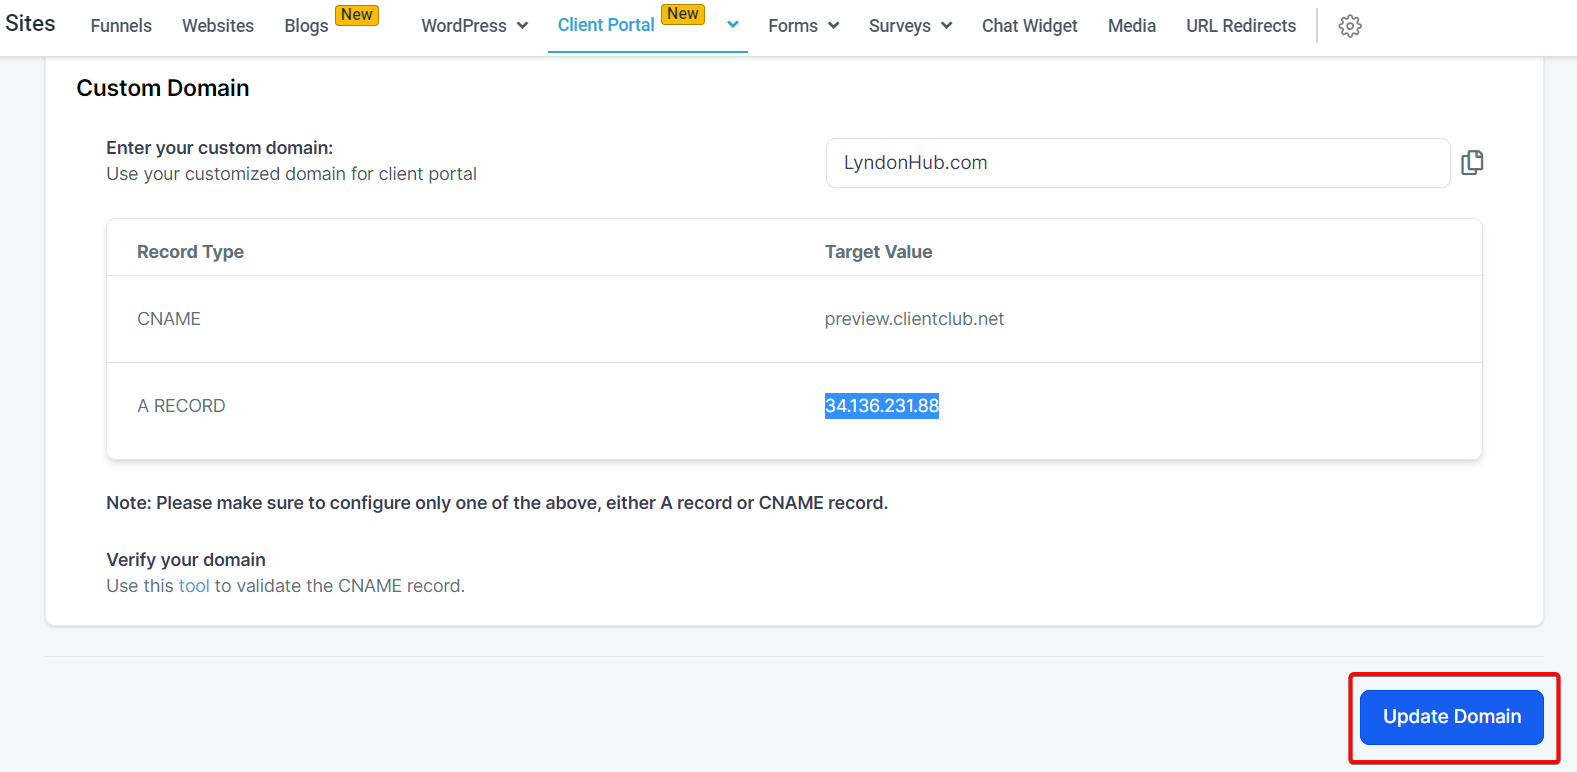
- IP address for A record: 162.159.140.166.
- Favicon max size: 16x16 pixels, 1:1 aspect ratio, SVG/PNG/JPG format.
- Logo max size: 200x200 pixels, 1:1 aspect ratio, SVG/PNG/JPG format.
- Portal image max size: 720x720 pixels, 1:1 aspect ratio, SVG/PNG/JPG format.
- DNS propagation typically 24 to 48 hours.
- HighLevel redirects visitors to the updated domain automatically after 30 seconds.
05Before you start
- Access to a domain registrar where DNS records can be edited.
- A HighLevel subaccount where the client portal will be configured.
06How to set up and use Client Portal in HighLevel
Configure custom domain
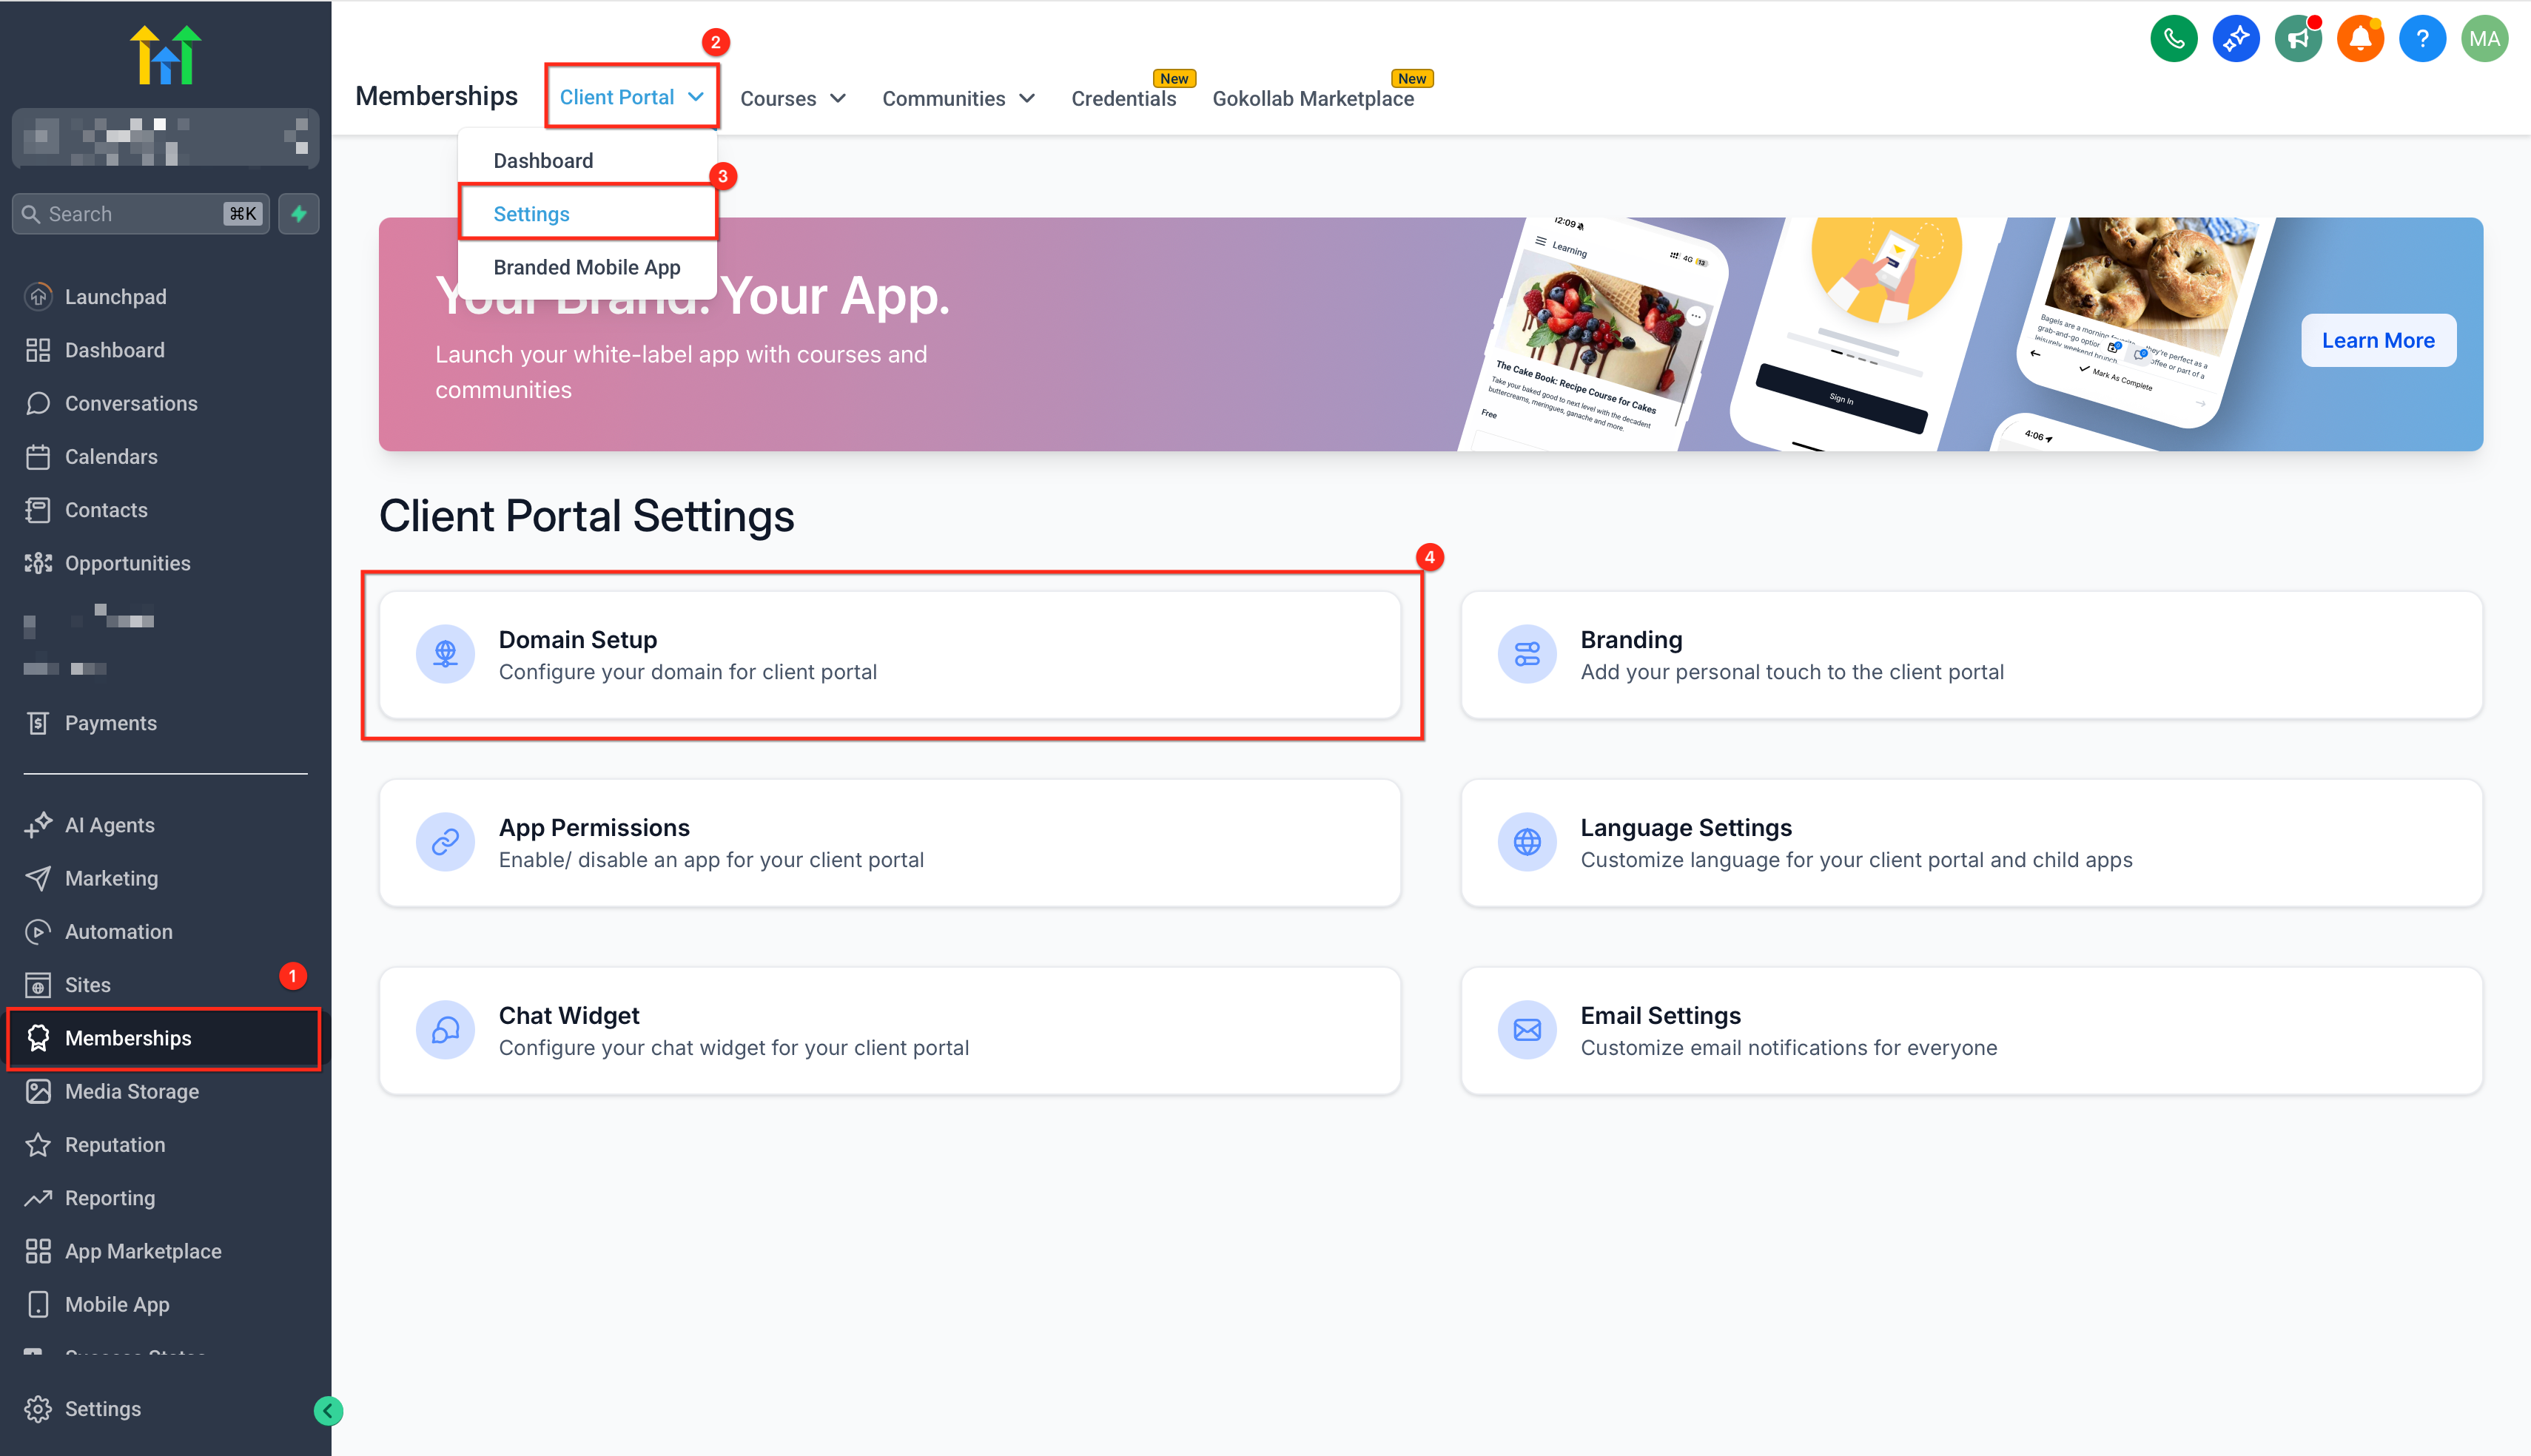
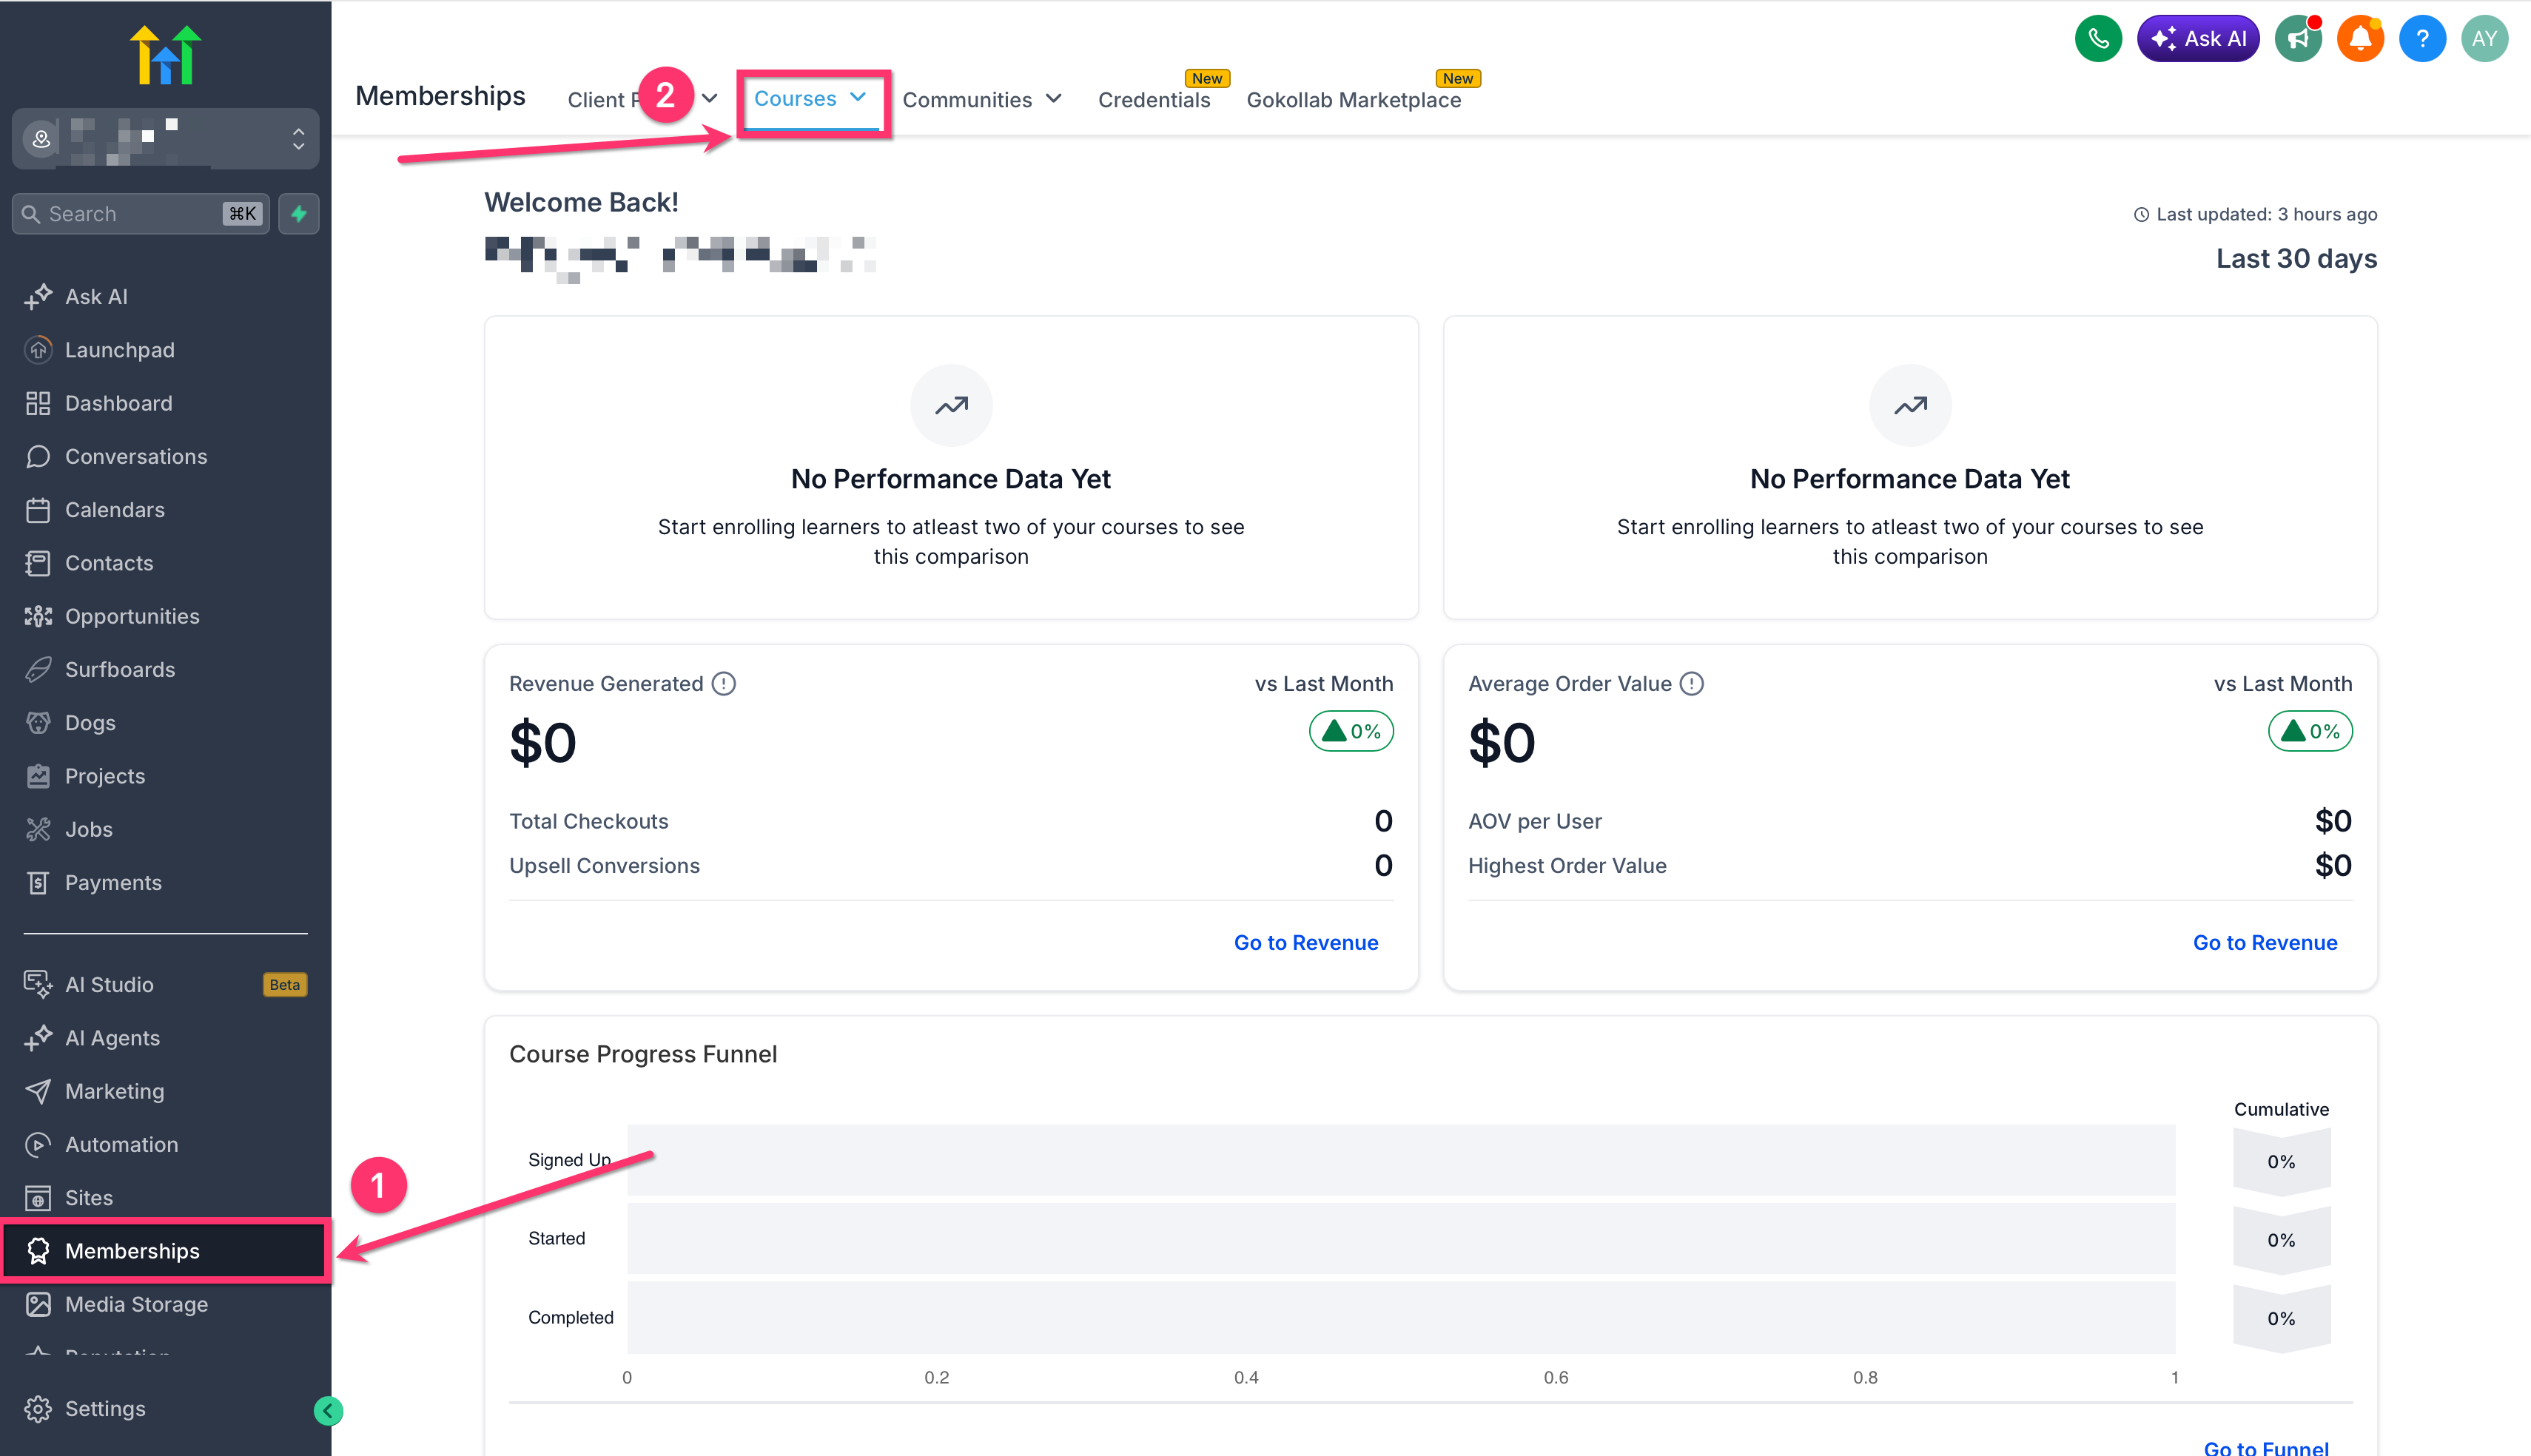
- Open the left sidebar, select Memberships, then choose Client Portal and go to Settings.
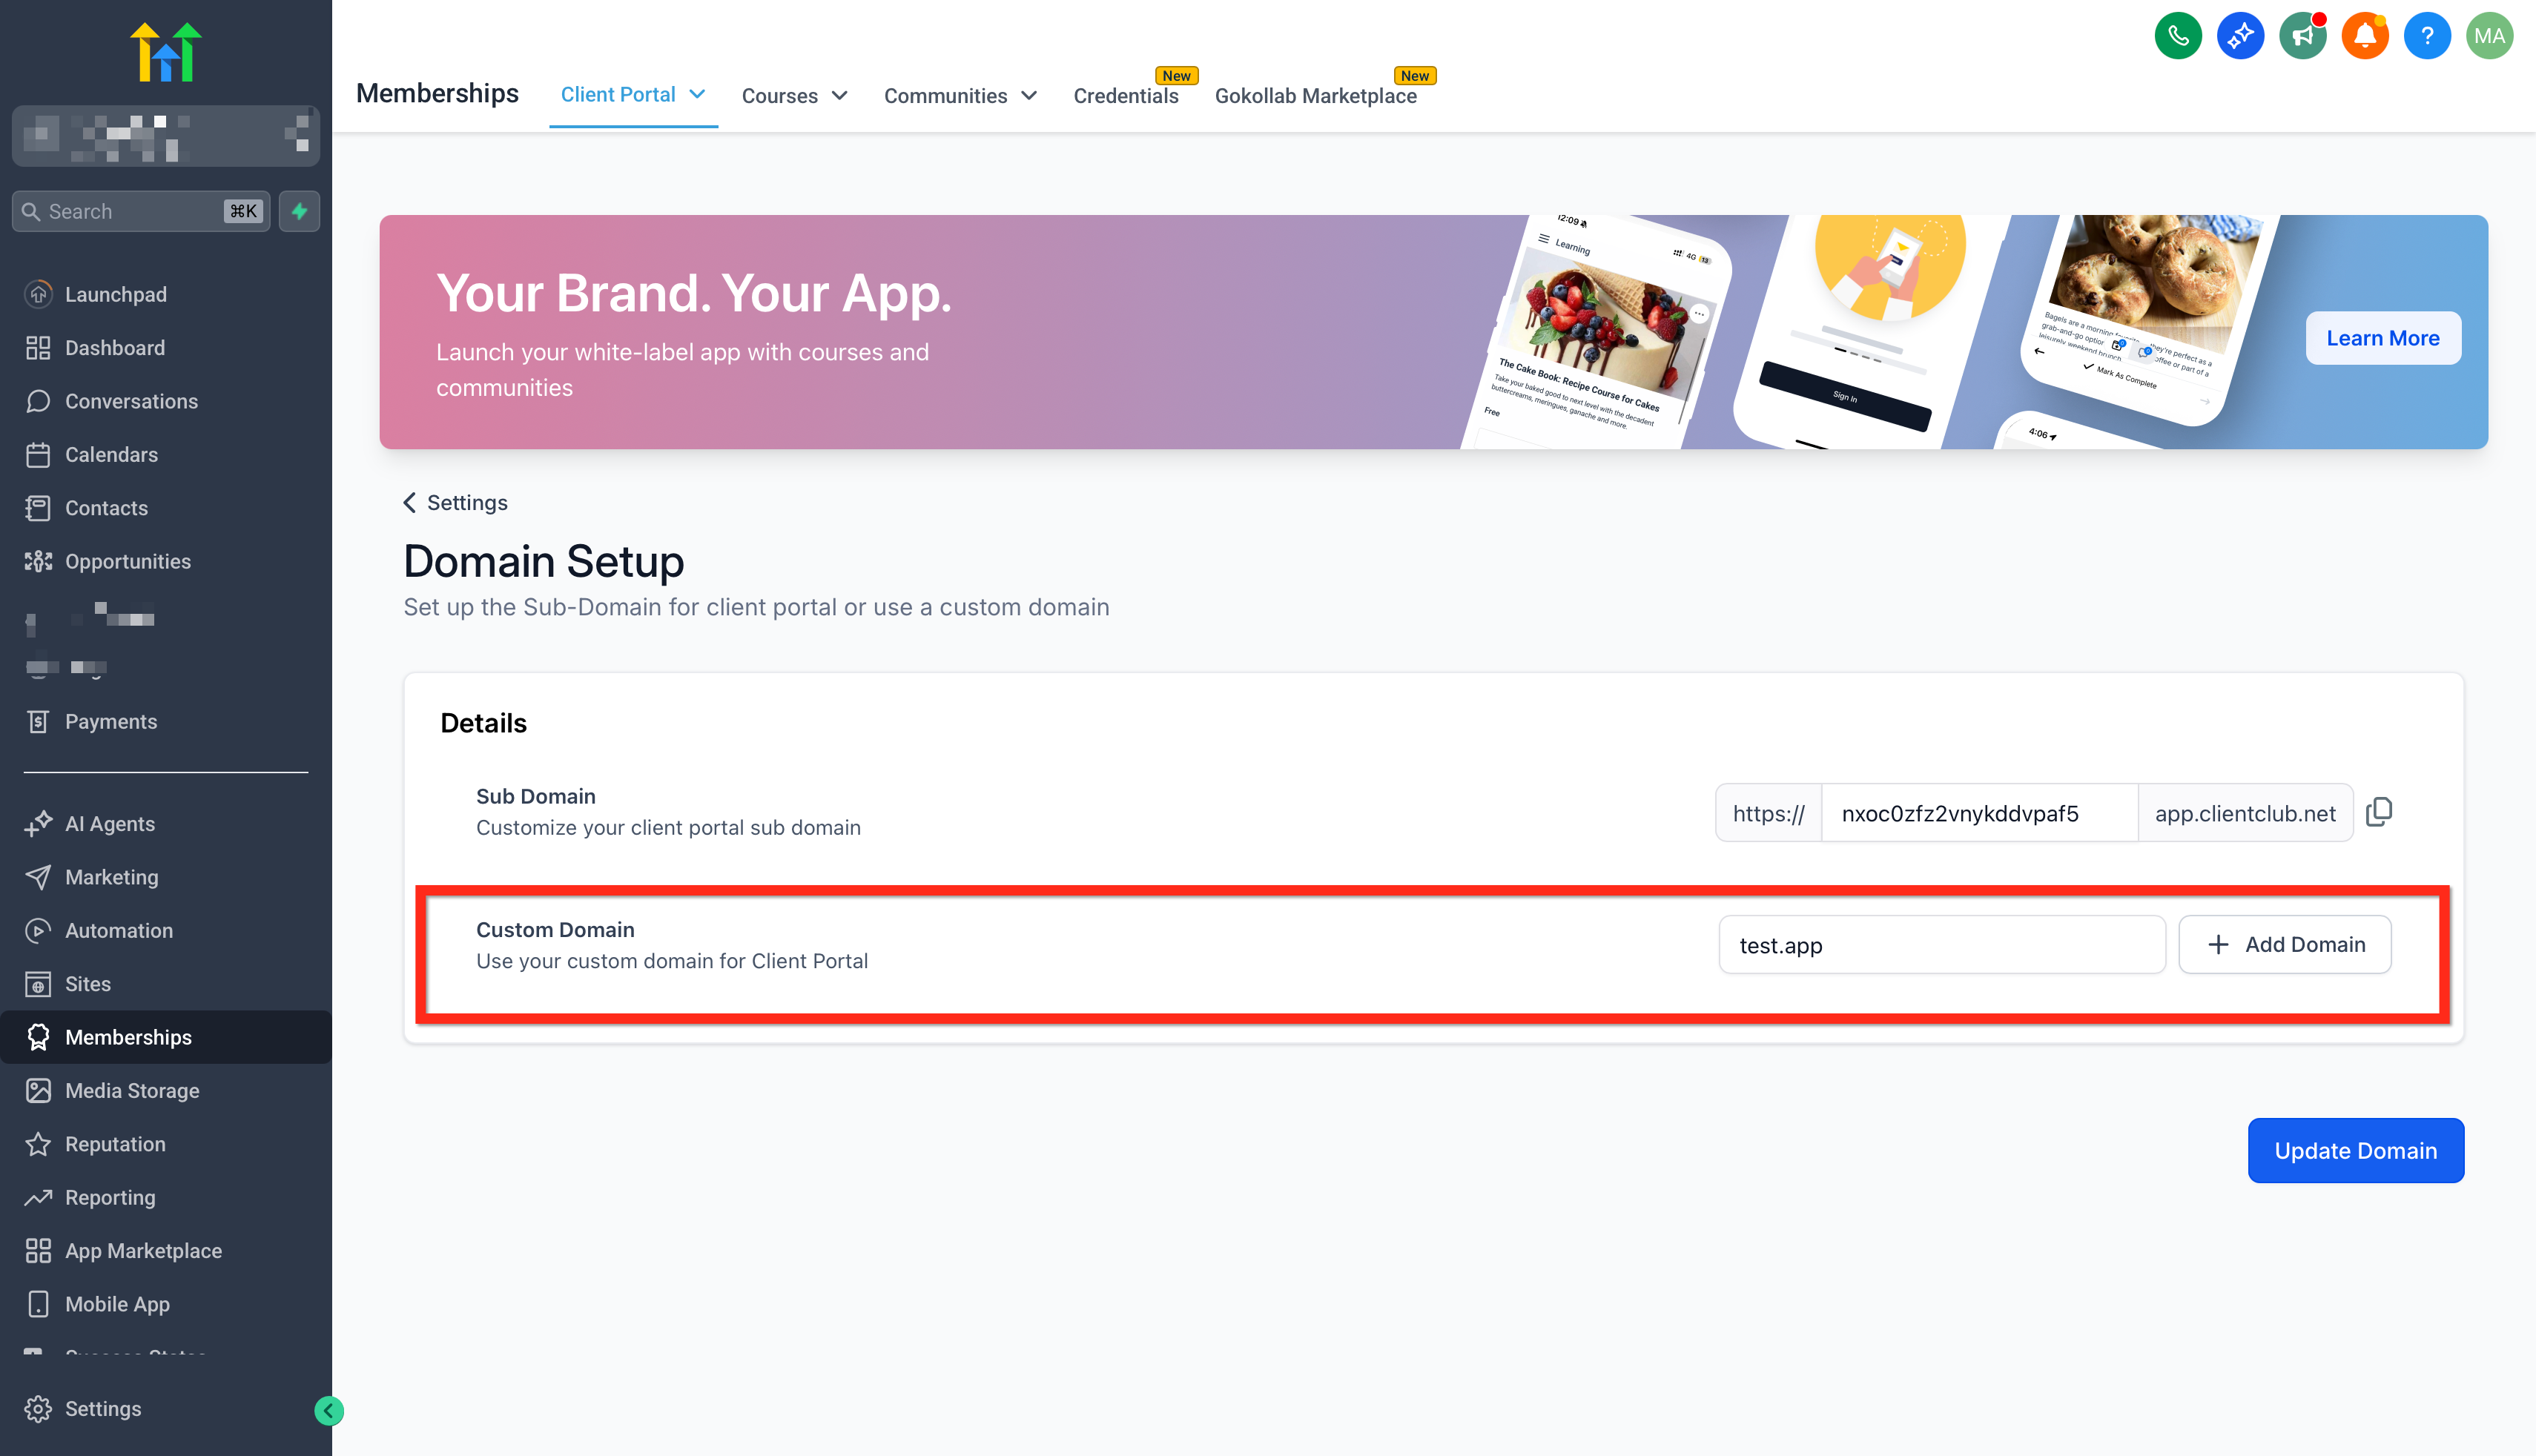
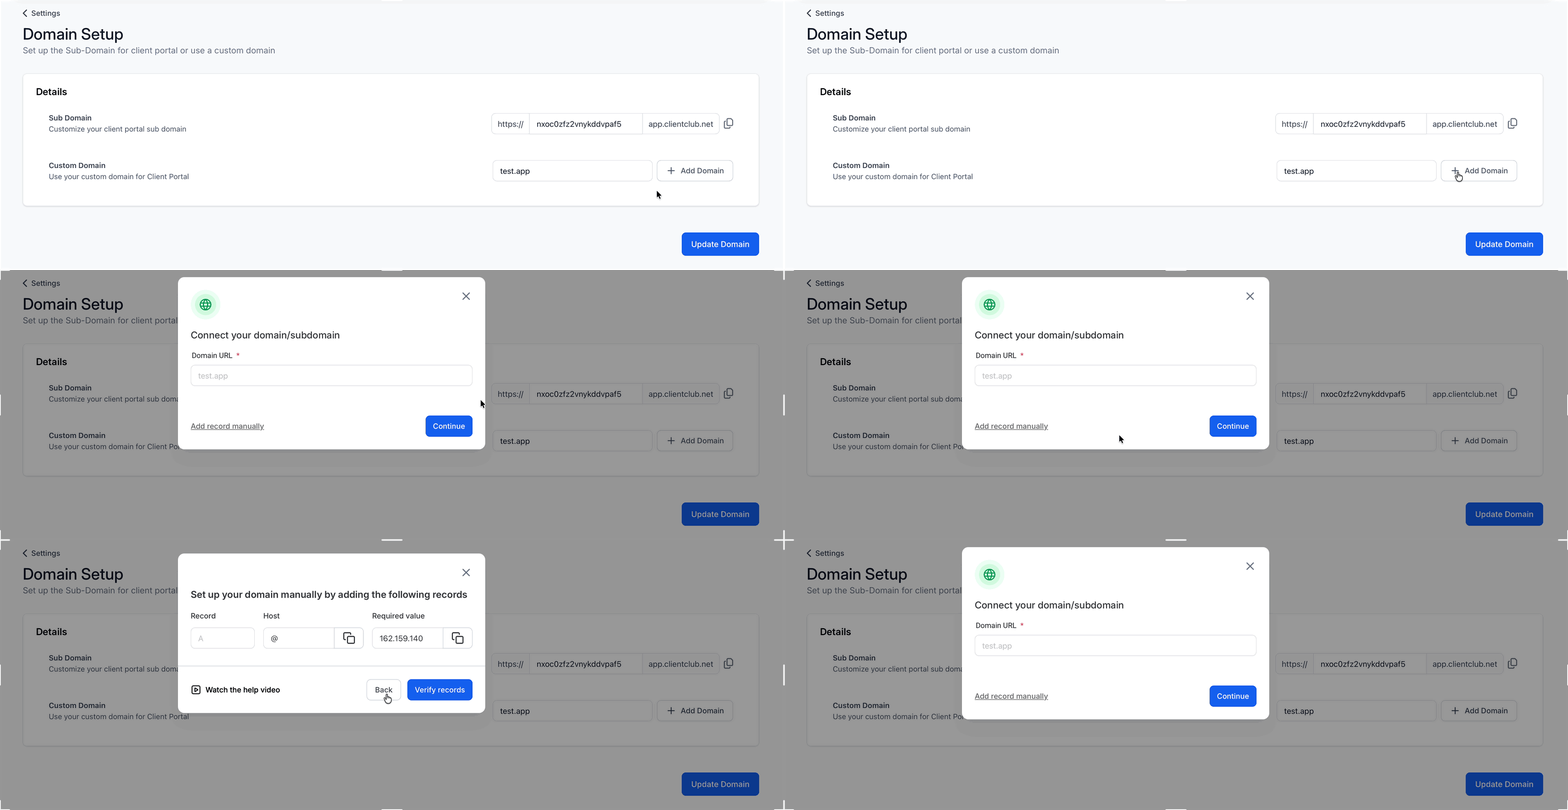
- In the Domain Setup area, pick the Custom domain option and type the desired address.
- Verify that your domain registrar is ready to point to the provided IP address or server.
- Log in to the domain registrar’s control panel.
- Navigate to the DNS management page and create a new record, selecting A or CNAME as needed.
- Enter the required values, for an A record use 162.159.140.166, for a CNAME use preview.clientclub.net, then save the entry.
Brand your Client Portal
- From the left navigation menu, open the client portal section of the subaccount.
- Click the Branding option to open the customization panel.
- Enter the portal’s public name in the Portal Name field.
- Add a short description in the Portal Description field.
- Select the primary brand color for buttons and headings.
- Select a secondary brand color to complement the primary shade.
- Upload a favicon that matches the required format and size.
- Upload the main logo and then click Save Settings.
Set a default language
- Navigate to Memberships > Client Portal > Settings > Language Settings.
- Choose the preferred language from the list.
- Click Save to apply the selection.
Invite clients to your client portal
- Copy the portal URL from the domain setup section in the settings screen.
- Distribute the copied link to clients using email, SMS or any communication channel you prefer.
- Optionally, use a child application such as the Affiliate Manager to generate a signup link and share that with specific users.
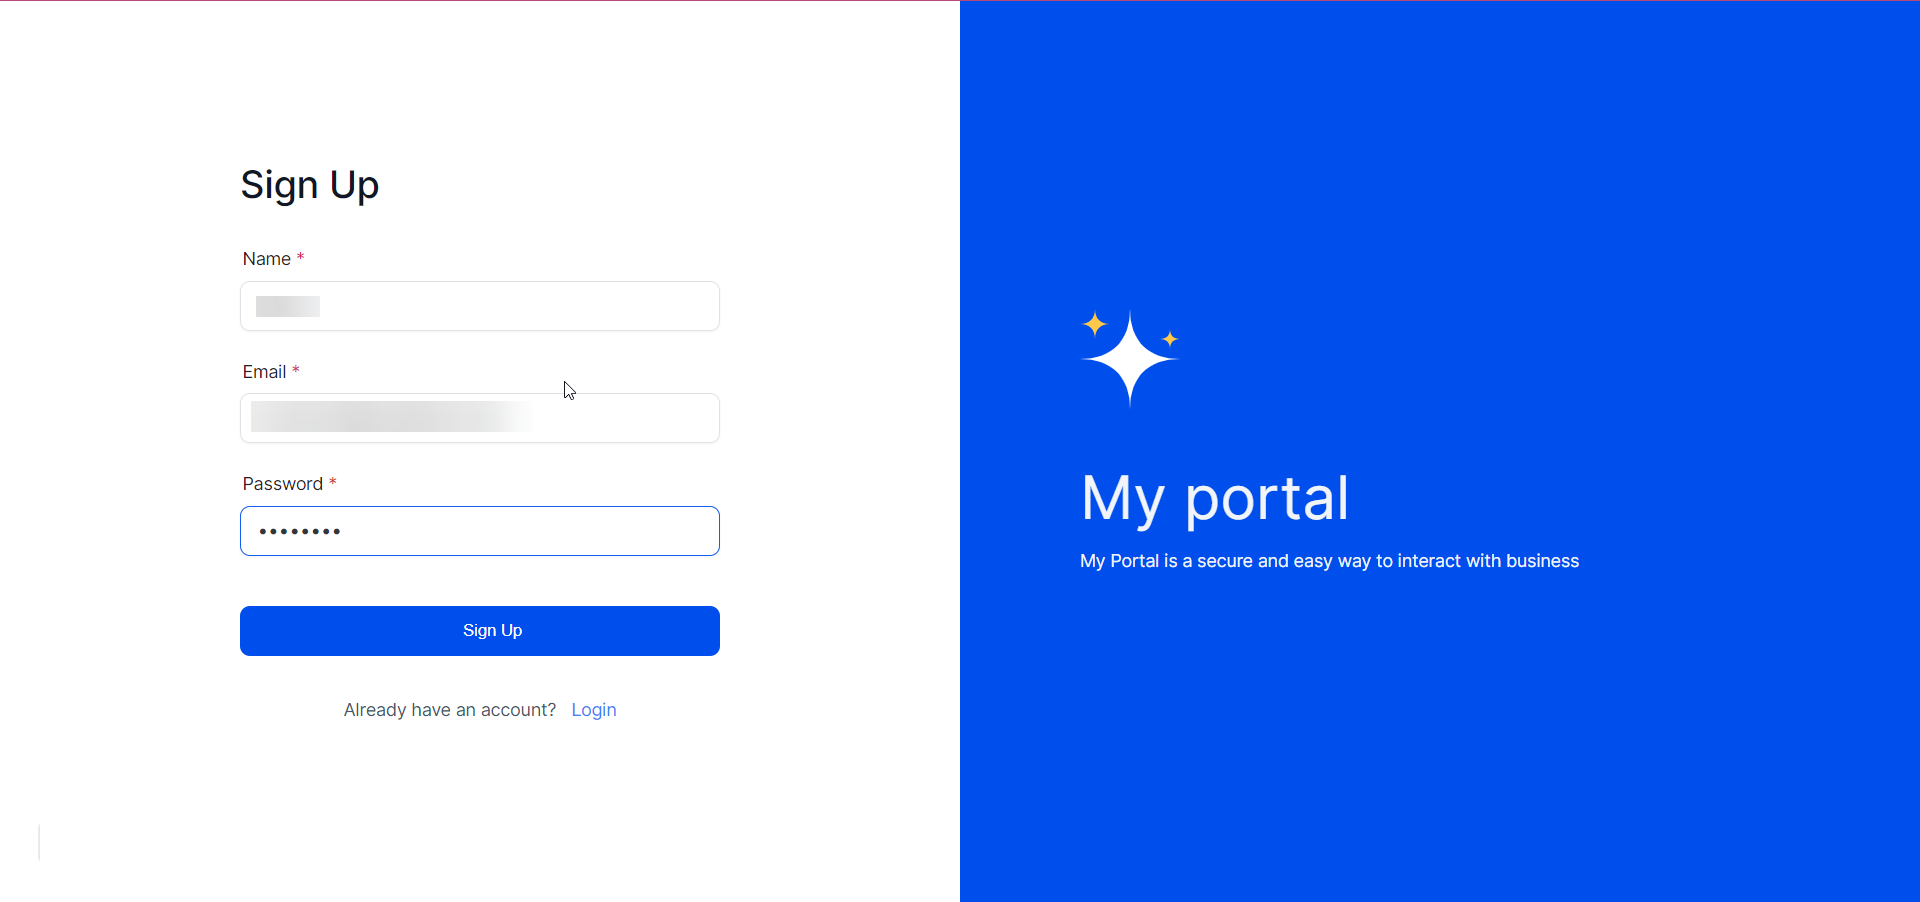
Configure sign up and login methods
- Open Client Portal Builder inside the subaccount.
- Go to the Sign up & login methods tab.
- Set the Default login screen to either secure code or password as desired.
- Toggle the Ask clients to create a password option on or off.
- Toggle the Allow Google sign up & login option on or off.
- Save the changes to confirm the new authentication settings.
07What it looks like in HighLevel
08Settings that matter
- Default login screen. Determines which login interface (secure code or password) appears first for portal users.
- Ask clients to create a password. Controls whether members without an existing password are prompted to set one after their first login.
- Allow Google sign, up & login. Enables or disables the option for users to register or log in using their Google account.
- Language Settings. Sets the portal’s initial language for all visitors; users can later change it in their account settings.
09Things to know before you rely on it
- DNS changes may take between 24 and 48 hours to propagate before the custom domain works.
- Branding updates can be cached; clearing the browser cache or using an incognito window may be required to see changes.
- New portals default to the secure code login screen; existing portals keep the password screen until the setting is changed.
- Google sign in is optional and must be enabled per subaccount; disabling it removes the Google button from both sign up and login pages.
10If something goes wrong
- Brand changes are not visible in the portal.. Clear the browser cache or open the portal in an incognito window to view the updated branding.
- Favicon fails to upload.. Make sure the file is SVG, PNG or JPG, uses a 1:1 aspect ratio and does not exceed 16 × 16 pixels.
- Portal is inaccessible after adding DNS records.. Allow up to 48 hours for DNS propagation; if the issue persists, contact your domain registrar.
- Affiliates cannot see their statistics.. Confirm the affiliates have correct login credentials and that the appropriate permissions have been granted.
- Domain update notice does not redirect correctly.. Verify that the updated domain was saved and give the DNS records time to propagate before testing the redirect.
11How it connects to the rest of HighLevel
- Learn how customers can interact with the portal Client portal usage
- Manage portal users and actions from the dashboard Portal dashboard
- View pricing and plan options for accessing the client portal Pricing
Michael's take

Wondering if a Client Portal is worth the effort for my coaching business? The portal provides a place where members can access courses, a community and affiliate earnings under my own brand and domain. It can help keep the experience consistent.
If I were setting it up, I’d start with the custom domain so the portal feels like an extension of my brand, then lock in the branding colors and logo. After that, I’d test the login flow. Both secure code and password. To be sure new members land where they expect. Once everything looks right, I’d roll out the invitation link to a handful of beta users before opening it to the full list.