
01Who this is for
- Founders who need a consistent look for the client facing app and want brand recognition across web and mobile.
- Marketing agencies building white label apps for multiple clients and requiring quick theme swaps.
02Theme and branding, explained
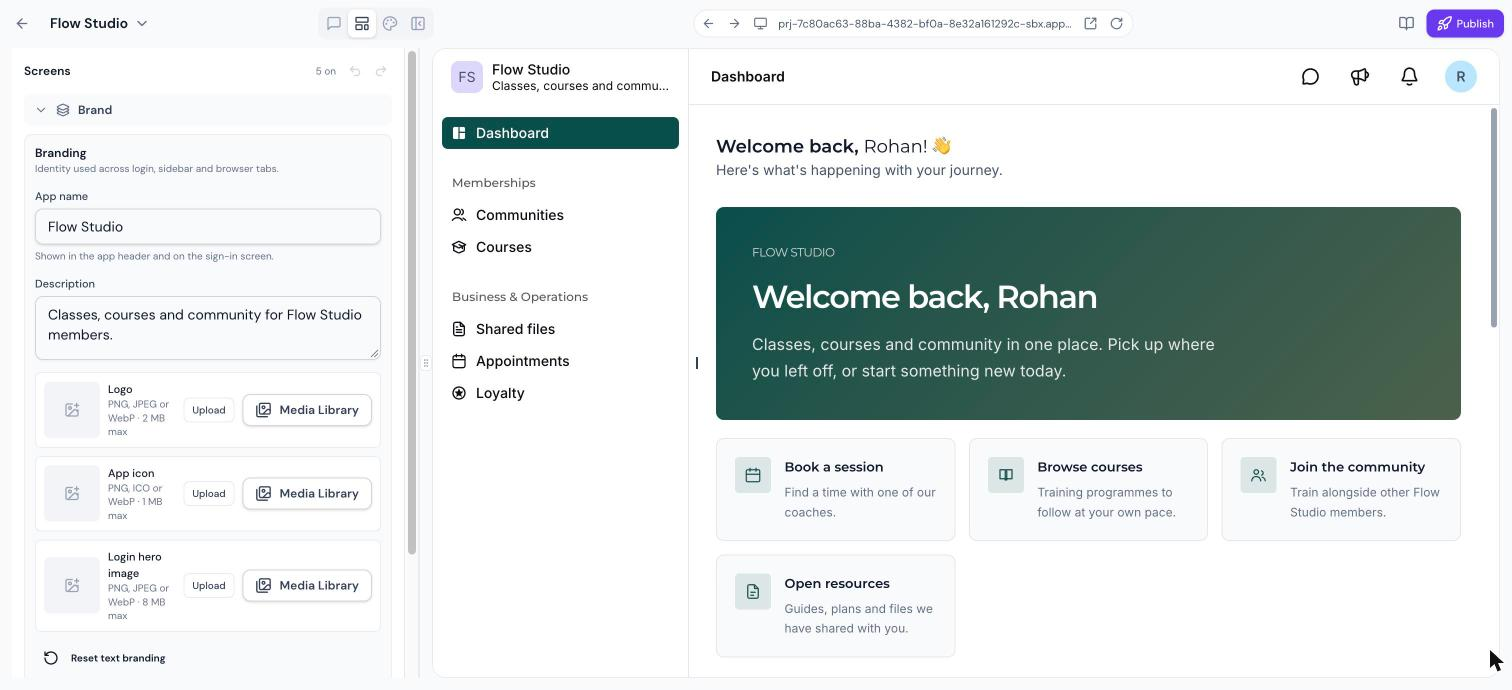
Branding lives inside the Client App Builder under the Layout > Brand section. It houses fields for the app name, description, logo, app icon and login hero image. Changing these values updates the header and sign in screen in the preview.
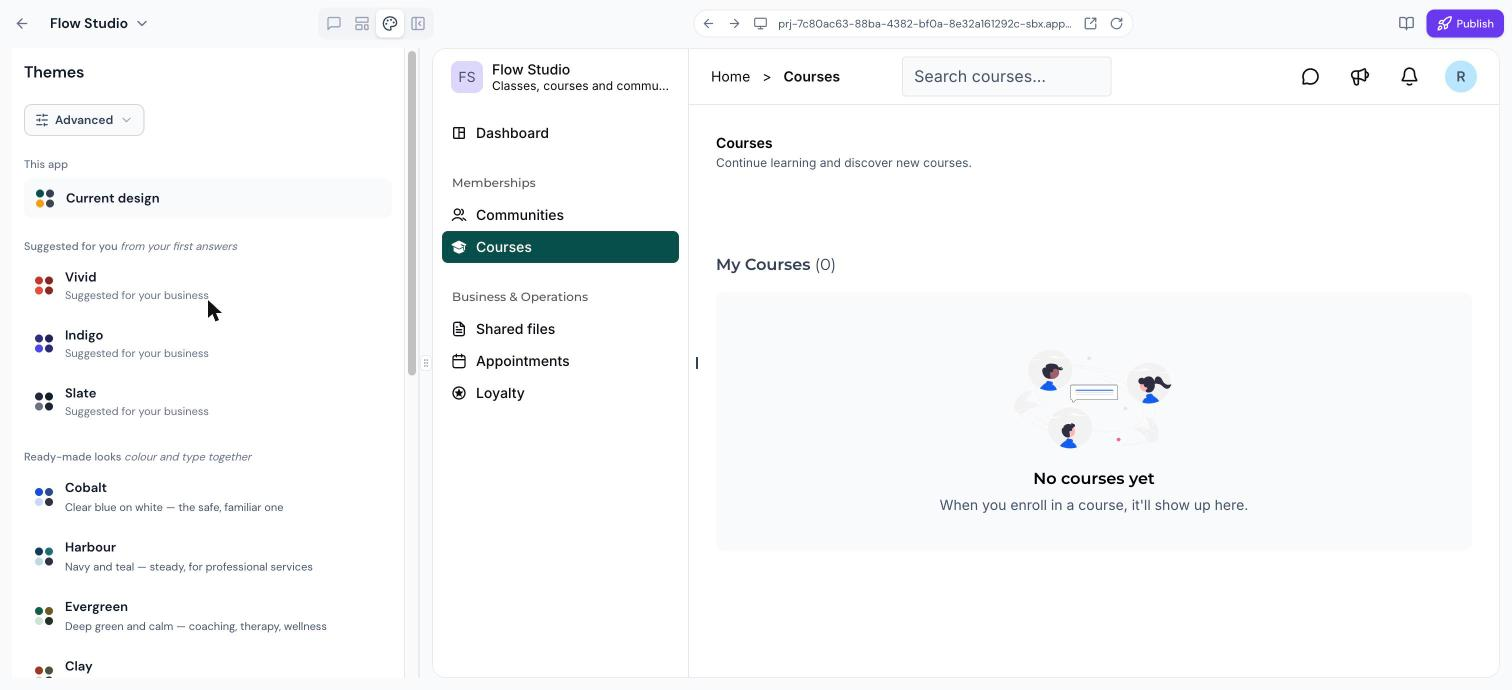
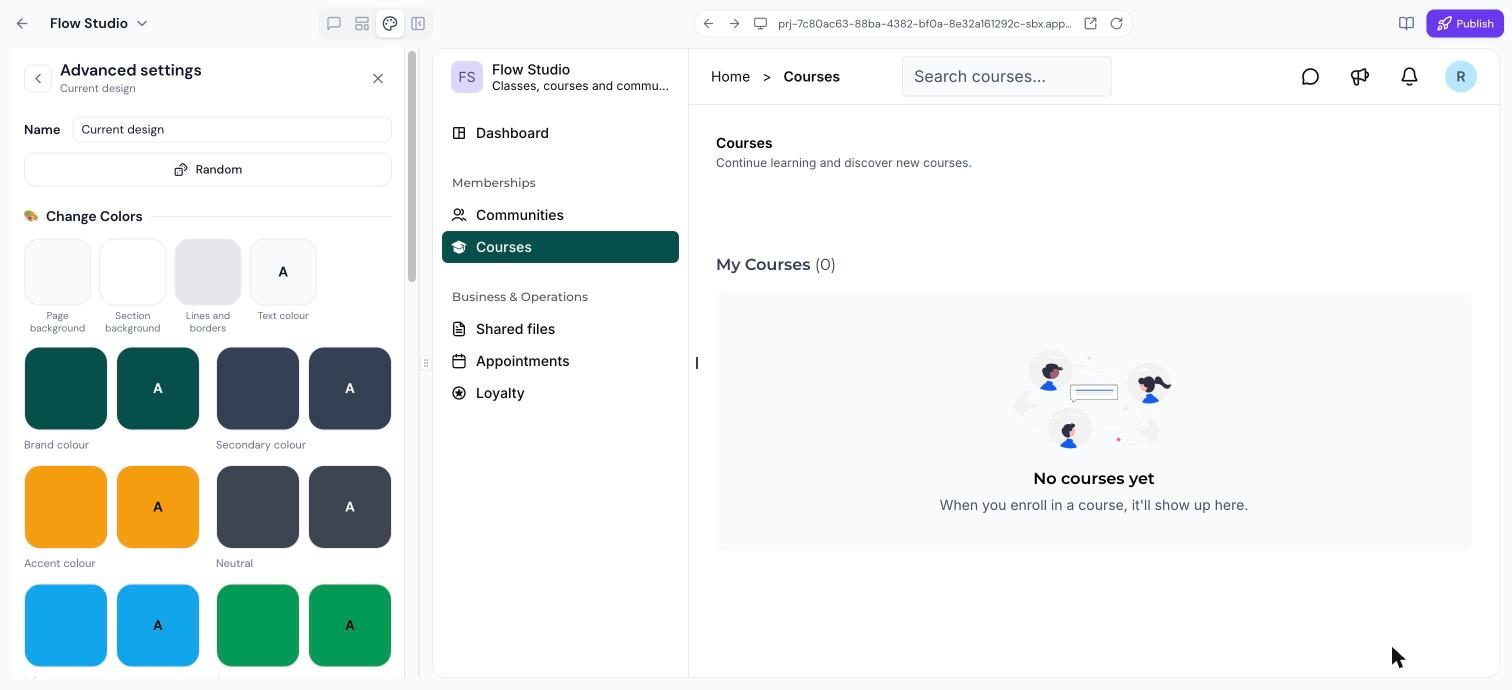
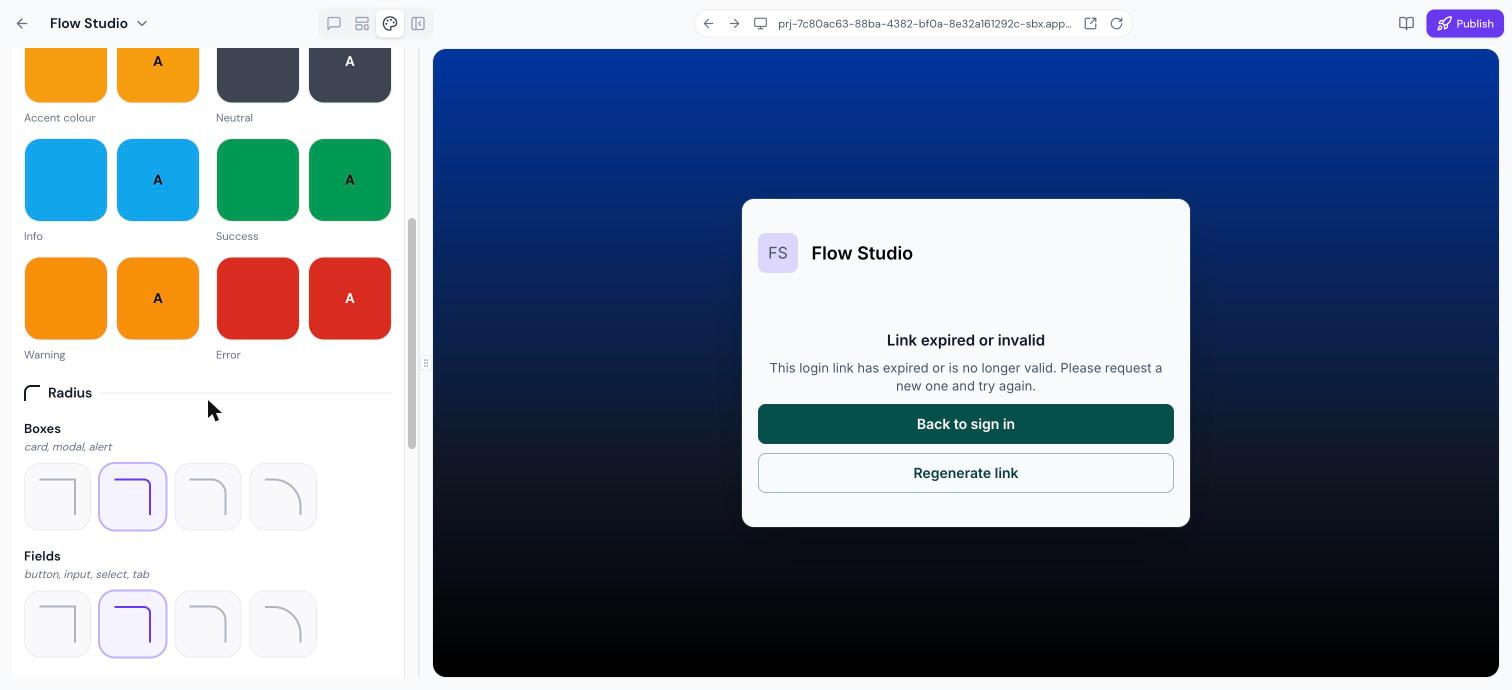
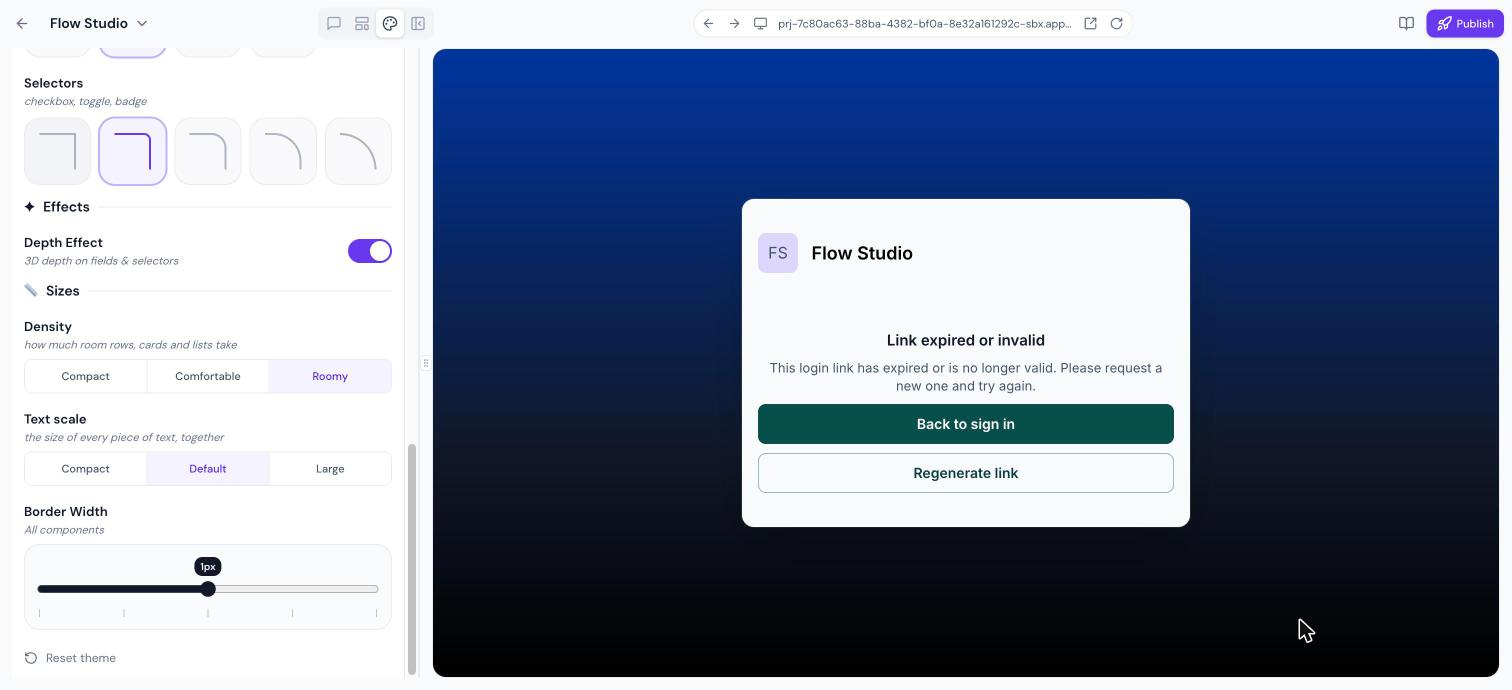
The Themes panel, opened from the top left palette icon, offers ready made looks, a colour picker option and the ability to type a custom colour. At the bottom of that panel you can set the heading and body fonts. An Advanced tab gives full control over colours, corner radius, depth effects and sizing options. Random and Reset buttons let you experiment or revert.
All adjustments are shown in real time in the preview area. The app only reflects the new design after you publish the changes.
03How businesses use theme and branding
- Fitness studio. The studio updates the app name, logo and selects a teal theme that matches its branding. It then fine tunes button radius and font style to create a clean, energetic look before publishing the new client portal.
- Dental practice. The practice uploads its logo, chooses a calm colour palette from the Ready made looks, and adjusts the text font to a serif style. Advanced settings are used to set a soft border radius for appointment cards.
- SaaS startup. The startup describes its desired look in the chat, prompting AI to apply a warm editorial theme with custom colours. It then reviews the changes in preview and publishes once satisfied.
04The numbers and rules that matter
- Effects toggle the 3D depth effect on fields and selectors.
05How to set up and use theme and branding in HighLevel
Set basic brand details for the app
- Open the target app inside Client App Builder.
- Click the Layout icon at the top left and expand the Brand section.
- Enter the new App name, Description, upload a Logo, choose an App icon and add a Login hero image.
Adjust detailed visual parameters
- Open the Themes panel and click Advanced at its top.
- Modify Colors, Radius, Effects and Sizes to match the brand style.
- Press Random for a new combination or Reset theme to revert to the default.
Make changes live
- After reviewing the preview, click Publish to apply the branding changes to the live app.
06What it looks like in HighLevel
07Settings that matter
- App name. Controls the title shown in the app header and on the sign in screen.
- Description. Provides a brief text displayed alongside the app name in the header.
- Logo. Sets the image that appears in the app header and branding areas.
- App icon. Defines the icon shown on device home screens for the mobile app.
- Login hero image. Specifies the background image displayed on the sign in page.
- Theme. Selects a colour and type combination that drives the base appearance of pages, buttons and text.
- Heading font. Determines the typeface used for titles and headings throughout the app.
- Text font. Sets the typeface for body copy and standard text elements.
- Colors. Allows customizing page backgrounds, borders, text and brand related colour roles.
- Radius. Adjusts the corner roundness for cards, fields, buttons and selectors.
- Effects. Enables or disables the 3D depth visual effect on fields and selectors.
- Sizes. Controls overall density, text scaling and border thickness.
08Things to know before you rely on it
- Brand changes appear only in the preview until you publish the app.
- AI driven branding updates apply to both web and mobile versions together.
- The Random button offers a quick experiment but may not match existing brand guidelines.
09How it connects to the rest of HighLevel
- Edit layout and navigation to complement your branding choices. Layout editor
- Publish a fully branded Android app directly from the builder. Publish Android app
Michael's take

Most people start by picking a ready made theme.
I would begin by updating the app name, logo and description, then use the advanced settings to align colours, fonts and corner radius with the brand guide. A quick AI prompt can apply the look across web and mobile, and publishing the app makes the changes live for clients.