
01Who this is for
- Rental company owners, they gain a single place to enforce consistent booking rules across locations.
- Operations managers, they can set business hours, cancel policies, and payment requirements that their team follows.
- Marketing teams, they control branding elements such as logo, colors, and consent text on the customer booking page.
02Rentals: Global settings, explained
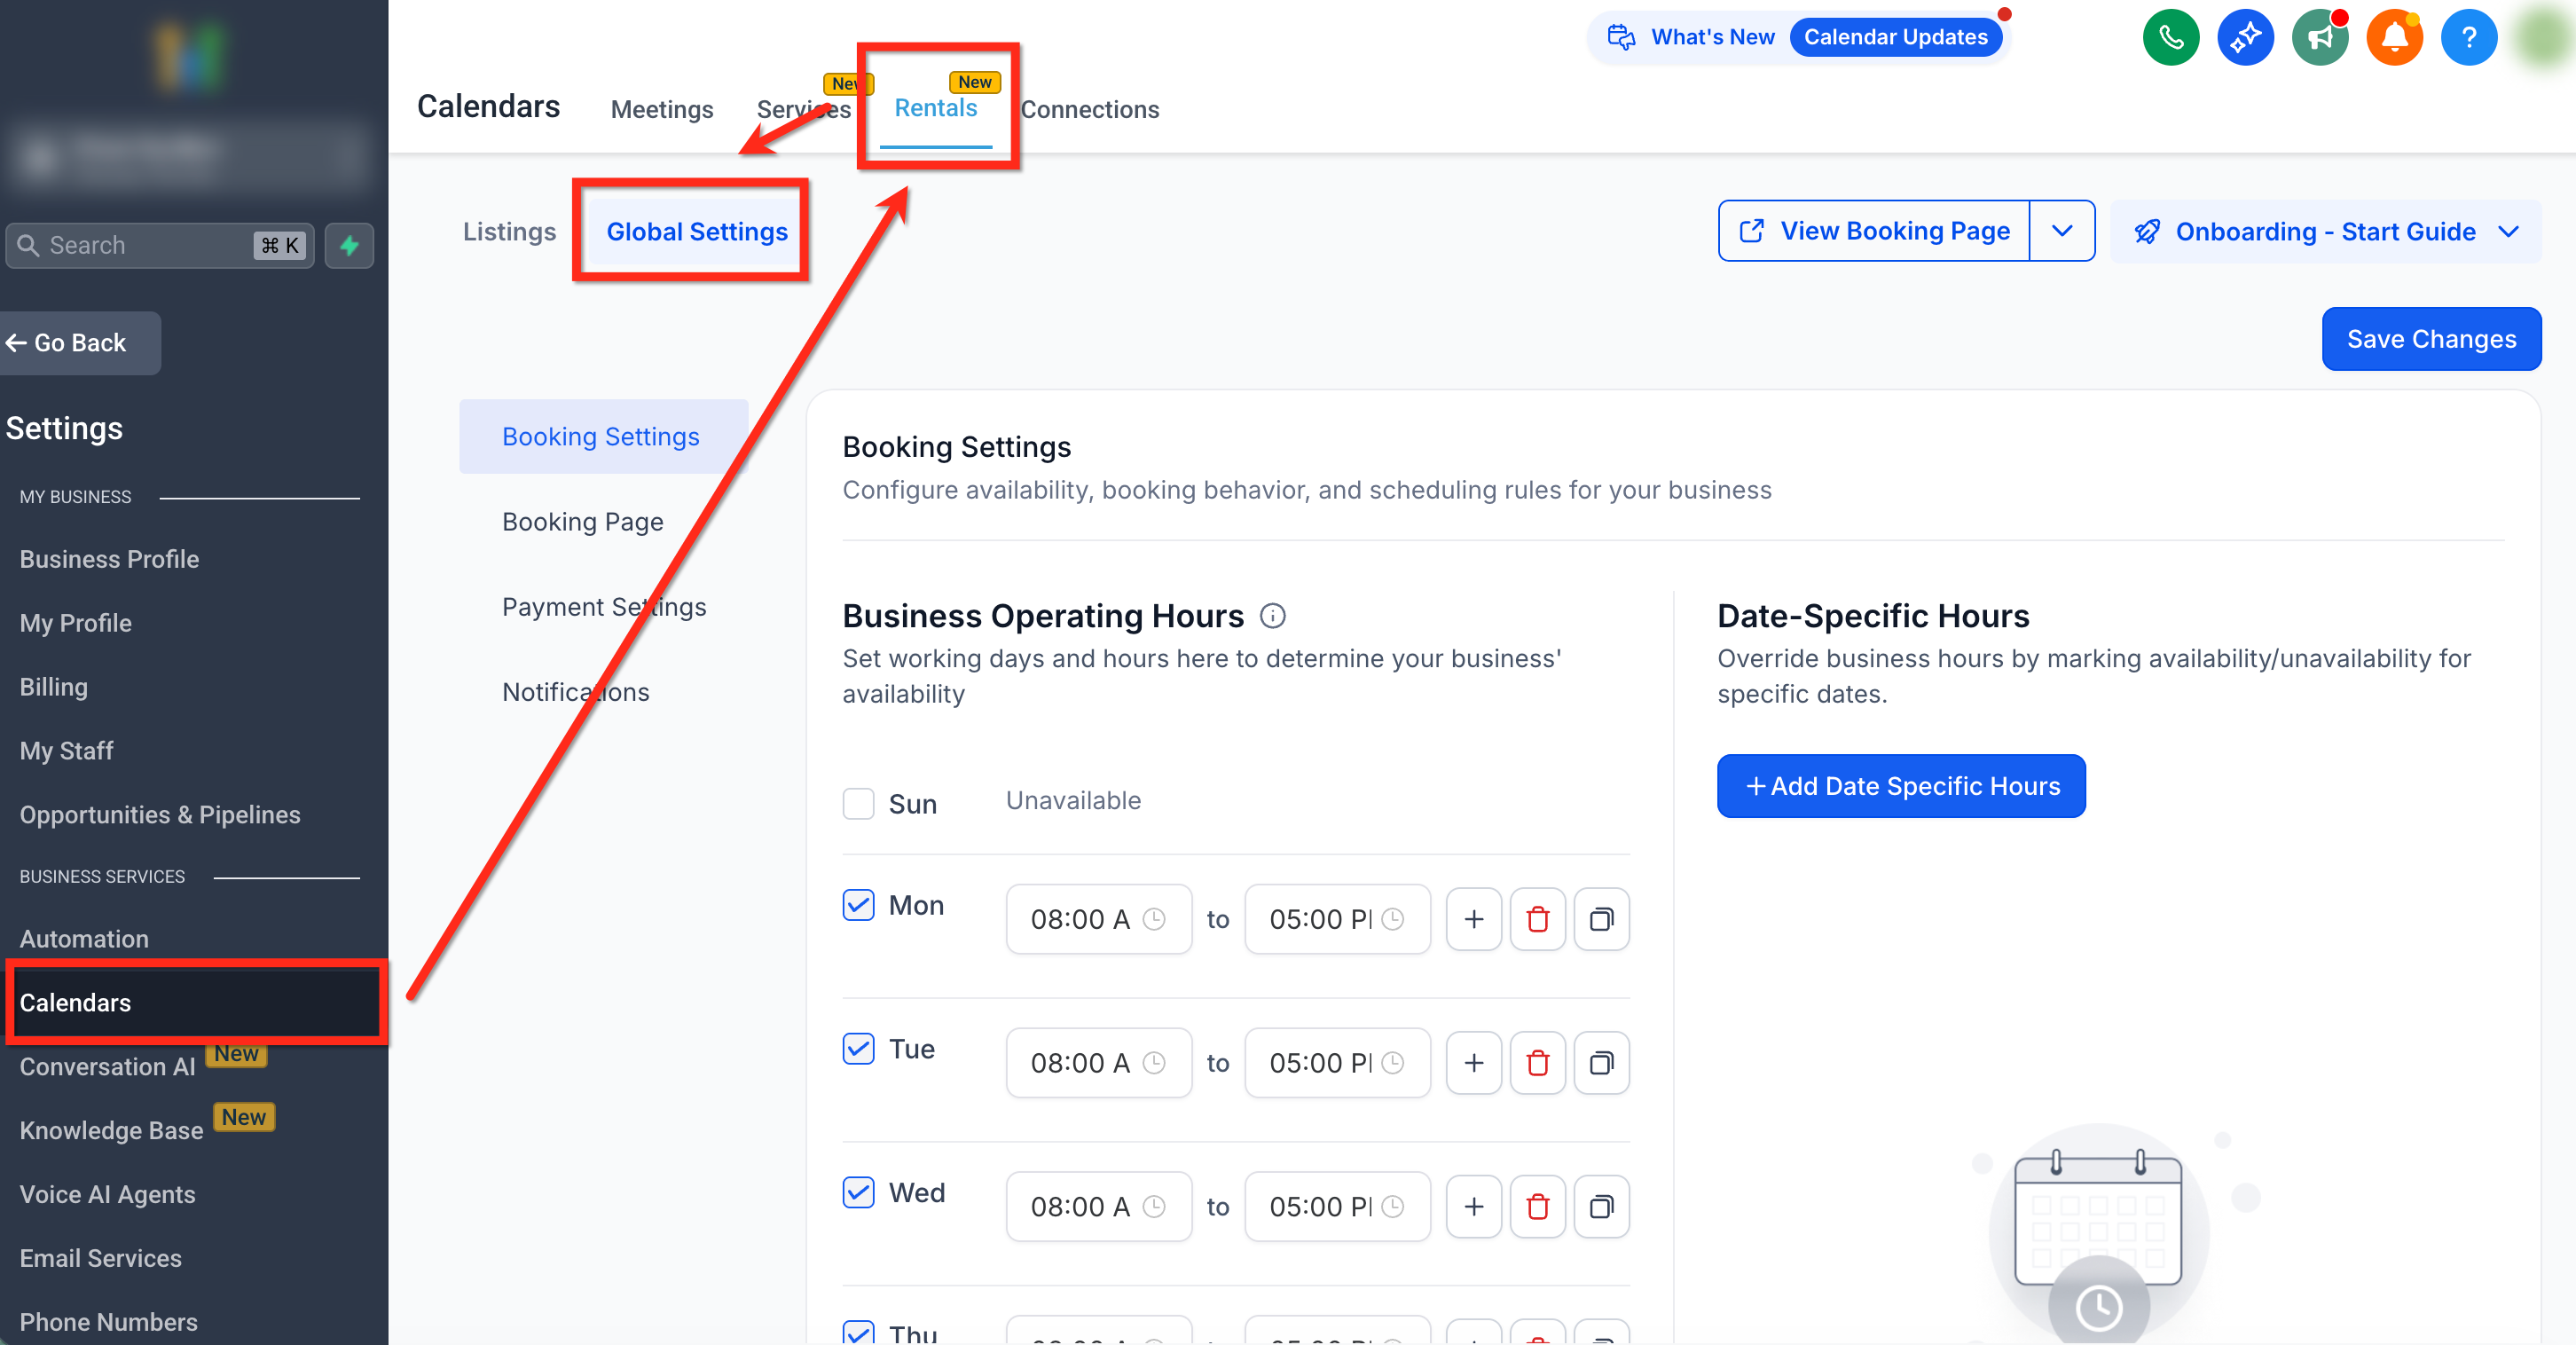
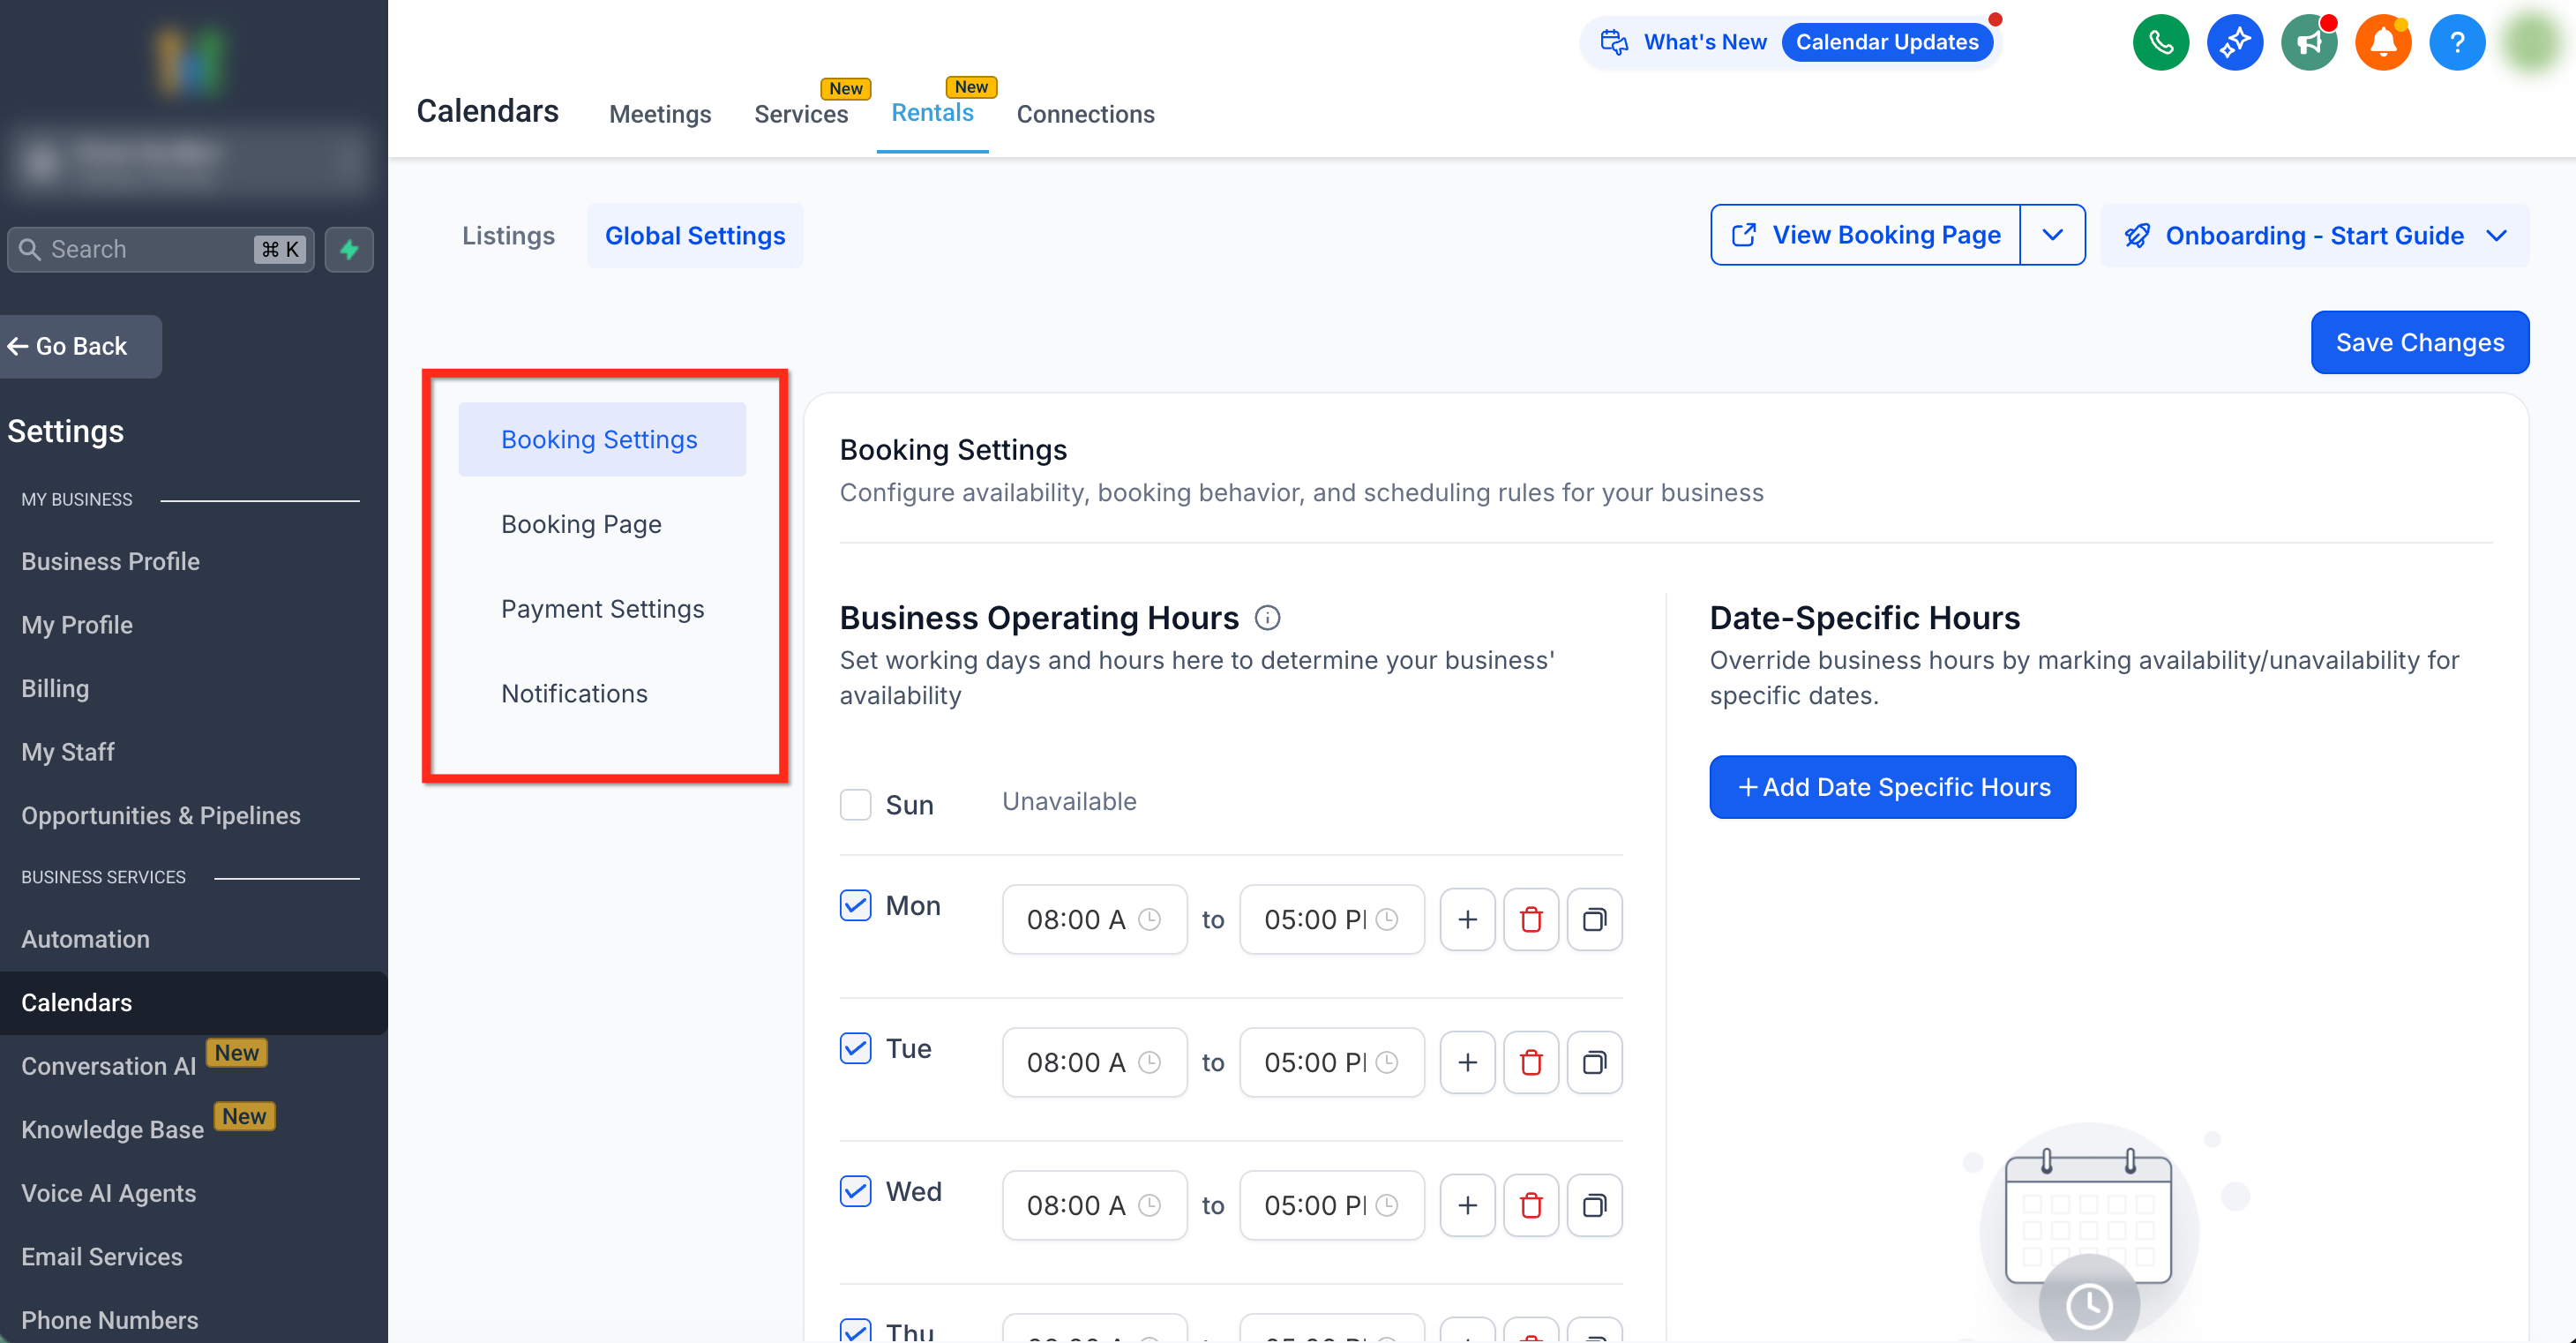
Global Settings centralize the core options that drive a rental operation. From the Calendars menu you reach the page via Calendars > Calendar Settings > Rentals > Global Settings. The interface is divided into four tabs, Booking Settings, Notifications, Booking Page, and Payment, each governing a specific area of the booking flow.
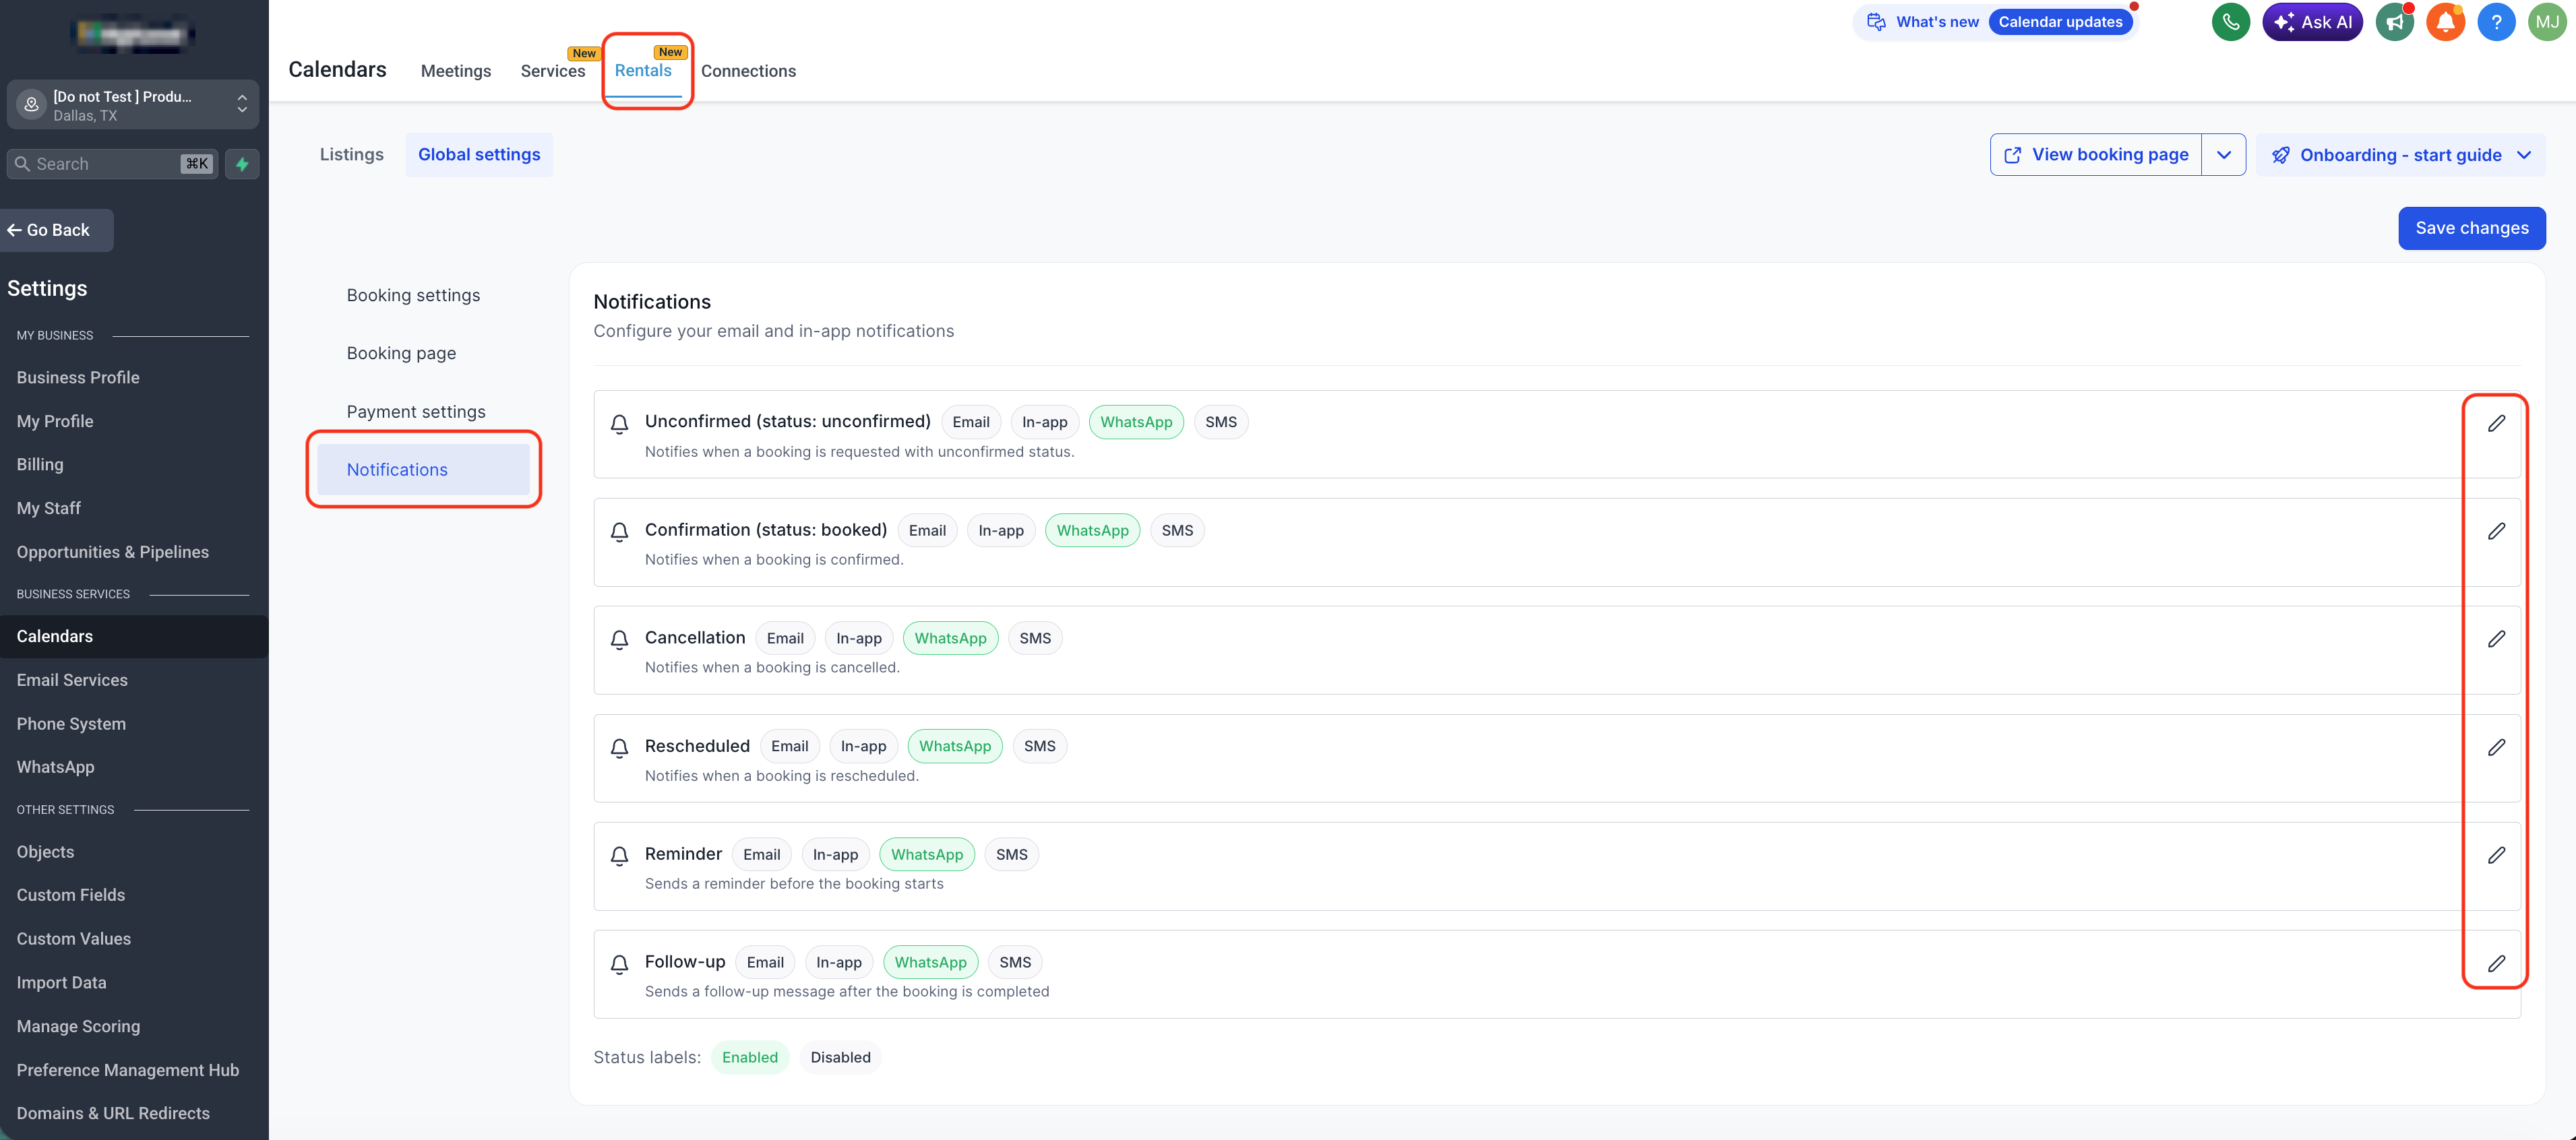
In Booking Settings you define when bookings may start, add special date specific hours, set the timezone, choose slot intervals, decide if bookings are auto confirmed, allow a multi item cart, enable Away Mode, set default rental times, and configure cancellation link expiration. Notifications let you tailor email, SMS, In App, or WhatsApp messages for events such as booking creation, confirmation, cancellation, reschedule, reminders and follow ups. The Booking Page tab controls the public booking site’s logo, URL slug, theme, language, colors, layout, button labels, custom CSS, and the form used to collect customer data. Finally, Payment settings let you pick the currency, require payment at booking, enable security deposits (with collect upfront or card on file modes), and switch between Test and Live payment modes.
03How businesses use global settings
- Equipment rental company. The manager opens Global Settings, sets Business Operating Hours to match shop opening times, activates Auto confirm Bookings, and turns on Enable Multi item Cart so customers can rent multiple items in one checkout.
- Event venue. The staff adds Date Specific Hours for holiday dates, enables Away Mode during renovation periods, and customizes the Booking Page theme and Primary Color to match the venue’s branding.
- Vehicle fleet provider. The administrator selects Require Payment at Booking, enables Security Deposits in Card on File Only mode, and configures a Cancellation Link Expiry of 24 hours so renters can cancel up to a day before the rental starts.
04The numbers and rules that matter
- Slot Interval: Defines time increments for slot selection (e.g., 15, 30, 60 minutes).
- Set Cancellation Link Expiry: Limits how close to start time customers can cancel via link.
- Notification channels: Email, In App, SMS, WhatsApp.
05How to set up and use global settings in HighLevel
Open the Global Settings screen
- Navigate to Calendars > Calendar Settings > Rentals > Global Settings.
Configure Booking Settings
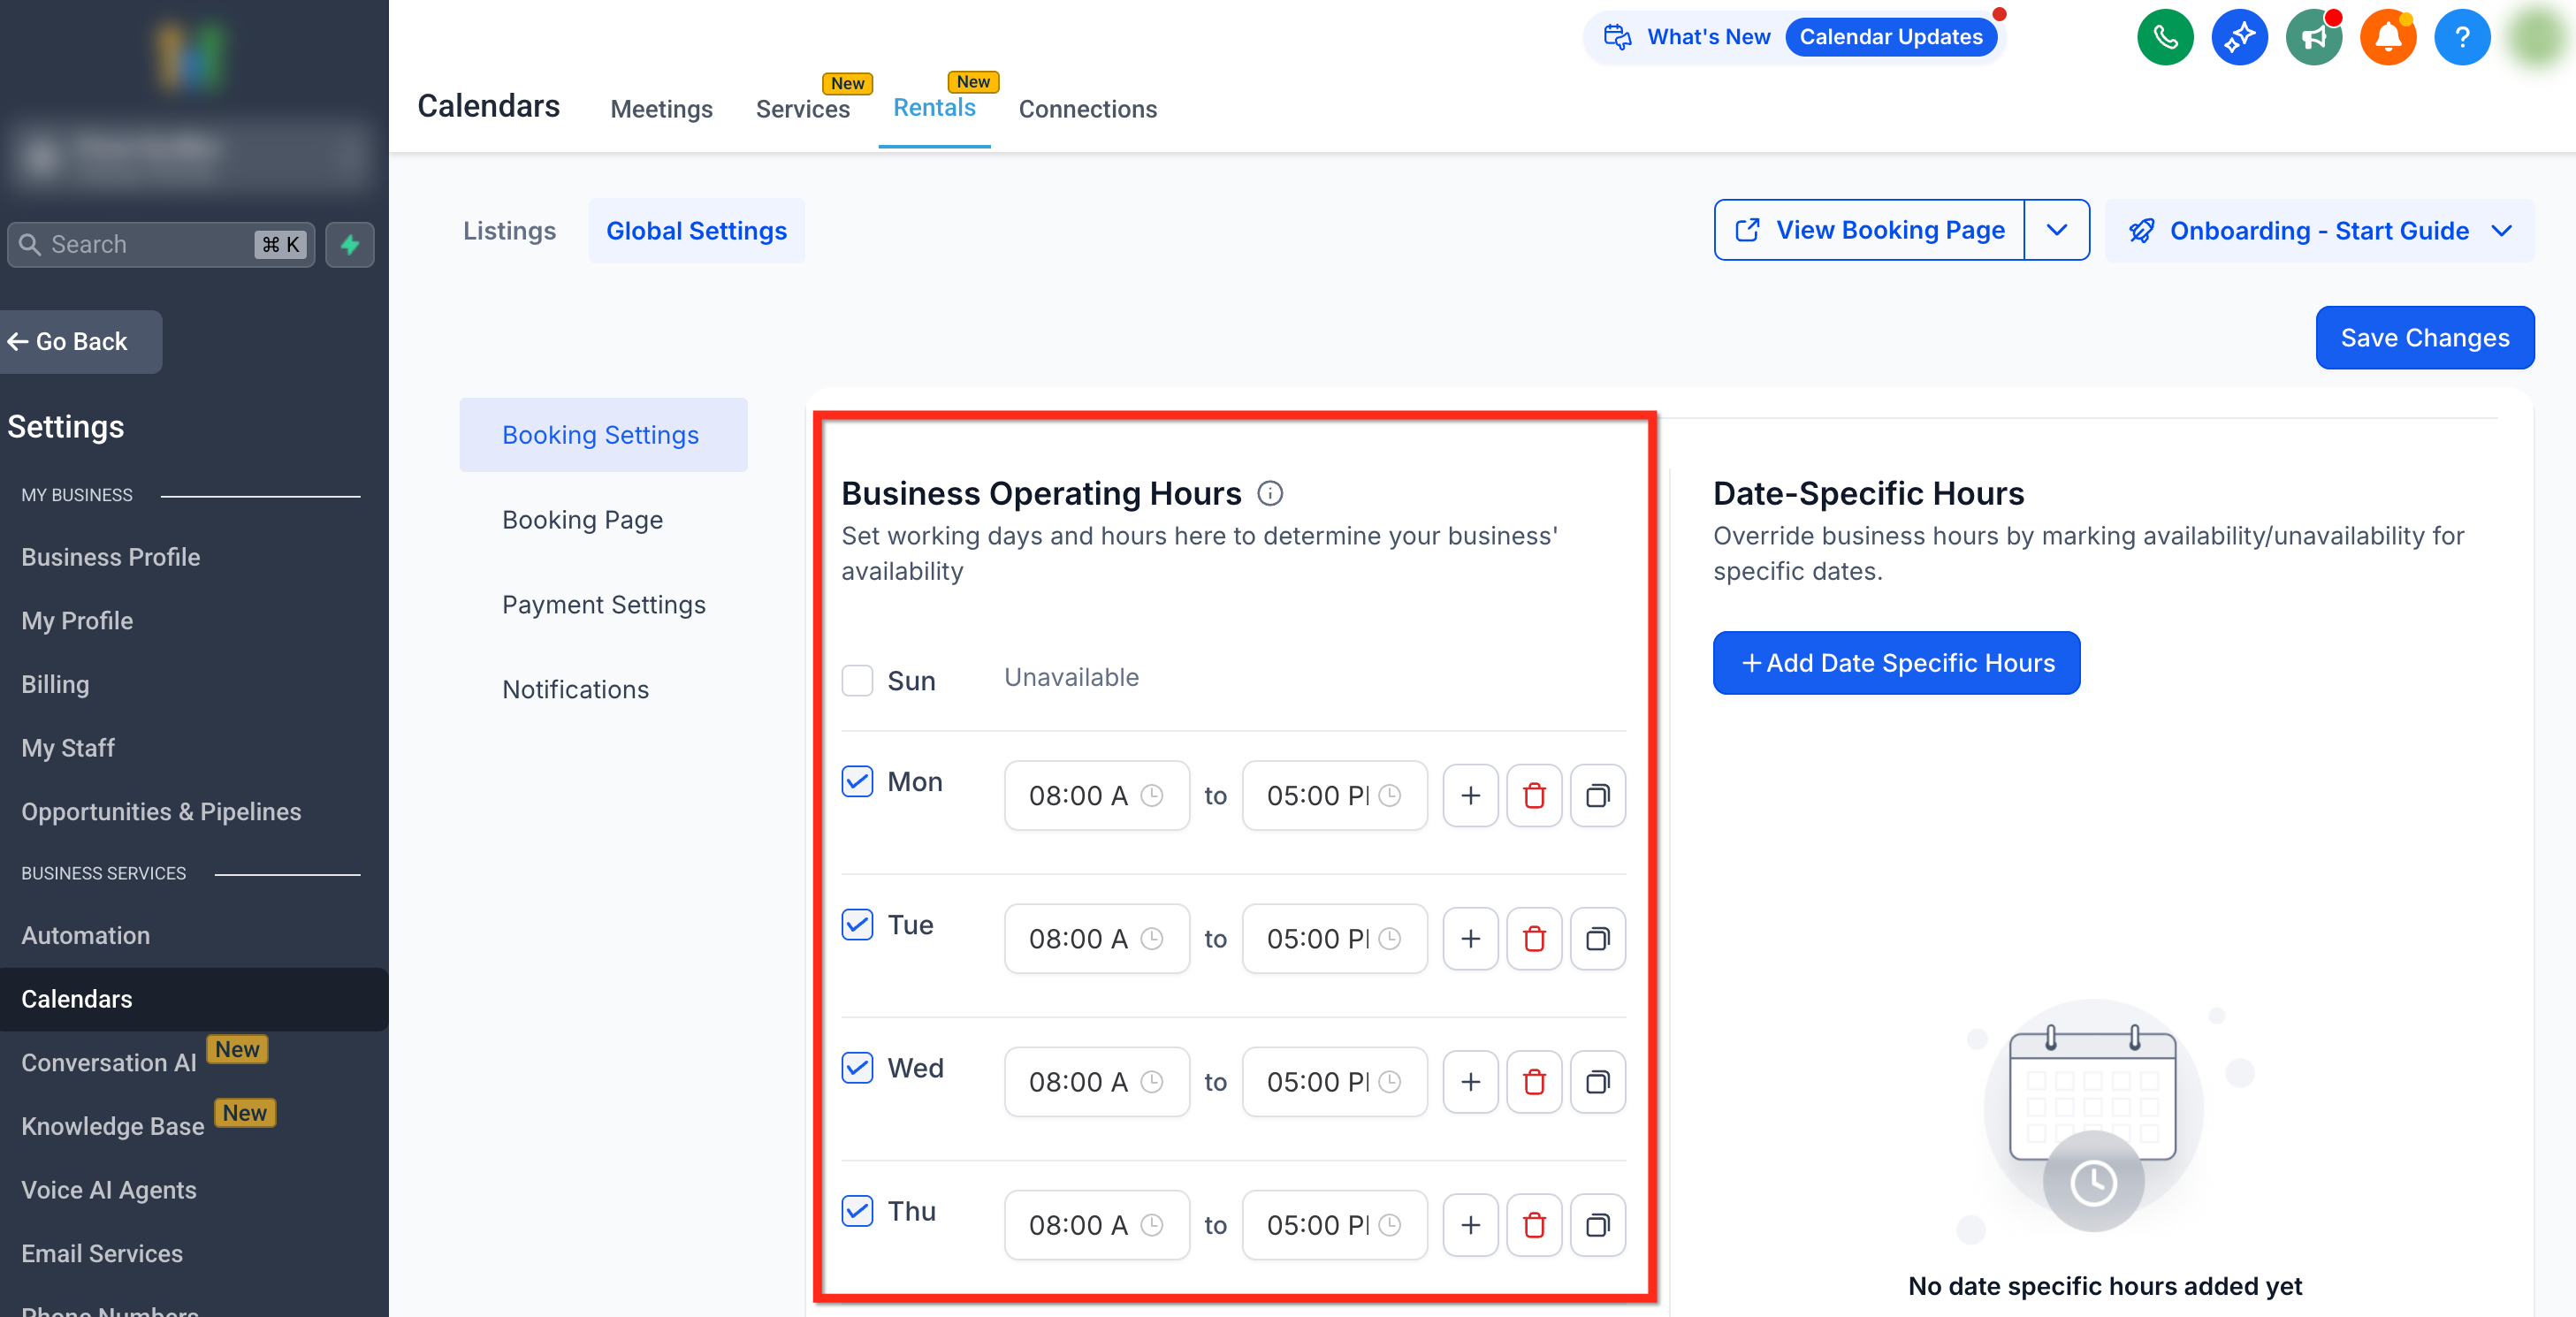
- Set Business Operating Hours, adding intervals with the + button and deactivating days as needed.
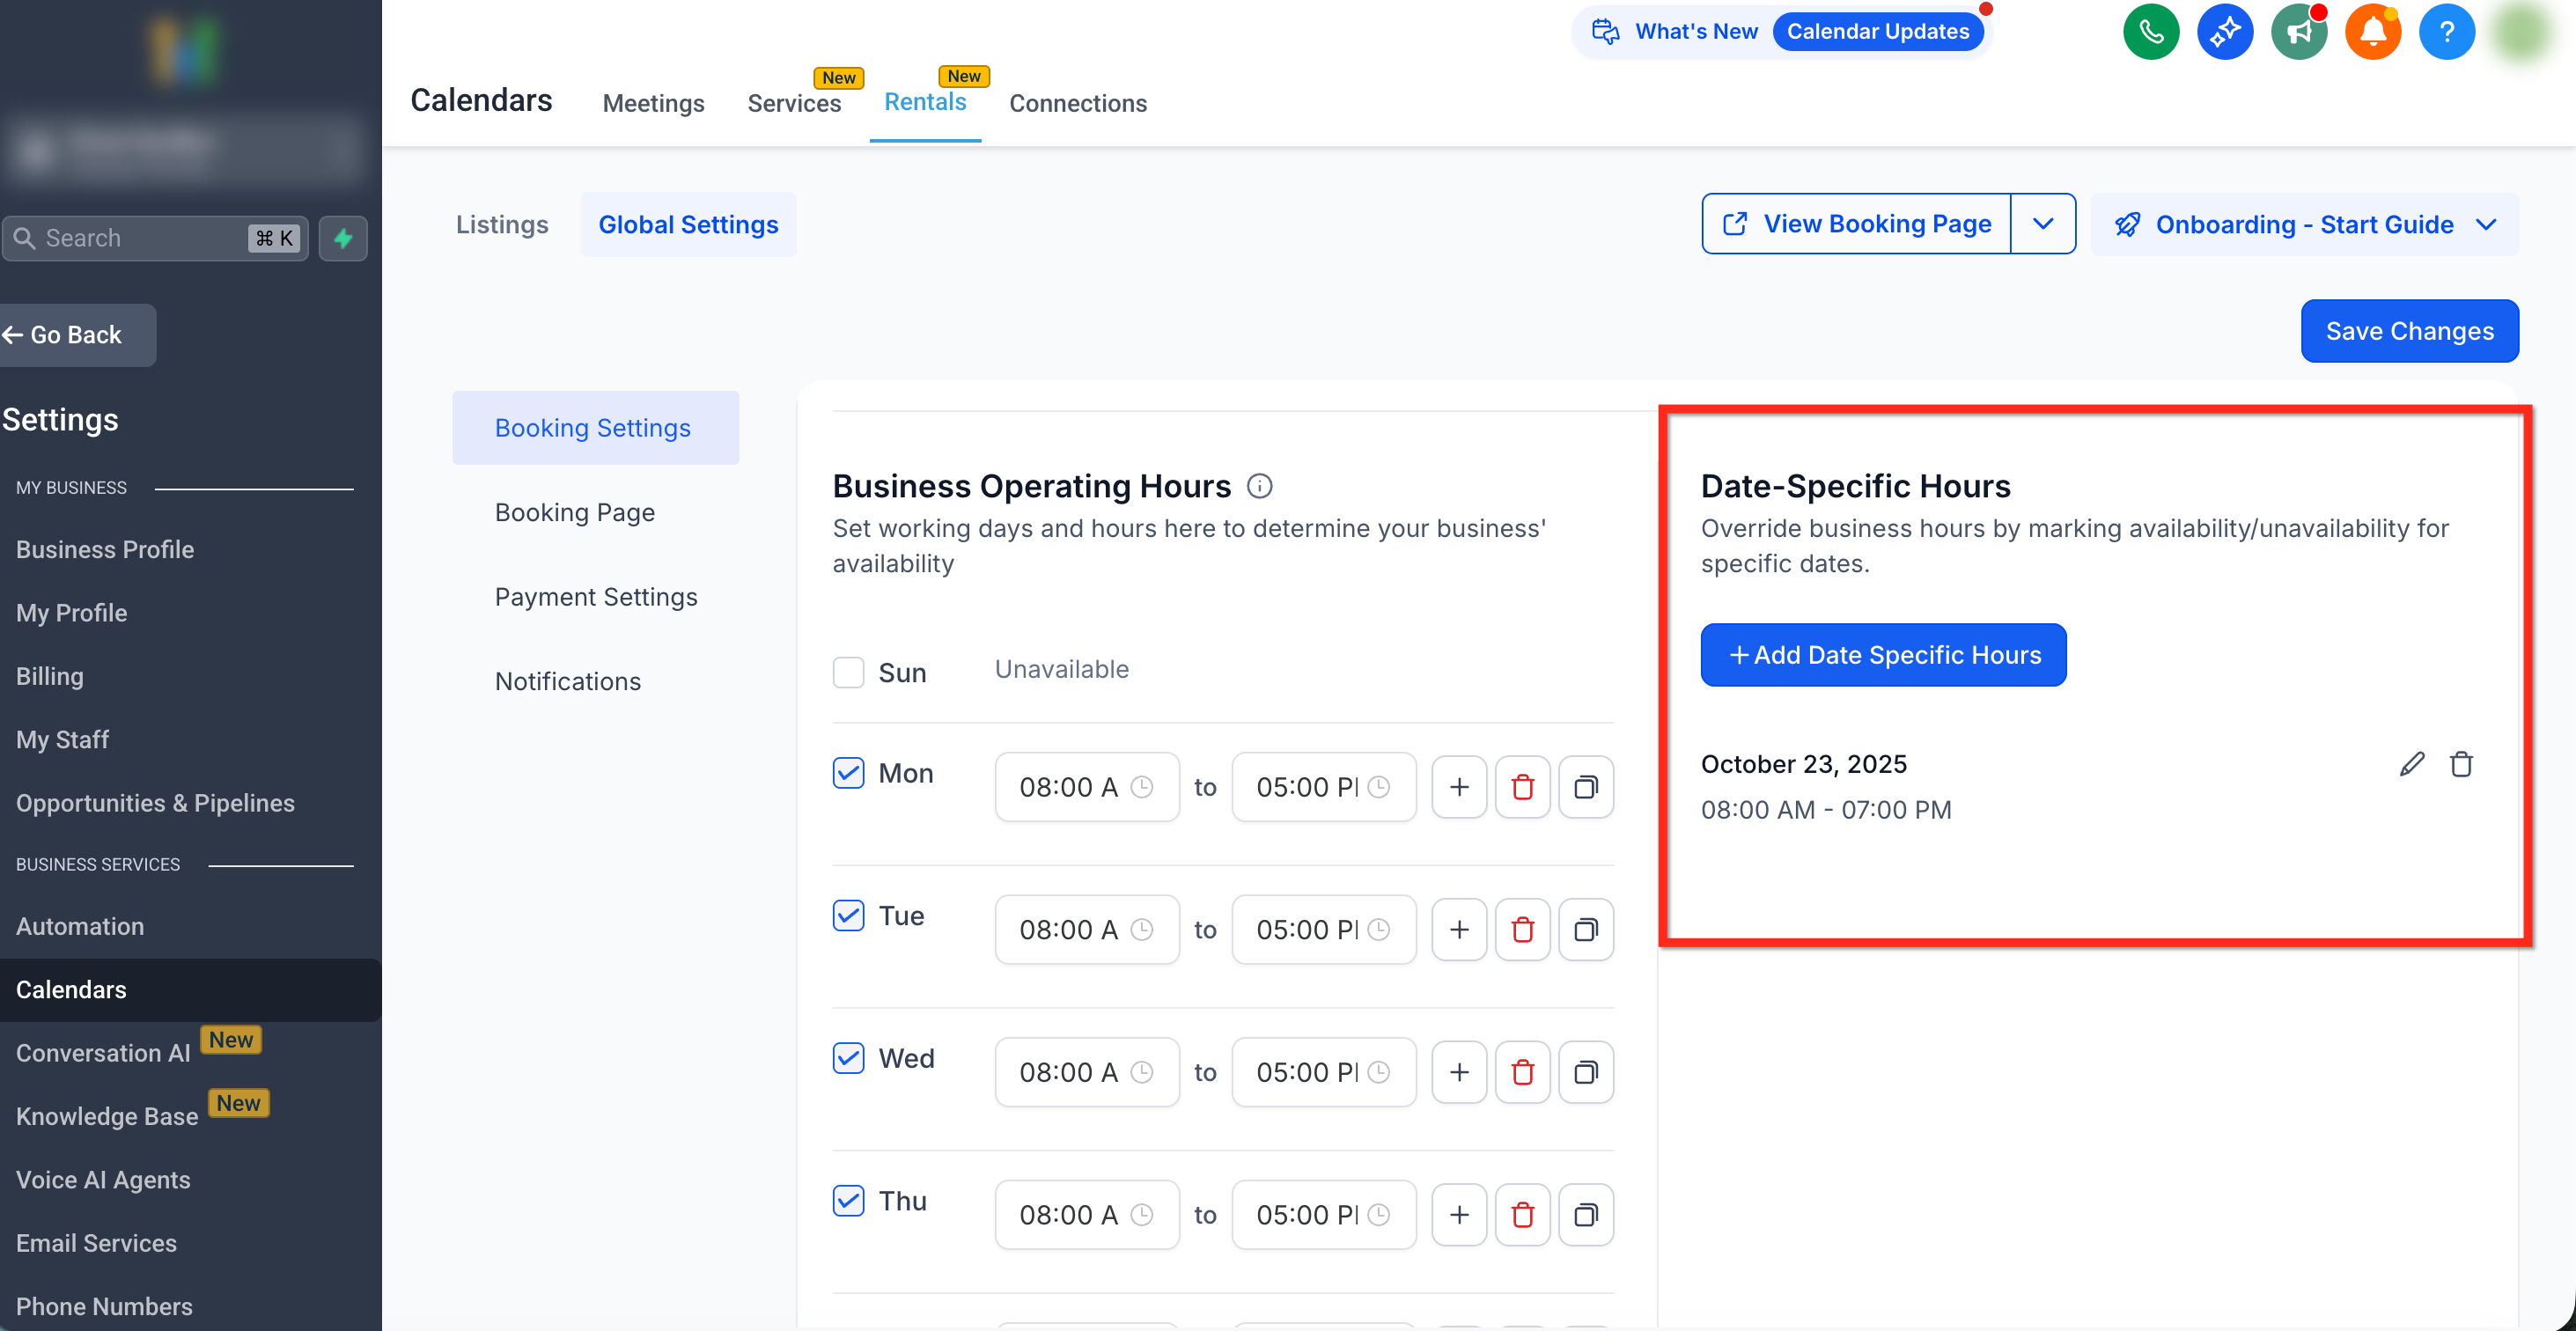
- Add Date Specific Hours for holidays or special events using + Add Date Specific Hours.
- Choose the business timezone and define the Slot Interval for time slot display.
- Toggle Auto confirm Bookings on or off.
- Enable Multi item Cart if customers should book multiple listings together.
- Turn on Away Mode to temporarily stop new online bookings.
- Define Default Rental Times when the time selector is disabled.
- Activate Set Cancellation Link Expiry and specify how early the link stops working.
- If Set Cancellation Link Expiry is on, set the Cancellation Link Expires value in minutes, hours, or days.
- Note: Bookings must start and end within Business Operating Hours, but the rental period can continue past closing time.
- Note: Admins can always override global restrictions while creating bookings in the app.
- Note: Customers can only cancel bookings that haven’t started yet; once a booking is Active or Completed the cancellation link stops working.
- Note: If Online payments are disabled, Security Deposits are included in the total due and must be collected in person.
Set up Notification templates
- Open the Notifications tab.
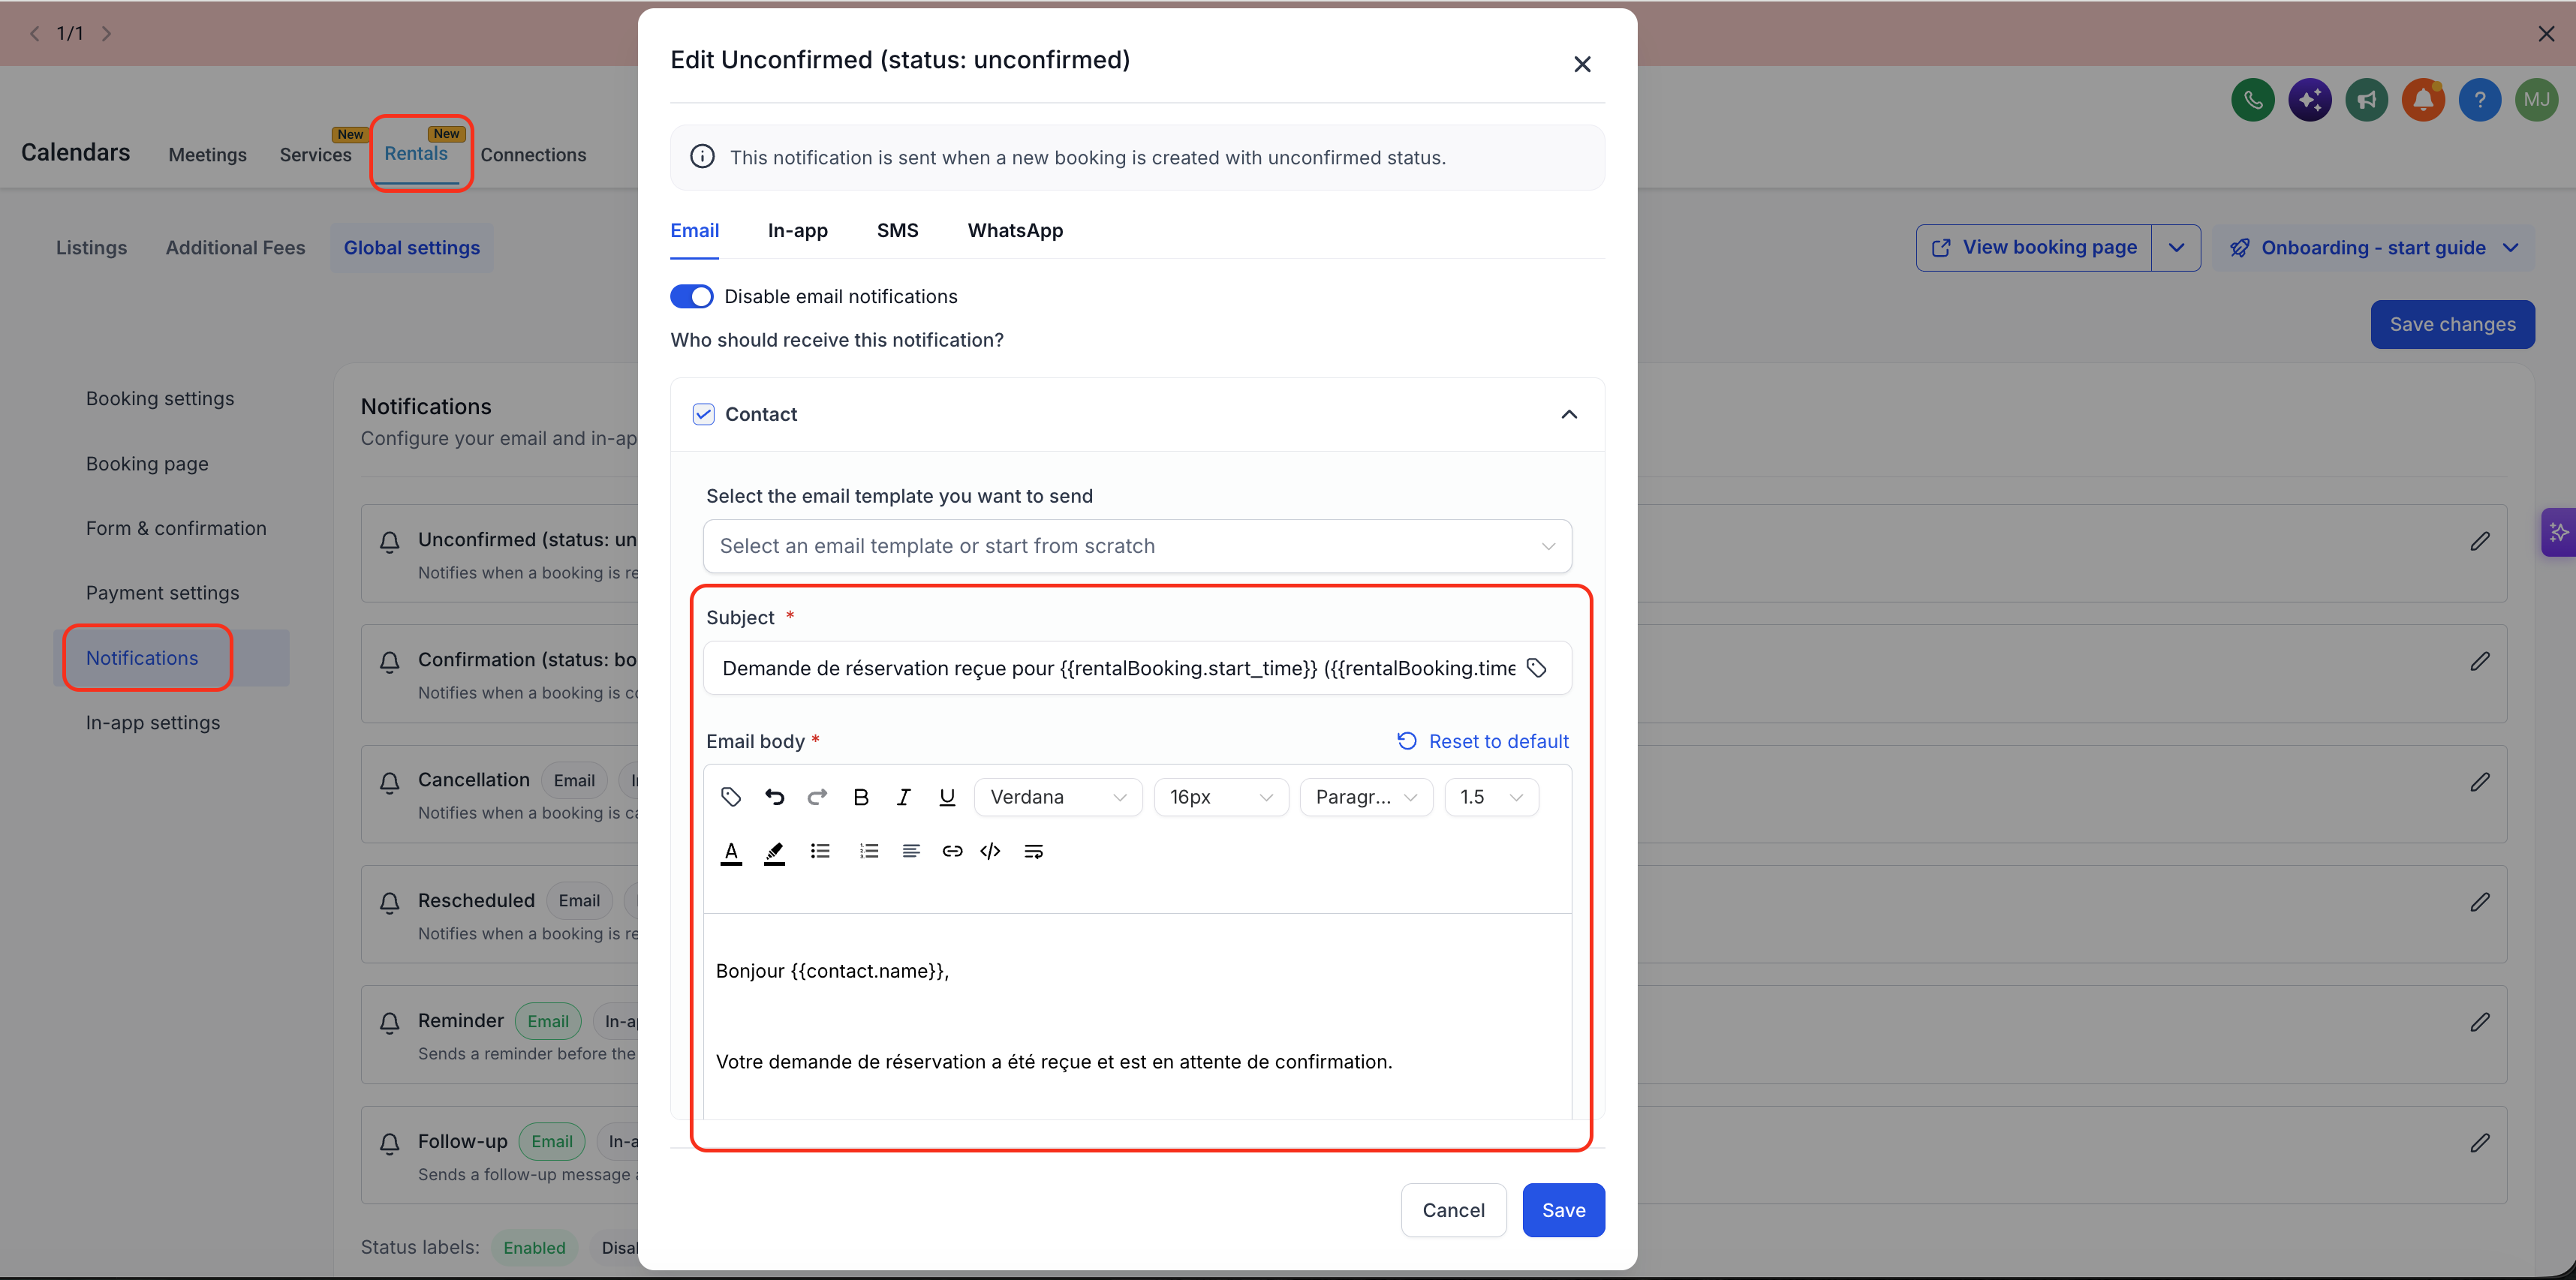
- Edit each template (Booked Unconfirmed, Booked Confirmed, Cancellation, Reschedule, Reminder, Follow up) using the pencil icon.
- Select the delivery channel(s), Email, In App, SMS, or WhatsApp, for each notification.
- Reset any template to the localized default if needed.
Customize the Booking Page
- Enter Company Logo & Name and define the Account Slug for the booking page URL.
- Choose Default Location address.
- Select Theme (light or dark), Language, Week Starts On, Primary Color, and Background Color.
- Pick a Booking Page Layout, card view, list view, or allow customers to switch.
- Set custom button labels for listing selection, final booking, and add to cart actions.
- Paste custom CSS in Insert Custom Code if further styling is required.
- Use Preview Booking Page to review changes before saving.
- Choose the Default Form or a custom form created in Sites > Forms.
- Enable Sticky Contacts if returning customers fill out the form themselves.
- Turn on Consent Checkbox & Message and edit the consent text (available with the Default Form).
Define Payment behavior
- Select the Currency for all listings.
- Toggle Require Payment at Booking to collect payment during booking or show price only.
- Enable Security Deposits and choose between Collect Upfront or Card on File Only mode.
- Pick Test Mode or Live Mode for transaction processing and connect the appropriate payment gateway.
06What it looks like in HighLevel
07Settings that matter
- Business Operating Hours. Controls which days and times bookings may start and end.
- Date, Specific Hours. Overrides normal operating hours for particular dates such as holidays.
- Timezone. Sets the time zone used for displaying times on the booking page and for creating bookings.
- Slot Interval. Determines the size of time increments shown as selectable slots.
- Auto, confirm Bookings. When on, new bookings are automatically marked as confirmed.
- Enable Multi, item Cart. Allows customers to add more than one listing to a single checkout.
- Away Mode. Temporarily disables all new online bookings while keeping existing ones active.
- Default Rental Times. Provides preset start and end times when the time selector is turned off.
- Set Cancellation Link Expiry. Enables a cutoff period before the rental start when the cancellation link stops working.
- Cancellation Link Expires. Specifies the amount of time before the start that the cancellation link expires.
- Notification Templates. Define the content and delivery channels for booking related messages.
- Company Logo & Name. Displays branding on the public booking page.
08Things to know before you rely on it
- Bookings must start and end within defined Business Operating Hours, but the rental period can continue past closing time.
- Cancellation links only work for bookings that haven't started yet; once a booking is Active or Completed the link is ignored.
- When Set Cancellation Link Expiry is off, customers may cancel at any time before the booking starts.
- Security Deposit configuration changes affect how the deposit appears on the Edit Booking screen.
- Add to Booking Button Label appears only if Enable Multi item Cart is turned on.
- If Online payments are disabled, Security Deposits are included in the total amount due and must be collected in person.
09How it connects to the rest of HighLevel
- Step by step guide to getting rentals set up in HighLevel Rentals overview
- Details on creating and editing rental listings Create & edit listings
- Information on HighLevel pricing and plan options Pricing
- Start a free 30 day trial of HighLevel 30 day trial
- Explore the HighLevel Founder Plan for advanced features Founder Plan
Michael's take

In my experience, Global Settings help keep rental operations consistent.