
01Who this is for
- Small business owners who sell multiple services benefit because a single page lets customers pick any offering.
- Coaches or consultants with several packages gain control over each calendar while presenting them together.
02Service menus, explained
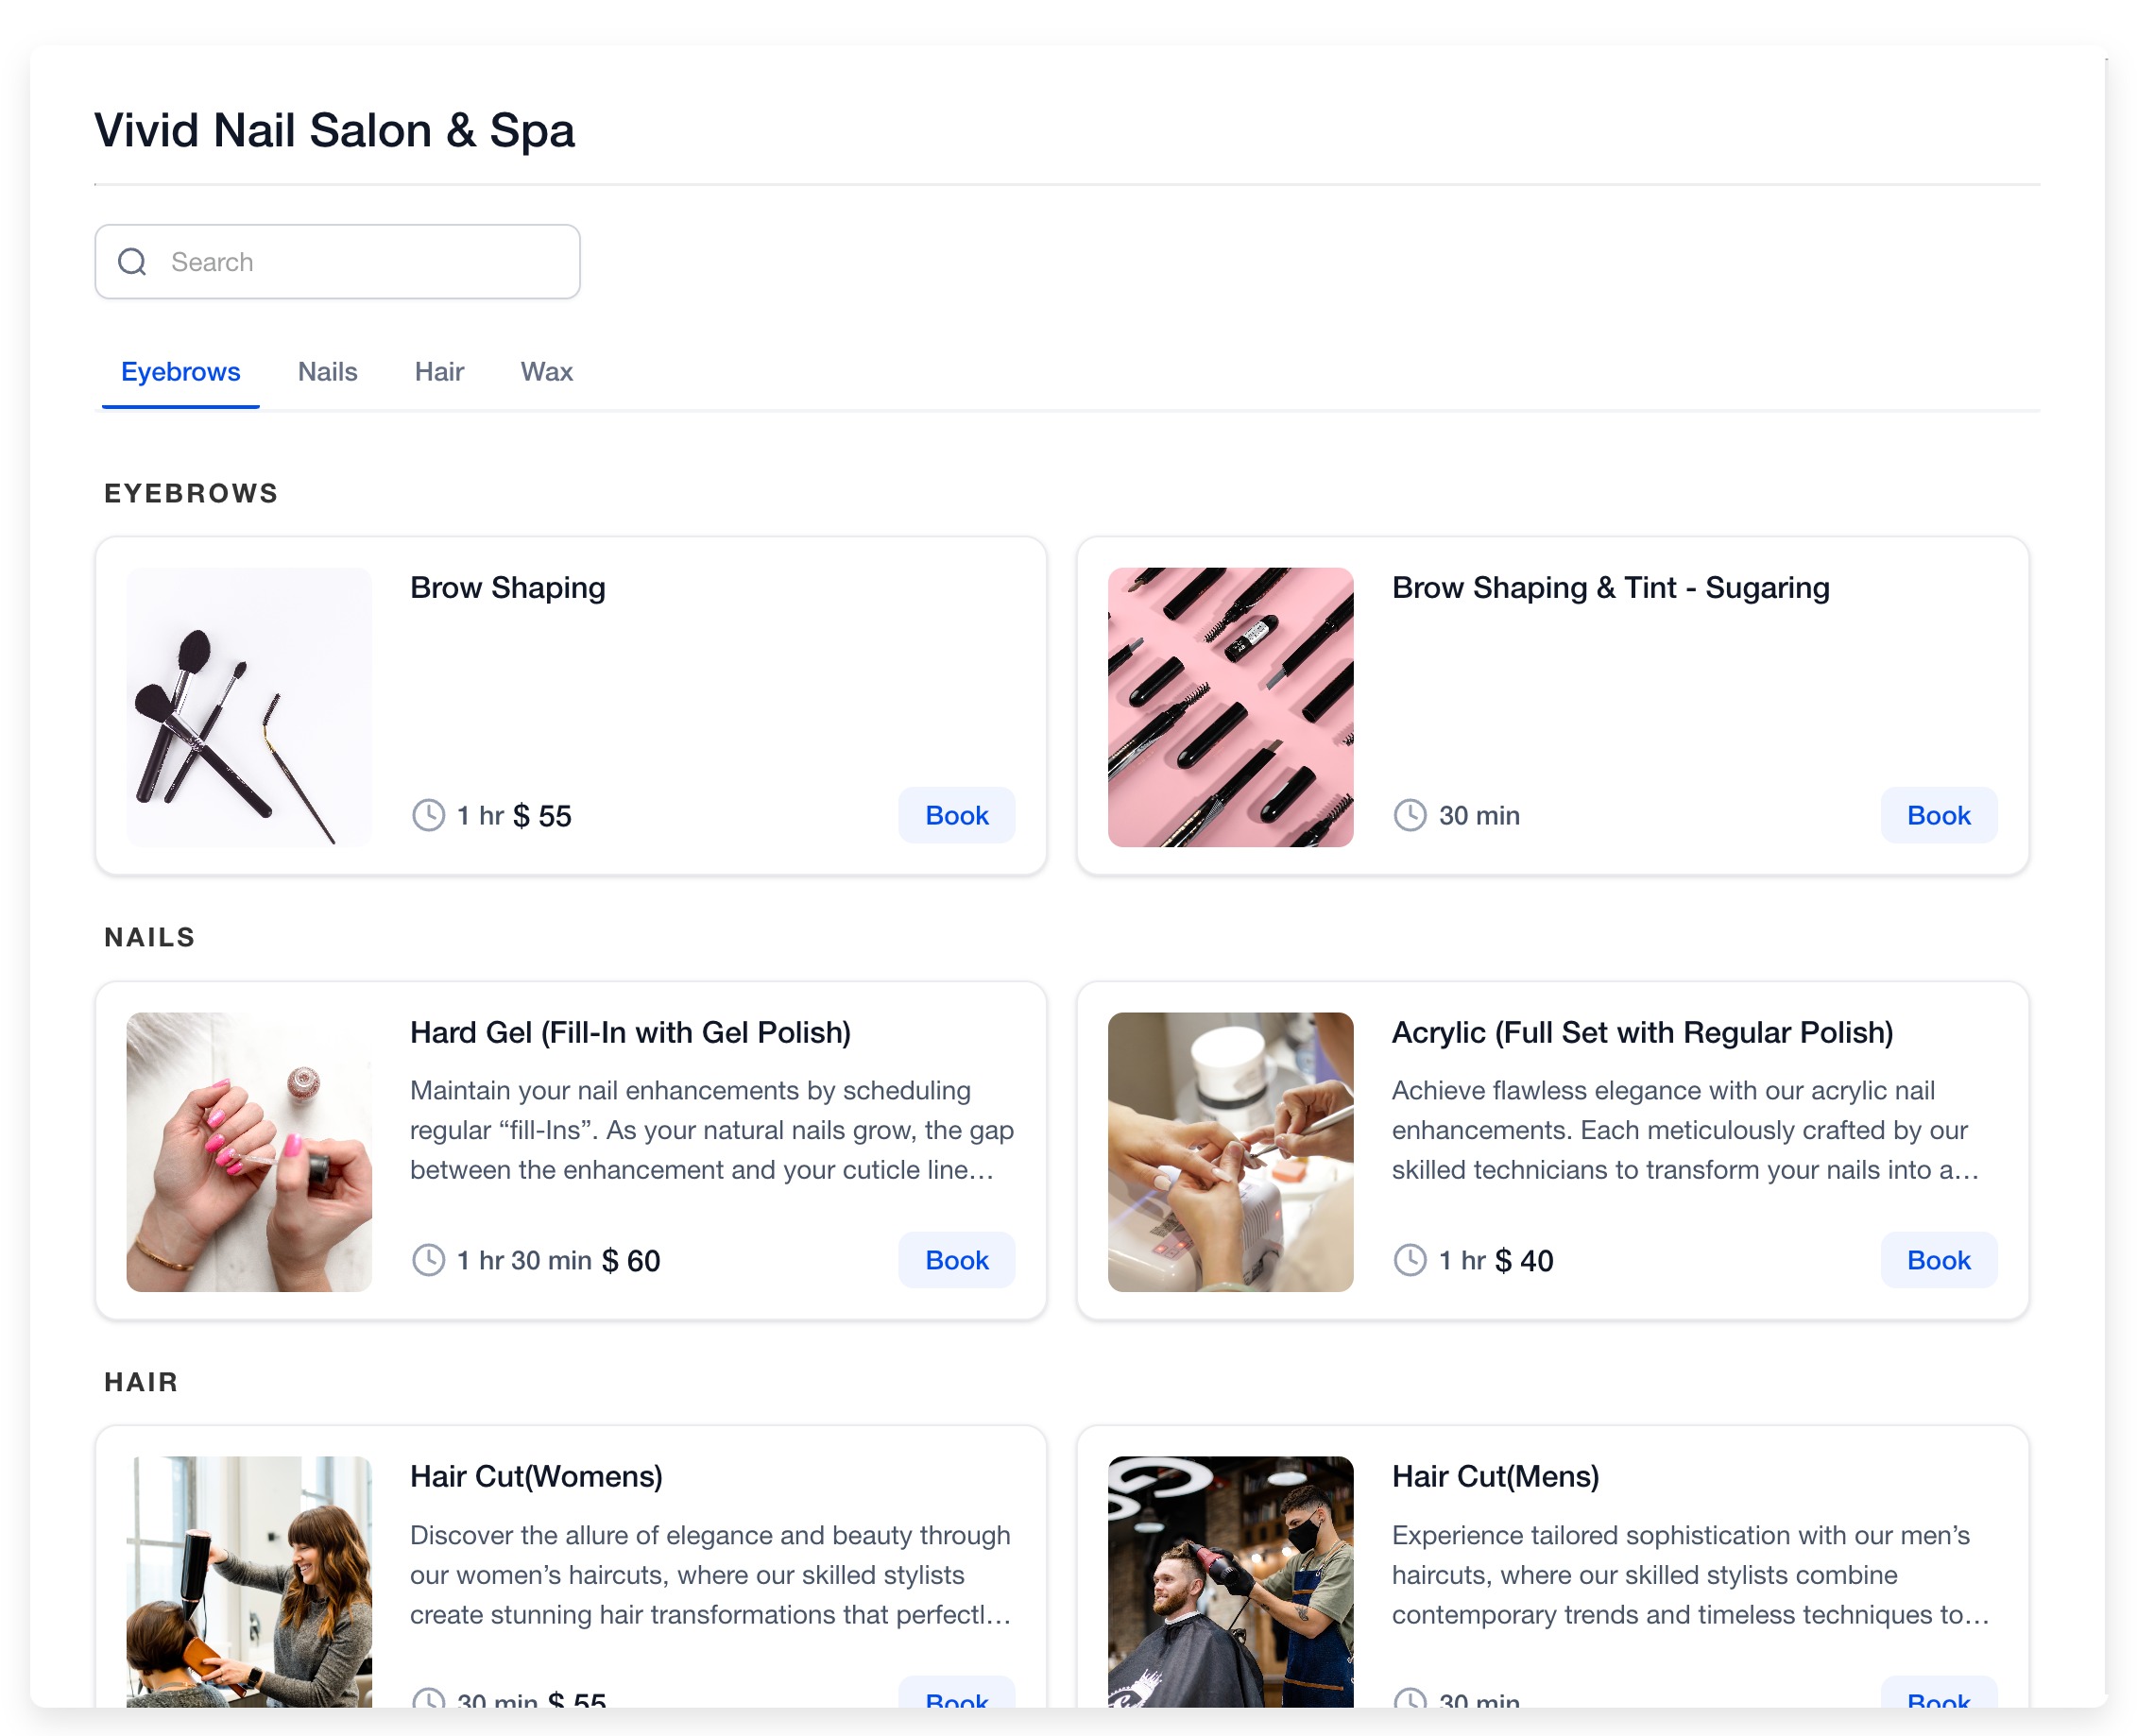
A Service Menu is a branded interface that aggregates services from individual service calendars. When a client visits the menu they can select one or more services and complete a single booking flow. Each listed service still uses its own calendar, so availability, staff assignment, pricing and duration remain independent.
The feature lives under the Calendars section of the platform. After activation, you create a menu, choose which calendars appear, and arrange their order. The menu receives its own URL slug and can include a custom form for extra client information.
03How businesses use service menus
- Hair salon. The salon creates a separate calendar for cuts, color, and styling. Using a Service Menu, they display all three on one page so a client can book a cut and color together without leaving the site.
- Dental practice. Each dental service, cleaning, orthodontics, whitening, gets its own calendar. The practice builds a Service Menu so patients can select multiple procedures in a single appointment request.
- Fitness studio. The studio sets up calendars for yoga, pilates, and personal training. A Service Menu lets members choose any combination of classes to schedule in one booking session.
04Before you start
- Create a Service Calendar for each service you plan to list.
- Create a Calendar Group and assign the service calendars to it.
05How to set up and use service menus in HighLevel
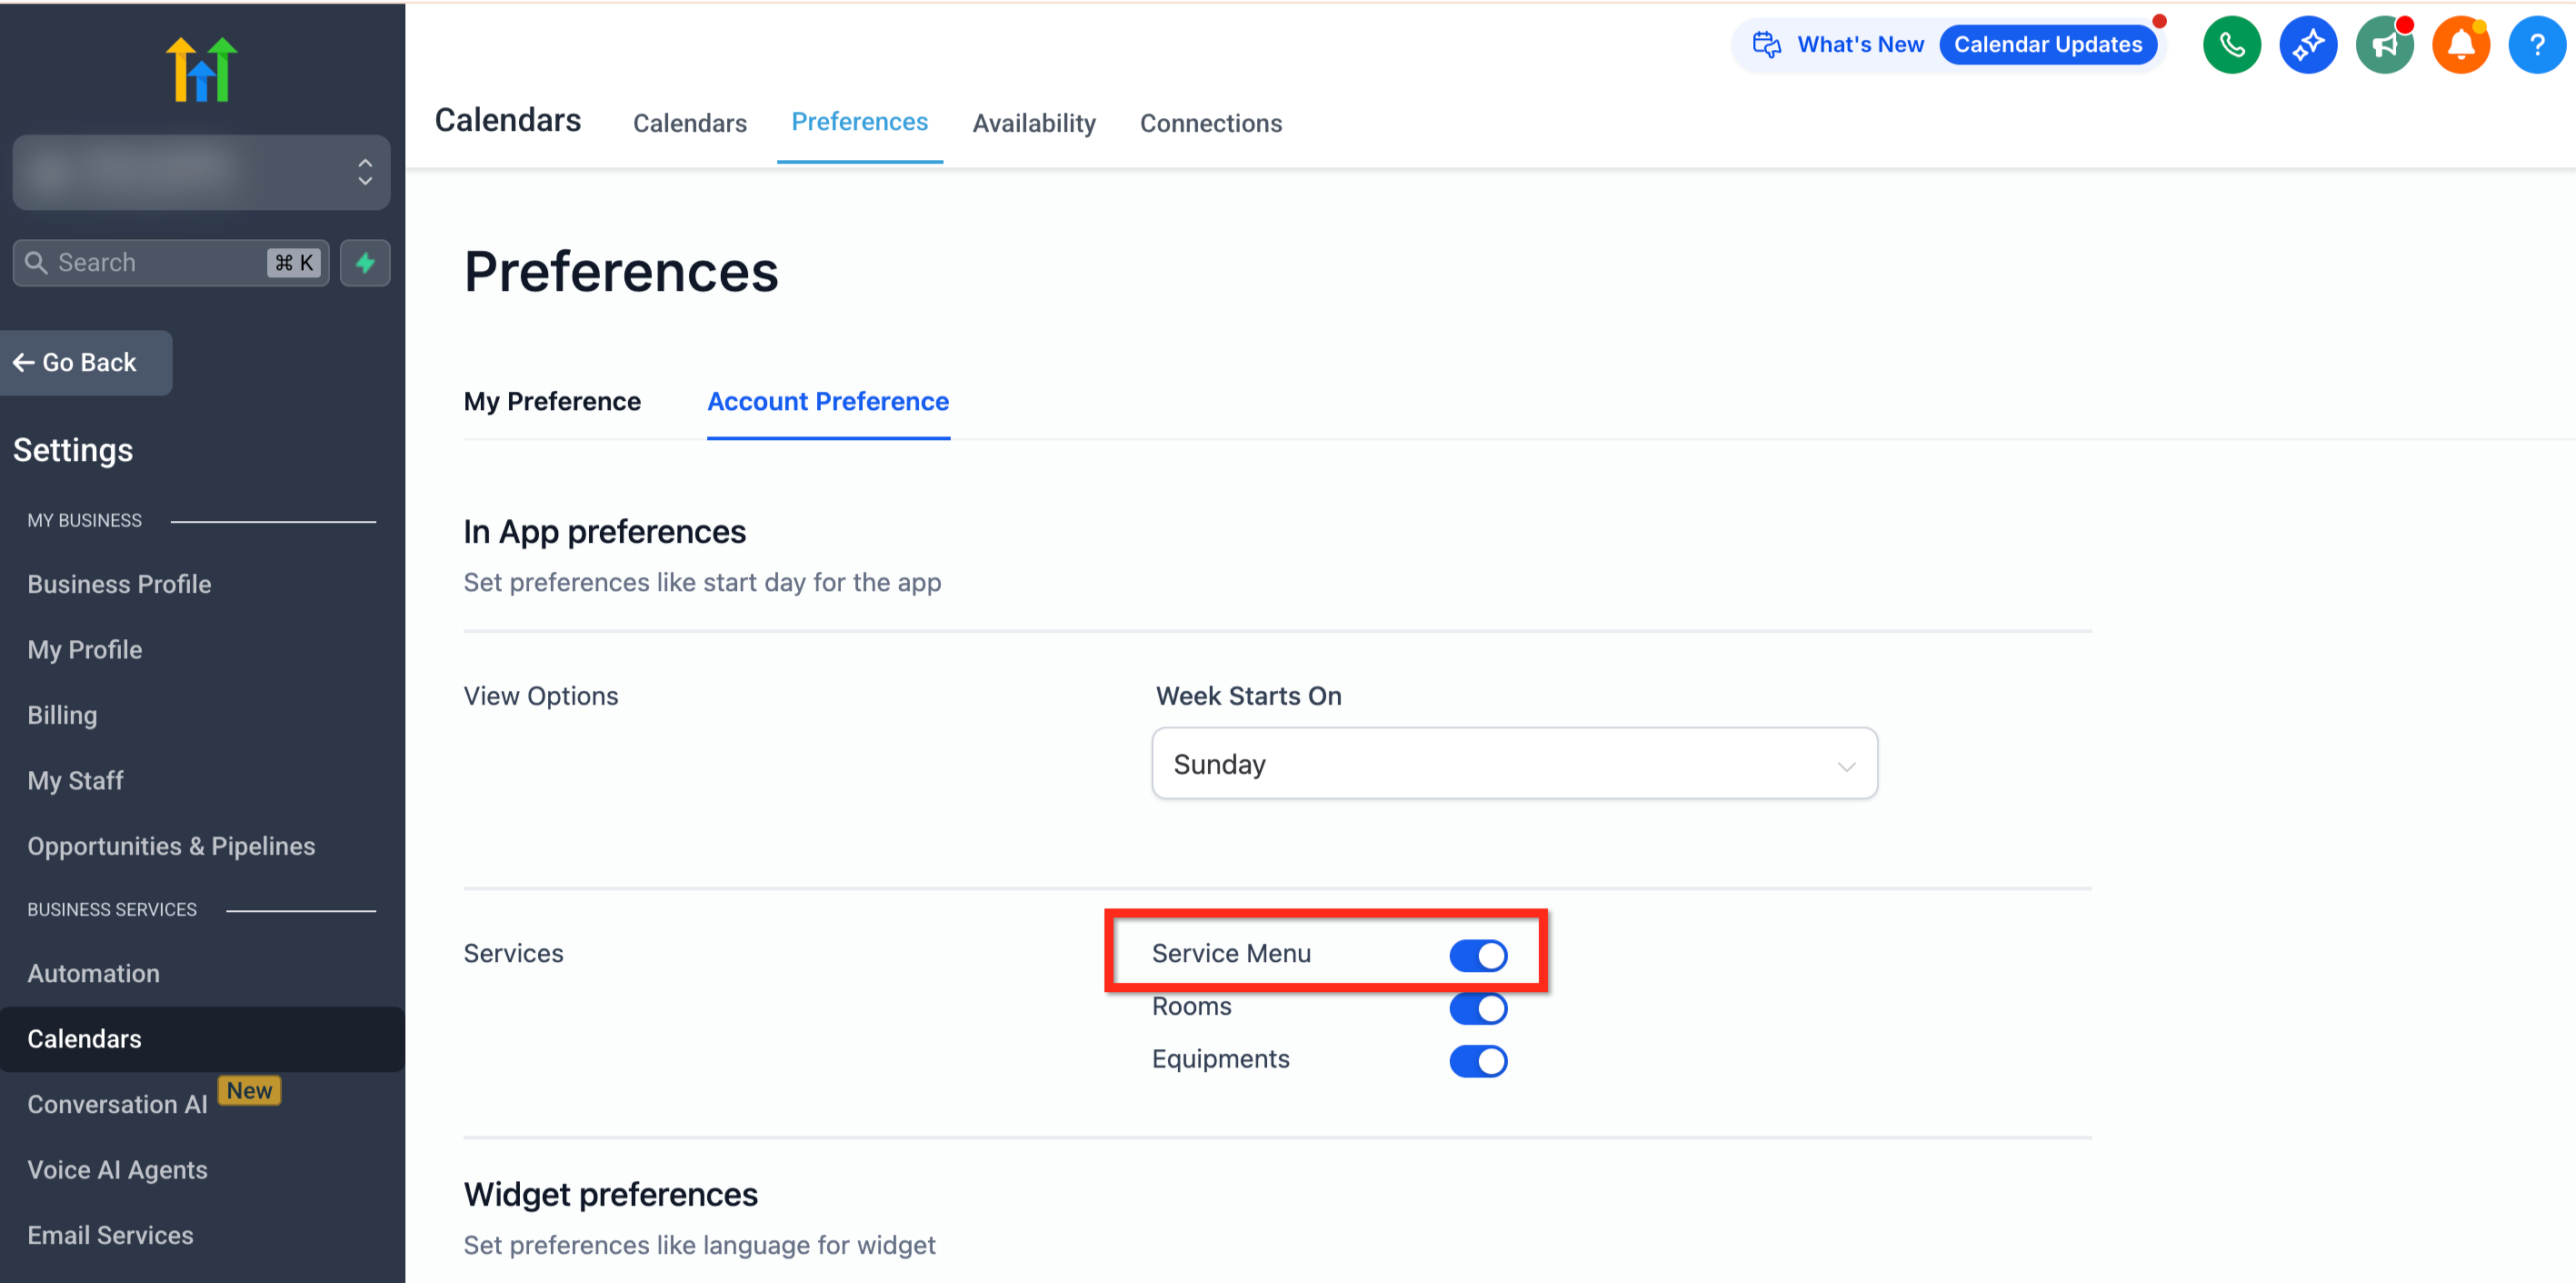
Enable the Service Menu feature
- Open the left side navigation and click Calendars.
- Select Calendar Settings and open the Preferences tab.
- Go to the Account Preference tab under Preferences.
- Turn on the blue toggle labeled Service Menu in the Services section.
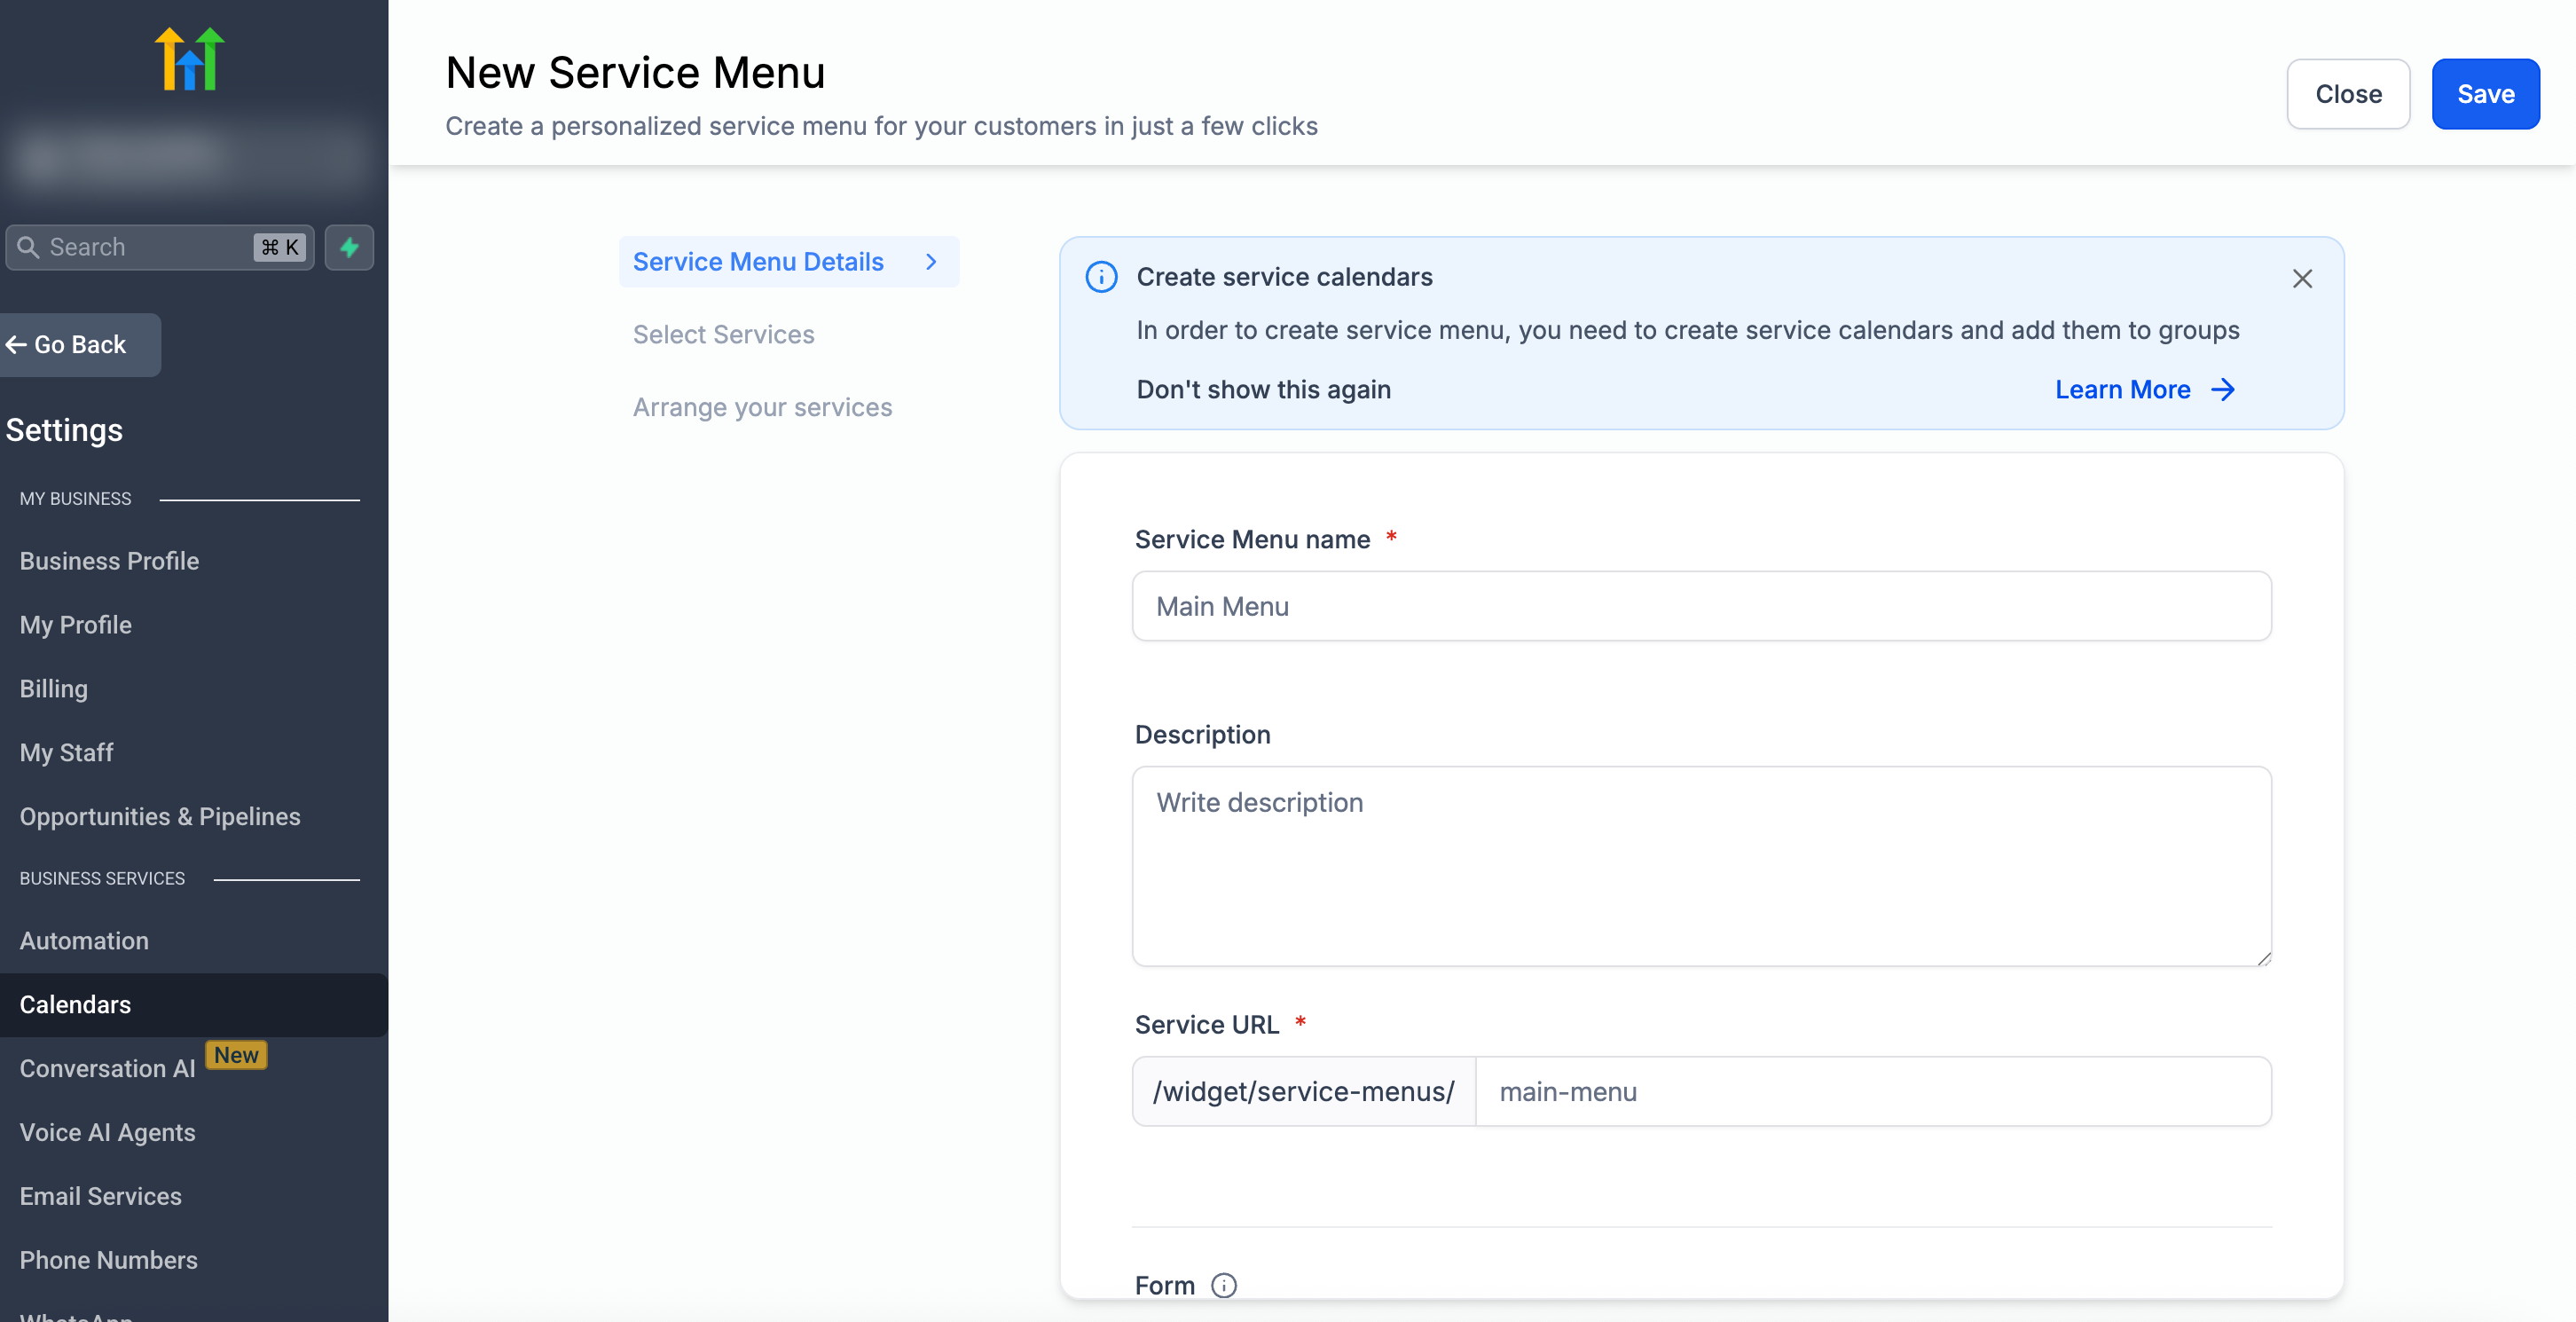
Create the Service Menu
- From the left navigation go to Settings > Calendars.
- Open the Service Menu tab under Calendar Settings.
- Click the blue Create Service Menu button at the top right.
- Enter a name for the menu.
- Add an optional description for clients.
- Fill in the slug URL for the menu.
- Choose a custom form if additional client fields are required.
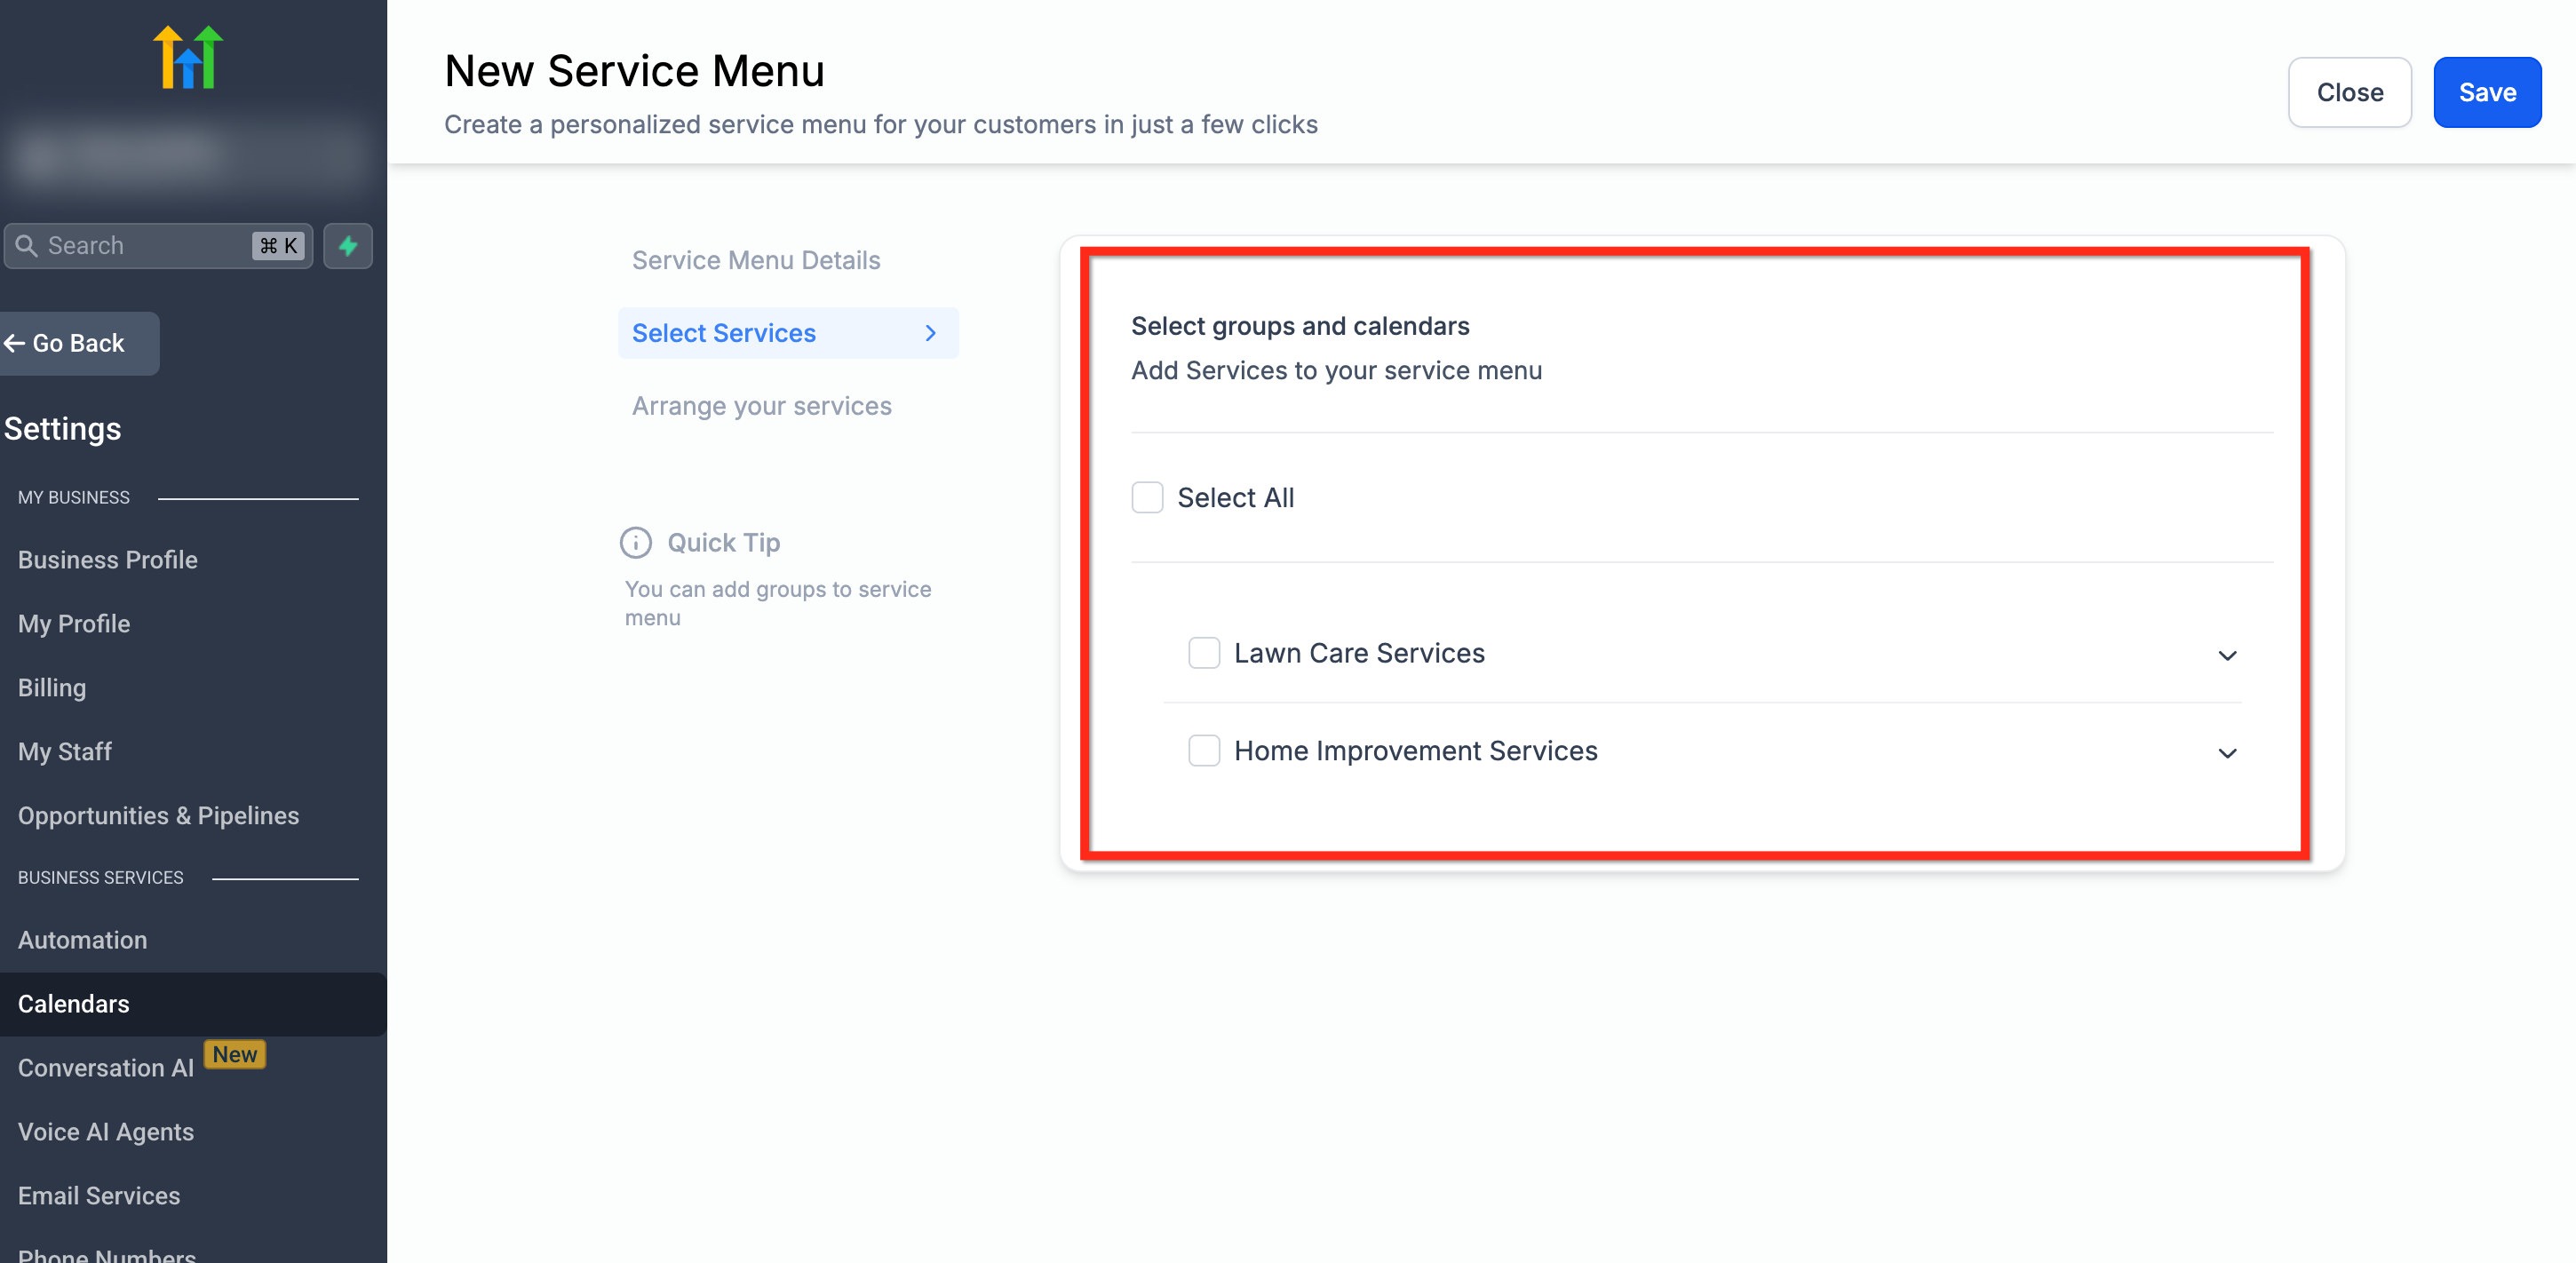
Select your Services
- In the Service Menu editor open the Select Services tab.
- Tick the checkboxes for the calendars you want to display.
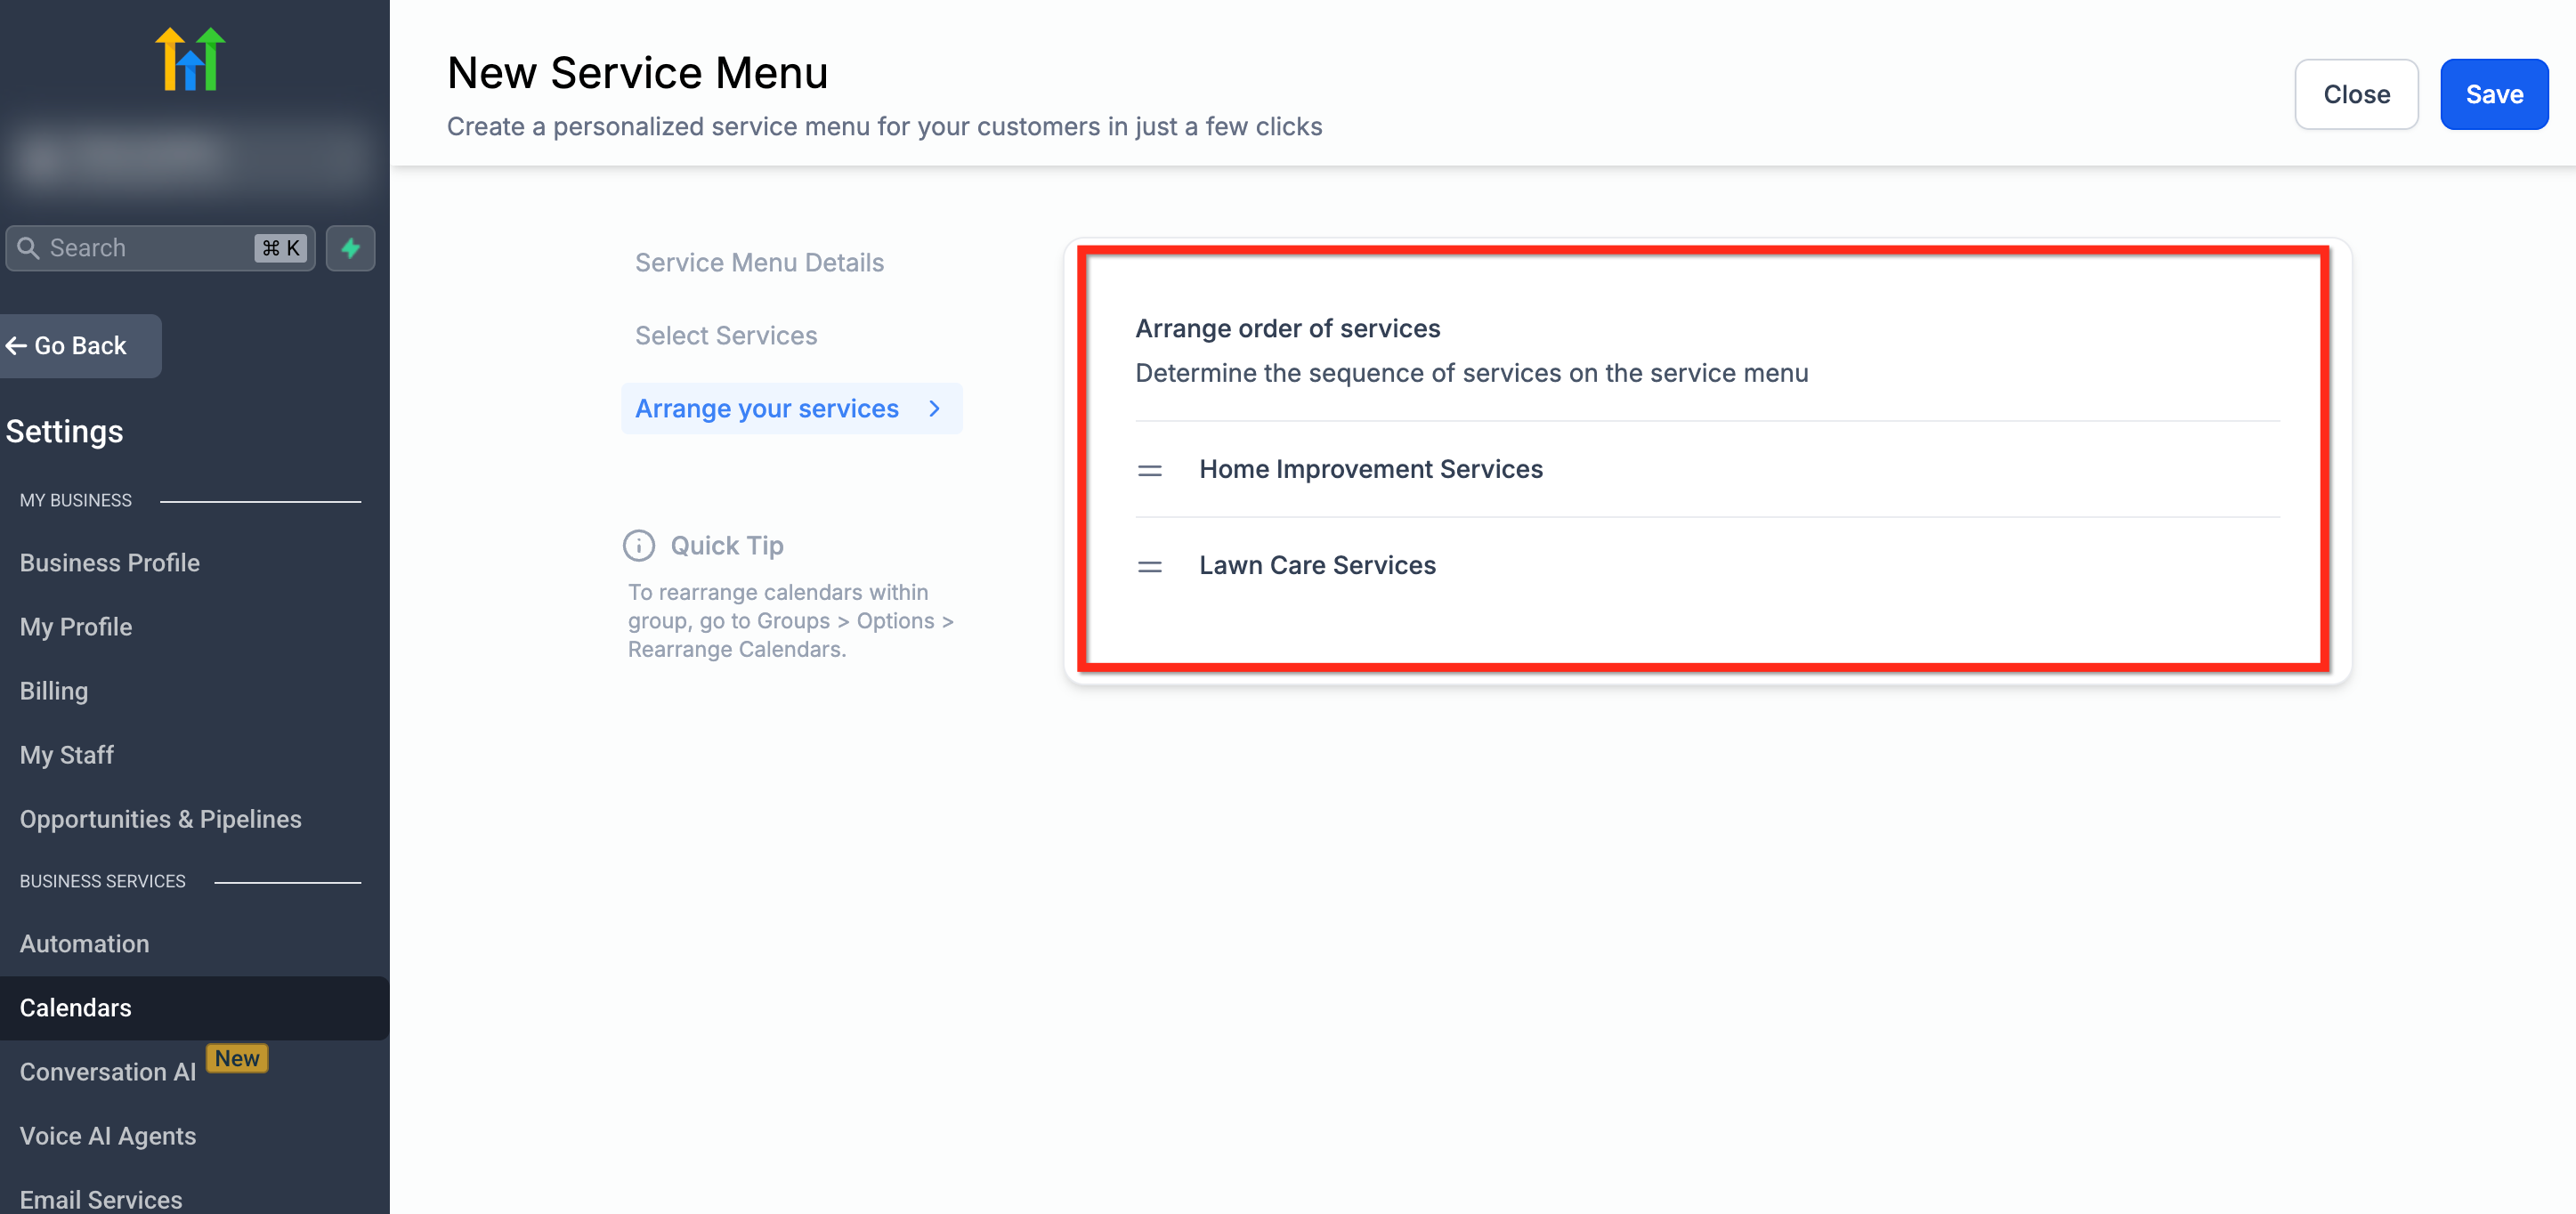
Arrange your Services
- Drag and drop services to set the desired order.
- Save the changes.
06What it looks like in HighLevel
07Settings that matter
- Service Menu (toggle). Activates the ability to build and display a Service Menu.
- Name. Sets the title that appears on the Service Menu page.
- Description. Provides an optional summary shown to clients.
- Slug URL. Creates the custom web address for the menu.
- Form. Allows selection of a custom form to collect extra client information.
08Things to know before you rely on it
- Payments collected through a Service Menu are limited to Stripe.
- Cards are not saved for future use when booking via the Service Menu.
- In app payments are not supported for Service Menu bookings.
- Coupon codes cannot be applied at checkout.
09How it connects to the rest of HighLevel
- Learn how to create Service Calendars that power a Service Menu Create Service Calendars
- Set up Calendar Groups to organize services for a menu Group Calendar Overview
- Review pricing and plan options for access to Services (v2) HighLevel pricing
Michael's take

Wondering if a single page can handle all the services you sell? Service menus let you pull separate calendars together so a client sees everything at once, then books the exact appointment they need. It’s a clean way to keep each service’s settings separate while offering a unified booking flow.
If I were setting up a new boutique, I’d enable the menu, add each treatment’s calendar, and then drag them into the order I want customers to see. Test the flow on a phone to make sure the mobile layout feels smooth before you publicize the link.