
01Rooms, explained
Rooms are assignable resources used to control scheduling, availability, and resource management within service calendars. When a room is linked to a calendar, its availability is considered in the booking logic, helping prevent double booking.
Rooms can also be tied to equipment, users or teams, and they inherit the calendar’s availability settings. This makes it easy to manage who can use a room, what tools are needed and when the space is open, keeping the scheduling process smooth for appointment based businesses.
02How businesses use rooms
- Prevent double booking. A clinic links each treatment room to its service calendar. When a client books a slot, HighLevel checks the room’s availability before confirming the appointment, helping prevent scheduling conflicts.
- Manage equipment alongside spaces. A car service shop creates rooms for each service bay and attaches the required lift equipment. The system ensures both the bay and the equipment are available before confirming a repair appointment.
- Control team access. A consulting firm assigns specific consultants to certain rooms. Only those users receive notifications and can schedule appointments in the rooms they are assigned to.
03The numbers and rules that matter
- No official limit on the number of Rooms that can be created.
04How to set up and use rooms in HighLevel
Enable rooms
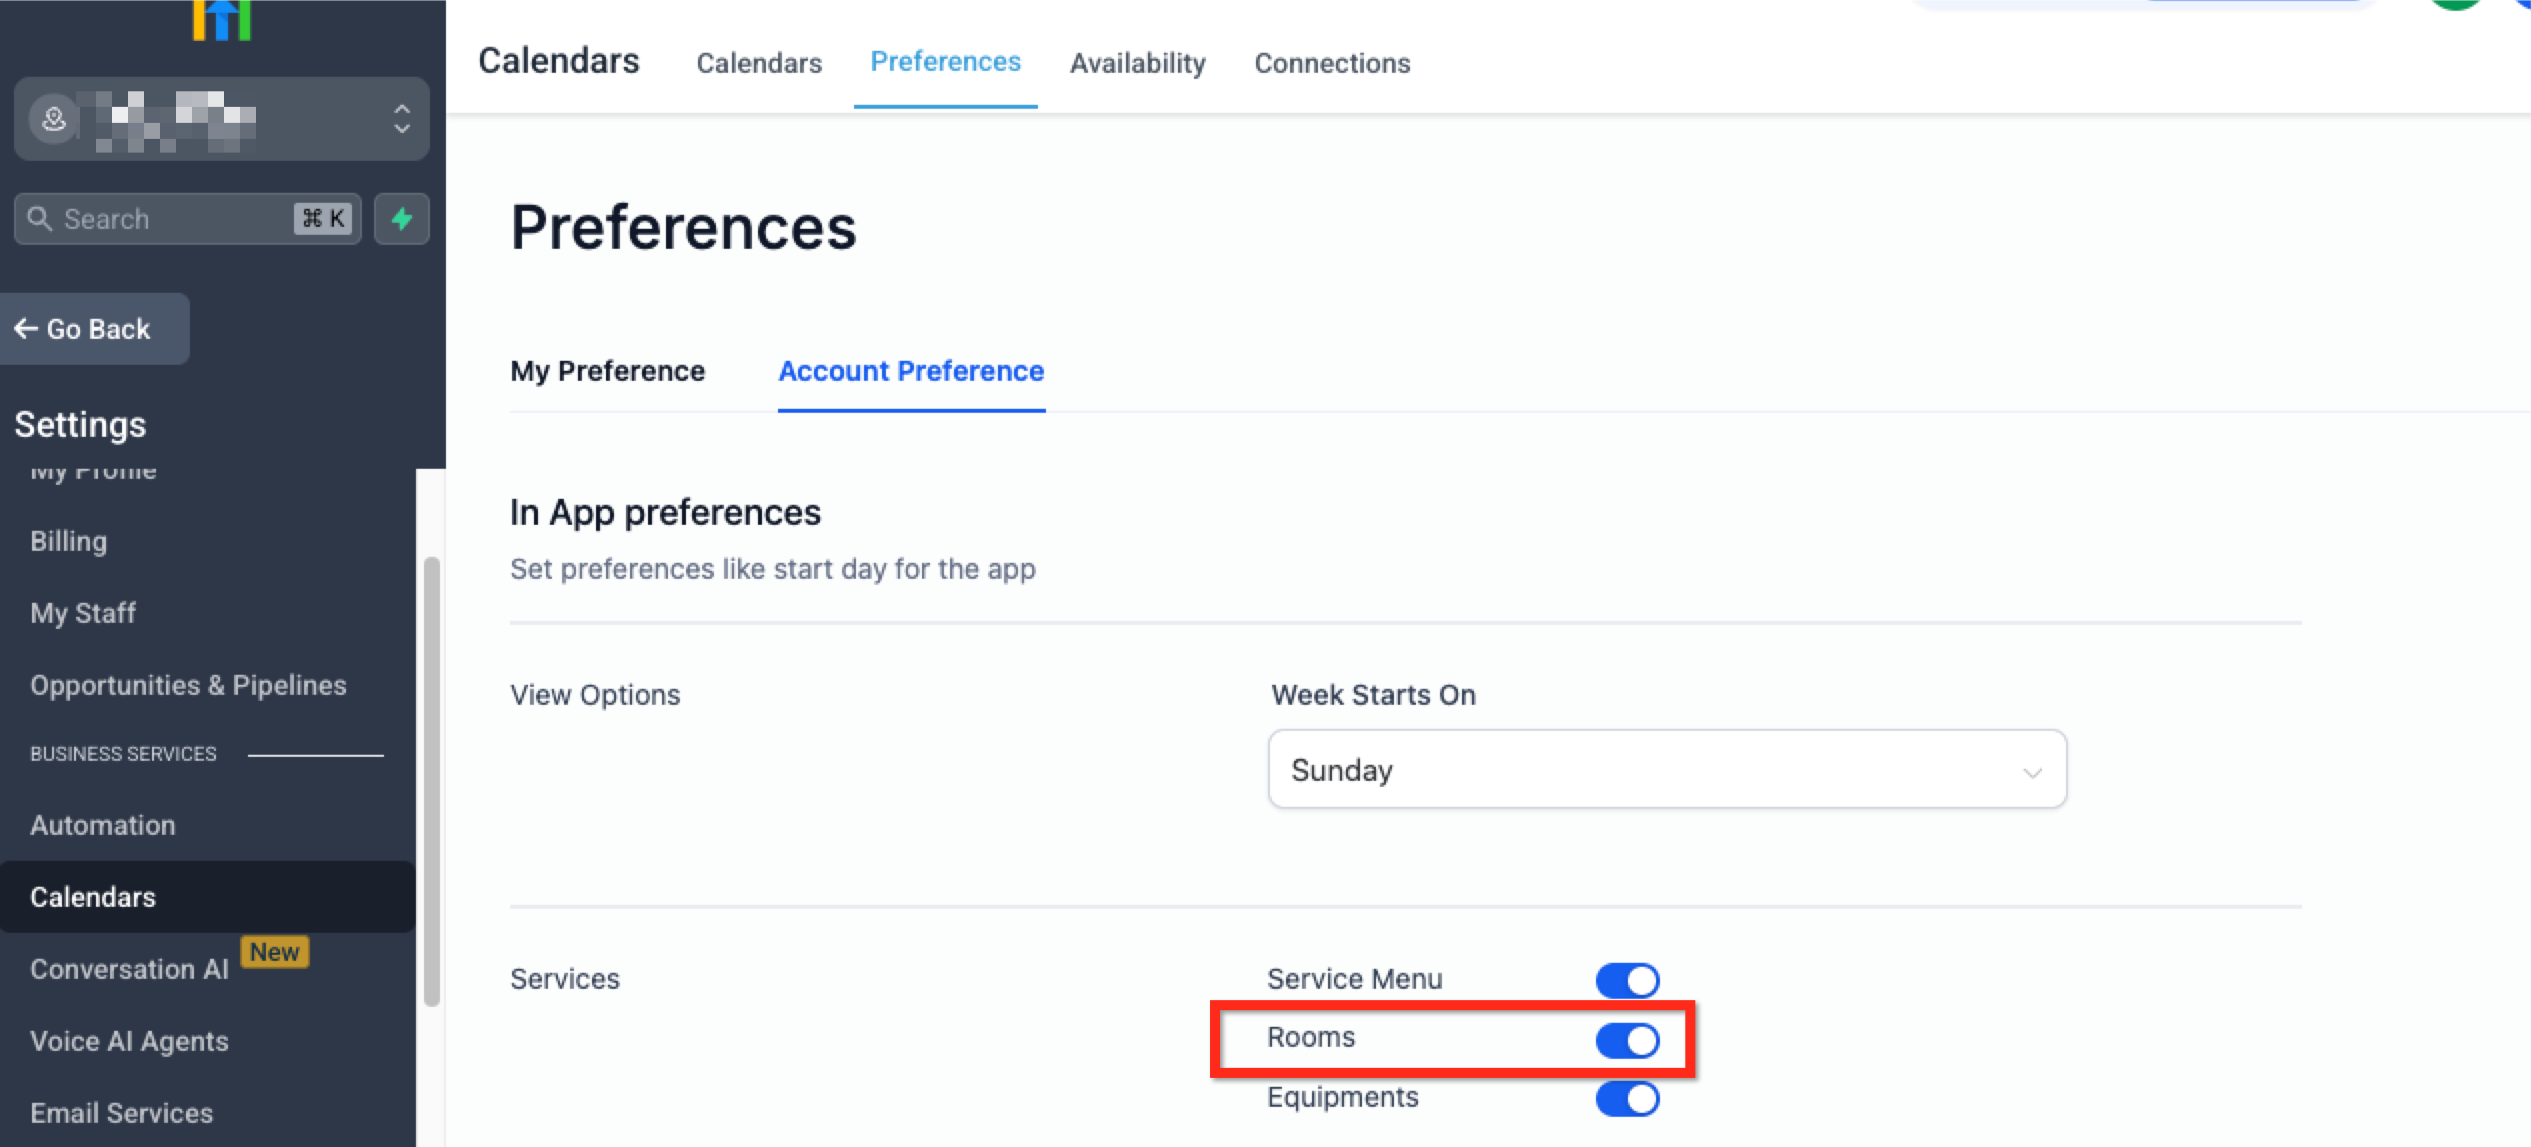
- Navigate to Settings > Calendar Settings in the primary navigation bar.
- Select the Preferences tab in the secondary navigation ribbon.
- Select the Account Preference tab located under Preferences.
- Turn on the blue Rooms toggle located in the Services section.
- Click the blue button labelled Save Preferences in the bottom right corner.
Create a room
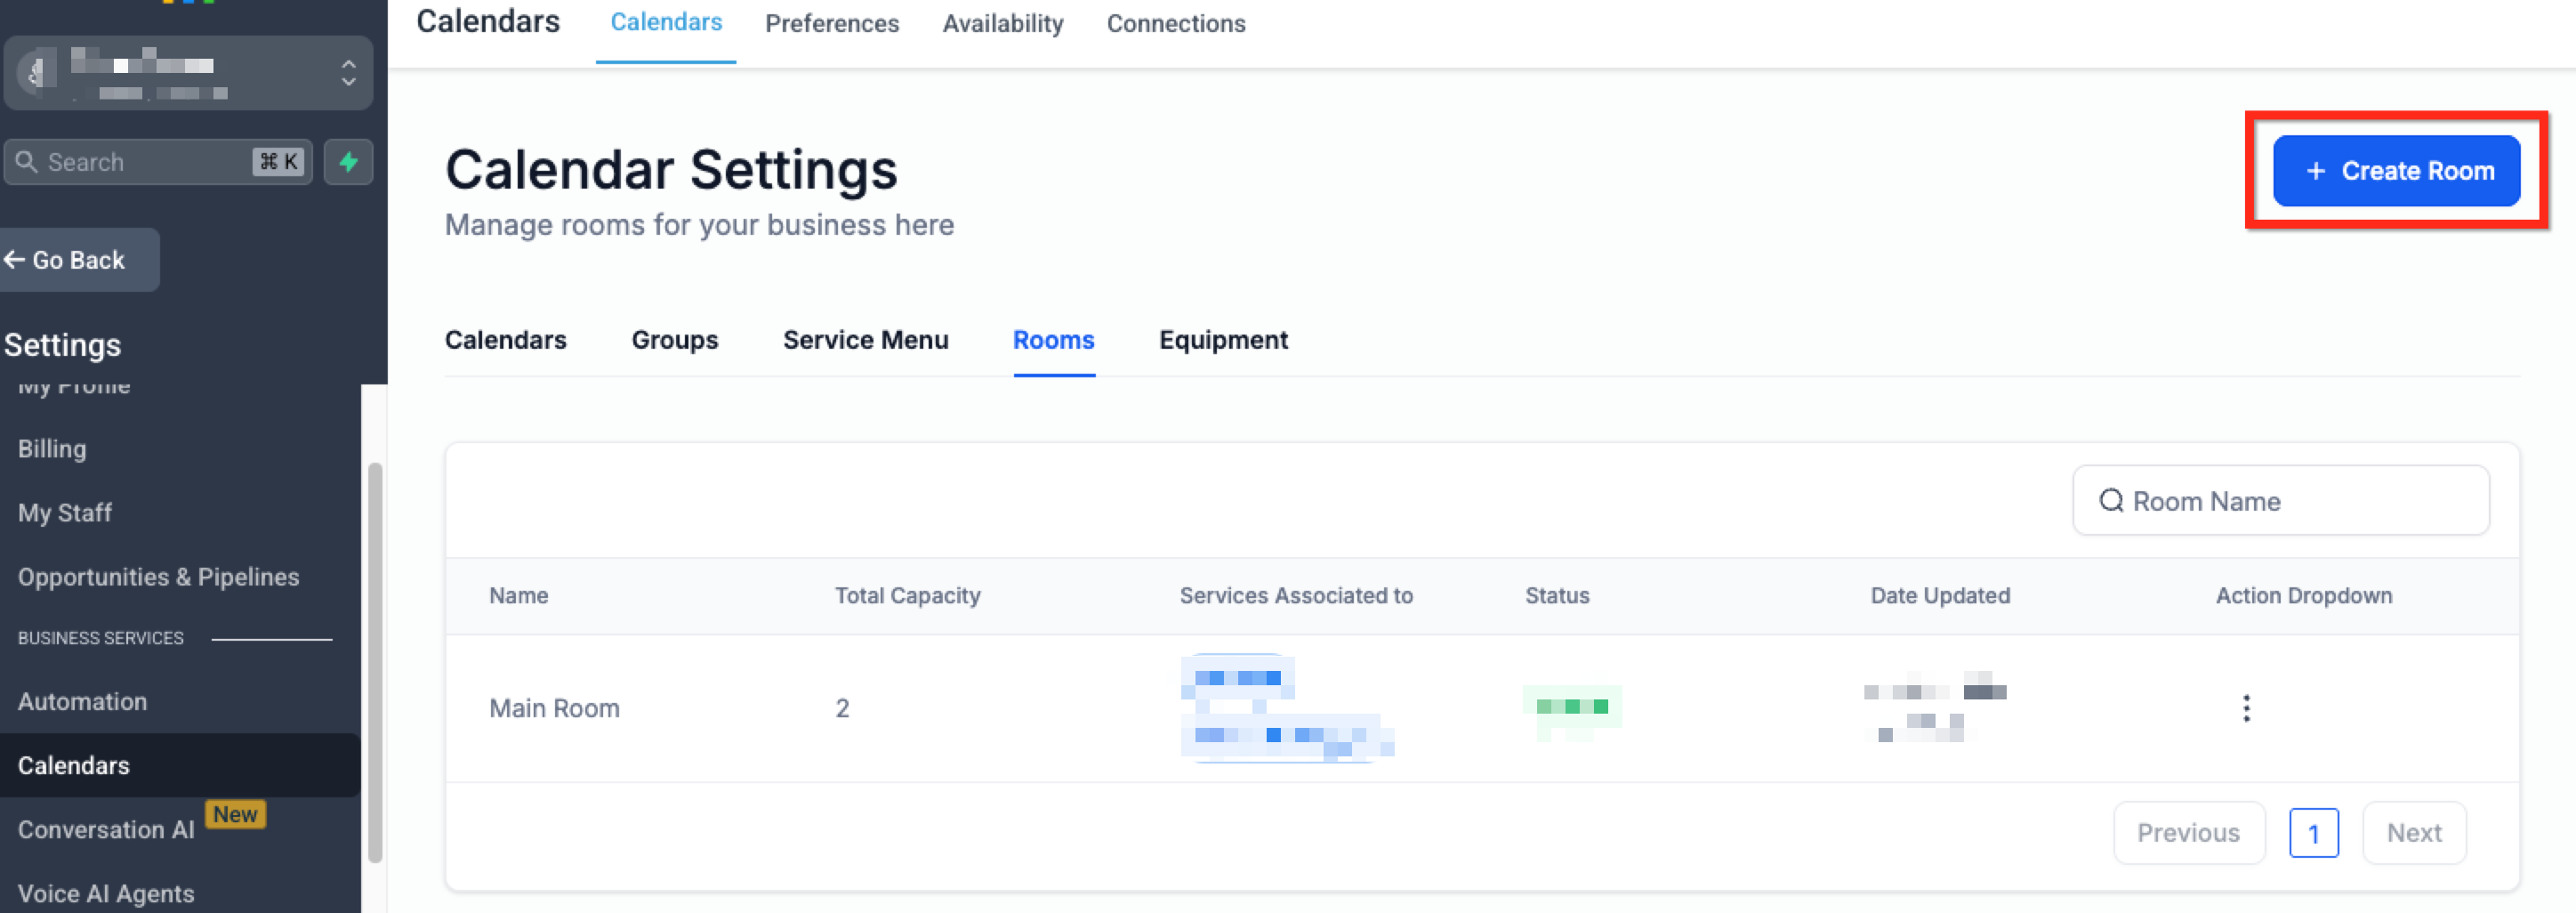
- Return to the Calendars tab in the secondary navigation ribbon of Calendar Settings.
- Select the Rooms tab located under Calendar Settings.
- Click the blue button labeled + Create Room in the top right corner.
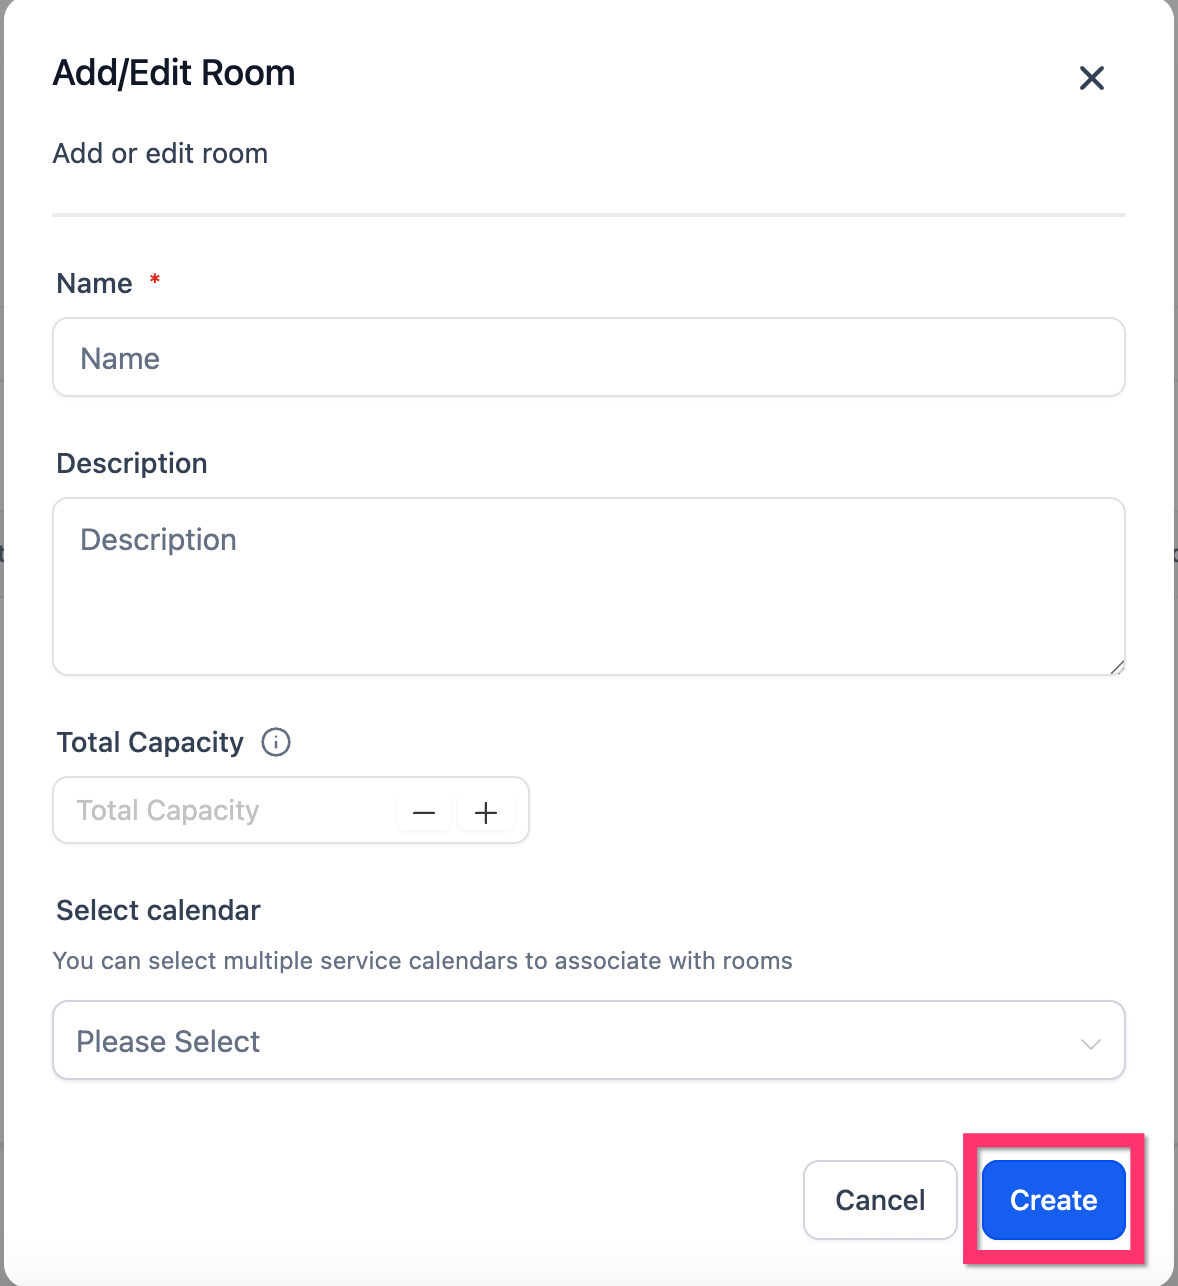
- Enter a Name, Description, Total Capacity and select the calendars you wish to associate.
- Click Create to finish the room setup.
Edit or delete a room
- Navigate to Settings > Calendar Settings.
- Select the Rooms tab.
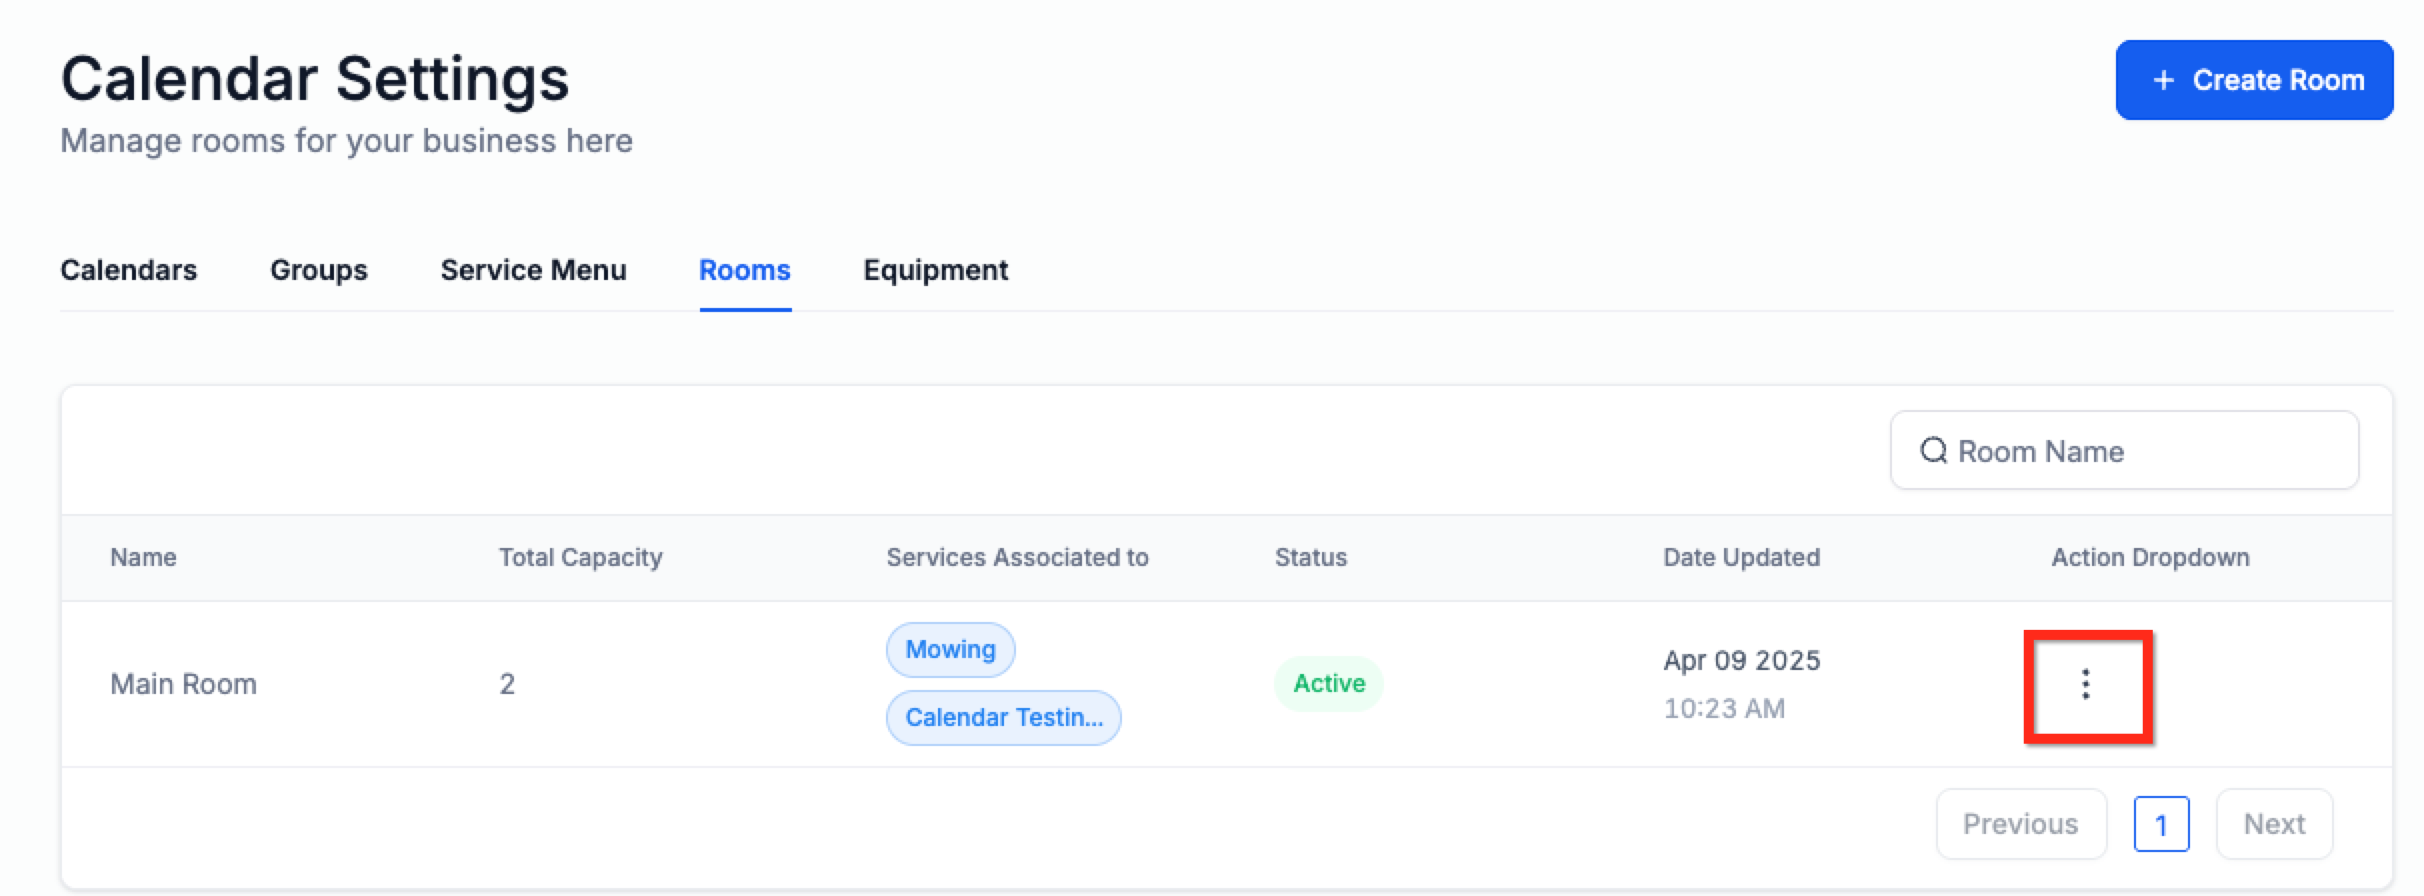
- Click the 3 Dots icon next to the desired room.
- Choose Edit to modify details or Delete to remove the room.
- Make changes and click the blue button labelled Save.
05What it looks like in HighLevel
06Settings that matter
- Rooms toggle. Enables the Rooms feature so you can create and manage assignable resources.
- Name field. A clear label that identifies the room, such as “Consultation Room 2”.
- Description field. Optional notes that explain the room’s intended use.
- Total Capacity field. Sets the maximum number of appointments that can occur in the room at the same time.
- Select Calendar field. Links the room to one or more service calendars for booking logic.
07Things to know before you rely on it
- There’s no official limit on the number of Rooms, but organizing names and assignments is strongly recommended.
- Assigning the same Room to multiple calendars can cause overlapping bookings if availability isn’t managed properly.
- If a Room isn’t linked to a calendar, double bookings may occur.
Michael's take

When a business runs multiple appointments in the same space, double bookings can become a headache for staff and clients. Rooms give you a way to keep each physical or virtual space under control so the scheduler respects its limits.
The first thing I would get right is the Rooms toggle in Settings > Calendar Settings. Turning it on enables you to start naming rooms, setting capacities and linking them to the appropriate calendars right away.