
01Who this is for
- Customer support managers can break complex help topics into dedicated agents, keeping each prompt focused.
- Clinic owners can automate patient intake, appointment booking, and billing queries using separate agents and routing.
- Ecommerce operators can capture contact details, answer product questions, and hand off order issues to a live team.
02Conversation AI Flow Builder, explained
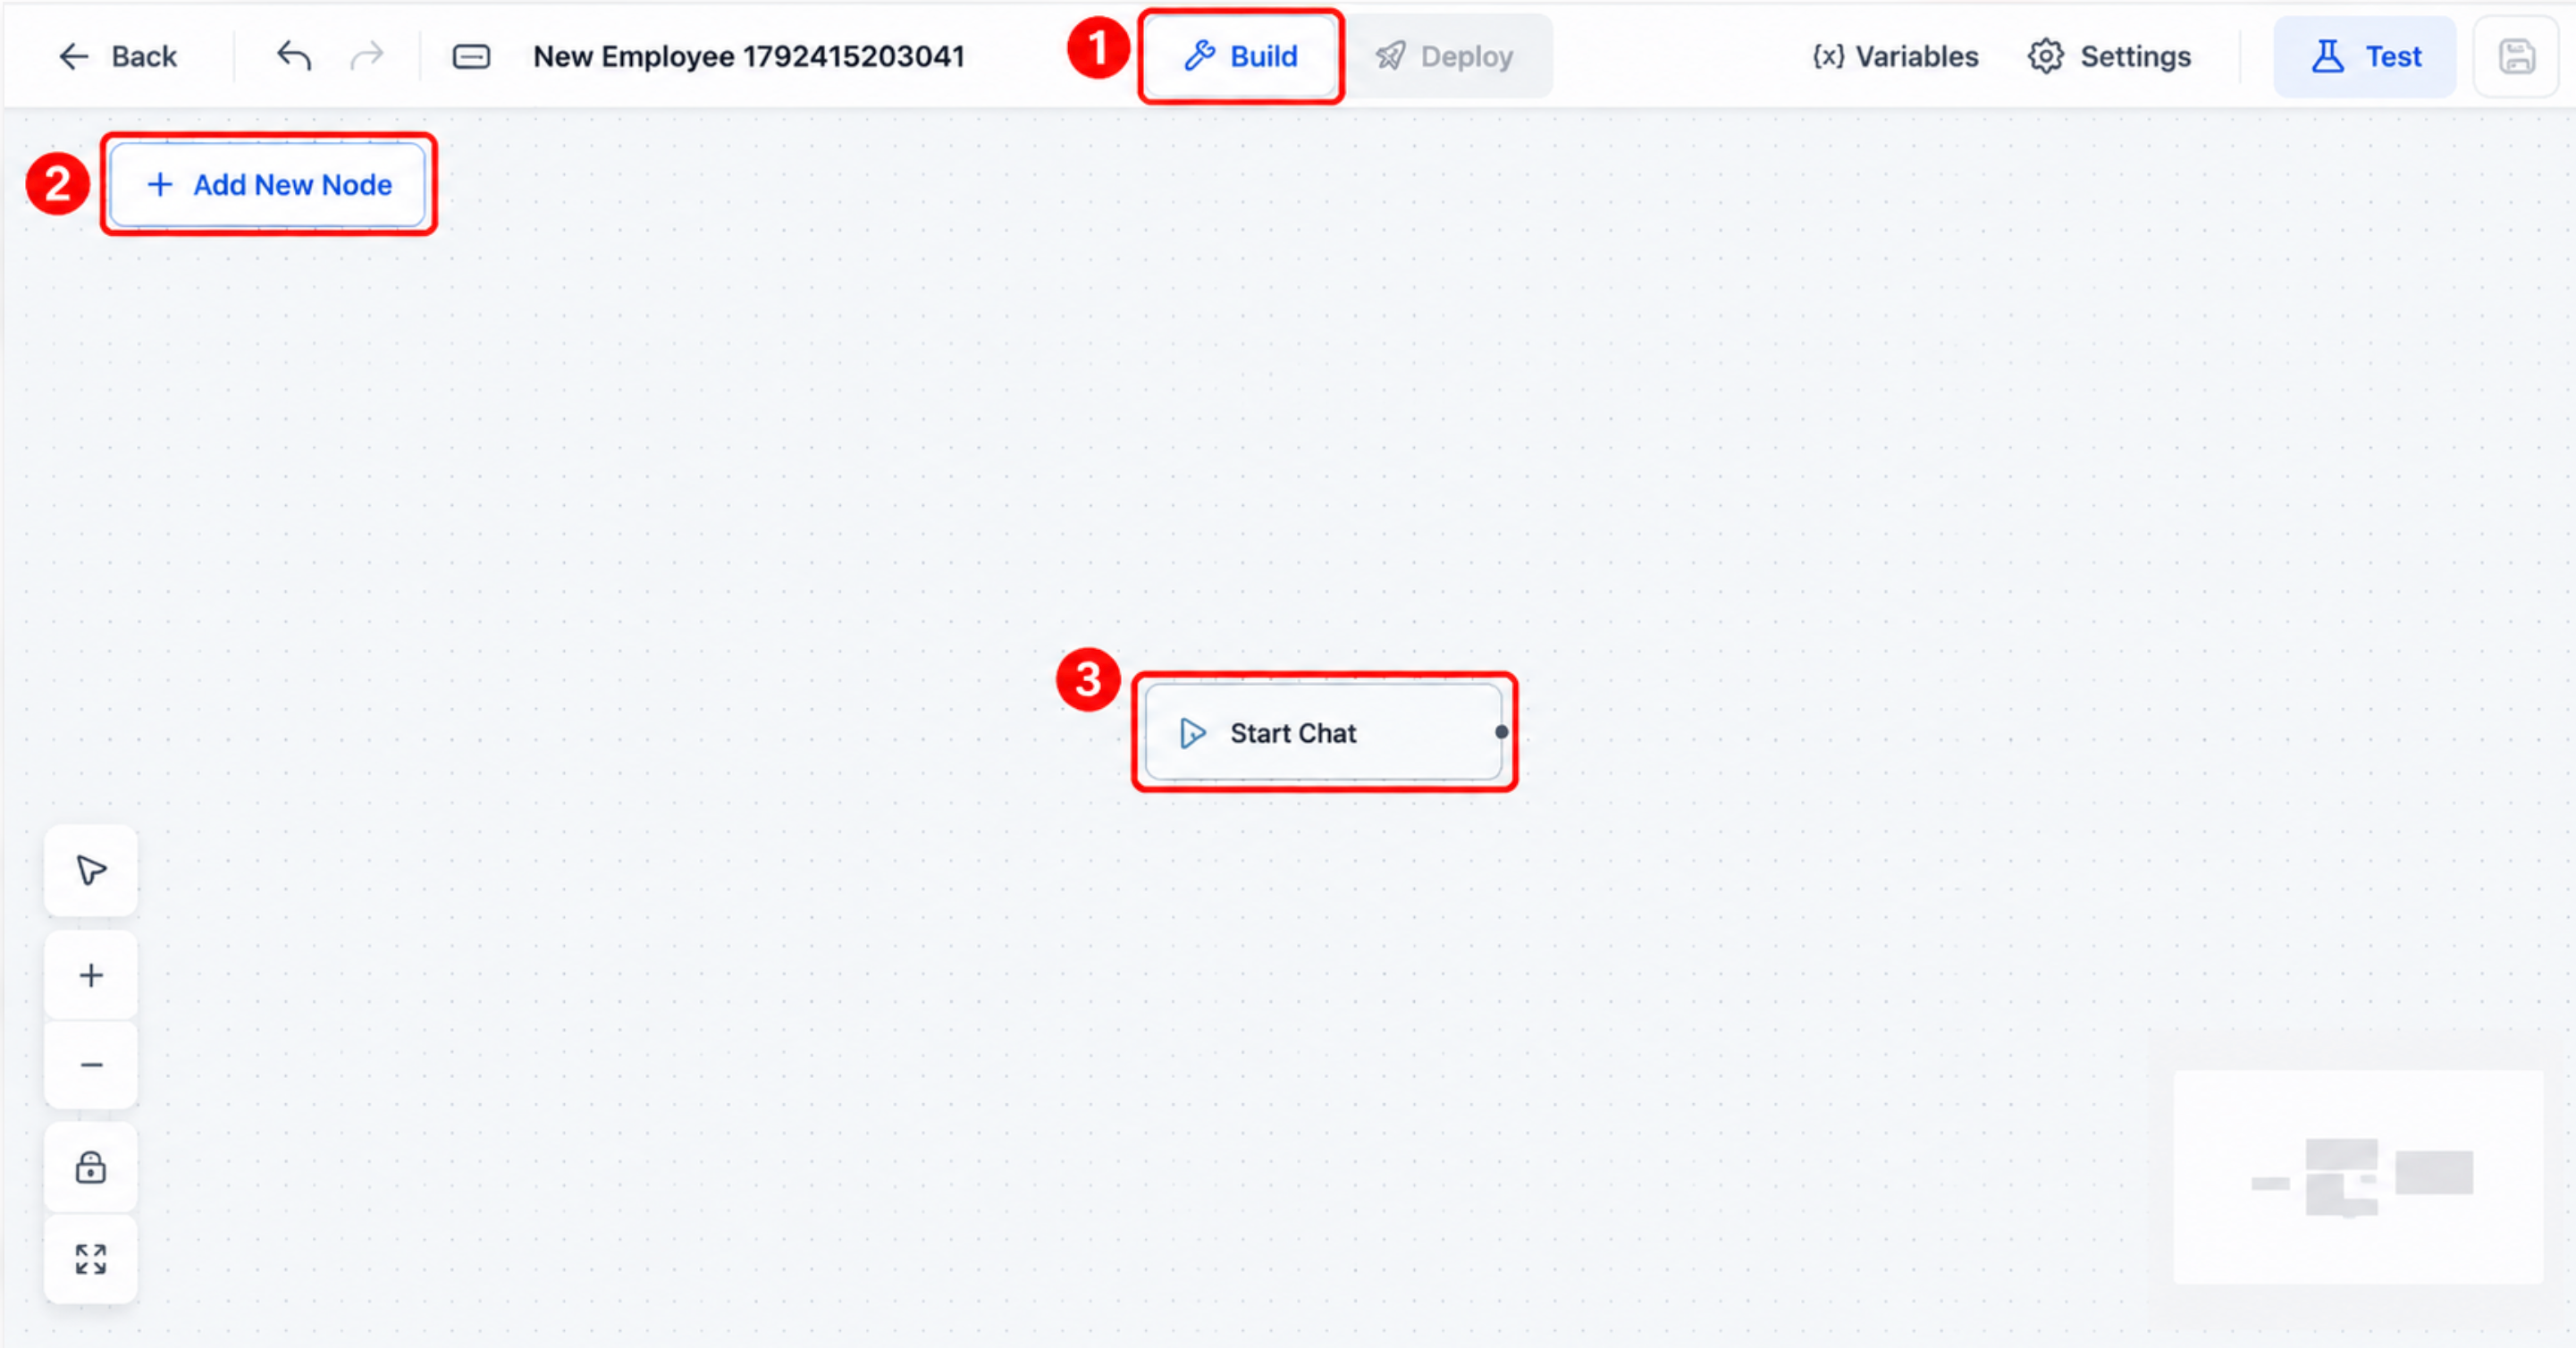
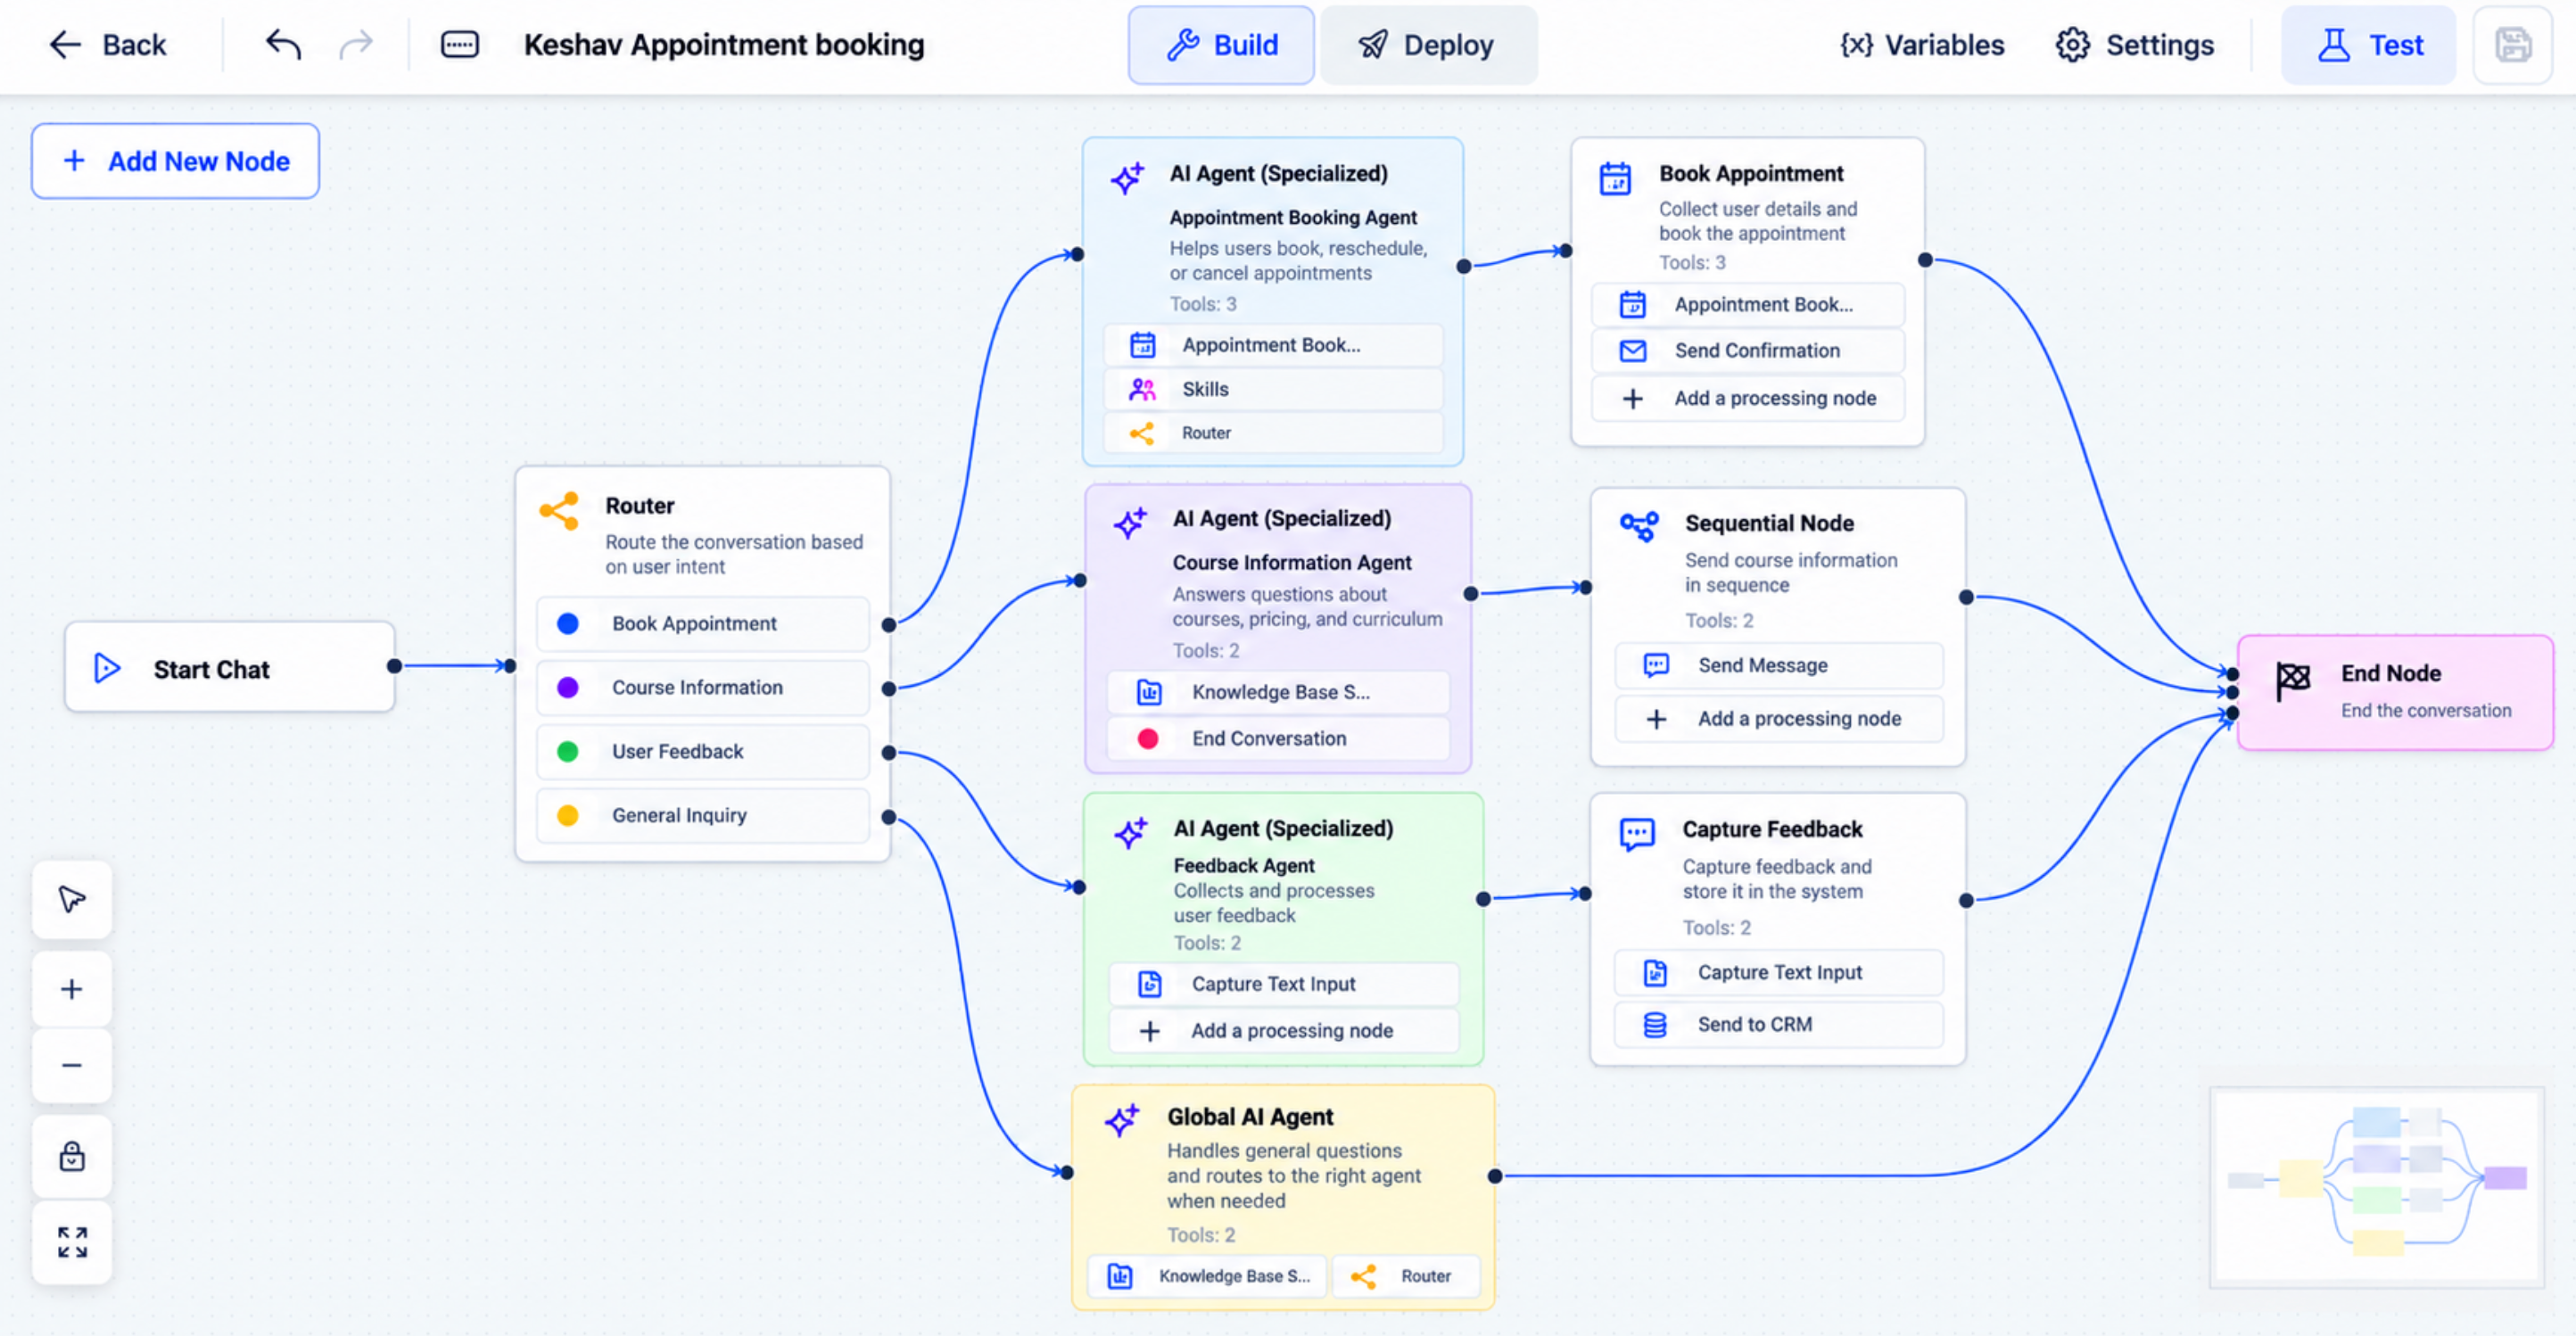
Conversation AI Flow Builder lives in the AI Agents > Conversation AI section of HighLevel. It provides a drag and drop canvas where a Start Chat node, an AI Agent node and an End Node appear by default. From there you add agents, tools, routers, waits, transfers and other nodes to shape the chat journey.
The builder is intended solely for inbound conversations. Outbound campaigns still use the older prompt based bot system. After you finish designing, the Deploy tab lets you choose inbound channels and set Working Hours, while activation occurs in Bot Settings.
03How businesses use Conversation AI Flow Builder
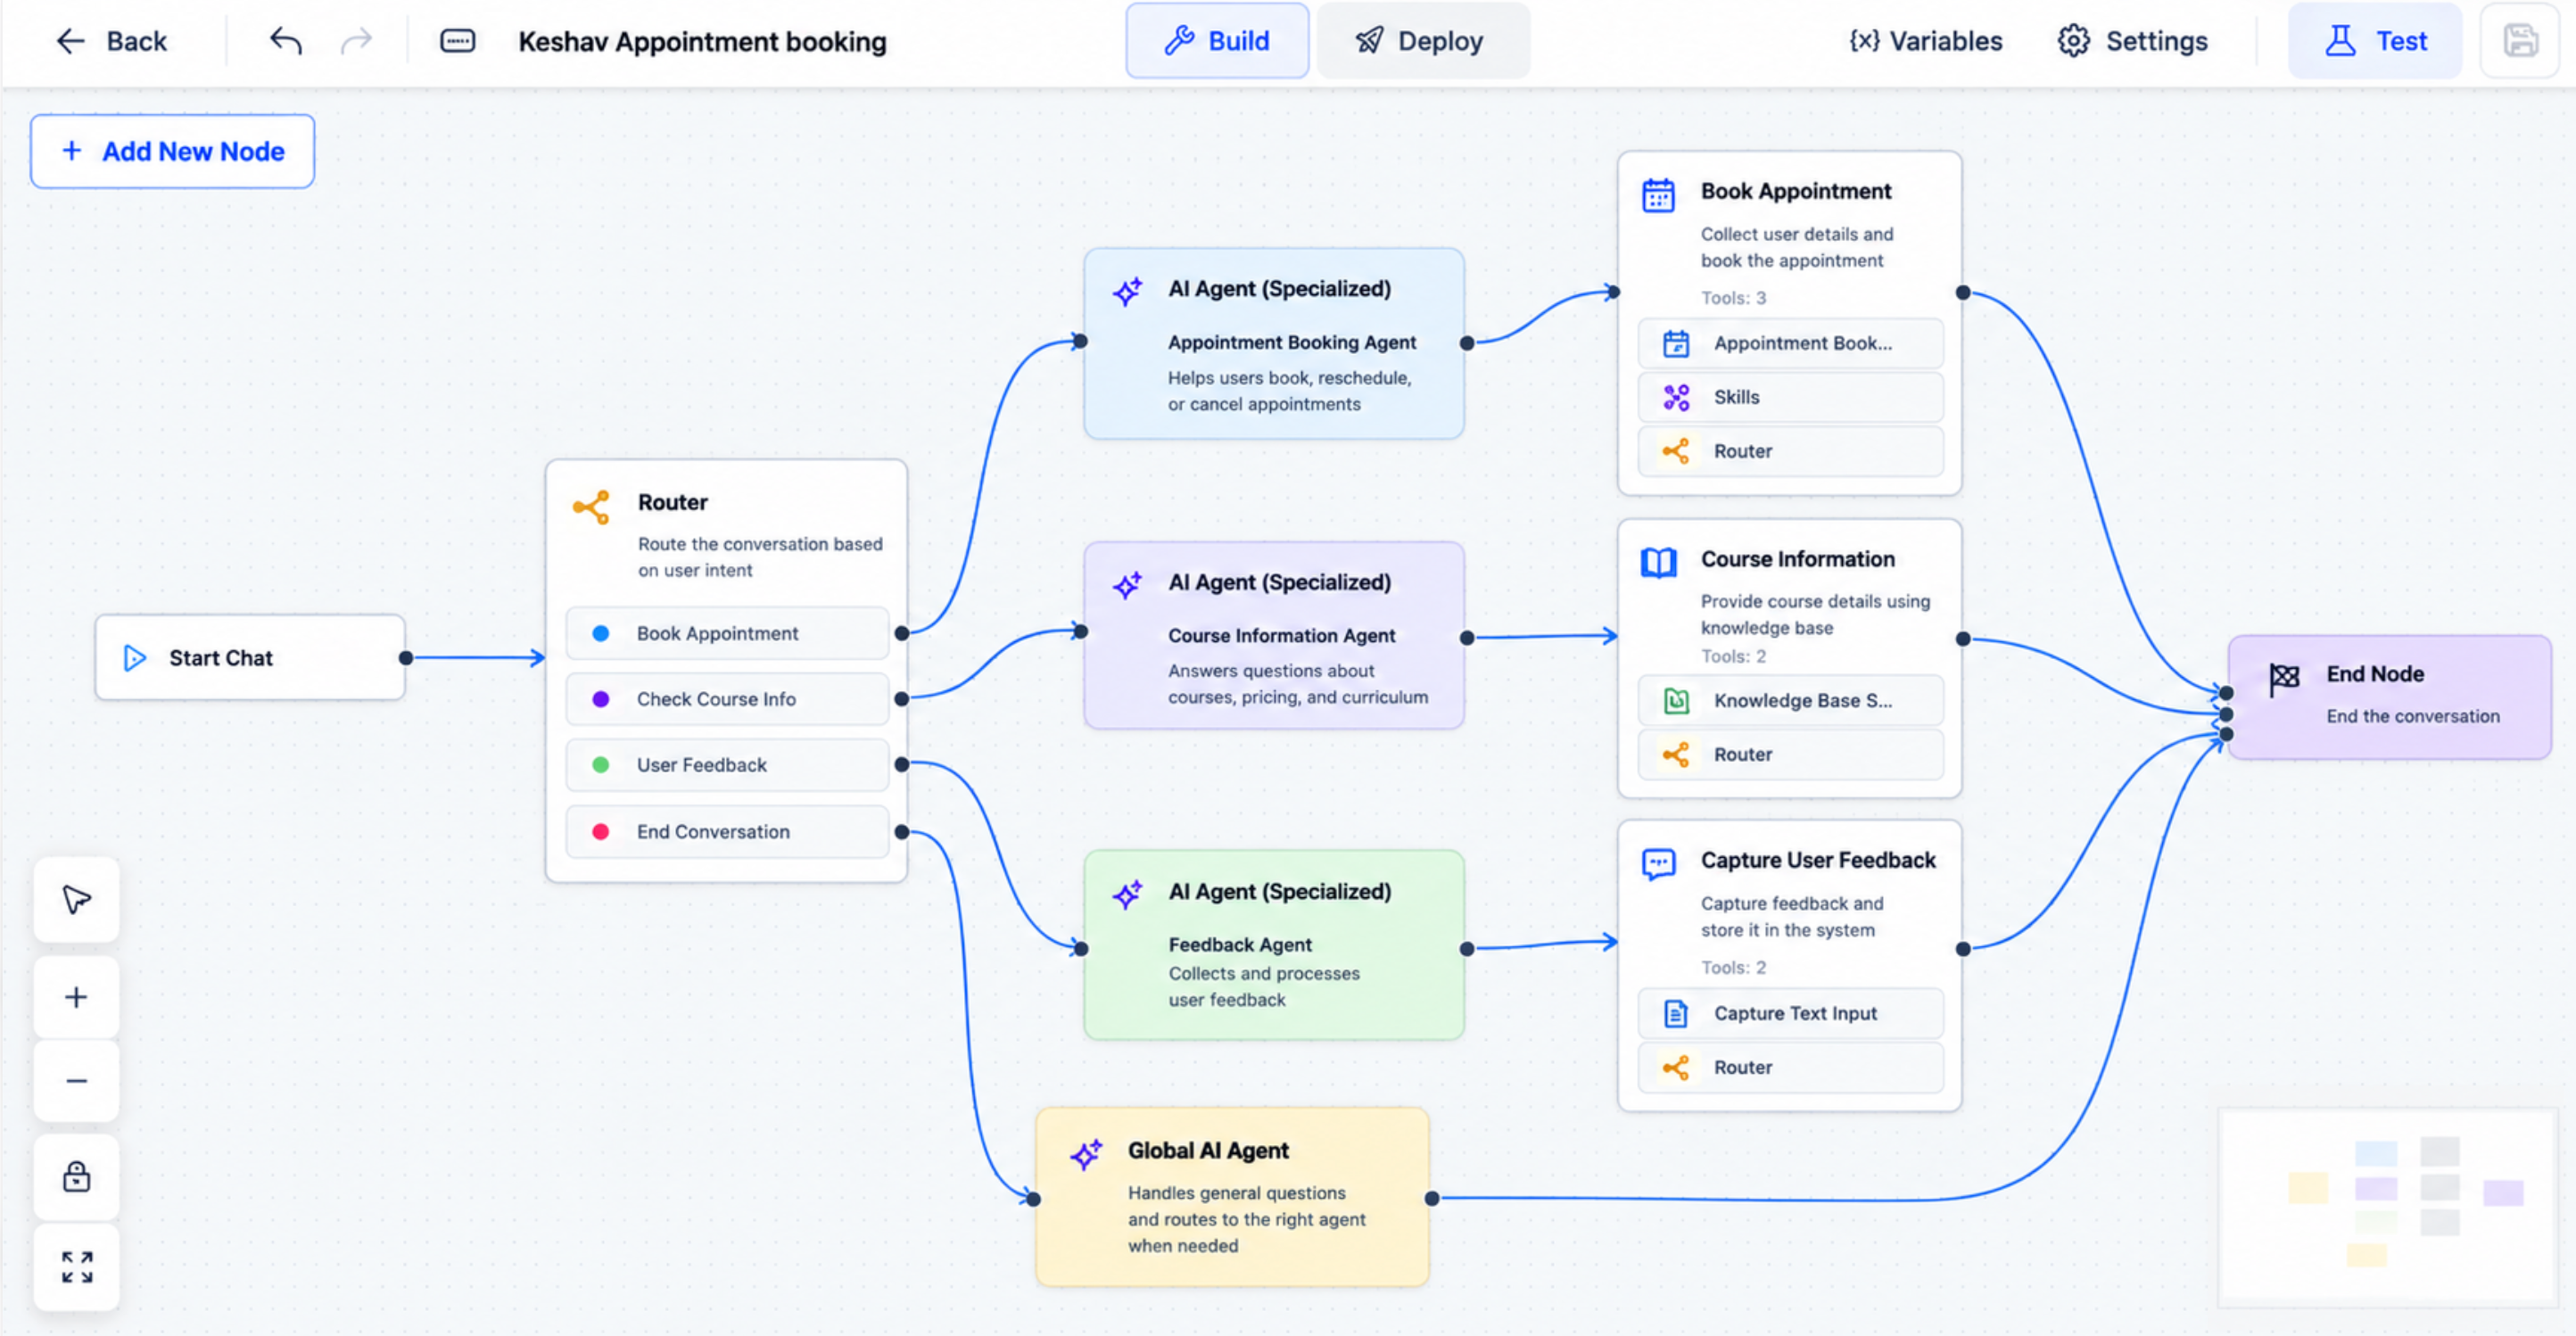
- Medical clinic. The clinic creates an Appointment Assistant agent, attaches the Appointment Booking tool, and adds a router that sends booking requests to that agent. It also adds a Global AI Agent to handle requests like speaking to a live person at any point.
- Real estate agency. The agency builds a Lead Qualifier agent with a Knowledge Base tool, then adds a router that directs qualified leads to a Follow up agent while routing other contacts to an Email Capture node.
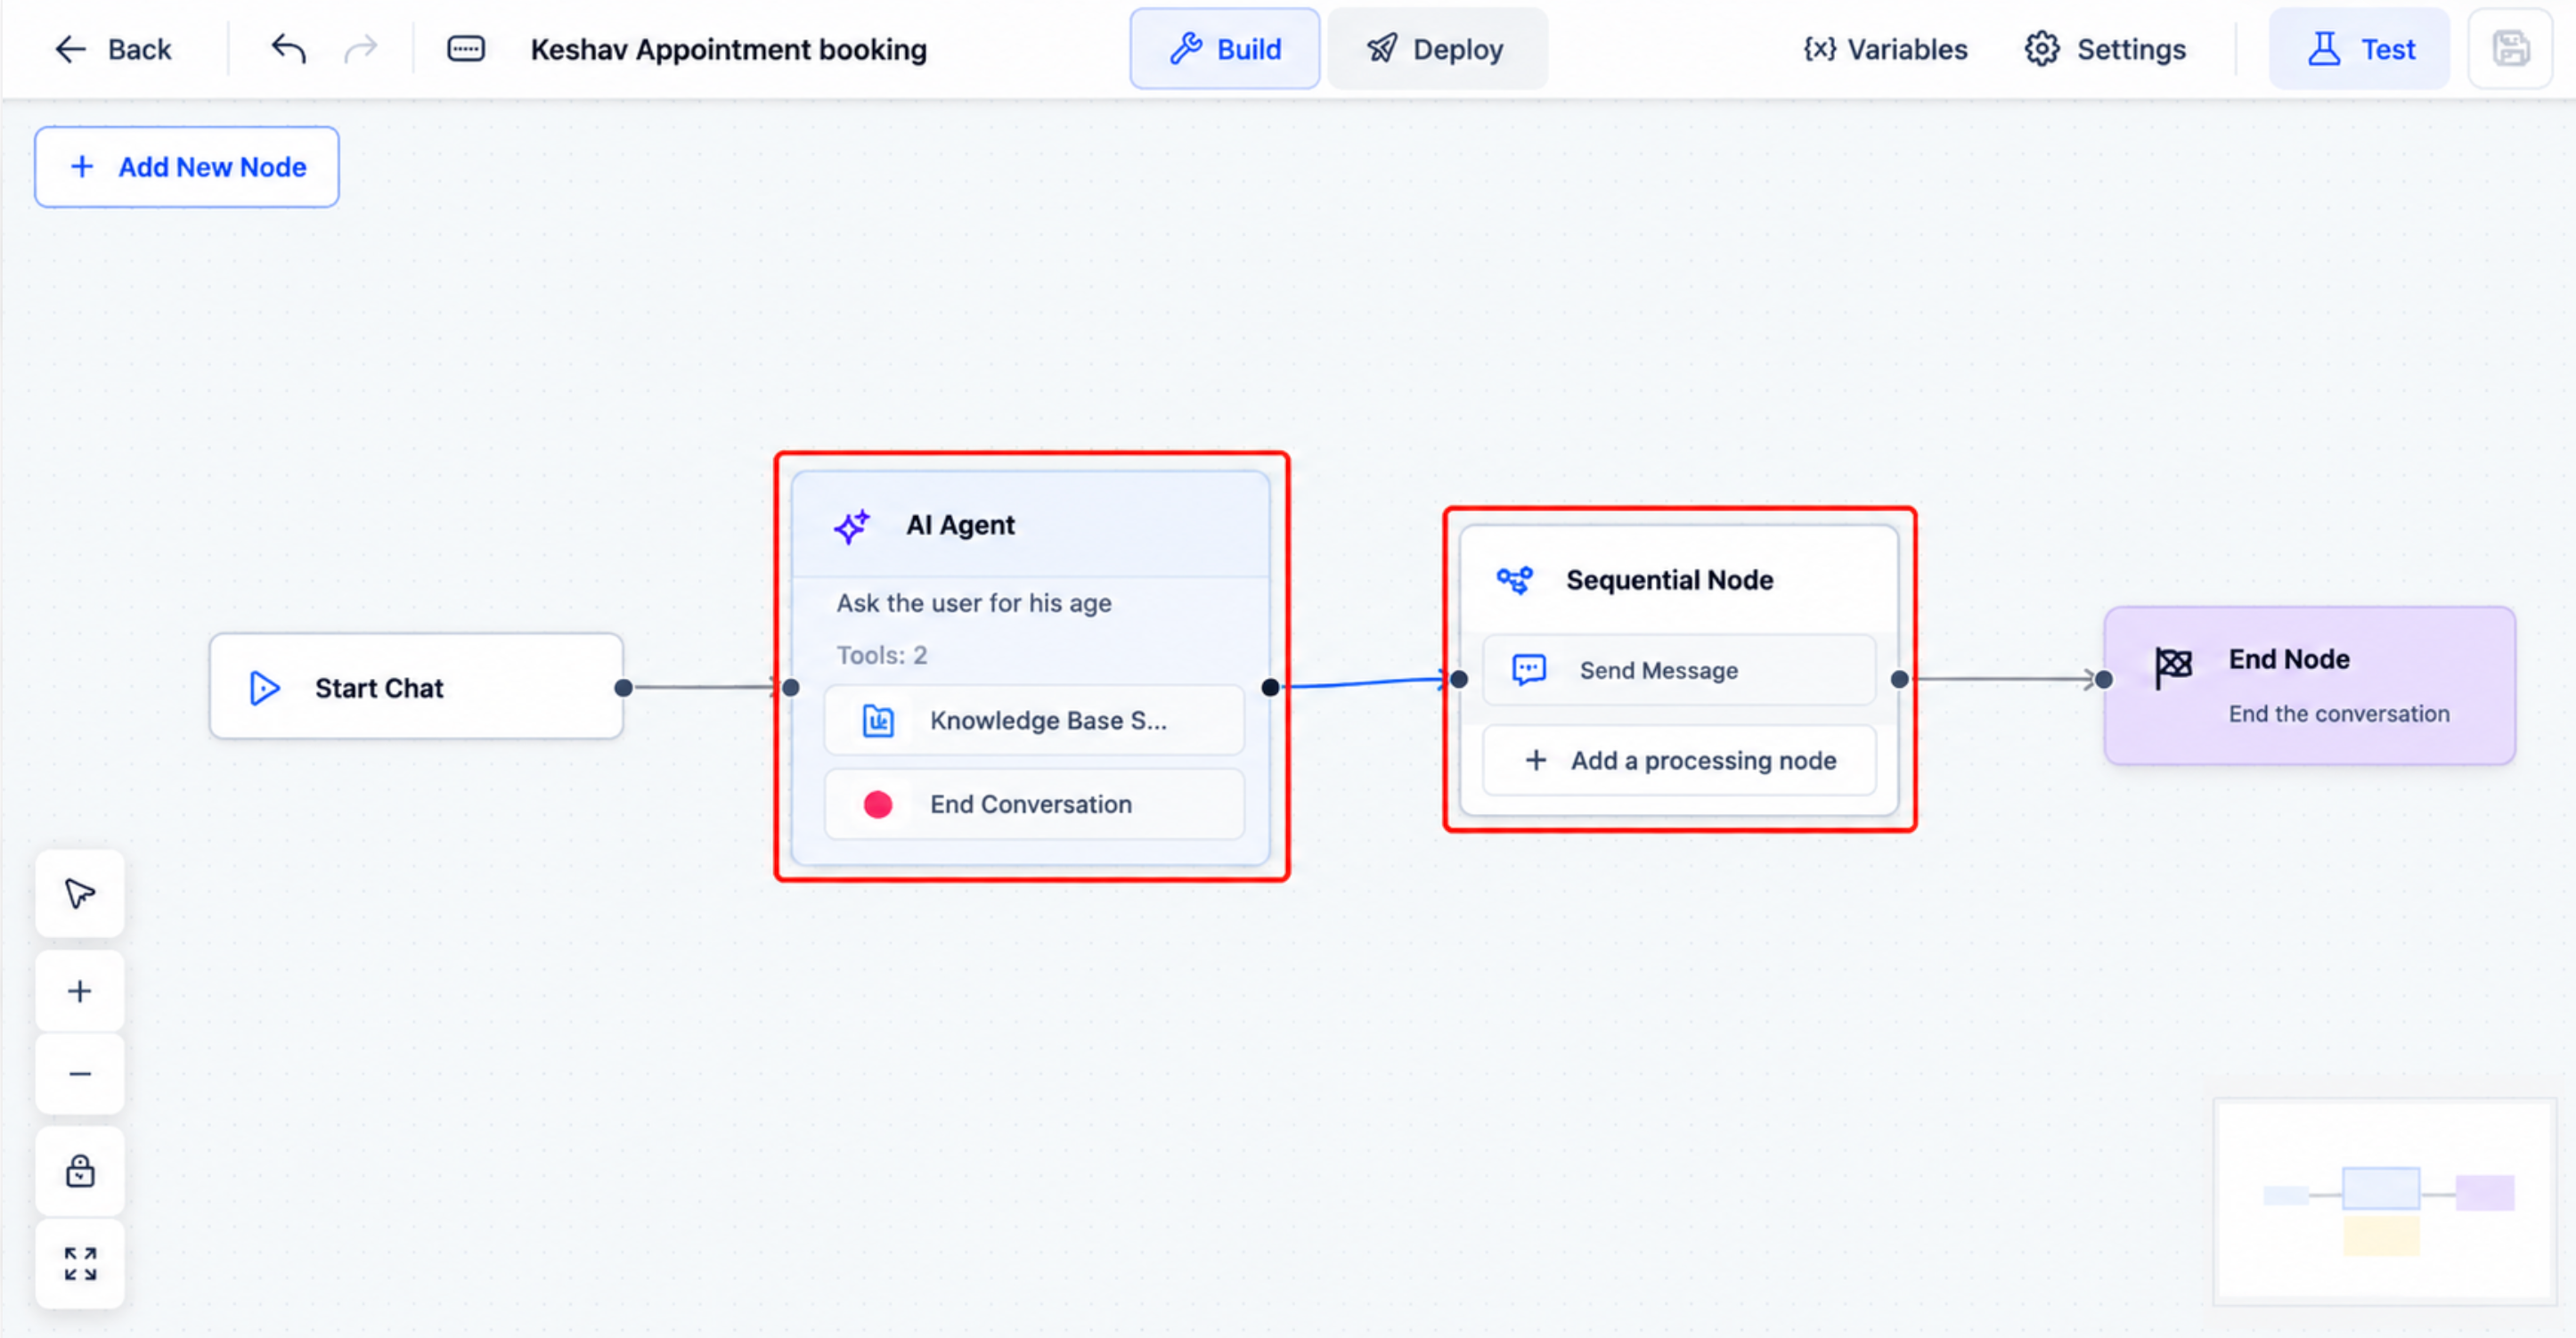
- Online retailer. The retailer adds a Product Info agent that uses the Web Search tool, a Wait node to pause for payment confirmation, and a Bot Transfer node that hands the conversation to a live sales bot when needed.
04The numbers and rules that matter
- Supported tools: Knowledge Base, Web Search, Appointment Booking, Skills, API Call, MCP, Custom Message, Email Capture, Phone Capture, Text Input Capture.
05How to set up and use Conversation AI Flow Builder in HighLevel
Create a flow based bot
- Navigate to AI Agents > Conversation AI.
- Select the Create Bot option.
- Pick Flow Based Builder as the bot type.
- Open the Build canvas that appears.
- Inspect the default Start Chat, AI Agent and End Node layout.
Add an AI Agent
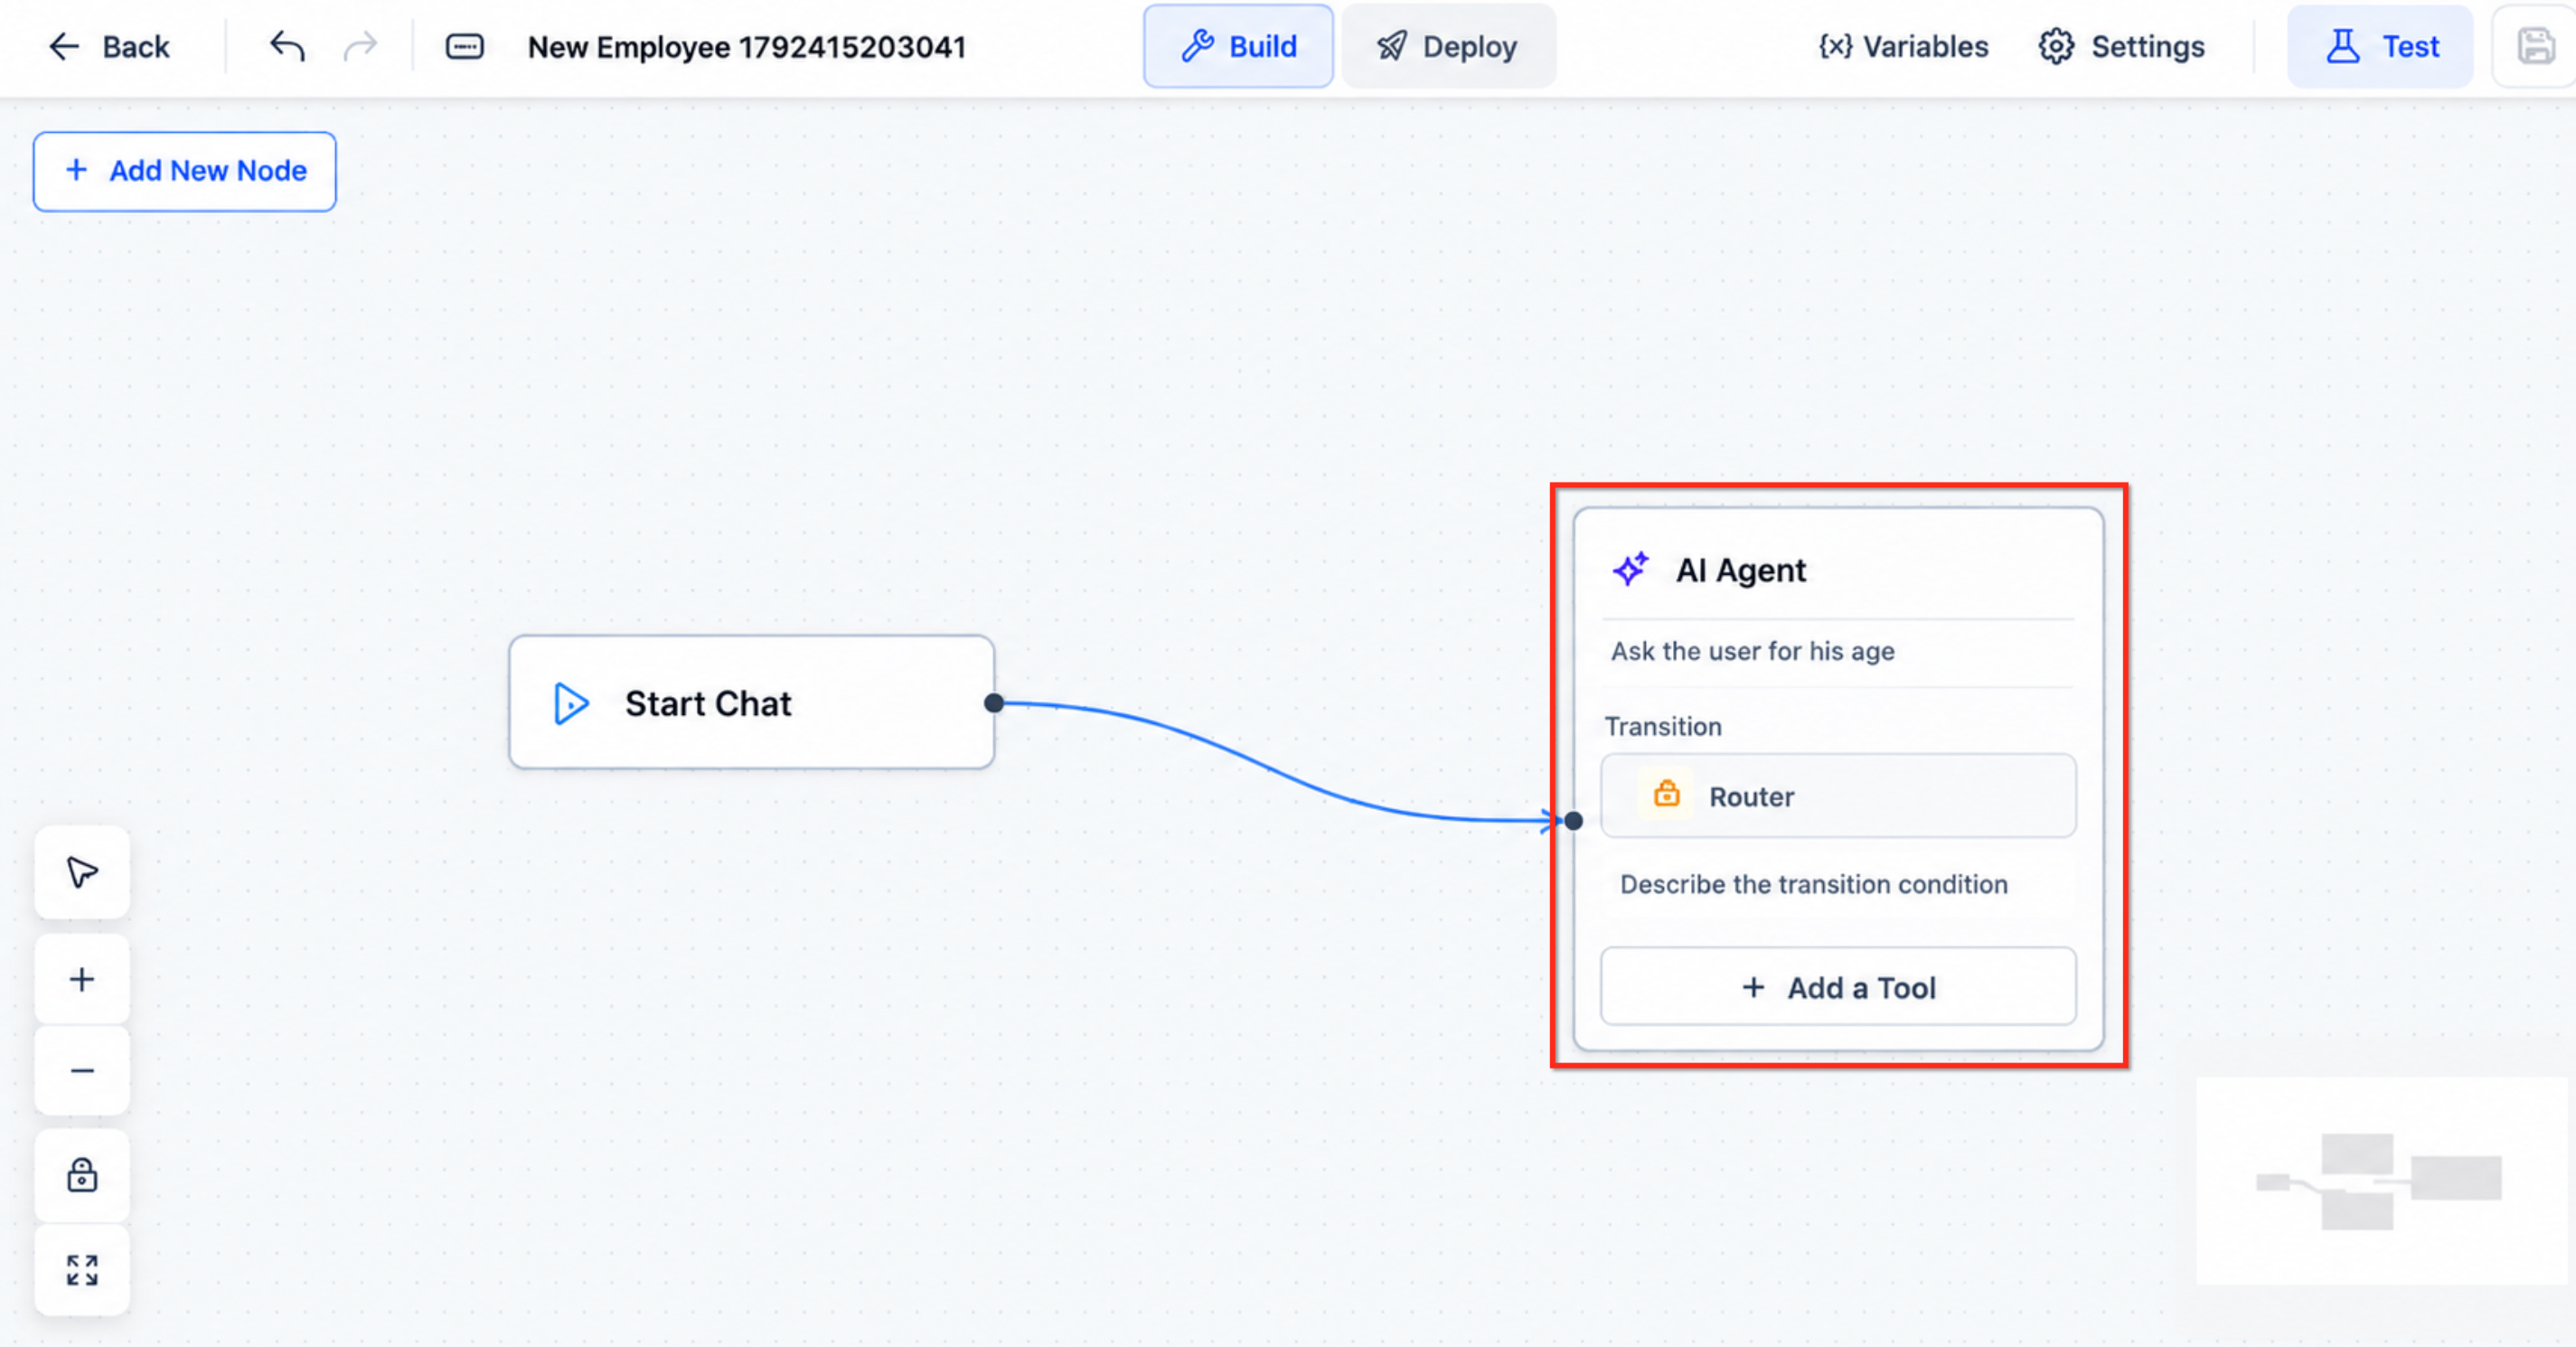
- Click the Add New Node button.
- Choose AI Agent from the node list.
- Enter a clear name for the new agent.
- Write instructions that define the agent’s responsibilities.
- Link the new agent node to the appropriate point in the flow.
Add tools to the agent
- Select the AI Agent node you just added.
- Press the Add a Tool button.
- Pick the tool that matches the agent’s task.
- Complete any required configuration fields for that tool.
Add conversation routes
- Insert a Router node where a branch is needed.
- Define the conditions or descriptions for each route.
- Connect each route line to its destination node.
- Verify that all router connections are correct.
Review the completed flow
- Examine every line linking nodes on the canvas.
- Read each agent’s instructions and confirm its tools.
- Check that each Router points to the intended node.
- Look over the Global AI Agent responsibilities.
- Confirm that Wait, Bot Transfer and End nodes are placed as expected.
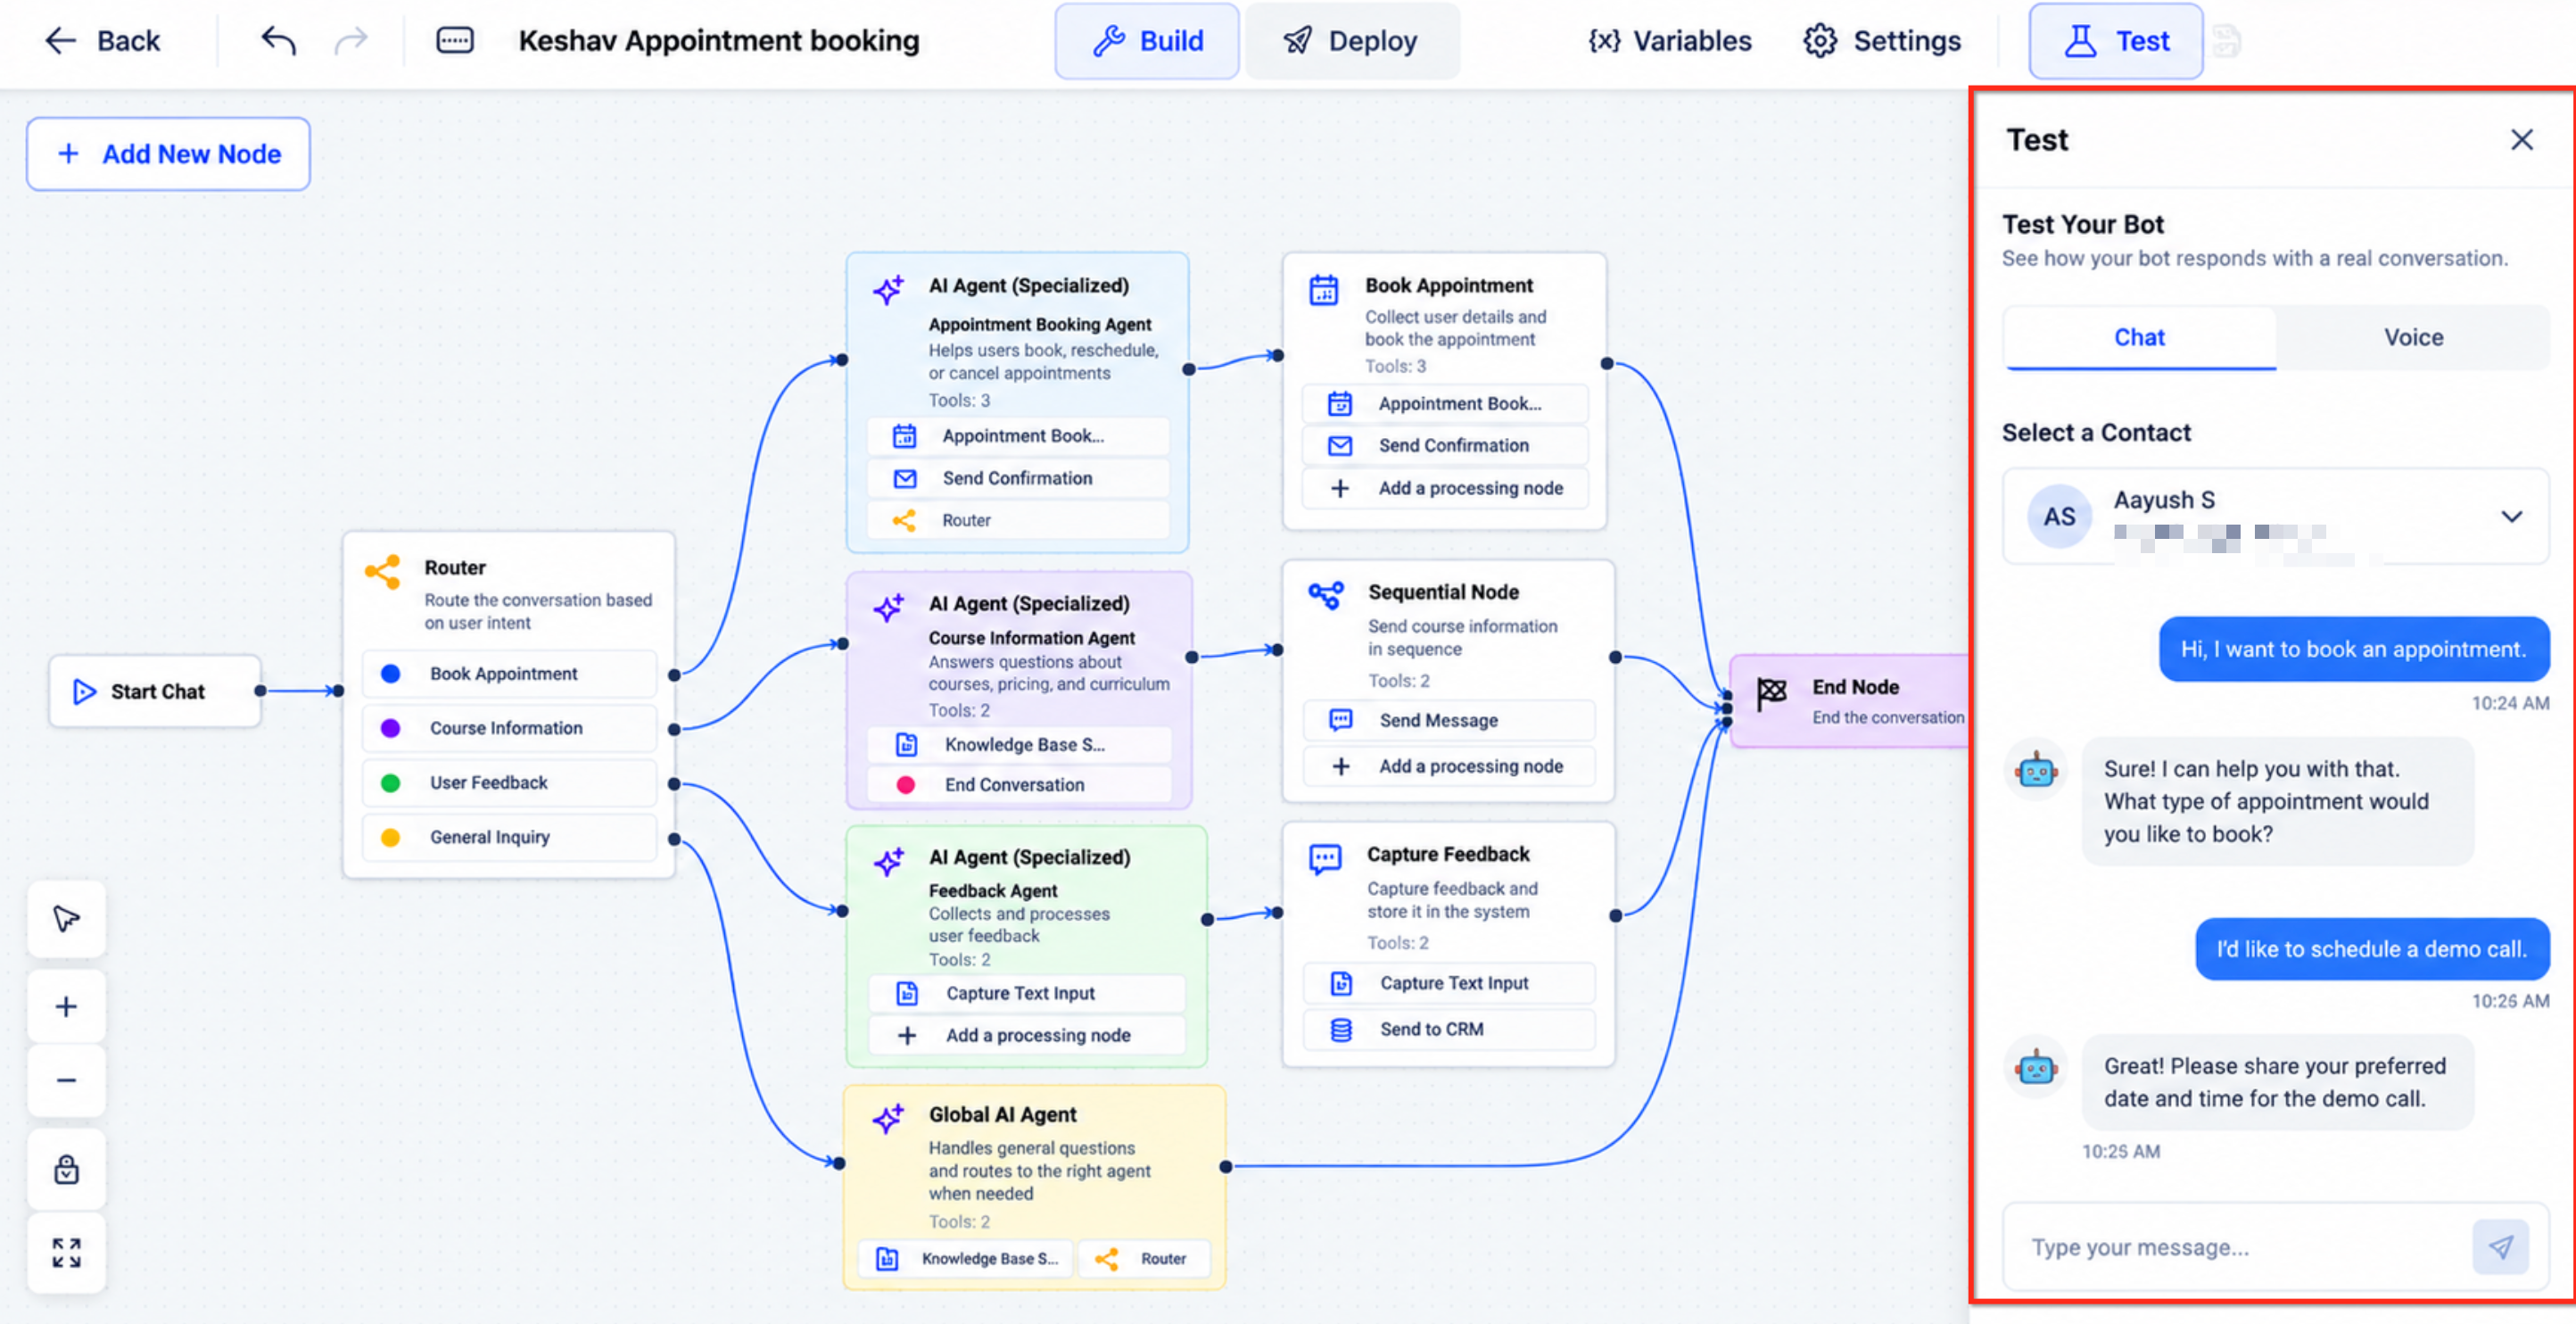
Test the flow
- Click the Test button in the canvas toolbar.
- Choose a contact record to run the test.
- Start a simulated chat session.
- Send different messages to trigger each route.
- Observe agent replies, tool actions and any handovers.
- Make adjustments to the flow based on the test results.
Configure deploy and activate the bot
- Open the Deploy tab.
- Select which inbound channels the bot should answer.
- Set Working Hours and any after hours behavior.
- Review all deployment choices for accuracy.
- Open Bot Settings from the same area.
- Enable the bot using the activation control.
06What it looks like in HighLevel
07Settings that matter
- Start Chat. The fixed entry point that runs automatically when a new inbound chat begins.
- Bot Settings. Controls the on/off state of the bot after deployment configuration.
- Working Hours. Defines when the bot is available to respond and what happens after hours.
- Inbound channels. Specifies which chat sources such as website widget or messaging apps the bot will answer.
08Things to know before you rely on it
- The Flow Builder handles only inbound conversations; outbound campaigns use a separate prompt based system.
- There is no separate Publish button; activation must be done through Bot Settings.
- The canvas does not maintain version history.
- Build with AI is marked Beta and should be reviewed before activation.
- Some tools require extra configuration, permissions or external connections before they work.
09How it connects to the rest of HighLevel
- Set up appointment booking for bots Appointment booking guide
- Add a chat widget to your website Chat widget setup
- Review pricing and plan options for AI Employee features Pricing page
Michael's take

The smarter approach is to break the conversation into focused AI Agents, each with its own instructions and the exact tool it needs.
If I were setting up a new inbound chat, I would start with a simple flow: A Start Chat node, a Global AI Agent for always on requests, and a dedicated Appointment Assistant agent with the Appointment Booking tool. I’d then test each branch with a dummy contact before turning the bot on, just to be sure nothing unexpected touches real records.