
01Who this is for
- Marketing agencies, need branded audit reports that reflect client identity.
- Real estate brokerages, want reports that highlight listings and contact details.
- SaaS startups, require clean, conversion focused layouts to showcase product audits.
02Prospect report builder, explained
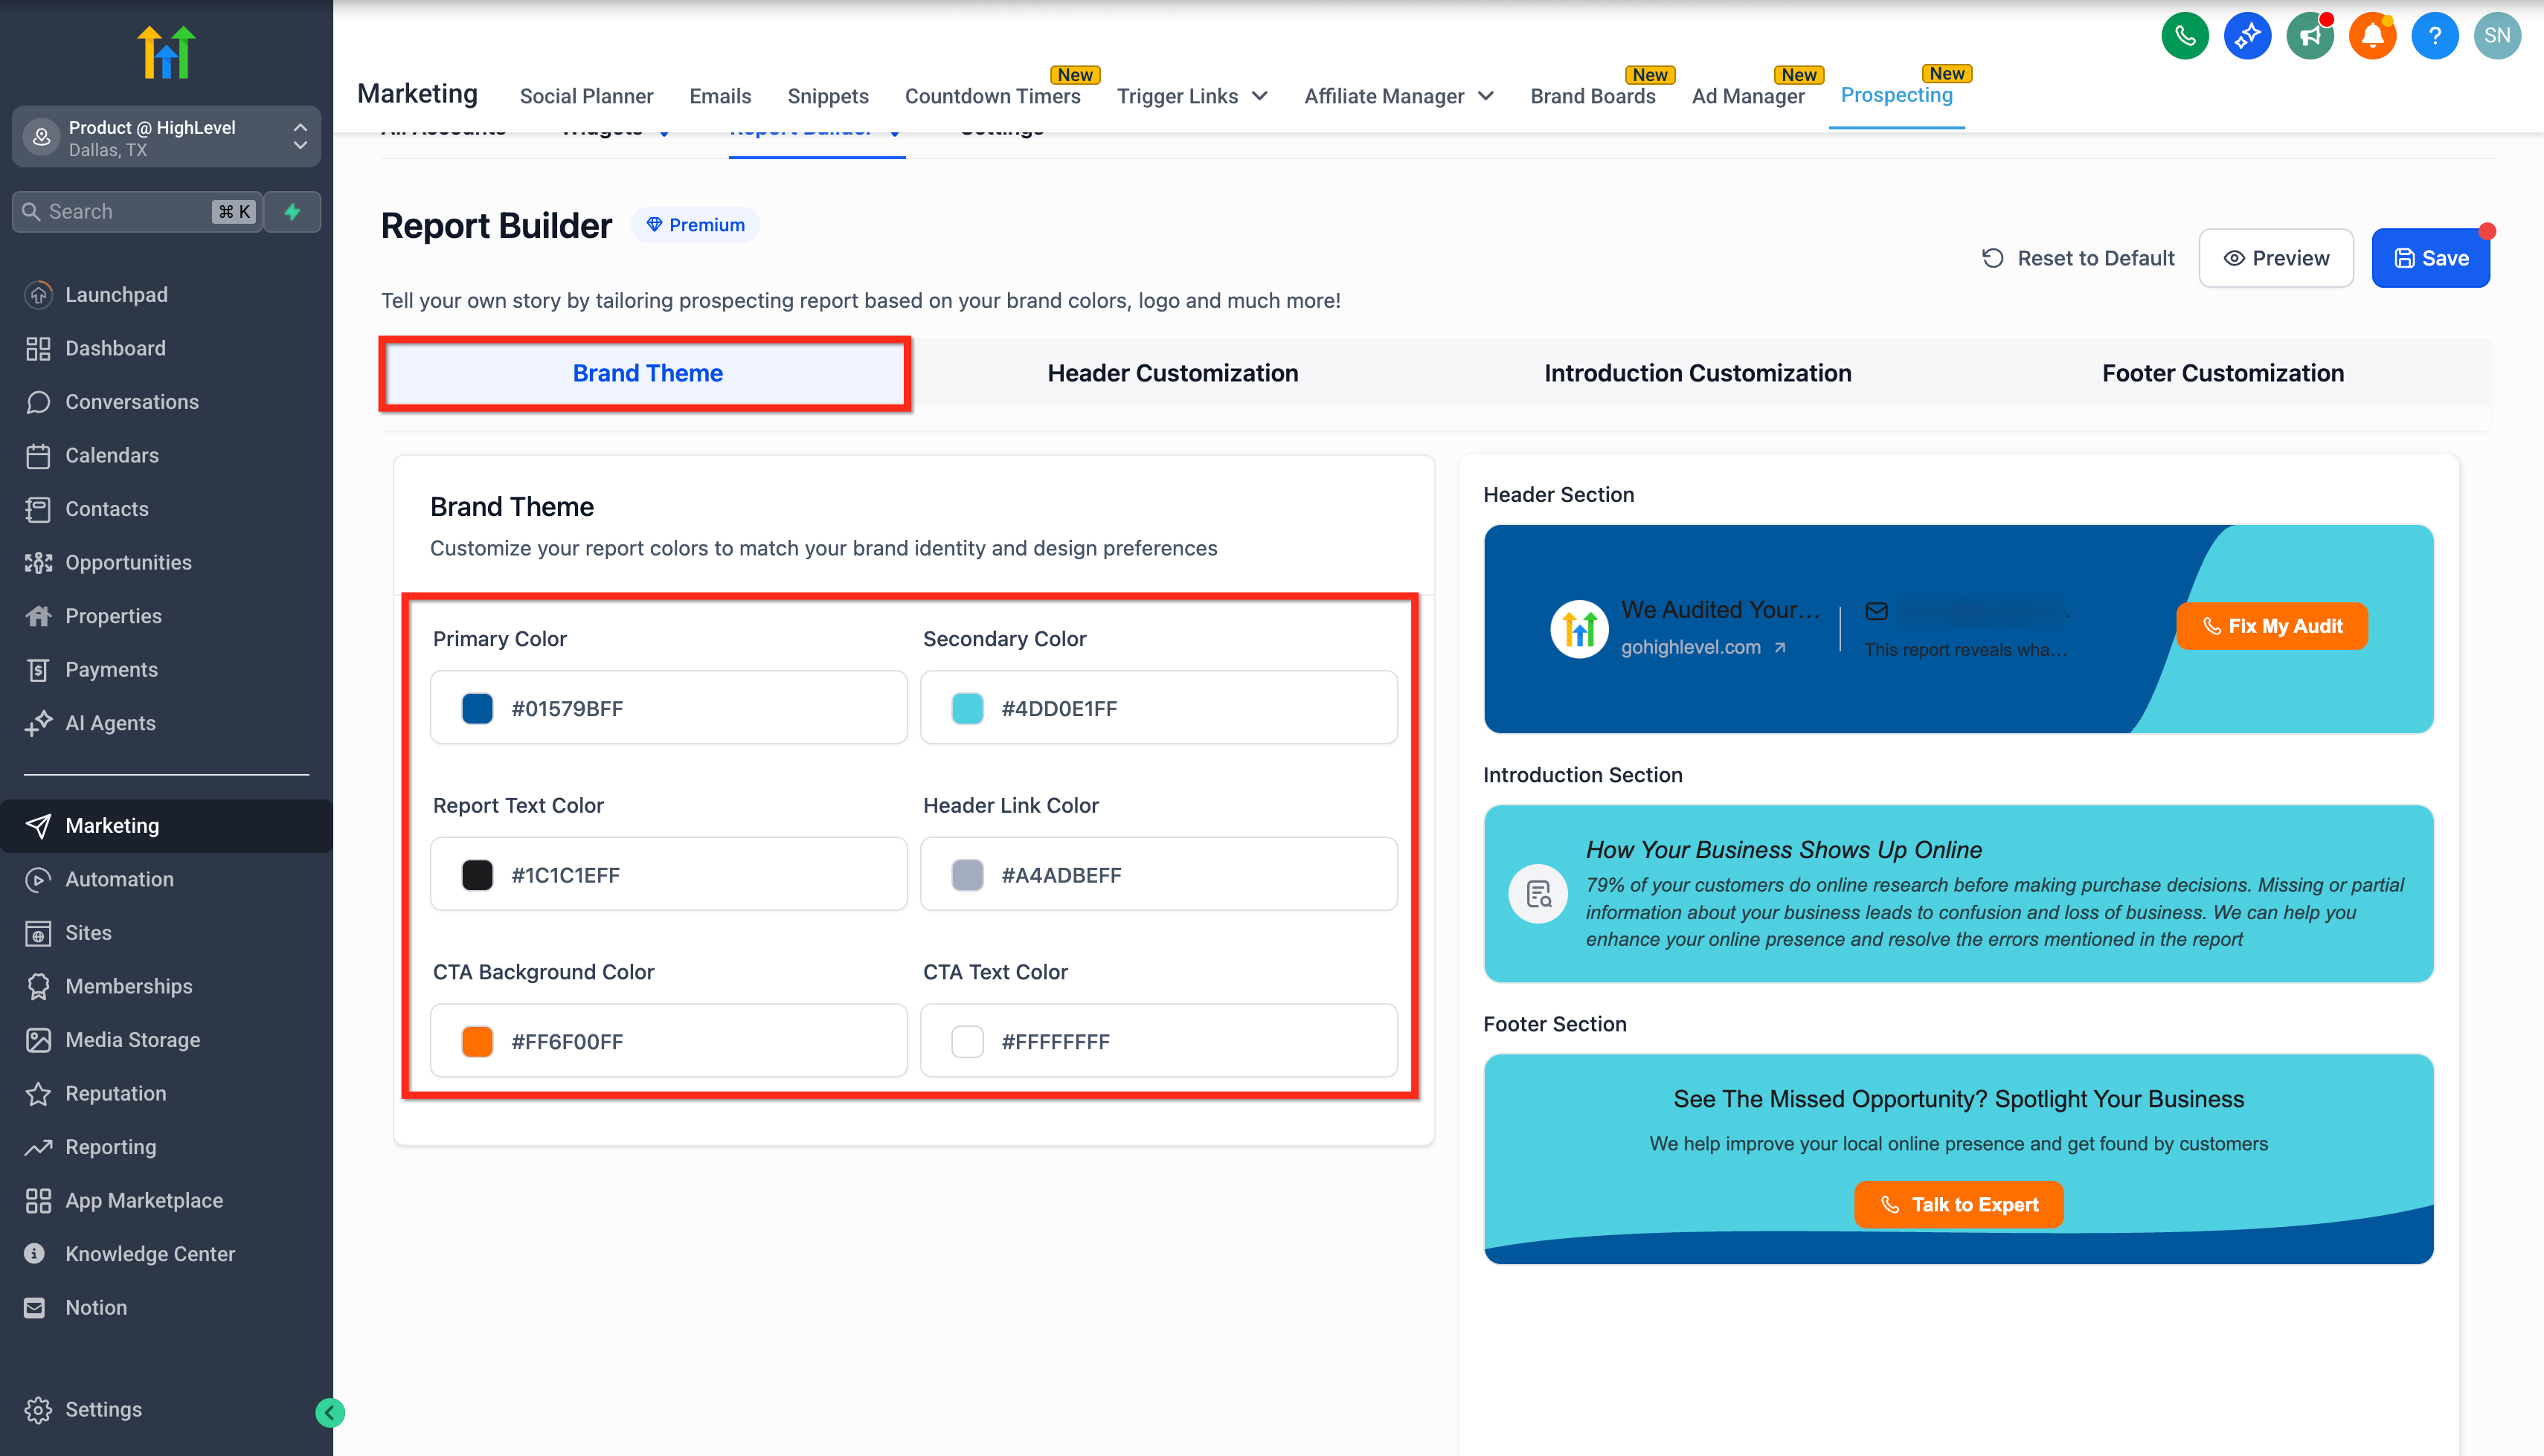
The builder gives full control over a prospect report’s visual theme and textual sections. Users can pick primary and secondary colors, set text and CTA colors, and align the design with existing brand assets. Header, introduction and footer panels each have display toggles, font options and style choices.
Changes appear right away in a live preview pane, letting users refine the layout without leaving the screen. After confirming the design, the report can be saved, applying the new look to all current and future reports.
The feature lives inside the Prospecting tool and is reachable from both agency and subaccount dashboards. Access requires a Premium Prospecting subscription; basic users can only view the builder in preview mode.
03How businesses use prospect report builder
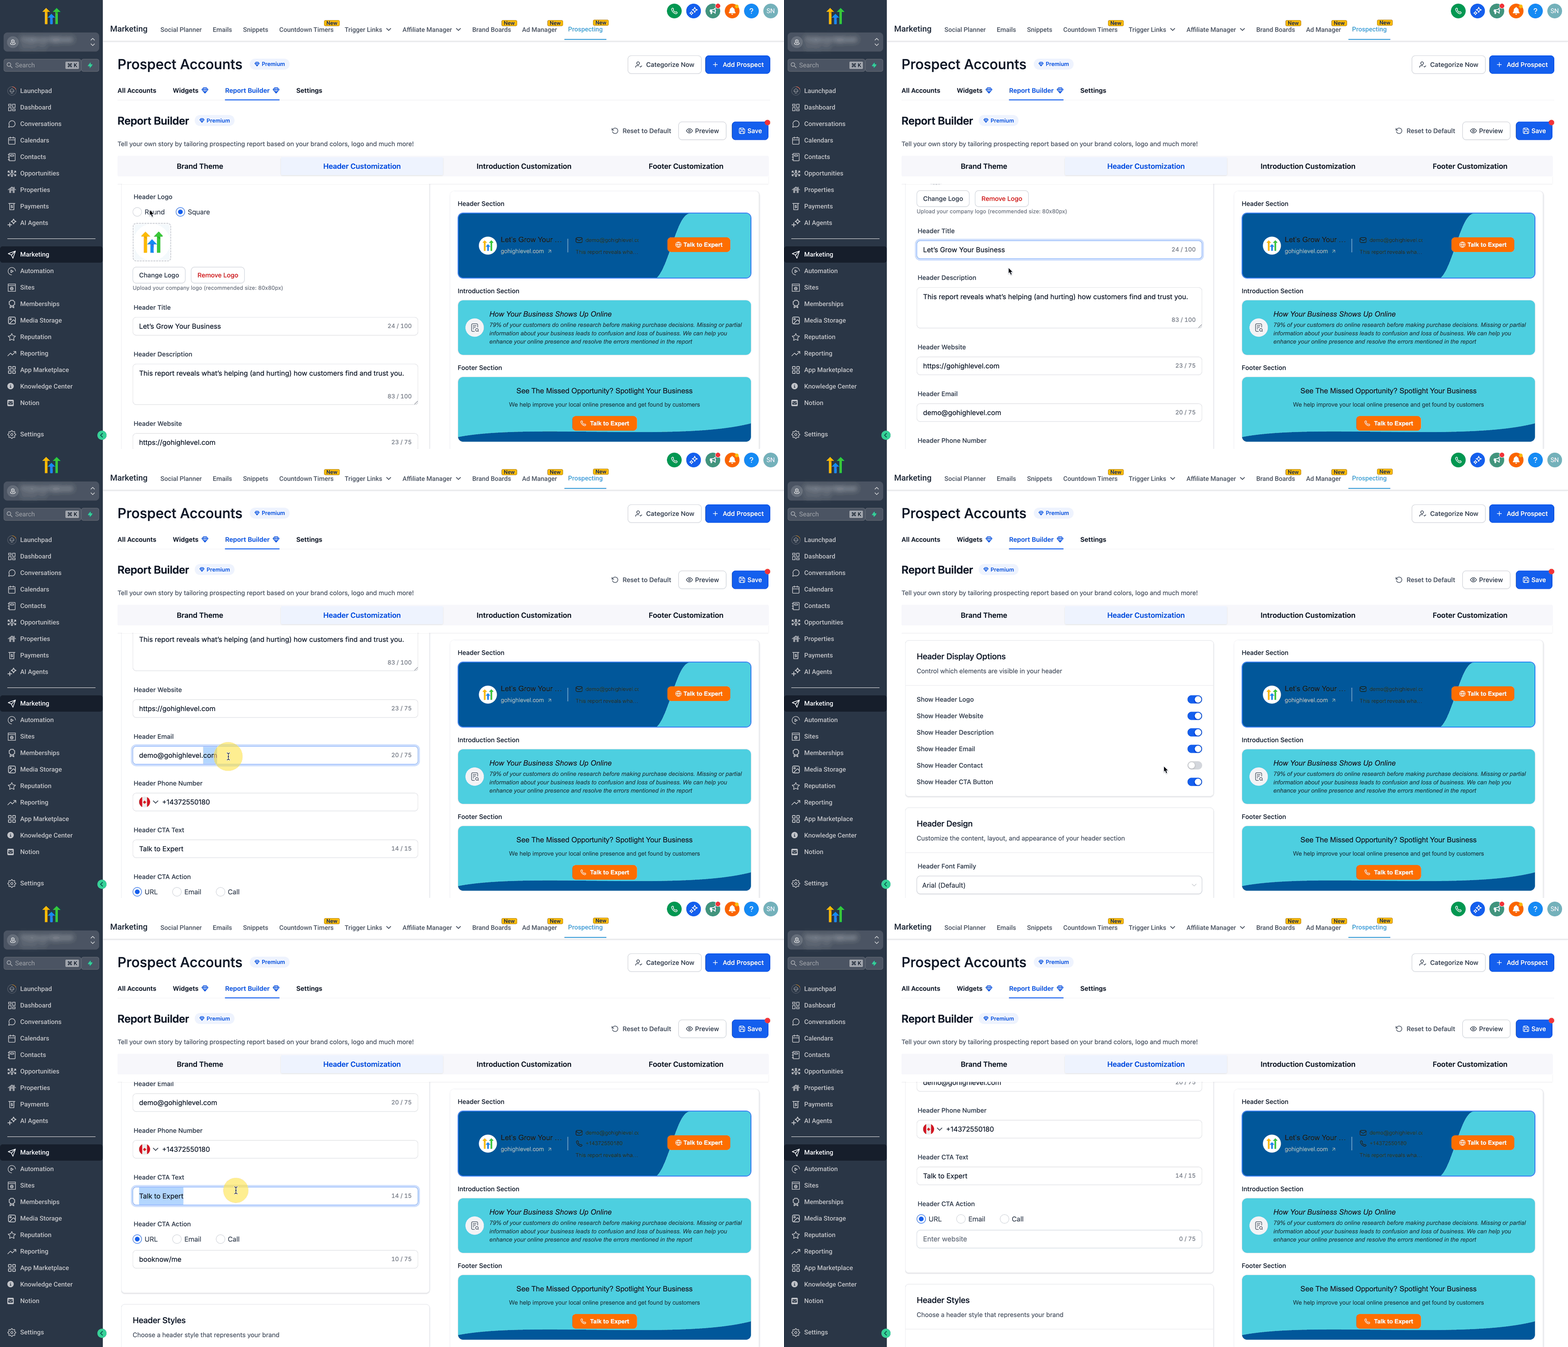
- Marketing agency. The agency opens the Report Builder, selects the brand theme to match its own logo colors, configures a header with a CTA button linking to a booking page, and saves the template. The customized report is then sent to clients as part of audit deliveries.
- Real estate brokerage. The brokerage accesses the builder in a subaccount, uploads its logo, sets the header to show contact phone and email, adds an introductory paragraph about market analysis, and saves the report to share with property sellers.
- SaaS startup. The startup uses the builder to define a primary color that matches its product UI, adds a footer CTA that opens an email draft to sales, and previews the report before saving to ensure the layout looks professional for investor presentations.
04The numbers and rules that matter
- Recommended logo upload size 80x80px.
05Before you start
- A Premium Prospecting subscription must be active for full customization and saving.
06How to set up and use prospect report builder in HighLevel
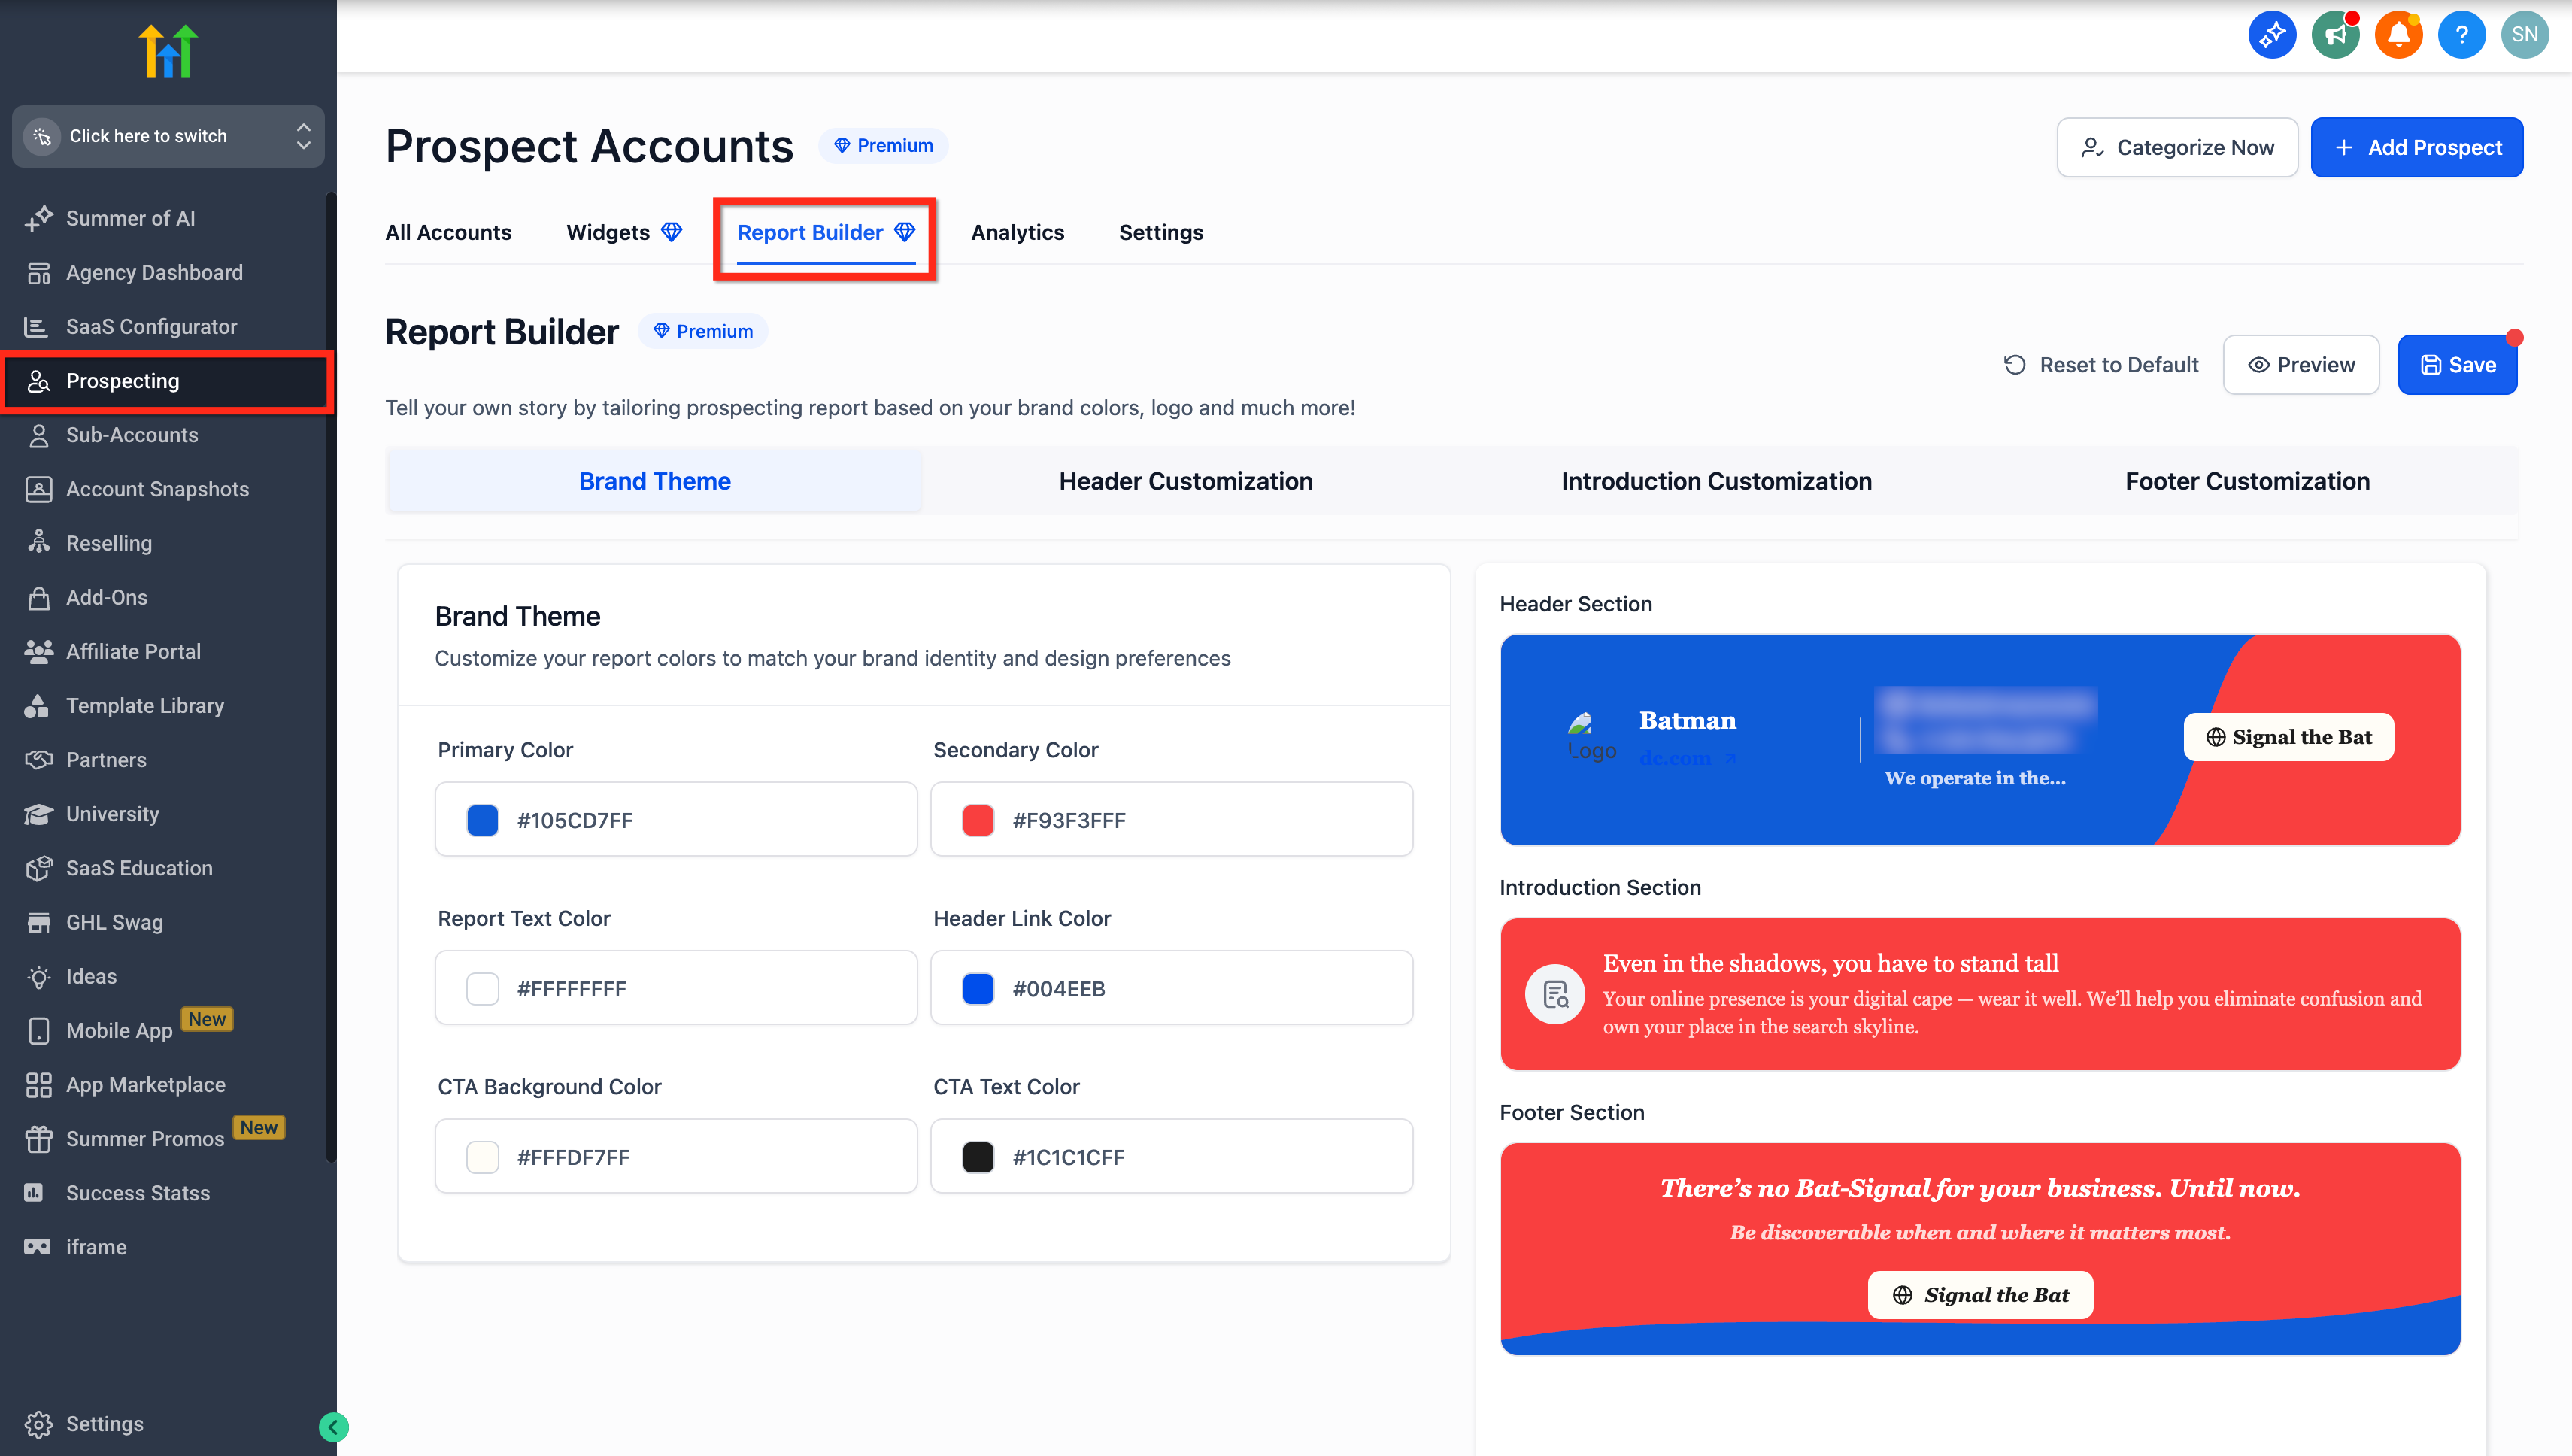
Access the Report Builder at the agency level
- Sign in to the agency account.
- Select the Prospecting tab from the main navigation.
- Open the Report Builder tab to start customizing reports.
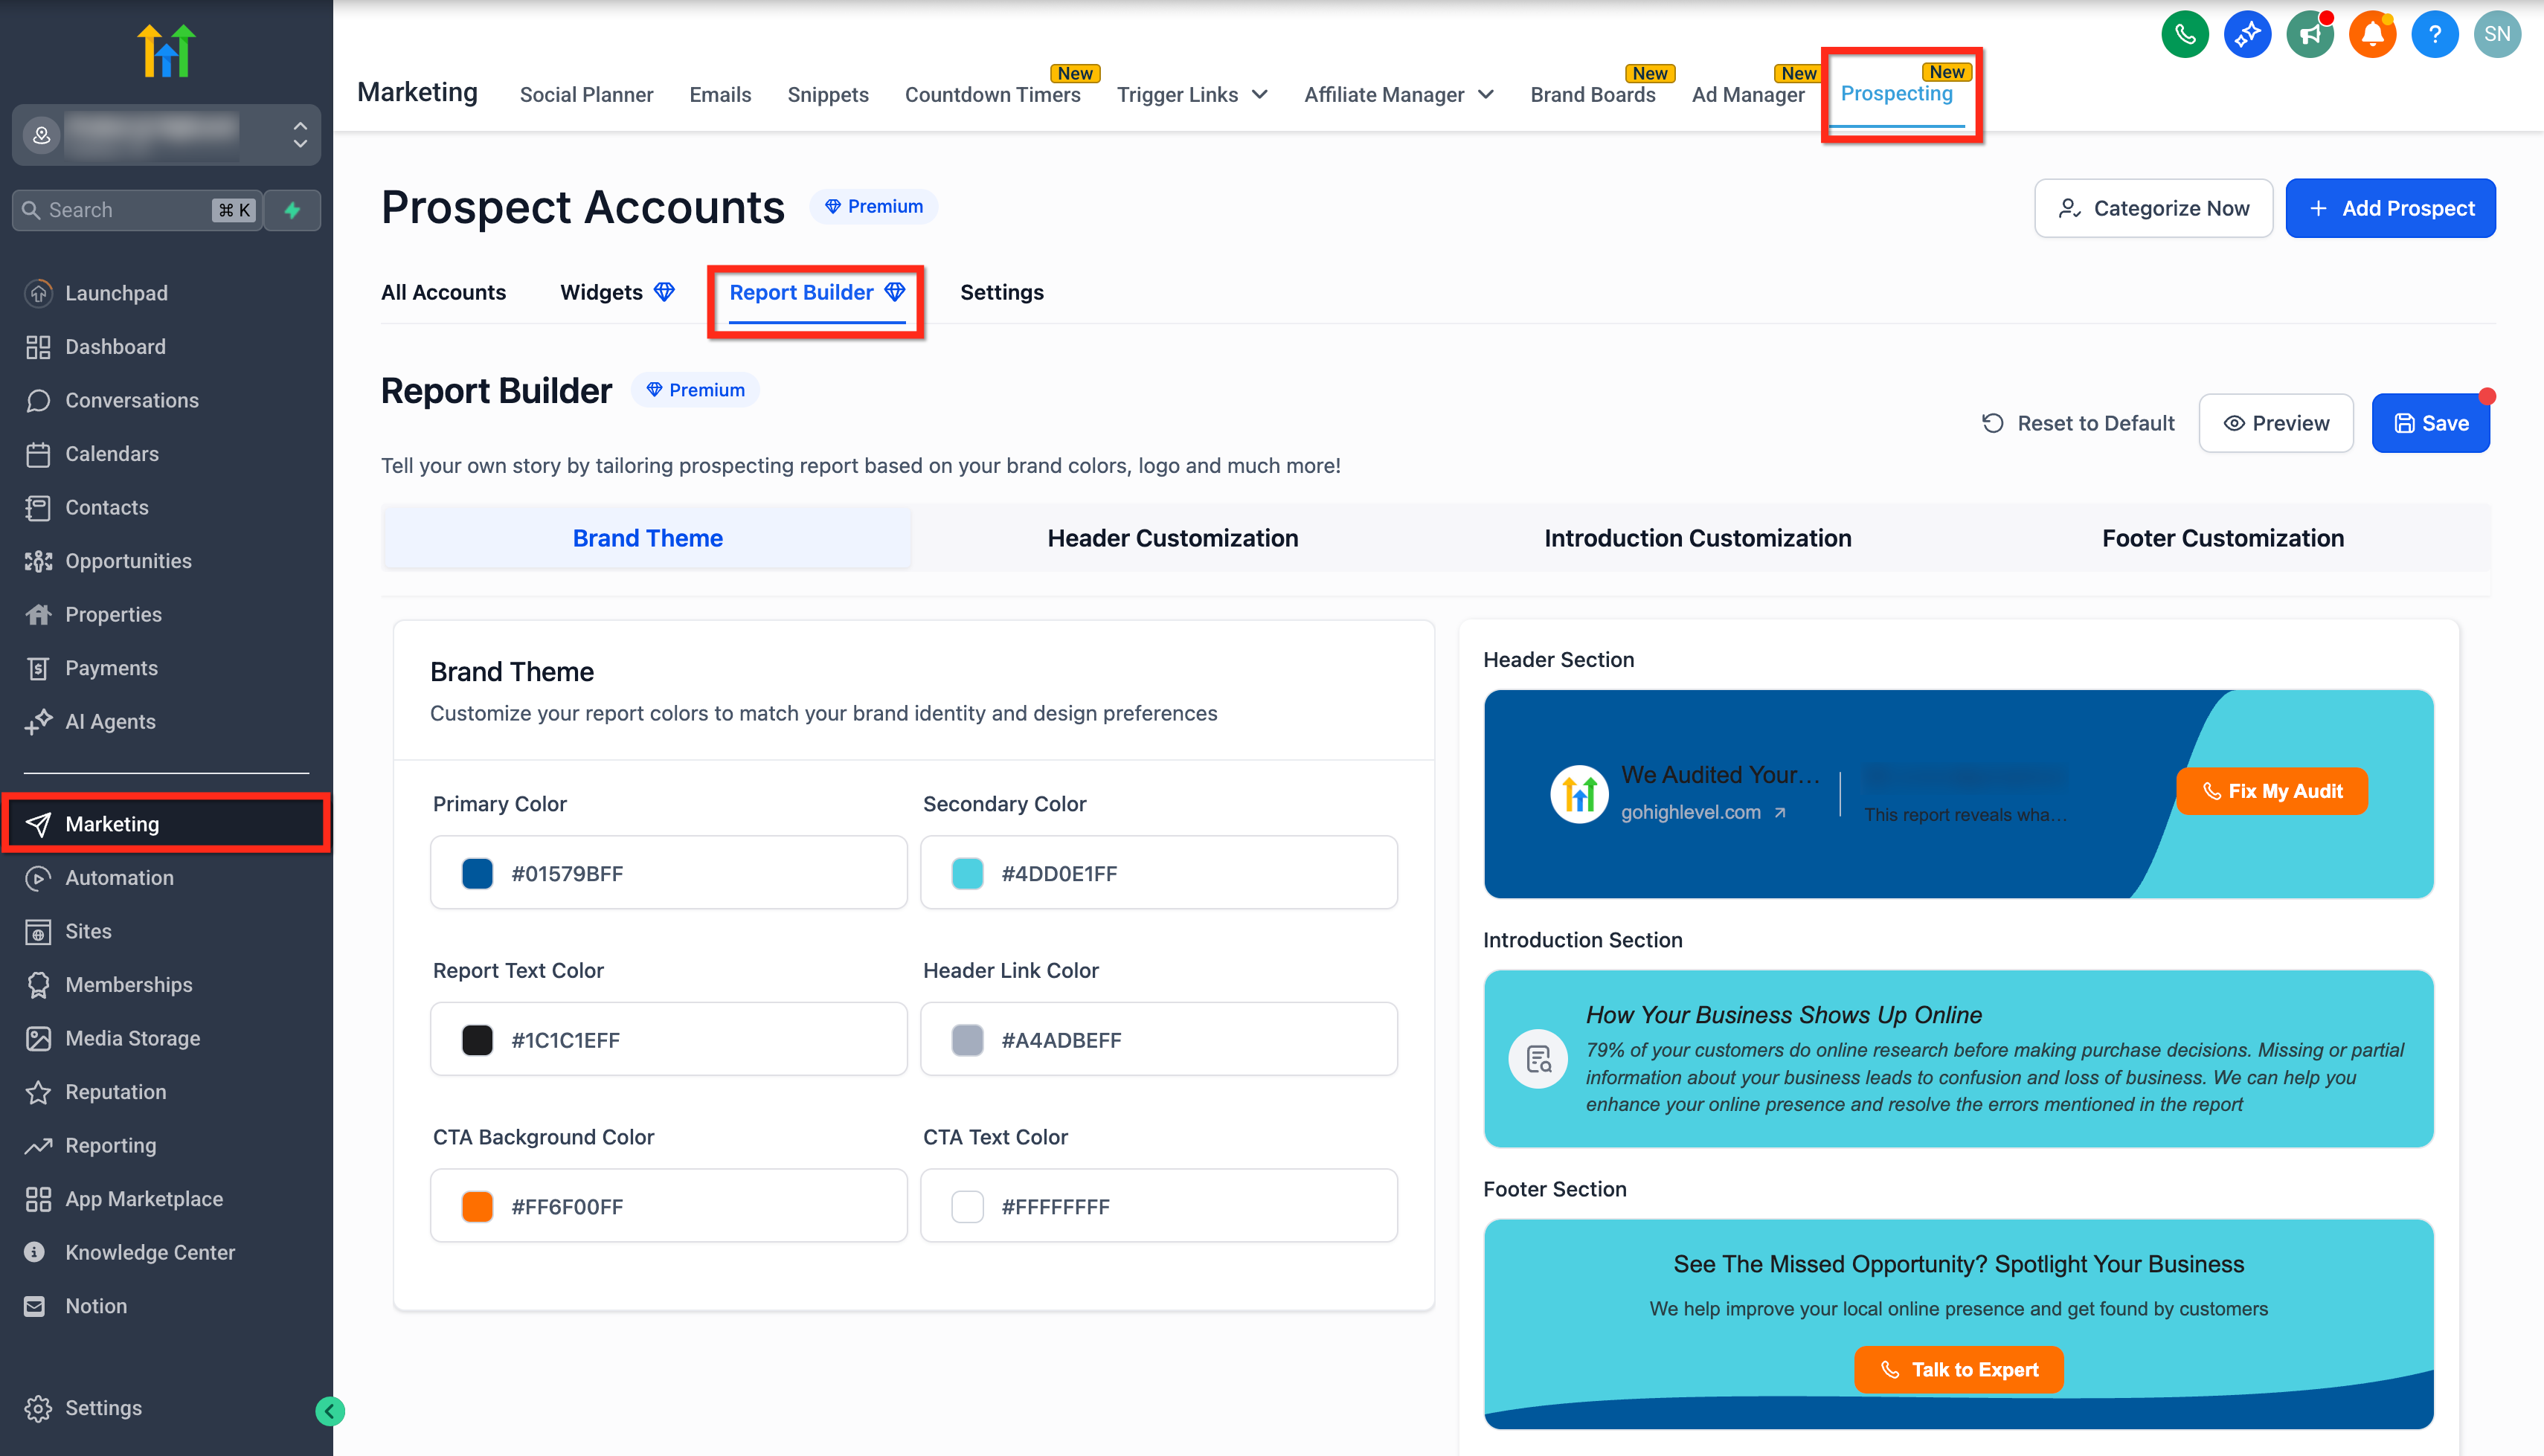
Access the Report Builder at the subaccount level
- Log in to the desired subaccount.
- Click the Marketing tab.
- Choose Prospecting from the submenu.
- Enter the Report Builder tab to begin building reports.
Customize a prospect report
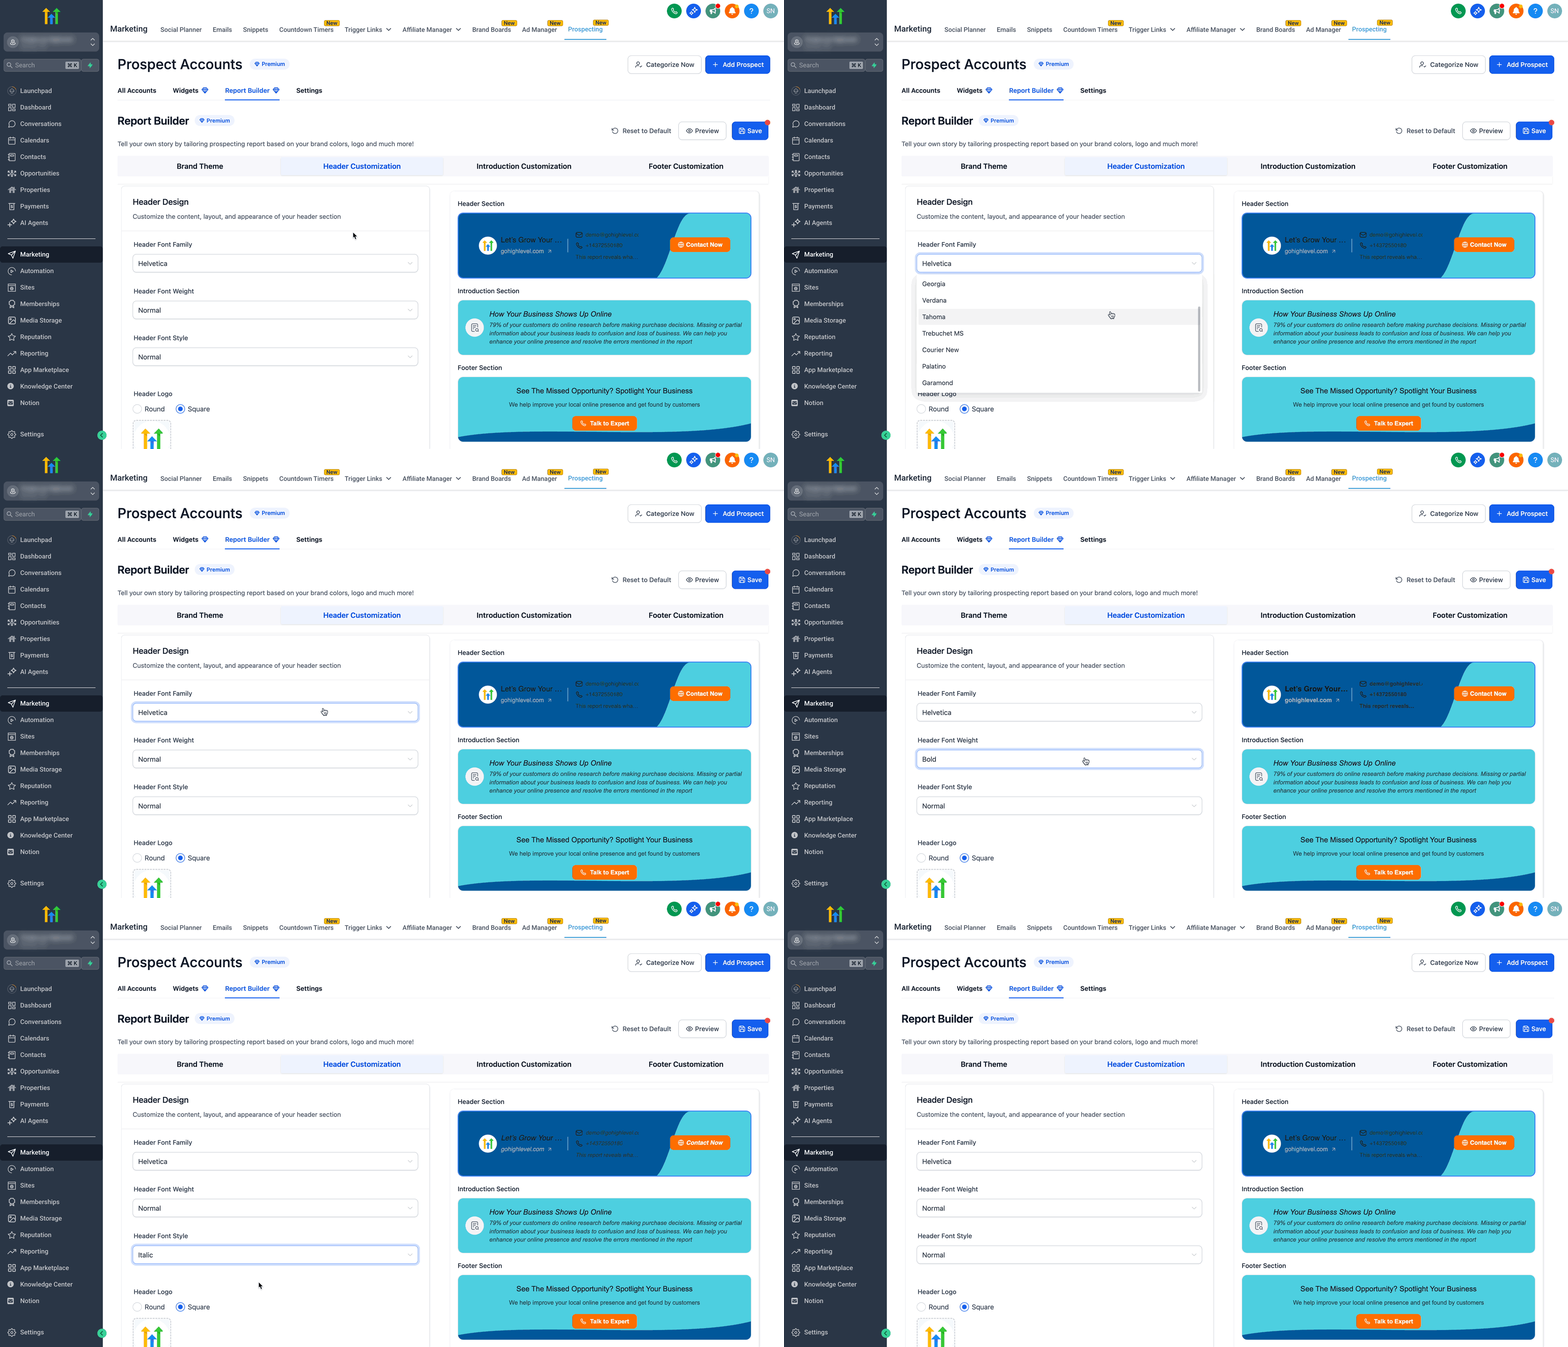
- Pick a tab, Brand Theme, Header, Introduction, or Footer, to edit.
- Adjust the available settings for the selected section.
- Watch the live preview update on the right side.
- Click Preview to view the full unsaved report in a new tab.
- Press Save to apply the changes to all reports.
- Use Reset to Default if you need to revert any customizations.
07What it looks like in HighLevel
08Settings that matter
- Primary Color. Sets the main background or base color for report sections.
- Secondary Color. Provides an accent color that complements the primary color.
- Report Text Color. Controls the default color of body text inside the report.
- Header Link Color. Defines the color of clickable links located in the header.
- CTA Background Color. Determines the background hue of call to action buttons.
- CTA Text Color. Sets the text color inside call to action buttons.
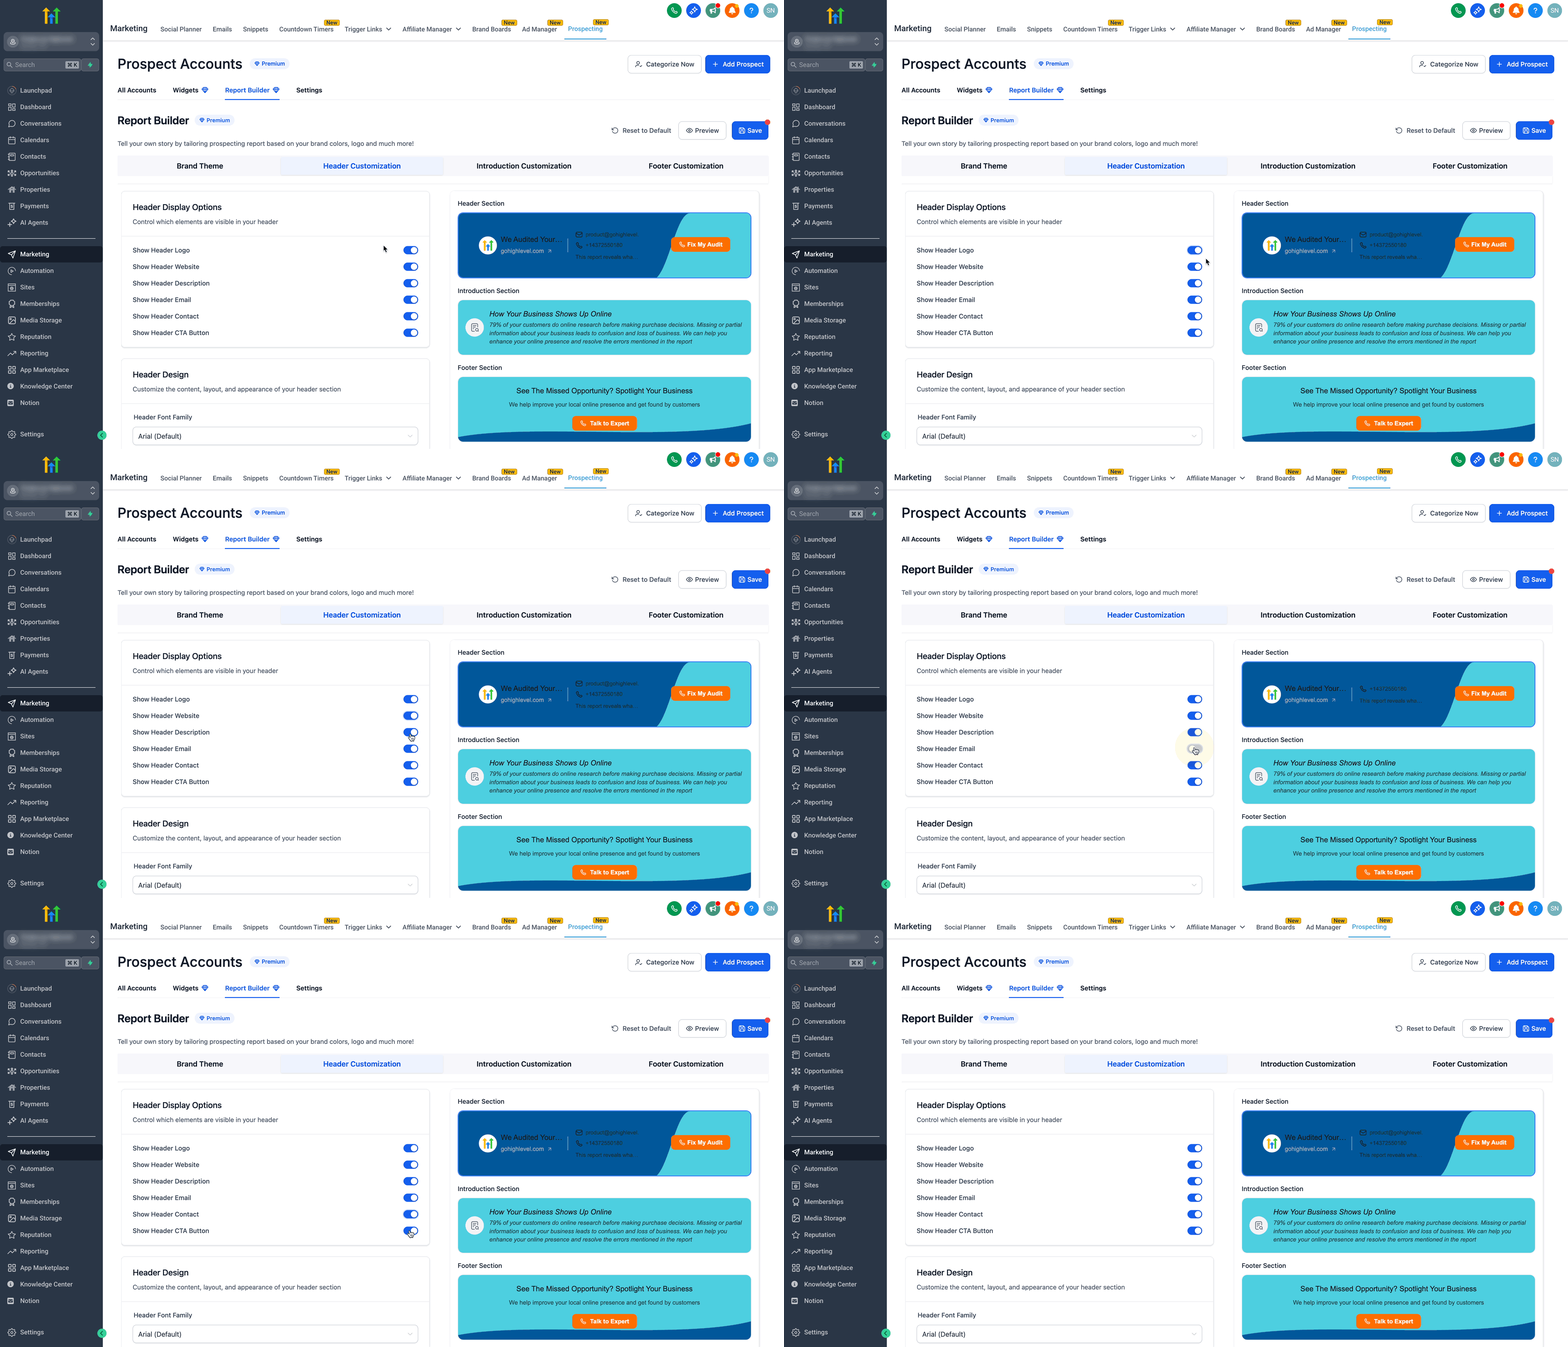
- Show Header Logo. Toggles the visibility of the business logo in the header.
- Show Header Website. Shows or hides the website link within the header.
- Show Header Description. Displays a short tagline or description next to the logo.
- Show Header Email / Contact. Shows or hides contact email and phone number in the header.
- Show Header CTA Button. Enables or disables the main call to action button in the header.
- Font Family (Header). Selects the typeface used for header text.
09Things to know before you rely on it
- Full customization and saving require a Premium Prospecting subscription; basic users can only preview.
- The redesigned UI applies only to web reports at this time.
- Recommended logo upload size is 80x80px.
10How it connects to the rest of HighLevel
- Compare free and premium prospecting options Free vs Premium prospecting
- Add workflow triggers for new prospects Prospect workflow trigger
- View pricing and plans for Premium access HighLevel pricing
Michael's take

Prospecting reports are often bland and break the flow of a brand story. Getting the look right helps you make a stronger first impression and nudges prospects toward the next step. The first setting I would lock in is the brand theme. Matching primary and secondary colors to the website makes the report feel like a natural extension of your marketing.
Once the colors are set, I would walk through the header and footer toggles to make sure the right contact info and CTA are visible. The live preview lets you confirm everything lines up before you hit save, so you can roll out a consistent, on brand report across all your clients.