
01Who this is for
- Agency owners who handle dozens of client subaccounts, because they can keep feature settings uniform without opening each account.
- Marketing consultants overseeing multiple client accounts, as bulk updates speed up onboarding of new tools.
- SaaS providers using HighLevel for their customers, because they can roll out feature changes across all tenant accounts quickly.
02Bulk feature management, explained
The bulk feature management tool lets you turn features on or off for many subaccounts in a single step. It removes the need to edit each account separately.
Select the subaccounts, pick the features you want to change, and choose Enable or Disable. Only the features you select are updated; everything else stays the same. Changes normally appear within two to five minutes, and you can follow progress in the bulk action history.
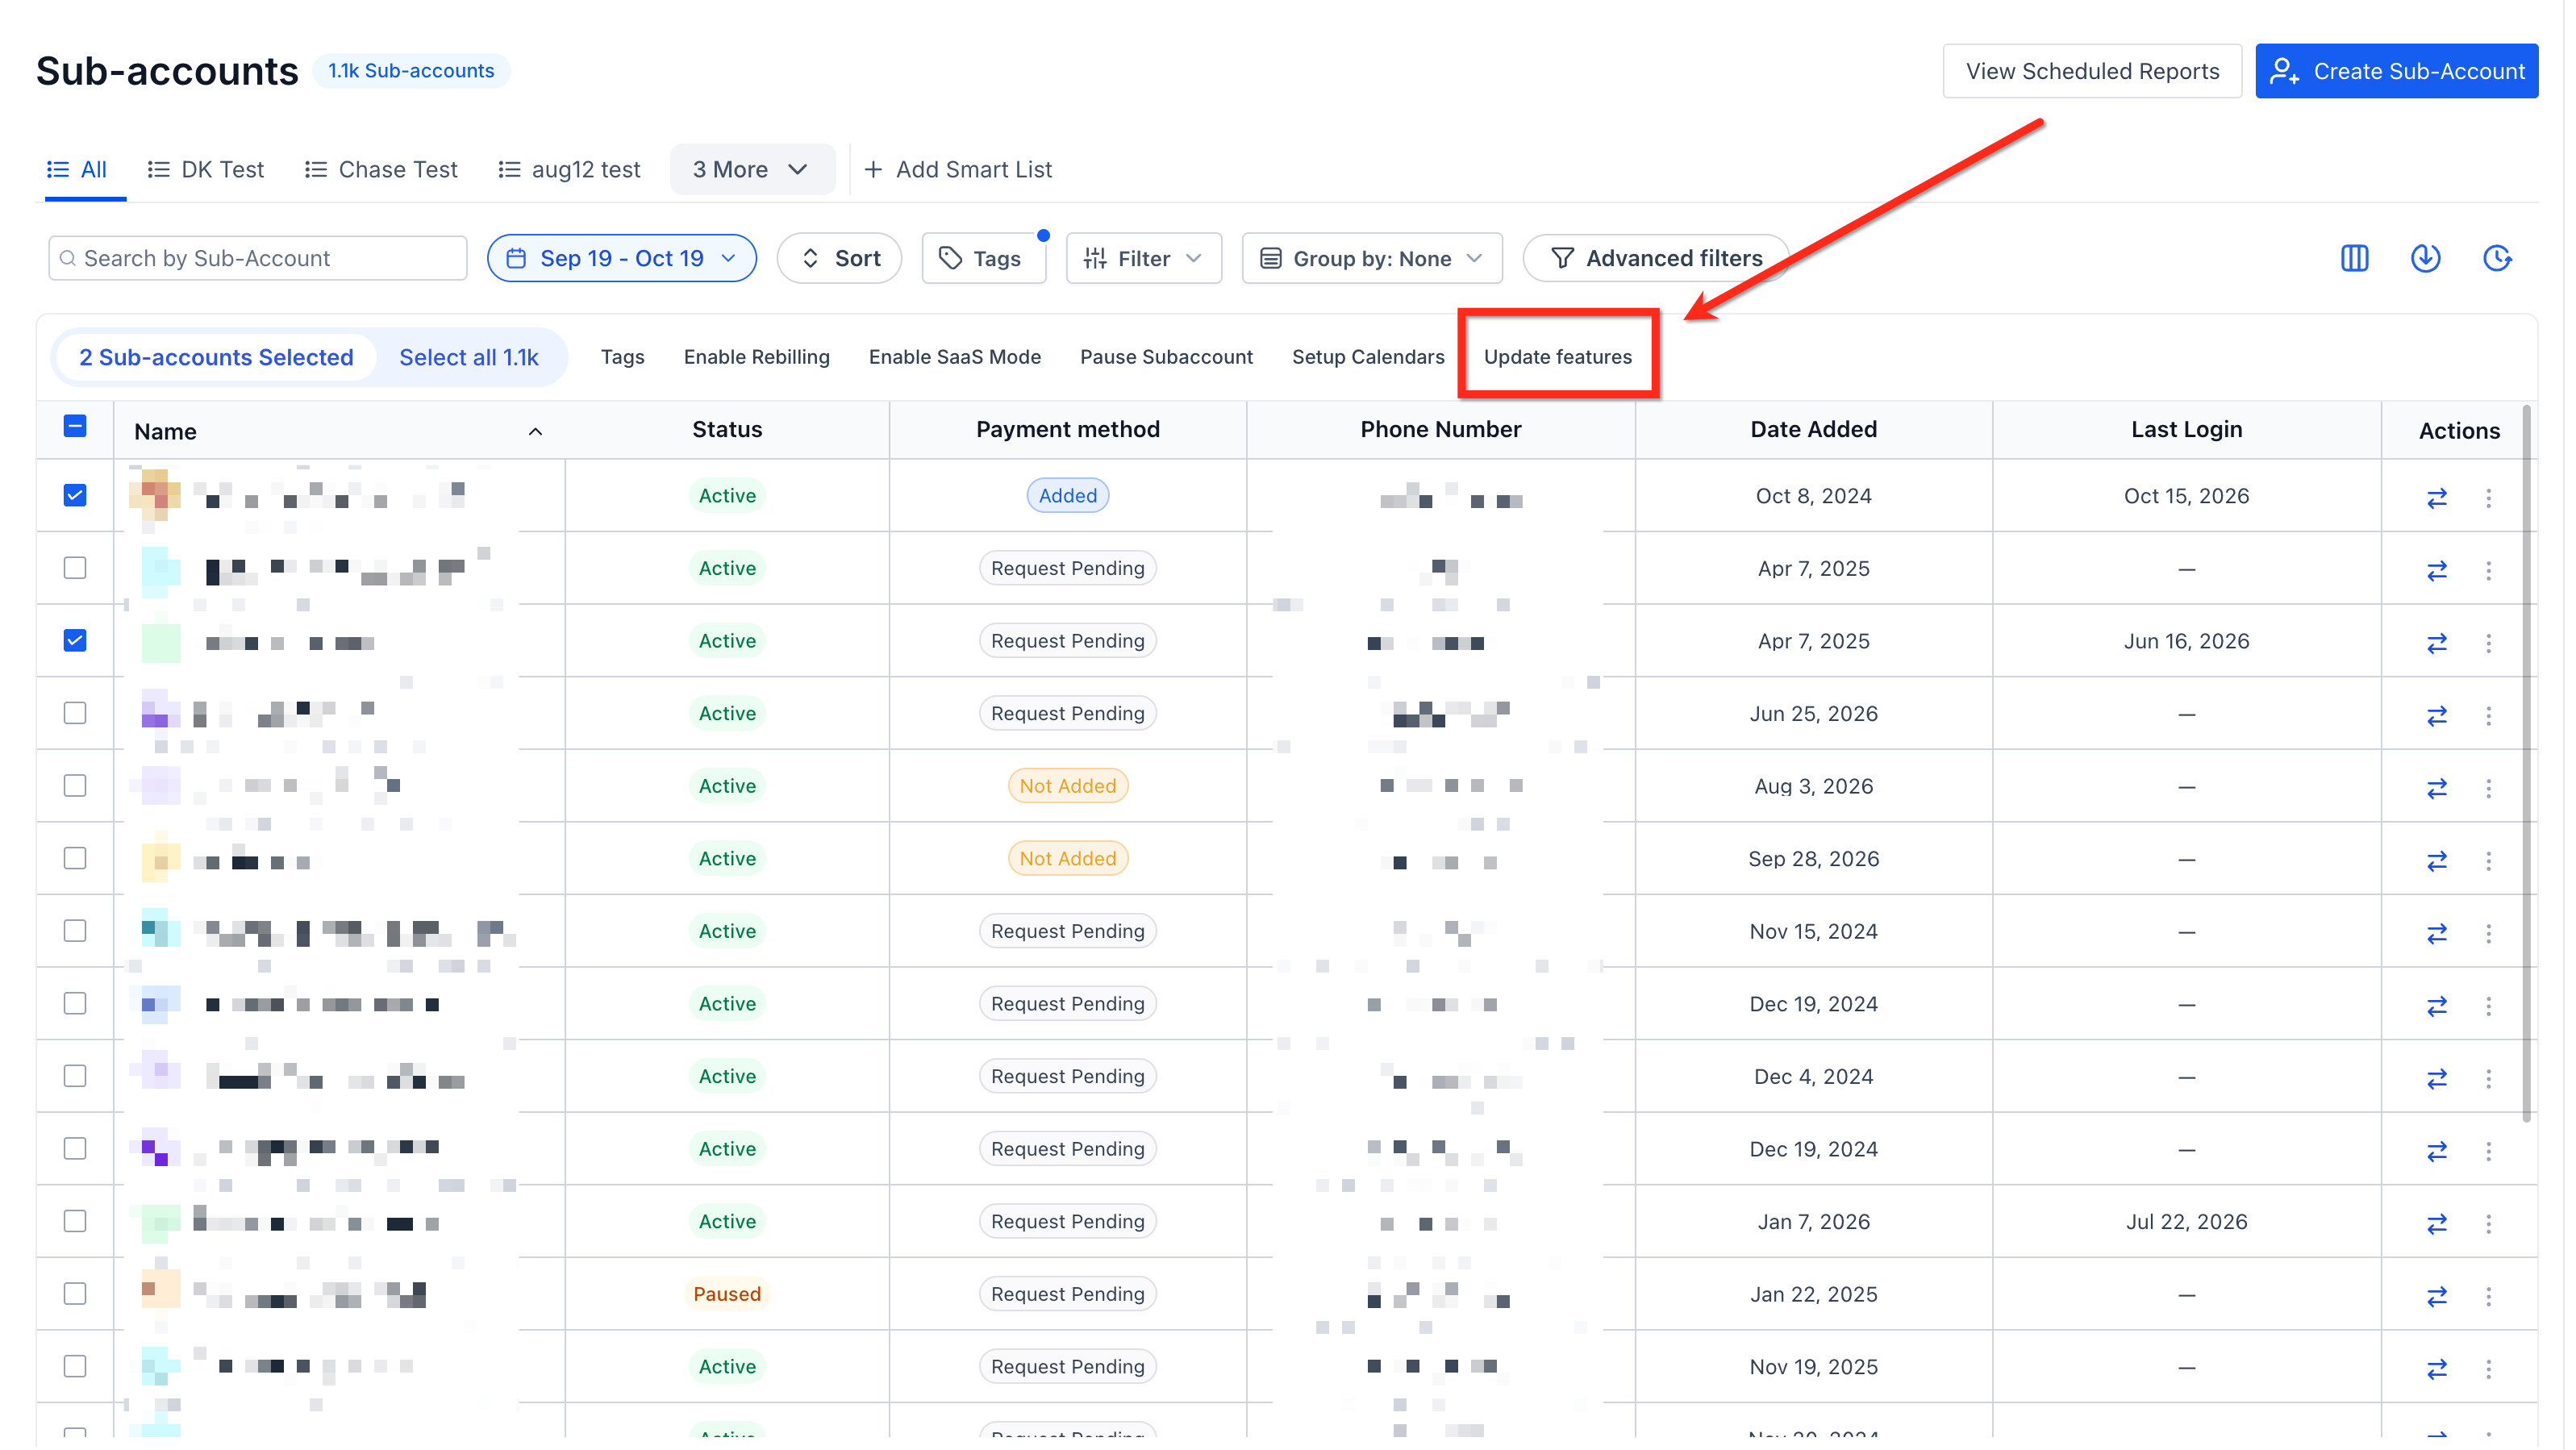
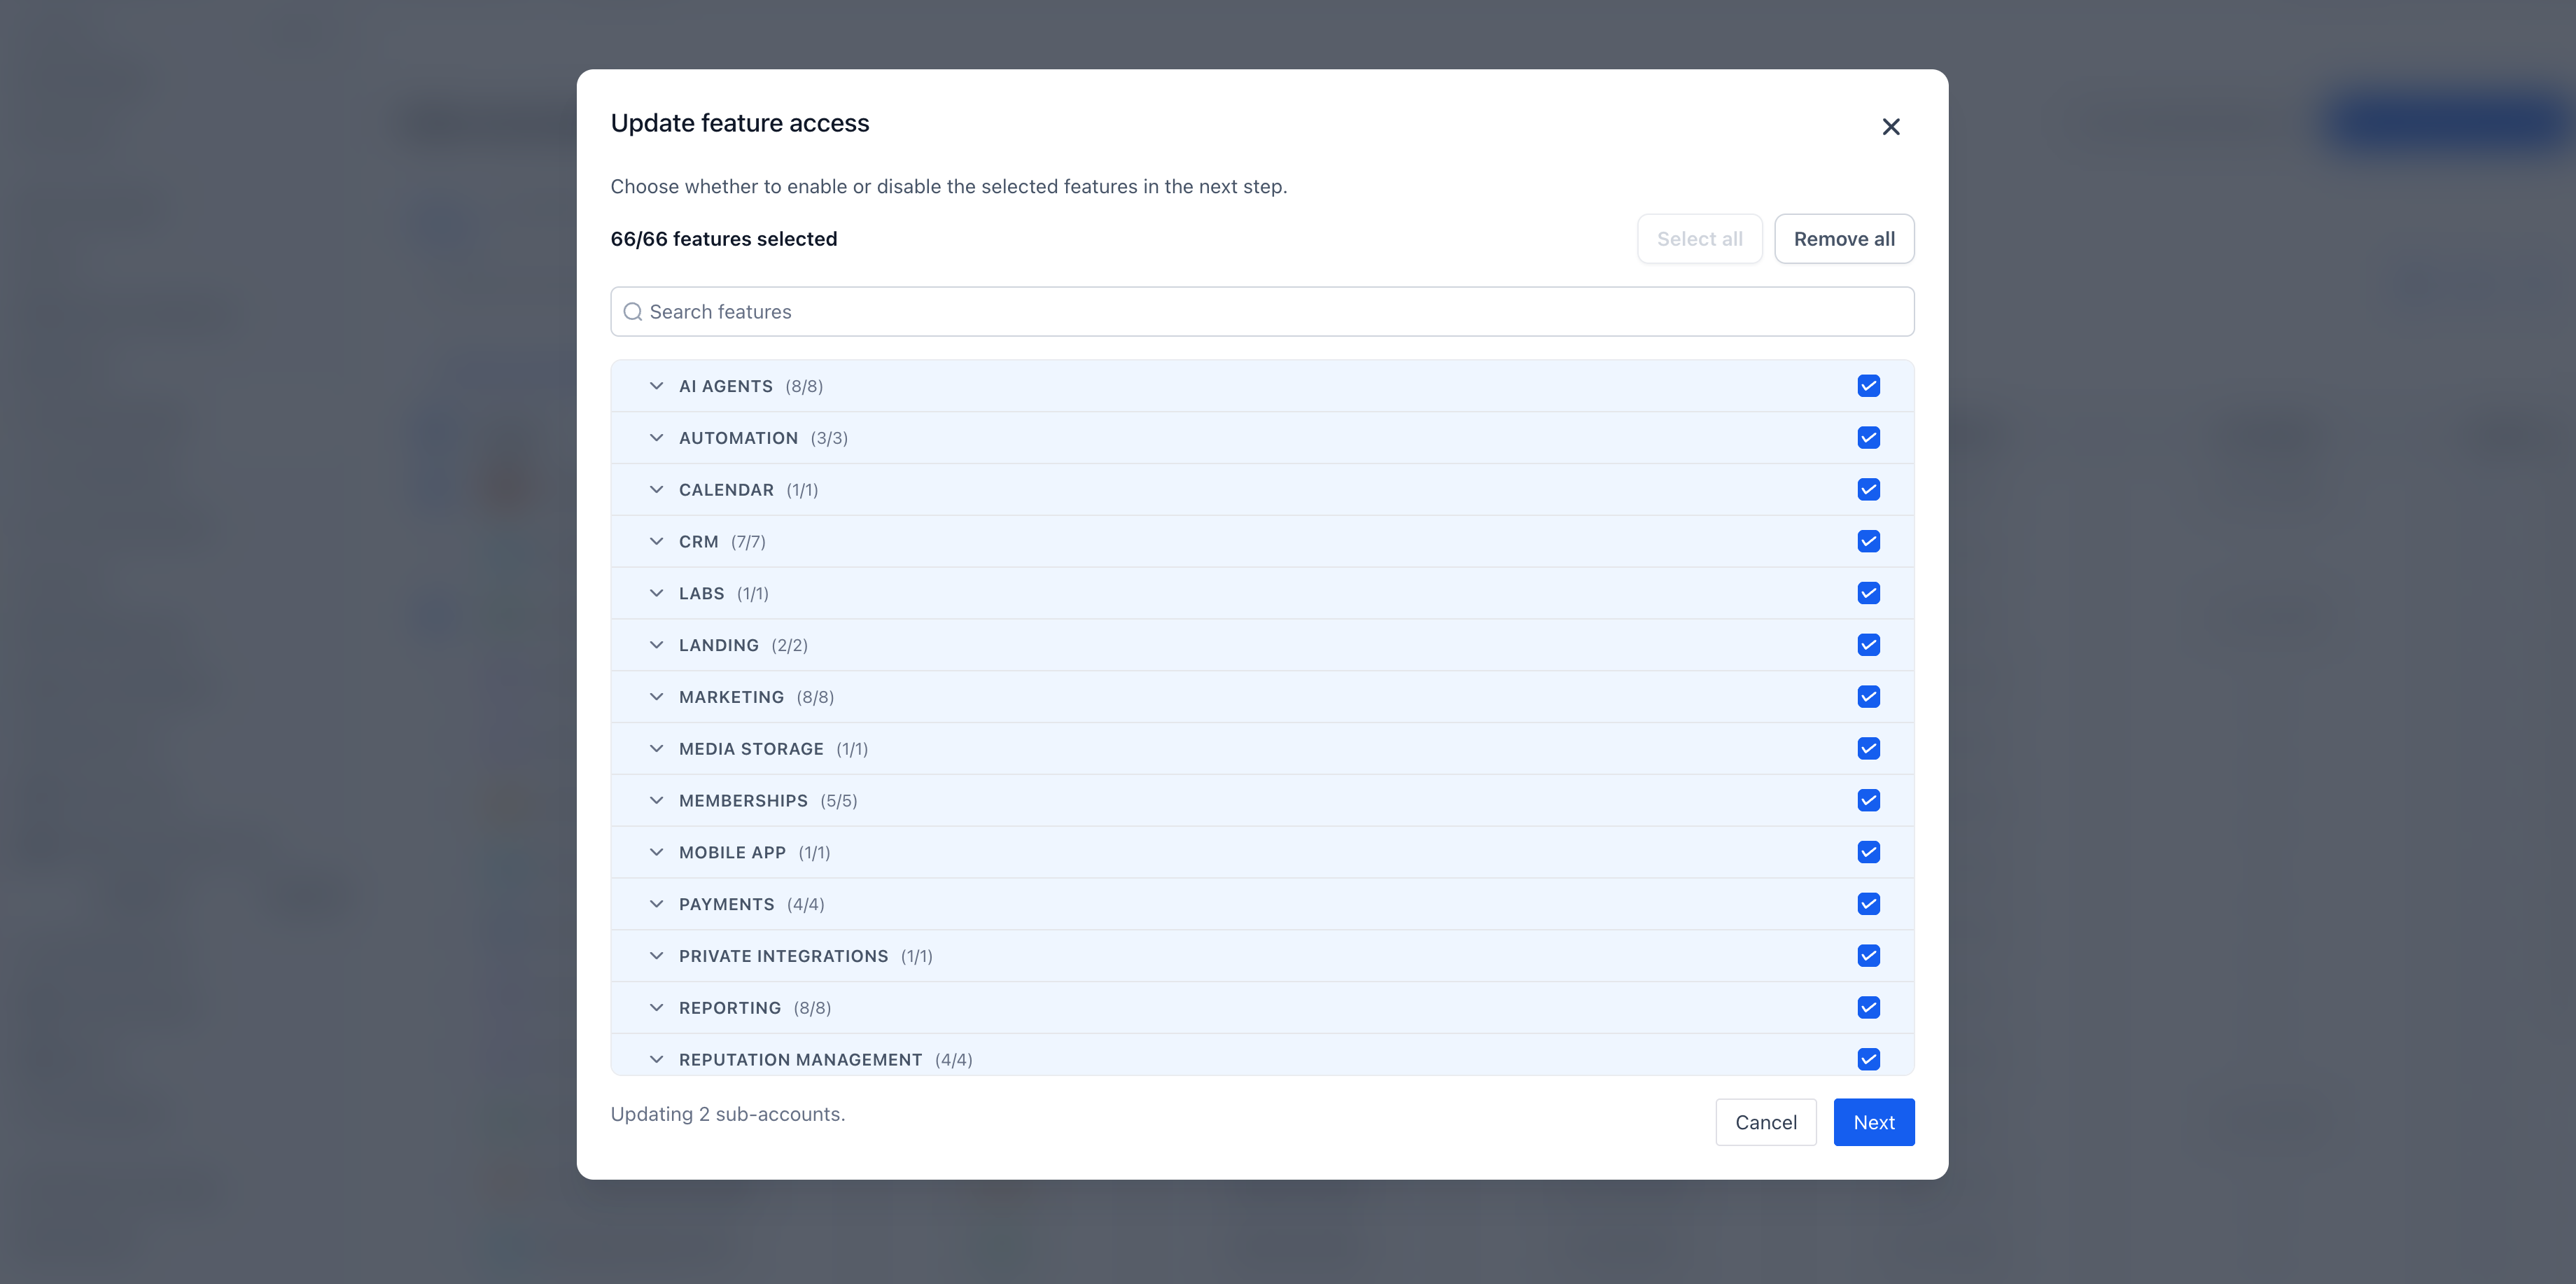
You access this function from Agency View > Subaccounts tab. After selecting accounts, the Update features button appears in the bulk action toolbar, opening the Update feature access window where you make your selections.
03How businesses use bulk feature management
- Digital marketing agency. The agency selects all client subaccounts that need a new email automation tool, chooses the automation feature, and disables it for accounts that are not yet ready. The bulk action updates the settings for every chosen account at once.
- Coaching business. A coach enables the calendar integration feature for all subaccounts that have enrolled in a premium program. By using the bulk enable option, the feature becomes active for the selected clients without opening each profile.
- Real estate brokerage. The brokerage disables the lead scoring feature for agents who use an external system. They select the relevant subaccounts, pick the lead scoring feature, and apply a bulk disable to remove access across the group.
04The numbers and rules that matter
- Updates typically take 2 to 5 minutes to take effect.
05How to set up and use bulk feature management in HighLevel
Bulk enable or disable features for subaccounts
- Open Agency View and navigate to the Subaccounts tab.
- Check the boxes next to each subaccount you want to modify.
- Click the Update features button in the bulk action toolbar.
- In the Update feature access window, find and select the desired features or groups, using Search, Select all or Remove all as needed.
- Press Next to continue.
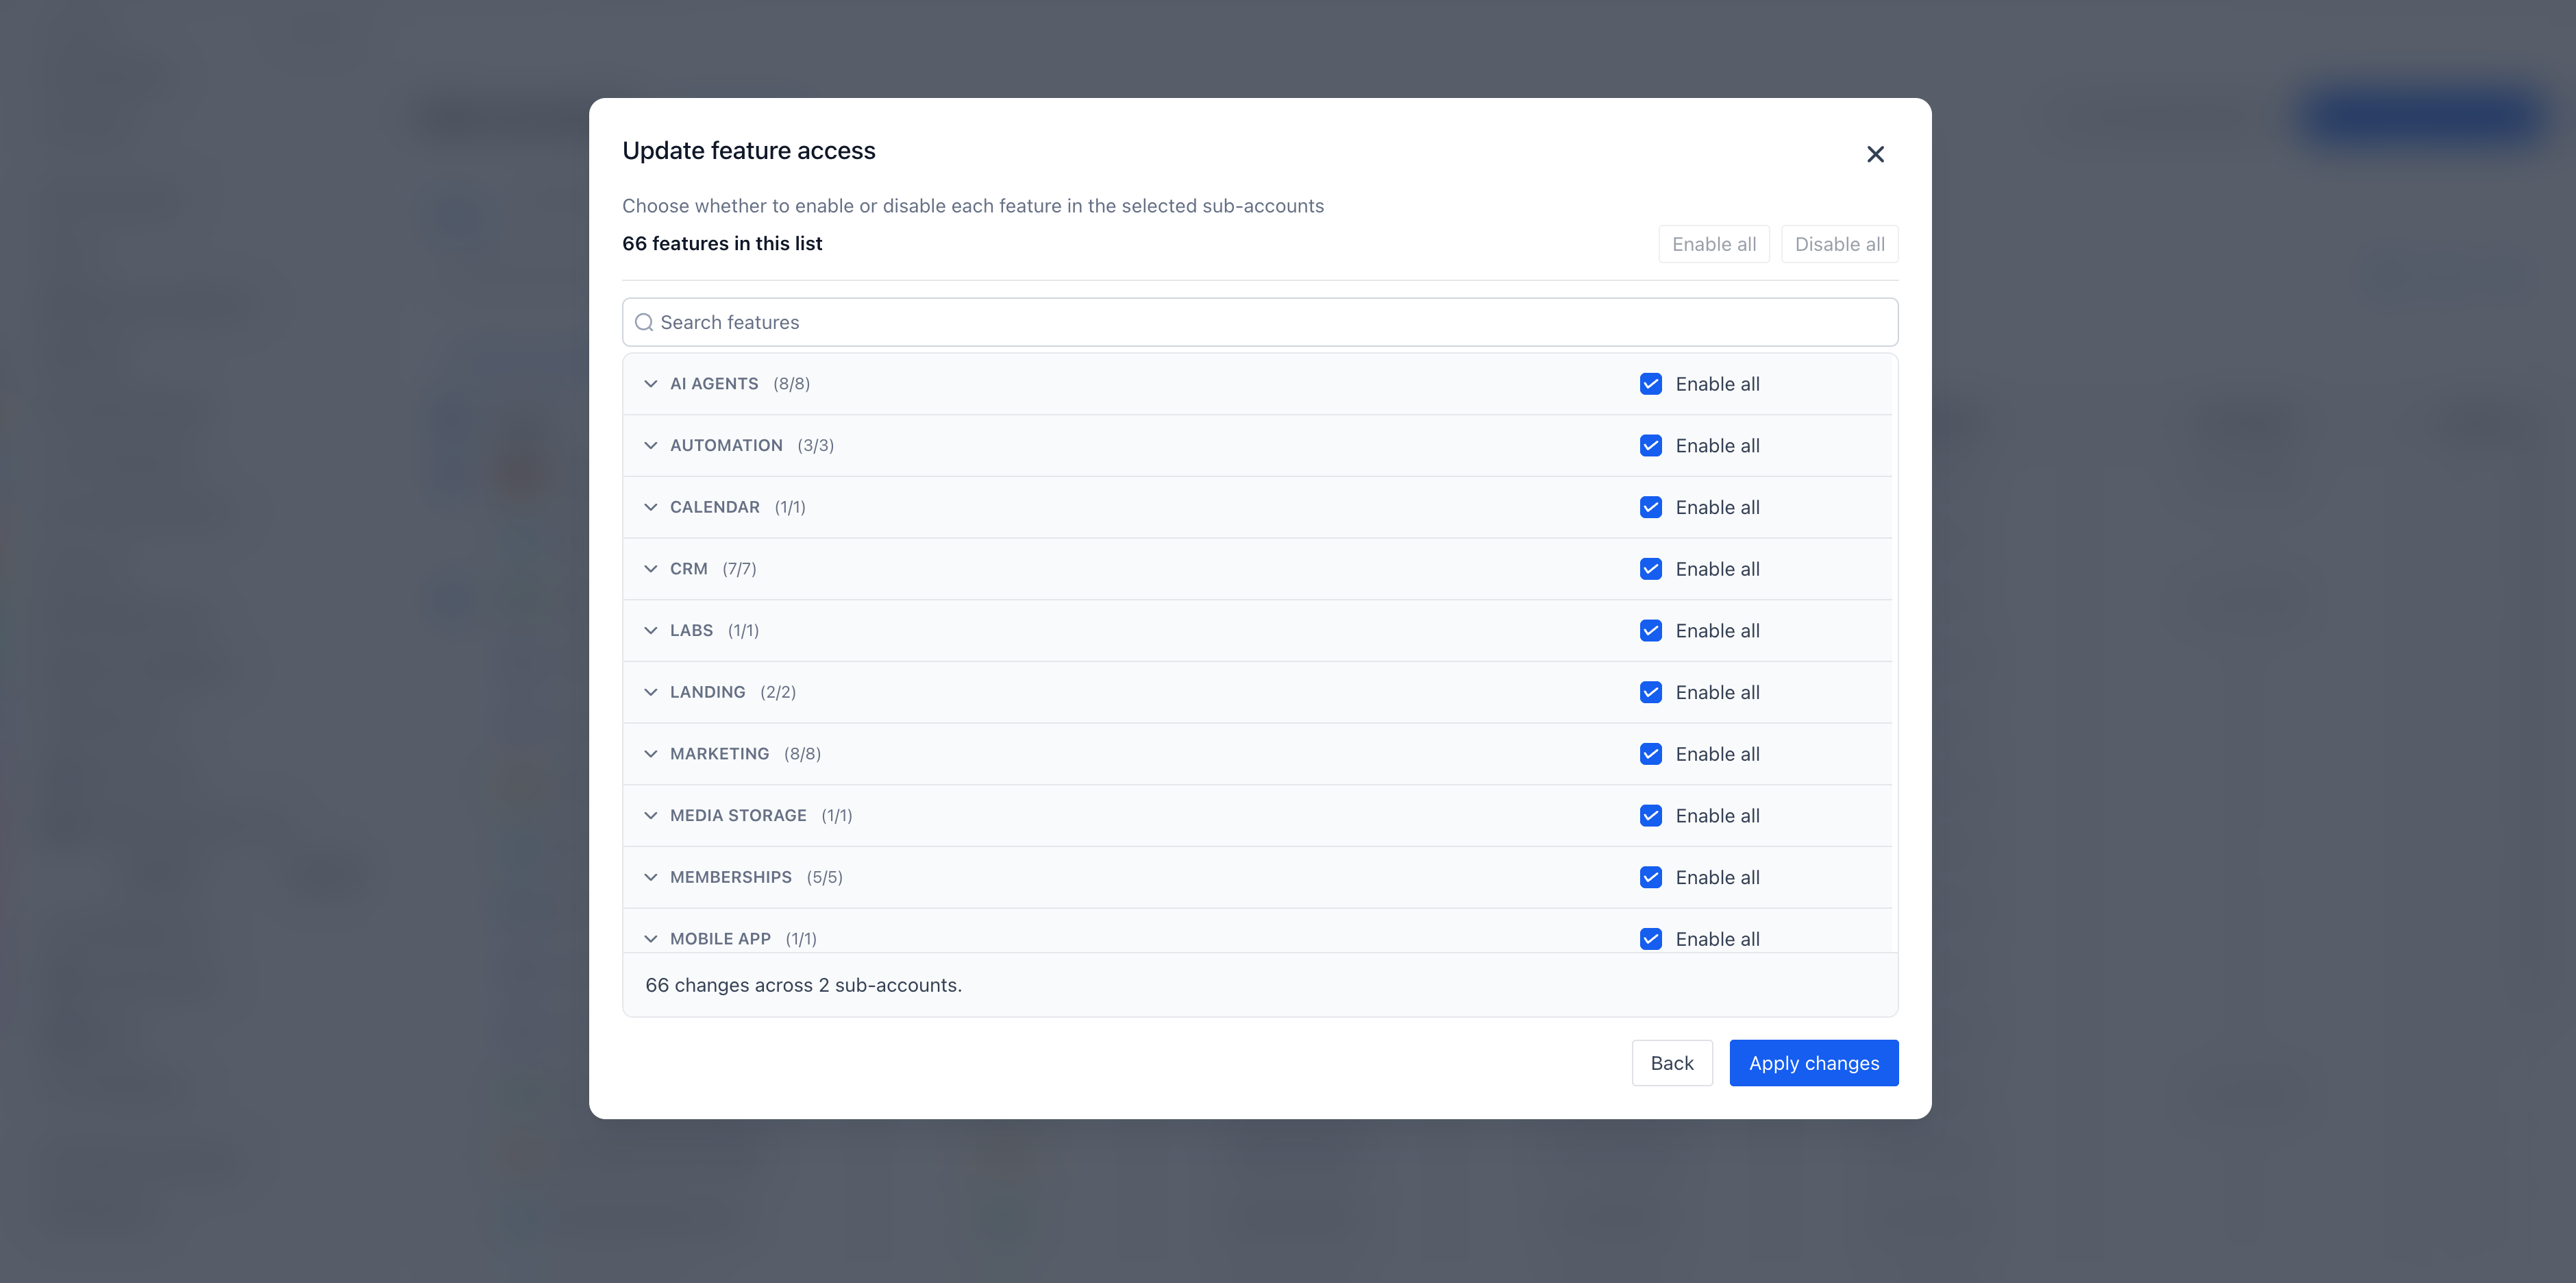
- Choose Enable or Disable for each highlighted feature, or use Enable all / Disable all to apply the same setting to all selected features.
- Click Apply changes, then watch for the confirmation message and use View bulk action history to monitor progress.
06What it looks like in HighLevel
07Settings that matter
- Enable. Activates the chosen feature for the selected subaccounts.
- Disable. Removes access to the chosen feature from the selected subaccounts.
- Select all. Marks every feature in the list as selected for the bulk update.
- Remove all. Clears all feature selections so no features are changed.
08Things to know before you rely on it
- Updates typically take two to five minutes to become effective.
- Only the features you select are changed; unselected features keep their current settings.
09How it connects to the rest of HighLevel
- Explore the new subaccount list with filters and bulk actions Subaccount list UI
- Learn how to enable SaaS mode for multiple subaccounts in bulk Bulk SaaS enablement
- View all features available in Agency View Agency View features
Michael's take

Bulk feature management can help get a group of clients up and running more quickly by reducing the need to update each account individually.
It also provides a way to keep permissions aligned without hopping between accounts.