
01Who this is for
- Agency staff who manage multiple client WordPress sites, because they can track each change and verify responsibility.
- Online store owners who need to monitor configuration edits and detect unusual traffic patterns.
- Platform administrators overseeing account wide WordPress activity, to maintain an audit trail of critical events.
02Access & activity logs, explained
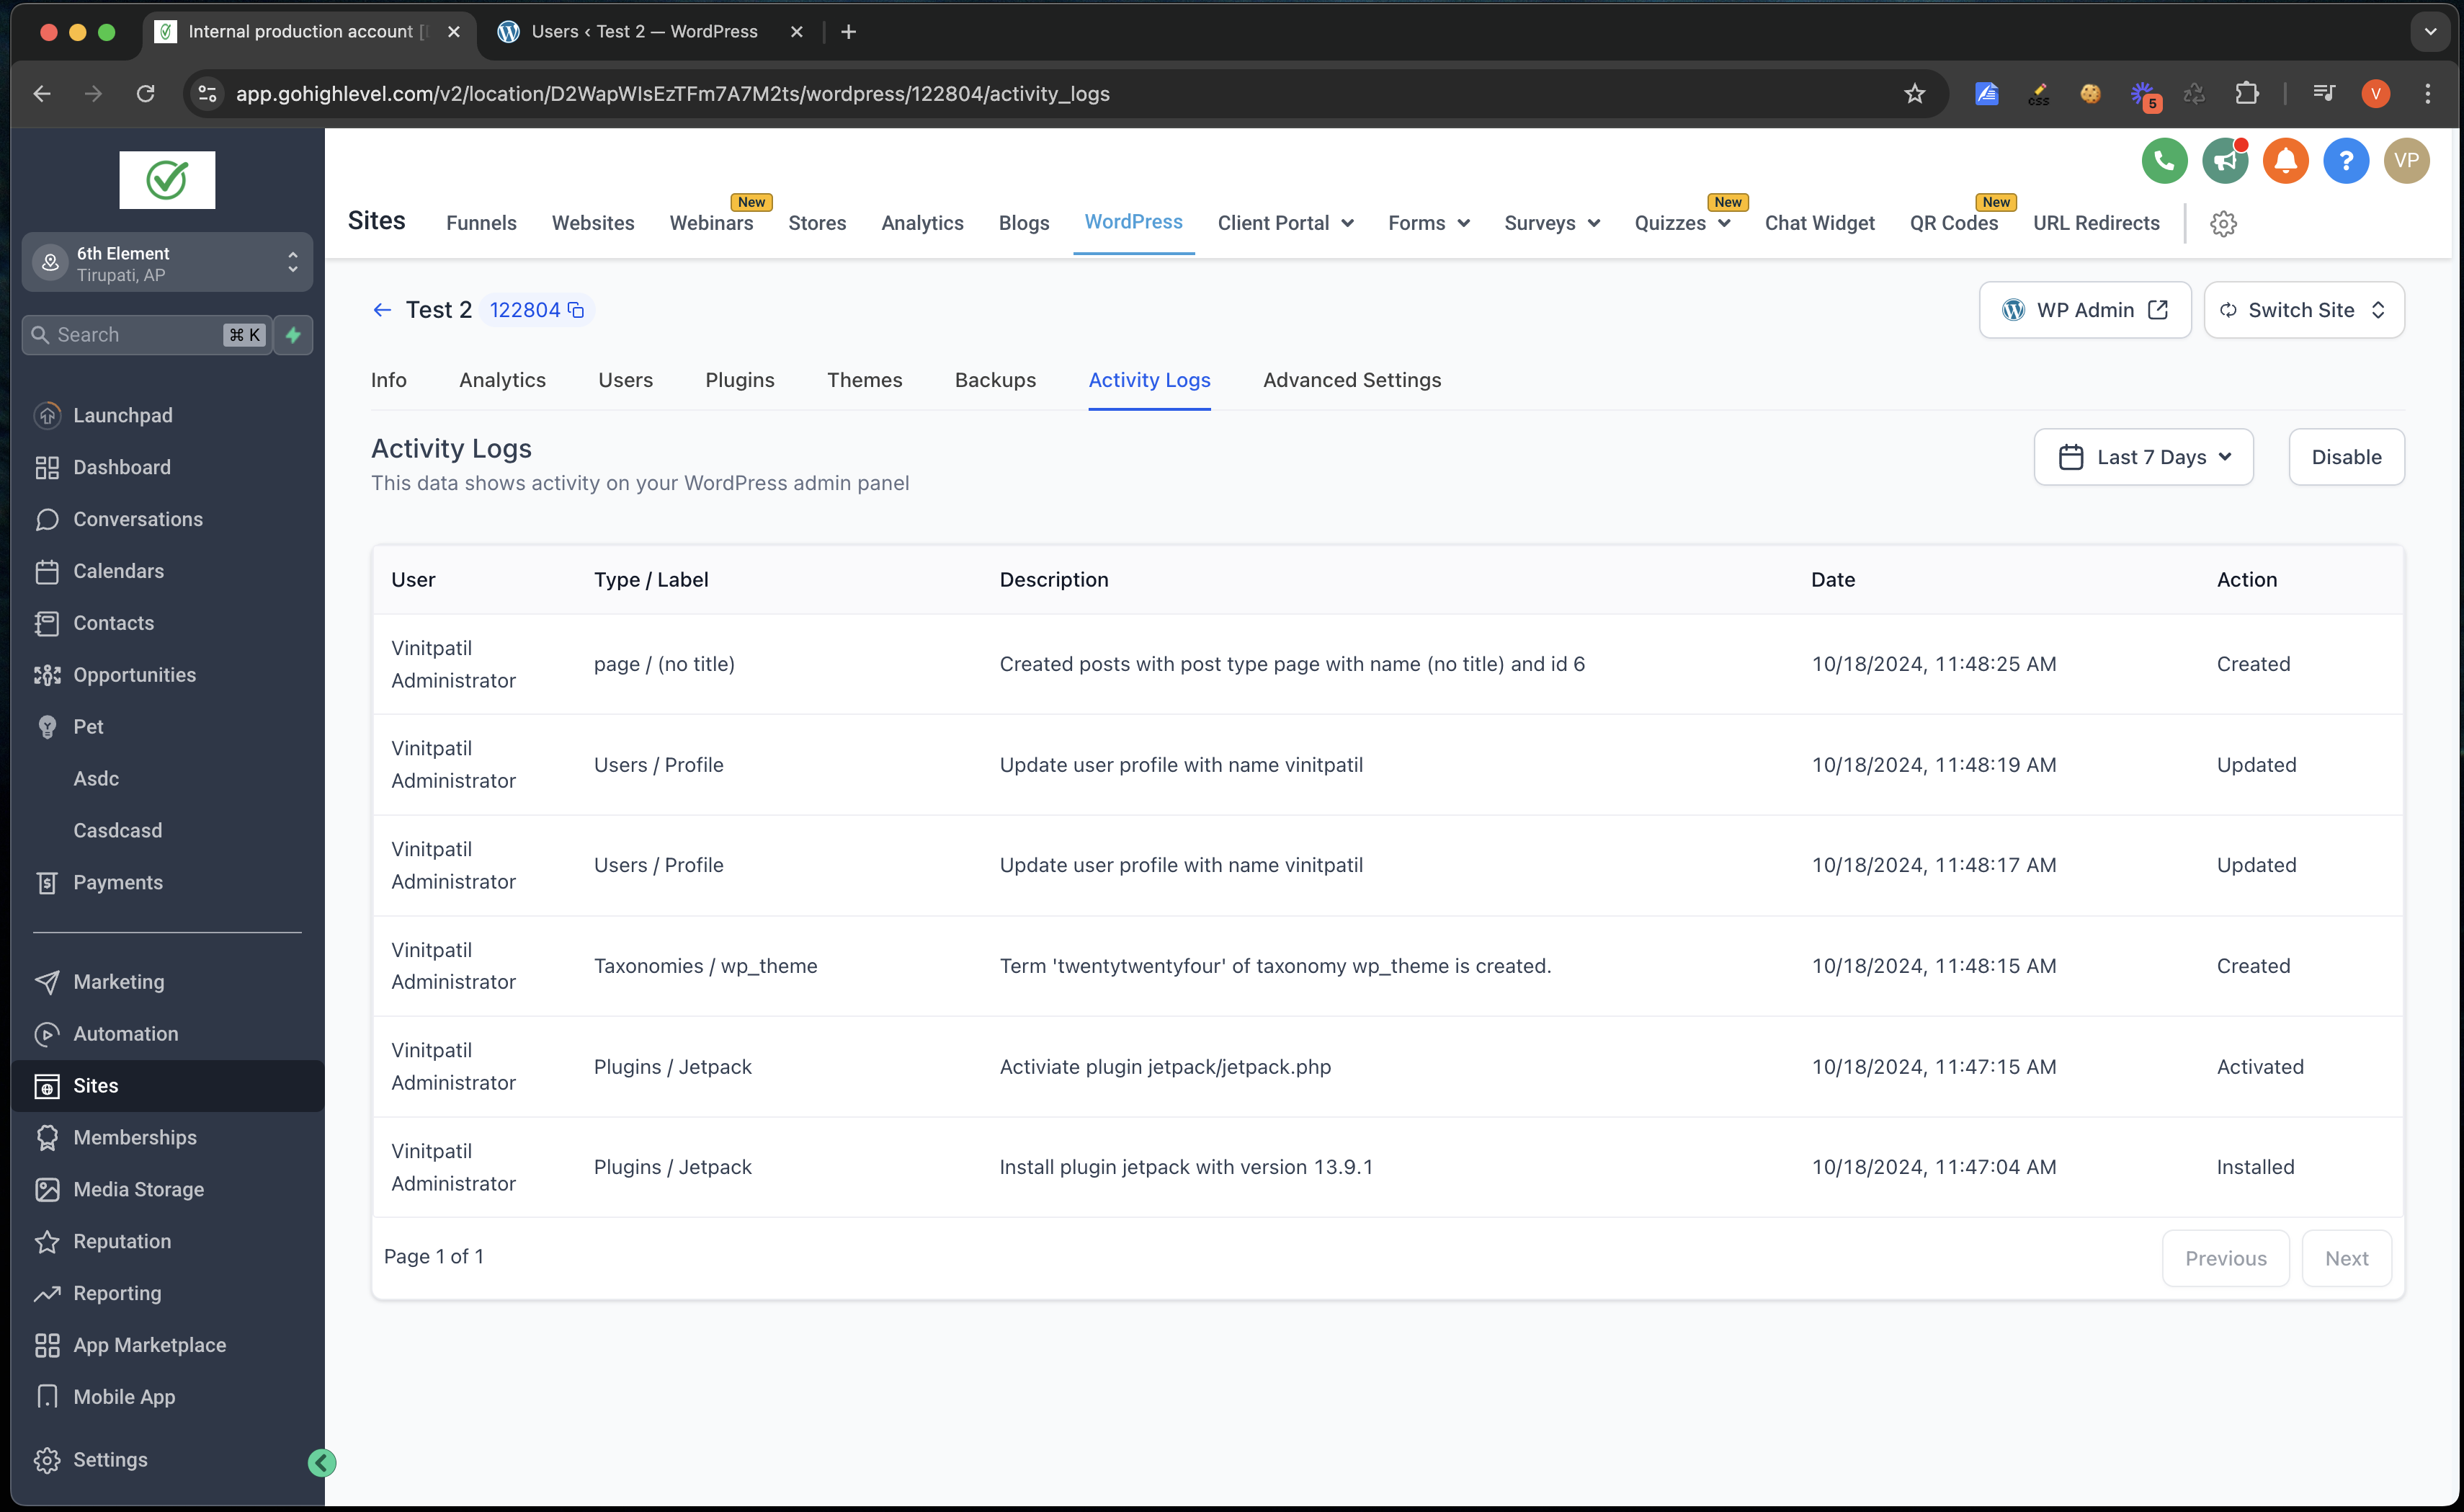
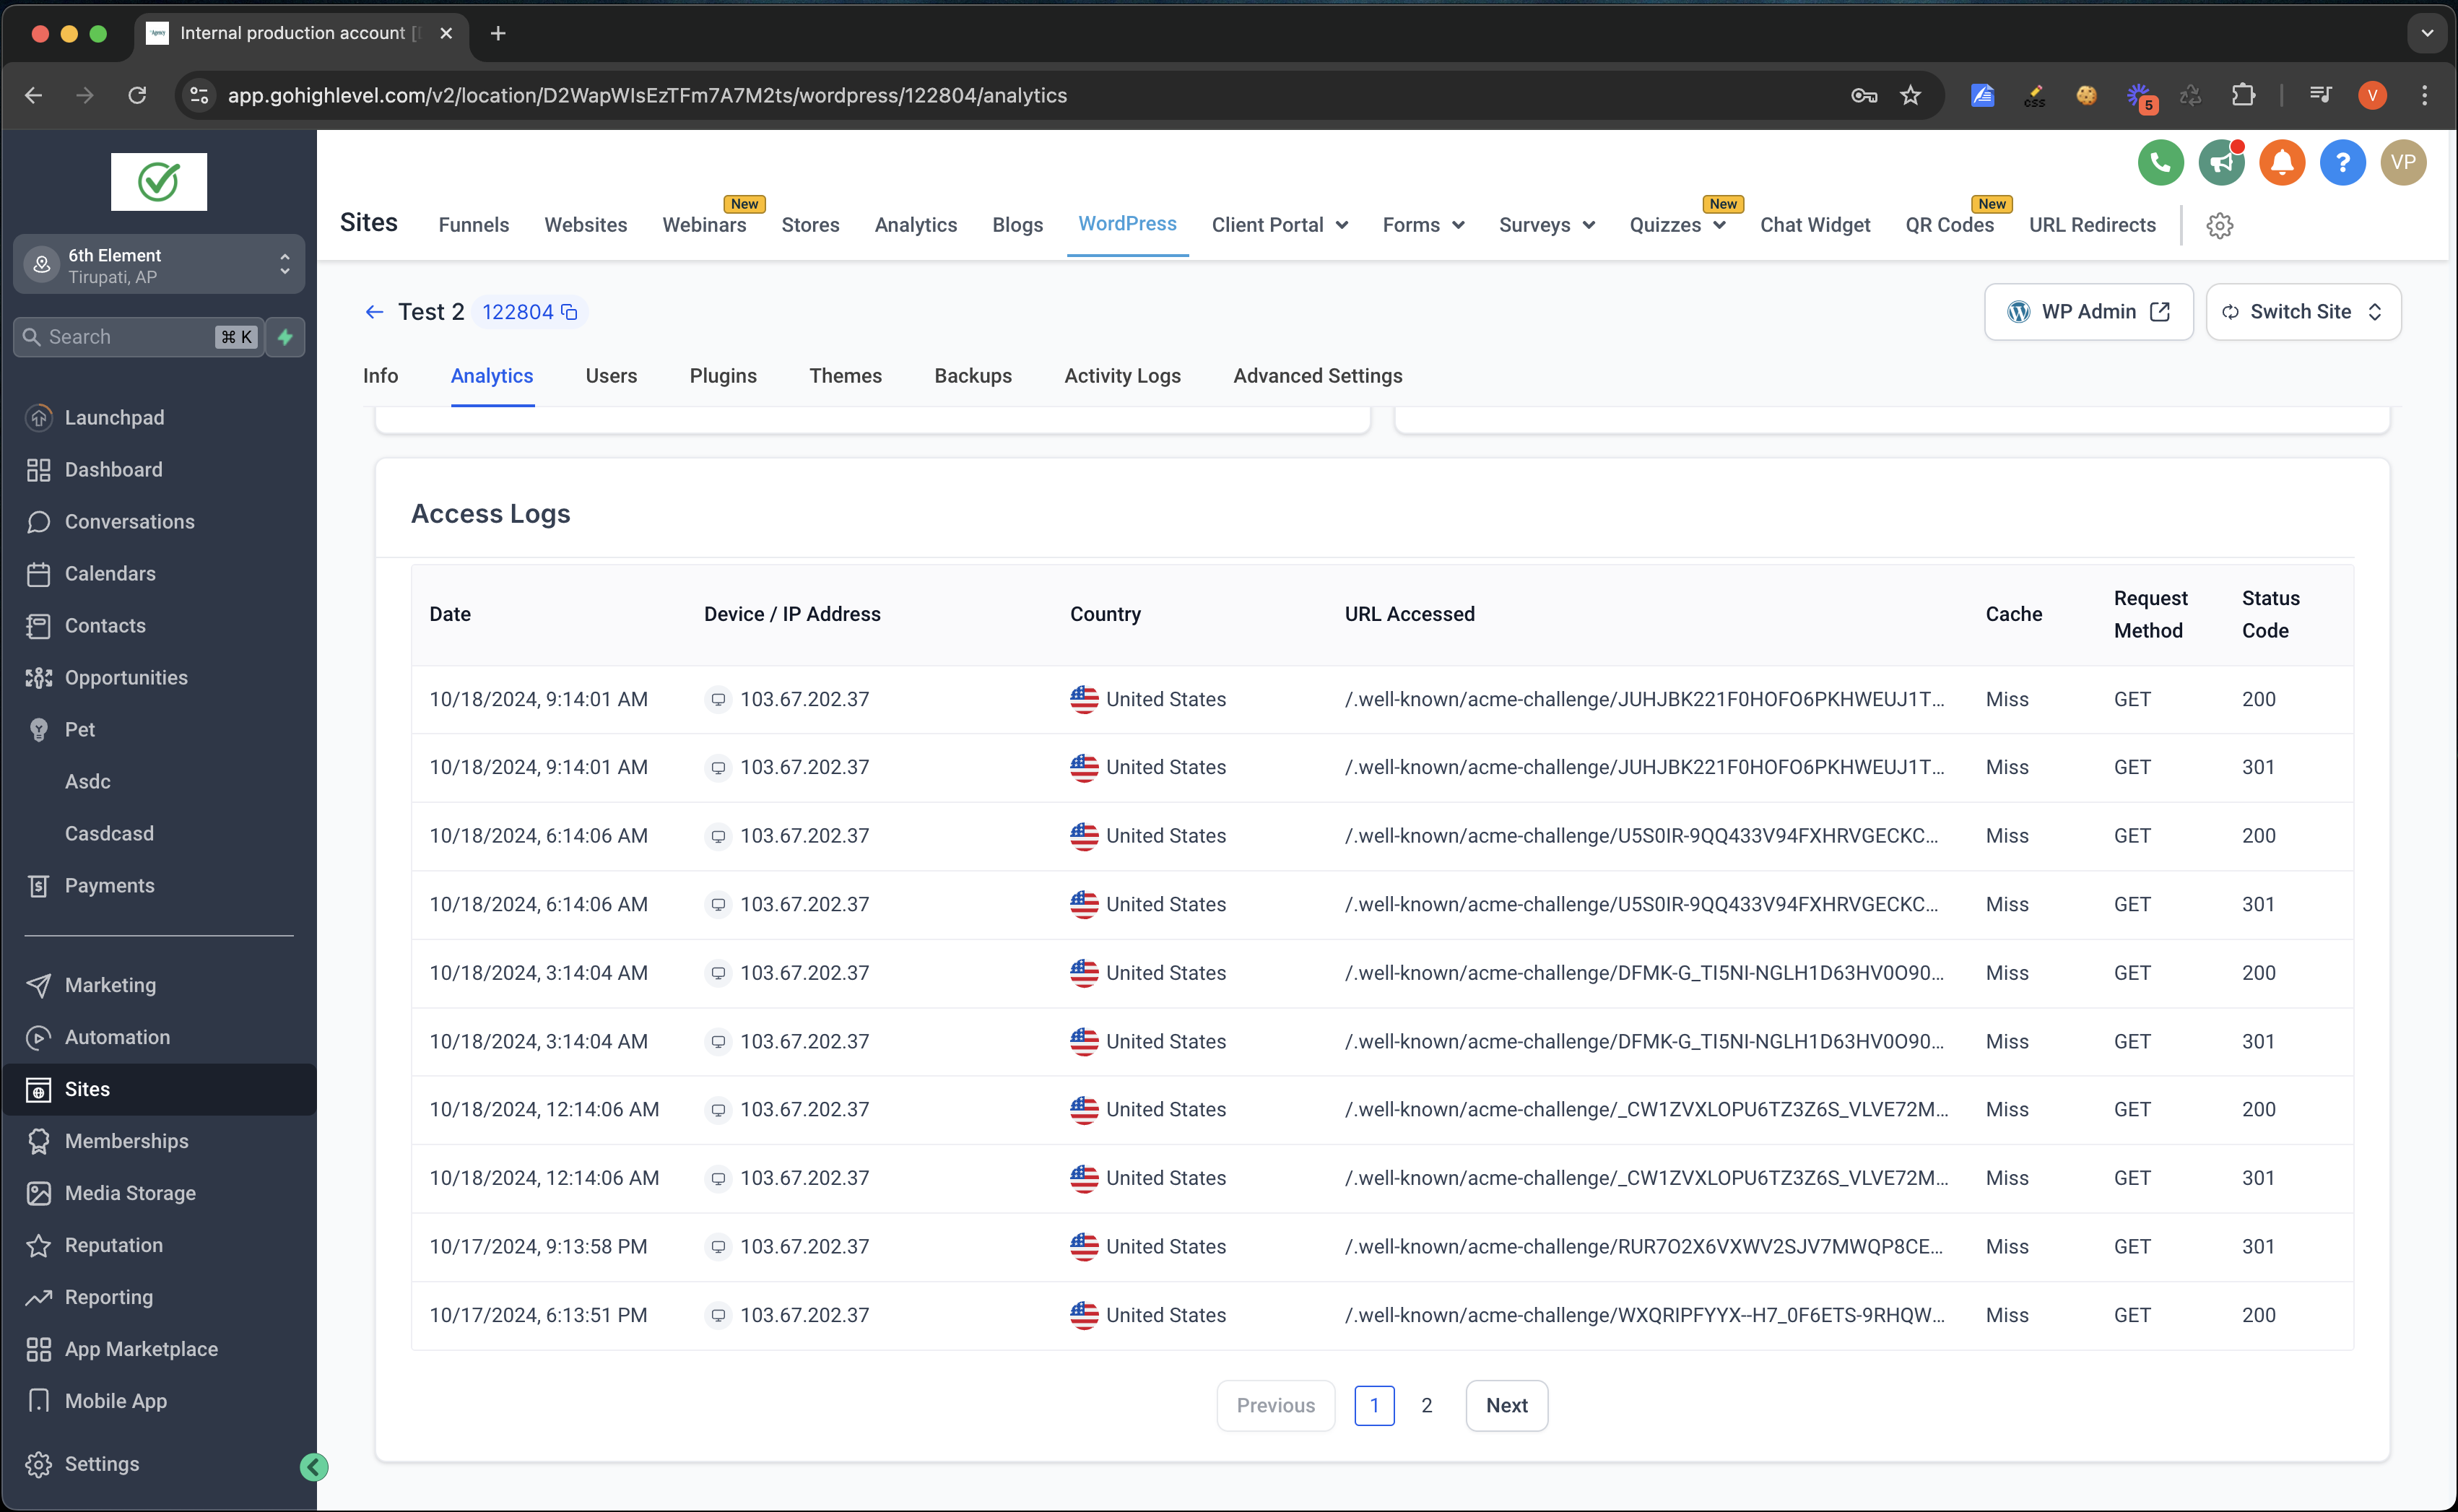
The feature records every interaction made inside a HighLevel hosted WordPress site. Activity logs list the user, timestamp, and result of each action, helping you see configuration changes or errors. Access logs capture each HTTP request, showing the URL, client IP, status code, and response size, useful for traffic analysis.
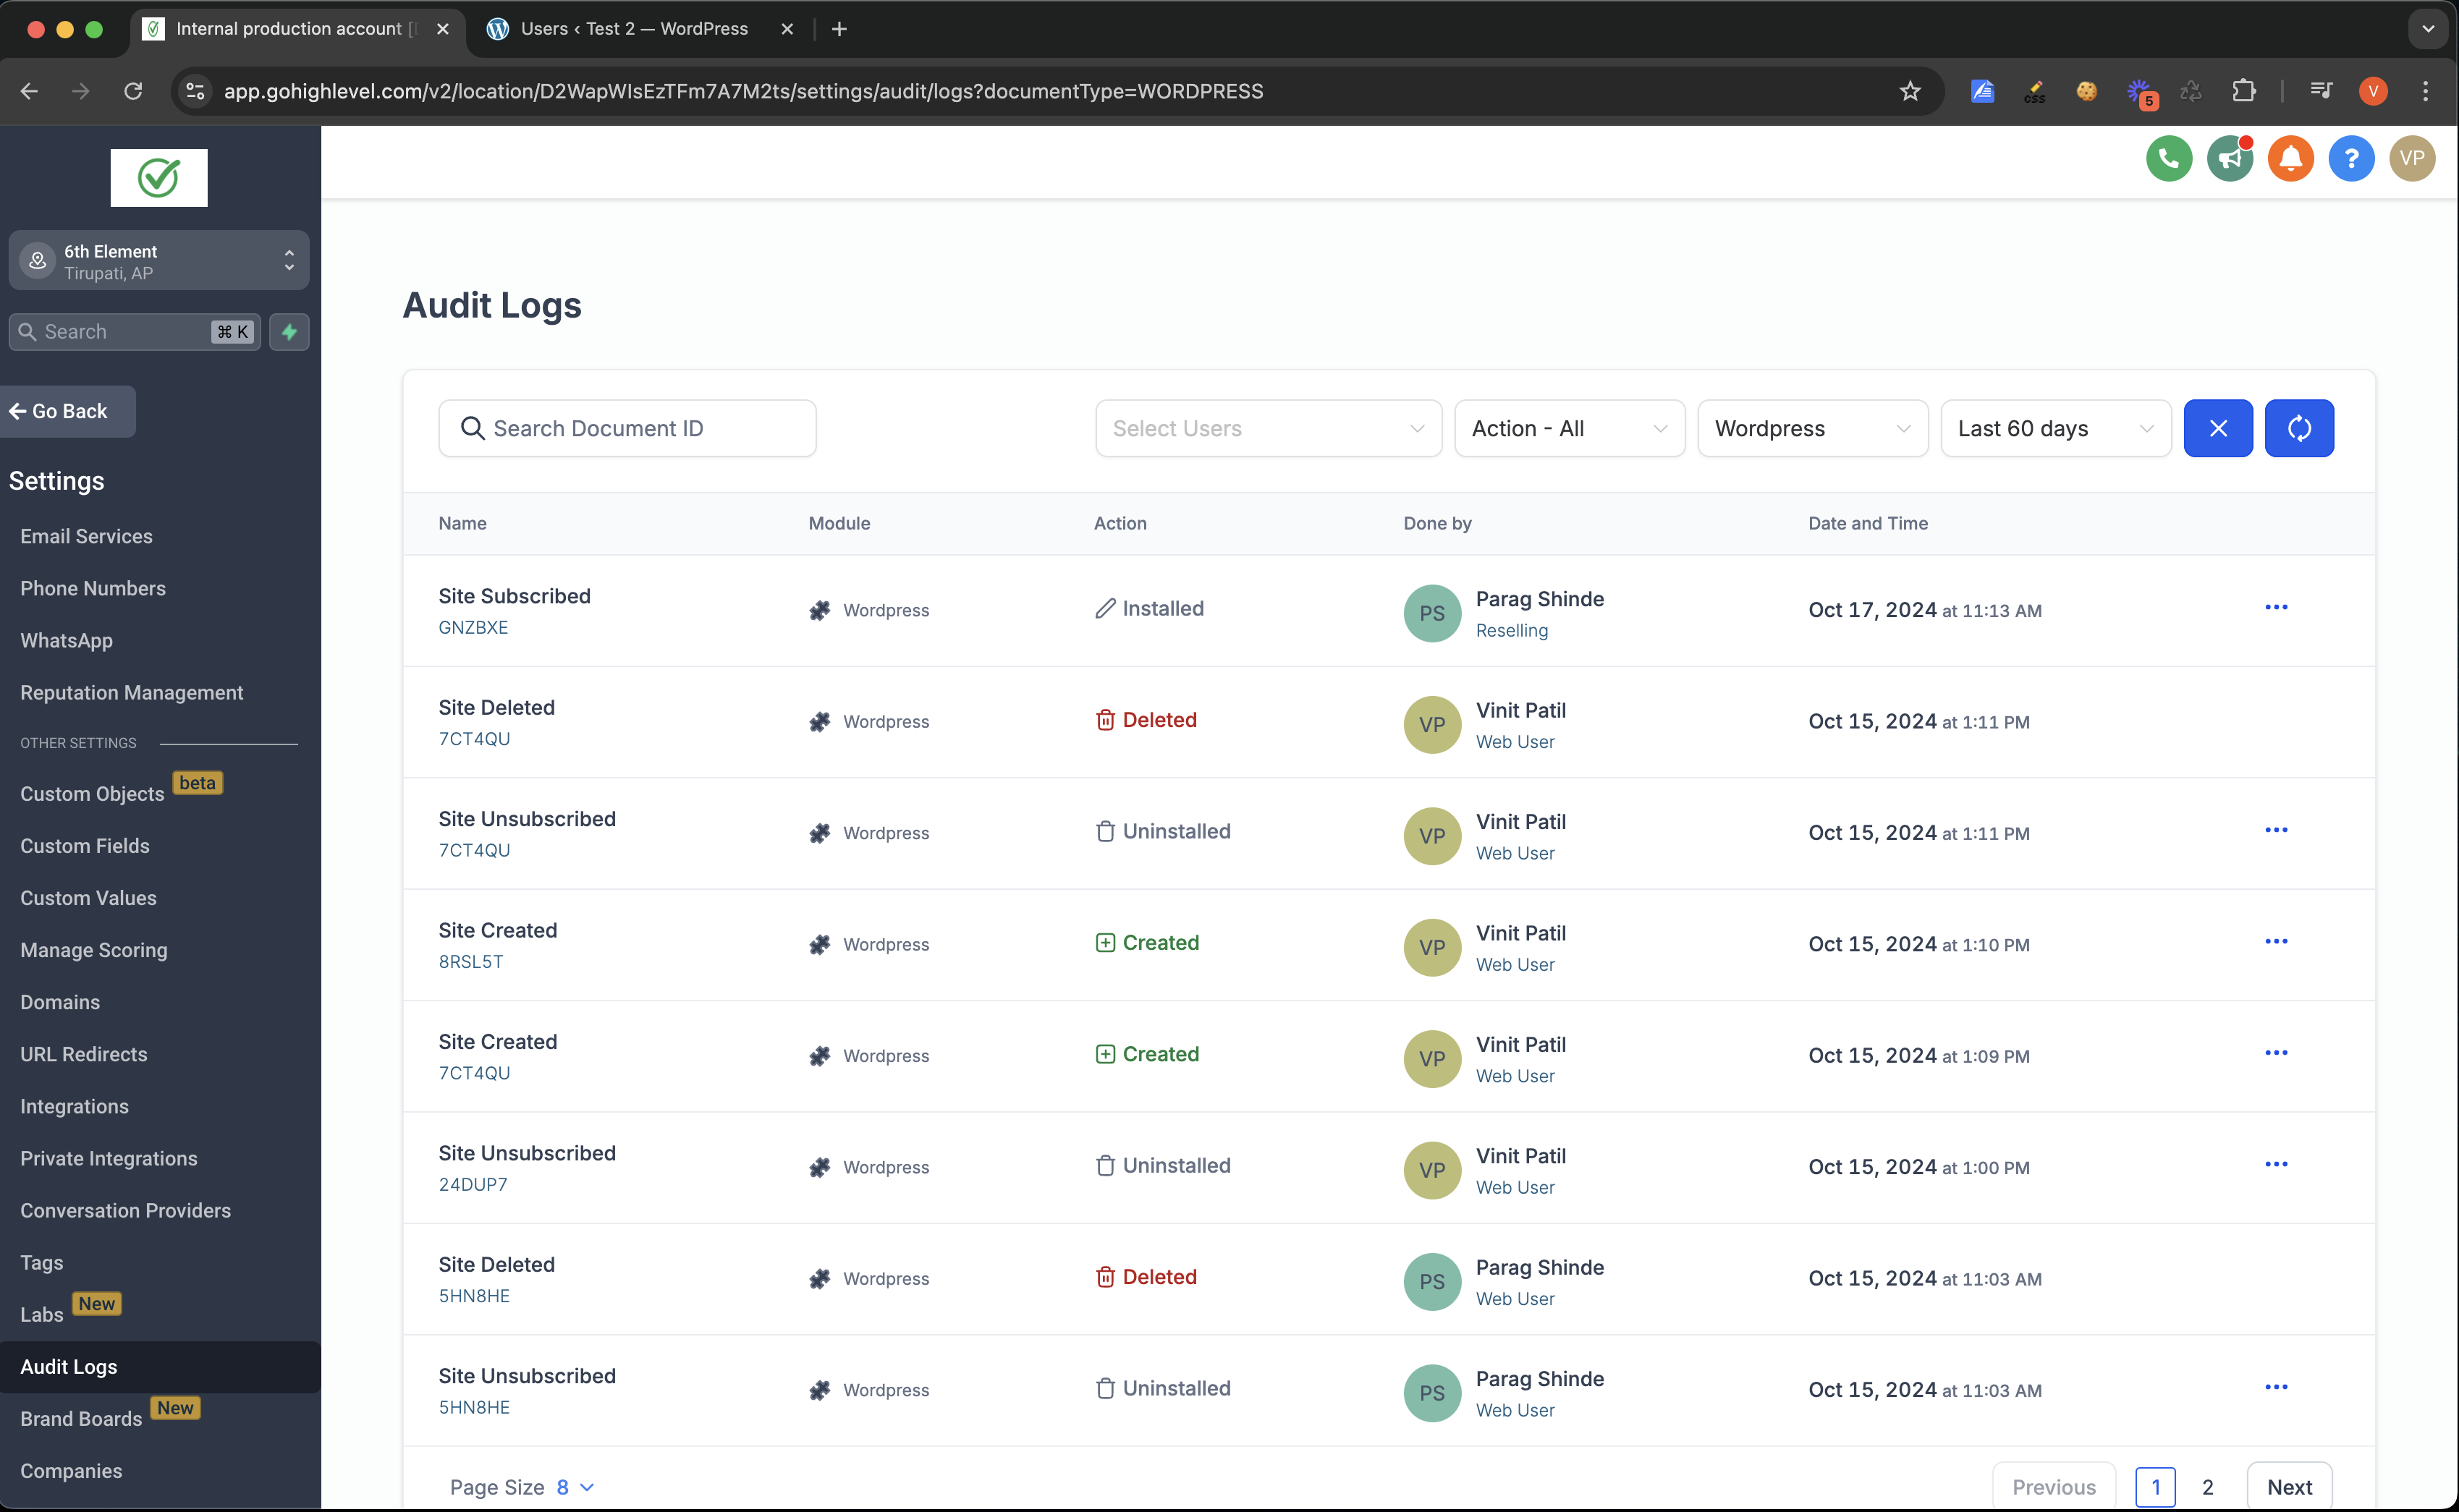
These logs are accessible from the WordPress Dashboard within HighLevel. Activity logs are turned on from the Manage Site submenu, while access logs appear in the Visitors Report under Analytics. Audit logs are merged with the platform’s native audit log view, reachable from Subaccount Settings. The logs only appear after the selected time range has elapsed once logging is enabled.
03How businesses use access & activity logs
- Digital marketing agency. The agency enables Activity Logs for each client site, selects a time window, and reviews the list to confirm that designers and copywriters applied changes as scheduled. The logs help the agency verify that no unauthorized edits occurred.
- Online retailer. The retailer opens the Access Logs from the Visitors Report to see which URLs generated 404 responses. By examining client IP addresses and timestamps, they identify broken links or potential bots affecting site performance.
- Consulting firm. The firm opens Audit Logs through Subaccount Settings to trace who purchased a WordPress add on or deleted a site. This creates a clear record that can be referenced during internal reviews or client disputes.
04Before you start
- User must have permission to view logs in the WordPress admin area.
05How to set up and use access & activity logs in HighLevel
View activity logs for a WordPress site
- Go to WordPress Dashboard > Manage Site.
- Select Activity Logs from the sub menu and click Enable.
- Choose a time range; logs appear after the selected period once logging is active.
06What it looks like in HighLevel
07Settings that matter
- Activity Logs. Controls whether actions performed on the WordPress account are recorded, including user, time, and success status.
- Access Logs. Shows each server request made to the site, detailing URL, client IP, timestamp, HTTP status, and response size.
- Audit Logs. Integrates WordPress specific events with the platform’s overall audit log, tracking major actions such as purchases, unsubscribes, site creation, and deletion.
08Things to know before you rely on it
- Logs only display after the chosen time range has passed once logging is enabled.
- Viewing logs requires appropriate user permissions.
09If something goes wrong
- Logs Not Showing. Ensure you have the necessary permissions to view logs.
- Suspicious Activity Detected. Immediately change passwords and review server access controls.
- High Error Rates in Logs. Identify failing plugins or misconfigured settings using the error details, then correct the underlying issues.
10How it connects to the rest of HighLevel
- Manage WordPress sites in HighLevel WordPress hosting guide
- Add domains to WordPress sites Domain setup
- WordPress plugin and theme management Plugin management
Get More InformationOpens on HighLevelPublished November 2, 2026 · Updated November 17, 2026