
01Who this is for
- Users who create new WordPress sites can pre select plugins during the setup wizard.
- Users can skip the selection step and add or remove plugins later through the WordPress dashboard.
02Popular wordpress plugins, explained
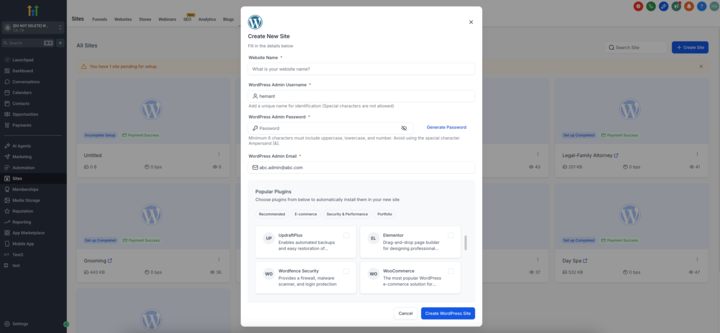
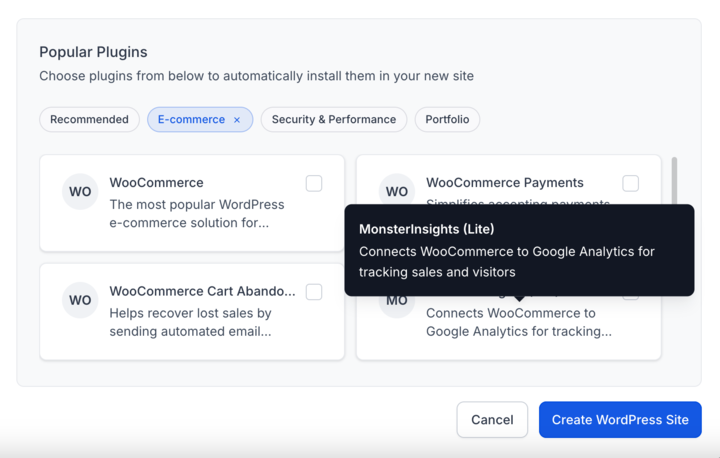
The plugin picker appears inside the site creation wizard and shows a set of commonly used WordPress extensions. You decide which items to include; the platform then installs and activates them without further interaction. If you skip the step, the site is created with only the core LeadConnector (LC) plugin.
During the wizard the list is optional and only the plugins shown can be chosen at that time. After the site goes live you retain full authority over every plugin through the standard WordPress admin area.
The feature lives in the Sites module. Open Sites > WordPress Dashboard, start a new site or finish an existing setup, and you will encounter the Popular Plugins step. Later management happens via Plugins > Installed Plugins inside the WordPress dashboard.
03How businesses use popular wordpress plugins
- Digital marketing agency. The agency opens the site creation wizard, selects SEO, analytics and form plugins from the curated list, and finishes setup. All chosen plugins appear ready to use, letting the agency focus on client content.
- Online course creator. During site creation the creator checks the LMS and membership plugins offered, completes the wizard, and finds those tools active immediately, later adjusting settings from the WordPress admin.
- Local service business. The business owner skips the plugin step for a clean baseline, then later opens the WordPress dashboard, adds a booking plugin from the standard marketplace, and activates it when needed.
04How to set up and use popular wordpress plugins in HighLevel
Install plugins during site creation
- Open Sites > WordPress Dashboard from the HighLevel account.
- Click Create Site or Complete Setup next to the target site.
- Proceed through the wizard until the Popular Plugins screen appears.
- Mark the checkboxes for each desired plugin.
- Select Continue or Finish Setup to complete the site build.
Manage plugins after setup
- From the HighLevel Sites page, click Open WordPress Dashboard.
- In the WordPress admin, go to Plugins > Installed Plugins.
- Deactivate, delete, or add new plugins as required.
05What it looks like in HighLevel
06Things to know before you rely on it
- The plugin selection step can be omitted; it is not mandatory.
- Only plugins displayed in the Popular Plugins list are available during the initial setup.
- Every new HighLevel hosted WordPress site receives the LeadConnector (LC) plugin automatically.
07How it connects to the rest of HighLevel
- Manage plugins and themes after they are installed. Plugin and theme management
- Activate a WordPress hosting plan to begin using the plugin picker. WordPress hosting activation
- Use the WP Admin button for single sign on to the WordPress dashboard. WP Admin single sign on
Michael's take

When you’re rushing to launch a new site, hunting down the right plugins takes precious time. The first thing I would get right is the plugin selection step in the setup wizard, so the tools you need are already installed and active before you ever log into WordPress. Then you can hop into the WordPress dashboard and fine tune the plugins or add others as your business evolves.