
01Who this is for
- Agencies developing client previews can stop unfinished sites from being crawled.
- Founders testing beta versions can keep the site private while gathering feedback.
- Businesses with internal portals can avoid accidental exposure to search engines.
02Disable SEO Indexing, explained
The feature adds a noindex, nofollow rule to a site’s robots.txt and inserts a matching meta tag in the page header. It works at the site level, so the whole WordPress installation becomes invisible to compliant search engines. Only users with Admin rights can view or change the setting.
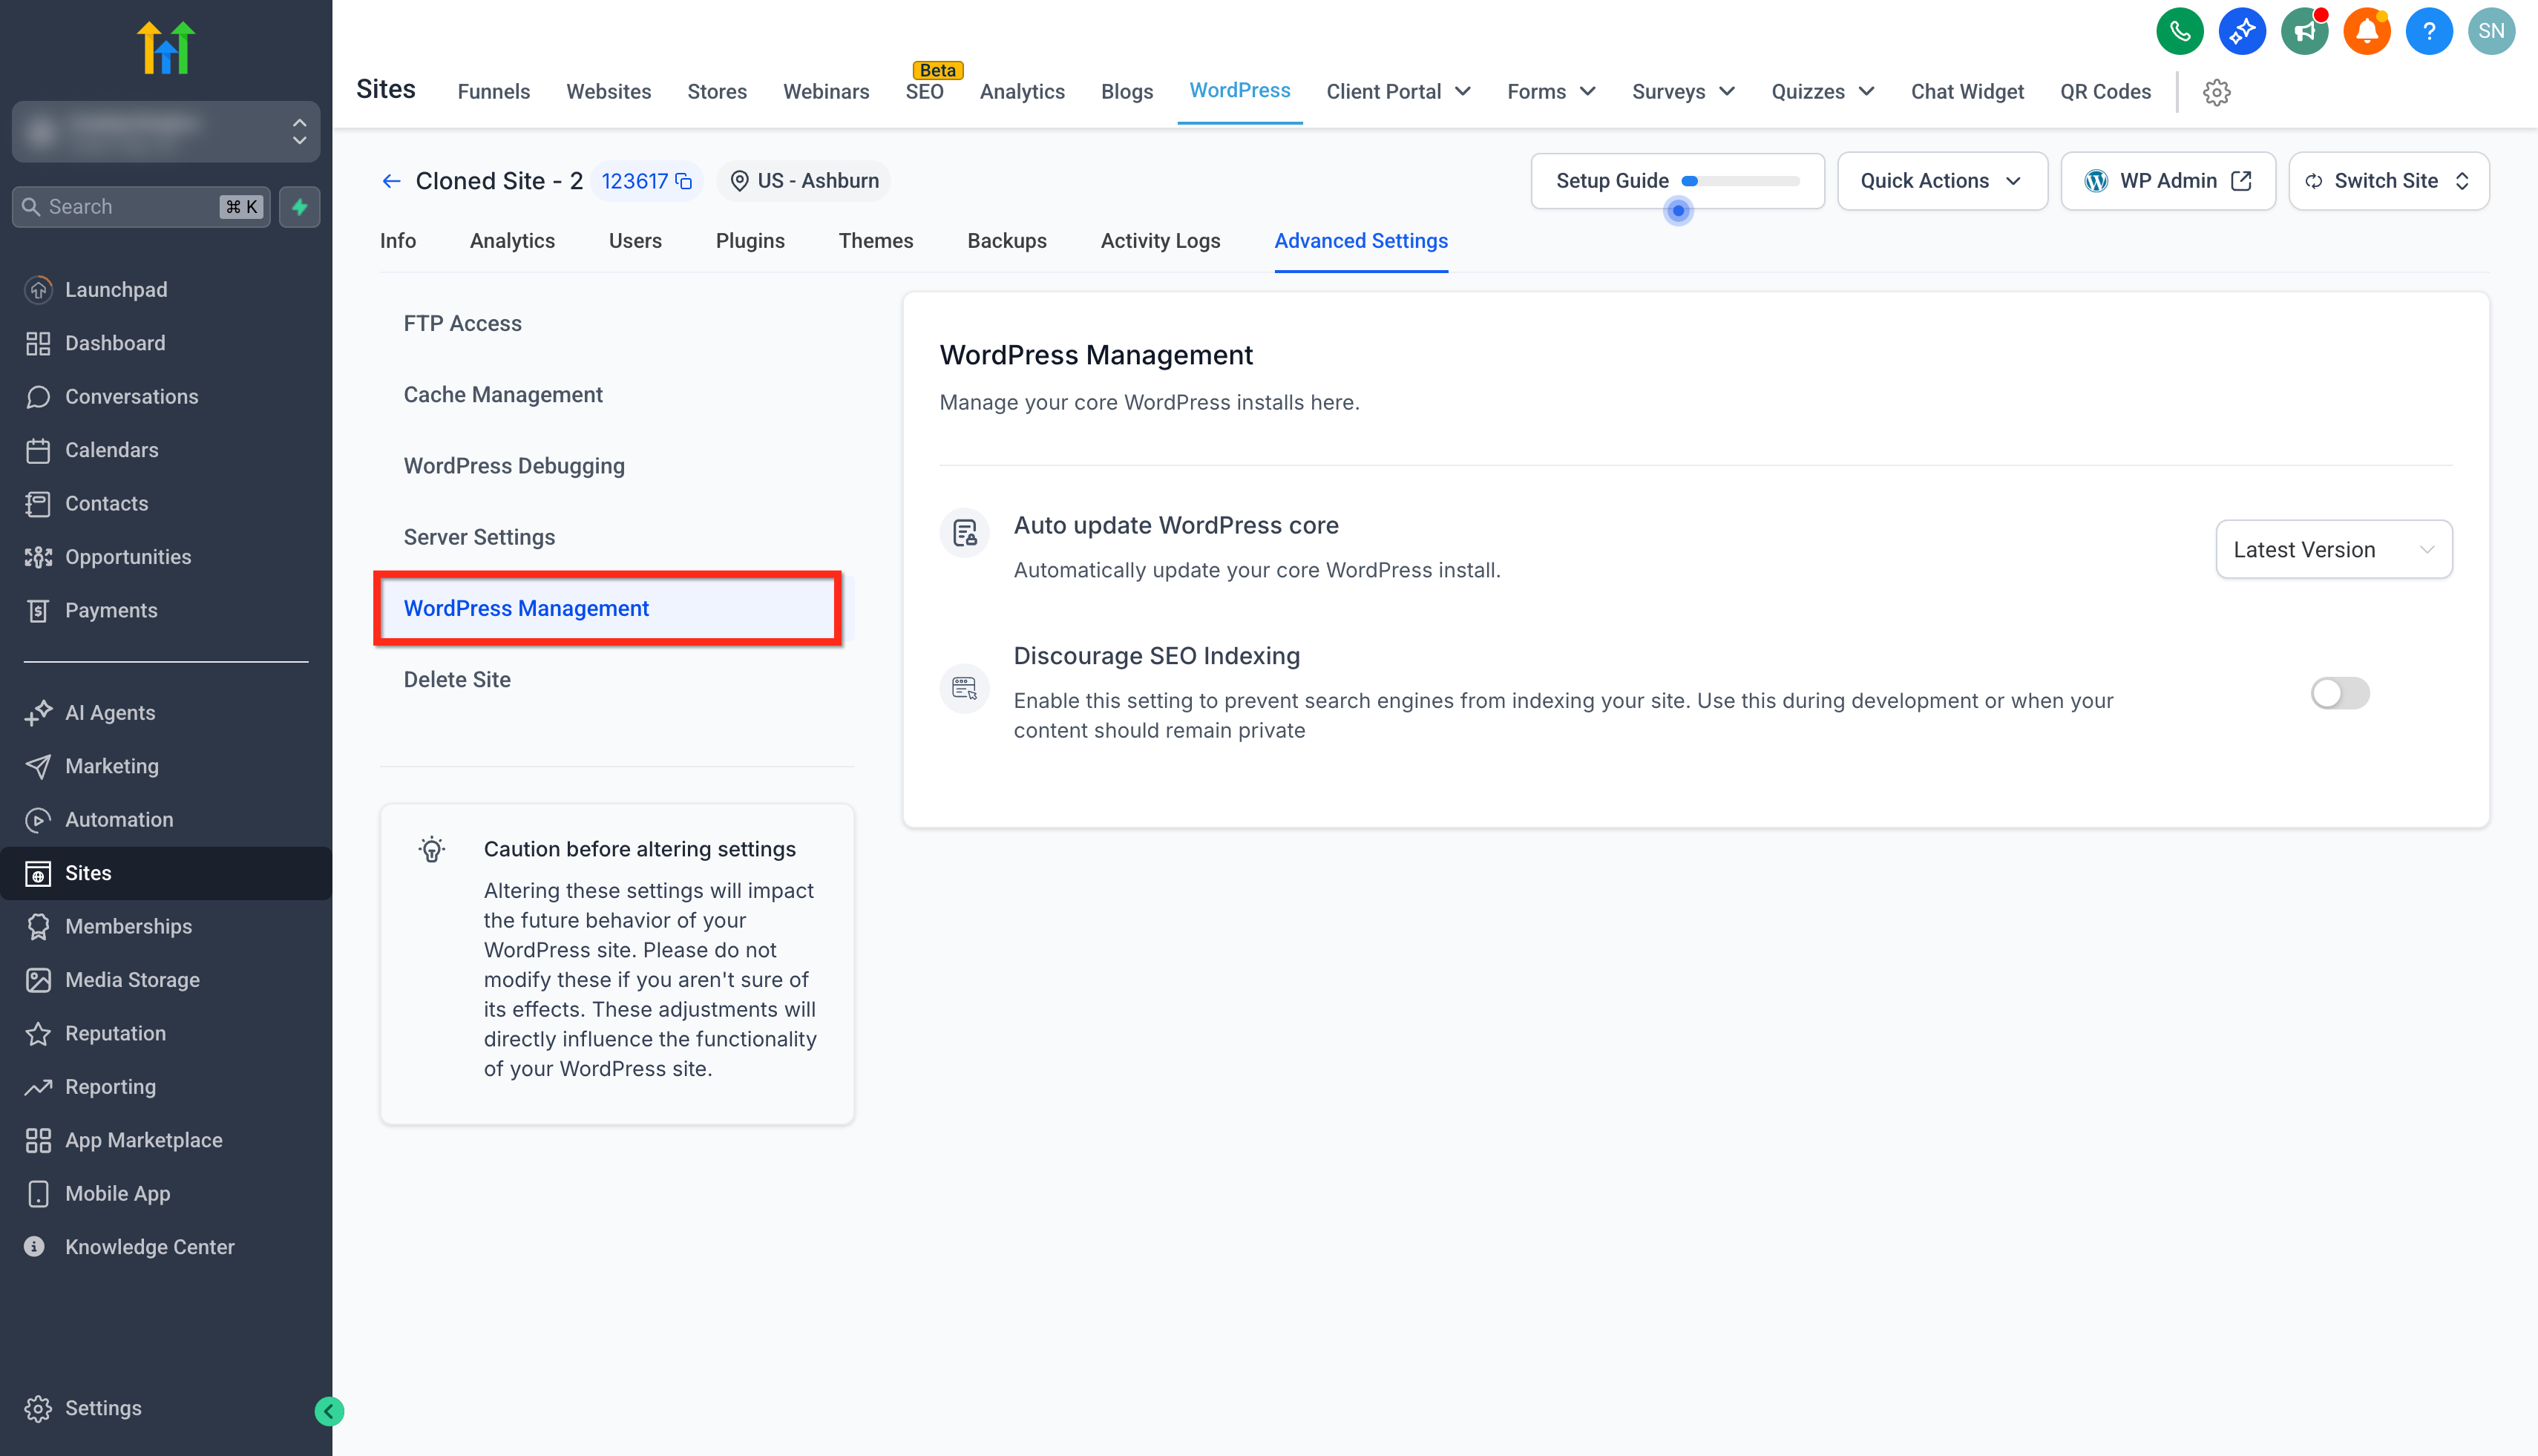
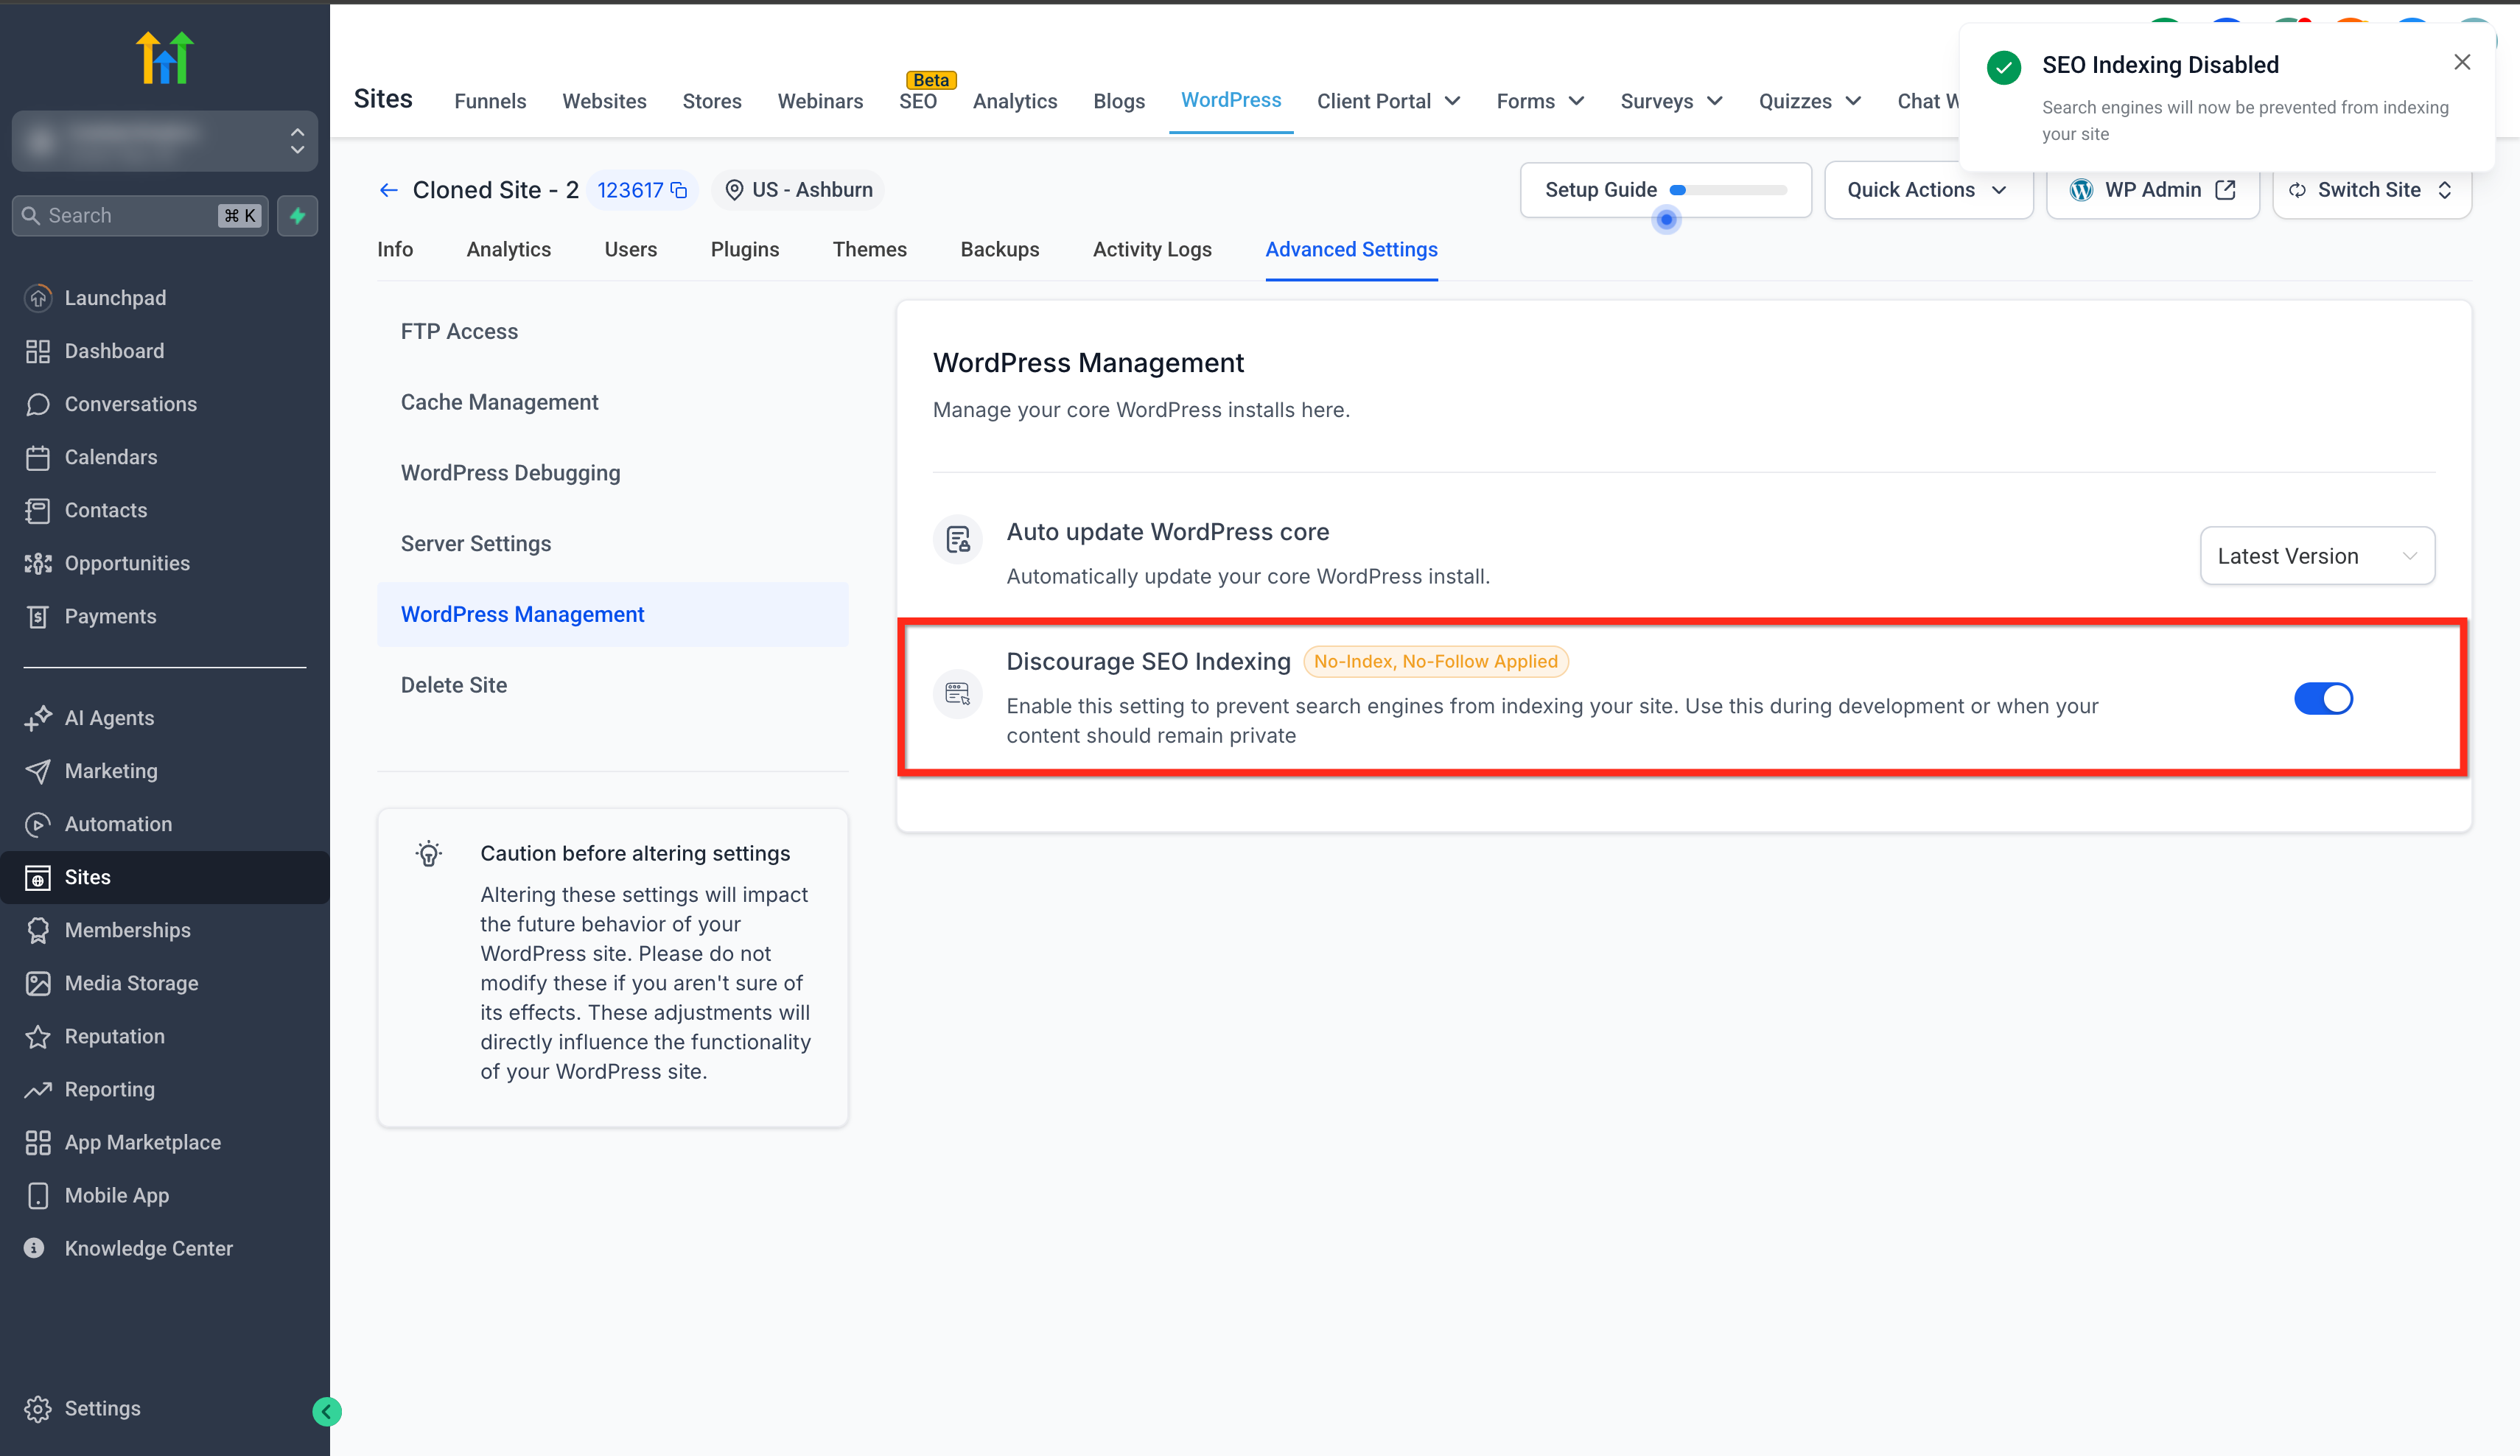
You find the control inside the HighLevel interface under Sites > WordPress > Manage Website > Advanced Settings > WordPress Management. Switching the Discourage SEO Indexing toggle on applies the changes right away, without touching WordPress files or installing additional tools.
Because the setting overrides plugin configurations, it takes precedence over SEO plugins such as Yoast or RankMath. It does not affect site performance, visitor access, or analytics tracking.
03How businesses use disable SEO Indexing
- Digital agency. After creating a staging site for a client, the agency opens the WordPress management panel in HighLevel and activates the Discourage SEO Indexing toggle. This keeps the work in progress site out of search results while the client reviews it.
- SaaS startup. When releasing a new product demo site, the startup logs into its HighLevel subaccount, navigates to the site’s Advanced Settings, and turns on the SEO indexing switch. The demo remains hidden from search engines until the official launch.
- Real estate brokerage. The brokerage maintains an internal property management portal. By enabling the Discourage SEO Indexing option in HighLevel, the portal stays private and does not appear in public search queries.
04Before you start
- An Admin level user must be signed into the appropriate subaccount.
- A WordPress site must already be created and visible in the HighLevel Sites list.
05How to set up and use disable SEO Indexing in HighLevel
Disable SEO indexing for a WordPress site
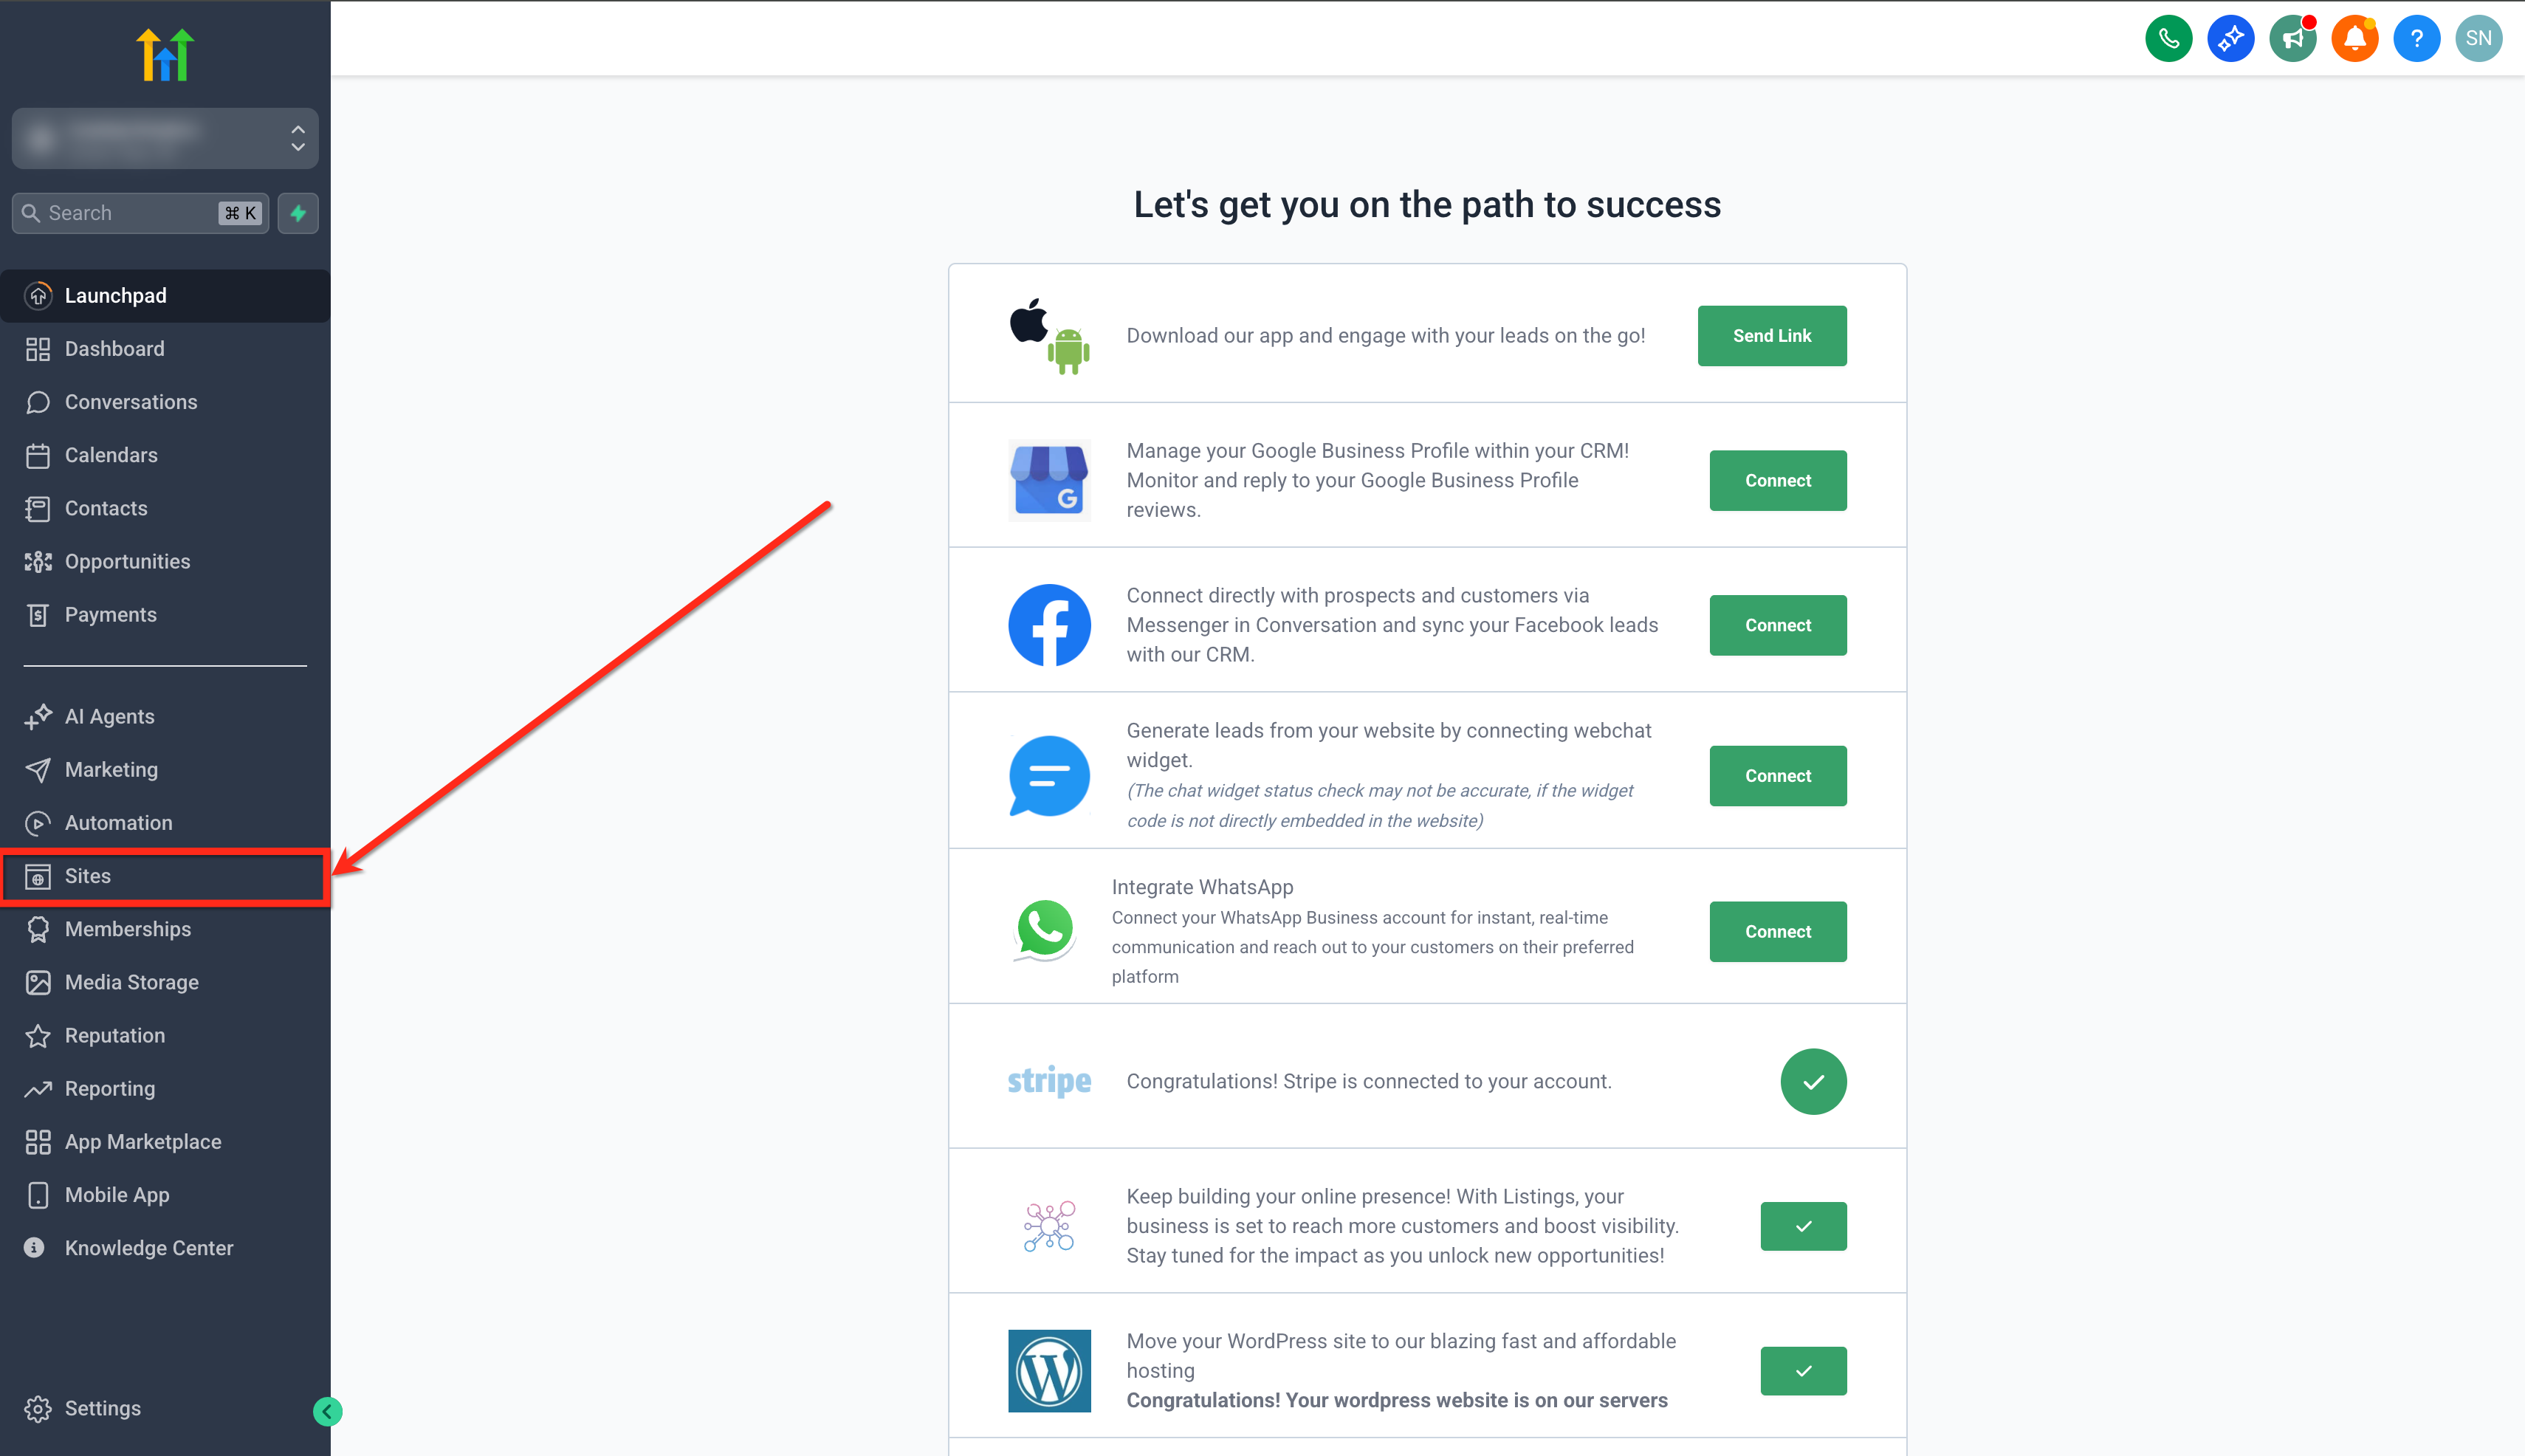
- Sign into the desired subaccount.
- Select Sites from the left navigation.
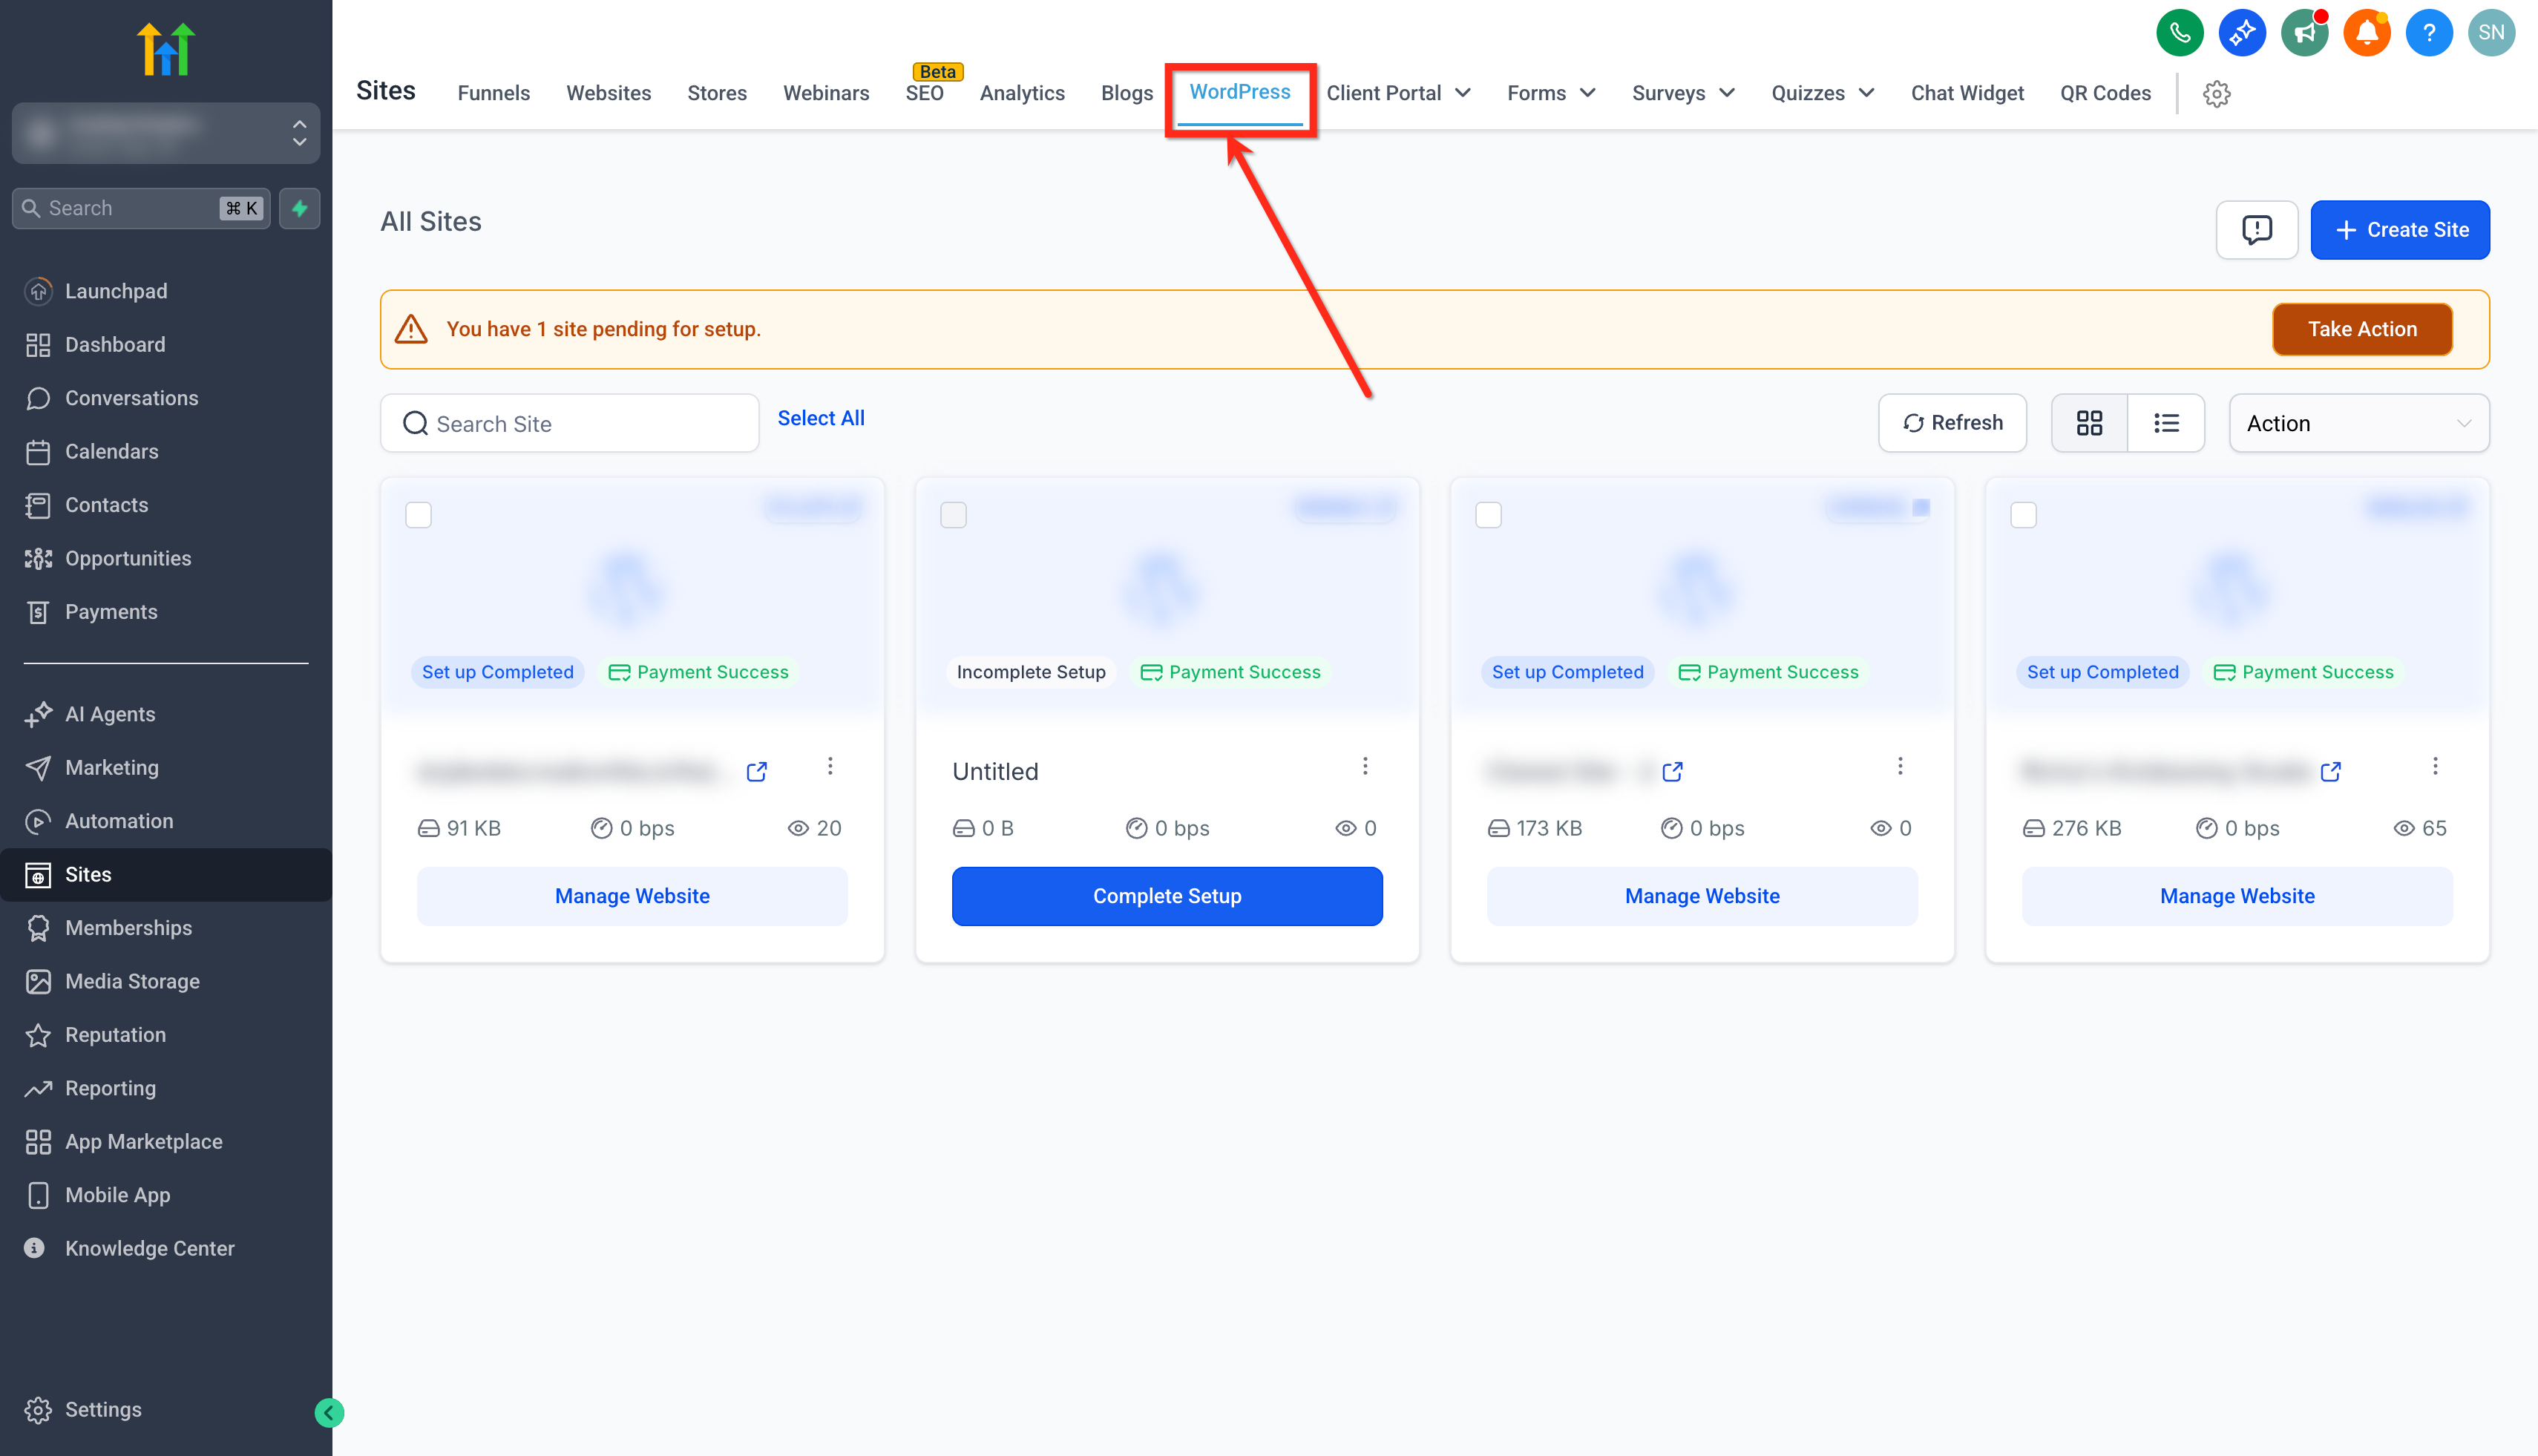
- Click the WordPress tab to view managed sites.
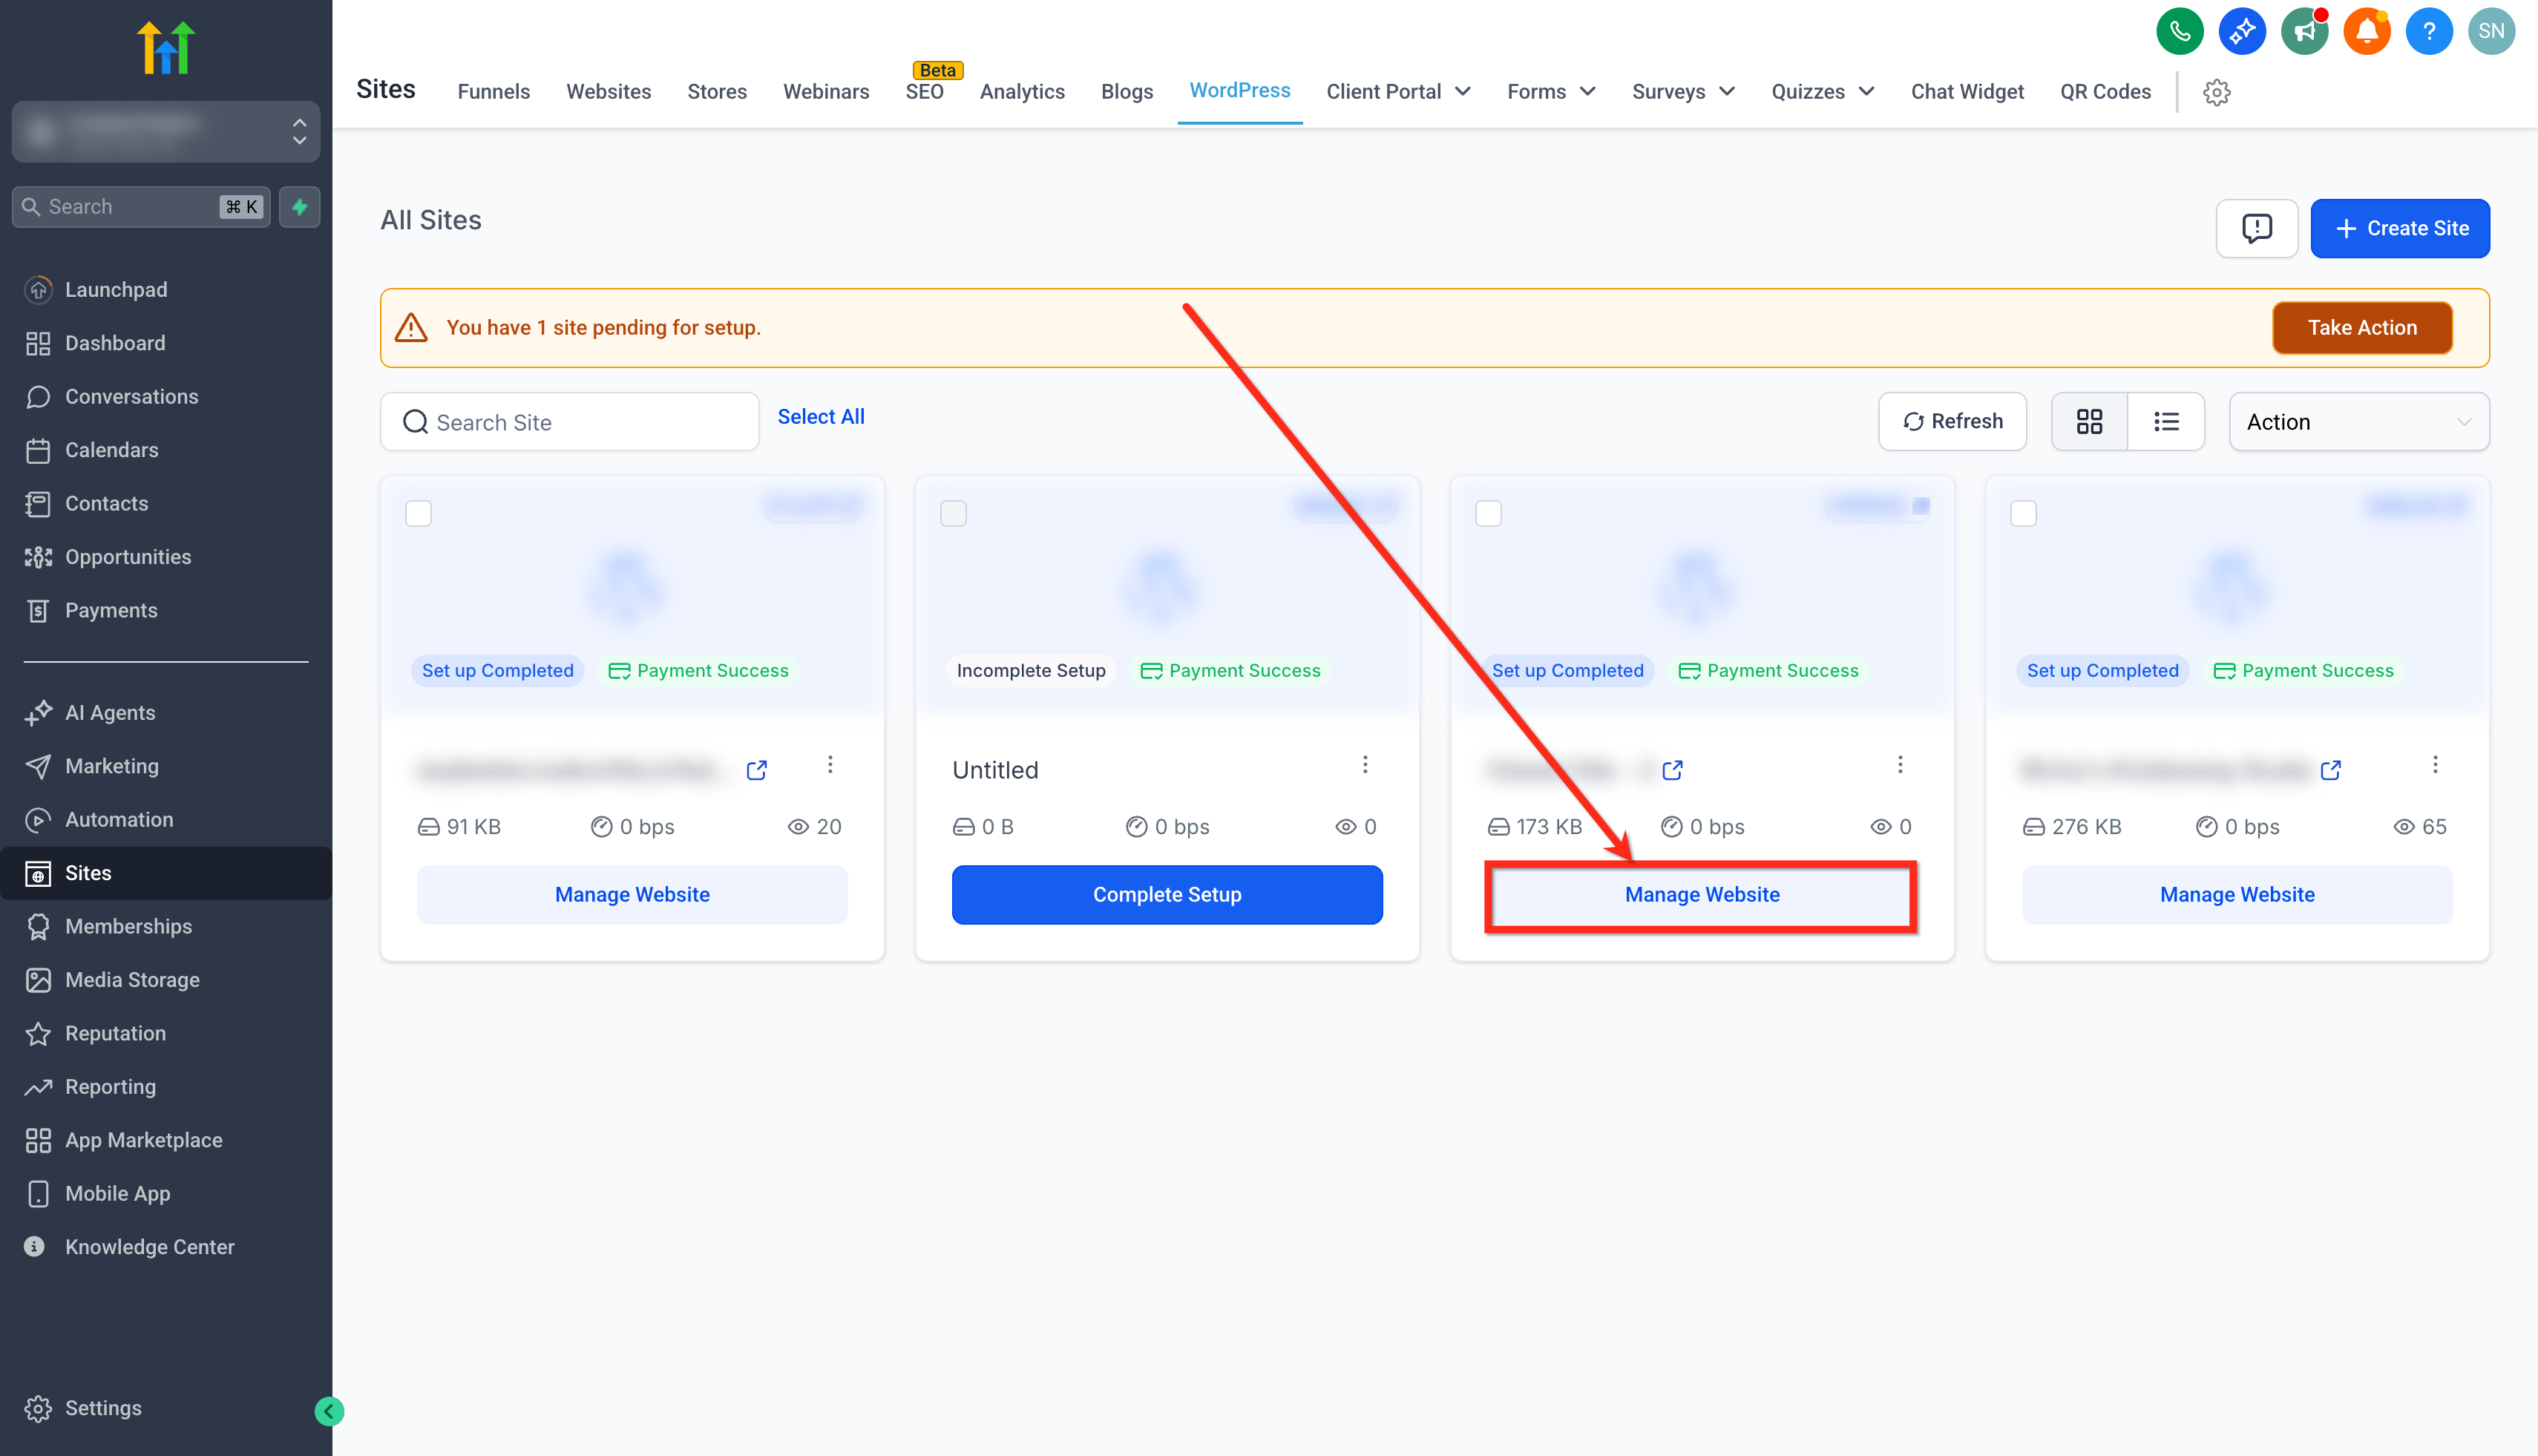
- Press Manage Website for the site you wish to hide.
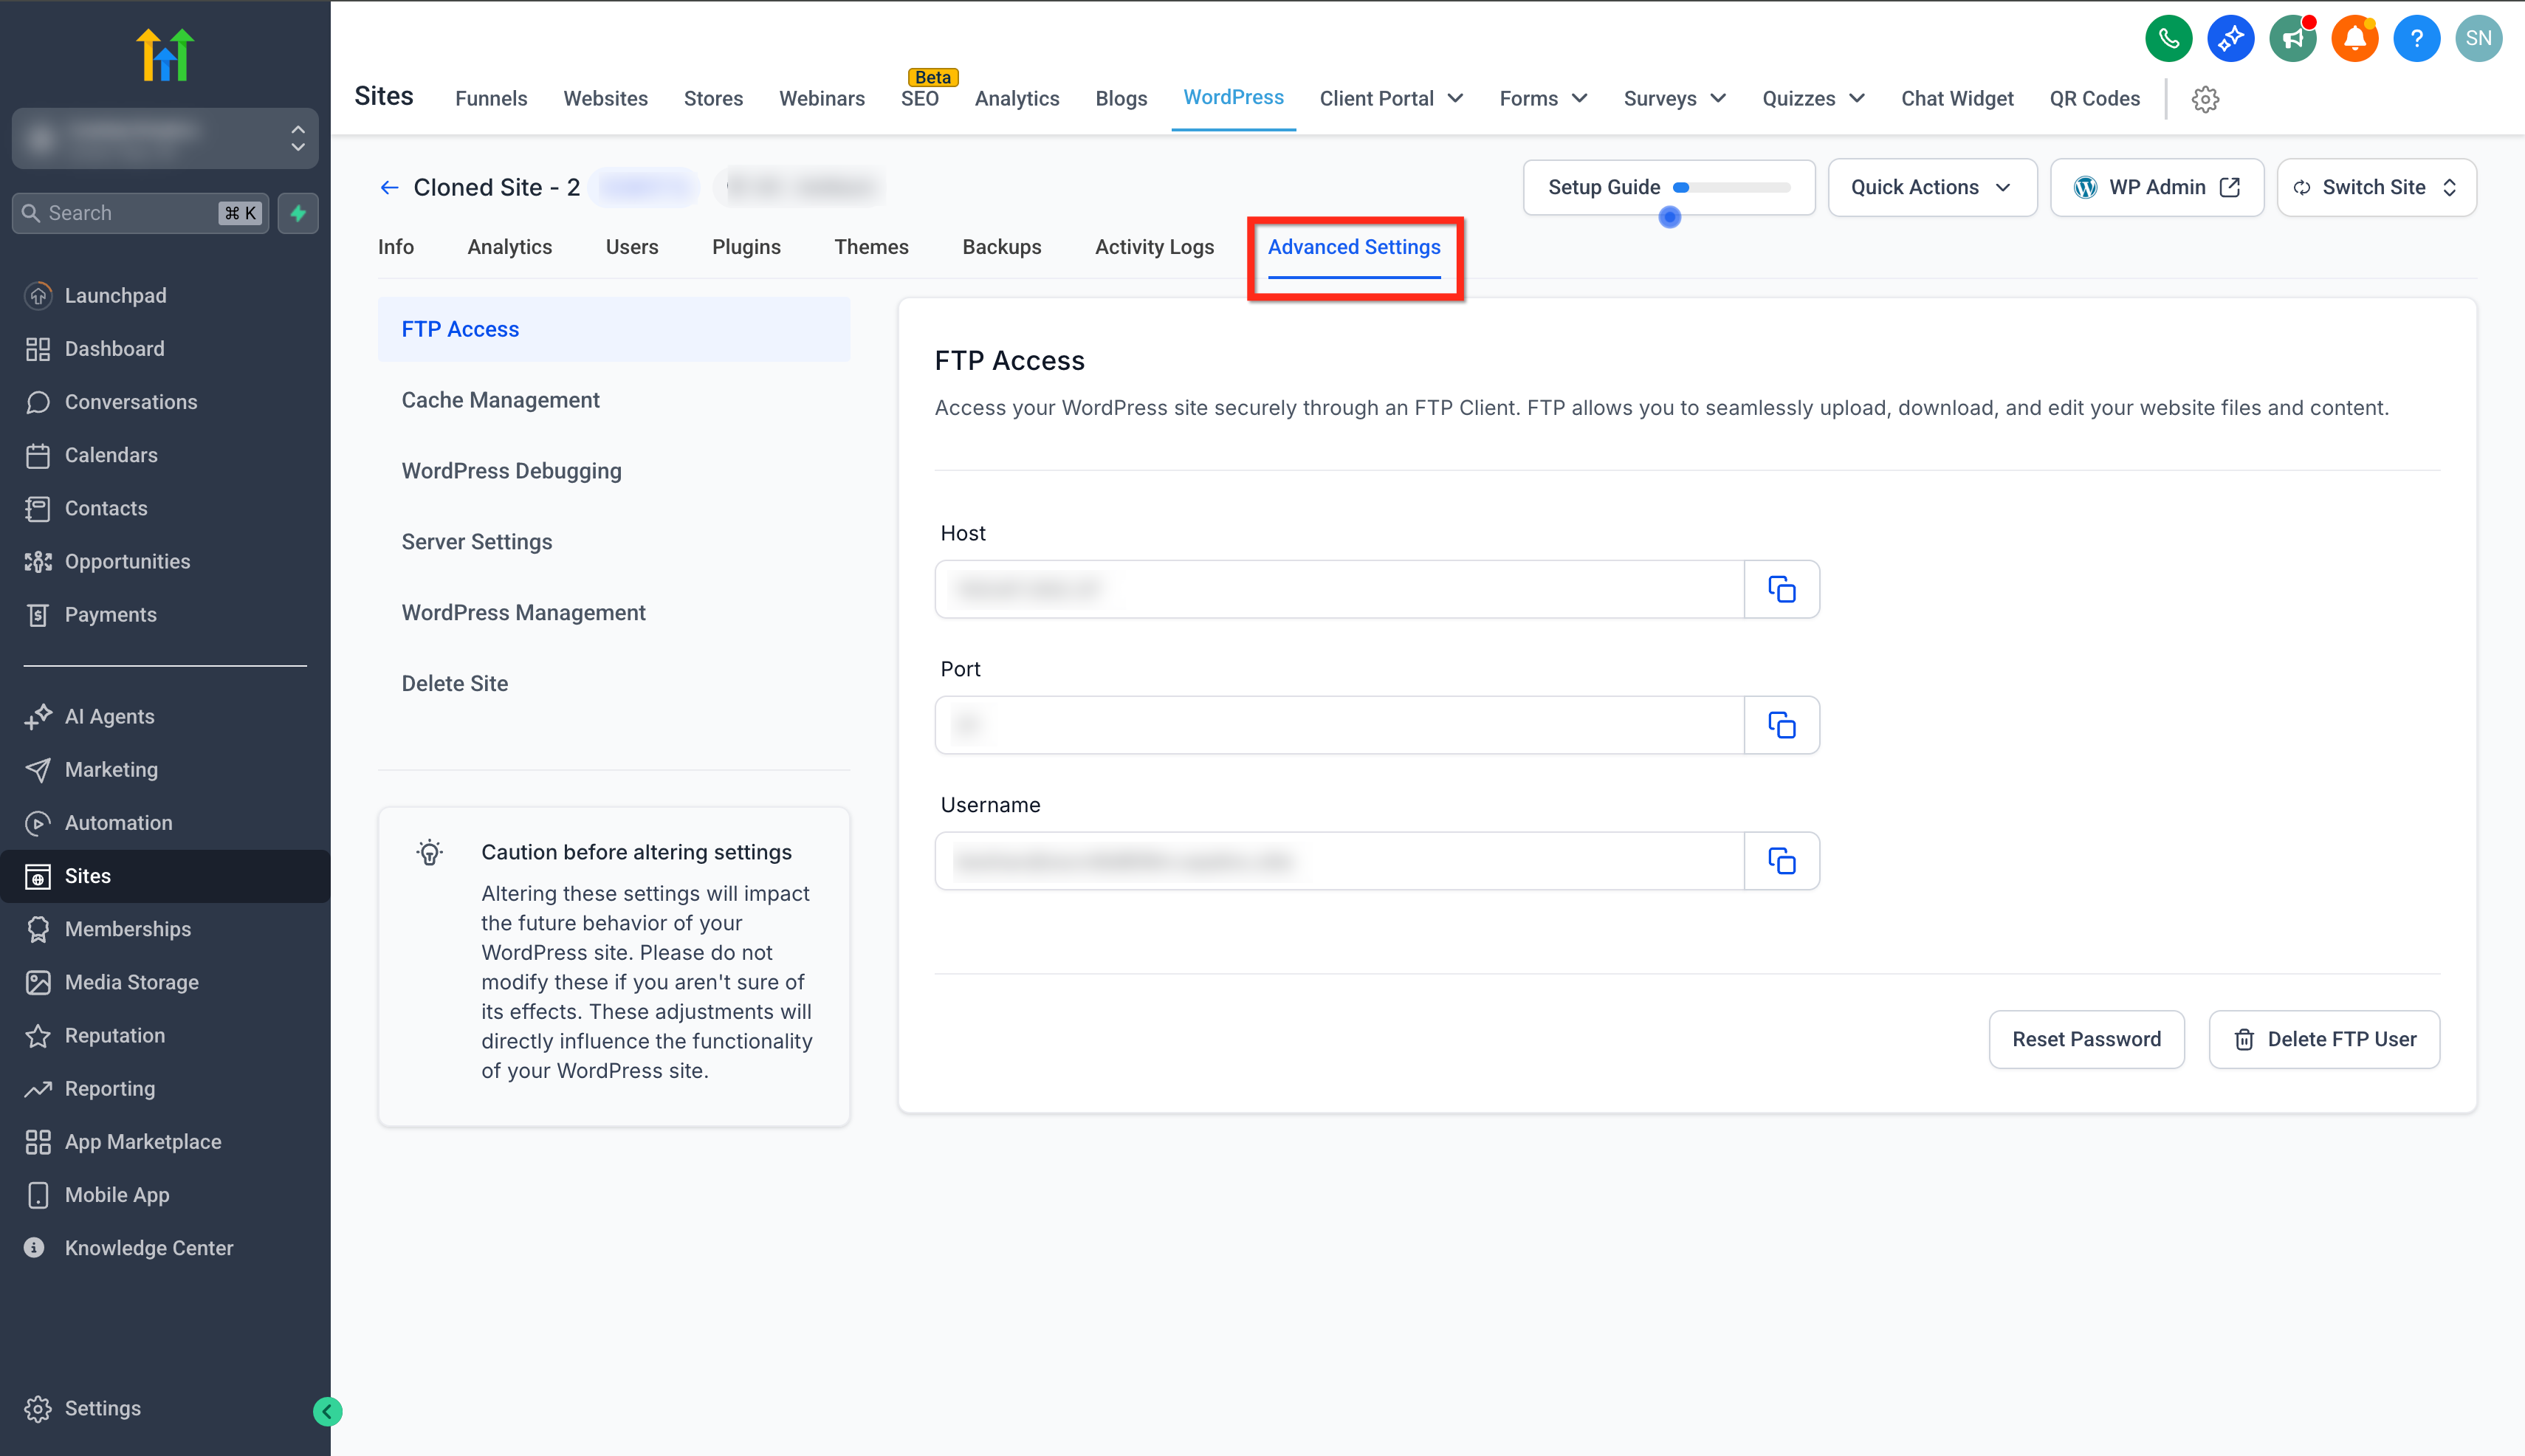
- Open the Advanced Settings section.
- Enter the WordPress Management tab.
- Switch the Discourage SEO Indexing option to ON.
06What it looks like in HighLevel
07Settings that matter
- Discourage SEO Indexing. Controls whether the site sends noindex and nofollow directives through robots.txt and header meta tags, preventing search engine indexing.
08Things to know before you rely on it
- Only Admin level users can see or modify this option.
- The setting applies to the entire site; individual pages cannot be excluded.
- It mainly affects compliant search engine bots; non compliant crawlers may still access the site.
09How it connects to the rest of HighLevel
- Learn how to set up and manage WordPress sites in HighLevel WordPress site setup
- Manage plugins and themes for WordPress installations Plugin & theme management
- Add domains to your WordPress sites within HighLevel Add domains
Michael's take

When you’re building a new site or a client’s staging environment, the last thing you want is a half finished page showing up in Google. That’s the problem the Disable SEO Indexing toggle solves. It hides the whole WordPress install from search engines with one click, no extra plugins required.
The first setting I’d get right is the Discourage SEO Indexing switch itself. Flip it on as soon as the site goes live in a development or staging state, then double check the robots.txt and page header to confirm the noindex tag is there.